Loading ...
Loading ...
Loading ...
13
ADJUSTMENTS
Always disconnect the appliance from the electrical power source before making any adjustments.
All seals must be replaced by the technician when any adjustments are completed.
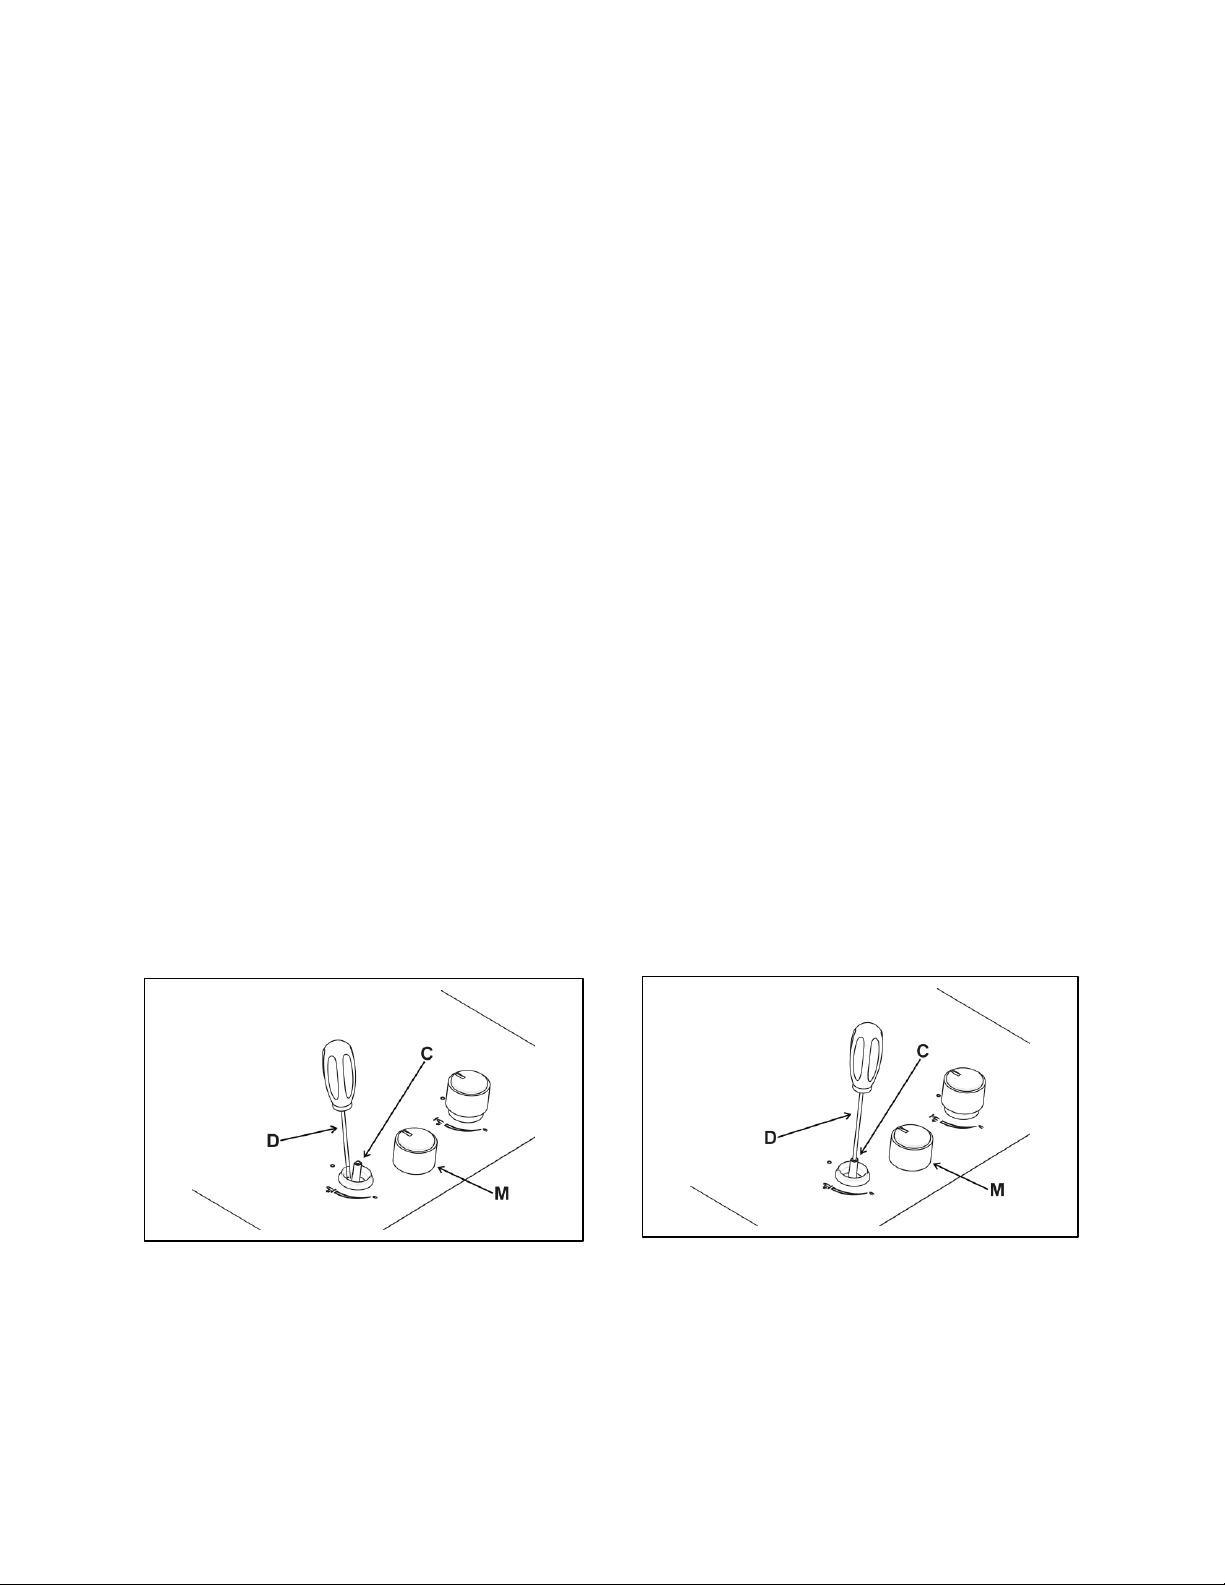
Taps
"Reduced rate" adjustment:
1. Switch on the burner and turn the relative knob to the “Reduced rate” position (small flame, fig.
8 page 12).
2. Remove knob “M” (fig. 6 and 6/A) of the tap, which is simply pressed on to its rod.
3. The by-pass for minimal rate regulation can be: beside the tap (fig. 6) or inside the shaft. In any
case, to access to regulation, it can be done through the insertion of a small screwdriver ‘’D’’
beside the tap (fig. 6) or in the hole ‘’C’’ inside the shaft of the tap (fig 6/A).
4. Turn the throttle screw to the right or left until the burner flame has been adequately regulated to
the “Reduced rate” position.
The flame should not be too low: the lowest small flame should be continuous and steady. Re-
assemble the several components.
It is understood that only burners operating with Natural Gas or City Gas should be subjected to the
above-mentioned adjustments. The screw must be fully locked when the burners operate with
Propane (turn clockwise).
The operations described above can be carried out easily, whatever the position of the cooktop or
however it is fastened to the work surface.
NOTE: The burners do not require any regulation of incoming air.
Fig. 6 Fig. 6/A
Loading ...
Loading ...
Loading ...