User manual Iron
-306042.png)
Parts & Accessories
-844020.png)
-834185.png)
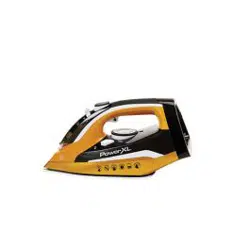
1. SOLEPLATE
2. SPRAY NOZZLE
3. WATER TANK CAP
4. STEAM SELECTOR
5. SPRAY BUTTON
6. STEAM BLAST TRIGGER
7. TEMPERATURE CONTROL DIAL
8. TEMPERATURE INDICATOR LIGHT
9. SELF-CLEANING BUTTON
10. MAXIMUM FILL LEVEL
11. BASE LOCK
12. BASE LOCK SWITCH
13. POWER CORD
14. BASE AUTOMATIC SHUT-OFF LIGHT
15. BASE UNIT
NOTE: Unpack all listed contents from the packaging. Contents vary by model. Please remove any clear or blue protective film on the components before use.
CAUTION: Iron may be hot. Be careful not to touch the Soleplate while in use. Keep the appliance away from other objects.
Parts & Accessories
-73668.png)
-919756.png)
PRODUCT DIMENSIONS: 12.6” (H) x 6” (W) x 8” (D) | 32 x 15.6 x 20.5 CM
CORD: APPROX. 2.44M | TANK SIZE: APPROX. 370ML
IMPORTANT: Please make sure that your PowerXL Cordless Iron & Steamer has been shipped with the components that you ordered. Check everything carefully before use. If any part is missing or damaged, do not use this product. Contact Tristar using the customer service number located on the back of this manual.
Instructions for Use
Before First Use
1. Remove all the packaging material.
2. Use the iron on a damp piece of cloth for a few minutes. This will ensure that any residue left over from the manufacturing process is burned off the Soleplate and won’t transfer to your clothes. Any odor or smoke during this process is normal and should disappear quickly.
3. Your PowerXL Cordless Iron & Steamer might come with some water in the Water Tank. Flush the system by filling the tank, setting the iron on the highest temperature, and pressing the steam trigger to release steam. Do this at least once before first use and also if you haven’t used your PowerXL Cordless Iron & Steamer for a long period.
Preparation
Sort the laundry to be ironed according to the international symbols on the garment label. If this symbol is missing, sort the laundry according to the type of fabric. Start ironing the garments requiring a low temperature first. This reduces the waiting times (the iron takes less time to heat up than to cool down) and eliminates the risk of scorching the fabric.
-234298.png)
Using the PowerXL Cordless Iron & Steamer
-106115.png)
NOTE: In hard water areas, you can use a mixture of 50% tap water and 50% distilled or demineralized water. Only use clean, pure water that contains no contaminants or additional chemicals.
1. Lift the Water Tank Cap and fill the Water Tank with water without exceeding the “Max” fill line. When filling the tank from empty, hold the Unit nearly vertical and use the Water Jug to add water. When refilling the Unit, remove the iron from the Unit Base, open the Water Tank Cap, and tilt the iron upward. Slowly fill the Water Tank without exceeding the “Max” fill line and then close the Water Tank Cap
NOTE: Some water can get trapped inside the cap and come out of the small air hole when the iron is held vertically. This is not a leak; simply open the cap and empty out any residual water. Also, there can sometimes be a noise created by air being vented through the air hole in the cap. If this occurs, simply open the cap to stop the noise.
2. Plug the Base into a grounded wall socket and switch the Unit on. Make sure the steam is set to Off while the Iron is heating.
NOTE: When used with the cord, the light will go on and off as the temperature regulates. When used cordlessly, the iron should be placed back on the Base Unit to maintain heat. When the thermostat light is off, the iron is ready.
Using the Steam Blast Trigger and Steam Ironing Vertically
Set the Steam Selector to the closed position to maintain the pressure for the steam blast function. After the iron has fully heated, press the Steam Blast Trigger (#6, p. 6) to generate a powerful burst of steam that can penetrate fabrics and smooth difficult creases. Wait for at least 2 seconds before pressing again.
WARNING: The Steam Blast Trigger function can only be used at high temperatures. Remember to place the iron on the base periodically when using the iron cordlessly. Once the temperature light is off, remove from the base and continue to steam. Always read the care label.
Dry Ironing
To dry iron, turn the temperature Control Dial to the desired setting and turn the Steam Selector to the "off" position.
Spray Function
To use the Spray Function, first ensure that there is water in the tank. Then, press the Spray button (#5, p. 6) slowly (for a dense spray) or quickly (for a vaporized spray)
WARNING: For delicate fabrics, we recommend moistening the fabric beforehand using the Spray Button or putting a damp cloth between the iron and the fabric. To avoid staining, do not use the spray on silk or synthetic fabrics.
-581391.png)
Steam Ironing
Filing the Tank
-255629.png)
-774297.png)
1. Check that the plug is disconnected from the outlet.
2. Detach and move the iron clear of the base before filling.
3. Move the Steam Selector (A) to -797220.png) .
.
4. Open the Water Tank Cap (B).
5. Raise the tip of the iron to help the water enter the opening without overflowing.
6. Slowly pour the water into the tank using the Water Jug and take care not to fill over the maximum level (about 370 ml) indicated by “MAX” on the tank.
7. Close the Water Tank Cap.
Using the Steam Function
-606831.png)
1. Follow the steps to “Filling the Tank” and then set the iron in the vertical position. Wipe away any water near the Water Tank Cap.
2. Connect the iron to the base and insert the plug into a power outlet.
3. Use the Temperature Control Dial (C) to select the desired temperature. To use steam, the temperature must be set between dot position two and dot position three. If using the iron while connected to the base, ensure that the Base Lock Switch (D) is in the locked position. If using the iron cordlessly, first place the iron vertically on the base and wait for it to reach the desired temperature before removing it from the base.
4. Set the Steam Selector to the desired position.
5. When the Temperature Indicator Light (E) turns off, you can begin to iron. If the iron is being used cordlessly or is no longer lit, you can iron for about 30 seconds after the Temperature Indictor Light darkens. Then, place the iron on the Base to reheat the iron.
Features & Tips
Anti-Drip System
With the anti-drip system, you can iron even the most delicate fabrics.
Always iron delicate fabrics at low temperatures. The plate may cool down to the point where drops of boiling water, which can leave marks or stains, come out of the plate rather than steam. Turn the steam selector to the off position so the anti-drip system activates to prevent vaporization, helping avoid the risk of staining.
Anti-Calc System
A special resin filter inside the Water Tank softens the water and prevents scale build-up in the plate. The resin filter is permanent and does not need to be replaced.
NOTE: Use tap water to fill the Water Tank. In hard water areas, you can use a mixture of 50% tap water and 50% distilled or demineralized water. Do not use chemical additives, scented substances, or decalcifiers in the water.
Automatic Shut-Off
If the iron (connected to the base with the power on) has been left idle for approximately 30 seconds in the horizontal position, heating will shut off. When this happens, the automatic shut-off indicator light will blink. Lift the iron to the vertical position to deactivate this safety feature and allow the iron to heat before ironing again.
If the iron (connected to the base with the power on) is in use for approximately 30 minutes, a safety feature will activate and the heat will shut-off. When this happens, the Automatic Shut-off Indicator Light will blink. Lift the iron to the horizontal position and then back to the vertical position to deactivate this safety feature (which will be indicated by a constant blue light) and allow the iron to heat to the required temperature before ironing again.
Tips for Good Ironing
- We recommend using the lowest temperatures with fabrics that have unusual finishes (sequins, embroidery, transfers etc.).
- If the fabric is mixed (for example, 40% cotton 60% synthetics), set the thermostat to the temperature of the fiber requiring the lower temperature.
- If you don’t know the composition of the fabric, determine the suitable temperature by testing on a hidden corner of the garment. Start with a low temperature and increase it gradually until the iron reaches the ideal temperature.
- Never iron areas with traces of perspiration or other marks. The heat of the plate fixes the stains on the fabric, making them permanent.
- To avoid making silk, woolen, or synthetic garments shiny, iron them inside out.
- To avoid making velvet garments shiny, iron in one direction (following the fiber) and do not press down on the iron.
- Many fabrics are easier to iron if they are not completely dry. For example, silk should always be ironed damp.
Care & Cleaning
Self-Cleaning
The Self-Cleaning feature cleans inside the plate, removing impurities. We recommend using it every 10–15 days.
1. Fill the tank up to the Maximum Level and set the Steam Selector (#4, p. 6) to the "off" position.
2. Place the iron vertically in the base.
3. Turn the Temperature Control Dial (#7, p. 6) to the Max position.
4. Plug the iron into the power outlet and allow it to heat for 2 minutes.
5. Unplug the iron, remove from the base, and hold it horizontally over a sink or basin.
6. Press the Self-Cleaning Button (#9, p. 6) repeatedly for around 1 minute to activate the cleaning function. This will release both steam and water through the soleplate to clear any deposits. Repeat the above steps again if needed, particulary in hard water areas.
CAUTION: When using the Self-Clean function, hot water and steam will rush through the soleplate
Cleaning
NOTE: Before cleaning the PowerXL Cordless Iron & Steamer in any way, make sure that it is unplugged from the electrical supply. Remove the Power Cable from the outlet.
1. Place the iron in the vertical position and allow to cool. This will enable any residual water to dry. Be certain the appliance is thoroughly cooled before cleaning.
2. Clean the Soleplate and the body of the iron using a lightly damp, moist cloth. Do not use abrasive scourers or brushes to clean any part of the iron.
3. Follow the Self-Cleaning instructions.
4. After completing the Self-Cleaning cycle, turn the iron on again and allow to heat for two minutes to dry out any residual water inside the steam chamber.
5. If any synthetic fibers fuse to the soleplate, set the iron to MAX and pass it over a clean piece of cotton to draw the deposits off the surface.
6. When the soleplate has cooled down, you can clean it with a damp cloth. Then, allow the iron to heat fully and activate the steam setting, ironing on a discardable cloth to get any remaining impurities that may have settled around the steam vents.
Storage
1. Unplug the appliance and let it cool down thoroughly.
2. Empty the tank by turning the iron upside down and gently shaking it.
3. Lock the iron back into the base.
4. Wind the power cord around the base. Do not overpull the cord as this may weaken the power cable and plug.
5. Always put the iron away in a vertical position.
-788261.png)
Frequently Asked Questions
1. Why is my iron not heating up?
Check that the main plug is properly inserted or try plugging the iron into a different socket. The temperature control may be set too low.
2. What is the right temperature for my clothes?
It is essential to select the right ironing temperature. The thermostat dial contains international markers with dots corresponding to three ironing temperatures. Use the marker with 1 dot for synthetic fabrics. Use the marker with 2 dots for wool and fabric. Use the marker with 3 dots for cotton and linen.
3. Why did my iron smoke on the first use?
When heating your iron for the first time, you may notice a small amount of odor and smoke. This is harmless residue from the manufacturing process that will quickly burn off and disappear.
4. Can I fill the iron with water when it is plugged in?
No, you must always unplug the iron before filling it.
5. Why is my iron leaking from the soleplate when I fill it?
Always set your iron to the “No Steam” (-32356.png) ) function before you start to fill.
) function before you start to fill.
6. What is the vertical steam function used for?
How do I use it? This function allows you to iron fabrics on a hanger. Set the iron temperature to the maximum position. Leave the item on a hanger and gently pull the fabric with one hand. Press the Steam Blast Trigger repeatedly and move the iron from top to bottom. NOTE: Never use the vertical steam function on an item being worn by anyone.
7. What water should I use in the iron?
Use tap water to fill the Water Tank. In hard water areas, you can use a mixture of 50% tap water and 50% distilled or demineralized water. Do not use chemical additives, scented substances, or decalcifiers in the water.
8. How can I avoid scratching the soleplate of my iron?
To avoid damaging the soleplate, always place your iron on its heel rest of its base, avoid ironing over abrasive item (buttons, zippers, etc.), and never clean your iron's soleplate with abrasive or metallic pads.
9. Can I use my steam iron for dry ironing?
Yes, and you do not need to fill the tank with water. Set the Steam Selector to off and set the temperature to suit the type of material. Once the iron has cooled down at the end of an ironing session, wipe the soleplate and around the steam holes to remove any burned fibers that may have collected around the steam holes.
10. How do I prevent water drips on my fabric?
Do not use the Steam Blast Trigger intensively. Wait a few seconds between each use. The temperature button much be placed within the Steam range (between 2 dots and MAX). Use steam only when the iron is hot (the light must be off).
11. What should I do to maintain my iron correctly?
After use, empty the tank, close the steam control, set the thermostat to minimum, and stand the iron upright or place it on the base. Use a damp soft cloth to wipe your iron and never use cleaners or solvents.
12. Can the iron be used while charging on the base?
Yes. Please lock the iron into the base before using and follow the instructions before pouring water into the Water Tank.
Troubleshooting
|
Symptom
|
Possible Cause
|
Solution
|
|
Iron is not hot.
|
The iron is not plugged in.
|
Plug the Power Cable into a working outlet.
|
|
You have not selected a temperature.
|
Turn the Temperature Control Dial to the desired temperature and the iron will begin to heat.
|
|
The Automatic Shut-Off is activated.
|
Lift the iron horizontally and back to the verticle position to deactivate the safety feature (indicated by a constant blue light). The iron will begin to heat again.
|
|
Water is leaking from the holes in the soleplate.
|
Water exceeds the Max line.
|
Pour water out of the Water Tank until the water level is below the Max line.
|
|
Steam button was pressed while the iron was not hot enough.
|
Wait a few seconds between each use of the button.
|
|
You have stored the iron horizontally without emptying it and without setting it to -281412.png) . .
|
Refer to the Storage section on p. 12.
|
|
The Steam Selector was moved to the open position.
|
If dry ironing, make sure the steam lever is set to the "No Steam" function ( ).
|
|
The soleplate is dirty or brown
and can stain the linen.
|
You are ironing at an inappropriate temperature selection (temperature too high).
|
Clean the soleplapte (refer to the Care & Cleaning section on p. 12.
|
|
You have ironed over a printed area of a garment.
|
Never iron over printed areas. Always iron the reverse side of such garments.
|
|
There is little to no steam.
|
The Water Tank is empty or not full enough.
|
Fill the Water Tank.
|
|
Your iron has been used dry for too long.
|
Carry out a Self-Cleaning cycle.
|
|
The iron is not hot enough.
|
Preheat for 2 minutes
|
|
The Anti-Drip Feature is on.
|
The Anti-Drip Feature will not allow steam when the temperature is set within the dry range.
|
|
Brown streaks come through the holes in the soleplate and stain the linen.
|
You are using ironing water additives (i.e. scented water, starch).
|
Never use ironing additives; these will permanently damage your steam iron.
|
|
Twisted cord.
|
|
If the Power Cord becomes twisted, unplug the iron and let it cool. Hold the middle of the Power Cord. Let the Power Cord and Unit Base dangle freely until the Power Cord uncoils. This will extend the life of the Power Cord.
|