B07GF9P3FY, B07GDXCPGD, B07GF9PH3K, B07GF5F3NB, B07GF4ZR17,
B07GF97GWX, B07GDRHSRS, B07GF4MRFB, B07GF9WY3P, B07GF4X7WC
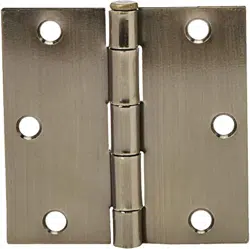
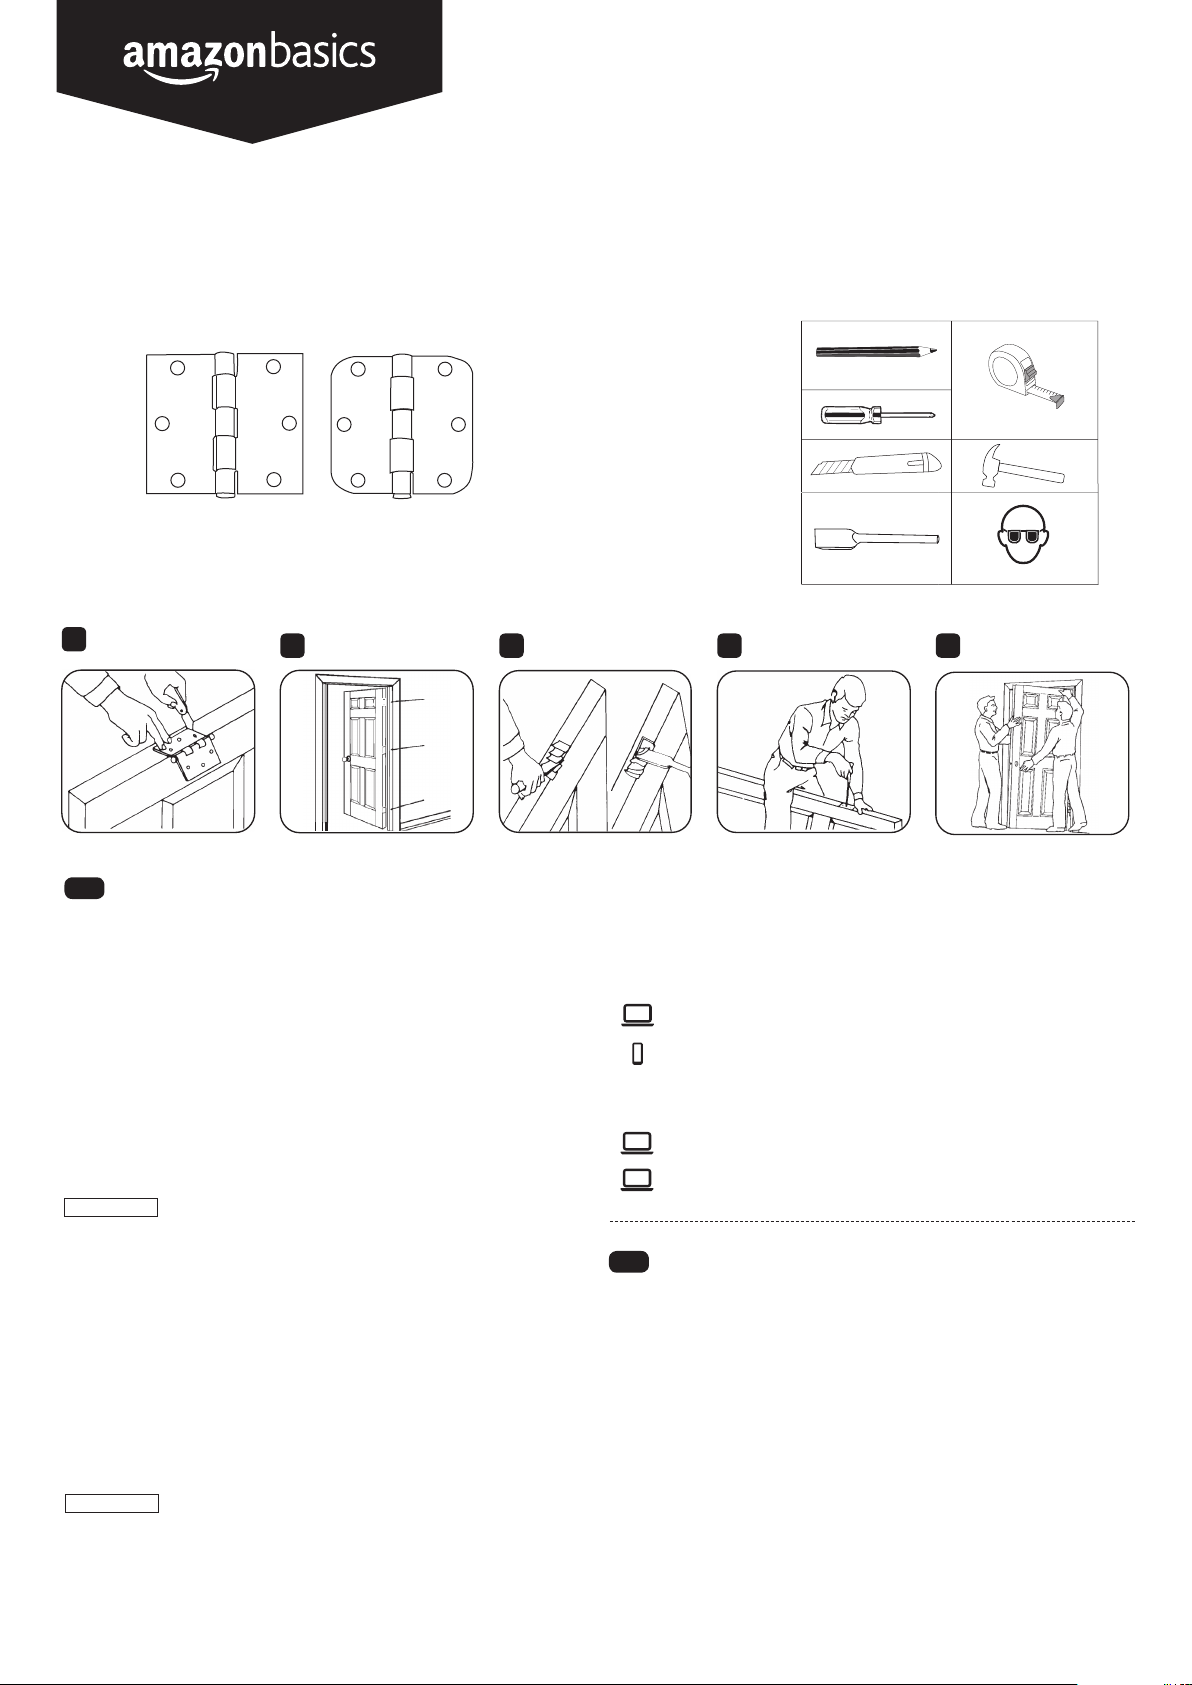
3.5" x 3.5" Door Hinges
Charnières de Portes 9 x 9 cm (3,5 x 3,5 po)
Bisagras para Puerta de 9 x 9 cm (3,5 x 3,5 pulgadas)
EN
Warranty Information
To obtain a copy of the warranty for this product:
amazon.com/AmazonBasics/Warranty
+1-866-216-1072
Feedback and Help
Love it? Hate it? Let us know with a customer review.
amazon.com/review/review-your-purchases#
amazon.com/gp/help/customer/contact-us
ES
•
Cleaning and Maintenance: Check the components regularly to make sure all
screws and bolts are tightened.
Caution
This product contains small items that could be a choking hazard if swallowed.
Keep these items away from young children.
Make Sure these instructions are read and completely understood before
attempting installation. If you are unsure of any part of this installation,
please contact a professional installer for assistance.
Step 1: The standard height for interior doors is 6 feet 8 inches (2.03 m). If it is
necessary to cut away part of the door, cut a little bit off from both the
top and the bottom rather than just cutting all from the bottom. Do not
remove more than 1/8"(3 mm) off of any side. Removing any more
material may affect the structural integrity of the door. Position the
hinges on your door using the existing door as your template for hinge
location. Using a utility knife or pencil mark, around the outside of the
hinge. The barrel of each hinge should extend at least 1/8" (3 mm)
outside the surface of the door from its inside edge.
Step 2: Please note the hinge locations. Doors 84 inches (2.13 m) in height or
more require 4 hinges.
Step 4: Remove the pins from the hinges, one pair at a time. Install each
hinge-half in its mortise bed on the door and on the jamb, making
sure that the halves are properly matched. Using a Phillips screwdriver,
drive the screws all the way in until the heads are flush.
Step 5: With the aid of a helper, install the door by slipping top hinges together
and inserting pin part way. Do not set the pins all the way until the job
is finished. Finally slip the lower hinge halves together and insert the
pins completely.
Step 3: Chisel mortises in both the jamb and door to a depth that will allow
hinges to lie flush with adjacent surfaces. Make the recesses by first
cutting small sections (left), then chiseling across the grain to remove
chips (right).
For hollow-core doors, only 2 hinges are required. For solid-core
doors, you will require 3 hinges.
NOTICE
If the door does not fit the opening, plane the door edges using
the old door as a template.
NOTICE
•
Atención
Este producto contiene objetos pequeños que podrían ser un riesgo de asfixia en
caso de tragarse. Mantenga estos objetos alejados de niños pequeños.
Asegúrese de leer y comprender completamente estas instrucciones antes
de intentar la instalación del producto. Si no está seguro sobre alguna pieza
o sobre la instalación, contacte a un instalador profesional para obtener ayuda.
Paso 1: La altura normalizada para puertas en interiores es de 2,03 m
(6 pies y 8 pulgadas). Si es necesario cortar parte de la puerta, corte un poco
desde la parte superior e inferior en lugar de cortar todo desde la parte inferior.
No corte más de 3 mm (1/8 pulgadas) de cualquiera de los lados. Cortar más
material podría afectar la integridad estructural de la puerta. Coloque las
bisagras en su puerta utilizando una puerta existente como su plantilla para
la ubicación de la bisagra. Marque el contorno de la parte exterior de la bisagra
usando un cuchillo o un marcador. El barril de cada bisagra debe extenderse
por lo menos 3 mm (1/8 pulgadas) hacia afuera de la superficie de la puerta
desde su borde interno.
1
2 3 4 5

HECHO EN CHINA
FABRIQUÉ EN CHINE
MADE IN CHINA
Información Sobre La Garantía
Para obtener una copia de la garantía de este producto:
amazon.es/basics-garantia
+52 (0) 442-348-9587
Comentarios y Ayuda
¿Le encanta? ¿No le gusta nada? Escriba una opinión como cliente.
amazon.com.mx/review/review-your-purchases#
amazon.com.mx/gp/help/customer/contact-us
Informations Sur La Garantie
Pour obtenir une copie de la garantie portant sur ce produit :
amazon.ca/AmazonBasics/Warranty
+1-877-586-3230
Vos Avis et Aide
amazon.com/review/review-your-purchases#
amazon.ca/gp/help/customer/contact-us
Limpieza y Mantenimiento: Revise regularmente los componentes para asegurarse
de que todos los tornillos y pernos estén apretados.
Paso 2: Tenga en cuenta las ubicaciones de las bisagras. Las puertas de
2,13 m (84 pulgadas) de altura o más deberá utilizar 4 bisagras.
Paso 3: Cincele las mortajas tanto en la jamba como en la puerta a la profundidad
necesaria para que las bisagras queden alineadas con las superficies
adyacentes. Realice las cavidades cortando primero las secciones
pequeñas (izquierda), luego cincele a través del grano para eliminar las
astillas (derecha).
Paso 4: Retire los pasadores de las bisagras, un par a la vez. Instale cada mitad de la
bisagra en su espacio de mortaja en la puerta y en la jamba, asegurándose de
que las mitades puedan coincidir correctamente. Con un destornillador, inserte
los tornillos hasta que queden al ras.
Paso 5: Con la ayuda de otra persona, instale la puerta deslizando las bisagras
superiores e inserte los pasadores parcialmente. No ajuste los pasadores
hasta que haya terminado el trabajo. Finalmente deslice las mitades inferiores
de la bisagra e inserte los pasadores completamente.
Para puertas de tambor, solo se requieren 2 bisagras. Para puertas de
núcleo sólido, necesitará colocar 3 bisagras.
AVISO
Si la puerta no coincide con la abertura, aplane los bordes de la puerta
usando la puerta anterior como plantilla.
AVISO
Nettoyage Et Entretien: Vérifiez régulièrement l’état des composants afin de vous
assurer que toutes les vis et tous les boulons sont
convenablement serrés.
Étape 1: Hauteur standard des portes intérieures: 2,03 m (6 pieds 8 pouces). S'il est
nécessaire d’enlever en coupant une partie de la porte, coupez à la fois un
peu de la partie supérieure et de la partie inférieure au lieu de tout couper au
niveau de la partie inférieure. Ne pas retirer plus de 3 mm (1/8 po) de tout
côté. Le retrait de tout matériau supplémentaire peut affecter l'intégrité
structurelle de la porte. Placez les charnières sur votre porte en vous servant
de la porte existante comme gabarit pour déterminer l'emplacement des
charnières. À l'aide d'un couteau tout usage ou d'un crayon, marquez autour
de l'extérieur de la charnière. Le canon de chaque charnière doit dépasser
d'au moins 3 mm (1/8 po) de la surface de la porte par rapport à son bord
intérieur.
Étape 2: Veuillez noter les emplacements des charnières. Les portes de
2,13 m (84 pouces) de hauteur ou plus nécessitent 4 charnières.
Étape 4: Retirez les broches des charnières, une paire à la fois. Installez chaque
charnière: la moitié dans son lit mortaise sur la porte et sur le montant, en
vous assurant que les moitiés sont convenablement adaptées. À l’aide
d’un tournevis, enfoncez les vis à fond jusqu'à ce que les têtes affleurent.
Étape 5: À l'aide d'un assistant, installez la porte en faisant coulisser les charnières
supérieures et en insérant la broche en partie. Ne pas fixer les broches
complètement jusqu'à la fin du travail. Enfin, faites coulisser les moitiés de la
charnière inférieure et insérez entièrement les broches.
Étape 3: Ciselez des mortaises dans le montant et la porte jusqu’à une profondeur qui
permettra aux charnières de reposer à plat sur les surfaces adjacentes.
Créez les renfoncements en coupant d'abord de petites sections (à gauche),
puis en ciselant à travers la fibre pour enlever les copeaux (à droite).
Pour les portes creuses, seules 2 charnières sont nécessaires. Pour les
portes pleines, vous aurez besoin de 3 charnières.
REMARQUE
Si la porte ne se loge pas dans l’ouverture, rabotez les bords de la
porte en vous servant de l’ancienne porte comme gabarit.
REMARQUE
FR
•
Attention
Ce produit contient de petits composants susceptibles de présenter un risque
d'étouffement en cas d'ingestion. Conservez ces composants hors de la
portée des enfants en bas âge.
Veillez à bien lire et assimiler l’intégralité des présentes instructions avant
de tenter de procéder à l'installation. En cas de doute concernant toute
étape de cette installation, veuillez contacter un installateur professionnel
afin d'obtenir de l'aide.