Loading ...
Loading ...
Loading ...
8
Installing and Connecting the Projection TV (continued)
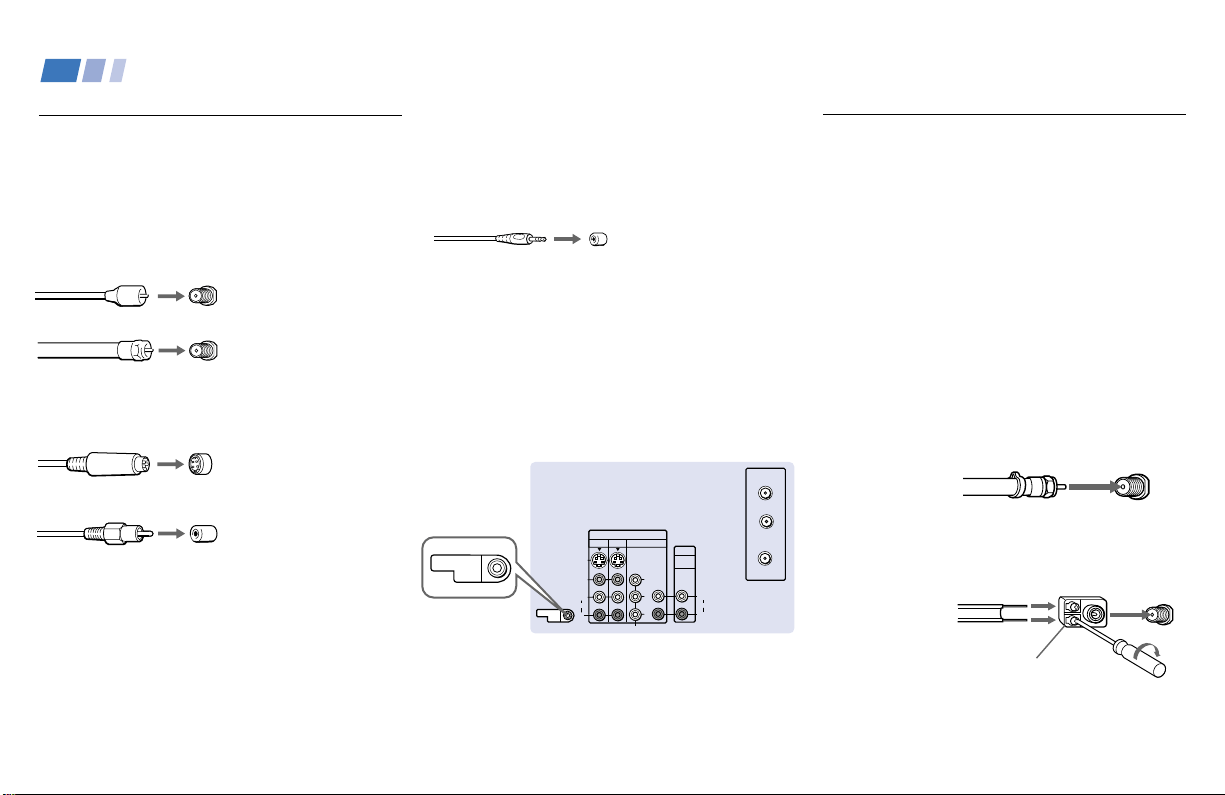
Making Connections
Connecting directly to a cable or
an antenna
The connection you choose will depend on
the cable found in your home. Newer homes
will be equipped with standard coaxial cable
(see
A); older homes will probably have 300-
ohm twin lead cable (see B); still other
homes may contain both (see
C).
Use 75-ohm coaxial cable for improved
picture quality (see
A).
A
• VHF only
or
• VHF/UHF
or
• Cable
B
• VHF only
or
• UHF only
or
• VHF/UHF
Connector Types
You may find it necessary to use some of the
following connector types during set up.
Coaxial cable
Standard TV cable and antenna cable
S Video cable
High quality video cable for enhanced
picture quality
Audio/Video cable
Video - Yellow
Audio (Left) - White
Audio (Right) - Red
Some DVD Players and DTV Receivers are
equipped with the following three video
connectors.
Y - Green
P
B (CB, Cb or B–Y) - Blue
P
R (CR, Cr or R–Y) - Red
Plug Type
Screw-on Type
Screw into connection.
Push into connection.
Align guides and
push into connection.
Push into connection.
CONTROL S cable
Sony cable for CONTROL S connection. This
feature is exclusive to Sony products and
allow greater control of all Sony equipment.
About the CONTROL S OUT jack
To control other Sony equipment with the
projection TV’s remote control, connect the
CONTROL S IN jack of the equipment to the
CONTROL S OUT jack on the projection TV
with the CONTROL S cable.
Antenna connector
(Rear of
projection TV)
VHF/UHF
300-ohm twin
lead cable
75-ohm
coaxial cable
Push into connection.
(Rear of
projection TV)
VHF/UHF
(Rear of projection TV)
S VIDEO
VIDEO
AUDIO
L
R
VHF/UHF
AUX
(MONO)
IN
VIDEO 1 VIDEO 4VIDEO 3
OUT
AUDIO
(VAR/FIX)
TO
CONVERTER
Y
P
B
P
R
R
L
(MONO)
AUDIO
COMPONENT
CONTROL S
OUT
CONTROL S
OUT
Loading ...
Loading ...
Loading ...