Loading ...
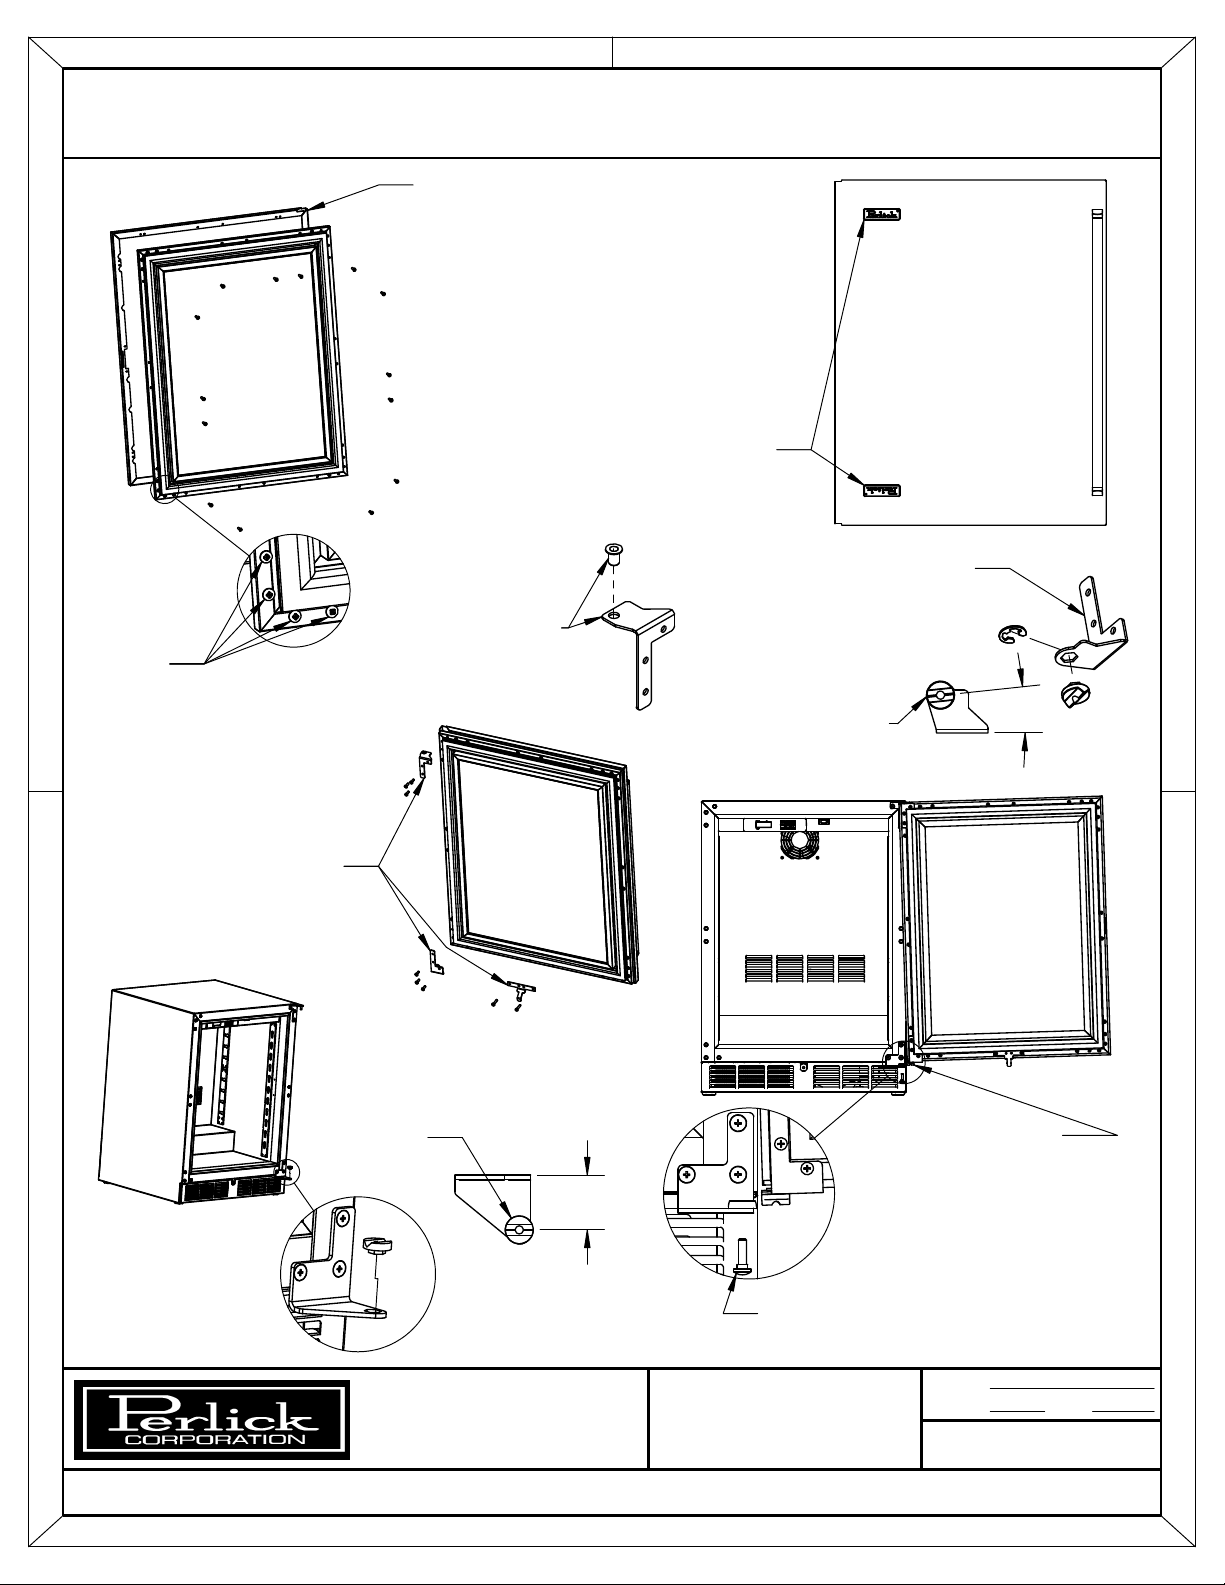
Step: 7 Remove the Front Panel
from the Door Assembly by
removing the inner mounting
screws, 4 per side, from the
perimeter of the assembly.
Rotate the Front Panel 180°,
the top becomes the bottom.
Reattach using the same
screws and mounting holes.
SW
THIS DOCUMENT/PUBLICATION/SOFTWARE/DRAWING CONTAINS PROPRIETARY INFORMATION WHICH IS THE PROPERTY OF THE PERLICK CORPORATION. IT MAY NOT BE REPRODUCED OR TRANSMITTED IN ANY FORM, ELECTRONIC
OR MECHANICAL, INCLUDING PHOTOCOPYING, RECORDING, OR USED IN ANYINFORMATION STORAGE, TRANSMISSION, OR RETRIEVAL SYSTEM, WITHOUT WRITTEN PERMISSION FROM THE PERLICK CORPORATION
COPYRIGHT 2001 PERLICK CORPORATION. ALL RIGHTS RESERVED.
Milwaukee, WI 53223
DRAWN
Perlick Corporation
67439
DOOR HINGE
REVERSAL
DAS 3/28/2011
SCALE
1:24
DATE
PROCEDURE FOR SWITCHING DIRECTION OF DOOR SWING
ON PERLICK C-SERIES, 15 INCH, AND SIGNATURE SERIES CABINETS
Corner
screws do not need
to be removed to
remove Front Panel.
Step 8: Remove Perlick
nameplate from Door
Front using Plastic Putty
Knife. Install new Perlick
nameplate (included)
Step9: Insert
bearing into
Top Door
Hinge Bracket.
Step 10: Insert V-block
into Bottom Door
Hinge Bracket, see
NOTE below, and
attach with E-Clip.
NOTE:
ORIENTATION
Bottom View
6°
Push Plunger using
screws removed in
Step 6.
Step 11: Attach the
Top and Bottom
Door Hinges and
Step 12: Place Lower
V-Block into Lower
Cabinet Hinge with
notch parrallel to
cabinet.
Top View
Parrallel
Step 13: Lift the
Door Assembly and
insert top pin into
bearing. Then move
door toward cabinet
and align V-Blocks.
Step 14: Insert and tighten Lower
Hinge Pin to complete assembly.