Loading ...
Loading ...
Loading ...
Preparation
10
Preparation
Setting the Date and
Time
Available in w, [, ], ;, ', ,, . or = mode
Example: Setting the date to June 2, 2003 and
the time to 1:30 pm.
Note:
• Setting procedure will vary depending on the
settings of “STYLE” and “12H/24H” in the DATE/
TIME screen. The example below shows a
“MMM.DD.YYYY” style with a 12H time setting
(see page 51).
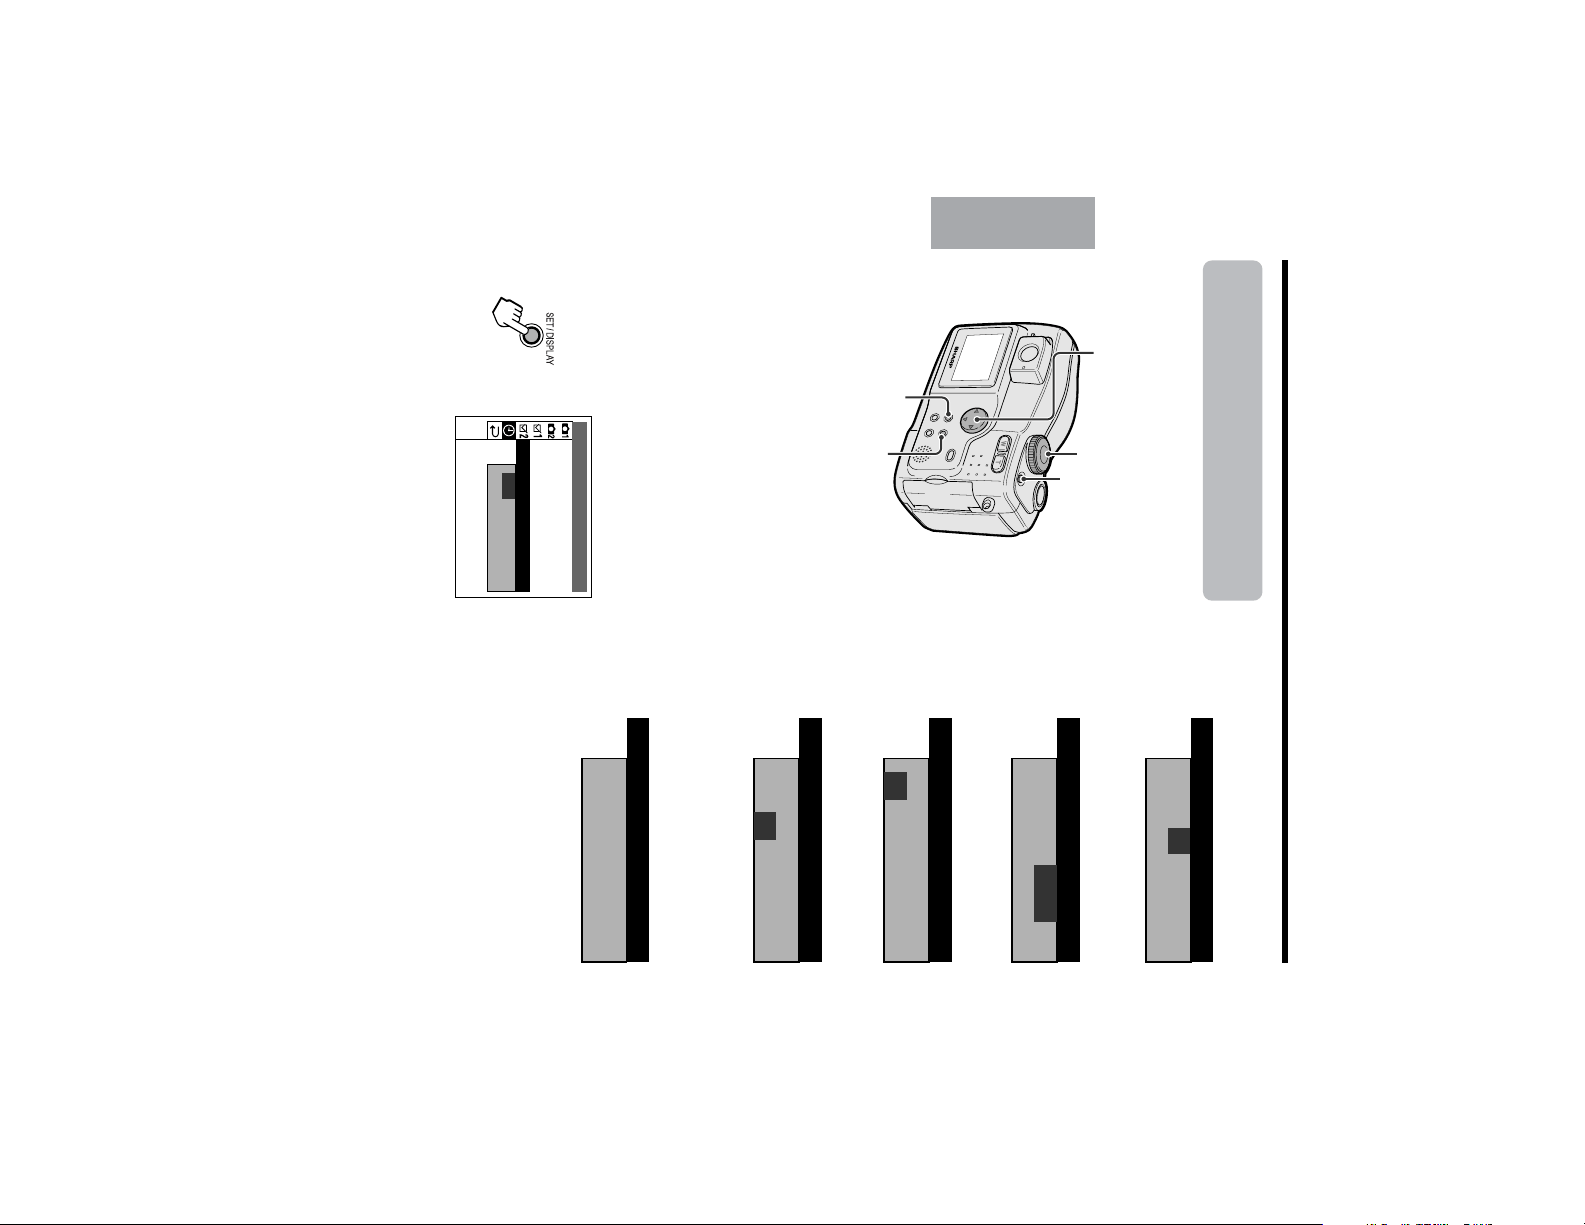
1 Press the Power button until the camera
turns on.
2 Press the MENU button until the menu
screen appears.
3 Press the SET button.
4 Press m or l to select “JUN” (month),
then press the SET button.
5 Press m or l to select “2” (day), then
press the SET button.
6 Press m or l to select “2003” (year),
then press the SET button.
7 Press m or l to select “1” (hour), then
press the SET button.
8 Press m or l to select “30” (minute),
then press the SET button.
• The internal clock starts up once the
second hand begins to blink.
Note:
• If you capture an image without setting the date
and time, under bars will display in the preview
screen instead of the date and time values.
DISPLAY
STYLE
RETURN
12H/ 24H
SETTING
DATE T IME/
2
0
0
0MA
0
:
2
21
.1.JAN
SETTING
2002.1.JUN
00MA:21
SETTING
.2.JUN
00MA:21
2002
SETTING
.2.JUN
03MP:00:1
3002
SETTING
.2.JUN
00MA:21
3002
SETTING
.2.JUN
00 MP:1
3002
Operation button
Mode dial
SET button
MENU button
Power button
Loading ...
Loading ...
Loading ...