Loading ...
Loading ...
Loading ...
5
3. Remove junction box cover if it is present.
4. Install a UL listed or CSA approved conduit connector to the
junction box.
5. Route the flexible cable conduit from the microwave oven to
the junction box through a UL listed or CSA approved conduit
connector.
6. Tighten screws on conduit connector.
7. See “Electrical Connection Options Chart” to complete
installation for your type of electrical connection.
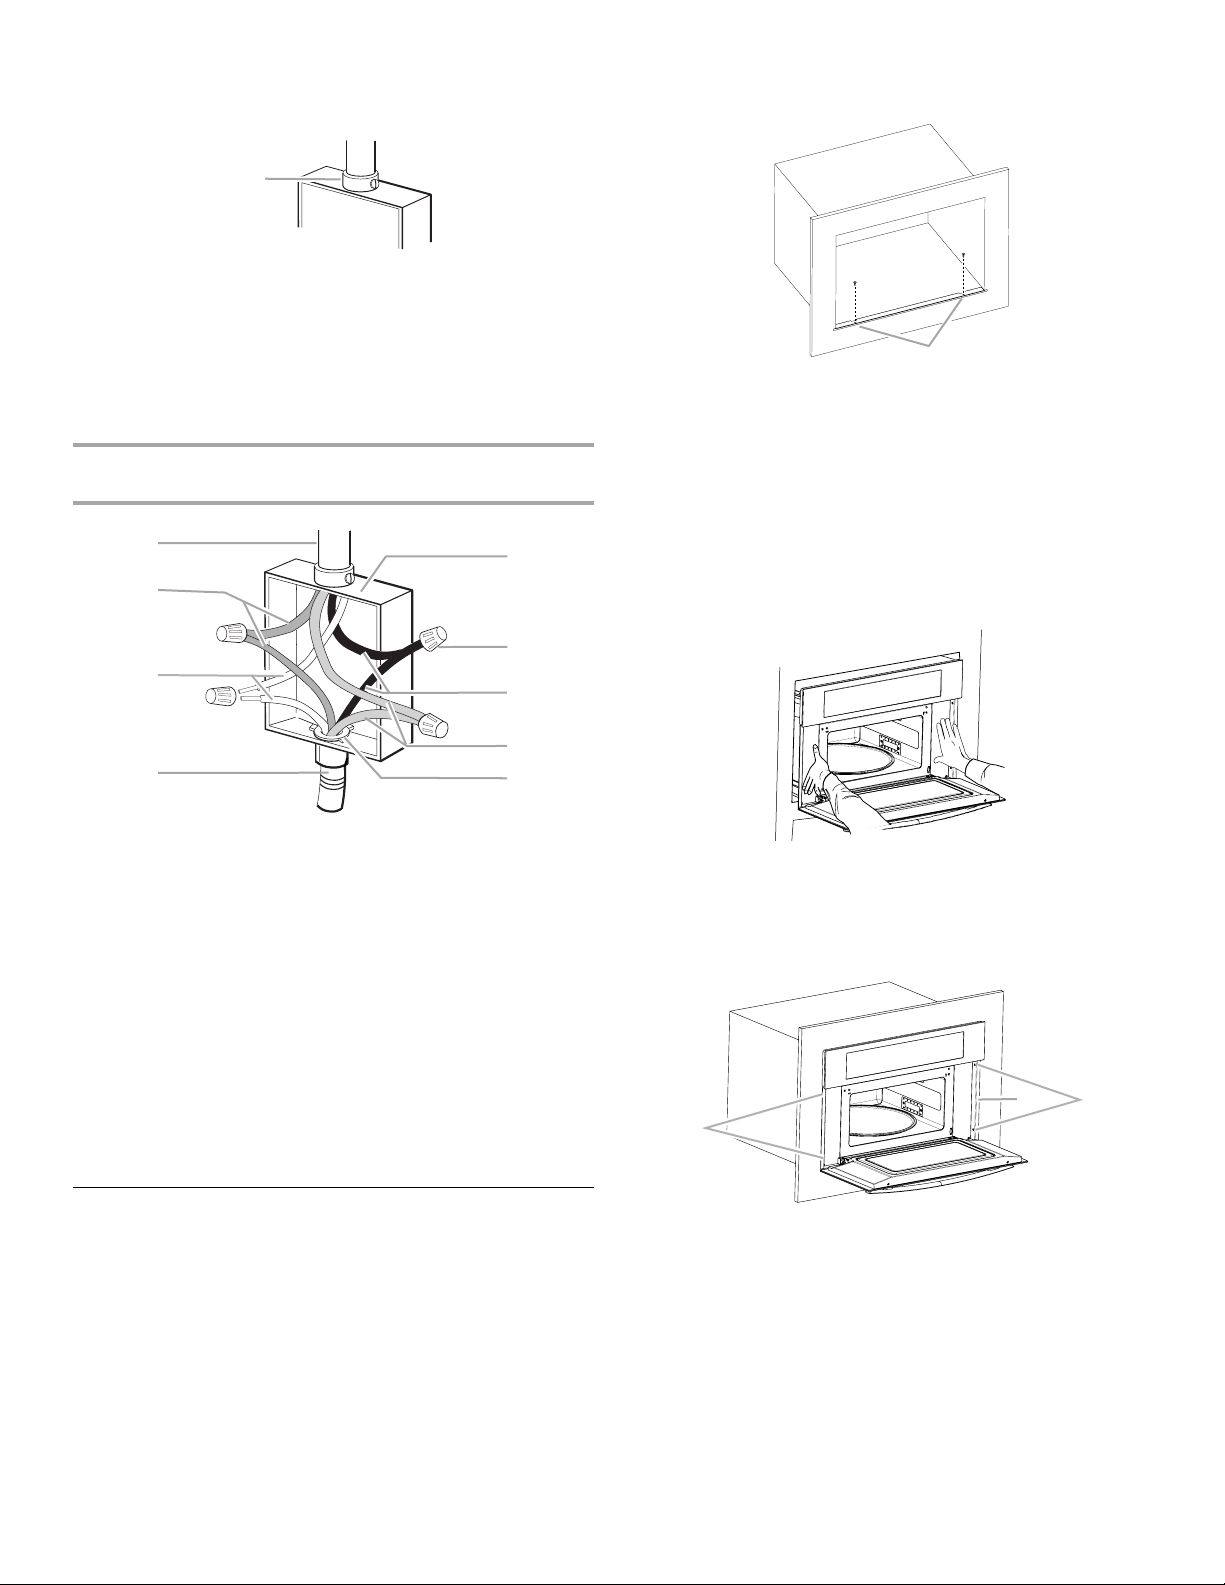
3-Wire Cable with Ground from Home Power Supply to
Microwave Oven Cable with 4 Wires
1. Connect the 2 black wires (G) together using a UL listed wire
connector.
2. Connect the 2 white wires (C) using a UL listed wire
connector.
3. Connect the 2 red (or black) wires (F) together using a UL
listed wire connector.
4. Connect the 2 green (or bare) wires together using a UL listed
wire connector.
5. Install junction box cover.
Install Microwave Oven
1. Center bottom trim over the lower edge of the cabinet cutout.
Using an ¹⁄₈" (0.32 cm) drill bit, predrill pilot holes through the
bottom trim.
NOTE: If a spacer kit has been installed, do not install the
bottom trim.
2. Fasten the bottom trim using 2 screws provided. Do not
overtighten the screws.
3. Using 2 or more people, lift microwave oven partially into
cabinet cutout. If a spacer kit has been installed, lift the
microwave oven over it.
NOTE: Open microwave oven door and push against seal
area of microwave oven front frame when pushing microwave
oven into cabinet. Do not push against outside edges.
4. Push against the front frame of the microwave oven to push
oven into cabinet. Push microwave oven completely into
cabinet and center in cabinet cutout.
5. Using an ¹⁄₈" (0.32 cm) drill bit, predrill pilot holes through the
mounting rails on each side of the microwave oven.
6. Securely fasten microwave oven to cabinet using the 4
screws provided. Insert the screws through holes in mounting
rails. Do not overtighten screws.
7. Replace convection grid, turntable and support hub.
8. Reconnect power.
9. Display panel will light briefly, and the clock should appear in
the display.
10. If display panel does not light, please reference the
“Assistance or Service” section of the Use and Care Guide or
contact the dealer from whom you purchased your
microwave oven.
A. UL listed or CSA approved conduit connector
A. Cable from home power supply
B. Green (or bare) wires
C. White wires
D. 4-wire cable from microwave
oven
E. UL listed or CSA approved
conduit connector
F. Red (or black) wires
G. Black wires
H. UL listed wire connector
I. Junction box
A
B
C
D
H
F
A
G
E
I
A. Two screws
A. Mounting rail
B. Four screws
A
A
B
B
Loading ...
Loading ...
Loading ...