Loading ...
Loading ...
Loading ...
Page 10
PART REQUIRED ACTION FREQUENCY
Char Grate
Back
Support
Brace
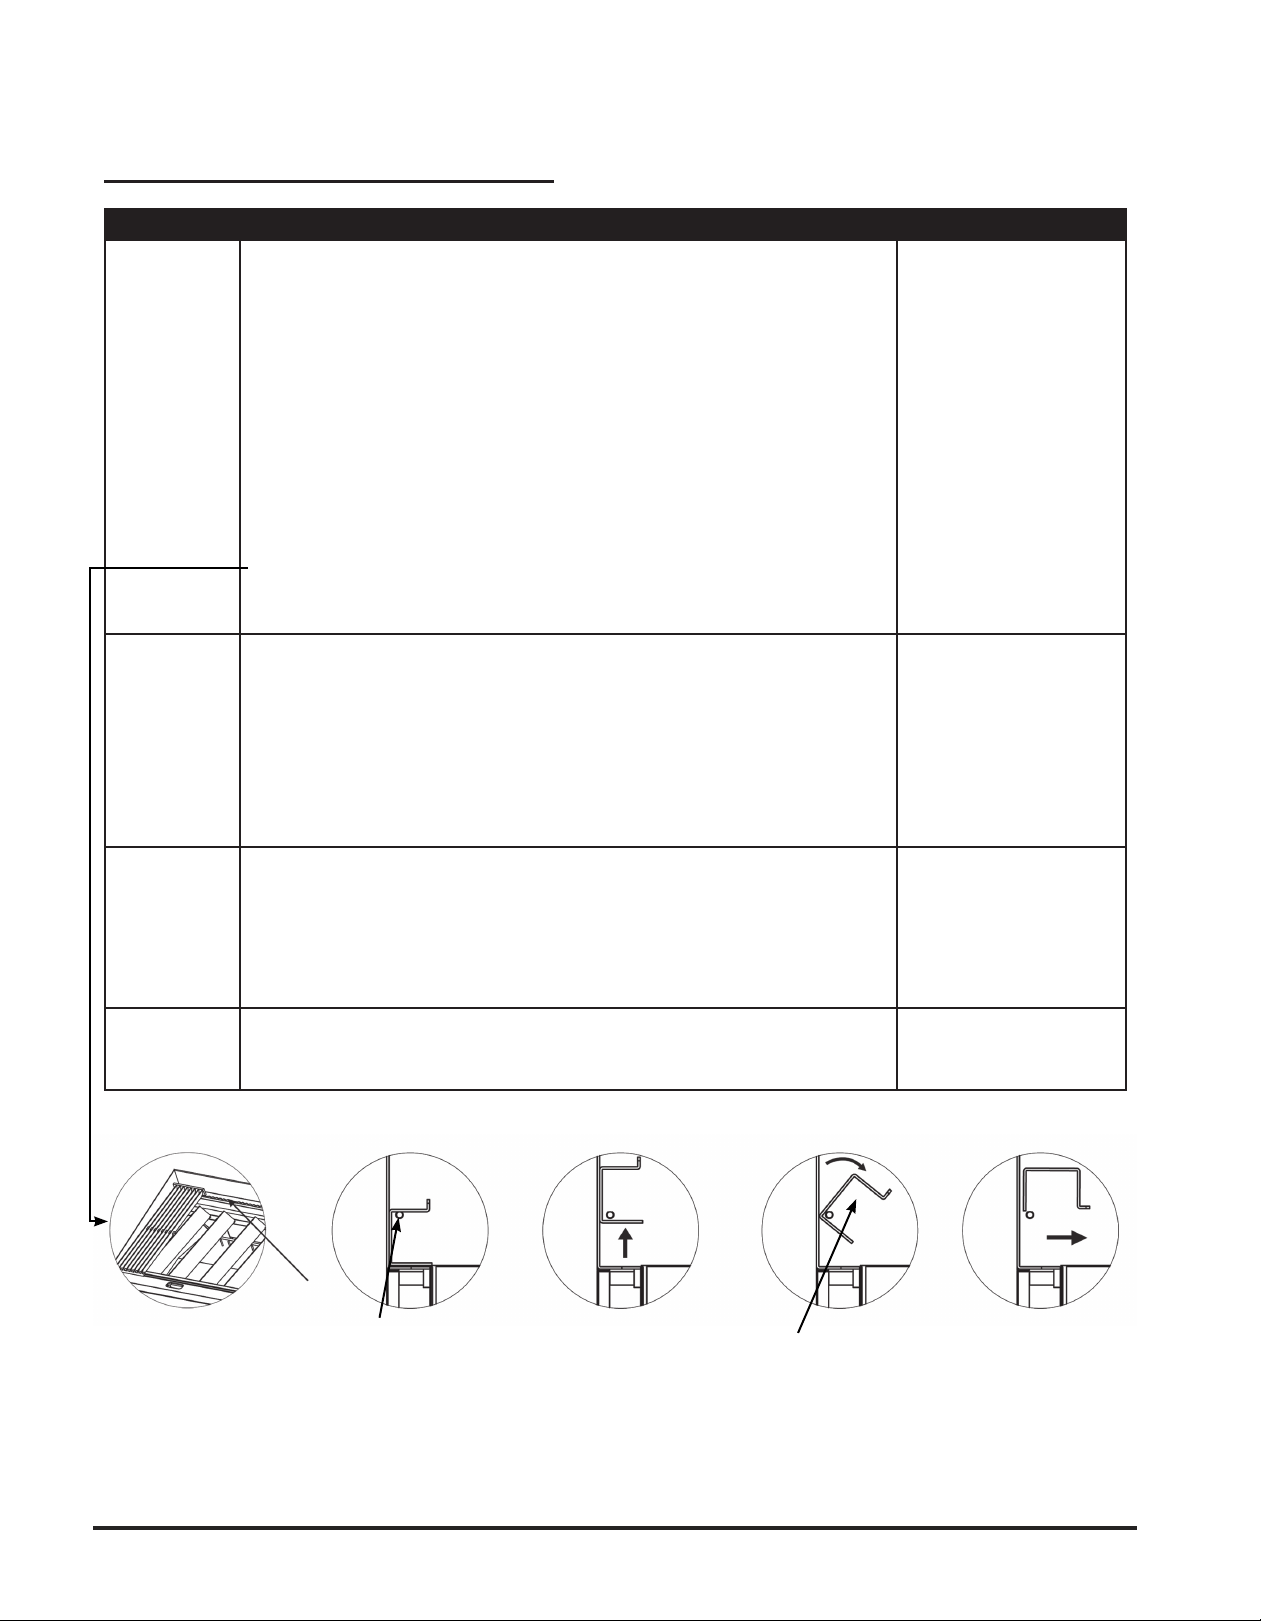
Once the unit has cooled, remove the cast iron grates
Lift and rock the back support brace toward you; lift the char grate back
support brace up and around the back support pins.
Clean and de-grease/remove debris from char grate back support brace.
Once the char grate back support brace is clean, reinstall it back into
place. Angle the long lead edge of the grate back support brace down
around the support pins and rock the back support brace around the
pins until it is seated at on the charbroiler’s back ledge.
(See illustration below for position and grate back support visual
instructions)
Daily
or
as need
Catch Tray Once the unit has cooled, remove the catch tray and discard the waste,
grease/debris and crumbs.
CAUTION: If the catch tray is permitted to ll too high, grease/debris is
likely to accumulate under the unit.
The catch tray/drawer is removed by pulling forward.
USE CAUTION WHEN REMOVING!
per Use
or
at least Daily
Burner Air
Shutter
Openings
Main burner ports must be kept clean. Close the gas valve to the unit,
shutting off the gas and extinguishing the pilot light.
Clean in place with a wire brush, or clean gas ports with a sharp-pointed
metal instrument to insure open ports; or the burners may be removed
and washed in soapy water for 15-20 minutes.
As needed
Regulator Make sure the vent is open and not blocked in any way. Failure to do so
will cause variations in pressure. Your unit will not function as well and it
could shorten the life of the product.
Monthly
Cleaning Instructions
RECOMMENDED CLEANING (CONTINUED)
Char Grate Back Support Visual Instruction
Char Grate
Back Support
Brace
Char Grate
Back Support
Brace
Back Support
Pin
Loading ...
Loading ...