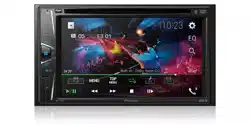
User Manual Pioneer AVH-120BT - 6.2" Screen Bluetooth AV Receiver
Parts and controls
Main unit


Basic operation
Resetting the microprocessor
 CAUTION
Pressing the RESET button resets settings and recorded contents to the factory settings.
- Do not perform this operation when a device is connected to this product.
- Some of the settings and recorded contents will not be reset.
- The microprocessor must be reset under the following conditions:
- Prior to using this product for the first time after installation.
- If this product fails to operate properly.
- If there appears to be problems with the operation of the system.
- Turn the ignition switch OFF.
- Press RESET with a pen tip or other pointed tools.
Settings and recorded contents are reset to the factory settings.
Remote control
The remote control is sold separately. For details concerning operations, see the remote control manual.
Starting up the unit
1. Start the engine to boot up the system.
The [Select Program Language] screen appears.
NOTE
From the second time on, the screen shown will differ depending on the previous conditions
2. Touch the language.
3. Touch  .
.
The top menu screen appears.
Using the touch panel
You can operate this product by touching the keys on the screen directly with your fingers.
NOTE
To protect the LCD screen from damage, be sure to touch the screen only with your finger gently.
Common touch panel keys
 Switches between playback and pause.
 Skips files/tracks/chapters forward or backward.
 Performs fast reverse or fast forward.
Touch again to change the playback speed.
 Stops playback.
 Text information
When all characters are not displayed, the rests are automatically scrolled on the display. The characters are displayed by touching the text information.
NOTE
This function is available only when you stop your vehicle in a safe place and apply the parking brake.
 Returns to the previous screen.
 Close the screen.
 Touching an item on the list allows you to narrow down the options and proceed to the next operation.
 Appears when all characters are not displayed on the display area.
If you touch the key, the rests are scrolled for display.
NOTE
This function is available only when you stop your vehicle in a safe place and apply the parking brake.
 Appears when items cannot be displayed on a single page.
Touch

or

to view any hidden items.
Operating the time bar
 You can change the playback point by dragging the key.
NOTE
The time bar function may vary depending on the activating source.
Top menu screen

 Source icons
 Setting the time and date (page 21)
 Settings (page 16) and Favorite menu (page 20)
 Hands-free phoning (page 8)
 AV source off
 If you select , you can turn off almost all functions.
The unit turns on by operating following functions:
- An incoming call is received (only for hands-free phoning via Bluetooth).
- A rear view camera image is input when the vehicle is in reverse.
- A button on this unit is pressed.
- The ignition switch is turned off (ACC OFF), then turned on (ACC ON).
Bluetooth
Bluetooth connection
- Turn on the Bluetooth function on the device.
- Press
 .
.
- Touch
 then
then  . The Bluetooth menu screen appears.
- Touch [Connection].
- Touch
 . The unit starts to search for available devices, then displays them in the device list.
- Touch the Bluetooth device name. After the device is successfully registered, a Bluetooth connection is established by the system. Once the connection is established, the device name is displayed on the list.
NOTES
- If three devices are already paired, [Memory Full] is displayed. Delete a paired device first (page 8).
- If your device supports SSP (Secure Simple Pairing), a six-digit number appears on the display of this product. Touch [Yes] to pair the device.
 is invalid when the device is already connected, during connection or disconnected.
- Before connecting from the Bluetooth device, make sure that the connection of this product and other Bluetooth device is disconnected.
TIP
The Bluetooth connection can also be made by detecting this product from the Bluetooth device. Before registration, make sure that [Visibility] in the [Bluetooth] menu is set to [On] (page 8). For details on Bluetooth device operations, refer to the operating instructions supplied with the Bluetooth device.
Bluetooth settings
- Press
 .
.
- Touch
 then
then .
.
 CAUTION
Never turn this product off and disconnect the device while the Bluetooth setting operation is being processed.
[Connection] Connect, disconnect, or delete registered Bluetooth device manually.
Touch  to delete registered device.
To connect a registered Bluetooth device manually, touch the name of the device.
To disconnect the device, touch the name of the connected device in the list.
NOTE
Connect the Bluetooth device manually in the following cases:
- Two or more Bluetooth devices are registered, and you want to manually select the device to be used.
- You want to reconnect a disconnected Bluetooth device.
- Connection cannot be established automatically for some reason.
[Auto Connect] [On] [Off]
Select [On] to connect the last connected Bluetooth device automatically.
NOTE
If two Bluetooth devices were connected the last time, the two devices are connected to this product automatically in the order that they are registered in the device list.
[Visibility]
[On] [Off]
Select [On] to make this product visible to the other device.
[PIN Code Input] Change the PIN code for Bluetooth connection.
The default PIN code is “0000”.
- Touch [0] to [9] to input the pin code (up to 8 digits).
- Touch
 .
.
[Device Information] Displaying the device name and address of this product.
[Bluetooth Memory Clear] Touch [Clear] then [OK] to clear the Bluetooth memory.
Switching the connected Bluetooth device
You can switch among the connected Bluetooth devices using the switch devices key in the Bluetooth menu.
- You can register up to three Bluetooth devices on this product (page 7).
- The Bluetooth audio player can be switched to other Bluetooth devices on the
- Bluetooth audio playback screen.
- Only one device can be connected as a hands-free phoning.
- The hands-free phoning is also switched when the connected device via Bluetooth is switched.
Hands-free phoning
To use this function you need to connect your cellular phone to this product via Bluetooth in advance (page 7).
 CAUTION
For your safety, avoid talking on the phone as much as possible while driving.
Making a phone call
- Press
 , then touch
 . The phone menu screen appears.
- Touch one of the call icons on the phone menu screen.
 The following items are displayed.
- Name of the current cellular phone
- List number of the current cellular phone
- Reception status of the current cellular phone
- Battery status of the current cellular phone
 Initial searches the phone book.
Touch the list area to stop initial search.
 Using preset dial list (page 9)
 Using phone book
Select a contact from the phone book. Touch the desired name on the list then select the phone number.
TIPS
- The contacts on your phone will be automatically transferred to this product.
- Update the phone book manually.
 Using call history
Make a phone call from the received call , dialed call , or missed call .
 Direct phone number input
Enter the number keys to enter the phone number then touch to make a call.
To end the call
- Touch
 .
.
Using the preset dial lists
Registering a phone number
You can easily store up to six phone numbers per device as presets.
- Press
 , then touch
 .
.
- Touch
 or
or . On the [Phone Book] screen, touch the desired name to display the contact’s phone number.
- Touch
 .
.
Dialing from the preset dial list
- Touch
 .
.
- Touch the desired entry on the list to make a call. The dial screen appears and dialing starts.
Deleting a phone number
- Press
 , then touch
  .
.
- Touch
 then
then .
.
- Touch [Yes].
Receiving a phone call
-
Touch

to answer the call.
Touch

to end the call.
TIPS
- Touch while getting a call waiting, switch to the talking person.
- Touch while getting a call waiting to reject the call.
Phone settings
- Press
 , then touch
 and
and .
.

Setting the private mode
During a conversation, you can switch to private mode (talk directly on your cellular phone).
- Touch
 or
or to turn private mode on or off.
Adjusting the other party’s listening volume
This product can be adjusted to the other party’s listening volume.
- Touch
 to switch between the three volume levels.
Notes for hands-free phoning
General notes
- Connection to all cellular phones featuring Bluetooth wireless technology is not guaranteed.
- The line-of-sight distance between this product and your cellular phone must be 10 meters or less when sending and receiving voice and data via Bluetooth technology.
- With some cellular phones, the ring sound may not be output from the speakers.
- If private mode is selected on the cellular phone, hands-free phoning may be disabled.
Registration and connection
- Cellular phone operations vary depending on the type of cellular phone. Refer to the instruction manual that came with your cellular phone for detailed instructions.
- When phone book transfer does not work, disconnect your phone and then perform pairing again from your phone to this product.
Making and receiving calls
- You may hear a noise in the following situations:
- When you answer the phone using the button on the phone.
- When the person on the other end of the line hangs up the phone.
- If the person on the other end of the line cannot hear the conversation due to an echo, decrease the volume level for hands-free phoning.
- With some cellular phones, even after you press the accept button on the cellular phone when a call comes in, hands-free phoning may not be performed.
- The registered name will appear if the phone number is already registered in the phone book. When the same phone number is registered under different names, only the phone number will be displayed.
The received call and dialed number histories
- You cannot make a call to the entry of an unknown user (no phone number) in the received call history.
- If calls are made by operating your cellular phone, no history data will be recorded in this product.
Phone book transfers
- If there are more than 1 000 phone book entries on your cellular phone, not all entries may download completely.
- Depending on the phone, this product may not display the phone book correctly.
- If the phone book in the phone contains image data, the phone book may not be transferred correctly.
- Depending on the cellular phone, phone book transfer may not be available.
Bluetooth audio
Before using the Bluetooth audio player, register and connect the device to this product (page 7).
NOTES
Depending on the Bluetooth audio player connected to this product, the available operations with this product may be limited to the following two levels:
- A2DP (Advanced Audio Distribution Profile): Only playing back songs on your audio player is possible.
- A2DP and AVRCP (Audio/Video Remote Control Profile): Playing back, pausing, selecting songs, etc., are possible.
- Depending on the Bluetooth device connected to this product, the available operations with this product may be limited or differ from the descriptions in this manual.
- While you are listening to songs on your Bluetooth device, refrain from operating the phone function as much as possible. If you try operating, the signal may cause noise for song playback.
- When you are talking on the Bluetooth device connected to this product via Bluetooth, it may pause playback.
- Press
 .
.
- Touch
 then
then . The system setting screen appears.
- Touch [AV Source Settings].
- Confirm that [Bluetooth Audio] is turned on.
- Press
 .
.
- Touch [Bluetooth Audio]. The Bluetooth audio playback screen appears.
Basic operation
Description of Bluetooth audio playback screen

AV source
Supported AV source
You can play or use the following sources with this product.
- Radio
- ROM (compressed audio or video files on discs)
- DVD-Video
- USB
The following sources can be played back or used by connecting an auxiliary device.
Selecting a source
Source on the AV source selection screen
- Press
 .
.
- Touch the source icon.
When you select , the AV source is turned off.
Source on the source list
- Touch
 on the AV Source screen.
- Touch the source key.
When you select [Source OFF], the AV source is turned off.
Smartphone connection for AV source
When using a smartphone with this product, the settings are automatically configured according to the device to be connected.
NOTES
- Operation methods may vary depending on the smartphone and its software version.
- Depending on the version of smartphone OS, it may not be compatible with this unit.
Smartphone (AndroidTM device)
These are the methods to connect a smartphone to this product. The available sources vary depending on the connection method.
- Connecting via Bluetooth (page 11)
- Connecting via USB (page 11)
Compatible smartphones
Compatibility with all smartphones is not guaranteed. For details about smartphone compatibility with this product, refer to the information on our website.
Connecting via Bluetooth
The following sources are available when a smartphone is connected to the unit via Bluetooth.
- Connect a smartphone with this product via Bluetooth (page 7).
- Press
 .
.
- Touch compatible desired source.
Connecting via USB
The following sources are available when a smartphone is connected to the unit via USB.
USB storage device
- Connect a smartphone with this product via USB (page 23)
- Press
 .
.
- Touch compatible desired source.
Radio
Starting procedure
- Press
 .
.
- Touch [Radio].
The Radio screen appears.
Basic operation
Description of Radio screen

 Recalls the preset channel stored to a key from memory.
 Stores the current broadcast frequency to a key.
 Displays the preset channel list.
Select an item on the list ([1] to [6]) to switch to the preset channel.
 Selects the FM1, FM2, FM3, or AM band.
 Performs BSM (best stations memory) function (page 12).

 Manual tuning
 Seek tuning or non stop seek tuning
Releasing the key in a few seconds skips to the nearest station from the current frequency. Keep holding the key for long seconds to perform, performs non stop seek tuning.
Storing the strongest broadcast frequencies (BSM)
The BSM (best stations memory) function automatically stores the six strongest broadcast frequencies under the preset channel keys [1] to [6].
NOTES
- Storing broadcast frequencies with BSM may replace those you have already saved.
- Previously stored broadcast frequencies may remain stored if the number of frequencies stored has not reached the limit.
1. Touch to begin search.
While searching, the six strongest broadcast frequencies will be stored under the preset channel keys in the order of their signal strength.
To cancel the storage process
1. Touch [Cancel].
Radio settings
- Press
 .
.
- Touch
 then
then . The system setting screen appears.
- Touch [AV Source Settings].
- Touch [Radio settings].
The menu items vary according to the source.

Disc
Inserting and ejecting a disc
You can play a normal music CD, Video-CD, or DVD-Video using the built-in drive of this product.
 CAUTION
Do not insert anything other than a disc into the disc-loading slot.
Insert the disc
1. Insert a disc into the disc-loading slot.
The source changes and then playback will start.
NOTE
If the disc is already set, select [Disc] as the playing source.
Ejecting a disc
1. Press  .
.
Basic operation
TIPS
- If a Video-CD with PBC (playback control) ON is being played, appears.
- You can set the screen size for the video image (page 21).
Audio source
Description of Audio source screen
 Track number indicator
 Sets a repeat play for the current disc/the current track.
 Plays or does not play tracks in random order.
 Selects a track from the list.
Touch a track on the list to play back.
Video source
 CAUTION
For safety reasons, video images cannot be viewed while your vehicle is in motion. To view video images, stop in a safe place and apply the parking brake.
Description of Video source screen
TIP
Touch anywhere on the screen, the touch panel keys appear.
 Performs frame-by-frame playback.
Performs slow-motion playback.
Each time you touch

, it changes the speed in four steps in the following order: 1/16 -> 1/8 -> 1/4 -> 1/2
TIP
Reverse slow-motion playback is only for Video CD.
 Displays the DVD menu.
NOTE
This function may not work properly with some DVD disc content. In that case, use touch panel keys to operate the DVD.
 Sets a repeat play for all files/the current chapter/the current title.
 Switches the audio/subtitle language.
 Displays the hidden function bar.
 Searches for the part you want to play.
Touch [Title], [Chapter], [10Key], or [Track] then input the desired number from [0] to [9].
To start playback from the number you registered, touch

.
TIPS
- To cancel an input number, touch [C].
- For DVD-Videos, you can select [Title], [Chapter] or [10Key].
- For Video-CDs, you can select [Track] or [10Key].*
 Selects the audio output from [L+R], [Left], [Right], [Mix].
This function is available for Video-CDs and DVDs recorded with LPCM audio.
 Changes the viewing angle (Multi-angle).
This function is available for DVDs featuring multi-angle recordings.
 Resumes playback (Bookmark).
This function is available for DVD-Video. You can memorize one point as a Bookmark for a disc (up to five discs). To clear the bookmark on the disc, touch and hold this key.
 Returns and begins playback from the specified point.
This function is available for DVD-Video and Video-CDs featuring PBC (playback control).
Compressed files
Inserting and ejecting media
You can play compressed audio, compressed video, or still image files stored in a disc or an external storage device.
 CAUTION
Do not insert anything other than a disc into the disc-loading slot.
Insert a disc
1. Insert a disc into the disc-loading slot.
The source changes and then playback will start.
NOTE
If the disc is already set, select [Disc] as the playing source.
Plugging a USB storage device
1. Open the USB port cover.
2. Plug in the USB device/smartphone (Android device) using an appropriate cable.
NOTES
- This product may not achieve optimum performance with some USB storage devices.
- Connection via a USB hub is not possible.
 CAUTION
Use a USB cable (sold separately) to connect the USB device as any device connected directly to the unit will protrude out from the unit, which could be dangerous.
Unplugging a USB storage device
1. Pull out the USB storage device from the USB cable.
NOTES
- Check that no data is being accessed before pulling out the USB storage device.
- Turn off (ACC OFF) the ignition switch before unplugging the USB storage device.
Starting procedure
For Disc
Insert the disc (page 13).
TIP
If the disc is already set, select [Disc] as the playing source.
Basic operation
TIP
You can set the screen size for the video and image files (page 21).
Audio source
Description of Audio source screen (Example: USB)
TIP
When you touch text information, all information is displayed by scrolling only when the parking brake is applied.
 Sets a repeat play range for all files/the current folder/the current file.
NOTE
The types of repeat play range depend on the source.
 Plays files or does not play in random order.
Displays the hidden function bar.
 Switches the following media file types.
[Music]: Compressed audio files
[Video]: Compressed video files
[CD-DA]: Audio data (CD-DA)
[Photo]: Image files
 Selects a file from the list.
Touch a file on the list to playback.
TIP
Touching a folder on the list shows its contents. You can play a file on the list by touching it.
 When you touch the memory select icon while connecting an Android device, it switches between internal memory and external memory.
 Selects the previous folder or the next folder.
 Switches the current music information display.
Settings
You can adjust various settings in the main menu.
Displaying the setting screen
- Press
 .
.
- Touch
 .
.
- Touch one of the following categories, then select the options.

 System settings
[Camera Settings]
A separately sold rear view camera (e.g. ND-BC8) is required for utilizing the rear view camera function. (For details, consult your dealer.)
Rear view camera
This product features a function that automatically switches to the full-screen image of the rear view camera installed on your vehicle when the shift lever is in the REVERSE (R) position.
Camera View mode also allows you to check what is behind you while driving.
Camera for Camera View mode
Camera View can be displayed at all times. Note that with this setting, the camera image is not resized to fit, and that a portion of what is seen by the camera is not viewable.
To display the camera image, touch [Camera View] on the AV source selection screen page 11).
NOTE
To set the rear view camera as the camera for Camera View mode, set [Back Camera Input] to [On] page 16).
CAUTION
- Pioneer recommends the use of a camera which outputs mirror reversed images, otherwise the screen image may appear reversed.
- Immediately verify whether the display changes to the rear view camera image when the shift lever is moved to REVERSE (R) from another position.
- When the screen changes to full-screen rear view camera image during normal driving, switch to the opposite setting in [Camera Polarity].
- If you touch while the camera image is displayed, the displayed image turns off temporarily.

[Touch Panel Calibration]
If you feel that the touch panel keys on the screen deviate from the actual positions that respond to your touch, adjust the response positions of the touch panel screen.
NOTES
- Do not use sharp pointed tools such as ballpoint or mechanical pens. They may damage the screen.
- Do not turn off the engine while saving the adjusted position data.
- This setting is available only when you stop your vehicle in a safe place and apply the parking brake.
1. Touch Panel Calibration] 1 Touch [Yes].
2. Touch four corners of the screen along the arrows.
3. Press .
.
The adjustment results are saved.
4. Press  once again.
Proceed to 16-point adjustment.
5. Gently touch the center of the [+] mark displayed on the screen.
The target indicates the order.
- When you press
 , the previous adjustment position returns.
- When you press and hold
 , the adjustment is canceled.
6. Press and hold .
.
The adjustment results are saved.
Other functions
Setting the time and date
1. Touch the current time on the screen.
2. Touch or
or to set the correct time and date.
You can operate the following items: Year, month, date, hour, minute.
TIPS
- You can change the time display format to [12hour] or [24hour].
- You can change the order of date display format: Day-month, Month-day.
Changing the wide screen mode
You can set the screen mode for AV screen and image files.
1. Touch the screen display mode key.
 Screen display mode key
2. Touch the desired mode.
[Full]
Displays 16:9 images on the full screen without changing the ratio.
NOTES
- Images other than 16:9 images for DVD may be displayed in the full screen with the ratio change.
- Enlarges and displays images of USB sources keeping the ratio of the original source image.
[Zoom]
Displays the images enlarging them vertically.
[Normal]
Displays images without changing the 4:3 aspect ratio.
NOTES
- For USB sources, 4:3 aspect ratio may not be displayed.
- Devices connected with USB MTP are not supported.
[Trimming]
- An image is displayed across the entire screen with the horizontal-to-vertical ratio left as is. If the screen ratio differs from the image, the image may be displayed partly cut off either at the top/bottom or sides.
NOTE
[Trimming] is for image files only.
TIPS
- Different settings can be stored for each video source.
- When a video is viewed in wide screen mode that does not match its original aspect ratio, it may appear different.
- The video image will appear coarser when viewed in [Zoom] mode.
NOTE
Image files can be set to either [Normal] or [Trimming] in wide screen mode.
Restoring this product to the default settings
You can restore settings or recorded content to the default settings from [Restore Settings] in the [System] menu (page 17).
Installation
Before installing
- Consult with your nearest dealer if installation requires drilling holes or other modifications of the vehicle.
- Before making a final installation of this product, temporarily connect the wiring to confirm that the connections are correct and the system works properly.
Installation notes
- Do not install this product in places subject to high temperatures or humidity, such as:
- Places close to a heater, vent or air conditioner.
- Places exposed to direct sunlight, such as on top of the dashboard.
- Places that may be exposed to rain, such as close to the door or on the vehicle’s floor.
- Install this product horizontally on a surface within 0 to 30 degrees tolerance within 5 degrees to the left or right). Improper installation of the unit with the surface tilted more than these tolerances increases the potential for errors in the vehicle’s location display, and might otherwise cause reduced display performance.

- When installing, to ensure proper heat dispersal when using this product, make sure you leave ample space behind the rear panel and wrap any loose cables so they are not blocking the vents.

Installation using the screw holes on the side of this product
1. Fastening this product to the factory radio-mounting bracket.
Position this product so that its screw holes are aligned with the screw holes of the bracket, and tighten the screws at three locations on each side. Use either the truss head screws or flush surface screws, depending on the shape of the bracket’s screw holes.


Appendix
Troubleshooting
If you have problems operating this product, refer to this section. The most common problems are listed below, along with likely causes and solutions. If a solution to your problem cannot be found here, contact your dealer or the nearest authorized Pioneer service facility.
Common problems
A black screen is displayed, and operation is not possible using the touch panel keys.
→ Power off mode is on.
- Press any button on this product to release the mode.
Problems with the AV screen
CD or DVD playback is not possible.
→ The disc is inserted upside down.
- Insert the disc with the label upward.
→ The disc is dirty.
- Clean the disc.
→ The disc is cracked or otherwise damaged.
- Insert a normal, round disc.
→ The files on the disc are in an irregular file format.
- Check the file format.
→ The disc format cannot be played back.
- Replace the disc.
→ The loaded disc is a type this product cannot play.
- Check what type of disc it is.
The screen is covered by a caution message and the video cannot be shown.
→ The parking brake lead is not connected or the parking brake is not applied.
- Connect the parking brake lead correctly, and apply the parking brake.
→ The parking brake interlock is activated.
- Park your vehicle in a safe place and apply the parking brake.
No sounds are produced. The volume level will not rise.
→ The system is performing still, slow motion, or frame-by-frame playback with DVD-Video.
- There is no sound during still, slow motion, or frame-by-frame playback with DVD-Video.
→ The system is paused or performing fast reverse or forward during the disc playback.
- For the media other than music CD (CD-DA), there is no sound on fast reverse or forward.
The icon is displayed, and operation is impossible.
→ The operation is not compatible with the video configuration.
- The operation is not possible. (For example, the DVD playing does not feature that angle, audio system, subtitle language, etc.)
The picture is extremely unclear/ distorted and dark during playback.
→ The disc features a signal to prohibit copying. (Some discs may have this.)
- Since this product is compatible with the copy guard analog copy protect system, the picture may suffer from horizontal stripes or other imperfections when a disc with that kind of protection signal is viewed on some displays. This is not a malfunction.
No back camera image when the vehicle is in reverse.
→ The back camera input setting on the receiver is set to Off.
- Change the back camera setting to On in the settings menu. (Refer to the System Settings section of this manual to adjust.)
→ The camera input may be loose or not connected.
- Check the connection and make sure the male end of the camera is connected to the brown input on the back of the receiver. Refer to Camera (page 24).
→ The reverse lead on the receiver may not be connected to the proper wire at the reverse lamp.
- Check the connection and make sure that the violet/white lead of the receiver is connected to the lead whose voltage changes when the shift lever is put in reverse. Refer to Camera (page 24).
Black screen displayed when the vehicle is in reverse, with no camera installed.
→ Back camera input is set to On.
- Turn the setting to Off in the settings menu. (Refer to the System Settings section of this manual to adjust.)
Back image displayed when vehicle is not in reverse.
→ The camera polarity is not set properly in the Camera settings menu.
- Review System Settings section of this manual for steps to switch the camera polarity. Park in a safe place, then while keeping your foot firmly on the brake, put the vehicle in reverse, access the System Settings menu, and change the camera polarity setting. Put vehicle back in park. (Refer to the System Settings section of this manual to adjust.)
Problems with the phone screen
Dialing is impossible because the touch panel keys for dialing are inactive.
→ Your phone is out of range for service.
- Retry after re-entering the range for service.
→ The connection between the cellular phone and this product cannot be established.
- Perform the connection process.
→ Of the two cellular phones connected to this product at the same time, if the first phone is dialing, ringing or a call is in progress, dialing cannot be performed on the second phone.
- When the operation on the first of the two cellular phones is completed, use the switch devices key to switch to the second phone and then dial.
Error messages
When problems occur with this product, an error message appears on the display. Refer to the table below to identify the problem, then take the suggested corrective action. If the error persists, record the error message and contact your dealer or your nearest Pioneer service center.
Common
AMP Error
→ This product fails to operate or the speaker connection is incorrect; the protective circuit is activated.
- Check the speaker connection. If the message fails to disappear even after the engine is switched off/on, contact your dealer or an authorized Pioneer Service Station for assistance.
Disc
Error-02-XX
→ The disc is dirty.
- Clean the disc.
→ The disc is scratched.
- Replace the disc.
→ The disc is loaded upside down.
- Check that the disc is loaded correctly.
→ There is an electrical or mechanical error.
- Press RESET.
Skipped
→ The inserted disc contains DRM protected files.
- The protected files are skipped.
Protect
→ All the files on the inserted disc are embedded with DRM.
- Replace the disc.
TEMP
→ The temperature of this product is outside the normal operating range.
- Wait until this product returns to a temperature within the normal operating limits.
USB storage device
Error-02-9X/-DX
→ Communication failed.
- Turn the ignition switch OFF and back ON.
- Disconnect the USB storage device.
- Change to a different source. Then, return to the USB storage device.
Skipped
→ The connected USB storage device contains DRM protected files.
- The protected files are skipped.
Protect
→ All the files on the connected USB storage device are embedded with DRM.
- Replace the USB storage device.
Bluetooth
Error-10
→ The power failed for the Bluetooth module of this product.
- Turn the ignition switch to OFF and then to ON.
If the error message is still displayed after performing the above action, please contact your dealer or an authorized Pioneer Service Station.
Handling and care of discs
Some basic precautions are necessary when handling your discs.
Built-in drive and care
- Use only conventional, fully circular discs. Do not use shaped discs.
- Do not use cracked, chipped, warped, or otherwise damaged discs as they may damage the built-in drive.
- Use 12-cm discs. Do not use 8-cm discs or an adapter for 8-cm discs.
- When using discs that can be printed on label surfaces, check the instructions and the warnings of the discs. Depending on the discs, inserting and ejecting may not be possible. Using such discs may result in damage to this equipment.
- Do not attach labels, write on or apply chemicals to the surface of the discs.
- Do not attach commercially available labels or other materials to the discs.
- To clean a disc, wipe it with a soft cloth, moving outward from the center.
- Condensation may temporarily impair the built-in drive’s performance.
- Playback of discs may not be possible because of disc characteristics, disc format, recorded application, playback environment, storage conditions and so on.
- Road shocks may interrupt disc playback.
- Read the precautions for discs before using them.
Playable discs
DVD-Video
- DVD is a trademark of DVD Format/Logo Licensing Corporation.
- It is not possible to play DVD Audio discs. This DVD drive may not be able to play all discs bearing the marks shown above.
AVCHD recorded discs
This unit is not compatible with discs recorded in AVCHD (Advanced Video Codec High Definition) format. Do not insert in AVCHD discs. If inserted, the disc may not be ejected.
Playing DualDisc
- DualDiscs are two-sided discs that have a recordable CD for audio on one side and a recordable DVD for video on the other.
- Playback of the DVD side is possible with this product. However, since the CD side of DualDiscs is not physically compatible with the general CD standard, it may not be possible to play the CD side with this product.
- Frequent loading and ejecting of a DualDisc may result in scratches to the disc.
- Serious scratches can lead to playback problems on this product. In some cases, a DualDisc may become stuck in the disc- loading slot and will not eject. To prevent this, we recommend you refrain from using DualDisc with this product.
- Please refer to the manufacturer for more detailed information about DualDiscs.
Dolby Digital
This product will down-mix Dolby Digital signals internally and the sound will be output in stereo.
- Manufactured under license from Dolby Laboratories. Dolby, Dolby Audio and the double-D symbol are trademarks of Dolby Laboratories.
Detailed information for playable media
Compatibility
Common notes about disc compatibility
- Certain functions of this product may not be available for some discs.
- Compatibility with all discs is not guaranteed.
- It is not possible to play DVD-RAM discs.
- Playback of discs may become impossible with direct exposure to sunlight, high temperatures, or depending on the storage conditions in the vehicle.
DVD-Video discs
- DVD-Video discs that have incompatible region numbers cannot be played on this DVD drive. The region number of the player can be found on this product’s chassis.
DVD-R/DVD-RW/DVD-R SL (Single Layer)/DVD-R DL (Dual Layer) discs
- Unfinalized discs which have been recorded with the Video format (video mode) cannot be played back.
- Discs which have been recorded with the
- Video Recording format (VR mode) cannot be played back.
- DVD-R DL (Dual Layer) discs which have been recorded with Layer Jump recording cannot be played back.
- For detailed information about recording mode, please contact the manufacturer of media, recorders, or writing software.
CD-R/CD-RW discs
- Unfinalized discs cannot be played back.
- It may not be possible to playback CD-R/ CD-RW discs recorded on a music CD recorder or a computer because of disc characteristics, scratches or dirt on the disc, or dirt, scratches or condensation on the lens of the built-in drive.
- Playback of discs recorded on a computer may not be possible, depending on the recording device, writing software, their settings, and other environmental factors.
- Please record with the correct format.
- For details, please contact manufacturer of media, recorders, or writing software.)
- Titles and other text information recorded on a CD-R/CD-RW disc may not be displayed by this product (in the case of audio data (CD-DA)).
- Read the precautions with CD-R/CD-RW discs before using them.
Common notes about the USB storage device
- Do not leave the USB storage device in any location with high temperatures.
- Depending on the kind of the USB storage device you use, this product may not recognize the storage device or files may not be played back properly.
- The text information of some audio and video files may not be correctly displayed.
- File extensions must be used properly.
- There may be a slight delay when starting playback of files on an USB storage device with complex folder hierarchies.
- Operations may vary depending on the kind of an USB storage device.
- It may not be possible to play some music files from USB because of file characteristics, file format, recorded application, playback environment, storage conditions, and so on.
USB storage device compatibility
- For details about USB storage device compatibility with this product, refer to Specifications (page 30).
- Protocol: bulk
- You cannot connect a USB storage device to this product via a USB hub.
- Partitioned USB storage device is not compatible with this product.
- Firmly secure the USB storage device when driving. Do not let the USB storage device fall onto the floor, where it may become jammed under the brake or gas pedal.
- There may be a slight delay when starting playback of audio files encoded with image data.
- Some USB storage devices connected to this product may generate noise on the radio.
- Do not connect anything other than the USB storage device.
The sequence of audio files on USB storage device.
For USB storage device, the sequence is different from that of USB storage device.
Handling guidelines and supplemental information
- This product is not compatible with the Multi Media Card (MMC).
- Copyright protected files cannot be played back.
Common notes about DivX files
Notes specific to DivX files
- Only DivX files downloaded from DivX partner sites are guaranteed for proper operation. Unauthorized DivX files may not operate properly.
- This product corresponds to a DivX file display of up to 1 590 minutes 43 seconds. Search operations beyond this time limit are prohibited.
- For details on the DivX video versions that can be played on this product, refer to Specifications (page 30).
- For more details about DivX, visit the following site: https://www.divx.com/
DivX subtitle files
- Srt format subtitle files with the extension “.srt” can be used.
- Only one subtitle file can be used for each DivX file. Multiple subtitle files cannot be associated.
- Subtitle files that are named with the same character string as the DivX file before the extension are associated with the DivX file. The character strings before the extension must be exactly the same. However, if there is only one DivX file and one subtitle file in a single folder, the files are associated even if the file names are not the same.
- The subtitle file must be stored in the same folder as the DivX file.
- Up to 255 subtitle files may be used. Any more subtitle files will not be recognized.
- Up to 64 characters can be used for the name of the subtitle file, including the extension. If more than 64 characters are used for the file name, the subtitle file may not be recognized.
- The character code for the subtitle file should comply with ISO-8859-1. Using characters other than ISO-8859-1 may cause the characters to be displayed incorrectly.
- The subtitles may not be displayed correctly if the displayed characters in the subtitle file include control code.
- For materials that use a high transfer rate, the subtitles and video may not be completely synchronized.
- If multiple subtitles are programmed to display within a very short time frame, such as 0.1 seconds, the subtitles may not be displayed at the correct time.
Bluetooth
The Bluetooth® word mark and logos are registered trademarks owned by Bluetooth SIG, Inc. and any use of such marks by PIONEER CORPORATION is under license. Other trademarks and trade names are those of their respective owners.
WMA
Windows Media is either a registered trademark or trademark of Microsoft Corporation in the United States and/or other countries.
- This product includes technology owned by Microsoft Corporation and cannot be used or distributed without a license from Microsoft Licensing, Inc.
Using the LCD screen correctly
Handling the LCD screen
- When the LCD screen is subjected to direct sunlight for a long period of time, it will become very hot, resulting in possible damage to the LCD screen. When not using this product, avoid exposing it to direct sunlight as much as possible.
- The LCD screen should be used within the temperature ranges shown in Specifications on page 30.
- Do not use the LCD screen at temperatures higher or lower than the operating temperature range, because the LCD screen may not operate normally and could be damaged.
- The LCD screen is exposed in order to increase its visibility within the vehicle. Please do not press strongly on it as this may damage it.
- Do not push the LCD screen with excessive force as this may scratch it.
- Never touch the LCD screen with anything besides your finger when operating the touch panel functions. The LCD screen can scratch easily.
Liquid crystal display (LCD) screen
- If the LCD screen is near the vent of an air conditioner, make sure that air from the air conditioner is not blowing on it. Heat from the heater may break the LCD screen, and cool air from the cooler may cause moisture to form inside this product, resulting in possible damage.
- Small black dots or white dots (bright dots) may appear on the LCD screen. These are due to the characteristics of the LCD screen and do not indicate a malfunction.
- The LCD screen will be difficult to see if it is exposed to direct sunlight.
- When using a cellular phone, keep the antenna of the cellular phone away from the LCD screen to prevent disruption of the video in the form of disturbances such as spots or colored stripes.
Maintaining the LCD screen
- When removing dust from or cleaning the LCD screen, first turn this product off and then wipe the screen with a soft dry cloth.
- When wiping the LCD screen, take care not to scratch the surface. Do not use harsh or abrasive chemical cleaners.
LED (light-emitting diode) backlight
A light emitting diode is used inside the display to illuminate the LCD screen.
- At low temperatures, using the LED backlight may increase image lag and degrade the image quality because of the characteristics of the LCD screen. Image quality will improve with an increase in temperature.
- The product lifetime of the LED backlight is more than 10 000 hours. However, it may decrease if used in high temperatures.
- If the LED backlight reaches the end of its product lifetime, the screen will become dimmer and the image will no longer be visible. In that case, please consult your dealer or the nearest authorized Pioneer Service Station.