Loading ...
Loading ...
Loading ...
35
Care and cleaning
1
2
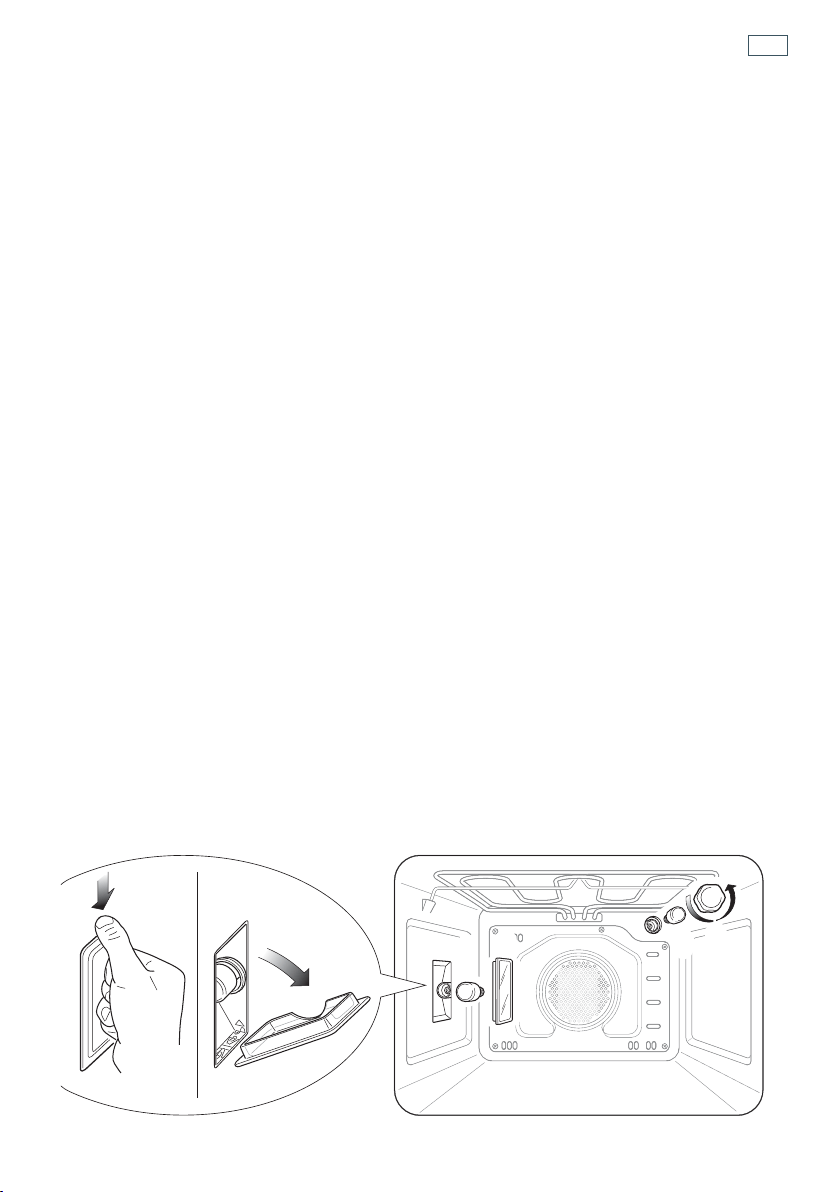
Replacing the oven lamp
Note: oven bulb replacement is not covered by your warranty.
1
Let the oven cavity and the grill element cool down.
2
Switch the power to the oven off at the wall.
LEFT LAMP (some models only)
3a
Remove the left side rack (and catalytic panel if supplied). See ‘Removing and refitting the side
racks and catalytic panels’.
4a
Press down on the lamp cover and rotate to remove.
Important!
Never use screwdrivers or other utensils to remove the lamp cover, as doing so could damage the
surrounding enamel. Only use your hands.
5a
Unscrew and replace the bulb with a new one suitable for high temperatures (300
o
C) with the
following specifications: 230-240V, 50Hz, E14 and same wattage as the bulb being replaced
(check wattage stamped on the bulb).
6a
Refit the lamp cover, operating in reverse order. Make sure that it clicks into place.
Important!
The notch in the inner edge of the cover must be on the side closer to the back of the oven.
7a
Refit the left side rack (and the left catalytic panel if supplied).
8a
Switch the power to the oven back on at the wall.
TOP RIGHT LAMP
3b
Twist the lamp cover off.
4b
Unscrew and replace the bulb with a new one suitable for high temperatures (300
o
C) with the
following specifications: 230-240V, 50Hz, E14 and same wattage as the bulb being replaced
(check wattage stamped on the bulb).
5b
Twist the lamp cover back on.
6b
Switch the power to the oven back on at the wall.
Fig.24 Removing the oven lamps
LEFT LAMP (some models only)
Loading ...
Loading ...
Loading ...