Loading ...
Loading ...
Loading ...
26 27
Removing and inserting the battery pack
Insert the battery pack. (Fig. E)
Align the battery pack with its compartment of the tool. Push the battery pack into the tank
until you hear a click. This means the battery pack has been locked in position, then close the
battery pack tank cover.
Removing the battery pack from the tool (Fig. F)
Open the battery pack tank cover. Push the battery pack release button, then pull out the
battery pack.
NOTE:
Always remove battery pack from your product when you are assembling parts,
making adjustments, cleaning, or when not in use. Removing battery pack will prevent
accidental starting that could cause serious personal injury.
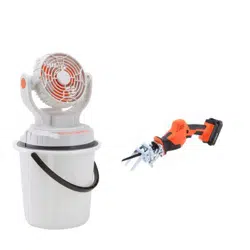
Control panel
Power indicator button (Fig. G)
Press the power indicator button , this misting fan will turn ON with a beep.
Fan speed adjustment button (Fig. H)
The three fan speeds can be selected by pressing the button.
Automatic rotary function (Fig. I)
The misting fan is equipped with an automatic rotary function, press the button it will
rotate at a certain angle automatically.
Misting function
Warning:
Only use clean, cold water.
Warning:
Do not use this misting fan to spray pesticides, liquid fertilizers, chemicals, or any
liquids other than clean water. Spraying these substances could result in serious injury or
illness to the operator or bystanders.
1. Fill water into the barrel. (Fig. J)
2. Put the mister fan onto the bucket. (Fig. K)
3. Power on the machine by pressing the button .
4. Select the required fan speed by pressing the button .
5. Press the button to to begin misting function
(
two misting ow rate can be selected
).
(Fig. L)
Warning:
When lling, moving, or emptying bucket, be careful not to spill water and do not
overll bucket. Spilled water can result in a slippery surface, create a slip and fall hazard, and
cause property damage.
ADJUSTING THE MISTING ANGLE (Fig. M)
The fan can be angled forward -15° or back 45° to adjust the direction of the mist.
OPERATION
MAINTENANCE AND STORAGE
WARNING:
When servicing, use only identical replacement parts. Use of any other parts may
create a hazard or cause product damage. To ensure safety and reliability, all repairs should
be performed by a qualied service technician.
WARNING:
To avoid serious personal injury, always remove the battery pack from the product
when cleaning or performing any maintenance.
General maintenance
Avoid using solvents when cleaning plastic parts. Most plastics are susceptible to damage
from various types of commercial solvents and may be damaged by their use. Use clean
cloths to remove dirt, dust, oil, grease, etc.
WARNING:
Do not at any time let brake uids, petrol, petroleum-based products, penetrating
oils, etc., come in contact with plastic parts. Chemicals can damage, weaken or destroy
plastic which may result in serious personal injury.
Hose filter cleaning section (Fig. N)
The misting fan is equipped with a water lter to protect the pump. If the lter is not kept
clean, the water ow to the appliance will be restricted and the pump may be damaged.
1. Disassemble the lter from the hose. Remove transfer adapter and take out lter.
2. Rinse lter until it is free of debris and blockages.
3. Replace the lter and inlet adapter.
STORAGE
1. Store indoors in a place that is inaccessible to children. Keep away from corrosive
agents, such as garden chemicals and de-icing salts.
TROUBLESHOOTING
Fault/malfunction Cause Remedial measure
Fan will not start
The battery pack is not
attached to the machine.
Attach the battery pack
No electrical contact
between the blower and
battery.
Remove battery, check contacts and
reinstall the battery pack.
The battery pack is
depleted.
Charge the battery pack
No misting function
Filter is full of debris and
blockages
Remove the battery pack, clear the
debris.
pump is damaged Contact service center for repair.
Loading ...