Loading ...
Loading ...
Loading ...

5. Cleaning
5.1 Washing and sanitizing the pump
Washing and sanitizing are two different activities. They must be done separately to protect
you and your baby, and to maintain the performance of the device.
Wash – To clean the surfaces of the parts by physically removing contamination.
Sanitize – To kill microorganisms, such as fungi, bacteria or viruses, that may be present on
the surfaces of the parts.
CAUTION
Can lead to minor injury.
• Separate and wash all parts that are exposed to breast milk immediately after use.
This will help to remove breast milk residue and prevent growth of bacteria.
• Wash hands thoroughly with soap and water.
• Only use drinking-quality tap water or bottled water for cleaning.
• Do not place pump parts directly in the sink to rinse or wash. Use a clean wash basin
used only for infant feeding items.
• Do not use a dish towel to rub or pat items dry.
• Do not use disinfectants for cleaning.
NOTICE
Can lead to material damage.
Pay attention to the following:
• Take care not to damage parts of the pump during cleaning. Do not use a sharp object
(such as a toothpick) for cleaning.
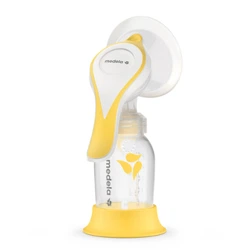
• Some parts of the Harmony
®
breast pump are very small (e.g. the O-ring or the valve
membrane). Make sure that no parts are missing when you reassemble the pump after
cleaning.
• Store the dried pump parts in a clean bag/container until next use.
• Do not store wet or damp parts as mould may develop.
• If you notice a white residue on the parts after boiling, your water may have a high mineral
content. Remove residue by wiping parts with a clean towel and allow to air dry.
• Distilled water is recommended when boiling parts to prevent substantial mineral build-up
over time, which may compromise your parts.
i Information
If using the dishwasher, parts may become discolored. This will not impact the part function.
What to do when: See detailed instructions on the next page.
7
Loading ...
Loading ...
Loading ...
