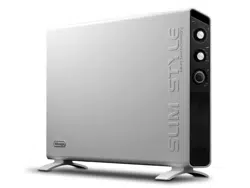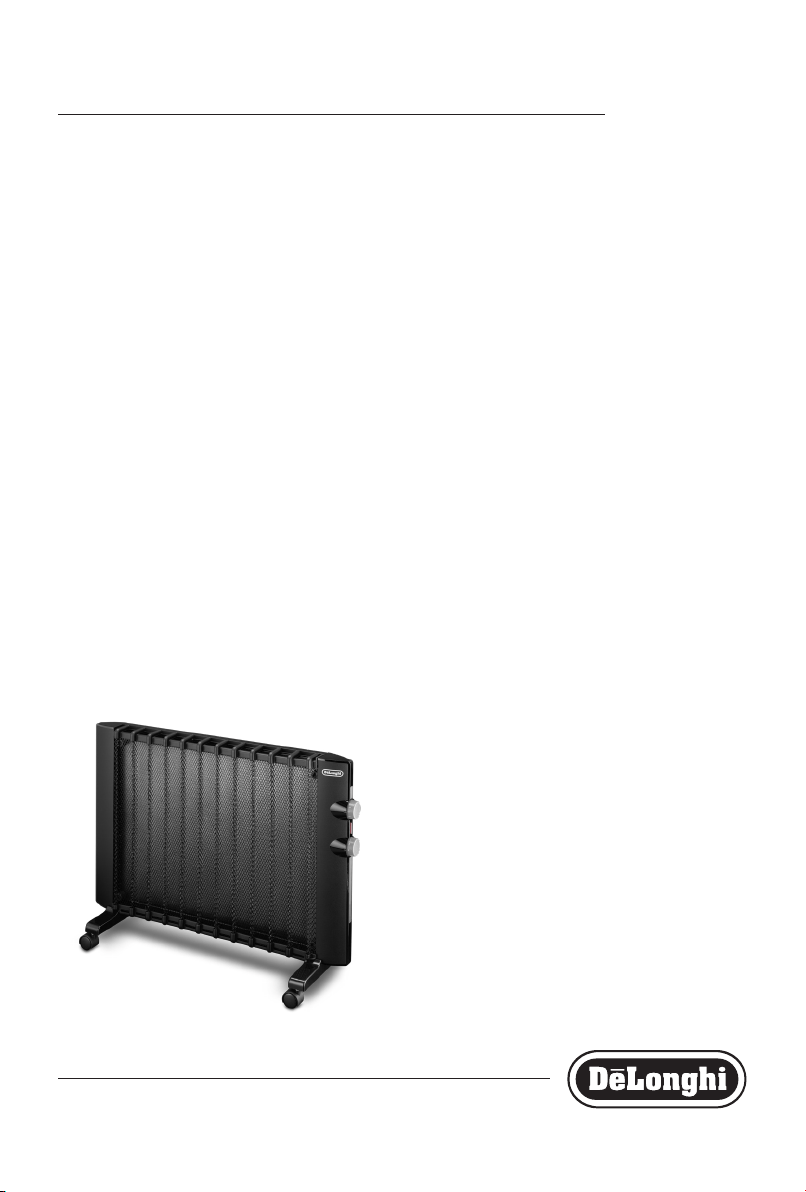
HMP Series
MICATHERMIC FLAT PANEL RADIATOR
Instructions for use. Keep these instructions
Visit www.delonghi.com for a list of service centers near you.
ELECTRIC CHARACTERISTICS
120 V~ 60 Hz 1500 W
PANEL RADIANTE MICATHERMIC
Repase y guarde estas instrucciones.
Lea cuidadosamente este instructivo antes de usar su aparato.
Visite www.delonghi.com para ver la lista de centros de servicios
cercanos a usted.
CARACTERISTICAS ELECTRICAS:
120 V~ 60 Hz 1500 W
2
EN
ES
page 4 pág. 8
3
min. 22 in
0,45 ft
3
4
1
2
E
A
B
C
D
G
4 x
1 x
2 x
2 x
4 x
(E)
(F)
(G) 3.5x20 PH
(H) 3.5x35 PH
(I) 6x30
F
H
4
IMPORTANT
SAFEGUARDS
When using any electrical appliance, some basic safety
precautions should always be observed to reduce the risk
of re, electric shock, and/or injury to persons. Read all
instructions carefully before using the appliance. Specically:
Danger!
Failure to observe the warning may result in life threatening
injury by electric shock.
- Do not operate any heater with a
damaged cord or plug or after the
heater malfunctions, has been dropped
or damaged in any manner.
Return heater to authorized service
facility for examination, electrical or
mechanical adjustment, or repair.
- This heater is not intended for use in
bathrooms, laundry areas and similar indoor
locations. Never locate heater where it may
fall into a bath tub or other water container.
- Do not use this heater in the immediate
surroundings of a bath, a shower or a
swimming pool.
- Do not insert or allow foreign objects to enter
any ventilation or exhaust opening as this
may cause an electric shock, re, or damage
the heater.
- CAUTION: to prevent electric shock
match wide blade of plug to wide slot,
then fully insert.
- CAUTION: In order to avoid a hazard due to
inadvertent resetting of thermal cutout, this
appliance must not be supplied through an
external switching device, such as a timer,
or connected to a circuit that is regulary
switched on and o by the utility.
- The appliance is tted with a safety auto
shut‐o device and an audible alarm. In case
of accidentally overheating the auto shut‐o
device will switch the appliance o, and the
alarm will sound. In this case, immediately
turn the Power selector in OFF position and
disconnect the plug from the power socket.
Inspect for any objects on or adjacent to the
heater that my cause high temperatures,
remove the cause of overheating. Wait a few
minutes that the appliance to cool down,
then plug the appliance in again.
- DO NOT OPERATE THE HEATER WITH THE
ALARM SOUNDING.
Important!
Failure to observe the warning could result in injury or
damage to the appliance.
- The appliance is not intended for use by
persons (including children) with reduced
physical, sensory ormental capabilities, or
lack of experience and knowledge, unless they
have been given supervision or instruction
concerning use of the appliance by a person
responsible for their safety. Children should
be supervised to ensure that they do not play
with the appliance.
- Extreme caution is necessary when any heater
is used by or near children and whenever the
heater is leftoperating and unattended.
- Always unplug heater when not in use.
- Use this heater only as described in this
manual. Any other use not recommended
by the manufacturer may cause re, electric
shock, or injury to persons.
- The heater must not be located immediately
below a socket-outlet.
- To prevent overload and blown fuses, be
sure that no other appliance is plugged into
the same outlet (receptacle) or into another
outlet (receptacle) wired into the same circuit.
- Be sure that the plug is fully inserted into an
appropriate outlet. Please remember that
outlets also deteriorate due to aging and
continuous use: check periodically if signs of
overheating or deformations are evi-denced
by the plug. Do not use the outlet and CALL
your electrician.
Danger of burns!!
Failure to observe the warning could result in burns or scalds.
- This heater is hot when in use. To avoid

5
burns, do not let bare skin touch hot surfaces.
Use handle when moving this heater. Keep
combustible materials, such as furniture,
pillows, bedding, papers, clothes, and
curtains at least 3 feet (0,9 m) from the front
and top of the heater and keep them away
from the sides and rear.
- Do not run cord under carpeting. Do not
cover cord with throw rugs, runners, or the
like. Arrange cord away from trac area and
where it will not be tripped over.
- To prevent a possible re, do not block air
intakes or exhaust in any manner. Do not use
on soft surfaces,like a bed, where openings
may become blocked.
- A heater has hot or arcing or sparking parts
inside. Do not use it in areas where gasoline,
paint, or ammable liquids are used or stored.
- It is normal for the heater’s plug and cord
to feel warm to the touch. A plug or cord
which becomes hot tothe touch or becomes
distorted in shape may be a result of a worn
electrical outlet. Worn outlets or receptacles
should be replaced prior to further use of the
heater. Plugging heater into a worn outlet /
receptacle/ may result in overheating of the
power cord or re.
- If the supply cord is damage, it must be
replaced by the manufacturer, its service
agent or similarly qualied person in order to
avoid a hazard.
- WARNING: Do not cover the appliance while
it is functioning in order to avoid overheating
which may cause risk of re.
Please note:
This symbol indicates recommendations and important
information for the user.
- If your appliance is equipped with a polythene
tape used as carry handle, remove it before
connecting appliance to the outlet.
- Do not use outdoors.
- To disconnect heater, turn controls to o, then
remove plug from outlet.
- Connect to properly polarized outlets only.
- This heater is not intended for use with an
extension cord or outlet strip. Plug the cord
directly into an appropriate wall receptable.
- Check that neither the appliance nor the
power cable have been damaged in any way
during transportation.
- Do not use the appliance in rooms with a oor
area of less than 43 square feet (4mq).
- Make sure that no pieces of polystyrene or
other packaging material have been left on
the appliance. It may be necessary to pass
over the appliance with a vacuum cleaner.
- When switching on the appliance for the
rst time, allow it to run at full power for at
least two hours to get rid of the unpleasant
smell. Make sure that the room in which the
appliance is located is well ventilated during
this operation. It is normal for the appliance
to emit small cracking sounds when you turn
it on.
- The appliance is tted with a tilt-switch which
turns the appliance o if it should fall over.To
restart the appliance, simply place it upright
again.
SAVE THESE
INSTRUCTIONS
THIS PRODUCT IS FOR HOUSEHOLD USE
ONLY

6
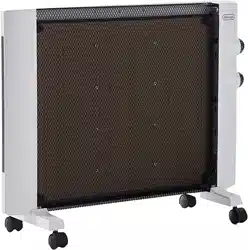
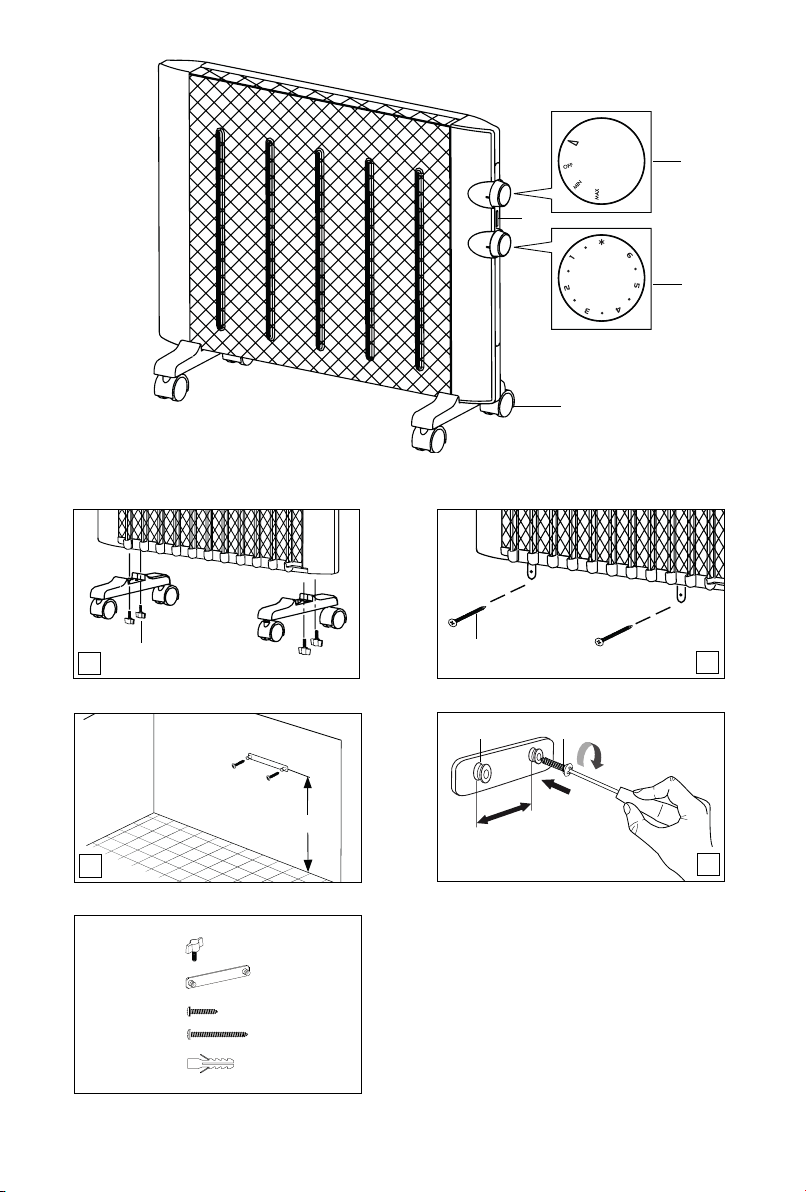
DESCRIPTION
A Power selector
B Pilot lamp
C Thermostat
D Wheel
FIRST USE
General instructions
Remove the heater from the packaging.
Check that neither the heater nor the power cable has been
damaged during transport.
Do not operate the heater if damaged. Remove all publicity
material present on the appliance. Your heater is suitable for
either freestanding or wall mounting usage. Do not assemble
the feet if wall mounting.
Electrical connection
- Before plugging in the appliance, check that your supply
voltage is the same as that shown on the rating plate of
the appliance and that the power supply is able to with
stand the power consumption (Watts) shown on the
rating plate.
- If using more than one appliance at a time, it is
important to ensure that the power supply is able to
with stand the power requirements.
Free standing operation
Mount the feet on the appliance using the screws provided:
4 x wing screws (E)
Fix the feet with the screws (E), as shown in g.1.
CAUTION: Never use this heater without feet when not wall-
mounted.
Wall-Mounting Installation
The wall mounting kit contains:
1 x plastic support (F)
2 x 3.5x20 PH screws (G)
2 x 3.5x35 PH screws (H)
4 x 6x30 plastic anchors (I)
Required tools for assembly and estimated assembly
time
Screwdriver PH 2 x 100 (Phillips type)
Estimated assembly time: 30 minutes
Before installing the unit , make sure of the following:
- The heater is not located directly below a power
outlet.
- The power outlet can be easily reached by the
plug and after installation.
- No electric cables or other pipes could be
damaged during the installation.
- Keep away from curtains or inammable
materials.
To wall-mount, proceed as follows:
For brick walls use a 15/64" (6 mm) concrete drill bit. For
plaster board or false (hollow) walls, it is recommended to
use appropriate screws and anchors (not supplied).
- Before drilling the wall, mark the exact points,
respecting the minimum distances as shown in g. 3
and g. 4.
- Drill the wall where previously marked, and insert the
plastic anchors (I).
- Fix the support (F) using the two screws provided (H)
(see Fig. 4).
- Hang the radiator on the support.
- Mark out the 2 lower xing points (g. 2).
Remove the appliance, drill the lower holes and insert
the wall anchors.
- Now, you can hang back the heater on the support and
x the lower part of the appliance with the 2 remaining
screws (G).
USE
Functioning and use
- Insert the plug into the mains.
- Turn the thermostat knob in a clockwise direction until it
reaches the 6 setting.
- Minimum power: turn the function knob to setting
“MIN” (the pilot light will light on).
- Maximum power: turn the function knob to setting
“MAX” (the pilot light will light on).
- Switching o: turn the function knob to setting “OFF”
and remove the plug.
Adjusting the thermostat
Turn the thermostat knob in a clockwise direction until
it reaches the maximum setting (6). When the room has
reached the desired temperature, slowly turn the thermostat
knob counter-clockwise until you hear a click and not
beyond. The thermostat will now adjust the set temperature
automatically keeping it constant.
Frost prevention mode
With the thermostat dial at minimum and the
mode selector on "MAX", the appliance maintains room

7
temperature at about 41°F (5°C), preventing freezing with
minimal energy consumption.
MAINTENANCE
Before carrying out any maintenance, unplug the heater from
the mains and wait for it to cool o completely. This heater
requires no particular maintenance. It is sucient to remove
the dustwith a soft, dry cloth. Never use abrasive powders or
solvents. If necessary remove concentrated areas of dirt with
a vacuum cleaner.
PROBLEM CAUSE SOLUTION
The appliance doesn’t work
The alarm sound and the ap-
pliance doesn’t work
Be sure it is plugged in and that the electri-
cal outlet is working.
The power selector is in the OFF position.
The thermostat may be set too low.
The tip-over switch has been activated.
Check for any obstruction.
Plug into the outlet.
Turn the power selector to the position MIN,
MAX.
Turn the thermostat clockwise to a higher
setting until the heater restarts.
Make sure the appliance is standing upright
on a at surface, if the problem persist, con-
tact the De longhi toll free number.
Remove the obstruction, unplug the heater
and let the appliance cool down. If the ap-
pliance doesn’t work please contact the De
longhi toll free number.
TROUBLESHOOTING
8
INSTRUCCIONES
IMPORTANTES
Cuando se utilizan aparatos eléctricos es oportuno adoptar
siempre algunas precauciones fundamentales para evitar
el riesgo de incendios, descargas eléctricas y/o lesiones.
Lea atentamente todas las instrucciones antes de utilizar el
aparato. Especícamente:
¡Peligro!
El incumplimiento puede ser o es la causa de lesiones
provocadas por descargas eléctricas con peligro para la vida.
- No haga funcionar ningún calentador
con el cable o enchufe averiado o si
éste funcionara mal, por haberse
caído o averiado en algún modo. Lleve
el calentador a un centro de servicio
de asistencia autorizado para que lo
examinen, para los ajustes eléctricos o
mecánicos o para su reparación.
- EI calentador no se debe de usar en baños,
lavaderos y otros locales similares. Nunca
coloque el calentador en donde se pueda caer
en la bañera o en cualquier otro recipiente con
agua.
- No utilice este calefactor en el entorno
inmediato de un baño, una ducha o una
piscina.
- No introduzca ni permita que entre ningún
objeto extraño en la ventilación o salida de
aire, porque esto puede causar una descarga
eléctrica, incendio o avería del aparato.
- ATENCIÓN: para prevenir descargas
eléctricas haga coindicir la espiga plana
del enchufe con la entrada ancha e
introdúzcalo hasta el fondo.
- PRECAUCIÓN: Con el n de evitar situaciones
de peligro debido al reinicio accidental de
protección térmica, este aparato no debe
tener un dispositivo de conmutación externo,
como un temporizador, o conectarse a un
circuito que se encienda o apague desde
afuera.
- El aparato está equipado con un dispositivo de
autoapagado de seguridad y con un alarma
audible. En caso de sobrecalentamiento
accidental el autoapagado apagará el
aparato y sonará la alarma. En este caso,
ponga de inmediato el selector de potencia
en OFF y desconecte la clavija del enchufe.
Inspecciones los objetos del aparato o los
próximos a él que puedan haber causado
las altas temperaturas y elimine la causa del
sobrecalentamiento. Espere unos minutos a
que se enfríe el aparato y vuelva a enchufarlo.
- NO HAGA FUNCIONAR EL CALEFACTOR CON LA
ALARMA SONANDO.
¡Atención!
El incumplimiento puede ser o es la causa de lesiones o de
desperfectos al aparato.
- No permita que personas (incluidos
niños) con capacidades psicofísicas
sensoriales disminuidas o con experiencia y
conocimientos insucientes usen el aparato
a no ser que estén vigilados atentamente o
instruidos por un responsable en relación a su
seguridad. Vigile a los niños para asegurarse
de que no jueguen con el aparato.
- Ponga extremo cuidado cuando use cualquier
calentador cerca de niños o inválidos y
cuando el calentador se deje funcionando sin
vigilancia.
- Siempre desconecte el calentador cuando no
lo esté usando.
- Use este calentador sólo como se indica en
este folleto. Todo otro uso que no sea aquel
recomendado por el fabricante puede causar
incendios, descarga eléctrica o lesiones a las
personas.
- El calefactor no debe estar situado
inmediatamente debajo de un tomacorriente.
- Para prevenir una sobrecarga de corriente
y que se quemen los fusibles, verique que
no haya otros aparato sconectados en el
mismo tomacorriente o en otro tomacorriente
conectado en el mismo circuito.
- Controle que el enchufe esté bien conectado y
que el tomacorriente sea adecuado. Recuerde
9
que los tomacorrientes se deterioran
con el tiempo y el uso continuo. Controle
periódicamente si el enchufe muestra signos
de recalentamiento o deformación. En tal
caso, no utilice el tomacorriente y llame
inmediatamente a un electricista.
¡Peligro de ustiones!
El incumplimiento de las advertencias puede ser la causa de
quemaduras o ustiones.
- Este calentador se calienta durante el uso.
Para evitar quemaduras, procure no tocar
supercies calientes con la piel sin protección.
Use la manija para desplazar este calentador.
Mantenga el material combustible, tal como
muebles, almohadas, ropa de cama, papeles,
prendas y cortinas, a una distancia de al
menos 90cm de la parte frontal y superior del
aparato, así como de los costados y de la parte
trasera del radiador.
- No pase el cable por debajo de la alfombra.
No cubra el cable con tapetes, alfombras o
similares.
Ponga el cable lejos de zonas transitadas y
donde no pueda provocar tropezones.
- Para evitar incendios, no cubra las entradas
o salidas de aire de ninguna manera. No use
el calentador sobre supercies blandas, como
una cama, en donde las aberturas se podrían
bloquear.
- Un calentador tiene adentro partes calientes o
que causan chispas. No lo use en zonas donde
seuse o almacene gasolina, pintura o líquidos
inamables.
- Es normal que el enchufe y el cable de
alimentación del aparato se sientan calientes
al tacto. Sin embargo, si el enchufe o el
cable están calientes o se deforman, puede
ser debido a un tomacorriente gastado. Los
tomacorrientes o enchufes gastados se deben
sustituir antes de seguir utilizando el aparato.
Si se conecta un aparato en un tomacorriente
deteriorado, el cable de alimentación podría
llegar a provocar un incendio.
- Si el cable de alimentación está dañado, debe
ser reemplazado por el fabricante, su agente
de servicio o persona calicada a n de evitar
un peligro.
- ADVERTENCIA: No cubra el aparato mientras
esté funcionando, a el n de evitar un
sobrecalentamiento, que puede provocar
riesgo de incendio.
Nota:
Este símbolo indica sugerencias e información importantes
para el usuario.
- Si el aparato tiene una cinta de polietileno
que se usa como manija para trasladarlo,
quítela antes deconectar el aparato a un
tomacorriente.
- No use el aparato a la intemperie.
- Para desconectar el calentador, apague los
mandos y luego desenchúfelo.
- Conecte el aparato solamente en
tomacorrientes debidamente polarizados.
- No use nunca el aparato conectándolo a una
extensión o a una tira de terminales. Conecte
el aparato directamente al tomacorriente en
el muro.
- Controle que el aparato y el cable de
alimentación no hayan sufrido daños durante
el transporte.
- No use este aparato en una habitación cuya
área de base sea inferior a 4m².
- Controle que en el aparato no hayan quedado
residuos de poliestireno u otras materiales
de embalaje. Podría ser necesario pasar el
aspirador sobre el aparato
- Al encender el aparato por primera vez, déjelo
funcionar durante alrededor de dos horas
a la potencia máxima, para eliminar el olor
desagradable. Ventile muy bien el local donde
se encuentra el aparato durante tal operación.
Es normal que el aparato produzca ligeros
crujidos cuando usted lo encienda.
- El aparato presenta un dispositivo antivuelco
que apaga el aparato si se vuelca. Para
encender de nuevo el aparato, solamente

10
tiene que ponerlo en posición vertical.
GUARDE ESTAS
INSTRUCCIONES
ÚNICAMENTE PARA USO DOMÉSTICO
DESCRIPCIÓN
A Selector de fónction
B Piloto
C Termostato
D Rueda
PRIMERA UTILIZACIÓN
Instrucciones generales
Extraiga el panel del embalaje.
Asegúrese de que el panel ni el cable hayan sufrido
daños durante el aparato. No utilice el panel si presenta
desperfectos. Elimine todo el material publicitario aplicado al
aparato. Puede usar el panel en el suelo o colgado en la pared.
No es necesario montar los pies para el uso mural del aparato.
Conexión eléctrica
- Antes de enchufar el aparato a la corriente, compruebe
que la tensión presente corresponda a la indicada en la
placa de datos técnicos del aparato y que la instalación
eléctrica sea adecuada para la potencia (vatios) indicada
en dicha placa.
- Si se usan varios aparatos al mismo tiempo, es
importante asegurarse de que la potencia del circuito
eléctrico sea suciente.
Utilización en el suelo
Para montar los pies en el aparato, utilice los tornillos de la
dotación:
n.º 4 tornillos con cabeza de mariposa (E)
Fije los pies con los tornillos (E) según las indicaciones de la
g. 1.
ATENCIÓN: No utilice nunca el panel sin los pies en el suelo.
Instalación mural
El kit para el montaje mural incluye:
n.º 1 soporte de plástico (F)
2 x 3.5x20 PH screws (G)
2 x 3.5x35 PH screws (H)
4 x 6x30 plastic anchors (I)
Herramientas necesarias y tiempo calculado para el
montaje
Atornillador PH 2 x 100 (del tipo Phillips)
Tiempo calculado para el montaje 30 minutos
Antes de montar el panel, asegúrese de que:
- El panel no se encuentre justo debajo de un
enchufe de corriente.
- Se pueda acceder fácilmente al enchufe desde la
clavija después de la instalación.
- Cables eléctricos ni otros tubos puedan resultar
estropeados durante la instalación.
- Estará alejado de cortinas u otros materiales
inamables.
Realice las siguientes operaciones para el montaje mural:
Use una broca para cemento de 15/64" (6 mm) en paredes
de ladrillos. Use tornillos y tacos especícos (no en dotación)
para paredes de pladur o huecas.
- Siga las indicaciones de las guras 3 y 4 para marcar
los puntos exactos (respetando las distancias mínimas)
antes de taladrar la pared.
- Taladre la pared en las posiciones indicadas antes y
coloque los tacos de plástico en los agujeros (I).
- Fije el soporte (F) con los 2 tornillos de la dotación (H)
(véase la g. 4).
- Cuelgue el panel en el soporte.
- Marque los 2 puntos de jación inferior (g. 2).
Descuelgue el aparato, realice los agujeros inferiores y
coloque los tacos en la pared.
- Coloque ahora el aparato en el soporte superior y je
con los dos tornillos restantes (G) la parte inferior del
aparato.
USO
Funcionamiento y uso
- Enchufe la clavija a la corriente.
- Gire el mando del termostato en el sentido de las agujas
del reloj para situarlo en la posición 6.
- Funcionamiento con potencia mín.: gire el selector
de funciones hasta la posición "MIN" (el indicador
luminoso se enciende).
- Funcionamiento con potencia máx.: gire el selector
de funciones hasta la posición "MAX" (el indicador
luminoso se enciende).
- Apagado: gire el selector de funciones hasta la posición
“OFF” y desenchufe el aparato.
Regulación del termostato
Gire el mando del termostato en el sentido de las agujas del
reloj para situarlo en la posición 6.
Cuando la temperatura ambiente sea la elegida, gire
11
lentamente el mando del termostato en el sentido contrario
de las agujas del reloj hasta oír un “clic”, no supere esta
posición. La temperatura programada se regulará y
mantendrá automáticamente con el termostato.
Modo antihielo
Al situar el mando del termostato en el mínimo y
el selector de funciones en la posición "MAX", el aparato
mantiene una temperatura ambiente constante alrededor de
los 41°F (5°C) con un consumo mínimo de energía.
MANTENIMIENTO
Antes de realizar las operaciones de mantenimiento,
desenchufe el panel de la corriente y espere hasta que se
haya enfriado totalmente. El panel no requiere operaciones
especiales de mantenimiento. Solo ha de utilizar un paño
suave y seco para desempolvarlo. No utilice nunca polvos
abrasivos o disolventes. Utilice un aspirador para eliminar las
concentraciones de suciedad, si es necesario.
PROBLEMA CAUSA SOLUCIÓN
El aparato no funciona
El sonido de alarma y el
aparato no funcionan
Asegúrese de que está enchufado y que la
salida eléctrica funciona.
El selector de potencia está en posición OFF.
El termostato puede estar muy bajo.
Se ha activado el interruptor antivuelco.
Verique las posibles obstrucciones.
Enchufe la salida.
Ponga el selector de potencia en posición
MIN, MAX.
Gire el termostato en sentido horario a un
ajuste más elevado hasta que el calentador se
ponga de nuevo en marcha.
Asegúrese de que el aparato se encuentre en
posición vertical sobre una supercie plana.
Si el aparato no funciona, por favor contacte
el número de teléfono gratuito Delonghi.
Quite la obstrucción, desenchufe el calen-
tador y deje que el aparato se enfríe. Si el
aparato no funciona
contacte el número de
teléfono gratuito Delonghi.
RESOLUCIÓN DE PROBLEMAS

www.delonghi.com
5711210351_00_0319
Printed in China