Loading ...
Loading ...
Loading ...
19GB
To a common ground (earth) point
First connect the black ground (earth) lead, then
connect the yellow and red power supply leads.
To the +12 V power terminal which is
energized at all times
Be sure to first connect the black ground (earth)
lead to a common ground (earth) point.
To the +12 V power terminal which is
energized when the ignition switch is set to
the accessory position
If there is no accessory position, connect to the
+12 V power (battery) terminal which is
energized at all times.
Be sure to first connect the black ground (earth)
lead to a common ground (earth) point.
To the power antenna (aerial) control lead or
the power supply lead of the antenna (aerial)
booster
It is not necessary to connect this lead if there is
no power antenna (aerial) or antenna (aerial)
booster, or with a manually-operated telescopic
antenna (aerial).
To AMP REMOTE IN of an optional power
amplifier
This connection is only for amplifiers and a
power antenna (aerial). Connecting any other
system may damage the unit.
Subwoofer Easy Connection
You can use a subwoofer without a power amplifier
when it is connected to a rear speaker cord.
Note
Use a subwoofer with an impedance of 4 to 8 ohms,
and with adequate power handling capacities to avoid
damage.
Memory hold connection
When the yellow power supply lead is connected,
power will always be supplied to the memory circuit
even when the ignition switch is turned off.
Speaker connection
Before connecting the speakers, turn the unit off.
Use speakers with an impedance of 4 to 8 ohms,
and with adequate power handling capacities to
avoid damage.
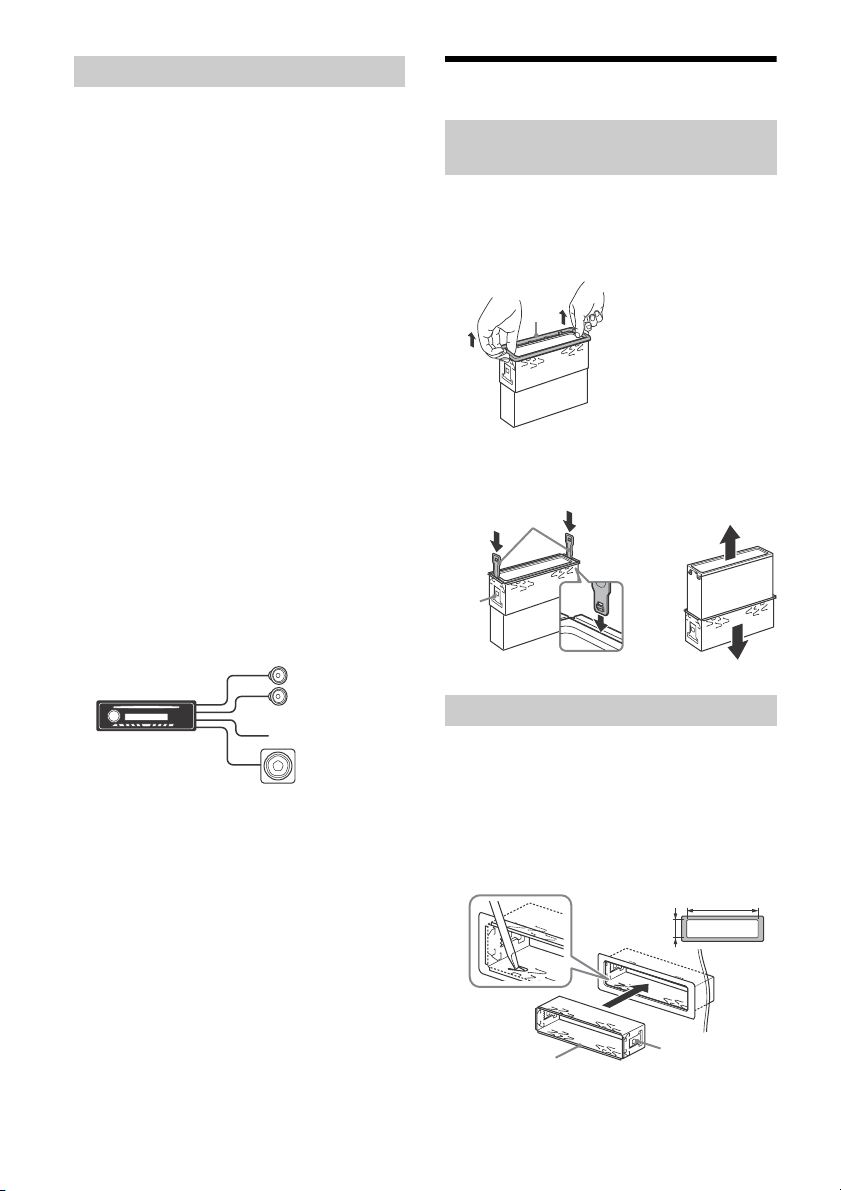
Installation
Before installing the unit, remove the protection
collar and the bracket from the unit.
1 Pinch both edges of the protection collar
, then pull it out.
2 Insert both release keys until they
click, and pull down the bracket , then
pull up the unit to separate.
Before installing, make sure the catches on both
sides of the bracket are bent inwards 2 mm (
3
/32
in). When mounting in a Japanese car, see
“Mounting the unit in a Japanese car” (page 20).
1 Position the bracket inside the
dashboard, then bend the claws outward
for a tight fit.
Making connections
Front speaker
Subwoofer
Removing the protection collar and the
bracket
Mounting the unit in the dashboard
Face the hook inwards.
182 mm (7
1
/4 in)
53 mm (2
1
/8 in)
Catch
Loading ...
Loading ...
Loading ...