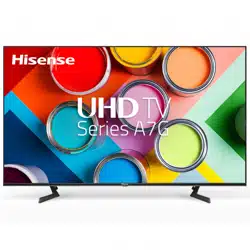
Hisense 50A7G 50″ UHD 4K TV Series A7G
Product's Documents
Below are documents related to this product, you can read online or download:
- User Manual - (English) Read Online | Download pdf
User Manual
The following accessories are included with TV:
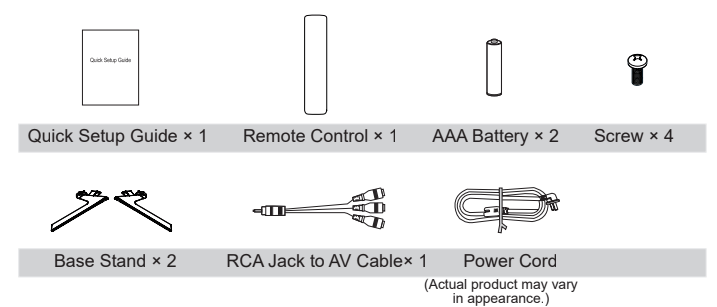
The accessories may be different from the list above due to different models, countries/regions, please refer to the actual accessory bag.
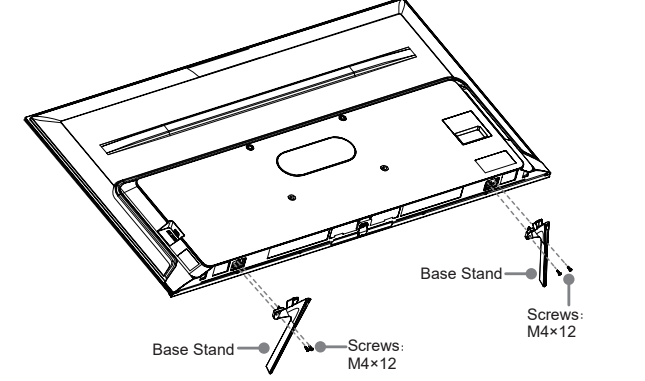
Follow the illustrations and textual instructions below to complete the installation steps:
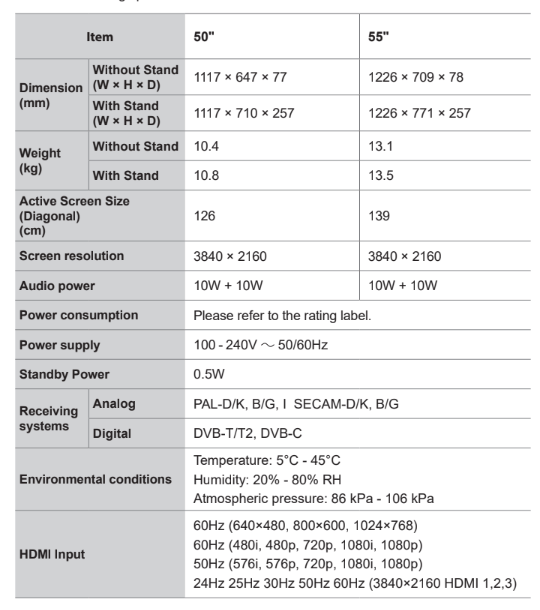
For 50"/55"
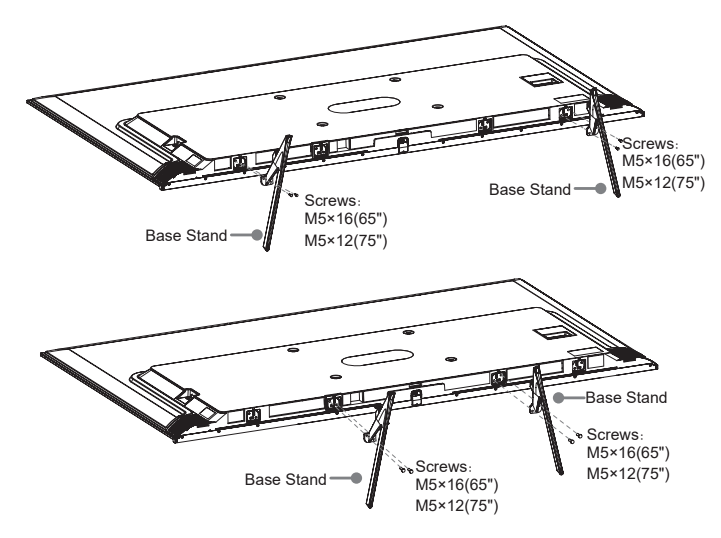
For 65"/75"
Attention: According to the size of the TV supporting surface, you can select one of the base stand installation patterns, as shown in the figure.
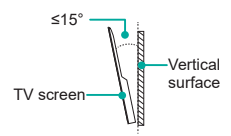
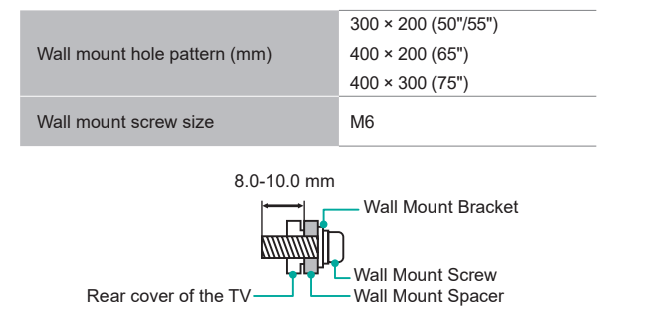
Before mounting the TV, remove the TV stand if you have already attached it, and make sure the wall mount bracket supports the weight of your TV.
When mounting the TV on a wall, follow instructions provided with the wall mount bracket. If it is not correctly mounted, the TV may fall and cause property damage or personal injury
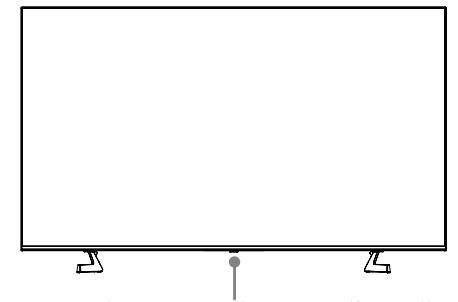
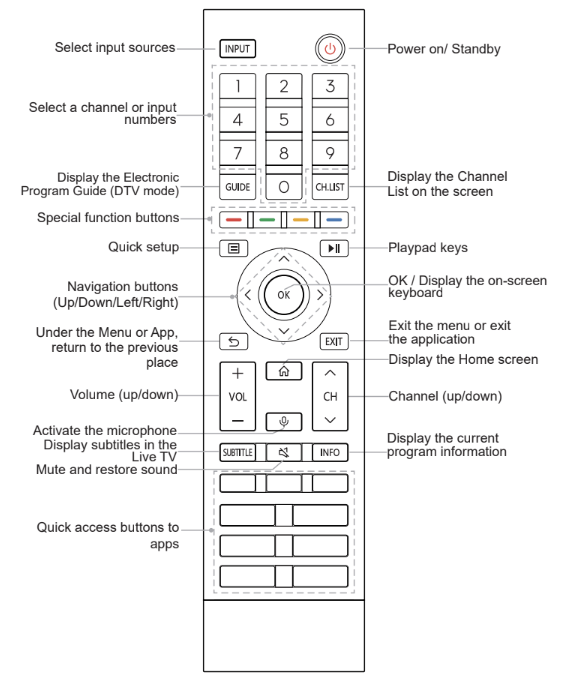
Remote sensor/Power indicator/Single button (Standby/Source)

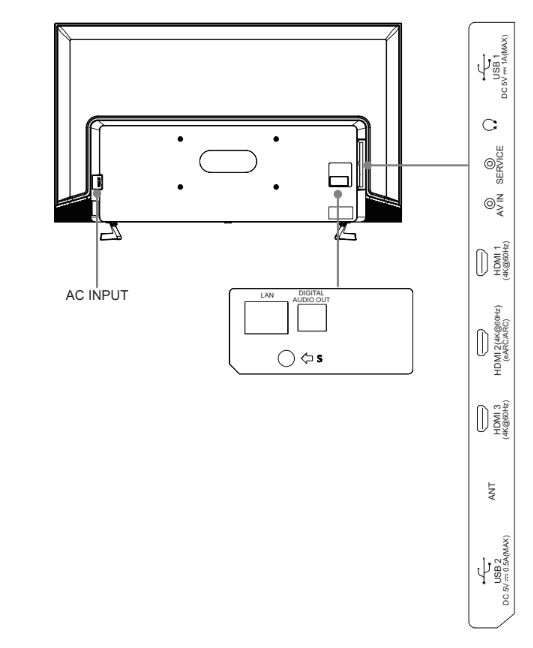
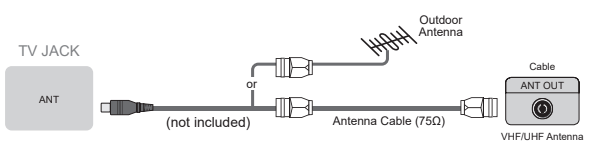
► ANT Connect an outdoor VHF/UHF antenna or cable
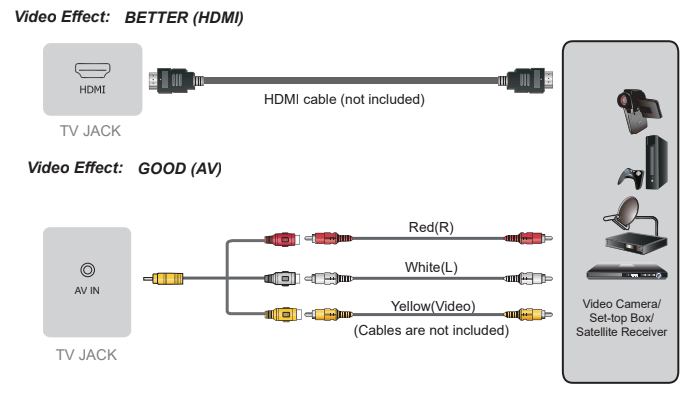
► HDMI / AV
Connect a HDMI / AV cable from an external AV equipment. No sound connection is needed for HDMI to HDMI connection. If the signal resolution does not match the specification table, you need to change the setting of device according to the table. Please consult your device user manual for instruction.
To select the HDMI / AV
Press the [INPUT] button, when the list of input Source appears, press the [ / / < / >] buttons to select the source HDMI / AV, then press the [OK] button to connect.
Video Effect: BETTER (HDMI)
► HEADPHONE Connect Headphone for audio out of the TV.
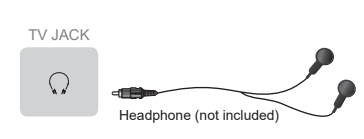
ATTENTION
Excessive sound pressure from earphones and headphones can cause hearing loss.
► DIGITAL AUDIO OUT Connect to an external digital audio system.
Before connecting a digital audio system to the DIGITAL AUDIO OUT jack, you should decrease the volume of both the TV and the system to avoid that the volume suddenly becomes bigger.

► eARC/ARC Connect an HDMI cable from an external digital audio system.
eARC/ARC enables the TV to directly output the digital sound through an HDMI cable. Please note that it works only when the TV is connected to the audio receiver that supports the eARC/ARC (Audio Return Channel) function.
When this port is used as the eARC/ARC function, it can't be used as signal input at the same time.

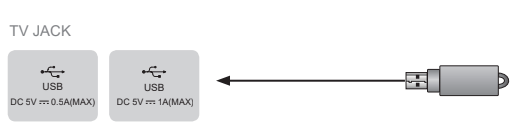
► USB
Connect the USB1.1 and USB2.0 devices such as hard drives, USB sticks and digital cameras for browsing photos, listening music and watching movies.
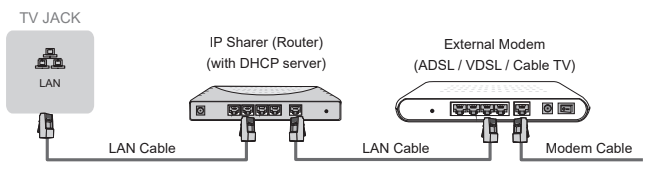
► LAN (Wired setup)
Connect your TV to your network by connecting the LAN port on the back of your TV to an external modem or router using a LAN (Ethernet/Cat 5) cable. See the illustration below.
We recommend you to use a modem or router that supports Dynamic Host Configuration Protocol (DHCP). Modems and routers that support DHCP automatically provide the IP address, subnet mask, gateway, and DNS, so you don’t have to enter them manually. Most home networks already have DHCP.
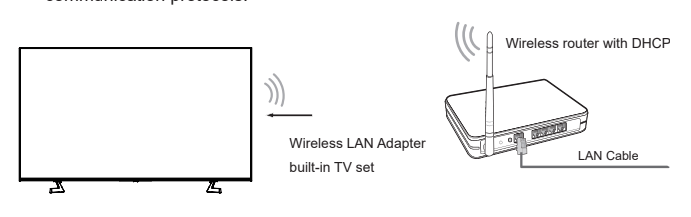
Wireless setup
Connect your TV to your wireless network, you need a wireless router or modem.
See the illustration below.
The TV’s built-in Wireless LAN Adapter supports the IEEE 802.11 a/b/g/n/ac communication protocols.
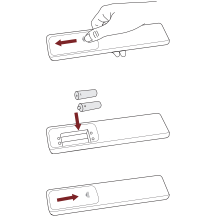
Installing Batteries in the Remote Control
Pairing the Remote Control (only for Bluetooth remote control)
Pair the remote to the TV after you power it on. Keep the remote control within 3 metres from the TV. Press any button (except power and mic button) to pair.
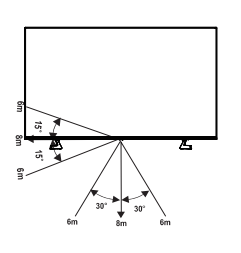
Remote Control Operation Range
Disposal of this unit
Product should not be damaged, dismantled or thrown in municipal waste.
It should be packed and handed over to authorised re-cycler.
 /
/ / < / > ] buttons to navigate the menu and change the settings. Press the [OK] button to confirm.
Features, appearance and specifications are subject to change without notice.
If you encountered difficulty when setting up your TV, we suggest you refer to the troubleshooting tips in the User Manual or the E-Manual.
Reference file: Hisense 50A7G 50″ UHD 4K TV Series A7G
Series: A7G
Additionally, the document applies to other Hisense models: 55A7G, 65A7G, 75A7G