
Loading ...
Picture 1
Picture 2
KEG KIT INSTALLATION:
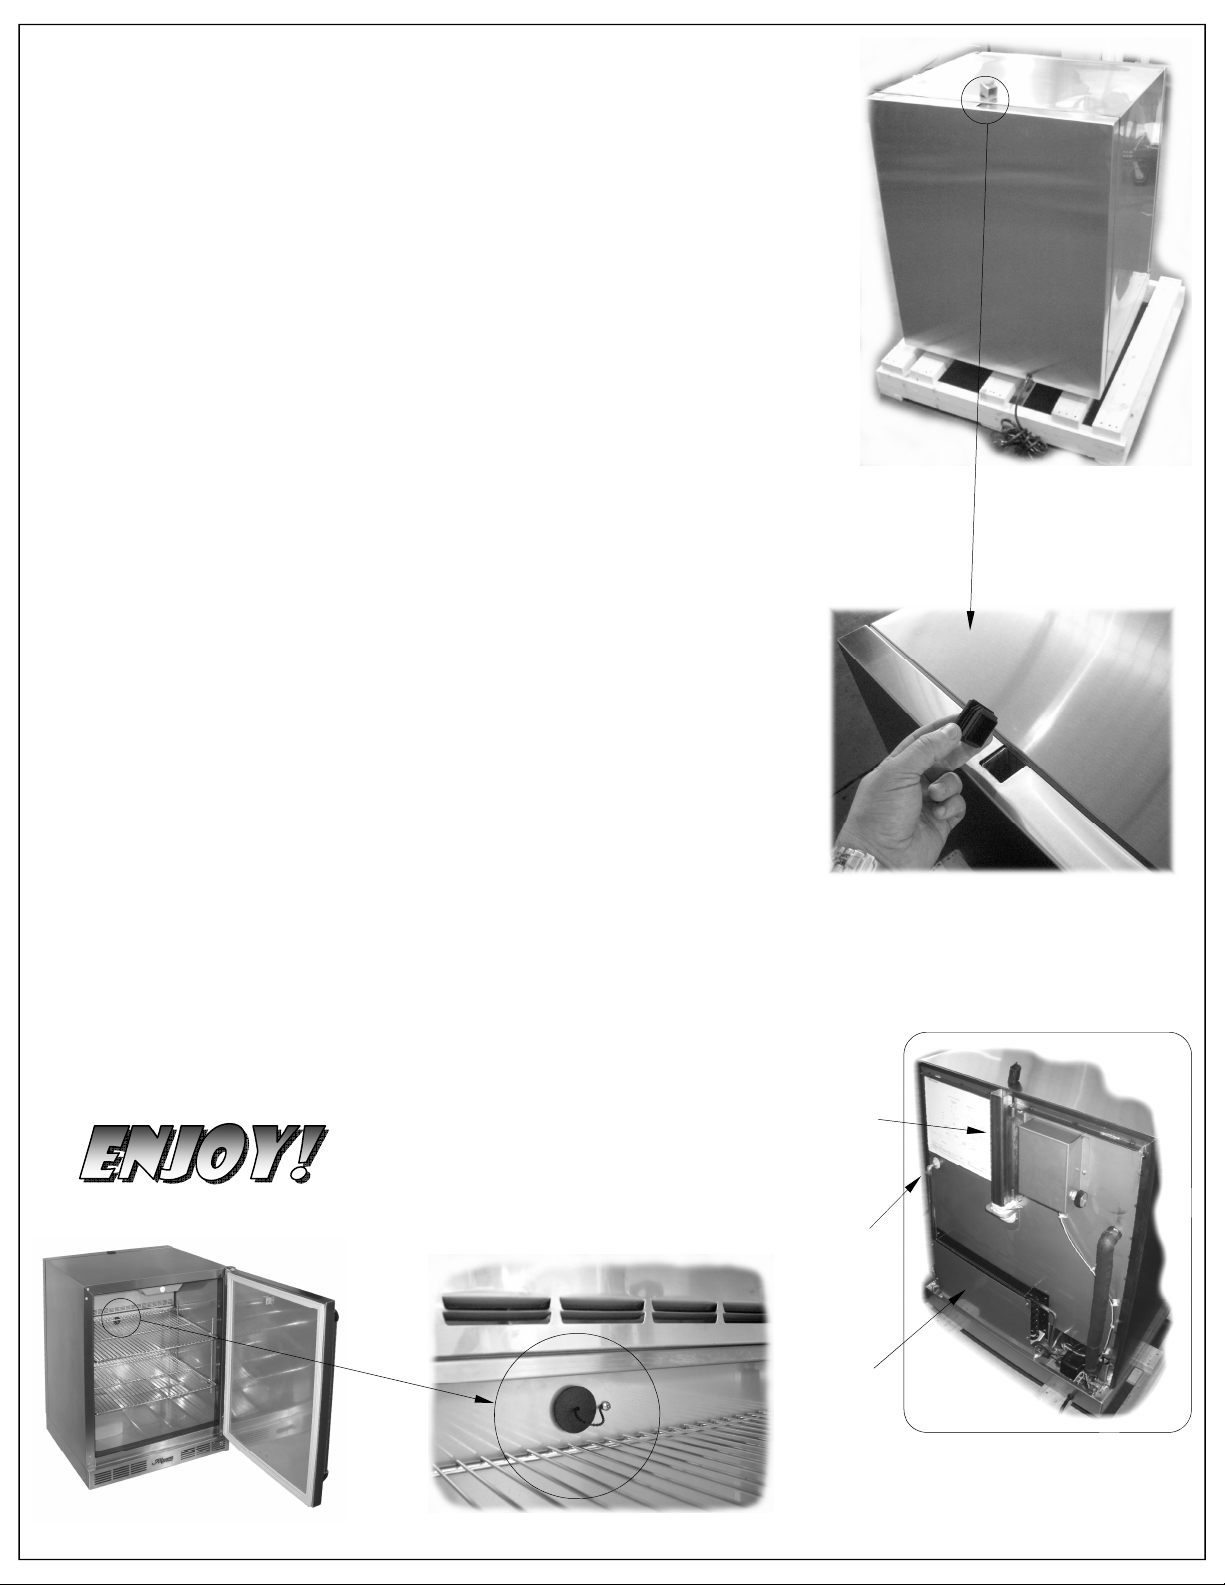
1. On the back top section of your refrigerator there is an opening provided for the
faucet support arm (see picture 1 & 2).
2. Remove the cover as shown on picture 2 by lifting the cover straight out exposing
the opening
3. Remove the beer line access hole plug located on the inside of the refrigerator,
just below evaporator. (See picture 3 & 4)
4. Insert the beer line (3/16ӯ ID / clear color tubing) from the top of the refrigerator
and allow it to drop to the inside of the refrigerated compartment.
NOTE 1: The beer line travels through the back section of the unit into the
refrigerated compartment by following the faucet arm support structure locat-
ed behind the refrigerator’s back cover. (See picture 5)
NOTE 2: Verify that the beer line is not in direct contact with the evapora-
tor wall of the air discharge grill. If the beer line should come in contact with
this parts it might freeze the beer inside the line and cause a blockage.
5. Once the beer line has been inserted all the way to the refrigerated section, insert
the support arm into the top opening.
6. Install the pressure regulator to the CO
2
bottle and tighten securely using a
wrench in order to avoid CO
2
leakage.
7. Close the ball valve in the regulator and open the CO
2
bottle valve.
8. Adjust the regulator to a pressure between 8 ~ 10 PSI using the regulator set
screw.
NOTE 3: More than 10 PSI of pressure will cause the beer to foam up at the
tap, maintain the pressure between 8 ~ 10 PSI for optimum performance.
9. Connect the CO
2
line (5/16ӯ ID / Blue color tubing) to the regulator and Sanitary
Key [SANKEY] and install the hose clamps provided in order to secure the tubing
to the hose barbed fittings.
10. Install the Sanitary Key [SANKEY] on the beer keg and connect the beer line from
the faucet arm to the SANKEY. Secure the tubing with the clamps provided.
NOTE 4: The SANKEY provided is a standard US “D” Style keg tap also
known as Perlick™ type. For specialty beers that might require other connec-
tions please go to : http://www.beveragefactory.com or call 1-800-710-9939 for
assistance.
11. Open the CO2 regulator ball valve slowly and pressurize the keg.
12. Open the TAP faucet slowly to allow the beer to flow through the system.
13. Locate the Keg and CO2 bottle inside the refrigerator.
NOTE 5: Maintain beer between 34°F and 38°F for proper flow and foam.
If beer is over 38°F it will foam out easily.
14.
Picture 3
Picture 4
BEER
ACCESS
PLUG
Evaporator
Drain Line
NOTE: There is no need to remove the re-
frigerator’s back in order to install the beer
line. Illustrations are for reference only.
Picture 5
REFRIGERATOR’S BACK
Condenser
Faucet Arm
Support
structure
Evaporator