Loading ...
Loading ...
Loading ...
6
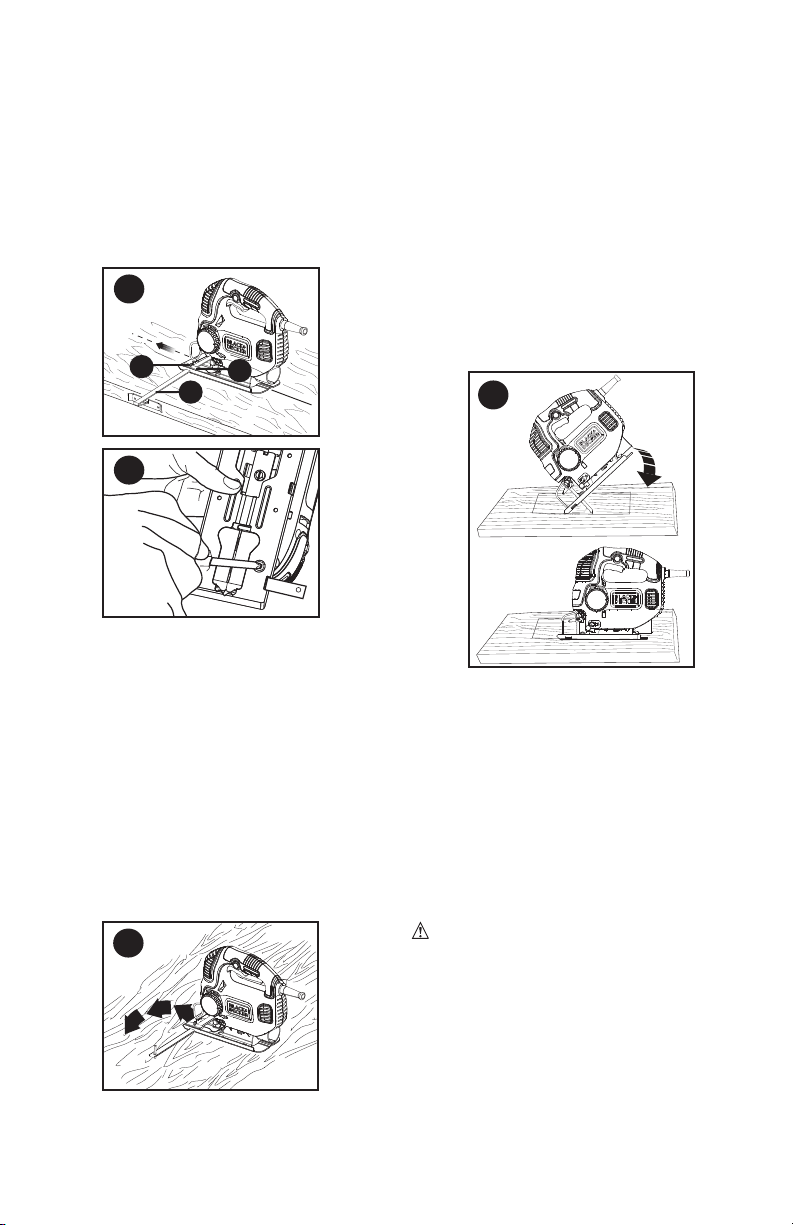
Attaching Rip Fence (gure F & G)
cross bar (13) facing down as shown in
figure F.
shoe.
lipped edge facing down and pointing
towards the rear of the saw.
screw into the threaded hole in the bar
clamp as shown in figure G.
Circle Cutting (FIGURE H)
of saw shoe with cross bar facing up.
blade to hole in cross bar is the desired
radius and tighten screw.
from edge of material to get blade into
position).
a small nail through hole in cross bar into
fence as a pivot arm, begin cutting circle.
Pocket Cutting (FIGURE I)
an inside cut. The saw can be inserted
directly into a panel or board without
cutting, measure the surface to be cut and
forward until the front end of the shoe sits
Switch the tool on and allow it to attain
blade reaches its complete depth. Hold
the shoe flat against the wood and begin
it is still moving. Blade must come to a
complete stop.
MAINTENANCE
Use only mild soap and damp cloth to clean
tool; never immerse any part of the tool into
IMPORTANT: To assure product SAFETY
and RELIABILITY, repairs, maintenance
and adjustment should be performed by
service organizations, always using identical
replacement parts.
ACCESSORIES
WARNING: The use of any accessory
not recommended for use with this tool
could be hazardous.
Recommended accessories for use with
your tool are available from your local dealer
or authorized service center. If you need
assistance regarding accessories, please
call: 1-800-544-6986.
SERVICE INFORMATION
All Service Centers are
staffed with trained personnel to provide
customers with efficient and reliable power
tool service. Whether you need technical
H
I
G
F
13
14
15
Loading ...
Loading ...
Loading ...