Loading ...
Loading ...
Loading ...
Installation instructions en
29
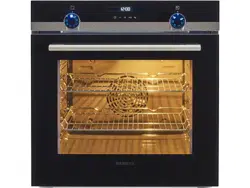
20.2 Appliance dimensions
You will find the dimensions of the appliance here
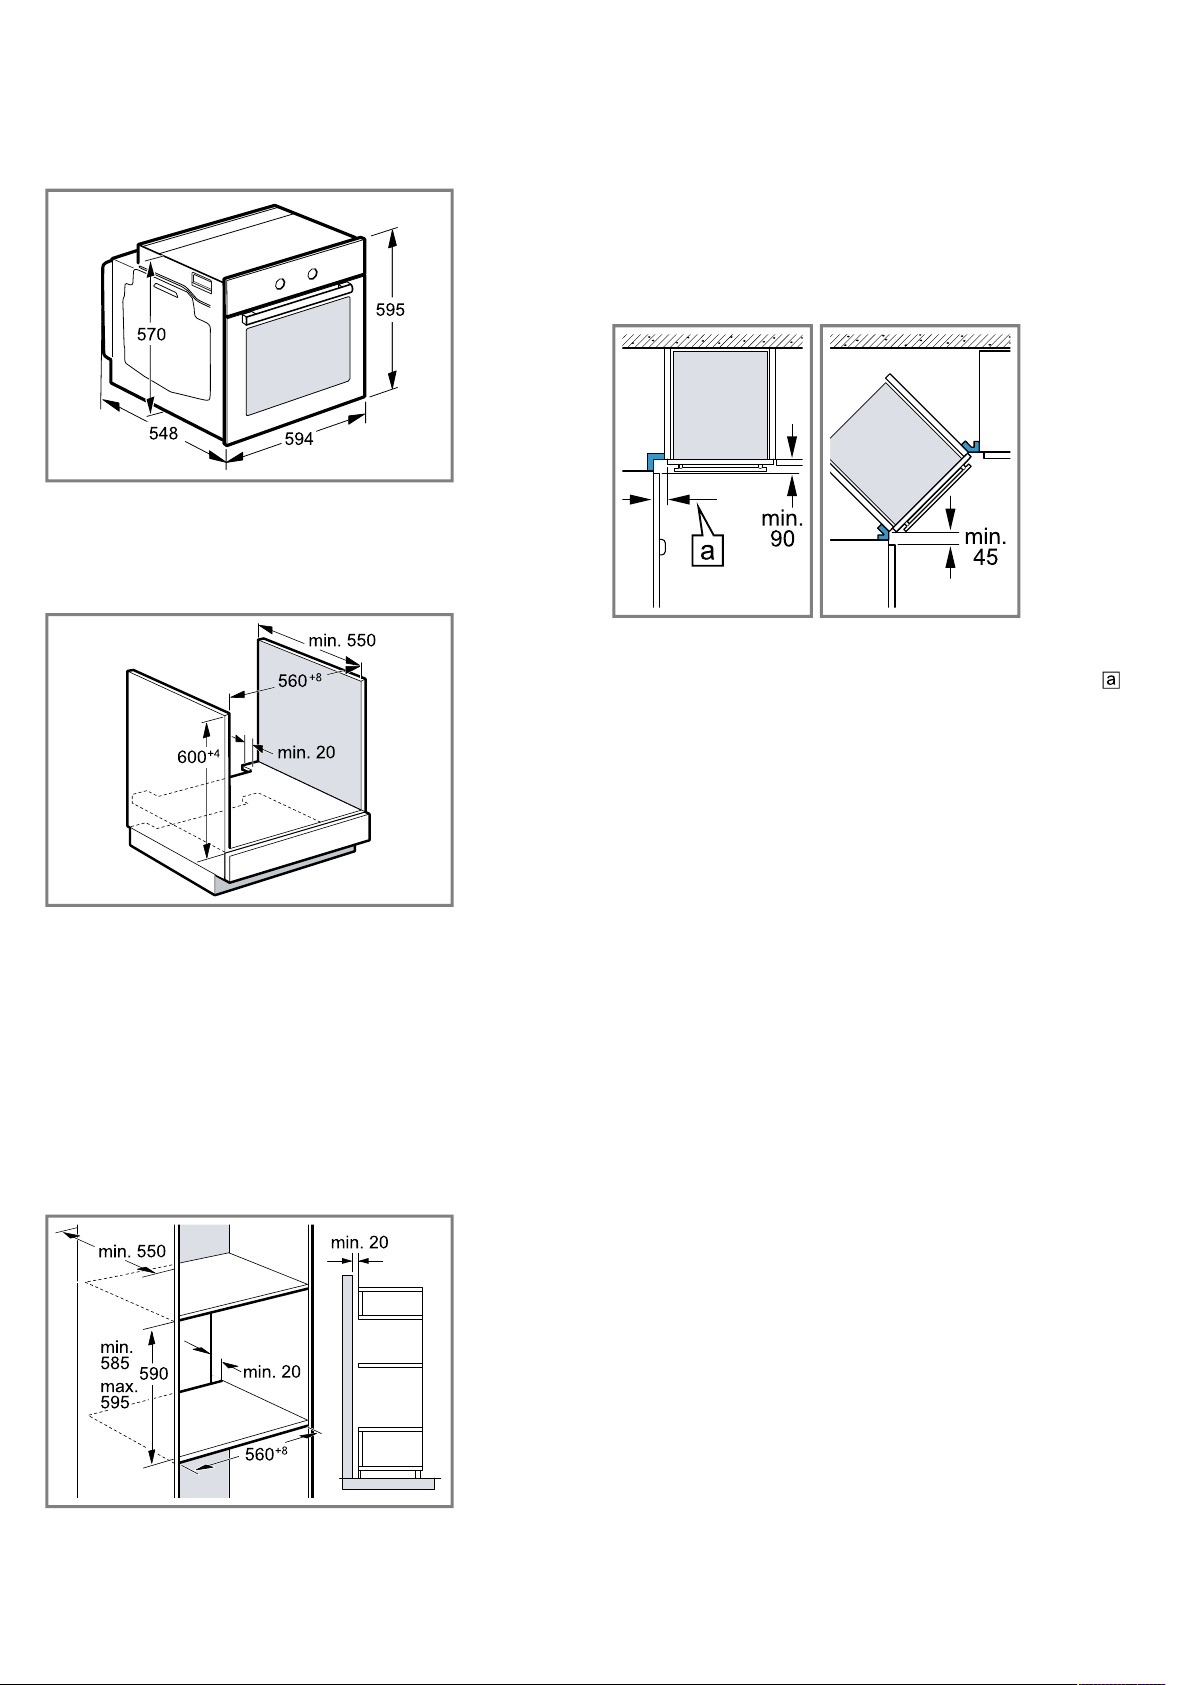
20.3 Installation below a worktop
Observe the installation dimensions and the installation
instructions when installing below a worktop.
¡ To ventilate the appliance, the intermediate floor
must have a ventilation cut-out.
¡ In combination with induction hobs, the gap
between the worktop and appliance must not be
sealed using additional strips.
¡ The worktop must be secured to the built-in unit.
¡ Observe any available installation instructions for the
hob.
20.4 Installation in a tall unit
Observe the installation dimensions and the installation
instructions when installing in a tall unit.
¡ To ventilate the appliance, the intermediate floors
must have a ventilation cut-out.
¡ If the tall unit has another back panel in addition to
the element back panels, this must be removed.
¡ Only fit the appliance up to a height which allows
accessories to be easily removed.
20.5 Corner installation
Observe the installation dimensions and the installation
instructions when installing in a corner.
¡ To ensure that the appliance door can be opened,
you must take the minimum dimensions into consid-
eration when installing in a corner. The dimension
is dependent on the thickness of the unit front and
the handle.
20.6 Electrical connection
In order to safely connect the appliance to the elec-
trical system, follow these instructions.
¡ The appliance corresponds to protection class I and
must only be operated with a protective earth con-
nection.
¡ The fuse protection must correspond to the power
rating specified on the appliance's rating plate and
to local regulations.
¡ The appliance must be disconnected from the
power supply whenever installation work is being
carried out.
¡ The appliance must only be connected using the
power cable provided.
¡ The power cable must be plugged in at the rear of
the appliance until you hear a clicking sound. A 3 m
power cable can be obtained from the after-sales
service.
¡ The power cable must only be replaced with a cable
from the original manufacturer. This is available from
after-sales service.
¡ Contact protection must be ensured during the in-
stallation.
Electrically connect the appliance with the
protective contact plug
Note:The appliance must only be connected to a pro-
tective contact socket that has been correctly installed.
▶
Insert the plug into the protective contact socket.
When the appliance is installed, the mains plug of
the power cord must be freely accessible. If free ac-
cess to the mains plug is impossible, an all-pole
isolating switch must be integrated into the perman-
ent electrical installation in accordance with the in-
stallation regulations.
Loading ...
Loading ...
Loading ...