Loading ...
Loading ...
Loading ...

PERLICK RESIDENTIAL COLUMN REFRIGERATION INSTALLATION INSTRUCTIONS
6 | perlick.com/residential
ELECTRICAL
Serious electroculon hazard. Electrical
grounding is required. This appliance is equipped with a
3-prong (grounding) polarizing plug for your protecon against
possible shock hazards. Failure to comply with these electrical
guidelines may result in possible death or serious injury, re or
loss of property.
Never use an extension cord to connect unit
to electrical source. Do not use a two-prong adapter or remove
the power cord grounding prong.
Installaon must comply with all applicable electrical codes.
The electrical supply must be located within the shaded area
of the illustraon below. A separate circuit, servicing only this
appliance, is required. A ground fault circuit interrupter (GFCI)
is not recommended and may cause interrupon of operaon.
The outlet should be placed in the hatched area dimensioned
below.
Electrical Supply 115V, 60 Hz., Phase 2, 3.3 amps
Service Dedicated 15 amp circuit
Power/Cord Type/ Length NEMA 5-15P w/5’ power cord
WARNING
DANGER
!
ANTI-TIP BRACKET
To prevent the unit from pping forward,
the an-p bracket must be installed. Use all an-p bracket
hardware as instructed. Level as instructed on page 7 prior to
installing an-p bracket(s)
The an-p bracket and supporng hardware is included with
your unit. Please note that four an-p brackets are required
for each unit or dual installaon. In the case of dual installaon,
each individual unit must be ouied with the two an-p
brackets on cabinet sides for a total of four.
For drawings of the an-p bracket installaon on integrated
(built-in) units, see page 8. For drawings of the an-p bracket
installaon on freestanding units, see page 9.
Verify there are no electrical wires or
plumbing in the area which the screws could penetrate.
Always wear safety glasses and use other
necessary protecve devices or apparel when installing or
working with anchors. Anchors are not recommended for use in
lightweight masonry material such as block or brick, or for use
in new concrete which has not had sucient me to cure. The
use of core drills is not recommended to drill holes for anchors.
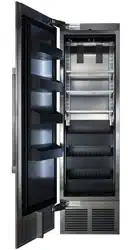
90° HINGE STOP
Perlick column doors open to 105°. When installing a panel
thicker than ¾” (19), or if located next to adjacent wall, the 90°
hinge stop pin may be required to prevent damage to the unit
and adjacent cabinetry/walls. This hinge pin must be installed
prior to full integraon.
1. Remove the cabinet hinge trim cover by removing the
three Phillips head fasteners located on the top of the
cabinet. Li the rear of trim cover to lt trim cover to
disengage tab on right and le end of trim cover. Slide
forward to remove.
2. Open cabinet door approximately 45° to 85° to expose hole
under hinge guard. Install hinge pin into hole. Ensure hinge
pin is fully seated to top of hinge to prevent damage to
hinge guard.
3. Reaach the cabinet hinge trim piece. Slide front boom
of hinge trim cover under reed switch. Tilt trim cover to
engage right and le end tab into cabinet. Install the three
fasteners.
WARNING
WARNING
CAUTION
ELECTRICAL / ANTI-TIP BRACKET / PRODUCT PLACEMENT
PLACEMENT
Before moving unit into posion, secure the
door closed and protect any nished ooring.
Use an appliance dolly to move the unit near the opening.
CAUTION
Loading ...
Loading ...
Loading ...