Loading ...
Loading ...
Loading ...
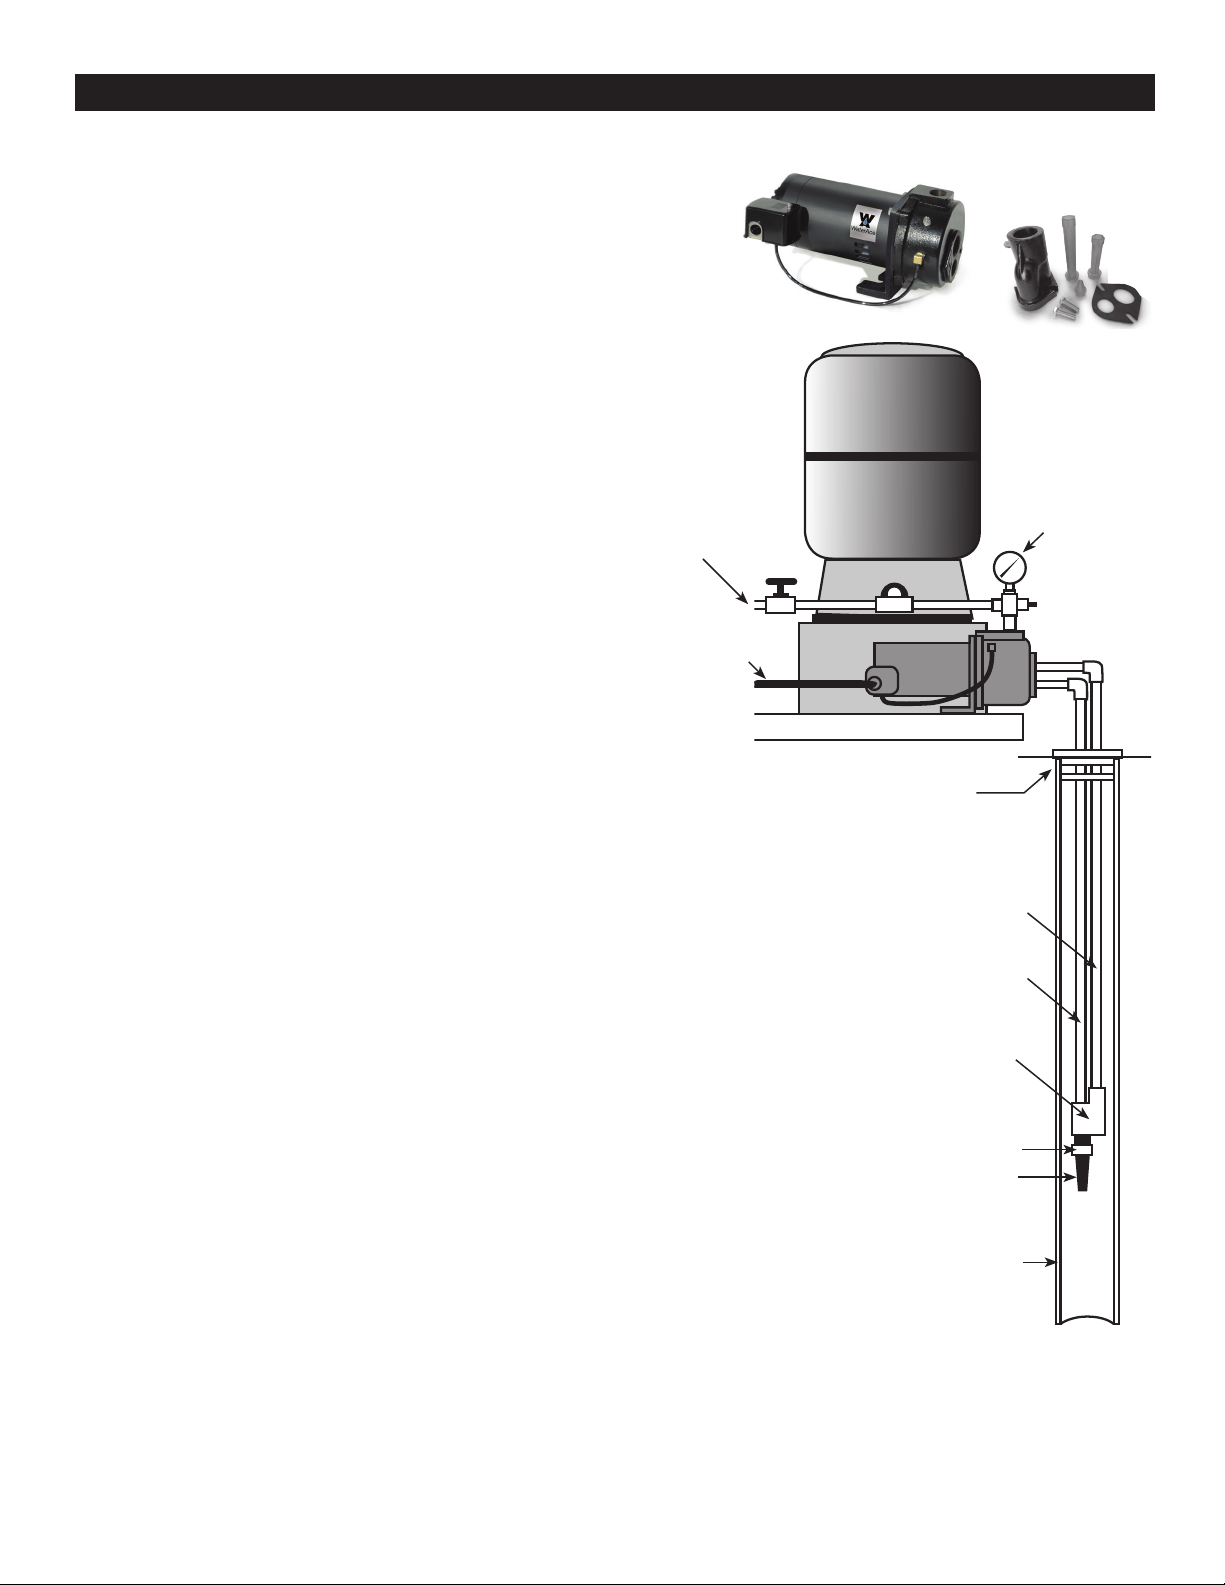
Deep Well Installation (26’ - 75’) (Figure 5)
CONVERTIBLE WELL PUMP INSTALLATIONS
1. Install a pressure regulator control valve along
with pressure gauge, and other ttings (see g. 5).
Mount on pump’s discharge port. Any valve (ball,
gate, etc.) can be used as pressure regulator valve.
Place valve between pump discharge and tee with
gauge.
2. Prepare the ejector.
3. Note the nozzle is installed at the factory in the
ejector body (see g A, page 6).
4. Select and install the venturi tube marked with a
DW. DW denotes deep well. Install as described
above. (see g.A, page 6)
5. Install a short pipe nipple and foot valve to the in
take end of the ejector to ensure the pipes do not
lose water and remain primed when the jet pump’s
motor is o.
6. Using the proper pipe for each port in the ejector,
install pipe on the ejector (Figure 5) and
begin lowering it into the water source.
7. Note the pipes will be two dierent sizes to
optimize the jet pump’s performance. One pipe
will be 1” and the other will be 1-1/4” in diameter.
8. Attach the opposite ends of the pipes to the intake
ports of the jet pump (see Figure4).
9. Install a sanitary well seal and connect the
ejector piping to the pump. Use steel nipples
through the well seal with exible poly pipe to
avoid crushing the plastic pipe when tightening
the seal.
10. Support the pipe so that there are no dips or sags
in the pipe, so it doesn’t strain the pump body
and so that it slopes slightly upward from the well
to the pump (high spots can cause air pockets
which can air lock the pump). Seal the suction
pipe joints with PTFE pipe thread sealant tape or
a PTFE-based pipe joint compound. Joints must
be air and water-tight. If the suction pipe can suck
air, the pump cannot pull water from the well.
11. You are now ready to prime the pump per
instructions on page 10.
12. See instructions on page 8 for connecting
discharge pipe to tank.
(Figure 5)
Priming tee with
priming port,
pressure gauge
and pressure
regulator control
Foot Valve
Ejector
Drive Line
to Well
Suction Pipe
from Well
Stainer
Well Casing
Sanitary
Well Seal
To Power Box
To House
Water
System
Priming Tee
with Priming
Port, Pressure
Gauge and
Pressure
Regulator
Control Valve
7
Loading ...
Loading ...
Loading ...