Loading ...
Loading ...
Loading ...
11
5
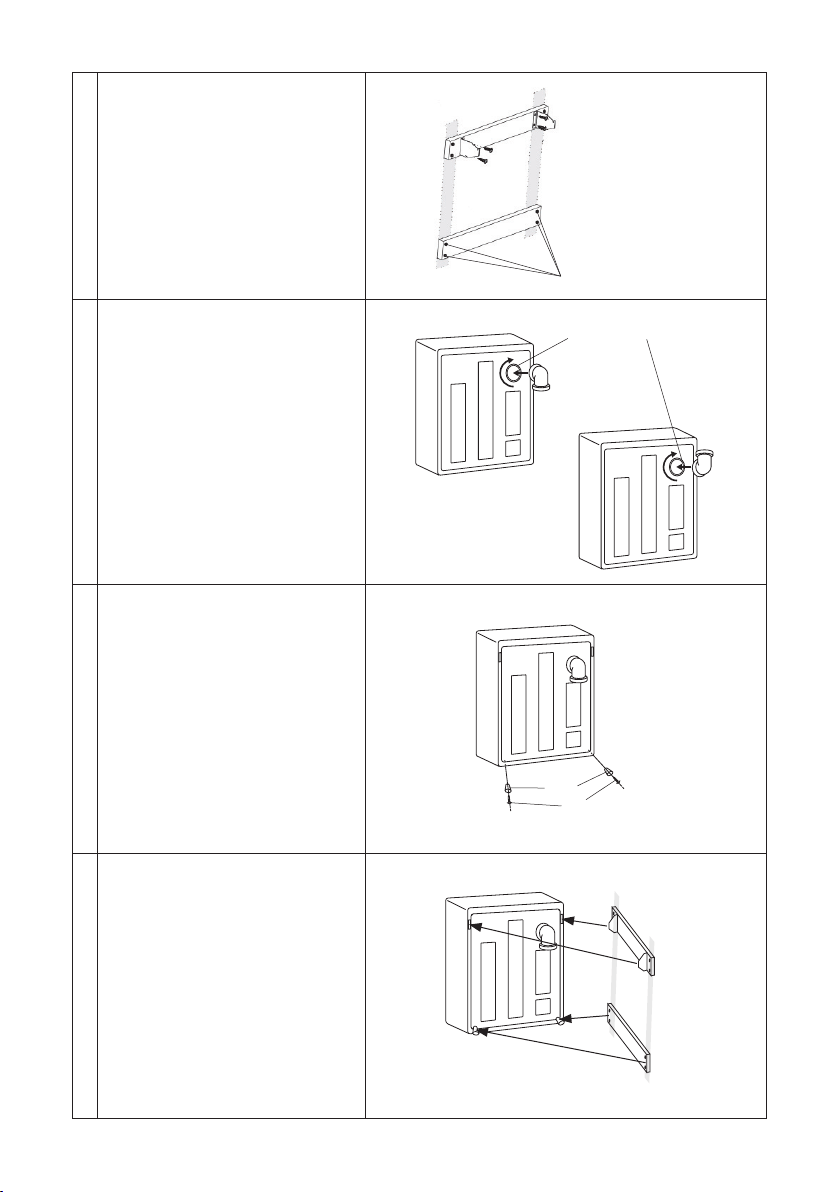
Install the four (4) wood screws to the
bottom wooden slat.
6
Install the exhaust connector as shown in the
illustration using the (3) ½” Phillips round
head screws included.
•Fordownwardexhaust,refertoSection1.
•Forupwardexhaust,refertoSection2.
7
Install the lower wall spacers (included)
using the (2) ½” Phillips flat head
screws (included).
These spacers are required when installing
the unit on the wall to allow the necessary
ventilation for efficient operation.
Failure to install the spacers will both
reduce the ventilation needed to operate
your unit as well as put the appliance in
a tilted position on the wall which could
present a possible unstable wall installation.
8
Mount the dryer to the wall hanging
assembly.
With the assistance of a 2nd person, lift the
dryer and align the mounting holes at the rear
of the dryer with the mounting hooks.
Tilting the dryer to a 45° angle, insert the
hanging brackets into the mounting holes on
the dryer as shown in the figure to the right.
Once the dryer mounts are in place, slowly
lower the dryer in place and check all
installation points for stress or weakened
contact.
Wood Screws
Exhaust Connector
Section 1
Wall
Spacers
½” Phillips Flat Head Screws
Section 2
Loading ...
Loading ...
Loading ...