Loading ...
Loading ...
Loading ...
en Cleaning and maintenance
8
Cleaning the metal grease filter
Notes
■ Do not use any aggressive, acidic or alkaline
cleaning agents.
■ When cleaning the metal mesh grease filters, also
clean the holder for the metal mesh grease filters in
the appliance using a damp cloth.
■ The metal mesh grease filters can be cleaned in the
dishwasher or by hand.
By hand:
Note: You can use a special grease solvent for
stubborn dirt. It can be ordered via the Online Shop.
■ Soak the metal mesh grease filters in a hot soapy
solution.
■ Clean the filters with a brush and then rinse them
thoroughly.
■ Leave the metal mesh grease filters to drain.
In the dishwasher:
Note: If the metal mesh grease filters are cleaned in the
dishwasher, slight discolouration may occur. This has
no effect on the function of the metal mesh grease
filters.
■ Do not clean heavily soiled metal mesh grease filters
together with utensils.
■ Place the metal mesh grease filters loosely in the
dishwasher. The metal mesh grease filters must not
be wedged in.
Installing the metal mesh grease filter
1. Insert metal grease filter.
2. Fold up metal grease filter and engage the lock.
Note: Make sure that the filter lock engages properly.
Changing the activated charcoal filter (only in
circulating-air mode)
To ensure effective odour removal, the filters must be
serviced regularly.
The activated charcoal filters must be replaced at least
every 3 months.
Notes
■ The activated charcoal filters are not included with
the appliance. Activated charcoal filters are available
from specialist retailers, from our after-sales service
or from our online shop.
■ The activated charcoal filters cannot be cleaned or
reactivated.
1. Remove metal grease filter: See above.
2. Turn the old activated charcoal filter and pull away
from the bracket. ¨
3. Push the new activated charcoal filter onto the
bracket and turn. ©
4. Fit the metal grease filter: See above.
%$
Trouble shooting en
9
3Trouble shooting
Tr oubl e shoot i ng
Malfunctions often have simple explanations. Please
read the following notes before calling the after-sales
service.
:Warning – Risk of electric shock!
Incorrect repairs are dangerous. Repairs may only be
carried out and damaged power cables replaced by
one of our trained after-sales technicians. If the
appliance is defective, unplug the appliance from the
mains or switch off the circuit breaker in the fuse box.
Contact the after-sales service.
Fault table
--------
Replacing the LED lights
:Warning – Risk of electric shock!
When changing the bulbs, the bulb socket contacts are
live. Before changing the bulb, unplug the appliance
from the mains or switch off the circuit breaker in the
fuse box.
:Warning – Risk of injury!
The light emitted by LED lights is very dazzling, and can
damage the eyes (risk group 1). Do not look directly
into the switched on LED lights for longer than 100
seconds.
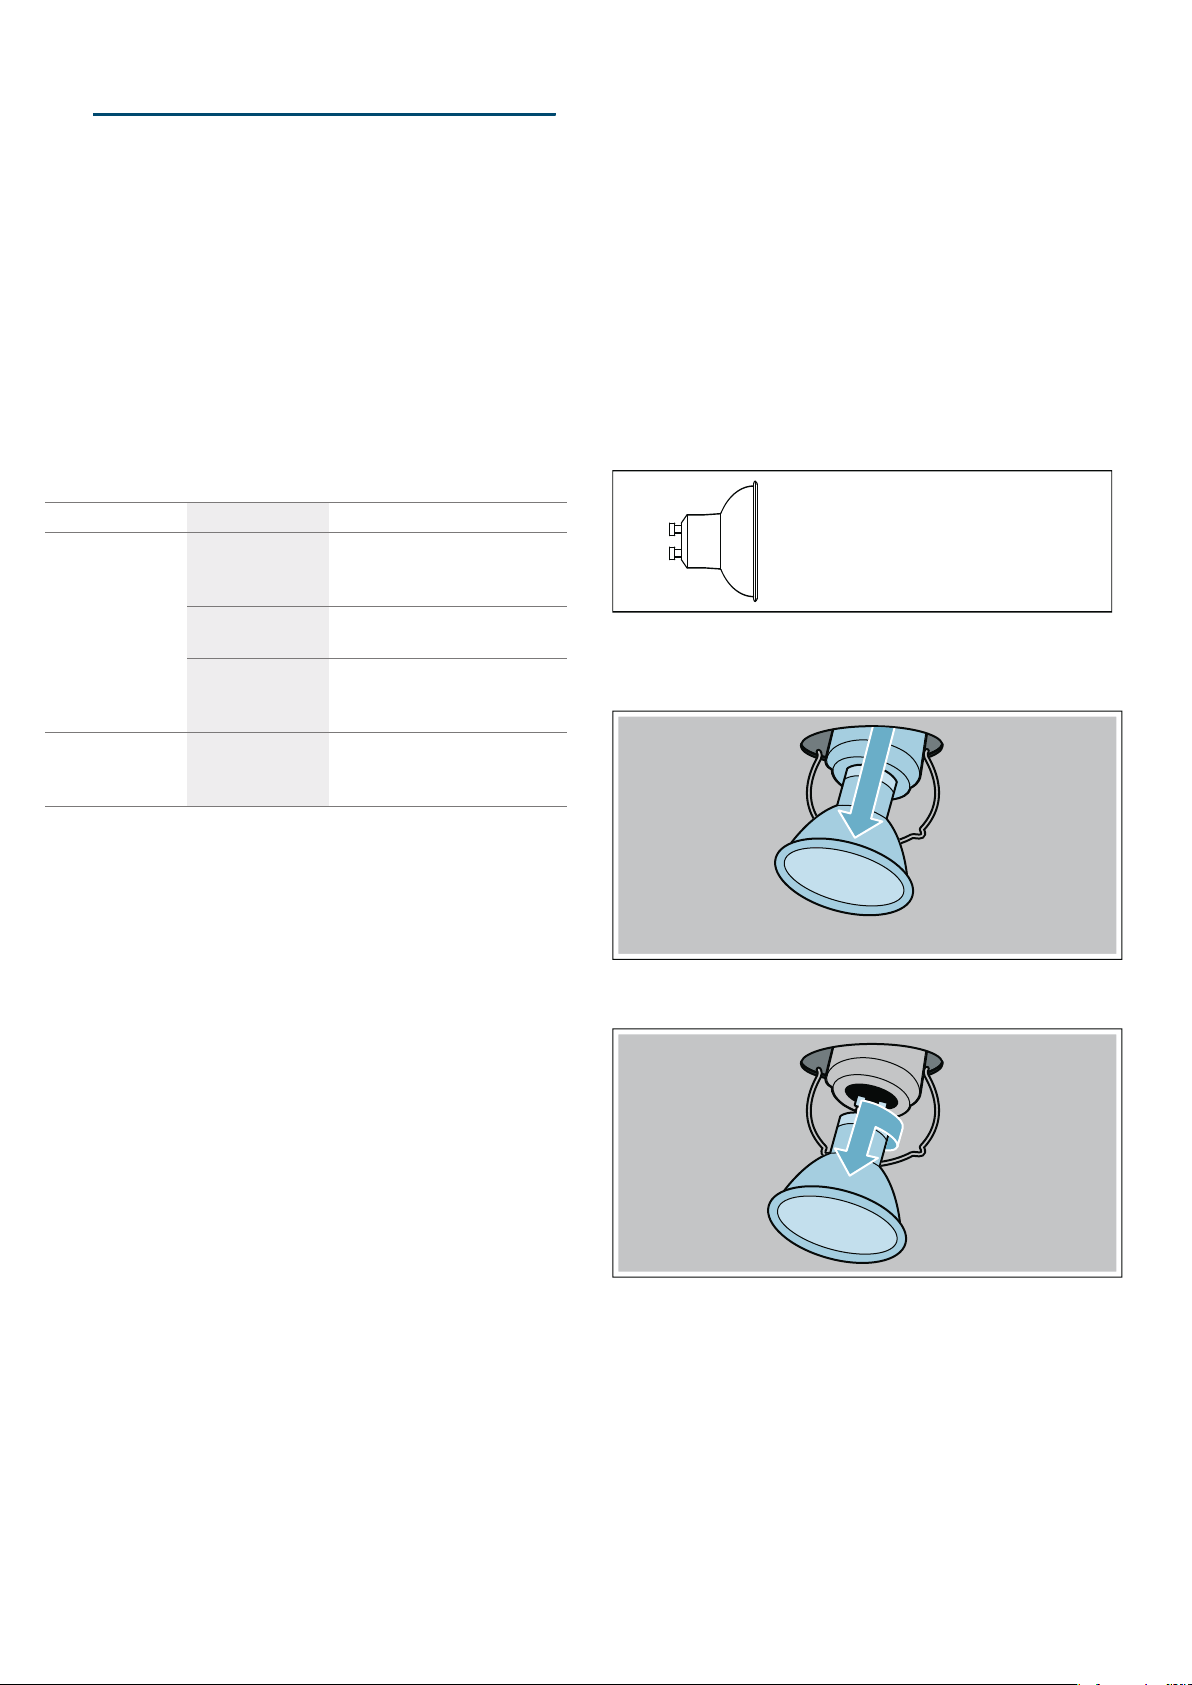
Important! Only use bulbs of the same type and
wattage.
1. Disconnect the appliance from the power supply.
2. Remove the bulb that is in the retaining clip from the
appliance.
3. Turn the bulb a quarter turn anti-clockwise and
remove it.
4. Replace the bulb with one of the same type.
5. Plug in the mains plug and switch the fuse back on.
Problem Possible cause Solution
The appliance
does not work
The plug is not
plugged into the
mains
Connect the appliance to the
power supply
Power cut Check whether other kitchen
appliances are working
The fuse is faulty Check in the fuse box to make
sure that the fuse for the appli-
ance is in working order
The lighting does
not work.
The LED lights
are defective.
You can read about this in the
section entitled "Replacing the
LED lights".
'53$5*8
Loading ...
Loading ...
Loading ...