Loading ...
Loading ...
Loading ...
4 EN
2 Get started
(Optional) Install the webcam
software and driver
Note
To use special features provided by Philips •
CamSuite and Webcam Driver SPZ2000/
SPZ2500, visit www.philips.com/support and
download the applications from the website.
Philips CamSuite only works on PCs with the
operating systems Microsoft
®
Windows
®
XP
(SP2 and higher), Vista, or Windows 7. After
the software installation, you can adjust Philips
SPZ2500 webcam settings on respective
property pages.
1 At www.philips.com/support, click the
Choose country / language box to select
your country/language.
2 Click the Search box, enter SPZ2500 and
then click the search button.
3 Click SPZ2500 under the search results.
4 Click Support.
Under » Product support, you will
nd information about Software and
drivers.
5 Download the software or driver installer
that you want.
6 Run the installer and follow the
instructions on the screen to complete
the installation.
Tip
You can use the same way to download the •
latest software and driver available for Philips
SPZ2500 webcam.
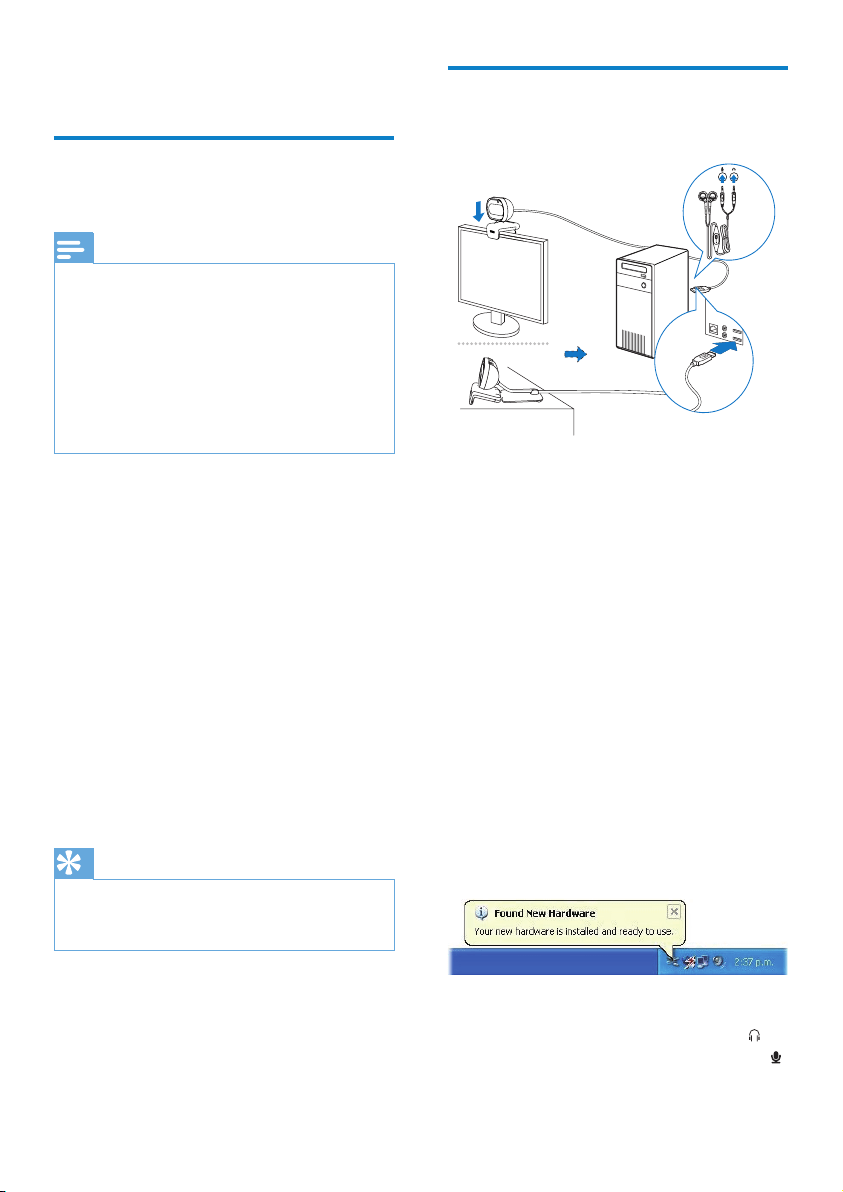
Connect the webcam to your
PC/notebook
1 Turn on the PC/notebook.
2 For the rst time you use the webcam
with Philips CamSuite, install the software
downloaded from the website.
After the software installation is complete, »
the Philips CamSuite icon is displayed at
the lower right corner of the screen.
3 Use the clamp to mount the webcam on
your PC monitor or notebook display.
Fold the clamp to place the webcam •
on a desk or (large) desktop monitor.
4 Connect the cable to a USB port on the
PC/notebook.
After the webcam is properly »
connected, the following pop-up
window is displayed at the lower right
corner of the screen .
5 Aim the webcam in a proper angle.
6 Connect the headphone plug to the
socket and the microphone plug to the
socket on the PC/notebook.
Loading ...
Loading ...
Loading ...