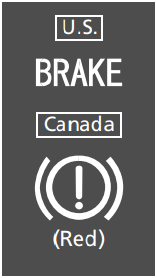
• Comes on for a few seconds when you turn the ignition switch to ON *1, then goes off.
• Comes on when the brake fluid level is low.
• Comes on if there is a problem with the brake system.
• Comes on while driving - Check the brake fluid level. 2 What to do when the indicator comes on while driving P. 605
• Comes on along with the ABS indicator - Have your vehicle checked by a dealer. 2 If the Brake System Indicator (Red) Comes On P. 605
*1:Models with the keyless access system have an ENGINE START/STOP button instead of an ignition switch.
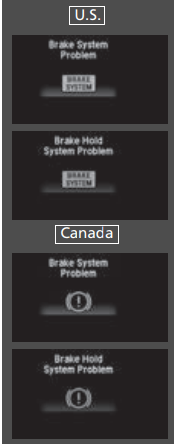
Brake System Indicator (Amber)
Comes on for a few seconds when you turn the ignition switch to ON *1, then goes off.
• Comes on if there is a problem with a system related to braking other than the conventional brake system.
• Comes on if there is a problem with an automatic brake hold system.
• Stays on constantly - Have your vehicle checked by a dealer.
*1:Models with the keyless access system have an ENGINE START/STOP button instead of an ignition switch.
Electric Parking Brake Indicator
• Comes on for a few seconds when you turn the ignition switch to ON*1, then goes off if the parking brake has been released.
• Comes on when the parking brake is applied, and goes off when it is released.
• Comes on for about 15 seconds when you pull the electric parking brake switch while the ignition switch is in LOCK *1.
• Stays on for about 15 seconds when you turn the ignition switch to LOCK *1 while the electric parking brake is set.
• Blinks and the electric parking brake system indicator comes on at the same time - There is a problem with the electric parking brake system. The parking brake may not be set.
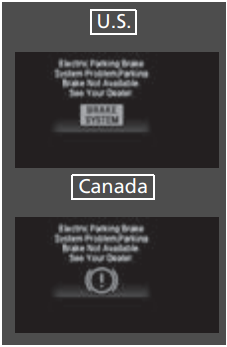
Electric Parking Brake System Indicator
• Comes on for a few seconds when you turn the ignition switch to ON*1, then goes off.
• Comes on if there is a problem with the electric parking brake system.
• Comes on while driving - Avoid using the parking brake and have your vehicle checked by a dealer immediately. 2 If the Electric Parking Brake System Indicator Comes On P. 606
*1:Models with the keyless access system have an ENGINE START/STOP button instead of an ignition switch.
* Not available on all models
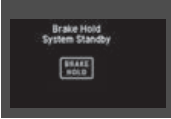
Automatic Brake Hold System Indicator
•Comes on for a few seconds when you turn the ignition switch to ON *1, then goes off.
• Comes on when the automatic brake hold system is on.
Automatic Brake Hold P. 510
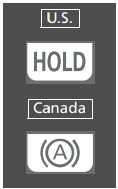
Automatic Brake Hold Indicator
• Comes on for a few seconds when you turn the ignition switch to ON *1, then goes off.
• Comes on when the automatic brake hold is activated.
Automatic Brake Hold P. 510
Brake Depressing Indicator
• Comes on for a few seconds when you turn the ignition switch to ON *1, then goes off.
• Comes on when the electric parking brake switch is pressed without depressing the brake pedal while the electric parking brake is in operation.
• Comes on while driving - Press the electric parking brake switch with the brake pedal depressed. 2 Parking Brake P. 507
__
• Comes on when the automatic brake hold button is pressed without depressing the brake pedal while the automatic brake hold is in operation.
• Blinks if the automatic brake hold is automatically canceled while it is in operation. The beeper sounds.
● Comes on while driving - Press the automatic brake hold button with the brake pedal depressed. 2 Automatic Brake Hold P. 510
• Immediately depress the brake pedal.
*1:Models with the keyless access system have an ENGINE START/STOP button instead of an ignition switch.
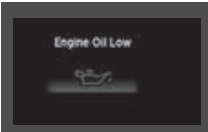
Low Oil Pressure Indicator
•Comes on when you turn the ignition switch to ON *1, and goes off when the engine starts.
• Comes on when the engine oil pressure is low.
• Comes on while driving - Immediately stop in a safe place. 2 If the Low Oil Pressure Indicator Comes On P. 603
Malfunction Indicator Lamp
• Comes on when you turn the ignition switch to ON *1, and goes off either when the engine starts or after several seconds if the engine did not start. If “readiness codes” have not been set, it blinks five times before it goes off.
• Comes on if there is a problem with the emissions control system.
• Blinks when a misfire in the engine’s cylinders is detected.
•Readiness codes are part of the on board diagnostics for the emissions control systems. 2 Testing of Readiness Codes P. 623
• Comes on while driving - Have your vehicle checked by a dealer.
• Blinks while driving - Stop in a safe place where there are no flammable objects. Stop the engine for 10 minutes or more, and wait for it to cool down. Then, take your vehicle to a dealer. 2 If the Malfunction Indicator Lamp Comes On or Blinks P. 604
Charging System Indicator
• Comes on when you turn the ignition switch to ON *1, and goes off when the engine starts.
• Comes on when the battery is not charging.
• Comes on while driving - Turn off the heating and cooling system*/climate control system* and rear defogger in order to reduce electricity consumption. 2 If the Charging System Indicator Comes On P. 603
Shift Lever Position Indicator
• Indicates the current shift lever position.
Shifting P. 444, 446
--
Transmission System Indicator
• Blinks if the transmission system has a problem.
• Blinks while driving - Avoid sudden starts and acceleration and have your vehicle checked by a dealer immediately
M (7-speed manual shift mode) Indicator/Shift Indicator*
• Comes on when 7-speed manual shift mode is applied.
7-Speed Manual Shift Mode P. 448
--
Seat Belt Reminder Indicator
• Comes on and the beeper sounds if you are not wearing a seat belt when you turn the ignition switch to ON *1.
• If the front passenger is not wearing a seat belt, the indicator comes on a few seconds later.
• Blinks while driving if either you or the front passenger has not fastened a seat belt. The beeper sounds and the indicator blinks at regular intervals.
• The beeper stops and the indicator goes off when you and the front passenger fasten their seat belts.
• Stays on after you or the front passenger has fastened the seat belt - A detection error may have occurred in the sensor. Have your vehicle checked by a dealer. 2 Seat Belt Reminder P. 44
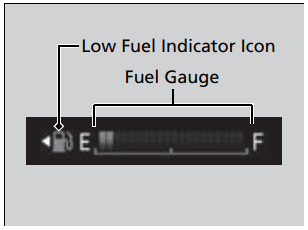
Low Fuel Indicator*
• Comes on when the fuel reserve is running low (approximately 1.98 U.S. gal./7.5 Liter left). • Blinks if there is a problem with the fuel gauge.
• Comes on - Refuel your vehicle as soon as possible. • Blinks - Have your vehicle checked by a dealer.
--
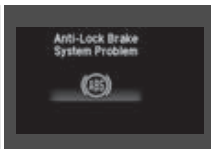
Anti-lock Brake System (ABS) Indicator
• Comes on for a few seconds when you turn the ignition switch to ON *1, then goes off. • If it comes on at any other time, there is a problem with the ABS.
• Stays on constantly - Have your vehicle checked by a dealer. With this indicator on, your vehicle still has normal braking ability but no anti-lock function. 2 Anti-lock Brake System (ABS) P. 512
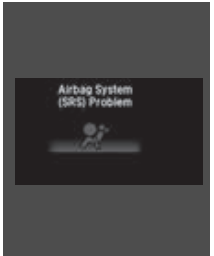
Supplemental Restraint System Indicator
• Comes on for a few seconds when you turn the ignition switch to ON *1, then goes off. • Comes on if a problem with any of the following is detected: - Supplemental restraint system - Side airbag system - Side curtain airbag system - Seat belt tensioner
• Stays on constantly or does not come on at all - Have your vehicle checked by a dealer.
*1:Models with the keyless access system have an ENGINE START/STOP button instead of an ignition switch.
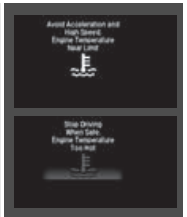
High Temperature Indicator (Red)
• Comes on for a few seconds when you turn the ignition switch to ON *1, then goes off.
• Blinks when the engine coolant temperature goes up, and stays on if the temperature continues to rise.
• Goes off, then comes on in blue when the engine coolant temperature is low.
• Blinks while driving - Drive slowly to prevent overheating.
• Stays on while driving - Immediately stop in a safe place and allow the engine to cool. 2 Overheating P. 601
Low Temperature Indicator (Blue)
• Comes on while the engine coolant temperature is low, then goes off once the engine reaches normal operating temperature.
• If the indicator stays on after the engine has reached normal operating temperature, there may be a problem with the temperature sensors. Have your vehicle inspected by a dealer.
--
Auto HighBeam Indicator*
• Comes on when all the operating conditions of the auto high-beam are met.
Auto High-Beam* P. 180
--
*1:Models with the keyless access system have an ENGINE START/STOP button instead of an ignition switch.
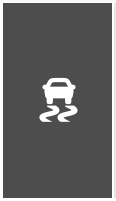
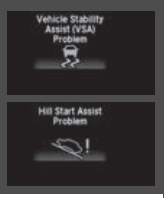
Vehicle Stability AssistTM (VSA®) System Indicator
• Comes on for a few seconds when you turn the ignition switch to ON *1, then goes off.
• Blinks when VSA® is active.
• Comes on if there is a problem with the VSA® system or hill start assist system.
• Stays on constantly - Have your vehicle checked by a dealer. 2 Vehicle Stability AssistTM (VSA®), aka Electronic Stability Control (ESC), System P. 454
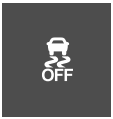
Vehicle Stability AssistTM (VSA®) OFF Indicator
• Comes on for a few seconds when you turn the ignition switch to ON *1, then goes off.
• Comes on when you deactivate VSA®.
VSA® On and Off P. 455
--
Door and Tailgate Open Indicator*
• Comes on for a few seconds if you turn the ignition switch to ON *1, then goes off.
• Comes on if any door or the tailgate is not completely closed.
• The beeper sounds and the indicator comes on if any door or the tailgate is opened while driving.
• Goes off when all doors and the tailgate are closed.
--
Information Display*
The information display shows the fuel gauge, odometer, trip meter, engine oil life and maintenance service item codes, and other gauges.
Switching the Display
Press the (select/reset) knob to change the display. Each time you press the (select/reset) knob, the information display changes as follows:
Instant Fuel Economy
Shows the instant fuel economy as a bar graph in mpg.
Odometer
Shows the total number of miles that your vehicle has accumulated.
Trip Meter
Shows the total number of miles driven since the last reset. TRIP A and B can be used to measure two separate trips.
Resetting a trip meter
To reset a trip meter, display it, then press and hold the knob. The trip meter is reset to 0.0.
Range
Shows the estimated distance you can travel on the remaining fuel. This distance is estimated from the fuel economy of your trips in the past.
Average Fuel Economy
Shows the estimated average fuel economy of each trip meter in mpg. The display is updated at set intervals. When a trip meter is reset, the average fuel economy is also reset
Outside Temperature
Shows the outside temperature in Fahrenheit.
Adjusting the outside temperature indicator
Adjust the temperature reading up to ± 5°F if the temperature reading seems incorrect.
Turn the ignition switch to ON (w.
Press and hold the (select/reset) knob for 10 seconds or more while the outside temperature is shown on the information display.
The information display goes into temperature adjustment mode. The display starts showing from -5°F to +5°F.
Release the knob when the right adjustment amount is shown.
The adjustment is complete.
Multi-Information Display*
The multi-information display shows the odometer, trip meter, and other gauges. It also displays important messages such as warnings and other helpful information.
Switching the Display
Main displays
Press the (information) button to change the display
Lower displays
Press the SEL/RESET button or (select/reset) knob to change the display.
Fuel Gauge
Displays the amount of fuel left in the fuel tank.
Fuel Low warning
When the remaining fuel is running low, the display color will change to orange and warns you to refuel as soon as possible. The icon will start to blink when the fuel gauge is malfunctioning.
Features
Audio System
About Your Audio System
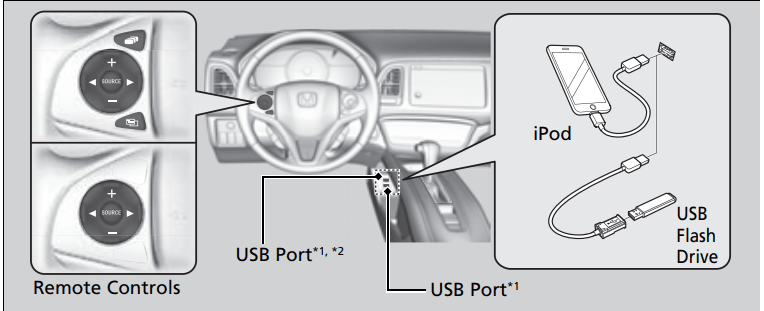
The audio system features AM/FM radio and SiriusXM® Radio service*. It can also play audio CDs*, WMA/MP3/AAC files, USB flash drives, iPod, iPhone and Bluetooth® devices.
You can operate the audio system from the buttons and switches on the panel, the remote controls on the steering wheel, or the icons on the touchscreen interface*
*1:Models with display audio system
*2:Models with color audio system
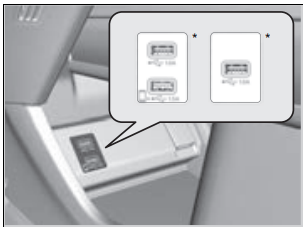
USB Port(s)
Install the device USB connector or the USB flash drive to the USB port.
The USB port (1.0A) is for playing audio files on a USB flash drive, connecting a cellular phone and charging devices.
Models with display audio system
The USB port (1.5 A) is for charging devices, playing audio files and connecting compatible phones with Apple CarPlay or Android Auto.
To prevent any potential issues, be sure to use an Apple MFi Certified Lightning Connector for Apple CarPlay, and for Android Auto, the USB cables should be certified by USB-IF to be compliant with USB 2.0 Standard.
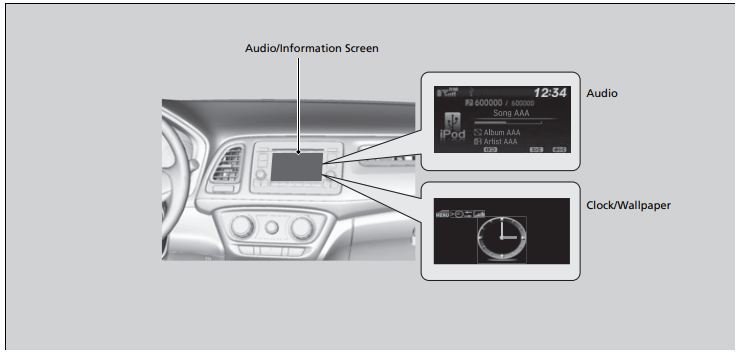
Audio/Information Screen
Displays the audio status and wallpaper. From this screen, you can go to various setup options.
Switching the Display
Audio
Shows the current audio information.
Clock/Wallpaper
Shows a clock screen or an image you import.
Change display
Press the MENU/CLOCK button.
Rotate to select Settings, then press .
Rotate to select Display Change, then press .
Rotate to select Wallpaper, then press .
If you want to return to the audio display, select Audio.
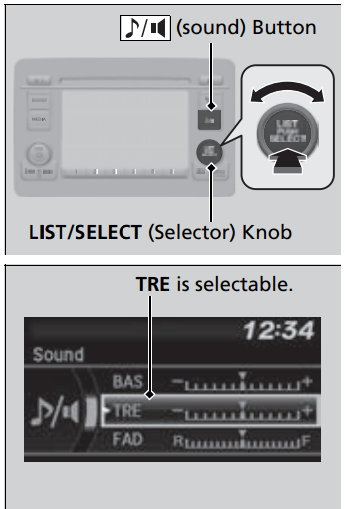
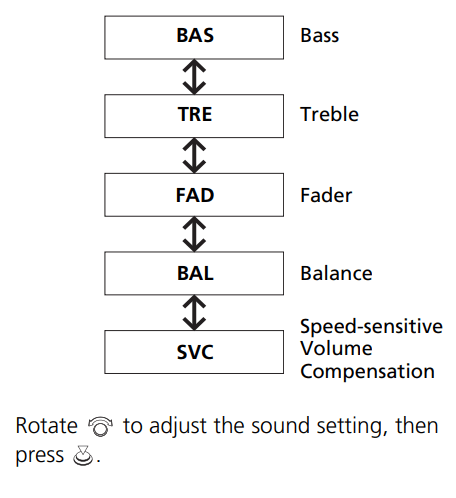
Adjusting the Sound
Press the (sound) button, and rotate to scroll through the following choices:
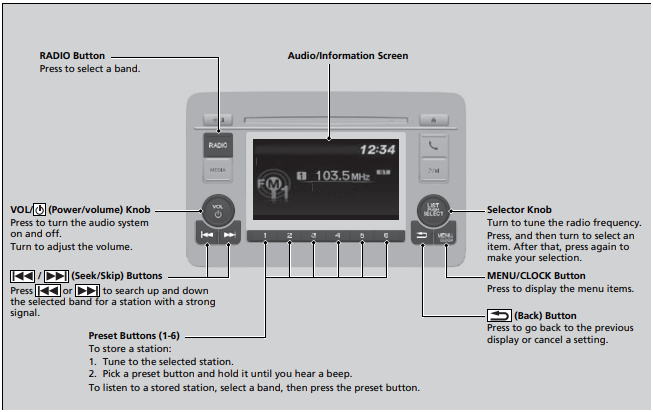
Playing AM/FM Radio
Radio Data System (RDS)
Provides text data information related to your selected RDS capable FM station.
To find an RDS station from Station List
Press while listening to an FM station.
Rotate to select the station, then press .
Update List
Updates your available station list at any time.
Press while listening to an FM station.
Rotate to select Update List, then press .
Radio text
Displays the radio text information of the selected RDS station.
Press the MENU/CLOCK button.
Rotate to select Settings, then press .
Rotate to select RDS Settings, then press .
Rotate to select Radio Text, then press .
Scan
Samples each of the strongest stations on the selected band for 10 seconds.
Press the MENU/CLOCK button.
Rotate to select Scan, then press .
To turn off scan, press .
Control
Clock Adjusting the Clock
Models without navigation system
You can adjust the time in the clock display with the ignition switch is in ON
Adjusting the Time
Models with display audio system
Using the Settings menu on the audio/information screen
Select the (HOME) icon, then select Settings.
Select Clock/Info, then Clock Adjustment.
Adjust the hours and minutes by selecting
Select OK to set the time
Using the MENU/CLOCK button
Press and hold the MENU/CLOCK button. ->Adjust Clock is selected.
Rotate to change hour, then press .
Rotate to change minute, then press
To enter the selection, rotate and select Set, then press .
Key
This vehicle comes with the following keys:
Use the keys to start and stop the engine, and to lock and unlock all the doors and tailgate.
Built-in Key*
The built-in key can be used to lock/unlock the doors when the keyless remote battery becomes weak and the power door lock/ unlock operation is disabled.
To remove the built-in key, slide the release knob and then pull out the key. To reinstall the built-in key, push the built-in key into the keyless remote until it clicks.
Key Number Tag
Contains a number that you will need if you purchase a replacement key
Keep the key number tag separate from the key in a safe place outside of your vehicle. If you wish to purchase an additional key, contact a dealer.
If you lose your key and you cannot start the engine, contact a dealer.
Low Keyless Remote Signal Strength*
The vehicle transmits radio waves to locate the keyless remote when locking/ unlocking the doors and tailgate, or to start the engine.
In the following cases, locking/unlocking the doors and tailgate, or starting the engine may be inhibited or operation may be unstable:
Strong radio waves are being transmitted by nearby equipment.
You are carrying the keyless remote together with telecommunications equipment, laptop computers, cell phones, or wireless devices.
A metallic object is touching or covering the keyless remote
Locking/Unlocking the Doors from the Outside
Using the Keyless Access System*
When you carry the keyless remote, you can lock/unlock the doors and the tailgate. You can lock/unlock the doors and the tailgate within a radius of about 32 inches (80 cm) of the outside door or tailgate outer handle.
Locking the doors and tailgate Press the door lock button on the front door or the tailgate.
Some exterior lights flash; the beeper sounds; all the doors and tailgate lock; and the security system sets.
Unlocking the doors and tailgate
Grab the driver’s door handle:
The driver’s door unlocks.
Some exterior lights flash twice and the beeper sounds twice.
Grab the front passenger’s door handle:
All the doors and the tailgate unlock.
Some exterior lights flash twice and the beeper sounds twice.
Press the tailgate release button:
The tailgate unlocks.
Some exterior lights flash twice and the beeper sounds twice.
Opening/Closing the Tailgate P. 161
Locking the doors and tailgate (Walk away auto lock®)
When you walk away from the vehicle with all doors and tailgate closed while carrying the keyless remote, the doors and tailgate will automatically lock.
The auto lock function activates when all doors and tailgate are closed, and the keyless remote is within about 5 feet (1.5 m) radius of the outside door handle or tailgate outer handle.
Exit vehicle while carrying keyless remote and close door(s) and tailgate.
While within about 5 feet (1.5 m) radius of the vehicle.
The beeper sounds; the auto lock function will be activated.
Carry the keyless remote beyond about 5 feet (1.5 m) from the vehicle and remain outside this range for 2 or more seconds.
Some exterior lights flash; the beeper sounds; all doors and tailgate will then lock.
To temporarily deactivate the function:
Set the power mode to OFF.
Open the driver’s door.
Using the master door lock switch, operate the lock as follows:
Lock->Unlock->Lock->Unlock.
The beeper sounds and the function is deactivated.
To restore the function:
Set the power mode to ON.
Lock the vehicle without using the auto lock function
With the keyless remote on you, move out of the auto lock function operation range.
Open any door.
Using the Remote Transmitter
Locking the doors
Press the lock button.
Once:
Some exterior lights flash, all the doors and tailgate lock, and the security system sets.
Twice (within five seconds after the first push):
A beeper sounds and verifies the security system is set.
Unlocking the doors
Press the unlock button.
Once:
Some exterior lights flash twice, and the driver’s door unlocks.
Twice:
The remaining doors and the tailgate unlock.
Locking/Unlocking the Doors Using a Key
If the lock or unlock button of the remote does not work, use the key instead.
If the lock or unlock button of the remote does not work, use the key instead. Fully insert the key and turn it.
Driving
Driving Preparation
Check the following items before you start driving.
Exterior Checks
Make sure there are no obstructions on the windows, door mirrors, exterior lights, or other parts of the vehicle.
Remove any frost, snow, or ice.
Remove any snow on the roof, as this can slip down and obstruct your field of vision while driving. If frozen solid, remove ice once it has softened.
When removing ice from around the wheels, be sure not to damage the wheel or wheel components.
Make sure the hood is securely closed.
If the hood opens while driving, your front view will be blocked.
Make sure the tires are in good condition.
Check air pressure, and check for damage and excessive wear.
Checking and ing Tires P. 559
Make sure there are no people or objects behind or around the vehicle.
There are blind spots from the inside
Maximum Load Limit
The maximum load for your vehicle is 850 lbs (385 kg). See the Tire and Loading Information label attached to the driver’s doorjamb.
This figure includes the total weight of all occupants, cargo, and accessories, and the tongue load if you are towing a trailer.
Steps for Determining Correct Load Limit -
Locate the statement “The combined weight of occupants and cargo should never exceed XXX kg or XXX lbs.” on your vehicle’s placard.
Determine the combined weight of the driver and passengers that will be riding in your vehicle.
Subtract the combined weight of the driver and passengers from XXX kg or XXX lbs.
The resulting figure equals the available amount of cargo and luggage load capacity. For example, if the “XXX” amount equals 1,400 lbs. and there will be five 150 lb. passengers in your vehicle, the amount of available cargo and luggage load capacity is 650 lbs. (1,400 - 750 (5 x 150) = 650 lbs.)
Determine the combined weight of luggage and cargo being loaded on the vehicle. That weight may not safely exceed the available cargo and luggage load capacity calculated in step 4.
If your vehicle will be towing a trailer, load from your trailer will be transferred to your vehicle. Consult this manual to determine how this reduces the available cargo and luggage load capacity of your vehicle.
In addition, the total weight of the vehicle, all occupants, accessories, cargo, and trailer tongue load must not exceed the Gross Vehicle Weight Rating (GVWR) or the Gross Axle Weight Rating (GAWR). Both are on a label on the driver’s doorjamb.
General Information
Your vehicle has been designed primarily for use on pavement, however, its higher ground clearance allows you to occasionally travel on unpaved roads. It is not designed for trail-blazing, or other challenging off-highway activities.
If you decide to drive on unpaved roads, you will find that it requires somewhat different driving skills and that your vehicle will handle somewhat differently than it does on pavement. Pay attention to the precautions and tips in this section, and get acquainted with your vehicle before leaving the pavement.
Avoiding Trouble
Check Out Your Vehicle before you leave the pavement and make sure that all scheduled maintenance has been completed. Pay special attention to the condition of the tires, and check the tire pressures.
Remember the route you choose presents limits (too steep or bumpy), you have limits (driving skill and comfort), and your vehicle has limits (traction, stability, and power). Failing to recognize these limits will likely put you and your passengers in a hazardous situation.
Accelerating and Braking should be done slowly and gradually. Trying to start or stop too fast can cause a loss of traction and you could lose control.
Avoiding Obstacles and Debris in the road reduces the likelihood of a rollover or damage to your suspension or other components.
Driving on Slopes increases your risk of a rollover, particularly if you attempt to drive across a slope that is too steep. Going straight up or down a slope is usually the safest. If you can’t clearly see all conditions or obstacles on a slope, walk it before you drive it. If there is any doubt whether you can safely pass, don’t try it. Find another route. If you get stuck when climbing, do not try to turn around. Back down slowly following the same route you took up the hill.
Crossing a Stream - Avoid driving through deep water. If you encounter water in your route (a small stream or large puddle, for example), evaluate it carefully before going ahead. Make sure it is shallow, flowing slowly, and has firm ground underneath. If you are not sure of the depth or the ground, turn around and find another route. Driving through deep water can also damage your vehicle. The water can get into the transmission and differential, diluting the lubricant and causing an eventual failure. It can also wash the grease out of the wheel bearings.
If You Get Stuck, carefully go in the direction that you think will get you unstuck. Do not spin the tires as this will only make things worse and could damage the transmission. If you are unable to free yourself, your vehicle will need to be towed. Front and rear tow hooks are provided for this purpose.
Starting the Engine
Make sure the parking brake is applied.
The electric parking brake indicator comes on for 15 seconds when you pull up to electric parking brake switch.
Check that the transmission is in P, then depress the brake pedal.
Although it is possible to start the vehicle in N, it is safer to start it in P
Turn the ignition switch to START without depressing the accelerator pedal.
Starting to Drive
Keeping your right foot on the brake pedal, put the shift lever in (D. Select (R when reversing.
With the parking brake applied, release the brake pedal and gently depress the accelerator pedal.
Make sure the electric parking brake indicator goes off.
Parking Brake P. 507
Hill start assist system
Hill start assist keeps the brake engaged briefly to help prevent the vehicle from rolling on inclines as you move your foot from the brake pedal to the accelerator. Put the transmission into D, S, or L when facing uphill, or R when facing downhill, then release the brake pedal.
Precautions While Driving
Driving Guidelines for Your Utility Vehicle
Utility vehicles have a significantly higher rollover rate than other types of vehicles. To prevent rollovers or loss of control:
Take corners at slower speeds than you would with a passenger vehicle.
Avoid sharp turns and abrupt maneuvers whenever possible.
Do not modify your vehicle in any way that you would raise the center of gravity.
Do not carry heavy cargo on the roof.
Never carry more than 165 lbs (75 kg) of cargo on the roof rack (Honda accessory).
In Rain
Avoid driving in deep water and on flooded roads. This can damage the engine or driveline, or cause electrical component failure.
Other Precautions
If there is a strong impact with something under the vehicle, stop in a safe location. Check the underside of the vehicle for damage or any fluid leaks.
Continuously Variable Transmission
Creeping
The engine runs at a higher idle speed and creeping increases.
Keep the brake pedal firmly depressed when stopped.
Kickdown
Quickly depressing the accelerator pedal while driving uphill may cause the transmission to drop to a lower ratio, unexpectedly increasing vehicle speed. Depress the accelerator pedal carefully, especially on slippery roads and curves.
Shifting
Change the shift position in accordance with your driving needs.
Shift lever positions
Shift Lever Operation
Shift lever positions
You cannot change the power mode from ON to VEHICLE OFF (LOCK) unless the shift lever is in P.
The vehicle may move forward very slightly even in N while the engine is cold. Depress the brake pedal firmly and, when necessary, apply the parking brake.
When shifting positions in extremely low temperatures (-22°F/-30°C), there may be a short delay before the shift position is displayed. Always confirm you are in the correct shift position before driving.
NOTICE
When you change the shift lever from (D to (R and vice versa, come to a complete stop and keep the brake pedal depressed.
Operating the shift lever before the vehicle has come to a complete standstill can damage the transmission.
Use the shift lever position indicator to check the lever position before pulling away.
If the transmission indicator blinks when driving, in any shift position, there is a problem with the transmission.
Avoid sudden acceleration and have the transmission checked by a dealer as soon as possible.
The fuel supply may be cut off if you drive at engine speeds in or over the tachometer red zone (engine speed limit). If this happens, you may experience a slight jolt.
It may not be possible to operate the shift lever if the brake pedal is applied while the shift lever release button is held down.
Depress the brake pedal first.
7-Speed Manual Shift Mode
Use the paddle shifters to change between 1st and 7th speeds without removing your hands from the steering wheel. The transmission switches to the 7-speed manual shift mode when you pull a paddle shifter while driving. This mode is useful when engine braking is needed.
When the shift lever is in D:
The shift mode goes into the 7-speed manual shift mode temporarily, and the number is displayed in the shift indicator.
The 7-speed manual shift mode is canceled automatically if you drive at constant speed or accelerate, and the number in the shift indicator goes off.
You can cancel this mode by pulling the + paddle shifter for a few seconds.
The 7-speed manual shift mode is especially useful when reducing the vehicle speed temporarily before making a turn.
When the shift lever is in S:
The shift mode goes into the 7-speed manual shift mode. The M indicator and the speed number are displayed in the shift indicator. As the vehicle speed slows down, the transmission automatically shifts down accordingly. When the vehicle comes to a stop, it automatically shifts down into 1st.
If the vehicle speed increases and the engine speed reaches near the tachometer’s red zone, the transmission automatically shifts up.
You can only pull away in 1st speed.
When canceling the 7-speed manual shift mode, move the shift lever from S to D. When the 7-speed manual shift mode is canceled, the - indicator and shift indicator go off.
Each paddle shift operation makes a single speed change.
To change continuously, release the paddle shifter before pulling it again for the next speed.
The shift indicator blinks when you cannot shift up or down. It indicates that your vehicle speed is not in its allowable shifting range. Slightly accelerate to shift up and decelerate to shift down while the indicator is blinking.
ECON Button
The ECON button turns the ECON mode on and off. The ECON mode helps you improve your fuel economy by adjusting the performance of the engine, transmission, heating and cooling system*/climate control system*, and cruise control*.
Cruise Control*
s a constant vehicle speed without having to keep your foot on the accelerator. Use cruise control on freeways or open roads where you can travel at a constant speed with little acceleration or deceleration.
To Set the Vehicle Speed
Take your foot off the pedal and press the –/SET button when you reach the desired speed.
The moment you release the –/SET button, the set speed is fixed, and cruise control begins. The CRUISE CONTROL indicator comes on.
To Adjust the Vehicle Speed
Increase or decrease the vehicle speed using the RES/+ or –/SET buttons on the steering wheel.
Each time you press the button, the vehicle speed is increased or decreased by about 1 mph (1.6 km/h).
If you keep the button pressed, the vehicle speed increases or decreases until you release it. This speed is then set.
To Cancel
To cancel cruise control, do any of the following:
Press the CANCEL button.
Press the CRUISE button.
Depress the brake pedal.
The CRUISE CONTROL indicator goes off.
LaneWatchTM*
LaneWatch is an assistance system that allows you to check the passenger side rear areas displayed on the audio/information screen when the turn signal is activated to the passenger’s side. A camera in the passenger side door mirror monitors these areas and allows you to check for vehicles, in addition to your visual check and use of the passenger door mirror. You can also keep the system on for your convenience while driving.
Real Time AWD with Intelligent Control SystemTM*
Your vehicle is equipped with the AWD system. When the system senses a loss of front wheel traction, it automatically transfers some power to the rear wheels. This allows you to utilize all available traction and may increase mobility.
You still need to exercise the same care when accelerating, steering, and braking that you would in a two wheel drive vehicle.
If you excessively spin all four wheels and overheat the AWD system, only the front wheels receive power. Stop until the system cools down.
Tire Pressure Monitoring System (TPMS)
Instead of directly measuring the pressure in each tire, the TPMS on this vehicle monitors and compares the rolling radius and rotational characteristics of each wheel and tire while you are driving to determine if one or more tires are significantly under-inflated.
This will cause the low tire pressure/TPMS indicator to come on and a message to appear on the multi-information display*.
Maintenance
Maintenance Minder Messages on the Information Display
Oil Life Display
Explanation
Information
Maintenance Minder Indicator
The engine oil life indicator starts to appear along with other due soon maintenance item codes when the remaining oil life becomes 15 percent.
The engine oil is approaching the end of its service life.
Starts to come on when the remaining engine oil life becomes 15 percent. It goes off when the display is switched.
The SERVICE message also starts to appear along with the engine oil life indicator and the maintenance item codes.
The engine oil has almost reached the end of its service life, and the maintenance items should be inspected and serviced as soon as possible
The remaining engine oil life has passed its service life, and a negative distance appears after driving over 10 miles. The negative distance on the display blinks.
The engine oil life has passed. The maintenance items must be inspected and serviced immediately.
Stays on as a reminder even when the display is switched.
Maintenance Service Items
CODE A
Maintenance Main Items
Replace engine oil*1
CODE B
Maintenance Main Items
Replace engine oil*1 and oil filter
Inspect front and rear brakes
Inspect tie rod ends, steering gearbox, and boots
Inspect suspension components
Inspect driveshaft boots
Inspect brake hoses and lines (Including ABS/VSA®)
Inspect all fluid levels and condition of fluids
Inspect exhaust system#
Inspect fuel lines and connections#
*1: If a message SERVICE does not appear more than 12 months after the display is reset, change the engine oil every year.
# : See information on maintenance and emissions warranty
Maintenance Under the Hood
Maintenance Items Under the Hood
Opening the Hood
Park the vehicle on a level surface, and set the parking brake.
Pull the hood release handle under the driver’s side lower corner of the dashboard.
The hood will pop up slightly.
Push the hood latch lever (located under the front edge of the hood to the center) to the side and raise the hood. Once you have raised the hood slightly, you can release the lever.
Remove the support rod from the clamp using the grip. Mount the support rod in the hood.
When closing, remove the support rod, and stow it in the clamp, then gently lower the hood. Remove your hand at a height of approximately 12 inches (30 cm) and let the hood close
Recommended Engine Oil
Use a genuine engine oil or another commercial engine oil of suitable type and viscosity (for the ambient temperature) as shown in the image that follows.
Oil is a major contributor to your engine’s performance and longevity. If you drive the vehicle with insufficient or deteriorated oil, the engine may fail or be damaged.
Genuine Engine Oil
Commercial Engine Oil
• Honda Genuine Motor Oil
• Premium-grade 0W-20 detergent oil with an API Certification Seal on the container
*1:Formulated to improve fuel economy.
Synthetic oil
You may also use synthetic motor oil if it is labeled with the API Certification Seal and is the specified viscosity grade.
Oil Check
We recommend that you check the engine oil level every time you refuel. Park the vehicle on level ground.
Wait approximately three minutes after turning the engine off before you check the oil.
Remove the dipstick (orange).
Wipe the dipstick with a clean cloth or paper towel.
Insert the dipstick back all the way into its hole.
Remove the dipstick again, and check the level. It should be between the upper and lower marks. Add oil if necessary
Adding Engine Oil
Unscrew and remove the engine oil fill cap.
Add oil slowly.
Reinstall the engine oil fill cap, and tighten it securely.
Wait for three minutes and recheck the engine oil dipstick.
Changing the Engine Oil and Oil Filter
You must change the engine oil and oil filter regularly in order to the engine’s lubrication. The engine may be damaged if they are not changed regularly.
Change the oil and filter in accordance with the maintenance message on the information display*/multi-information display*.
Run the engine until it reaches normal operating temperature, and then turn the engine off.
Open the hood and remove the engine oil fill cap.
Remove the bolts and clips on the undercarriage and remove the under cover.
Remove the drain bolt and washer from the bottom of the engine, and drain the oil into a suitable container.
Remove the oil filter and dispose of the remaining oil.
Check that the filter gasket is not stuck to the engine contact surface.
If it is stuck, you must detach it.
Wipe away dirt and dust adhering to the contact surface of the engine block, and install a new oil filter.
Apply a light coat of new engine oil to the filter gasket.
Put a new washer on the drain bolt, then reinstall the drain bolt.
Reinstall the engine oil fill cap securely and start the engine.
Run the engine for a few minutes, and then check that there is no leak from the drain bolt or oil filter.
Stop the engine, wait for three minutes, and then check the oil level on the dipstick. u If necessary, add more engine oil.
Engine Coolant
This coolant is premixed with 50% antifreeze and 50% water. Do not add any straight antifreeze or water.
We recommend you check the engine coolant level every time you refuel. Check the reserve tank first. If it is completely empty, also check the coolant level in the radiator. Add the engine coolant accordingly.
Reserve Tank
Make sure the engine and radiator are cool.
Check the amount of coolant in the reserve tank.
If the coolant level is below the MIN mark, add the specified coolant until it reaches the MAX mark.
Inspect the cooling system for leaks.
Radiator
Make sure the engine and radiator are cool.
Turn the radiator cap 1/8 turn counterclockwise and relieve any pressure in the cooling system. Do not push the cap down when turning.
Push down and turn the radiator cap counter-clockwise to remove it.
The coolant level should be up to the base of the filler neck. Add coolant if it is low.
Put the radiator cap back on, and tighten it fully
Brake Fluid
Checking the Brake Fluid
The fluid level should be between the MIN and MAX marks on the side of the reserve tank.
Refilling Window Washer Fluid
Check the amount of window washer fluid by looking at the reservoir.
If the level is low, fill the washer reservoir.
If the washer fluid is low, a message appears on the multi-information display.
Pour the washer fluid carefully. Do not overflow the reservoir.
Front Side Marker Lights
Front side marker lights are LED type. Have an authorized Honda dealer inspect and replace the light assembly.
Parking/Daytime Running Lights
Parking/daytime running lights are LED type. Have an authorized Honda dealer inspect and replace the light assembly
Fog Light Bulbs*
When replacing, use the following bulbs
Remove the clips using a flat-tip screwdriver, and push up the under cover.
Push the tab to remove the coupler.
Rotate the old bulb counter-clockwise on driver side and clockwise on passenger side to remove.
Insert a new bulb into the fog light assembly and turn it clockwise on driver side and counter-clockwise on passenger side.
Insert the coupler into the connector of the bulb.
Side Turn Signal/Emergency Indicator Lights*
Door mirror side turn lights are LED type. Have an authorized Honda dealer inspect and replace the light assembly.
Rear Turn Signal Light Bulbs
When replacing, use the following bulbs
Use a Phillips-head screwdriver to remove the bolts.
Pull the light assembly out of the rear pillar.
Turn the socket counter-clockwise and remove it.
Remove the old bulb.
Insert a new bulb.
Slide the light assembly onto the guide on the body
Brake/Tail/Rear Side Marker Lights
Brake/tail/rear side marker lights are the LED type. Have an authorized Honda dealer inspect and replace the light assembly.
High-Mount Brake Light
High-mount brake light is a LED type. Have an authorized Honda dealer inspect and replace the light assembly.
Checking Wiper Blades
If the wiper blade rubber has deteriorated, it will leave streaks, become noisy, and the hard surfaces of the blade may scratch the window glass.
Changing the Front Wiper Blade Rubber
Lift the driver side wiper arm first, then the passenger side.
Press up on and hold the tab, then slide the holder off the wiper arm.
Slide the wiper blade out of the holder by pulling the tabbed end out.
Slide the new wiper blade onto the holder from the bottom end.
The tab on the blade should fit in the indent of the top of the wiper holder.
Slide the holder onto the wiper arm securely.
Lower the passenger side wiper arm first, then the driver side
Changing the Rear Wiper Blade Rubber
Raise the wiper arm off.
Pivot up the bottom end of the wiper blade until it comes off from the wiper arm.
Slide the wiper blade out of the end with the indent.
Remove the retainers from the rubber blade that has been removed, and mount to a new rubber blade.
Slide the new wiper blade onto the holder.
Make sure it is engaged correctly, then install the wiper blade assembly onto the wiper arm.
Checking Tires
To safely operate your vehicle, your tires must be of the proper type and size, in good condition with adequate tread, and properly inflated.
Inflation guidelines
Properly inflated tires provide the best combination of handling, tread life, and comfort. Refer to the driver’s doorjamb label or specifications page for the specified pressure.
Underinflated tires wear unevenly, adversely affect handling and fuel economy, and are more likely to fail from overheating.
Overinflated tires make your vehicle ride harshly, are more prone to road hazards, and wear unevenly.
Every day before you drive, look at each of the tires. If one looks lower than the others, check the pressure with a tire gauge.
At least once a month or before long trips, use a gauge to measure the pressure in all tires, including the spare. Even tires in good condition can lose 1-2 psi (10-20 kPa, 0.1-0.2 kgf/cm2) per month.
Inspection guidelines
Every time you check inflation, also examine the tires and valve stems.
Look for:
Bumps or bulges on the side or in the tread. Replace the tire if you find any cuts, splits, or cracks in the side of the tire. Replace it if you see fabric or cord.
Remove any foreign objects and inspect for air leaks.
Uneven tread wear. Have a dealer check the wheel alignment.
Excessive tread wear.
Wear Indicators P. 565
Cracks or other damage around valve stem
Tire and Loading Information Label
The label attached to the driver’s doorjamb provides necessary tire and loading information.
The tire and loading information label attached to the driver’s doorjamb contains:
The number of people your vehicle can carry.
The total weight your vehicle can carry. Do not exceed this weight.
The original tire sizes for front, rear, and spare.
The proper cold tire pressure for front, rear, and spare.
Tire Labeling
The tires that came on your vehicle have a number of markings. Those you should be aware of are described as shown.
Tire Sizes
Whenever tires are replaced, they should be replaced with tires of the same size
Tire Identification Number (TIN)
The tire identification number (TIN) is a group of numbers and letters that look like the example in the side column. TIN is located on the sidewall of the tire.
Glossary of Tire Terminology
Cold Tire Pressure – The tire air pressure when the vehicle has been parked for at least three hours or driven less than 1 mile (1.6 km).
Load Rating – Means the maximum load that a tire is rated to carry for a given inflation pressure.
Maximum Inflation Pressure – The maximum tire air pressure that the tire can hold.
Maximum Load Rating – Means the load rating for a tire at the maximum permissible inflation pressure for that tire.
Recommended Inflation Pressure – The cold tire inflation pressure recommended by the manufacturer.
Treadwear Indicators (TWI) – Means the projections within the principal grooves designed to give a visual indication of the degrees of wear of the tread.
Cleaning
Interior Care
Use a damp cloth with a mixture of mild detergent and warm water to remove dirt. Use a clean cloth to remove detergent residue.
Cleaning Seat Belts
Use a soft brush with a mixture of mild soap and warm water to clean the seat belts. Let the belts air dry. Wipe the loop of the seat belt anchors using a clean cloth.
Floor Mats
The driver’s floor mat hooks over the floor anchors, which keep the mat from sliding forward. To remove a mat for cleaning, turn the anchor knobs to the unlock position. When reinstalling the mat after cleaning, turn the knobs to the lock position.
Do not put additional floor mats on top of the anchored mats.
ing Genuine Leather*
To properly clean leather:
Use a vacuum or soft dry cloth first to remove any dirt or dust.
Clean the leather with a soft cloth dampened with a solution comprised of 90% water and 10% neutral soap.
Wipe away any soap residue with a clean damp cloth.
Wipe away residual water and allow leather to air dry in the shade
Exterior Care
Dust off the vehicle body after you drive.
Regularly inspect your vehicle for scratches on painted surfaces. A scratch on a painted surface can result in body rust. If you find a scratch, promptly repair it.
Washing the Vehicle
Wash the vehicle regularly. Wash more frequently when driving in the following conditions:
If driving on roads with road salt.
If driving in coastal areas.
If tar, soot, bird droppings, insects, or tree sap are stuck to painted surfaces.
Using an Automated Car Wash
Make sure to follow the instructions indicated on the automated car wash.
Fold in the door mirrors.
For models equipped with automatic intermittent wipers, turn the wipers off.
Using High Pressure Cleaners
Keep sufficient distance between the cleaning nozzle and the vehicle body.
Take particular care around the windows. Standing too close may cause water to enter the vehicle interior.
Do not spray high pressure water directly into the engine compartment. Instead, use low pressure water and a mild detergent.
Applying Wax
A good coat of automotive body wax helps protect your vehicle’s paint from the elements. Wax will wear off over time and expose your vehicle’s paint to the elements, so reapply as necessary.
ing the Bumpers and Other Resin Coated Parts
If you get gasoline, oil, engine coolant, or battery fluid on resin coated parts, they may be stained or the coating may peel. Promptly wipe it away using a soft cloth and clean water.
Cleaning the Window
Wipe using a glass cleaner.
ing Aluminum Wheels
Aluminum is susceptible to deterioration caused by salt and other road contaminants. When necessary, as early as possible use a sponge and mild detergent to wipe away these contaminants. Do not use a stiff brush or harsh chemicals (including some commercial wheel cleaners). These can damage the protective finish on aluminum alloy wheels, resulting in corrosion. Depending on the type of finish, the wheels also may lose their luster or appear burnished. To avoid water stains, wipe the wheels dry with a cloth while they are still wet
Accessories
When installing accessories, check the following:
Do not install accessories on the windshield. They can obstruct your view and delay your reaction to driving conditions.
Do not install any accessories over areas marked SRS AIRBAG, on the sides or backs of the front seats, on front or side pillars, or near the side windows. Accessories installed in these areas may interfere with proper operation of the vehicle’s airbags or may be propelled into you or another occupant if the airbags deploy.
Be sure electronic accessories do not overload electrical circuits or interfere with proper operation of your vehicle.
Fuses P. 608
Before installing any electronic accessory, have the installer contact a dealer for assistance. If possible, have a dealer inspect the final installation.
#1 Why do the doors lock after I unlocked the doors?
If you do not open the doors within 30 seconds, the doors are relocked automatically for security.
#2 Why does the brake pedal pulsate slightly when applying the brakes?
This can occur when the ABS activates and does not indicate a problem. Apply firm, steady pressure on the brake pedal. Never pump the brake pedal
#3 The rear door cannot be opened from inside the vehicle.Why?
Check if the childproof lock is in the lock position. If so, open the rear door with the outside door handle. To cancel this function, push the lever to the unlock position.

-149743.png) *1, then goes off.
*1, then goes off.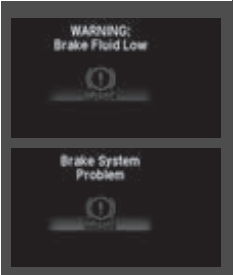


 *1.
*1. 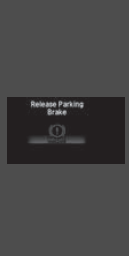


 (select/reset) knob to change the display. Each time you press the
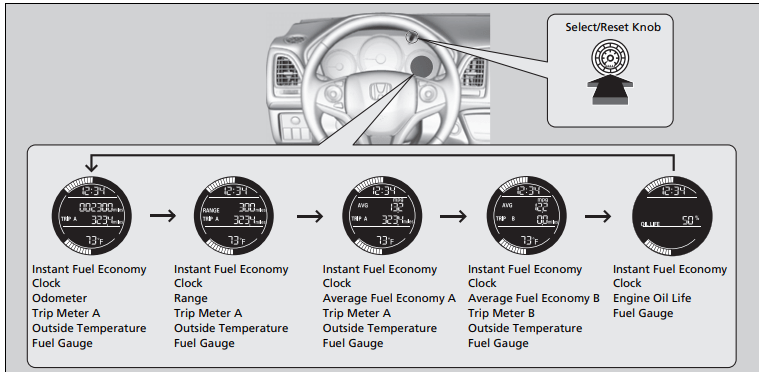

 (information) button to change the display
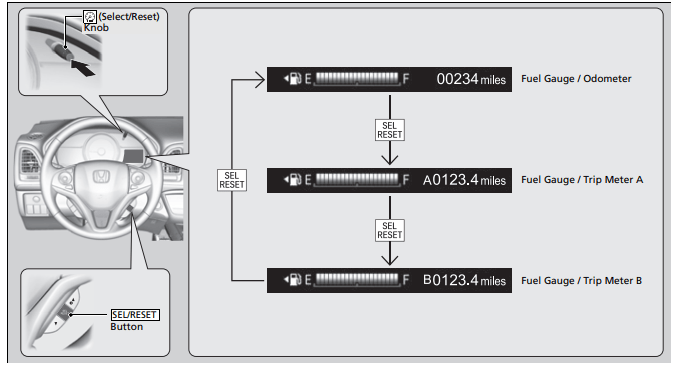
 to select Settings, then press
  .
.
-491765.png)
 (HOME) icon, then select Settings.
-23299.png)
-67859.png)
-803408.png) to change hour, then press
to change hour, then press-60720.png) .
.-779964.png)
-949204.png)
-255099.png)
-625683.png)
-643549.png)
-642468.png)
-5060.png)
-930589.png)
-681318.png)
-392022.png)
-496276.png)
-342521.png)
-876431.png)
-798133.png)
-592564.png)
-839696.png)
-108543.png)
-625512.png)
-173212.png)
-2521.png)
-735495.png)
-411324.png)
-650620.png)
-397066.png)
-854294.png)
-775273.png)
-48162.png)
-214083.png)
-743125.png)
-93658.png)
-573532.png)
-167166.png)
-252048.png)
-212846.png)
-176746.png) Remove the drain bolt and washer from the bottom of the engine, and drain the oil into a suitable container.
Remove the drain bolt and washer from the bottom of the engine, and drain the oil into a suitable container.-824093.png) Remove the oil filter and dispose of the remaining oil.
Remove the oil filter and dispose of the remaining oil.-560779.png)
-309174.png)
-993956.png)
-336855.png)
-243302.png)
-297591.png)
-271984.png)
-924639.png)
-912404.png) Slide the wiper blade out of the holder by pulling the tabbed end out.
Slide the wiper blade out of the holder by pulling the tabbed end out.-739983.png)
-900920.png) Remove the retainers from the rubber blade that has been removed, and mount to a new rubber blade.
Remove the retainers from the rubber blade that has been removed, and mount to a new rubber blade.-379360.png)
-316274.png)
-680744.png)
-993849.png)