Loading ...
Loading ...
Loading ...
6
Get more information and exclusive accessories, visit www.polkaudio.com
INSTALLATION
Out of the box and into the wall, that’s how easy it is to install
Polk RCi Series In-Wall Loudspeakers.
If you intend to do the installation yourself we recommend that
you possess some skill in the proper use of hand and power
tools. You should have a thorough understanding of local building
a
nd fire codes and a familiarity with the area behind the wall
or ceiling into which you plan to install your speakers. Install
speaker wires before installing speakers. Wire meeting appropri-
ate building and fire codes must be used. Use at least 18 gauge
wire or heavier for the utmost in sound quality. Wiring is best
performed by an experienced professional. If you are in doubt
that you possess the necessary skills or tools, consult your Polk
Audio dealer, or a professional installer.
INSTALLATION
L’installation des haut-parleurs Polk RCi Series « In-W all » est
très facile, littéralement « de la boîte au mur ».
Si vous comptez faire l’installation vous-même, vous devez pos-
séder une certaine compétence dans l’utilisation d’outils manuels
et électriques. V ous devez bien connaître le code du bâtiment et
le code des incendies. V ous devez être familier avec l’espace
qui se trouve derrière la surface du mur ou du plafond où vous
désirez installer les haut-parleurs. Installez les câbles avant d’in-
staller les haut-parleurs. Utilisez seulement des câbles conformes
aux codes de bâtiment et des incendies. Utilisez du fil de calibre
18 ou plus gros pour assurer la qualité sonore optimale. Le
filage devrait être confié à un professionnel expérimenté. Si
vous ne croyez pas être assez habile ou ne possédez pas les
outils nécessaires, consultez votre revendeur Polk ou un
installateur professionnel.
YOU WILL NEED:
• Pencil for marking the location of installation
• Keyhole saw, utility knife or material- appropriate incising
implement for cutting drywall or other wall material
•Level
• Screwdriver, preferably powered, with Phillips head bit
• Power drill with appropriate bit
(optional, for starting wall cut)
VOUS AUREZ BESOIN DE:
• Un crayon pour marquer l’endroit de l’installation
• Une scie d’entrée, un couteau tout usage ou un outil
permettant de couper du placoplâtre ou autre
surface de mur
• Un niveau
• Un tournevis avec mèche à tête Phillips
(préférablement électrique)
• Une perceuse électrique avec mèche appropriée
pour entamer l’embrasure (facultatif)
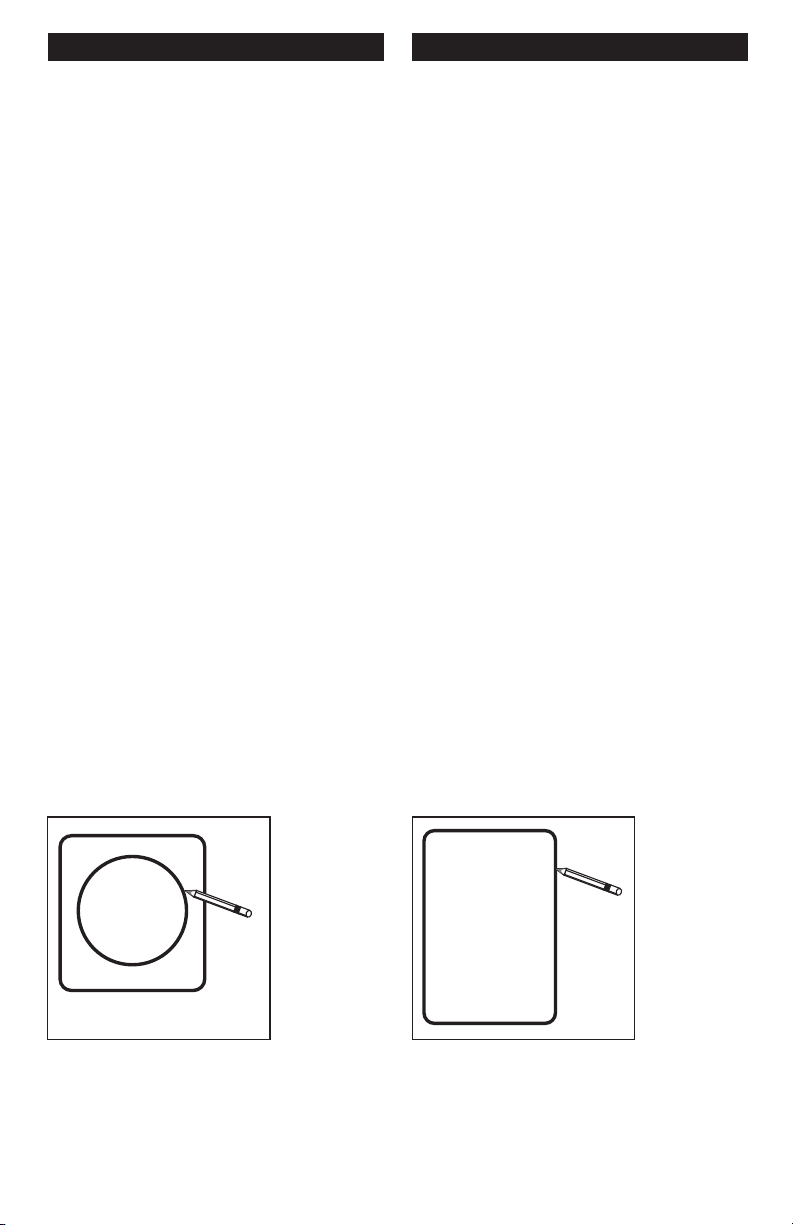
FIGURE 10b
Rectangular Template: Trace around the template.
Plantilla rectangular: Marque alrededor de la plantilla.
Gabarit rectangulaire: Tracez autour du gabarit.
Rechteckige Vorlage: Umranden Sie den äußeren
Rand der Vorlage mit einem
TEMPLATE
FIGURE 10a
Round Template: Trace within the pop-out area.
Plantilla redonda: Marque dentro del área que
se va a desechar.
Gabarit rond: Tracez à l'intérieur du gabarit.
Runde Vorlage: Umranden Sie den inneren,
gestanzten Teil der Vorlage.
POP-OUT AREA
TEMPLATE
Loading ...
Loading ...
Loading ...