Loading ...
Loading ...
Loading ...
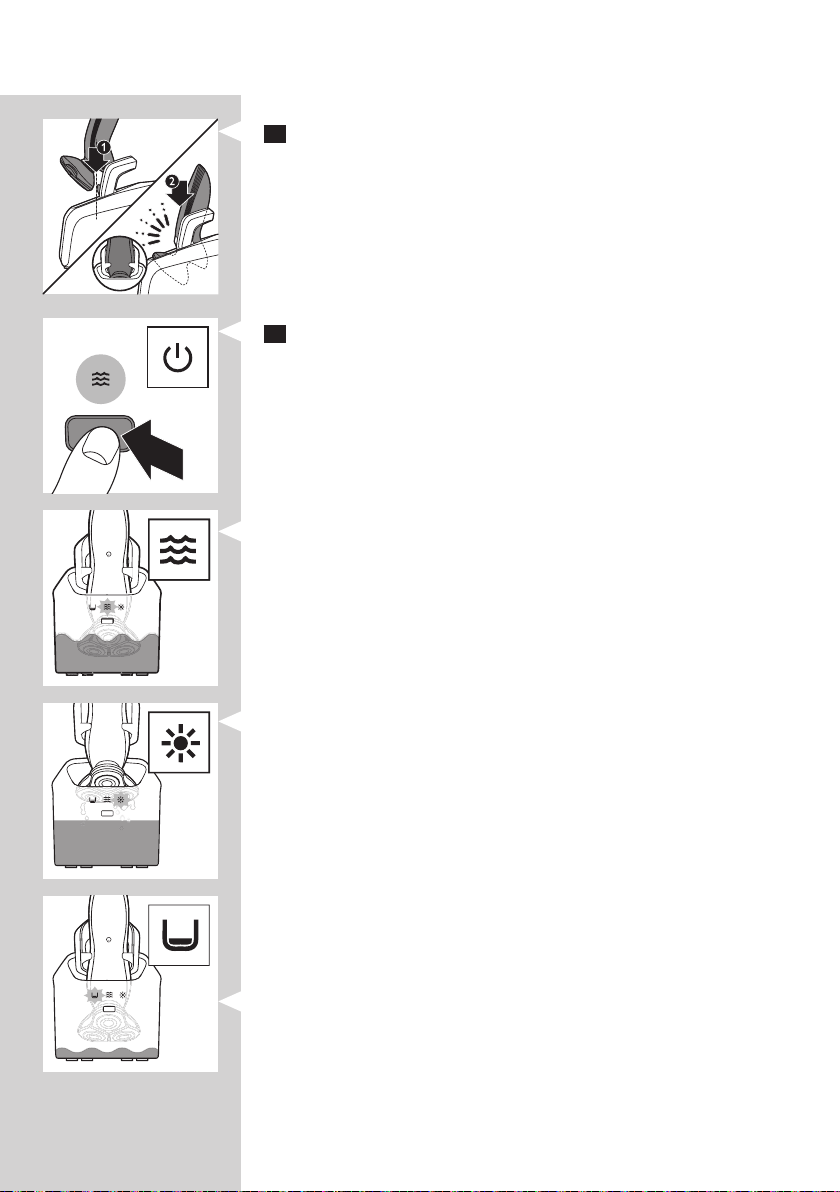
2 Place the shaver body in the holder behind the two clips (1) and
press it down until it locks into place (2).
, The display shows that the shaver is charging (see chapter ‘The
display’).
3 Press the on/off button on the Jet Clean System to start the cleaning
program.
, The shaver display stops showing the charging indication.
, The cleaning light starts to ash and the shaver is automatically
lowered into the cleaning uid.
, The cleaning light ashes throughout the cleaning program, which
takes a few minutes.
, During the rst phase of the cleaning program, the shaver
automatically switches on and off several times and moves up and
down.
, During the second phase of the cleaning program, the shaver is
placed in the drying position, indicated by the ashing drying symbol.
This phase takes approx. 2 hours. The shaver stays in this position
until the end of the program.
, After the cleaning program, the charging indication appears on the
shaver display (see chapter ‘The display’).
Note: If you press the on/off button of the Jet Clean System during the cleaning
program, the program aborts. In this case, the cleaning or drying light stops
ashing and the holder moves to the highest position.
Note: If you remove the adapter from the wall socket during the cleaning
program, the program aborts. The holder remains in its current position. When
you put the adapter back into the wall socket, the holder moves to the highest
position.
- When the cleaning uid drops below the minimum level, the ‘cleaning
chamber empty’ symbol starts to ash and the holder returns to its
starting position.
- If you use the Jet Clean System to clean your shaver every day, you
need to rell the cleaning chamber approx. every 15 days.
ENGLISH 19
Loading ...
Loading ...
Loading ...