Scalding or Electrical Shock Hazard! Make sure the water supply and electrical supply are shut off before installation or service. Electrical Shock/Fire Hazard! Do not allow the electrical and supply lines to touch.
Note: This dishwasher is designed to be enclosed on the top, back and both sides by standard residential kitchen cabinetry.
Select a location as close to the sink as possible for easy access to water supply and drain lines.
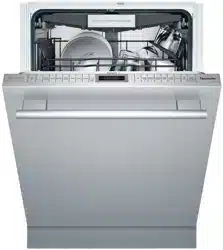
For proper dishwasher operation and appearance, ensure that the enclosure is square and has the dimensions shown.
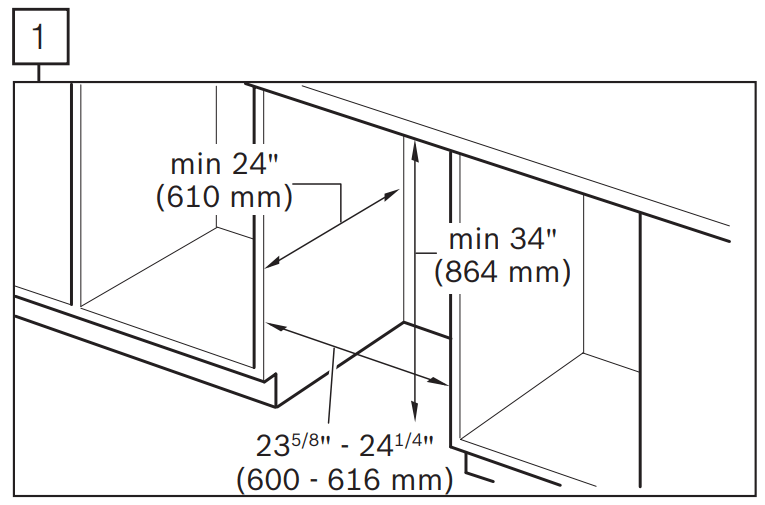
If the dishwasher is to be installed in a corner, ensure that there is adequate clearance to open the door as shown.
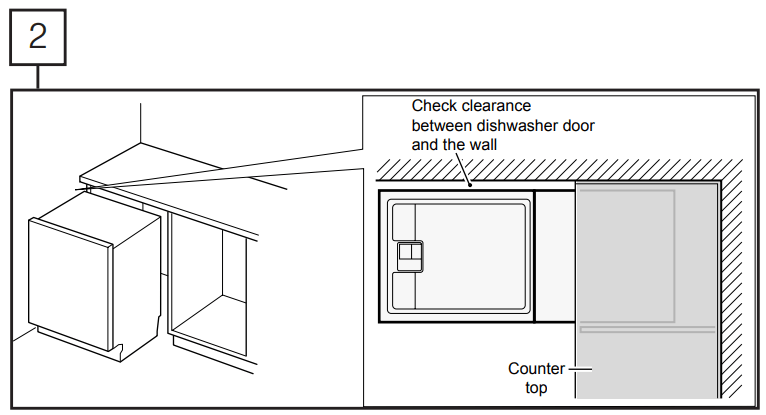
After locating the proper place for your dishwasher, create required openings in your cabinets in order to allow for water, drain and electrical lines on the appropriate side.
The holes should be cut within the 7 x 2.5" area shown.
If the opening is made through wood, sand it smooth.
If the opening is made through metal, use the Edge
Protector with Power Cord clips Kit SMZEPCC1UC, or other approved method to protect wiring from damage.
Pull the drain hose out of the packaging base as shown.
Set toe panel aside for later use.
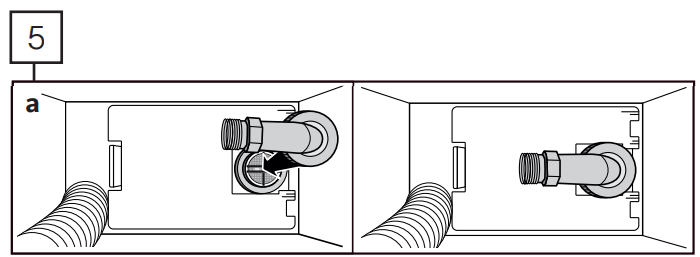
Attach elbow connection to dishwasher as shown. Do not overtighten.
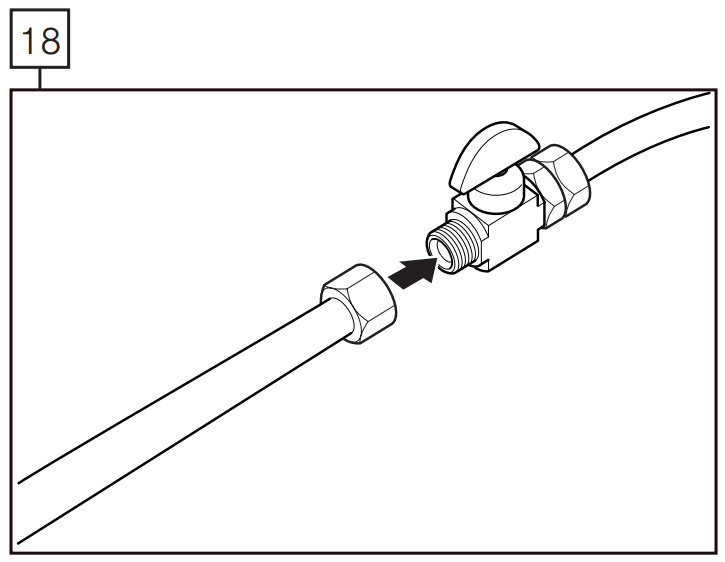
Attach hot water line to elbow.
Note: For a easier access to the hot water inlet connection, tip unit slightly forward with someone holding the front side of the unit.
WARNING DO NOT tip the dishwasher too far forward! This could cause serious injury or death. Always have an adult hold the front side if the unit is tipped.
NOTICE : Avoid cross-threading! It will cause leaks. After attaching hose, turn on water and check for leaks.
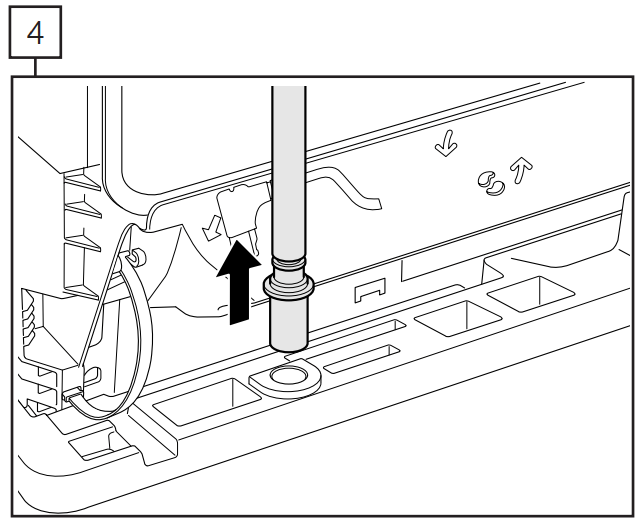
Remove the hose clip at the back of the dishwasher as shown. The hose clip may be used later to hold the drain hose inside your cabinet.
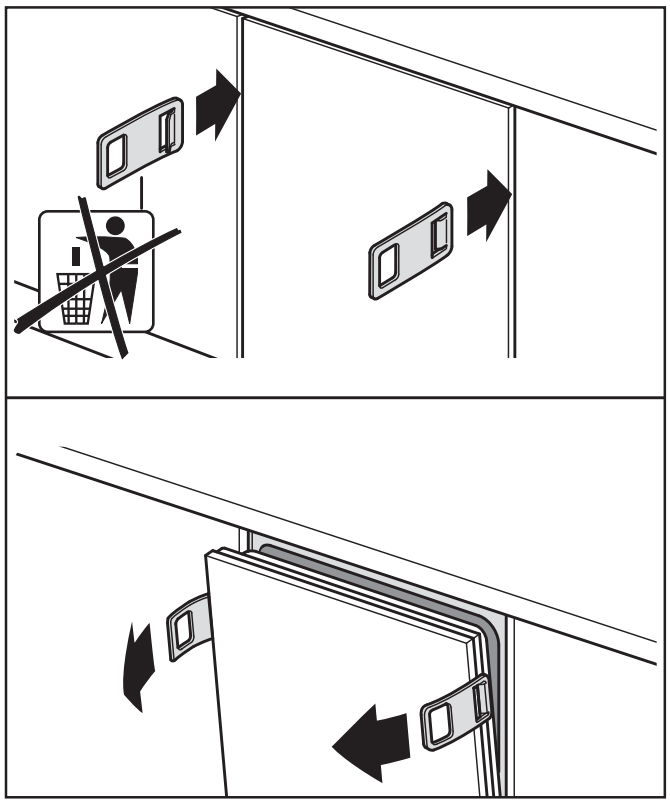
Installation of Mounting Brackets
Avoid Tip Over Hazard! Do not use the dishwasher until it is completely installed. When opening the door on an uninstalled dishwasher, carefully open the door while supporting the rear of the unit. Failure to follow this warning can result in serious injury.
Note: Before installing the supplied counter top mounting brackets, decide which method of securing the dishwasher into its enclosure will be used.
Once the mounting brackets are installed on the dishwasher, removing them is difficult and will damage the mounting brackets and the dishwasher.
If you have a Fully Integrated Panel, do not attach mounting brackets until after attaching the panel to the door.
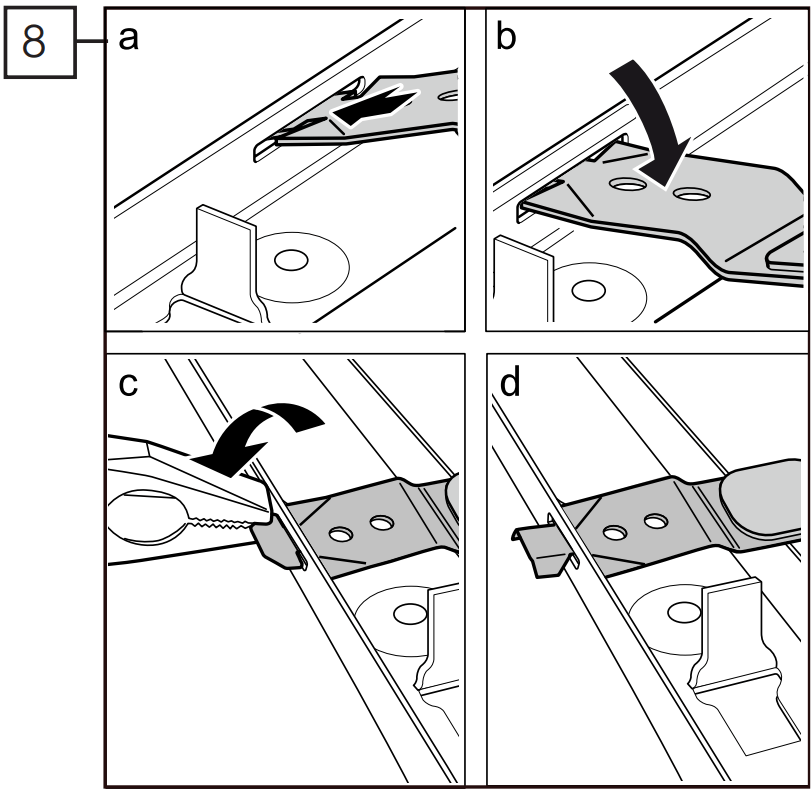
Top Mount is used for counter tops made of wood or other materials that can be easily drilled. If you have solid surface, marble, granite, or other very hard countertops, skip to step 9 now.
If insulation is covering the area in 8a, fold it back.
Orient the mounting brackets (C) for top mounting as shown in 8b.
Using pliers, bend side flanges down as shown in 8c and d so the bracket will not slip out of slot in frame. Do not attach to cabinet yet.
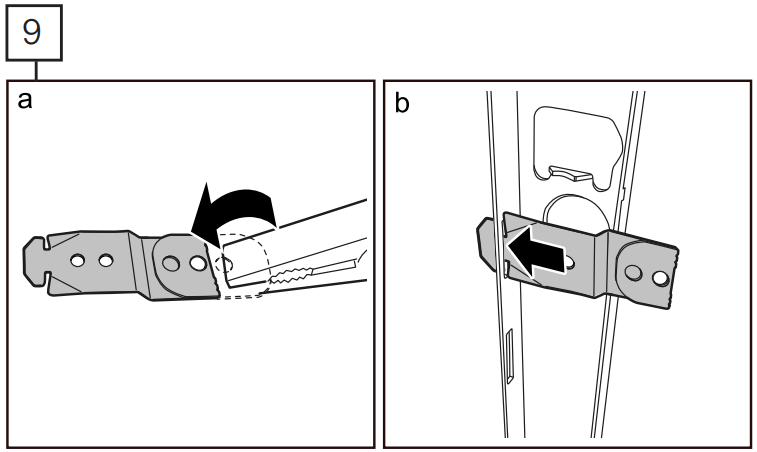
Side Mount is used for counter tops made of marble, granite, or other very hard materials that cannot be easily drilled.
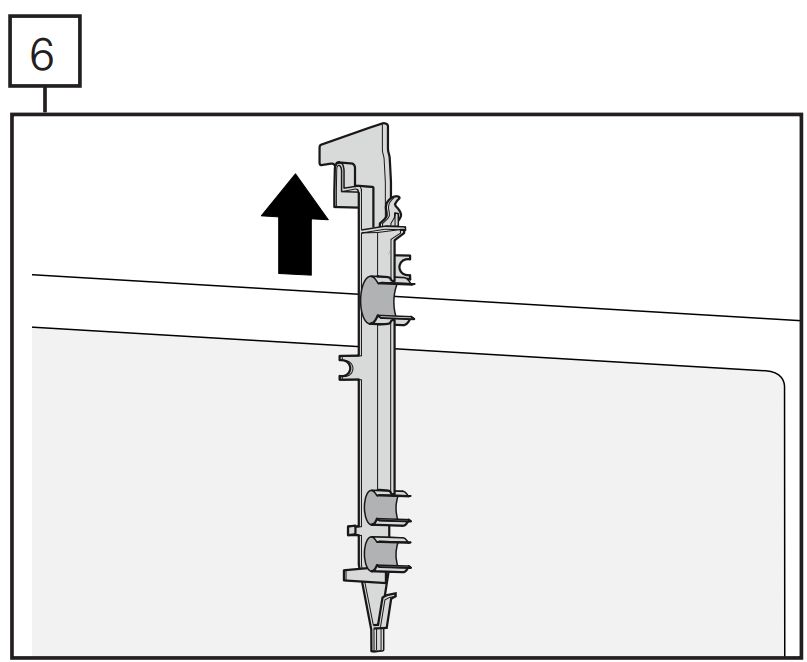
Grasp mounting bracket (C) with pliers and fold bracket at the perforation over onto itself as shown in 9a.
Slip bracket flange through side slots in frame as shown in 9b.
Using pliers, bend side flanges down as shown in 8c and d so the bracket will not slip out of slot in frame. Do not attach to cabinet yet.
Positioning the Dishwasher
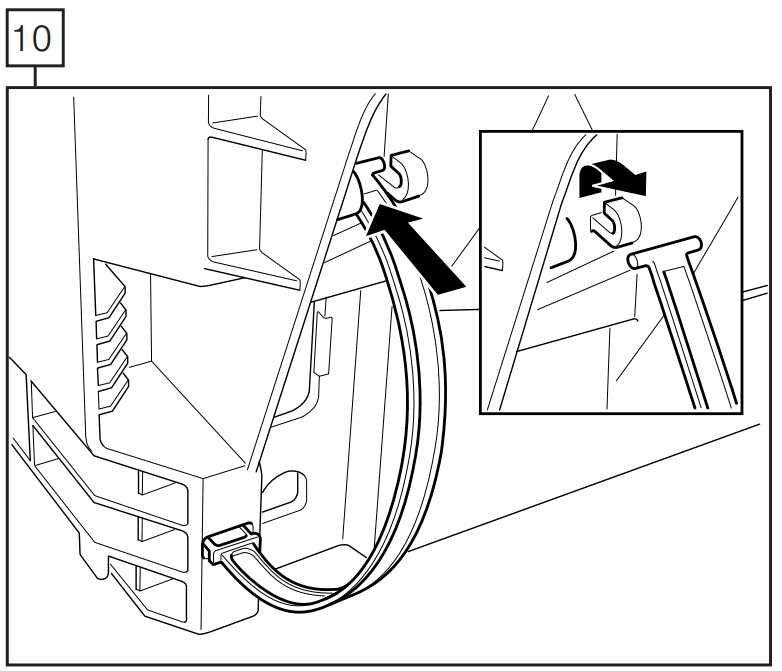
If your sink is to the right side of where you are installing the dishwasher, you will need to reposition the hoses and power cord behind the dishwasher before installing.
To do so, unhook the strap that the hoses are running through on the back of the dishwasher base and position them per your requirements.
If your sink is to the left side, leave the hoses and power cord as they came.
Reposition the hoses so they run through the strap on the other side.
Be sure to snap the strap back in place to secure the hoses as shown.
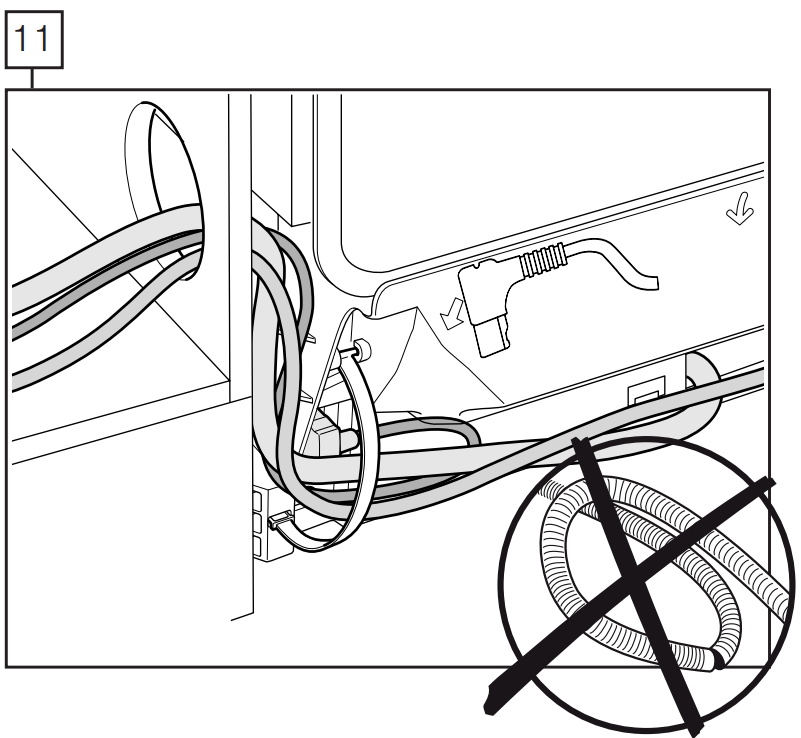
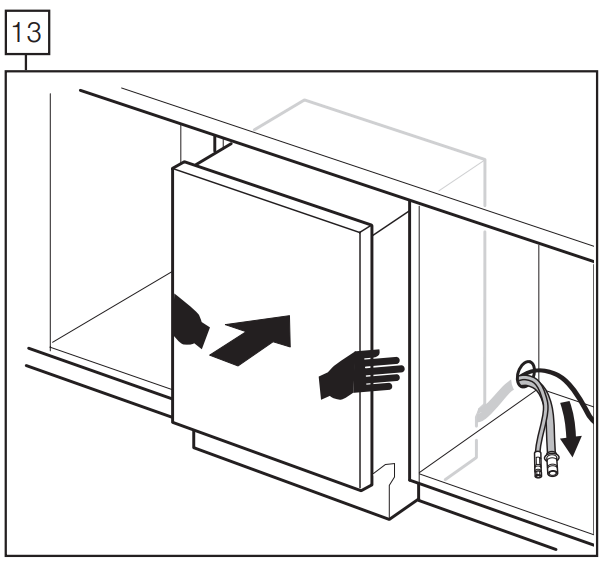
NOTICE : Be sure to pull the hoses all the way into the adjacent cabinet while pushing the dishwasher in. Otherwise, the hoses can fold, kink or break, potentially causing obstructions or leaks.
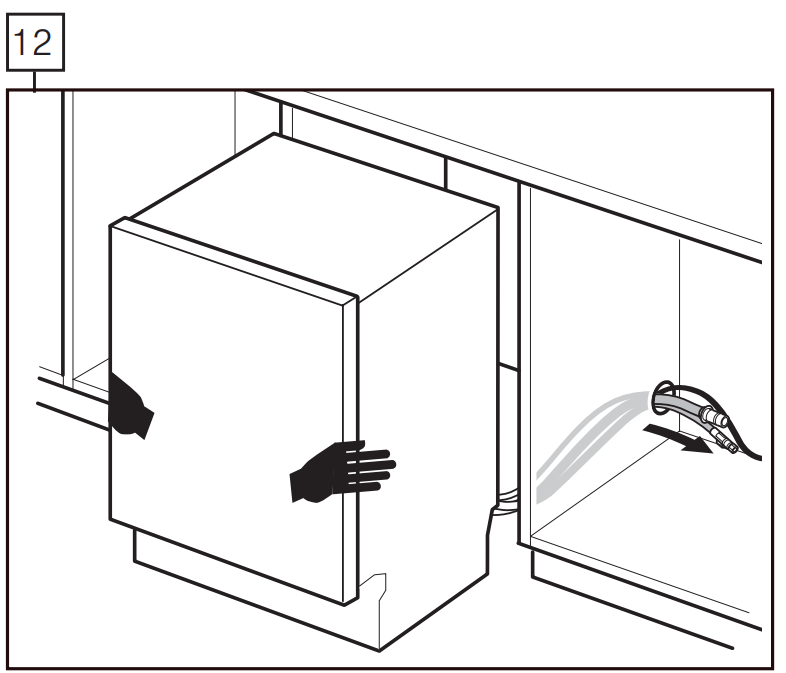
To avoid scratching the floor, use floor protection and caution when sliding the dishwasher into the cabinet. Use hands on both sides of dishwasher to push evenly.
Pull water inlet, drain hose and power cord through the hole in cabinet as shown.
Push the unit 2/3 of the way into the opening and stop.
Reach into adjacent cabinet and pull hoses and excess power cord completely out so they do not get kinked.
Push the unit in until flush with cabinet door.
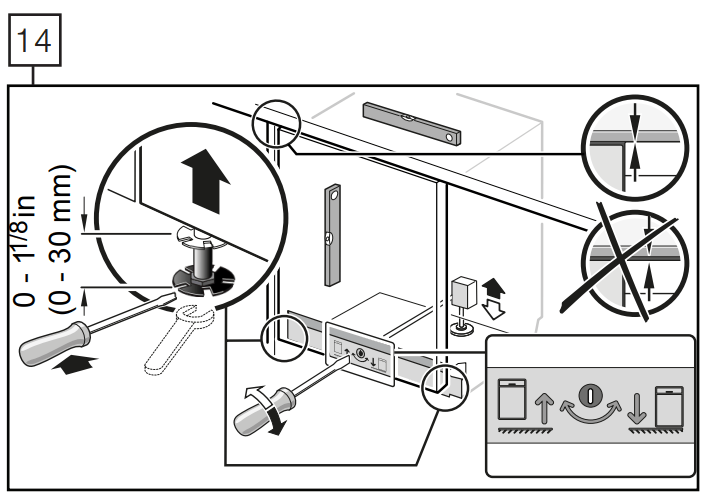
After pushing the unit in, adjust the legs as shown to raise the unit so it is flush with the counter.
Level side to side by turning feet clockwise to raise or counter-clockwise to lower front of the unit as shown.
Place a level on the door to see if the unit is level front to back. To make adjustments, turn the center screw clockwise to raise or counter-clockwise to lower the back.
Place a level on the the counter-top to be sure the unit isn’t pushing up against the counter.
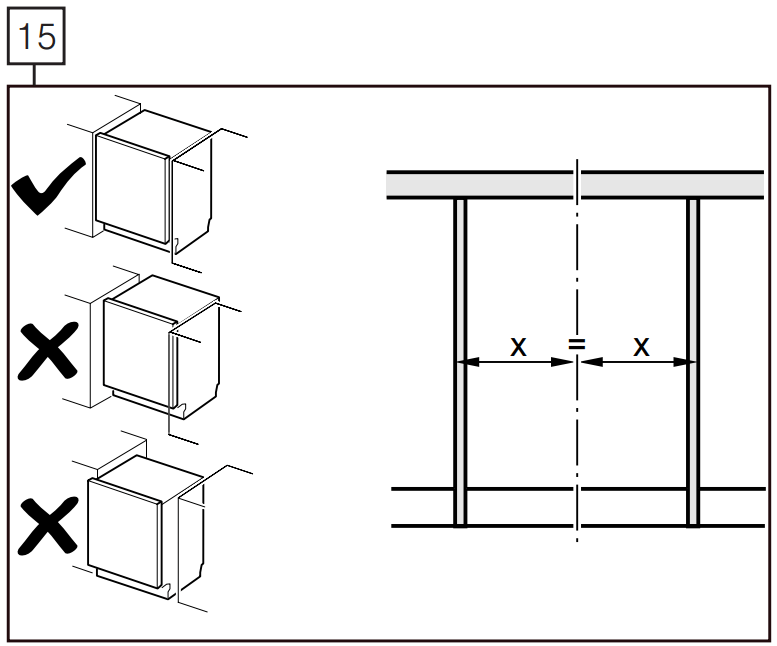
Center the dishwasher in the opening before securing it to your cabinet or counter top as shown.
Water Inlet Connection
WARNING
SCALDING HAZARD!Do not perform any work on a pressured hot water line. Serious injury could result. Only qualified plumbers should perform plumbing work. Do not attempt any work on the dishwasher hot water supply plumbing until you are certain the hot water supply is shut off.
NOTICE : Temperatures required for soldering and sweating will damage the dishwasher. If plumbing lines are to be soldered or sweated, keep the heat source at least 6 inches (152.4 mm) away from the dishwasher.
HOT WATER SUPPLY
The hot water heater should be set to deliver approximately F (49° C) water to the dishwasher. Water that is too hot can cause some detergents to lose effectiveness. Lower water temperatures will increase run times. The hot water supply pressure must be between 15 - 145 psi (1 - 10 bar).
IMPORTANT NOTES:
If using a solder joint instead of a compression fitting, be sure to complete all solder connections before connecting the water supply line to the dishwasher.
Make sure there are no sharp bends or kinks in the water line that might restrict water flow.
Always use appropriate seals when making plumbing connections.
Before connecting the water supply line to the dishwasher, flush the incoming water line for approximately 5 minutes to clear any foreign material.
Properly tighten all water connections. Not doing so could result in a leak.
Check local plumbing codes for approved plumbing procedures and accessories. All plumbing should be done in accordance with national and local codes.
If using copper tubing or other material not depicted in this manual for water supply, defer to a licensed plumber for proper installation.
Connect the dishwasher water supply line to the water shut off valve. If one isn’t already in the supply line, install one (not provided).
You will need to use an approved dishwasher water supply line with the correct fittings for this connection.
After all connections are made, turn on the hot water and check for leaks.
Drain Connection
IMPORTANT NOTES about your drain connection:
If local ordinance require an air gap, install it according to the manufacturer’s instructions.
If the dishwasher drain hose is to be connected to a disposer dishwasher drain connection, remove the plug from the disposer’s dishwasher drain connection.
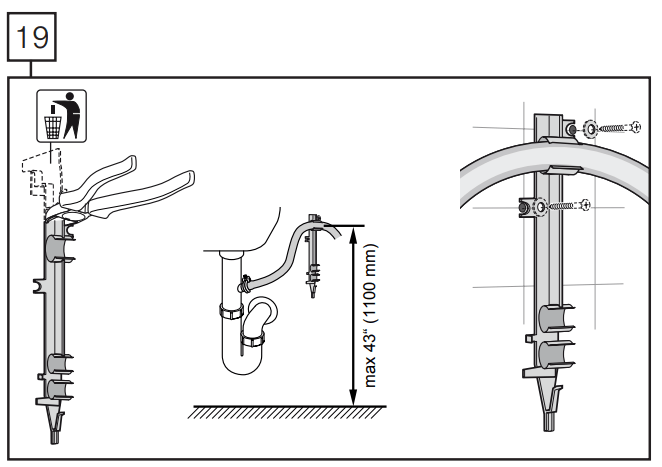
The dishwasher drain hose must have one place along its length that is securely attached 33" (508 mm) above the floor.
The drain hose length can be extended if necessary. The maximum length of the drain hose, including the hose leading to the air gap, is 150" (380 cm).
You may use the piece you removed in Step 7 to attach to the inside of the adjacent cabinet and hang the drain hose from as shown (screws are not supplied) in place of using a Nonmetallic Tie as pictured in the next illustrations. Do not exceed 43” in drain hose height.
The dishwasher drain hose must be installed with a portion of it at least 33” (84 cm) off the floor; otherwise the dishwasher may not drain properly.
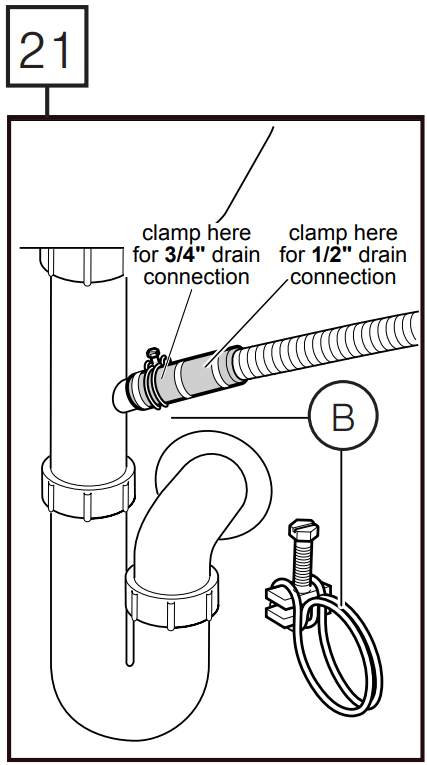
Note: Place hose clamp (C) around end of drain hose BEFORE connecting to the plumbing.
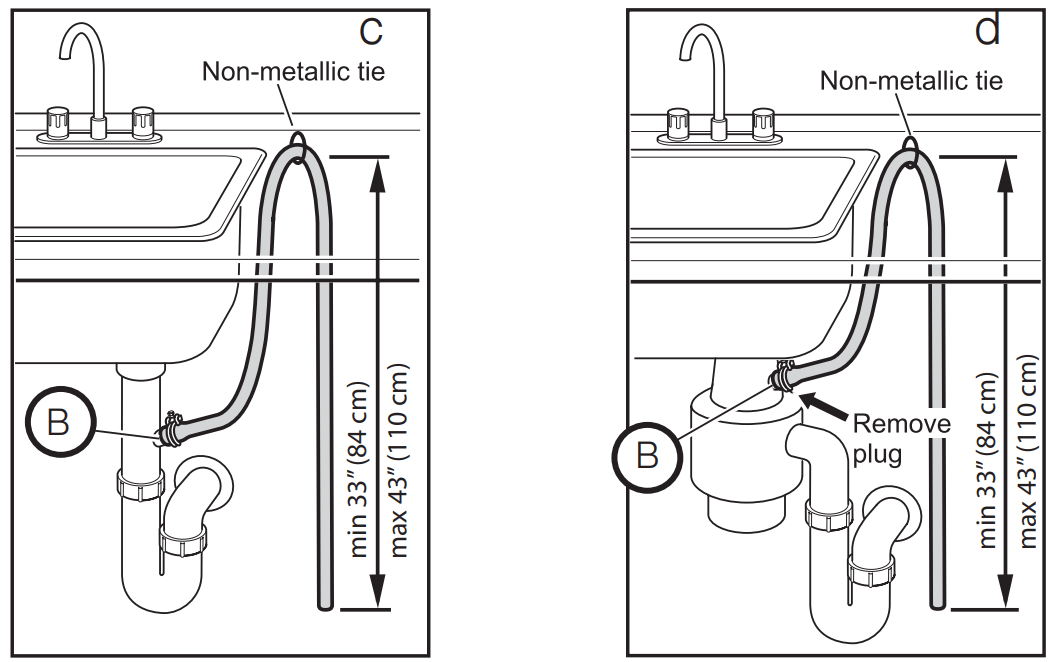
• The dishwasher drain hose may be connected to the drain plumbing using an air gap in one of two ways: - Connect to the under sink dishwasher drain connection (20a). - Connect to a disposer dishwasher drain connection (20b).
• The dishwasher drain hose may be connected to the drain plumbing using a high loop in one of two ways: - Connect to the under sink dishwasher drain connection (20c). - Connect to a disposer dishwasher drain connection (20d).
Use the clamp provided (C) to attach the drain hose to the house plumbing as shown.
Attaching the Toe Panel
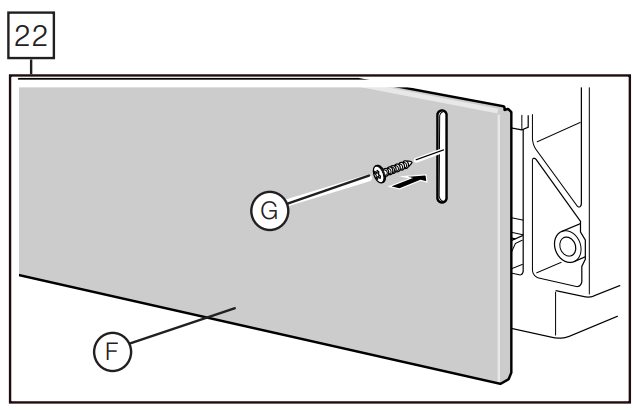
If your dishwasher came with a slotted toe panel (F) only, follow these instructions; otherwise skip to 23 now.
Note: If using the slotted toe panel shown in 22 above, then metal mounting brackets shown in 23 are not required.
Position the slotted toe panel (F) on the dishwasher. Allow it to rest on the floor.
Attach using screws (G) as shown. Use only the supplied screws to avoid damaging the dishwasher. The toe panel should be flush with the floor. Your installation is complete!
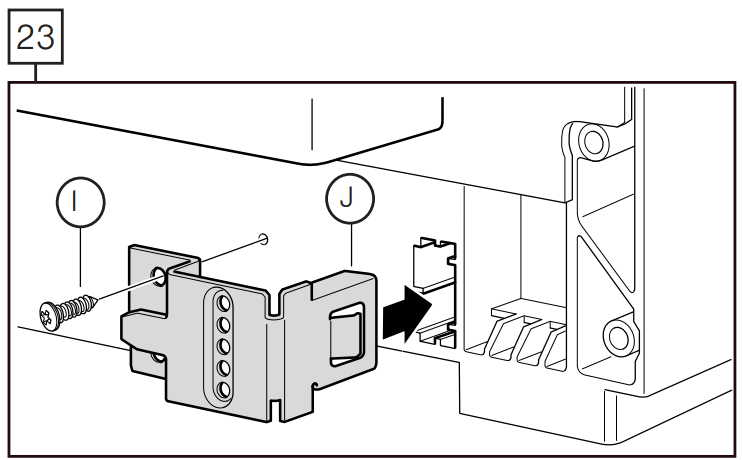
If your dishwasher came with a non-slotted toe panel (H) and toe panel brackets (J) follow these instructions; otherwise skip to 25 now.
Plug metal brackets (J) into openings on both sides of the base as shown.
Use screw (I) to mount metal brackets to the base as shown.
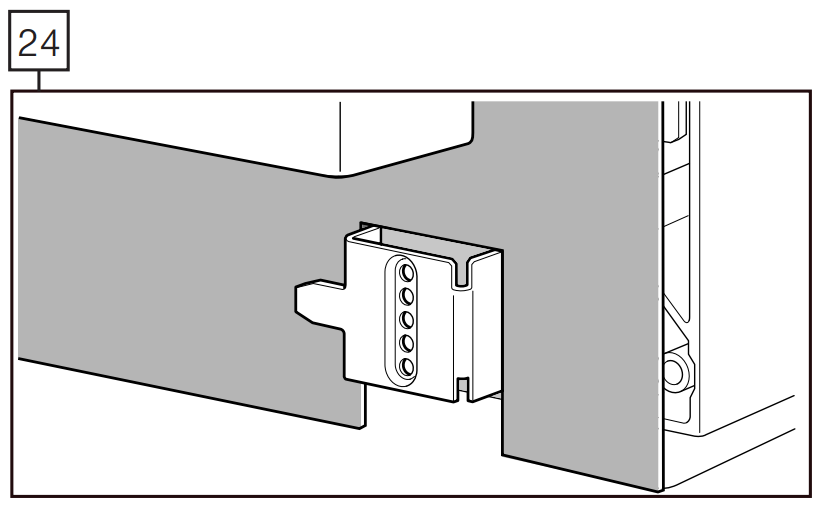
Tuck the pre-attached rubber apron behind the fingers on the metal brackets as shown.
Slide metal toe panel into position with folded hem edge at the top. Make sure the bottom of the toe panel is flush with the floor. Use screw (I) to mount the toe panel through the hole it matches up with on the metal brackets (J) as shown.
Note: The toe panel height can be adjusted by screwing into a different hole in the bracket.
Check for correct fit of apron by opening the door. Ensure the apron does not bind up and can freely move up and down behind the toe panel. Your installation is complete!
Fully Integrated Door Panel
Please see the included instructions and template for installing a fully integrated door panel.
Also included - two red door handles. If your door panel does not have a handle, use these handles to open the door in the event of a power outage that would cause the ‘push to open’ feature not to function.