
6
en
When using electrical appliances, basic safety precautions should always be followed, including the following:
• Readallinstructions.
• Donottouchhotsurfaces.Usehandlesandknobs.
• Toprotectagainstre,electricalshockandpersonalinjury,donotimmersecord,plugorapplianceinwaterorother
liquid.
• Neverallowtheappliancetobeusedbychildren.
• Unplugfromtheoutletwhennotinuseandbeforecleaning.Allowtocoolbeforettingortakingoparts,and
beforecleaningtheappliance.
• Donotoperatewithadamagedcordorplug,oraftertheappliancemalfunctions,orhasbeendamagedinany
manner.Returntheappliancetothenearestauthorizedservicefacilityforexamination,repairoradjustment.
• Theuseofaccessoryattachmentsorsparepartsnotrecommendedbytheappliancemanufacturermayresultin
re,electricalshockorpersonalinjury.
• Donotuseoutdoors.
• Donotletthecordhangovertheedgeofthetableorcounter,ortouchhotsurfaces.
• Donotplaceonornearahotgasorelectricalburner,orinaheatedoven.
• Plugcordintothewalloutlet.Todisconnect,turnanycontrolto“o”,thenremoveplugfromwalloutlet.
• Donotusetheapplianceforotherthantheintendeduse.Thisapplianceistobeutilizedfordomesticuseonly.Any
otheruseistobeconsideredimproperand,therefore,dangerous.
WARNING: To reduce the risk of re or electric shock, do not remove the cover. Don’t attempt to repair or
modify the machine, doing so will void the warranty. Repair should be done by authorized service person-
nel only!
SAVE THESE INSTRUCTIONS
ThisPRoDUcTisfoRhoUseholDUseoNly
SHORT CORD INSTRUCTIONS
- Ashortpowercordisprovidedtoreducerisksresultingfrombecomingentangledinortrippingoveralonger
cord.
- longer,detachablepowersupplycordsorextensioncordsareavailableandmaybeusedifcareisexercisedin
theiruse.
- ifanextensioncordisused,themarkedelectricalratingshouldbeatleastasgreatastheelectricalratingofthe
appliance.iftheapplianceisprovidedwith3-wire,groundingtypecord,theextensionshouldbeaGRoUNDiNG
TyPe3-WiRecoRD.Thelongercordshouldbearrangedsothatitwillnotdrapeoverthecounter-toportabletop
whereitcanbepulledonbychildrenortrippedover.
- yourproductisequippedwithapolarizedalternatingcurrentlineplug(aplughavingonebladewiderthanthe
other).Thisplugwilltintothepoweroutletonlyoneway.Thisisasafetyfeature.ifyouareunabletoinsertthe
plugfullyintotheoutlet,tryreversingtheplug.iftheplugshouldstillfailtot,contactyourelectriciantoreplace
yourobsoleteoutlet.Donotdefeatthesafetypurposeofthepolarizedplug.
IMPORTANT SAFEGUARDS

7
en
Read this instruction booklet carefully before installing
and using the appliance. This is the only way to ensure
the best results and maximum safety for the user.
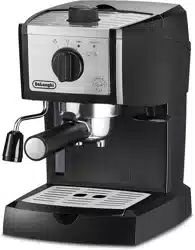
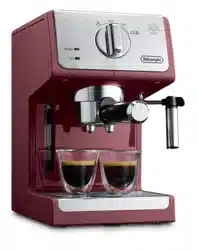
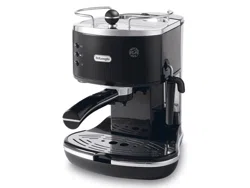
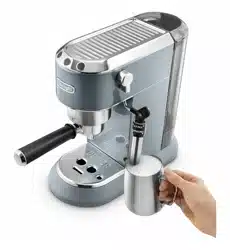
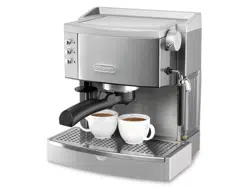
Description (seepage3)
The terminology below willbe used repeatedly on the fol-
lowingpages.
1 cupstoragetray
2 steamknob
3 Waterlevelindicator
4 Powercord
5 Watertank
6 Patentedcappuccinosystemfrother
7 steamtube
8 oN/offbutton
9 coee/hotwaterbutton
10 steambutton
11 oN/offindicatorlight
12 Preheatingcompletedindicatorlight
13 steamindicatorlight
14 smalllterfor1cupgroundcoeeor1pod
15 largelterfor2cupsgroundcoee
16 Patenteddual-functionlterholder
17 Tamper
18 Boiler outlet
19 Measuring scoop
20 Removabledriptray
21 Removablecupsupport
22 cuptraybars
Attention: Before using the machine for the rst time
all accessories and internal circuits must be washed
by making at least ve cups of coee without using
ground coee.
Description · Safety Warnings · Installation
Safety Warnings
• Thisapplianceisdesignedto“makeespressocoee”and
“hotdrinks”.Usewithcaretoavoidscaldsfromthewater
andsteamjetsorthroughincorrectuse.
• Nevertouchhotparts.
• Afterremovingthepackaging,makesuretheproductis
complete.ifindoubt,donotusetheapplianceandcon-
tactaDe’longhicustomerservicerepresentative.
• The packing elements (plastic bags, polystyrenefoam,
etc.)shouldbekeptoutofreachofchildrenastheyarea
safetyhazard.
• This appliance is intended for domestic use only. Any
otheruseisconsideredimproperandthusdangerous.
• Themanufacturercannotbeheldresponsibleforanyda-
magecausedthroughincorrect,wrongorunreasonable
use.
• Nevertouchtheappliancewithwetordamphands.
• Neverletchildrenusetheappliancewithoutsupervision.
• Neverallowchildrentoplaywiththeappliance.
• shouldtheappliancebreakornotfunctioncorrectly,turn
itoanddonottamperwithit.forallrepairs,contact
authorizedservicecentersonlyandinsistontheuseof
originalspareparts.
failuretorespecttheabovecouldreducethesafetyofthe
appliance.
• Thepowercordforthisappliancemustnotbereplacedby
theuserasthisoperationrequirestheuseofspecialtools.
in the eventof damage, contact an authorized service
centeronlytoavoidallrisks.
Installation
• Placetheapplianceonaworksurfaceawayfromwater
faucetsandsinks.
• checkthatthevoltageoftheoutletcorrespondstothe
value indicated on the appliance rating plate. connect
theappliancetoanecientlygroundedelectricalsocket
witha minimum ratingof 10Aonly.Themanufacturer
declines all liability for any accidents caused by the ab-
senceofanecientgroundsystem.
• if the plugtted to the appliancedoes notmatchthe
electricalsocket,havetheoutletreplacedwithasuitable
typebyaqualiedelectrician.
• Neverinstall the appliancein environments where the
temperaturemayreach0°c(32°f)orlower(theapplian-
cemaybedamagedifthewaterfreezes).

8
en
Filling the water tank
Removethe watertank bypulling sideways and lifting the
intaketubesoutofthewater(g.1).
Rinseandllwithcleancoldwater(g2).checkthewater
levelbyviewingtheoatingball.Replacethewatertankin
thehousing,makingsurethetubesareinthewater.
Thewatertankcanalsobelledbyextractingitjustenoughto
pourinwaterdirectlyfromajug.
Preheating the coee unit
Toobtainespressocoeeattherighttemperature,thecoee
machinemustbepreheated.itis,therefore,recommendedto
presstheoN/offbutton(g.3)atleast15minutesbeforepre-
paringtheespresso,makingsurethelterholderisattached
totheappliance(checkthatthesteamknobisclosed).
Toattachthelterholder,positionitundertheboileroutlet
withthehandletowardstheleft(g.4),pushitupwardswhile
atthesametimerotatingthehandletowardstheright.Rotate
rmly.Waitfor15minutes,thenmakethecoeeasdescribed
inthefollowingsection.
Alternatively,youcanpreheatmorerapidlybyproceedingas
follows:
1. PresstheoN/offbutton(g.3)andattachthelterhol-
dertotheappliancewithoutaddinggroundcoee.
2. Placeacupunderthelterholder.Usethesamecupthat
willbeusedtopreparethecoeeinordertopreheatit.
3. WaitfortheoKindicatorlighttocomeon(g.5),then
immediatelypressthecoeebutton(g.6).Runthewa-
terountiltheoKindicatorlightgoesout,theninterrupt
deliverybypressingthecoeebuttonagain(g.6).
4. emptythecup,detachthelterholderandemptyoutthe
hotwater.
(itisnormalforasmallandharmlesspuofsteamtobeemit-
tedwhenremovingthelterholder).
How to prepare Espresso coee using the patented
lter holder for ground coee
1. Afterpreheatingtheapplianceasdescribedinthepre-
vioussection,placethegroundcoeelterinthelter
holder. Make sure the tab is correctly inserted in the
slotasshowning.7,otherwiseyouwillnotbeable
toattachthelterholdertotheappliance.Theappliance
comeswithtwolters;thesmallltershouldbeusedfor
onecoeeandthelargelterfortwocoees.
2. Tomakeasinglecoeeonly,placeonelevelmeasureof
groundcoee,about0.24ounces(7grams),inthelter
(g.8).Topreparetwocoees,placetwolooselylled
measuresofgroundcoee(0.42ounces/6+6grams)in
thelter. filltheltera little at a timetopreventthe
groundcoeefromoverowing.
iMPoRTANT:to ensure correct operation, before placing the
groundcoeeinthelterholder,cleanthelterofresiduesof
groundcoeefromthepreviousinfusion.
3. Distributethegroundcoeeevenlyandtamplightlywith
thetamper(g.9).
Note:correcttampingofthegroundcoeeisessentialto
obtainagoodespresso.iftampingisexcessive,espresso
deliverywillbeslowandthecremawillbedark.iftam-
pingistoolight,coeedeliverywillbetoorapidandthe
frothwillbeskimpyandlightcolored.
4. Removeanyexcesscoeefromtherimofthelterholder
andattachtotheappliance.Rotatermly(g.4)toavoid
waterleakingout.
5. Placethecuporcupsunderthelterholderspouts(g.
10).itisrecommendedtoheatthecupsbeforemaking
thecoeebyrinsingthemwithalittlehotwaterorpla-
cingthemtowarmonthecupstoragetrayforatleast
15-20minutes(g.26).
6. MakesuretheoKindicatorlight(g.5)ison(ifitiso,
waituntilitcomeson),thenpressthecoeebutton(g.
6).oncetherequiredquantityofespressohasbeenob-
tained,interruptdeliverybypressingthecoeebutton
again(g.6).
7. Toremovethelterholder,rotatethehandlefromright
toleft.
iMPoRTANT: to avoidsplashes, never remove the lter
holderwhiletheapplianceisdeliveringespresso.
8. Todisposeoftheusedcoee,lockthelterinplaceusing
the lever incorporated in the handle then empty the
grounds by turning the lter holder upside down and
tapping(g.11).
9. Toturnthecoeemachineo,presstheoN/offbutton
(g.3).
IMPORTANT:Thersttimetheapplianceisused,allaccesso-
riesmustbewashedthoroughly.
How to prepare Espresso coee using pods
1. Preheattheapplianceasdescribedinthesection“PRehe-
ATiNGThecoffeeUNiT”,makingsurethelterholderis
attached.
Note:usepodsconformingtotheesestandard,indicatedon
thepackbythefollowingsymbol:
How to make Espresso coee

9
en
Theesestandardisasystemacceptedbyleadingpodprodu-
cersandenables espressocoeetobe preparedsimplyand
cleanly.
2. Placethesmall1cupgroundcoeeorpodlterinthe
lterholder,makingsurethelteriscorrectlyinsertedin
theslotasshowning.7.
3. insertapod,centeringitascloseaspossibleonthel-
ter(g.12).Alwaysfollowtheinstructions on the pod
packagingtopositionthepodontheltercorrectly.
4. Attachthelterholdertotheappliance.Alwaysrotateas
farasitwillgo(g.4).
5. Proceedasinpoints5,6and7intheprevioussection.
How to make Cappuccino
1. Preparetheespressocoeeasdescribedintheprevious
section,usingasucientlylargecup.
2. Pressthesteambutton(g.13)andwaitforthesteam
indicatorlighttocomeon(g.13).TheoKindicatorlight
indicatesthattheboilerhasreachedtheidealtempera-
tureforsteamproduction.
3. inthemeantime,llacontainerwithabout3.5ounces
(100grams)ofmilkforeachcappuccinotobeprepared.
Themilkmustbeatrefrigeratortemperature(nothot!).
inchoosingthesizeofthecontainer,bearinmindthat
themilkincreasesinvolumeby2or3times.
Note: It is recommended to use skim milk at refrigera-
tor temperature.
4. Placethecontainerwithmilkunderthecappuccinofro-
ther.
5. Dipthecappuccinofrotherintothecontainerwithmilk
(g.14),takingcarenottoimmerse the raisedlineon
thecappuccinofrother(indicatedbythearrowing.15).
Turnthesteamknobatleastahalfturncounter-clockwi-
se(g.16).steamisgivenobythecappuccinofrother,
givingthemilkacreamyfrothyappearance.Toobtaina
creamierfroth,dipthecappuccinofrotherintothemilk
androtatethecontainerwithslowmovementsfromthe
bottomupwards.
6. Whentherequiredtemperatureisreached(140°f/60°c
isideal),interruptsteamdeliverybyrotatingthesteam
knobclockwiseandatthesametimepressingthesteam
button(g.13).
7. Pourthefrothedmilkintothecupcontainingtheespres-
so coee preparedpreviously.Thecappuccino is ready.
sweetentotasteandifdesired,sprinklethefrothwitha
littlecocoapowder.
Note: To prepare more than one cappuccino, rst make
all the espressos then at the end prepare the frothed
milk for all the cappuccinos.
IMPORTANT: Always clean the cappuccino frother after
use. Proceed as follows:
1. Dischargealittlesteamforafewsecondsbyturningthe
steamknobcounter-clockwise(g.16).Thisemptiesany
milkleftinsidethesteamtube.
IMPORTANT: It is recommended to follow this pro-
cedure each time you make cappuccino to avoid
milk stagnating in the steam tube.
2. With one hand, hold the steam tube rmly and with
the other unscrew the cappuccino frother by rotating
clockwiseandpullingdownwards(g.17).
3. Remove the nozzle from the steam tube by pulling it
downwards(g.18).
4. Washthecappuccinofrotherandsteamnozzlethorou-
ghlywithwarmwater.
5. Makesurethetwoholesindicatedbythearrowsing.19
arenotblocked.ifnecessary,cleanwithapin.
6. Replacethesteamnozzlebyinsertingitontothesteam
tubeandrotatingrmlytowardsthetopofthetube.
7. Replacethecappuccinofrotherbyinsertingitandrota-
tingcounter-clockwise.
Hot water production
1. TurntheapplianceonbypressingtheoN/offbutton(g.
3).WaituntiltheoKindicatorlightcomeson(g.5).
2. Placeacontainerunderthecappuccinofrother.
3. Pressthecoeebutton(g.6)andatthesametimeopen
thesteamknob.hotwaterisdeliveredfromthecappuc-
cinofrother.
4. Tointerruptdeliveryofhotwater,closethesteamknob
byrotatingclockwiseandpressthecoeebuttonagain
(g.6).
Note: Maximumdeliveryof60secondsisrecommended.
Cleaning and maintenance
Beforecleaningtheoutsideoftheappliance,alwaysturno,
unplugfromtheoutletandallowtocool.
Cleaning the lter holder for ground coee
About every 200 coees, clean the lter holder for ground
coeeasfollows:
• Removethelterfromthelterholder.
• cleantheinsideofthelterholder.Neverwashinadi-
shwasher.
• Removethecap(g.20)byunscrewinginthedirection
indicatedbythearrowonthecap.
• Removethelterfromthecontainerbypushingitfrom
thecapend.
• Removethegasket.
How to make Cappuccino · Hot water production · Cleaning and maintenance

10
en
• Rinseallcomponentsandcleanthemetallterthorou-
ghlyinhotwaterusingabrush(g.21).Makesurethe
holes in the metal lter are not blocked. if necessary,
cleanwithapin(seeg.22).
• Replacethelterandplasticdiskonthegasketasshown
ing.23.Makesuretoinsertthepinontheplasticdisk
intotheholeinthegasketindicatedbythearrowing.
23.
• Replacetheassemblyinthesteelltercontainer(g.24),
makingsurethepinisinsertedintheholeinthesupport
(seearrowing.24).
• finally,screwonthecap.
failuretocleanasdescribedaboveinvalidatesthewarranty.
Cleaning the boiler outlet
Aboutevery200coees,the espressoboiler outlet must be
cleaned as follows:
• Makesuretheapplianceisnothotandthatitisunplug-
gedfromtheoutlet;
• Usingascrewdriver,unscrewthescrewxingtheespres-
soboileroutlet(g.25);
• cleantheboilerwithadampcloth;
• cleantheboileroutletthoroughlyinhotwaterusinga
brush.Makesuretheholesarenotblocked.ifnecessary,
cleanwithapin(g.22).
• Rinseunderrunningwater,rubbingallthetime.
• Replacetheespressoboileroutlet,makingsurethega-
sketiscorrectlypositioned.
failuretocleanasdescribedaboveinvalidatesthewarranty.
Other cleaning operations
1. Donotusesolventsorabrasivecleaningproductstoclean
theappliance.Asoft,dampclothissucient.
2. cleanthelterholder,lters,drip trayand watertank
regularly.
IMPORTANT: During cleaning, never immerse the
espresso maker in water. It is an electrical appliance.
Descaling
youmustdescalethecoeemachineaboutevery200coees.
Usethedescalerprovidedonly.Todescale,proceedasfollows:
1. fillthetankwith34ounces(1liter)ofwater;
2. Pourthe contents of the descaler bottle provided (8.4
.oz./250ml) into the tank. forsubsequent descaling
operations, descaling solution can be purchased from
authorizedtechnicalservicecenters.
3. Makesurethelterholderisnotattachedandpositiona
containerundertheboileroutlet.
4. PresstheoN/offbutton(g.3)andwaitfortheoKindi-
catorlighttocomeon.
5. Pressthe coeebutton,1/4empty thetankandevery
nowandthenrotatethesteamknobtoallowalittleof
thesolutiontoruno.Theninterruptbypressingthecof-
feebuttonagainandleavethesolutiontoactforabout5
minutes.
6. Repeatpoint5another3timesoruntilthetankiscom-
pletelyempty.
7. Toeliminateresiduesofthesolutionandscale,rinsethe
watertankwell,llwithcleanwaterandreplaceinits
housing.Pressthecoeebuttonandoperatetheapplian-
ceuntilthewatertankiscompletelyempty;
8. Pressthecoeebuttonagainandrepeatthelastopera-
tion.
Repairofdamagetotheespressomakercausedbyscaleisnot
coveredbythewarrantyunlessdescalingisperformedregu-
larlyasdescribedabove.
Descaling

11
en
Troubleshooting
Problem Possible causes Solution
Noespressocoeeisdelivered Nowaterinthetank fillthetankwithwater
Theholesinthelterholderareblocked cleanthelterholderspoutholes
Theespressoboileroutletisblocked cleanasdescribedinthesection”cleaning
theboileroutlet”
Theespressocoeedripsfromtheedges
ofthelterholderratherthantheholes
Thelterholderisinsertedincorrectly Attachthelterholdercorrectlyandro-
tate as far as it will go
Theespressoboiler gaskethas lost ela-
sticity
havetheespressoboilergasketreplaced
ataservicecenter
Theholesinthelterholderareblocked cleantheholes
Theespressocoeeiscold TheespressooK indicatorlightwasnot
onwhenthecoeebuttonwaspressed
WaituntiltheespressooKindicatorlight
comeson
Nopreheatingperformed Preheatasdescribedinthesection“Pre-
heatingthecoeeunit”
Thecupswerenotpreheated Preheat the cups by rinsing with hot
water
Thepumpisexcessivelynoisy Thewatertankisempty Rellthetank
Thecremaistoolight(deliveredfromthe
spout too fast)
Thegroundcoeeisnotpressed
downrmlyenough
Tamp/Pressthegroundcoeedown
morermly
Thereisnotenoughgroundcoee increasethequantityofcoee
Thegroundcoeeistoocoarse Usegroundcoeeforespresso
coeemachinesonly
Thecremaistoodark(deliveredfromthe
spout too slowly)
Thegroundcoeeispresseddown
toormly
Tamp/Pressthecoeedownless
rmly
Thereistoomuchgroundcoee Reducethequantityofgroundcoee
Theespressoboileroutletisblocked cleanasdescribedinthesection
“cleaningtheboileroutlet”
Thegroundcoeeistoone Usegroundcoeeforespressocoee
machinesonly
Thecoeehasanacidictaste inadequaterinsingafterdescaling Afterdescaling,rinsetheapplianceas
describedinthesection“Descaling”
No milk froth is formed when making
cappuccino
Milknotcoldenough Alwaysuseskimmilkatrefrigerator
temperature.
cappuccinomakerdirty Thoroughlycleantheholesinthe
cappuccino frother

12
en
Limited warranty
This warranty applies to all products with De’Longhi or Kenwood brand names.
What does the warranty cover?
Wewarranteachappliancetobefreefromdefectsinmaterialandworkmanship.ourobligationunderthiswarrantyislimitedtore-
pairatourfactoryorauthorizedservicecenterofanydefectivepartsorpartthereof,otherthanpartsdamagedintransit.intheevent
ofaproductsreplacementorreturn,theunitmustbereturnedtransportationprepaid.Therepairedornewmodelwillbereturned
atthecompanyexpense.
Thiswarrantyshallapplyonlyiftheapplianceisusedinaccordancewiththefactorydirections,whichaccompanyit,andonan
Alternatingcurrent(Ac)circuit.
How long does the coverage last?
Thiswarrantyrunsforoneyear(1)fromthepurchasedatefoundonyourreceiptandappliesonlytotheoriginalpurchaserforuse.
What is not covered by the warranty?
Thewarrantydoesnotcoverdefectsordamageoftheappliance,whichresultfromrepairsoralterationstotheapplianceoutside
ourfactoryorauthorizedservicecenters,norshallitapplytoanyappliance,whichhasbeensubjecttoabuse,misuse,negligenceor
accidents.Also,consequentialandincidentaldamageresultingfromtheuseofthisproductorarisingoutofanybreachofcontractor
breachofthiswarrantyarenotrecoverableunderthiswarranty.somestatesdonotallowtheexclusionorlimitationofincidentalor
consequentialdamage,sotheabovelimitationmaynotapplytoyou.
How do you get service?
ifrepairsbecomenecessary,seecontactinformationbelow:
U.S. Residents:Pleasecontactourtollfreehotlineat1-800-322-3848orlogontoourwebsiteatwww.delonghi.com
Residents of Canada: Pleasecontactourtollfreehotlineat1-888-335-6644orlogontoourwebsiteatwww.delonghi.com
Residents of Mexico: Pleasecontactourtollfreenumber01-800-711-8805forassistanceorlogontoourwebsiteat
www.delonghi.com
Theabovewarrantyisinlieuofallotherexpresswarrantiesandrepresentations.Allimpliedwarrantiesarelimitedtotheapplicable
warrantyperiodsetforthabove.ThislimitationdoesnotapplyifyouenterintoanextendedwarrantywithDe’longhi.somestates/
countriesdonotallowlimitationsonhowlonganimpliedwarrantylasts,sotheaboveexclusionsmaynotapplytoyou.De’longhi
doesnotauthorizeanyotherpersonorcompanytoassumeforitanyliabilityinconnectionwiththesaleoruseofitsappliance.
How does country law apply?
Thiswarrantygivesyouspeciclegalrights,andyoumayalsohaveotherrights,whichvaryfromstatetostate/countrytocountry.