Loading ...
Loading ...
Loading ...
9
Cleaning the Unit
1. Unplug the POWER CORD from the outlet.
2. Carefully wipe the exterior of the unit with a soft, damp (not wet) cloth and dry thoroughly with a soft, dry
cloth. Do not use harsh or abrasive cleaners as these may damage the aesthetic nish of the unit.
3. Remove particulate that may have gathered in the HOT AIR OUTLET or HUMIDIFIER OUTLET using
a vacuum with a brush attachment.
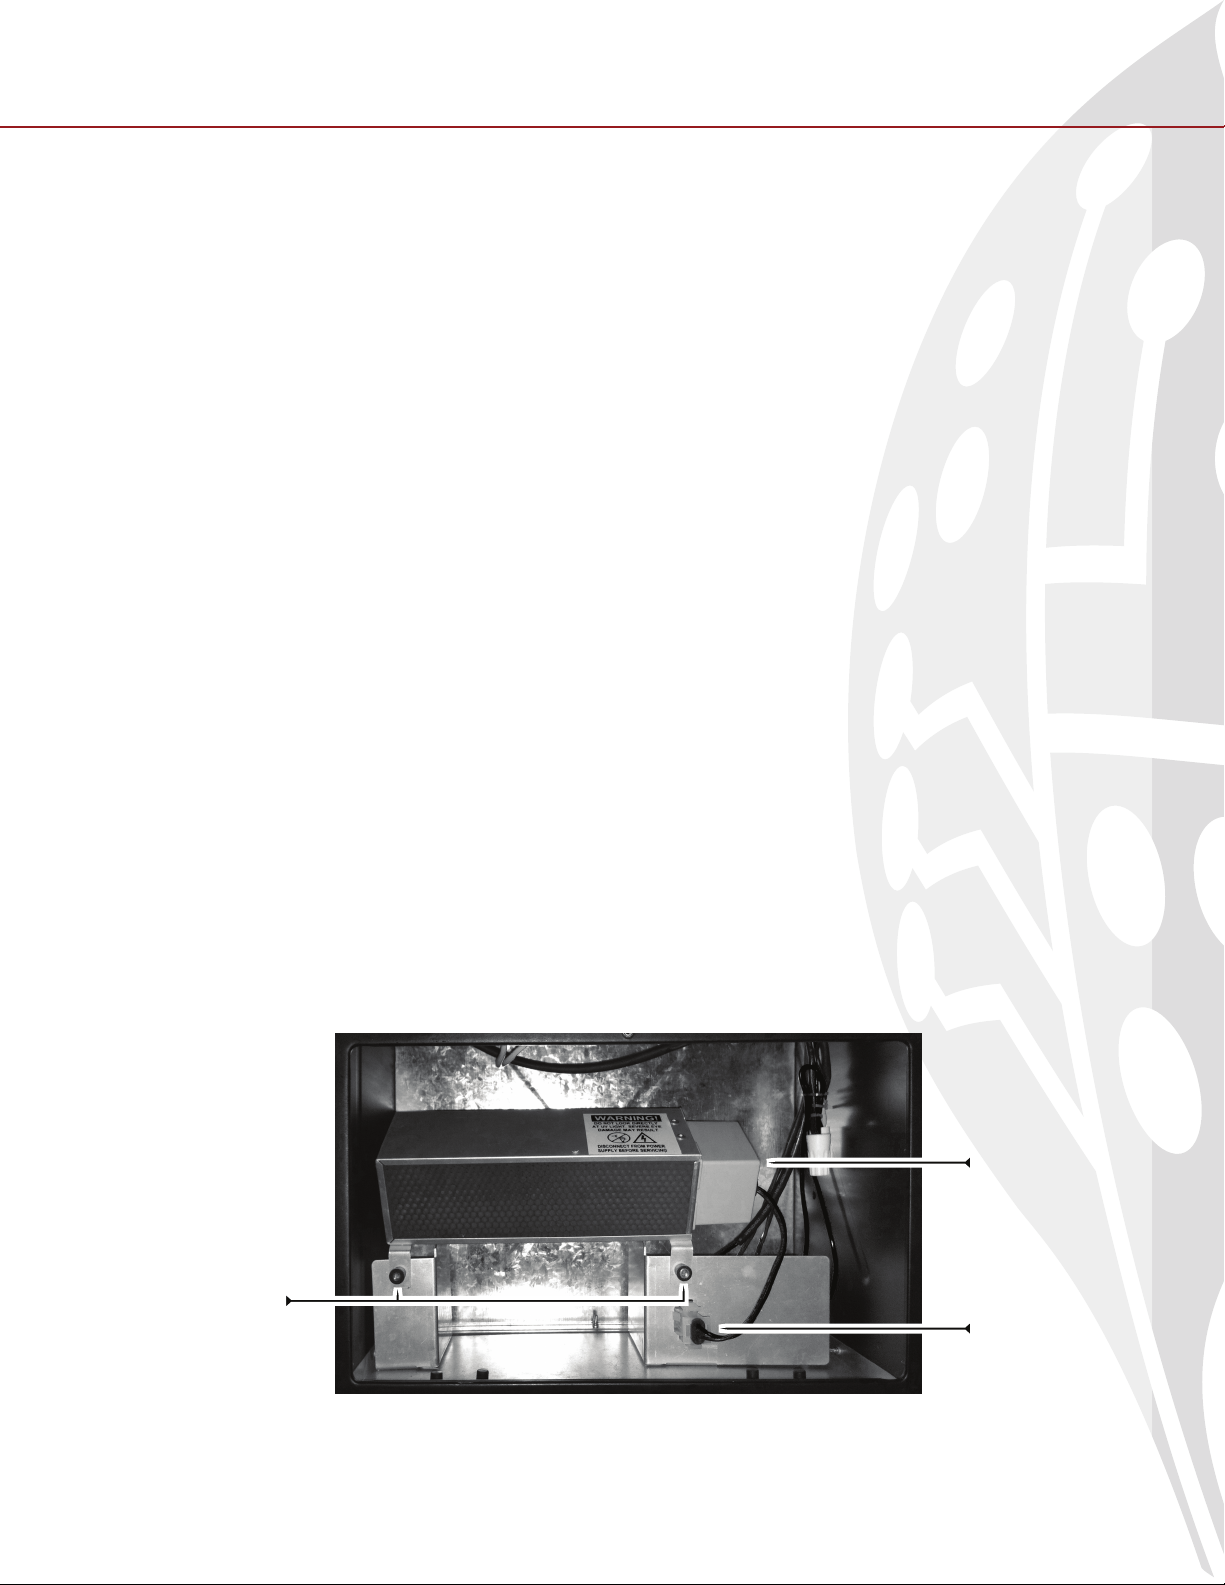
Replacing the PCO Cell
After some time the “Replace UV BULB” indicator may appear on your LCD SCREEN. This indicates that
you need to replace your PCO Cell. You may purchase a replacement PCO Cell through your GreenTech
Environmental Authorized Distributor. If your distributor is not available, please visit www.GreenTechEnv.
com to contact us regarding ordering a PCO Cell directly.
1. Remove the FILTER ASSEMBLY by following steps 1 through 3 of “Cleaning the Filter”.
2. Unplug the old PCO Cell by squeezing and disengaging the electrical adapter in the lower right hand
region of the rear of the unit.
3. Unscrew both of the plastic coated brass thumbscrews from their posts. Set the thumbscrews aside where
you will not misplace them.
4. Slide the old PCO Cell straight out of the rear of the unit.
5. Slide the new PCO Cell straight into it’s place in the rear of the unit.
6. Screw both thumbscrews back onto their post until snug.
7. Connect the new PCO Cell by plugging in the electrical adapter to it’s socket until it clicks into place.
8. Replace the FILTER ASSEMBLY by following steps 7 through 9 of “Cleaning the Filter”.
Electrical
Adapter
PCO
Cell
Plastic Coated
Thumbscrews
Loading ...
Loading ...
Loading ...