Loading ...
Loading ...
Loading ...
For best results, use no more than three 90°
elbows. Make sure that there is a minimum
of 24" of straight duct between elbows if more
than one is used. Do not install two elbows
together. If you must elbow right away, do it
as far away from the hood's exhaust opening
as possible.
FIGURE 5
FIGURE 4
CALCULATE THE DUCTRUN LENGTH
in FIGURE 4
FIGURE 5
PLAN THE DUCTWORK
FIGURES 1 and 2
FIGURE 3
-
WARNING!
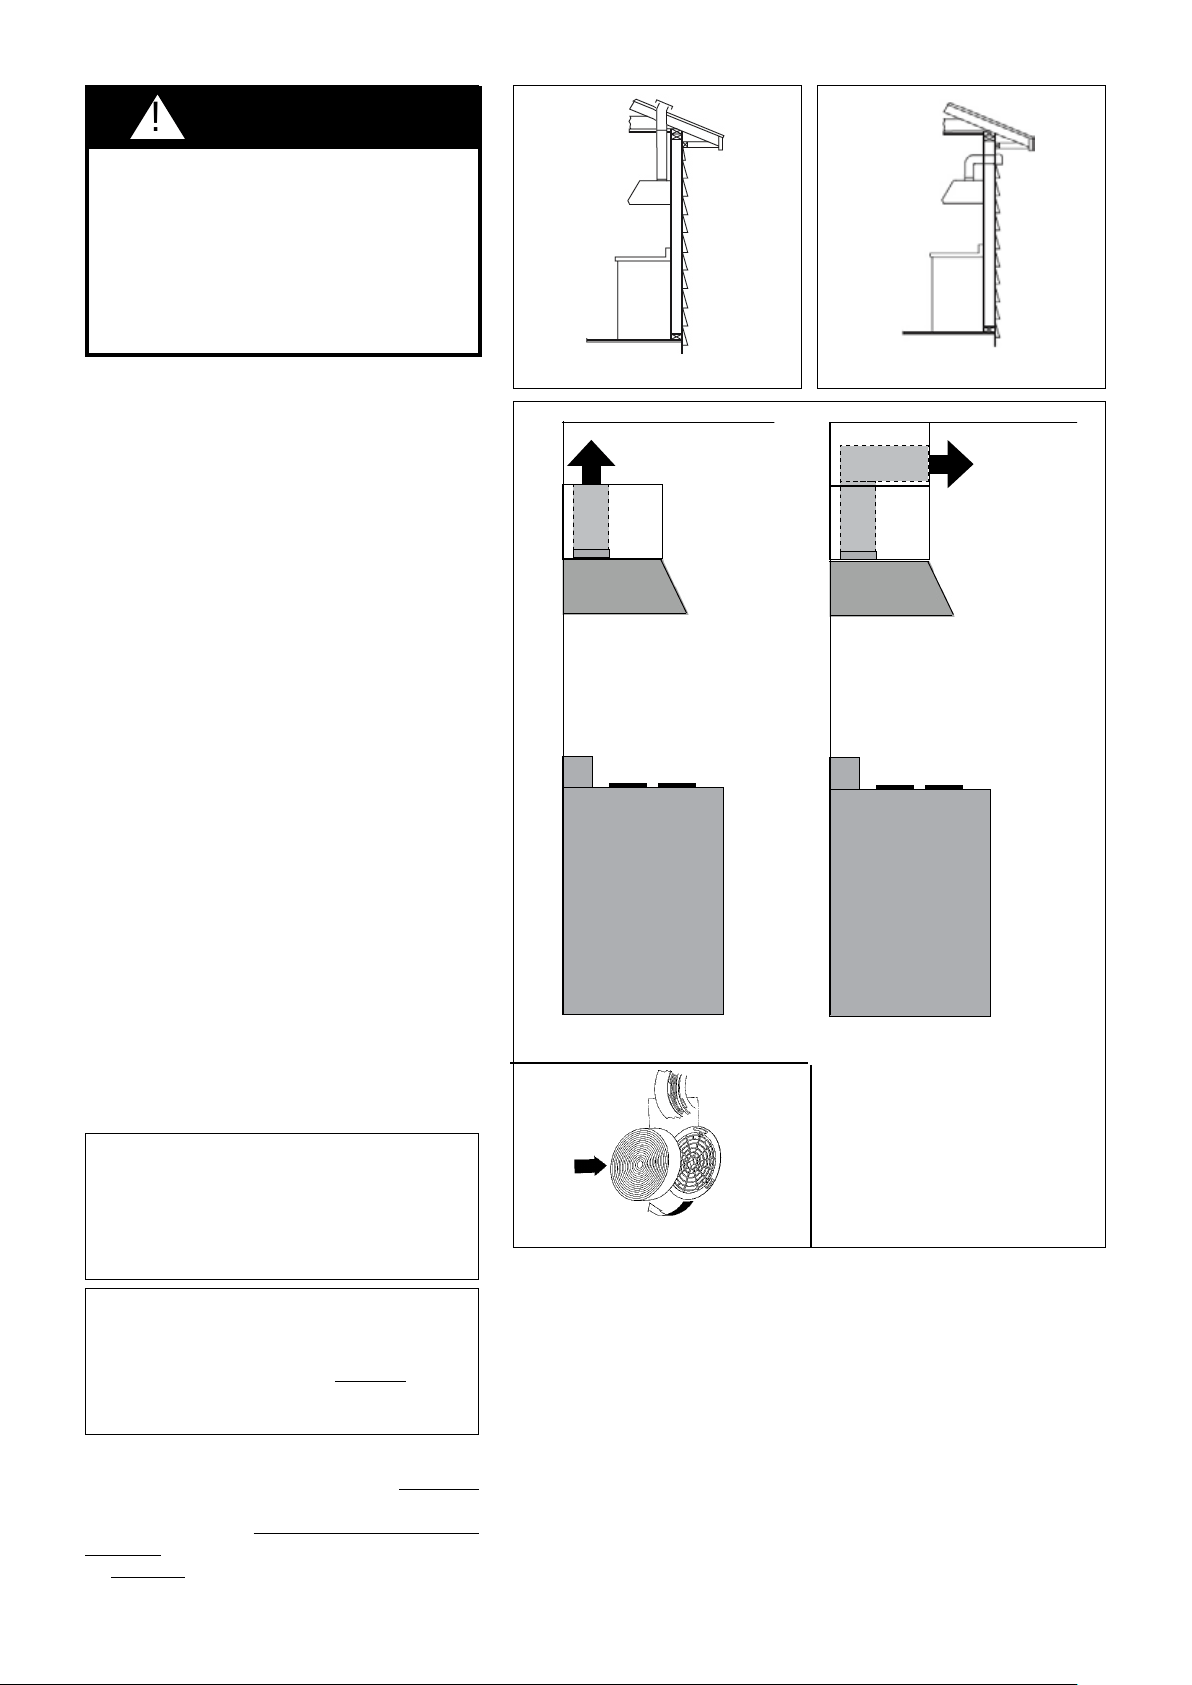
FIGURE 1 FIGURE 2
ceiling
enclosed soffit
side view
rangehood
cooking surface
upper
cabinet
ceiling
open space
side view
rangehood
cooking surface
upper
cabinet
FIGURE 3A FIGURE 3B
FIGURE 3C
WARNING
!
RECIRCULATING INSTALLATIONS
For recirculating installations, Charcoal Filters are necessary. Remove all
grease lters and set aside. Attach one charcoal lter to each end of the
blower. Each charcoal lter attaches to the black grid on the side of the
blower. Rotate the lter clockwise to install and counterclockwise to remove
(FIGURE 3C). Replace all grease lters.
There are 2 ways to recirculate the Pellicano :
1)Use the Recirculation Kit (sold seperately), refer to installation instructions
inside the Recirculation Kit.
2)Some ductwork must be installed to exhaust the rangehood back into the
kitchen, either at the top of the cabinet (FIGURE 3A) or at the face or side
of the soft (FIGURE 3B). Install at least 15" of metal ducting (g. 3A and
3B) at the air exit. Run the duct vertically and secure it at the opening cut
out at the top or side of the cabinet or soft. Installation of a metal grill is
recommended. This duct work must not terminate into a dead air space.
Loading ...
Loading ...
Loading ...