
Loading ...
Loading ...
Loading ...
J
I
Assembling
Assembling
1 1
7 8
O
P
A
B
1
1
11
2
1
3
6
54
A
B
G
E
F
H
D
C
B
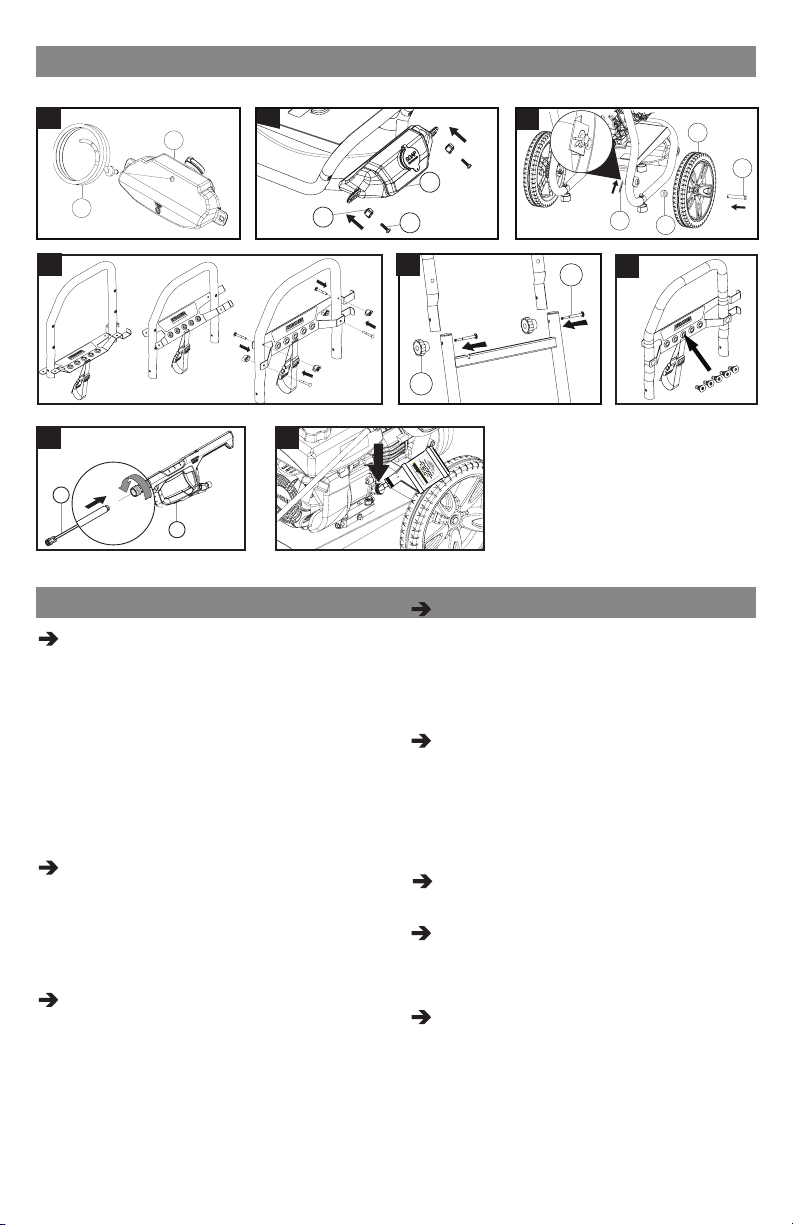
Illustration 1:
Pass the detergent siphon hose (A) under
the machine, aligning the detergent fill hole
on the detergent tank (B) towards the front of
the machine. Place detergent hose (A) into
the detergent hose hole on the back of the
detergent tank (B), and insert until the hose
end rests on the bottom of the deepest part
of the tank.
Illustration 2:
Insert hexagonal ¼ bolts (C) on the tank
knobs (D), attach the tank to the pressure
washer frame. Align holes, insert knob (C)/
bolt (D) and tighten.
Illustration 3:
Feed axle (G) through hub of wheel (E),
and spacer ½" (F). Insert assembly into axle
mount at back of frame. Push straight side of
cotter pin (H) through hole in axle until locked
in place. Repeat on other side of unit.
Illustration 4:
Mount nozzle holder (K) as shown on the il-
lustration, align holes, insert carriage ¼" bolt
(L) and tighten with name plate knob and ¼"
nut (M).
Illustration 5:
Attach the handle to the frame of the pressure
washer. Align holes, insert carriage bolts (I),
and tighten with knobs (J).
Illustration 6:
Place the quick connect nozzles (N) in the
nozzle holder (K).
Illustration 7:
Push the wand (O) into the trigger gun (P)
and then thread the connection.
Illustration 8:
Remove the cap/dipstick from the engine and
add correct amount of oil. Be sure oil level is
between “FULL/MAX” and “ADD/MIN” marks
on dipstick with machine on level surface.
Replace cap/dipstick.
English 7
Loading ...
Loading ...
Loading ...