
Loading ...
Loading ...
Loading ...
6
ASSEMBLY INSTRUCTIONS
We value your experience using Sunny Health and Fitness products. For assistance with parts or
troubleshooting, please contact us at support@sunnyhealthfitness.com or 1-877-90SUNNY
(877-907-8669)
26
8
27
8
27
29
27
8
31
S6
#27 d8*Φ20*2*R30 4PCS
#8 M8*16*S6 4PCS
16
17
13
13
14
#13 M16*1.5*18*Φ58 2PCS
#33
#32
S15
27
8
85L
85R
31
19
20
21
72L
72R
S15
#20 D5*Φ10*1 2PCS
#21 M5*16*Φ10 2PCS
#33
87
86
S19
#54
20
21
#86 9/16*20*H8*S19 1PC
#87 9/16*20*H8*S19 1PC
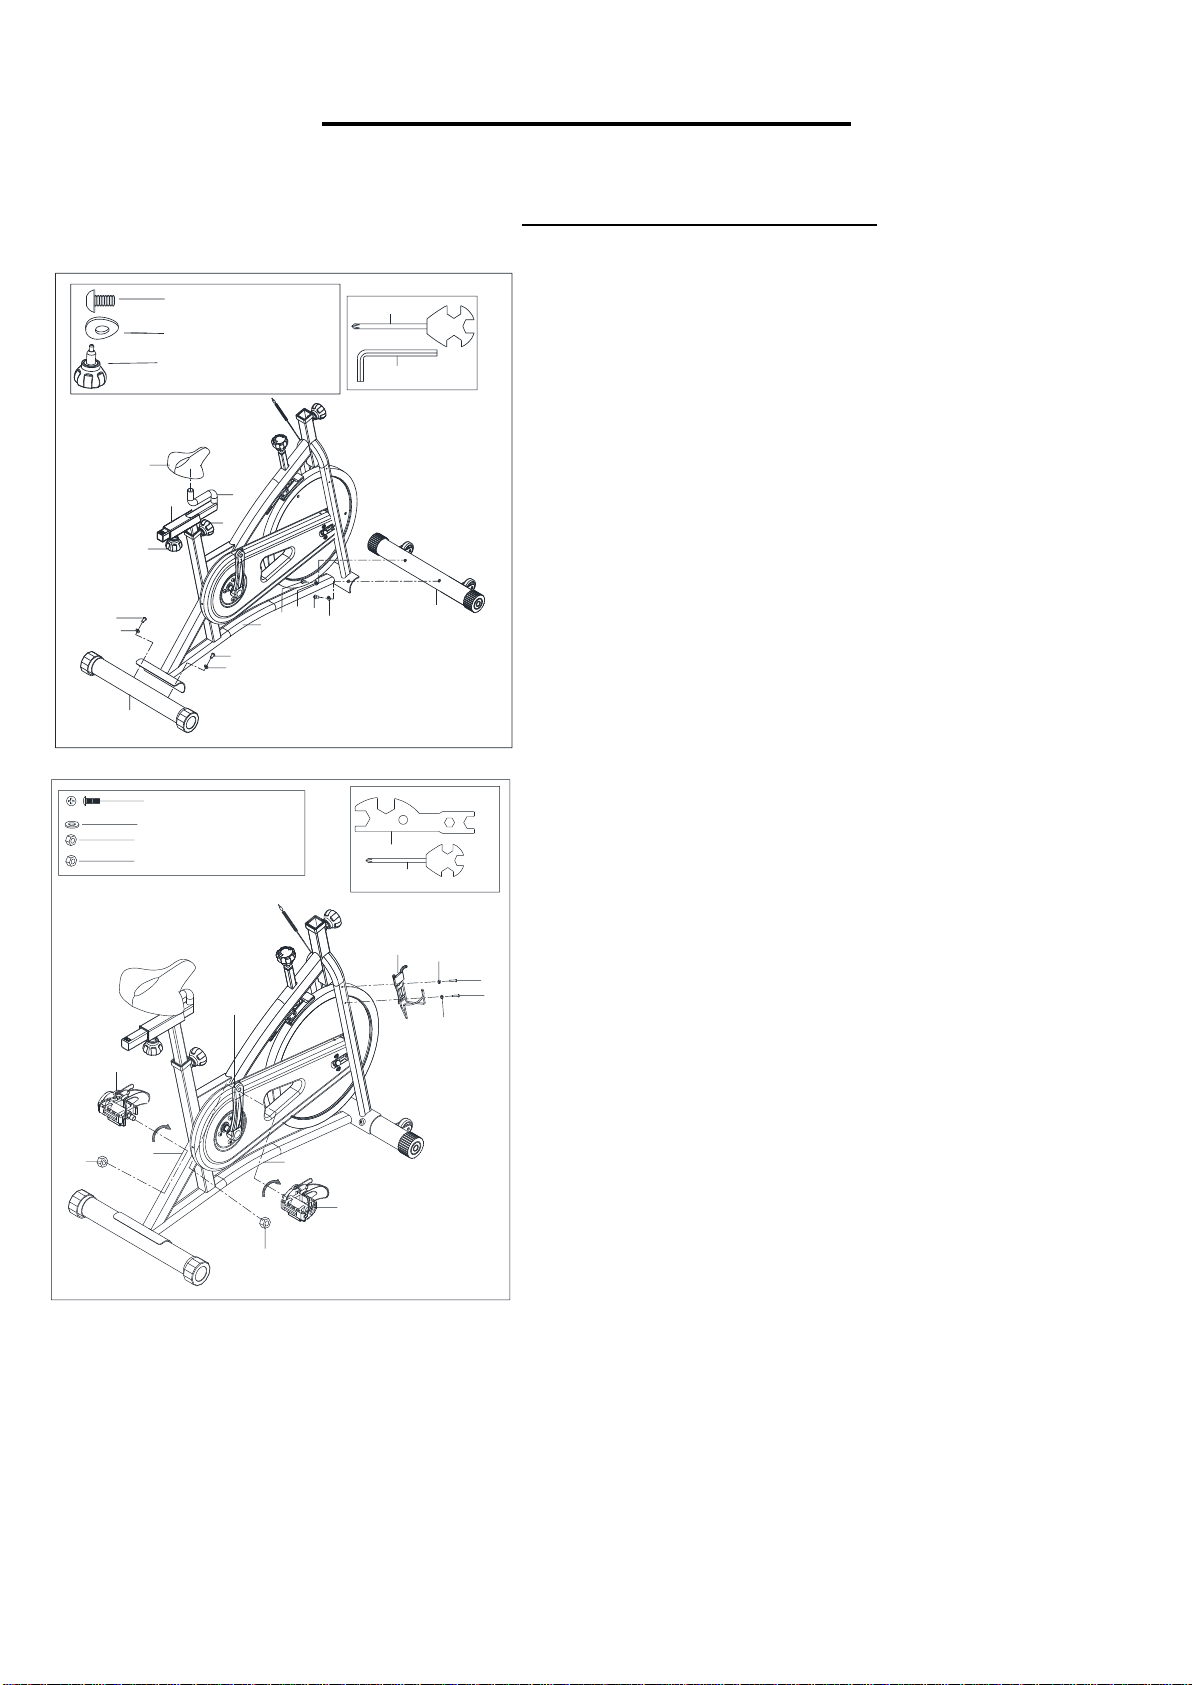
STEP 1:
Attach the Front and Rear Stabilizers (No. 26 & No.
29) to the Main Frame (No. 31) using 4 Screws (No. 8)
and 4 Arc Washers (No. 27). Tighten and secure with
Allen Wrench (No. 32).
Secure Seat (No. 17) to the Seat Slider (No. 16),
tighten and secure with Spanner (No. 33).
Loosen and pull out the Adjustment Knob (No. 13).
Adjust the Seat Slider (No. 16) and Seat Post (No.
14) to the desired position and reinsert and tighten
Adjustment Knob (No. 13) to secure the posts in
place.
STEP 2:
WARNING! Read instructions carefully as improper
assembly may cause permanent damage to your bike.
(Before you begin, immobilize the cranks by turning
the tension knob all the way to the right).
Remove 2 Left and Right Nylon Nuts (No. 86 and
No. 87) located on Left & Right Pedals (No. 85L &
No. 85R). Attach Left Pedal (No. 85L)
counter-clockwise into its corresponding Left Crank
(No. 72L). Once screwed in place, use Spanner (No.
33) to hold the bolt of the pedal then attach Left Nylon
Nut (No. 86) clockwise onto the thread end of the Left
Pedal (No. 85L). Secure with Spanner (No. 54).
Attach Right Pedal (No. 85R) clockwise into its
corresponding Right Crank (No. 72R). Once screwed
in place, use Spanner (No. 33) to hold the bolt of the
pedal then attach Right Nylon Nut (No. 87)
counter-clockwise onto the thread end of the Right
Pedal (No. 85R). Secure with Spanner (No. 54).
Remove pre-assembled 2 Screws (No. 21) and 2
Washers (No. 20) from Main Frame (No. 31) with
Spanner (No. 33). Then attach Water Bottle Holder
(No. 19) onto Main Frame (No. 31) using 2 Screws
(No. 21) and 2 Washers (No. 20) that were removed.
Tighten and secure with Spanner (No. 33).
Loading ...
Loading ...
Loading ...