Loading ...
Loading ...
Loading ...
73
Installation 1. Shove the built-in cooker into the
installation opening of the
conversion cabinet and align
horizontally.
Important for function and safety:
Slide in built-in cooker completely.
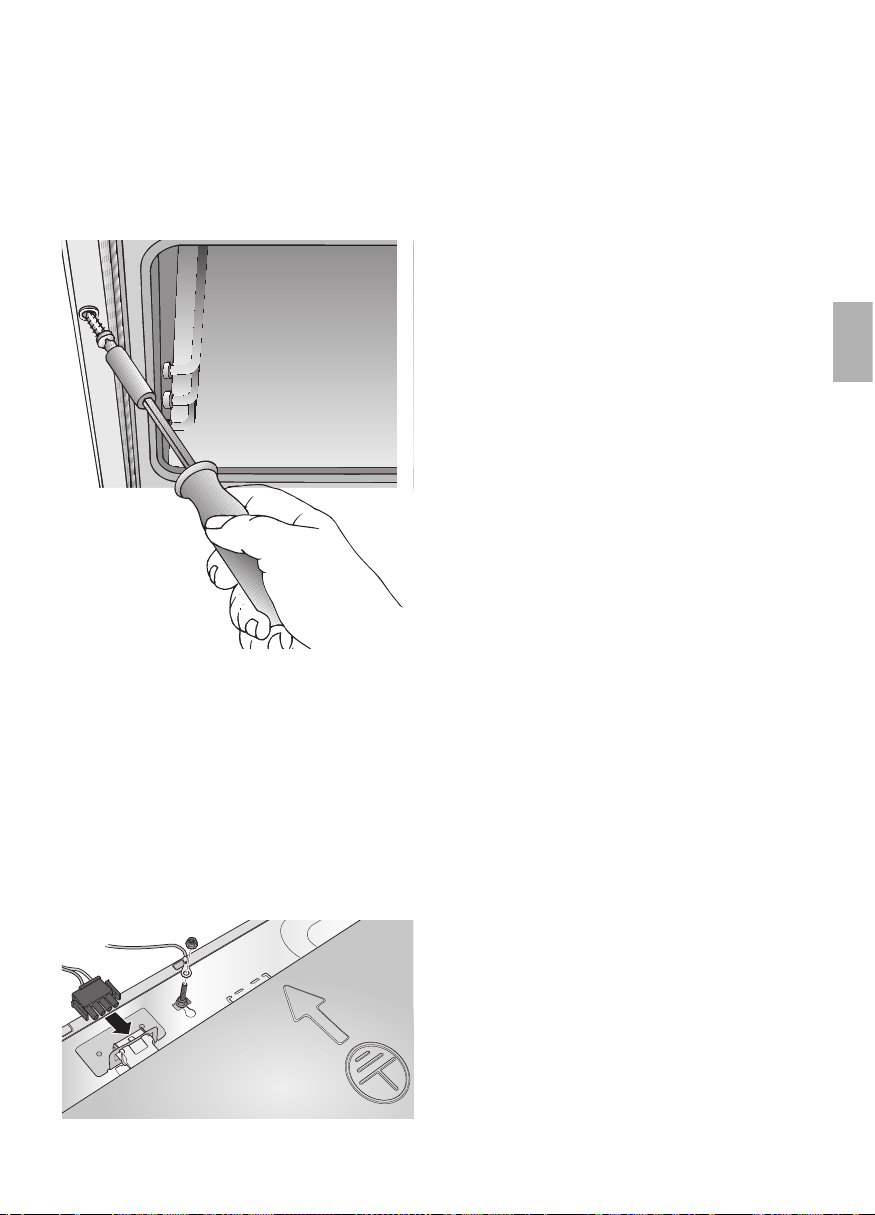
2. Open oven door and fasten the
built-in cooker to the side strips on
the conversion cabinet with one
screw each. When screwing in the
two screws (enclosed in a bag with
the built-in cooker), ensure that they
are pointing outwards at a slight
angle. Please use these screws only.
3. Check whether the built-in cooker
has been installed solidly and
horizontally and whether the given
installation dimensions have been
observed.
In units featuring telescoping
extensions, these may not move
by themselves.
In units featuring automatic oven
cleaning, after filling 0,4 l of
cleaning solution into the recess
in the oven floor, the liquid must
not spill toward the front.
4. Make the electrical connection
between the built-in cooker and hob
through connection plug and socket
strip with earthing cable.
5. Make electrical connection between
the built-in cooker and safety plug
socket through mains connection
plug.
6. Installing the hob.
Make absolutely certain that
you observe assembly
instructions enclosed to the
appliance.
7. Function control.
Loading ...
Loading ...
Loading ...