Loading ...
Loading ...
Loading ...
12
Installation Instructions
MAKING THE LP CONVERSION
1
SAFETY INFORMATION YOU
SHOULD KNOW
The pressure regulator and burner orifices are set
for natural gas. To use LP gas, the regulator and
burner orifices must be converted. The LP orifice
spuds for the cooktop burners are attached to
the regulator along with separate LP conversion
instructions.
CAUTION: The cooktop, as shipped from
the factory, is set for use with natural gas. If you
wish to use your cooktop with LP gas, you must
first replace the orifices and convert the pressure
regulator.
WARNING: This conversion must be
performed by a qualified installer or gas supplier in
accordance with the manufacturer’s instructions
and all codes and requirements of the authority
having jurisdiction. Failure to follow instructions
could result in serious injury or property damage.
The qualified agency performing this work assumes
responsibility for the conversion.
CAUTION: The following adjustments
must be made before turning on the burner. Failure
to do so could result in serious injury. Be sure
pressure regulator has been converted as
described in Step 2.
TOOLS YOU WILL NEED
FOR LP CONVERSION
Safety Glasses
Small Flat-Head
Screwdriver (4mm or
5/32s tip size, 60mm
or 2-3/8” long)
7mm Nutdriver
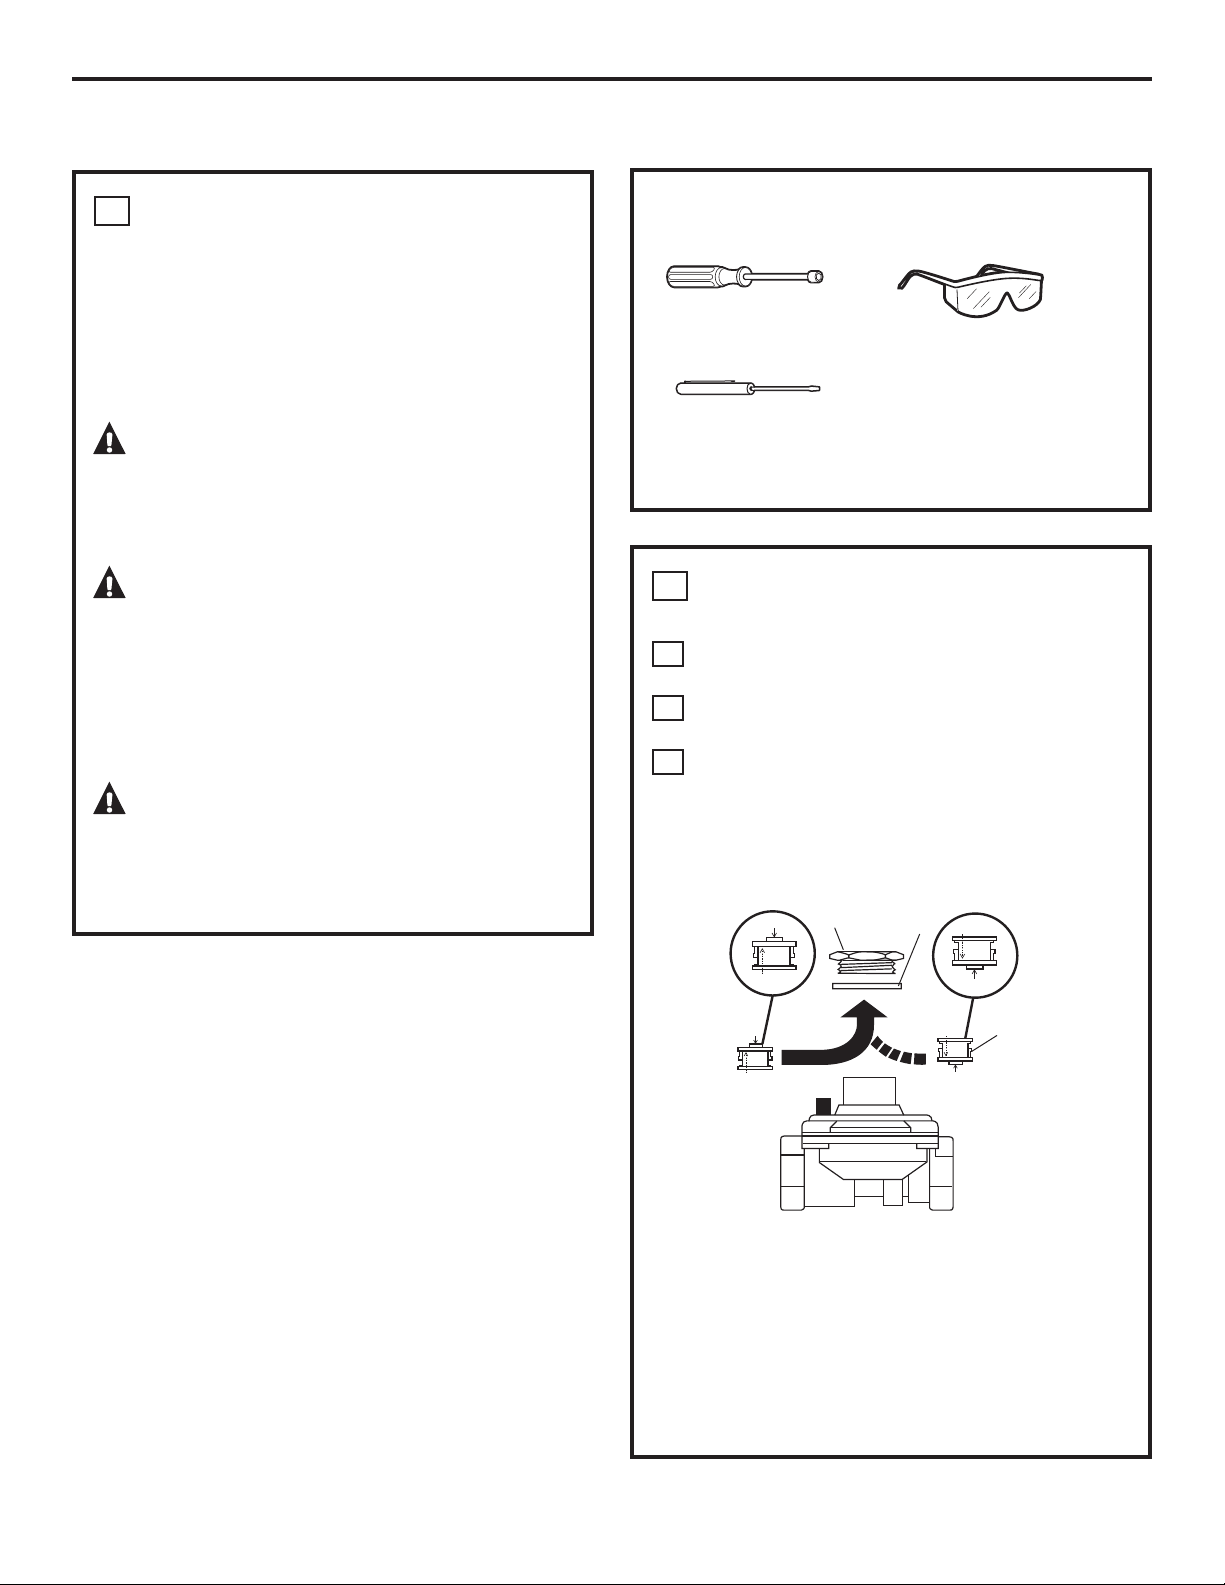
2
ADJUST YOUR COOKTOP FOR USE
WITH LP GAS
A
Disconnect all electrical power, at the main
circuit breaker or fuse box.
B
Shut off the gas supply to the cooktop
by closing the manual shut-off valve.
C
Adjust the pressure regulator, by the following
instructions:
• Unscrew the cap.
• Carefully look at the spring retainer to locate
the NAT or LP position.
• Turn the spring retainer over by rotating it
90 deg., pull it from the cap, turn the spring
retainer over so that LP is showing, insert it
back into the cap, and then rotate it 90 deg.
into position.
• Screw the cap back onto the regulator and
tighten.
NAT
LP
NAT
LP
NAT
LP
NAT
LP
Gasket
Cap
Spring
Retainer
L.P./Propane
Position
NAT.
Position
Pressure Regulator
Loading ...
Loading ...
Loading ...