Loading ...
Loading ...
Loading ...
16
EN
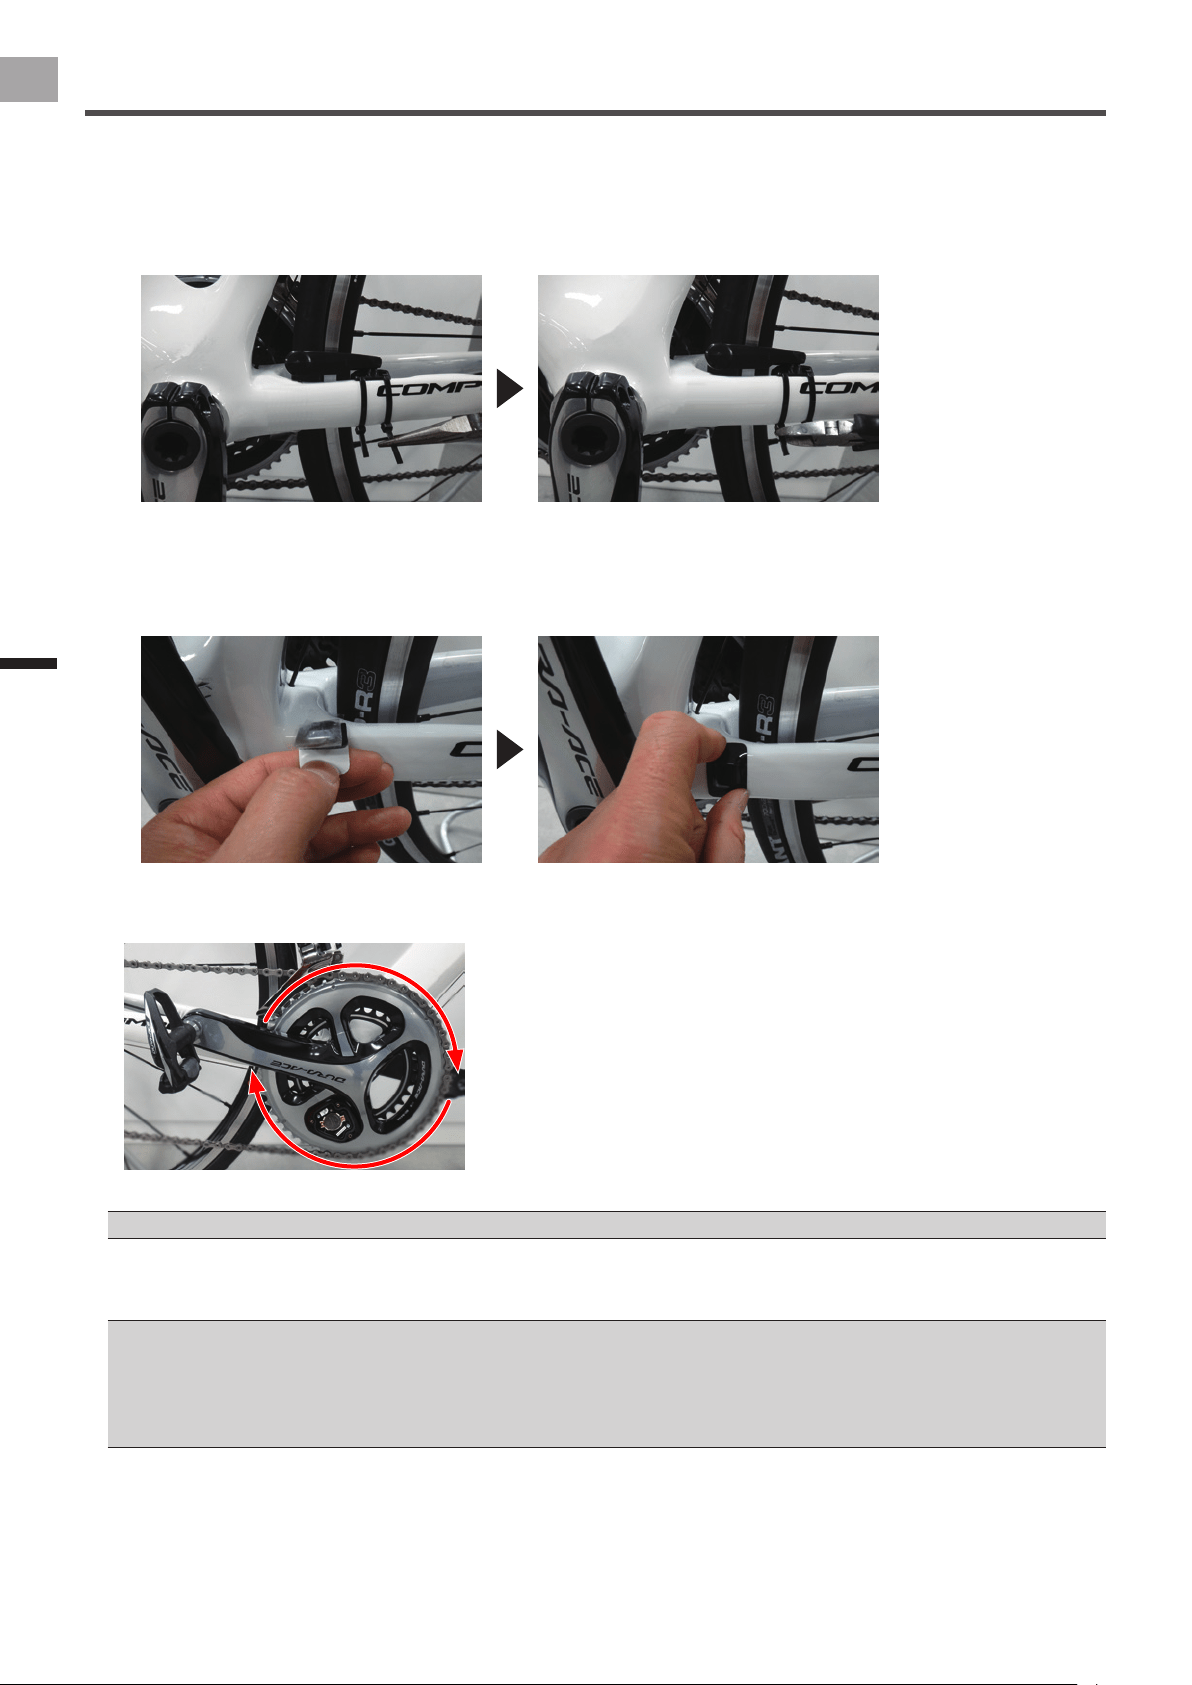
Installing the Magnets
Calibrating the Magnets and Fixing Them in Place
7
Fix the magnets in place.
Be careful not to move the magnets from their adjusted positions when you x them in place.
Arm type•
Use needle nose pliers to tighten the cable ties to x the magnets in place, then use snips to cut off the excess parts of
the cable ties.
Patch type•
Keep the magnet attached to the tape as you lift up the tape. When you do this, leave one side of the masking tape
attached, so the magnets remain in their adjusted positions.
Remove the non-adhesive backing paper from the back of the magnet, and then re-stick the masking tape back the way
it was. Press on the magnet, through the masking tape, to x it in place, then remove the masking tape.
8
Rotate the bicycle’s crank set slowly at about 30 rpm, and conrm that the LED lights green for each
rotation.
Conrm that the left and right LEDs light green for at least seven rotations.
If the LED lights red, then you are turning the crank set too fast. Turn it slowly at about 30 rpm.•
9
Press and hold down the switch on the right transmitter for at least 5 seconds.
The LEDs light green for 10 seconds. The calibration data is saved and the sensor exits the magnet calibration mode.
In step 8, if you rotate the crank fewer than 6 rotations or if there are vibrations while calibrating the magnet, the LED lights red for 10 •
seconds and the sensor exits the magnet calibration mode. You must re-calibrate the magnets.
To exit the magnet calibration mode while calibrating, briey press the switch during the calibration. The left and right transmitters' LEDs •
ash orange 5 times, the calibration data is destroyed and the sensor exits the magnet calibration mode.
In addition, 30 minutes after switching to the magnet calibration mode, the calibration data is destroyed and the sensor exits the magnet
calibration mode.
Loading ...
Loading ...
Loading ...