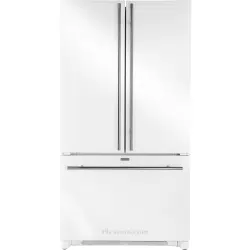
Jenn-Air JFC2089HTW - 20 cu. ft. French Door Counter Depth Refrigerator

User Manual

For JFC2089HTW.

PDF File Manual, 96 pages, Read Online | Download pdf file

JFC2089HTW photo
background
JENN-AIR
FRENCH DOOR REFRIGERATOR
E
!!ii!ili!ii!iiii i!;;....
JENN-AIR
Form No. 0/12/04 Part No. 12828119
TABLE OF CONTENTS
Important Safety Instructions ........................................1-2
Installation .............................................................................3-9
Temperature Controls ...................................................10-12
Fresh Food Features .....................................................13-14
Freezer Features ...................................................................15
Ice and Water .........................................................................16
Water Filter .......................................................................17-19
Food Storage Tips ..........................................................20-22
Care and Cleaning ........................................................23-26
Operating Sounds ................................................................27
Troubleshooting ..............................................................28-30
Warranty & Service ...............................................................31
Guide de I'utilisateur ...........................................................32
Guia de Uso y Cuidado ......................................................64
Printed in U.S.A.
,_)2004 Maytag Appliances Sales Co.
"i¸¸!_!iii!'i¸i:iiiii_¸i!i_!!!iiii!¸I¸!iiii_!¸I__i!i_i!_!¸il¸iiii!!_iiiil¸¸iiiilill
Loading page 2...
Loading page 3...
Loading page 4...
Loading page 5...
Loading page 6...
Loading page 7...
Loading page 8...
Loading page 9...
Loading page 10...
Loading page 11...
Loading page 12...
Loading page 13...
Loading page 14...
Loading page 15...
Loading page 16...
Loading page 17...
Loading page 18...
Loading page 19...
Loading page 20...
Loading page 21...
Loading page 22...
Loading page 23...
Loading page 24...
Loading page 25...
Loading page 26...
Loading page 27...
Loading page 28...
Loading page 29...
Loading page 30...
Loading page 31...
Loading page 32...
Loading page 33...
Loading page 34...
Loading page 35...
Loading page 36...
Loading page 37...
Loading page 38...
Loading page 39...
Loading page 40...
Loading page 41...
Loading page 42...
Loading page 43...
Loading page 44...
Loading page 45...
Loading page 46...
Loading page 47...
Loading page 48...
Loading page 49...
Loading page 50...
Loading page 51...
Loading page 52...
Loading page 53...
Loading page 54...
Loading page 55...
Loading page 56...
Loading page 57...
Loading page 58...
Loading page 59...
Loading page 60...
Loading page 61...
Loading page 62...
Loading page 63...
Loading page 64...
Loading page 65...
Loading page 66...
Loading page 67...
Loading page 68...
Loading page 69...
Loading page 70...
Loading page 71...
Loading page 72...
Loading page 73...
Loading page 74...
Loading page 75...
Loading page 76...
Loading page 77...
Loading page 78...
Loading page 79...
Loading page 80...
Loading page 81...
Loading page 82...
Loading page 83...
Loading page 84...
Loading page 85...
Loading page 86...
Loading page 87...
Loading page 88...
Loading page 89...
Loading page 90...
Loading page 91...
Loading page 92...
Loading page 93...
Loading page 94...
Loading page 95...
Loading page 96...

Other documents for Jenn-Air JFC2089HTW

The following documents are available:
User Manual Other Documents
  • Use and Care Guide - (English) Download
  • Quick Specs/Dimensions - (English) Download
Photos

Specifications

User Manual - Transcript

  • Page 1 - English - : JENNAIR FRENCH DOOR REFRIGERATOR E iiiliiiiiii i JENNAIR Form No 01204 Part No 12828119 TABLE OF CONTENTS Important Safety Instructions 12 Installation 39 Temperature Controls 1012 Fresh Food Features 1314 Freezer Features 15 Ice and Water 16 Water Filter 1719 Food Storage Tips 2022 Care and Cleaning 2326 Operating Sounds 27 Troubleshooting 2830 Warranty amp Service 31 Guide de Iutilisateur 32 Guia de Uso y Cuidado 64 Printed in USA 2004 Maytag Appliances Sales Co quotiiiiiiiiiiiiiiiiiIiiiiIiiiiliiiiiiiiliiiilill
  • Page 2 - English - : I MPORTANT SAFETY I NSTRUCTIONS What You Need to Know About Safety Instructions Warning and Important Safety Instructions appearing in this guide are not meant to cover all possible conditions and situations that may occur Common sense caution and care must be exercised when installing maintaining or operating appliance Always contact the manufacturer about problems or conditions you do not understand Recognize Safety Symbols Words Labels This appliance is equipped with a threeprong grounding plug for your protection against possible electrical shock hazards It must be plugged into a grounding receptacle Where a standard twoprong wall receptacle is encountered it is the personal responsibility and obligation of the customer to have it replaced with a properly grounded threeprong wall receptacle Do not under any circumstances cut or remove the third ground prong from the power cord Do not use an adapter plug Power supply cord with threeprong grounding plug Grounding type wall receptacle
  • Page 3: I MPORTANT SAFETY I NSTRUCTIONS SAVE THESE INSTRUCTIONS 2
  • Page 4 - English - : I NSTALLATI 0 N Your refrigerator was packed carefully for shipment Remove and discard shelf packaging and tape Do not remove the serial plate Location Do not install refrigerator near oven radiator or other heat source If not possible shield refrigerator with cabinet material Do not install where temperature falls below 55 F 13 C or rises above 110 F 43 C Malfunction may occur at this temperature Refrigerator is designed for indoor household application only Measuring the Opening When installing your refrigerator measure carefully Allow 2quotspace at top and space behind the machine compartment cover located in the rear for proper air circulation Subflooring or floor coverings ie carpet tile wood floors rugs may make your opening smaller than anticipated Some clearance may be gained by using the leveling procedure under Leveling IMPORTANT If refrigerator is to be installed into a recess where the top of the refrigerator is completely covered use distance from floor to top of hinge cap to verify proper clearance Transporting Your Refrigerator NEVER transport refrigerator on its side If an upright position is not possible lay refrigerator on its back Allow refrigerator to sit upright for approximately 30 minutes before plugging it in to assure oil returns to the compressor Plugging the refrigerator in immediately may cause damage to internal parts Use an appliance dolly when moving refrigerator ALWAYS truck refrigerator from its side or backNEVER from its front Protect outside finish of refrigerator during transport by wrapping cabinet in blankets or inserting padding between the refrigerator and dolly Secure refrigerator to dolly firmly with straps or bungee cords Thread straps through handles when possible Do not overtighten Overtightening restraints may dent or damage outside finish Glass Panel Doors select models
  • Page 5 - English - : I NSTALLATI 0 N Leveling To enhance the appearance and maintain performance the refrigerator should be level 3 Using hex head driver turn the front adjustment screws A on each side to raise or lower the front of the refrigerator Note Complete any required door reversal panel installation andor a water supply connection before leveling Materials Needed 38quothex head driver Carpenters level 1 Remove toe grille Grasp firmly and pull outward to unclip 2 Remove bottom hinge covers Place the eraser end of a pencil or similar blunt tool in the cover notch Notch Location Use slight pressure to pry the cover loose Continue to maintain downward pressure to the notched side of the cover while swinging it off I Note Some models only have adjustment screws quotA Using the hex head driver turn each of these adjustment screws B to raise or lower the rear of the refrigerator Using the carpenters level make sure front of refrigerator is Y4quot6 ram or 8bubble higher than back of refrigerator and that the refrigerator is level from side to side 6 Turn stabilizing legs 3 clockwise until firmly against floor 7 Turn adjustment screws A counterclockwise to allow the full weight of the refrigerator to rest on the stabilizing legs 8 Replace bracket covers Position cover into the outer edge of the hinge Swing the cover toward the cabinet and snap it into place 9 Replace the toe grille Note For proper reinstallation ensure the quottopquot marking on the interior of the toe grille is oriented correctly Align the toe grille mounting clips with the lower cabinet slots Push the toe grille firmly until it snaps into place
  • Page 6 - English - : I NSTALLATI ON Door and Drawer Removal Some installations require doordrawer removal to transport the refrigerator to its final location Remove center hinge pin with a 56quot hex head driver and retain hinge pin for later use Remove Phillips screws to remove right and left hinges and retain all screws for later use Remove both stabilizing brackets with 3 hex head driver and retain screws for later use Pullout Freezer Drawer select models 1 Unplug power cord from power source 2 Remove toe grille and bottom hinge covers see page 4 3 Remove top hinge cover from refrigerator door by removing Phillips screw and retain screw and cover for later use 4 Unscrew 5quothex head screws from t top hinge to remove hinge and retain all screws for later use 5 Lift right side refrigerator door from center hinge pin Remove door closure from center hinge pin on right the right side and retain for later sde use I door osure 6 Disconnect wire harness on top of left side refrigerator door top hinge Release twopin connector by pressing junction point with a flat blade screwdriver or fingernail Green ground wire remains attached to the hinge 7 Unscrew 5quothex head screws from top hinge to remove hinge and retain for later use Lift left side refrigerator door along with top hinge from center hinge pin quot To Remove 1 Pull drawer open to full extension 2 Tilt the lower basket forward and lift to remove 3 On each white drawer bracket is a basket cradle with two snap attachments To release each cradle unlatch the snaps by pushing them inward away from the side bracket Lift the cradles off of the rails 4 Remove Phillips screw from each of the drawer slides select models
  • Page 7 - English - : I NSTALLATI 0 N 5 Lift top of drawer front to unhook the drawer from the slides Lift door front out to remove To Install 1 Pull both rails out to full extension 2 While supporting door front hook supports into slots located on inside of each slide Note All four drawer bracket supports must be in the proper slots for the drawer to function properly 3 Lower door front into final position 4 Replace and tighten Phillips screws that were removed from the drawer slides select models 5 Place the basket cradles back onto the drawer slides Align basket cradle snaps with the slots on the drawer brackets and press each cradle towards the bracket until it clicks Basket cradle snap attachments 6 Tilt the lower basket front down and set it down into the basket cradles Door Reinstallation 1 Install hinge assemblies Install center hinge with Phillips screws 2 Place hinge side of refrigerator door on center hinge pin Install top hinge with 56quothex head screws 3 While holding refrigerator door upright tighten down top hinge with 5quothex head driver 4 Reconnect twopin connector 5 Replace top hinge covers Handles style varies by model This handle style is installed at the factory Style may vary by model Materials Needed 332quotallen wrench To Remove Remove set screw from handle mounting post using the 3allen wrench Repeat the procedure on all posts to remove the handle To replace Align handle with the mounting posts Fully tighten all set screws to secure handle in place
  • Page 8 - English - : I NSTALLATI 0 N Installing FrontMounted Handles for Stainless Steel Door 1 Loosen lower door clip on door with a phillips screwdriver 2 Locate predrilled hole at base of handle and fit hollow end of handle over lower door clip 3 Fit other end of handle over upper door clip and slide up as far as possible NOTE If top of handle does not fit over top clip loosen lower clip further until fit can be accomplished 4 Insert phillips screwdriver into predrilled hole at base of handle to tighten screw Insert plastic button plug into hole 5 Repeat above steps to install other handle Removing FrontMounted Handles for Stainless Steel Door 1 Remove plastic button plug at base of handle with a very small flatblade sc rewd river Insert phillips screwdriver into predrilled hole to remove screw 2 Slide handle down and remove from door clip 3 Repeat above steps to remove other handle Installing FrontMounted Handles for Stainless Steel Freezer Door 1 Loosen lower door clip on door with a phillips screwdriver 2 Locate predrilled hole at base of handle and fit hollow end of handle over left door clip Fit other end of handle over left door clip and slide left as far as possible NOTE If end of handle does not fit over left clip loosen right clip further until fit can be accomplished Insert phillips screwdriver into predrilled hole at end of handle to tighten screw Insert plastic button plug into hole Removing FrontMounted Handles for Stainless Steel Freezer Door 1 Remove right side plastic button plug at end of handle with a very small flatblade screwdriver Insert phillips screwdriver into predrilled hole to remove screw 2 Slide handle right and remove from door clip
  • Page 9 - English - : I NSTALLATI 0 N Opening and Closing Your Fresh Food Doors Your new refrigerator is uniquely designed with two fresh food doors Either door can be opened or closed independently of one another There is a verticallyhinged section on the left fresh food door When the left door is closed the hinged section automatically forms a seal between the two doors when both doors are closed When the left door is opened the hinged seal automatically folds inward so that it is out of the way
  • Page 10 - English - : I NSTALLATI 0 N Connecting the Water Supply Materials Needed aquotouter diameter flexible copper tubing Shutoff valve requires a hole to be drilled into water supply line before valve attachment Adjustable wrench Xquot hex nut driver Notes Use copper tubing only for installation Plastic is less durable and can cause damage Add 8 to tubing length needed to reach water supply for creation of service loop 2 diameter 1 Create service loop with copper minimum tubing minimum 2 diameter f Avoid kinks in the copper tubing quot when bending it into a service loop Do not use plastic tubing 2 Remove plastic cap from water valve inlet AN port Place brass nut A and sleeve B A quotB on copper tube end as illustrated Reminder Do not use an old iquot sleeve The nut and sleeve are provided in the use and care packet Place end of copper tubing into water valve inlet port Shape tubing slightly Do not kink so that tubing feeds straight into inlet port 5 Slide brass nut over sleeve and screw nut into inlet port Tighten nut with wrench IMPORTANT Do not overtighten Cross threading may occur Pull on tubing to confirm connection is secure Connect tubing to frame with water tubing clamp C and turn on water supply Check for leaks and correct if necessary Continue to observe the water supply connection i i for two to three hours prior to moving the refrigerator to its permanent location 7 Monitor water connection for 24 hours Correct leaks if necessary
  • Page 11 - English - : TEMPERATURE CONTROLS Touch Temperature Controls The controls are located at the top front of the refrigerator compartment Control Initial Control Settings After plugging the refrigerator in set the controls Pressing the Vor Apads adjusts the controls to the desired setting The temperature control range for both compartments is 1 through 7 coldest Initially set the refrigerator control on 4 Initially set the freezer control on 4 Let the refrigerator run at least 8 to 12 hours before adding food Warm Cabinet Surfaces At times the front of the refrigerator cabinet may be warm to the touch This is a normal occurrence that helps prevent moisture from condensing on the cabinet This condition will be more noticeable when you first start the refrigerator during hot weather and after excessive or lengthy door openings Adjusting the Controls 24 hours after adding food you may decide that one or both compartments should be colder or warmer If so adjust the controls as indicated in the Temperature Control Guide table below See page 20 for instructions on checking compartment temperature Except when starting the refrigerator do not change either control more than one number at a time Allow 24 hours for temperatures to stabilize Changing either control will have some effect on the temperature of the other compartment Temperature Control Guide Refrigerator too warm Set the refrigerator control to next higher number by pressing the Apad Refrigerator too cold Freezer too warm Freezer too cold Turn refrigerator OFF Set the refrigerator control to next lower number by pressing the Vpad Set the freezer control to next higher number by pressing the Apad Set the freezer control to next lower number by pressing the pad Press the refrigerator or freezerv pad until a dash appears in the display
  • Page 12 - English - : TEMPERATURE CONTROLS Trisensor Climate Control select models The control is located at the top front of the fresh food compartment Control Speed Ice When activated Speed Ice reduces the freezer temperature to the optimum setting for 24 hours in order to produce more ice Note When the Speed Ice feature is in operation the Aand Vpads for the freezer control will not operate Initial Temperature Setting Temperatures are preset at the factory at 38 F 3 C in the fresh food compartment and 0 F 18 C in the freezer compartment Adjusting the Control 24 hours after adding food you may decide that one or both compartments should be colder or warmer If so adjust the control as indicated in the Temperature Control Guide below The first touch of the V or A pads shows the current temperature setting The display will show the new setting for approximately three seconds and then return to the actual temperature currently within that compartment Do not change either control more than one degree at a time Allow temperature to stabilize for 24 hours before making a new temperature adjustment Temperature Control Guide Refrigerator too cold Refrigerator too warm Freezer too cold Freezer too warm Turn refrigerator OFF Set the refrigerator control to next higher number by pressing the pad Set the refrigerator control to next lower number by pressing the pad Set the freezer control to next higher number by pressing the IL pad Set the freezer control to next lower number by pressing the pad Press the freezer pad until OFF appears in the display Press either the freezer or refrigerator V pad to turn back on Reset Filter select models When a water filter has been installed in the refrigerator the yellow Order light will illuminate when 90 percent of the volume of water for which the filter is rated has passed through the filter OR 11 months have elapsed since the filter has been installed The red Replace light will illuminate when the rated volume of water has passed through the filter OR 12 months have elapsed since the filter was installed A new filter should be installed immediately when the Replace light is illuminated After replacing the filter press and hold the Reset Filter pad for three seconds The Order and Replace lights will go off Vacation Mode The Vacation Mode feature causes the freezer to defrost less frequently conserving energy The Vacation Mode indicator light will illuminate when the feature is activated To deactivate press the Vacation Mode pad again OR open either door The indicator light will go out Notes Door openings will not deactivate Vacation Mode for approximately one hour after activation If vacationing for more than a few days see the Preparing for Vacation section page 26 Temp Alarm The Temp Alarm system will alert you if the freezer or fresh food temperatures exceed normal operating temperatures due to a power outage or other event When activated the Temp Alarm light will illuminate If the freezer or fresh food temperatures have exceeded these limits the display will alternately show the current compartment temperatures and the highest compartment temperatures reached when the power was out An audible alarm will sound repeatedly
  • Page 13 - English - : TEMPERATURE CONTROLS Press the Temp Alarm pad once to stop the audible alarm The Temp Alarm light will continue to flash and the temperatures will alternate until the temperatures have stabilized To turn off Temp Alarm press and hold the Temp Alarm pad for three seconds The indicator light will go off Door Alarm The Door Alarm will alert you when one of the doors has been left open for five continuous minutes When this happens an audible alarm will sound every few seconds until the door is closed OR press the Door Alarm pad to deactivate the feature Max Cool When activated Max Cool causes the fresh food and freezer temperatures to drop to the minimum settings on the control This cools down the refrigerator and freezer after extended door openings or when loading the refrigerator or freezer with warm food Note When the Max Cool feature is in operation the A and rv pads for the refrigerator and freezer controls will not operate To activate press the Max Cool pad Max Cool will deactivate automatically after 12 hours OR press the Max Cool pad to deactivate the feature User Preferences Access the User Preferences menu to Activate or turn off Super Cool select models Change the temperature display from F to C Enable or disable audible alarms Adjust the light level at which the Dispenser Auto Light will illuminate when this feature is activated on the ice and water dispenser select models Activate the Sabbath Mode To access the User Preferences menu press and hold the Door Alarm pad for three seconds When in the User Preferences mode a short title for the feature will appear in the Freezer temperature display and the feature status will appear in the Fresh Food display 1 Use the Freezer up and down control to scroll through the features 2 When the desired feature is displayed use the Fresh Food up and down control to change the status 3 When changes are complete press the Door Alarm pad for three seconds OR close the Fresh Food door Super Cool CO select models When Super Cool is ON an airmixing fan in the fresh food compartment is activated to improve air flow and temperature control To save energy this feature may be deactivated by choosing OFE Temperature Display FC Change the display to show temperatures in degrees Fahrenheit or degrees Celsius Alarm AL When the Alarm mode is OFE all audible alarms will be disabled until the feature is turned on Auto Light Level Selection LL select models This setting adjusts the light level at which the dispenser light will illuminate when the sensor detects that the light levels in the room are low Setting 1 is the darkest light level setting setting 9 is the lightest light level setting Note The Auto Light select models must be activated on the ice and water dispenser control to take advantage of this option Sabbath Mode SAB When the Sabbath Mode is ON all control lights and the night light will be disabled until the feature is turned OrE This feature does not disable the interior lights Press any pad to restore the control lights Warm Cabinet Surfaces At times the front of the refrigerator cabinet may be warm to the touch This is a normal occurrence that helps prevent moisture from condensing on the cabinet This condition will be more noticeable when the refrigerator is first started during hot weather and after excessive or lengthy door openings
  • Page 14 - English - : FRESH FOOD FEATURES Shelves Place hand under the frame to push up the glass Lift glass out Lift frame from refrigerator liner rails To Install Replace frame in refrigerator liner rails Carefully replace glass into frame Your refrigerator has Spillproof Glass Shelves The Spillproof shelves have a spill retainer edge which allows for easier clean up and are equipped with a slide out feature To slide out grasp the front of the shelf and pull forward Push in the shelf to return to the original position To Remove a Shelf Slightly tilt up the front and lift up the rear of the shelf then pull the shelf straight out To Lock the Shelf Into Another Position Tilt up the front edge of the shelf Insert the hook into the desired frame openings and let the shelf settle into place Be sure the shelf is securely locked at the rear Rear Shelf Extensions Rear Shelf Extensions help prevent articles from falling off the back of the shelf To remove and install shelf extension To remove pull extension straight up from the rear of shelf To install insert posts of the shelf extension into holes in the shelf frame The Crisper quotlop serves as the lower fresh food shelf To Remove the Crisper Top Remove crisper drawers Door Storage Dairy Center The Dairy Center provides convenient door storage for spreadable items such as butter and margarine This compartment can be moved to different locations to accommodate storage needs To use the dairy center raise the cover To Remove Raise the cover pull upward and tilt out To Install Slide the Dairy Center in and down until firmly seated in the door liner Door Buckets Door Buckets can be moved to meet storage needs To Remove Slide bucket up and pull straight out To Install Slide bucket in and down until firmly seated in the door liner Crisper Drawers The Crisper Drawers provide a higher humidity environment for fresh fruit and vegetable storage Controls The Crisper Controls regulate the amount of humidity in the crisper drawer Slide the control toward the Fruit setting for produce with outer skins Slide the control toward the Vegetables setting for leafy produce I
  • Page 15 - English - : FRESH FOOD FEATURES To Remove Pull drawer out to full extension Tilt up front of drawer and pull straight out To Install Insert drawer into frame rails and push back into place Note For best results keep the crisper drawers tightly closed Gourmet BayTM The Gourmet Bay TM drawer is a fullwidth drawer with adjustable temperature control This drawer can be used for large party trays deli items beverages or miscellaneous items There is a divider to organize the drawer into sections if desired A There is a temperature control which adjusts A the amount of cold air allowed into the A A Gourmet Bay TM The control is located on the A right of the drawer under the lid Set the control to cold to provide a normal refrigerator temperature Set the drawer on the coldest setting when a temperature colder than the main refrigerator compartment is desired Use the coldest setting when storing meats Notes Cold air directed to the Gourmet BayTM drawer can decrease refrigerator temperature Refrigerator control may need to be adjusted Do not place leafy vegetables in the Gourmet BayTM drawer Colder temperatures could damage leafy produce To Remove Lift lid Pull drawer out to full extension Tilt the drawer front up and pull straight out To Install Push metal glide rails to the back of the refrigerator Place drawer onto rails and slide drawer back until it falls into place To Remove Divider Pull drawer completely out and raise the front of the divider to unhook it from the rear wall of the pantry and lift it out To Install Divider Hook back of divider over rear wall of pantry and lower into place Accessories Wine TrivetCan Rack select models The Wine TrivetCan Rack accessory fits in the Gourmet BayTM or on a shelf Bottles or cans can be laid crosswise or a single bottle may be laid in the center depression Gourmet Bay TM Tray The Gourmet Bay TM Tray allows for a removable tray within the fullwidth storage drawer Adjustable Storage Rack The Adjustable Storage Rack provides a place for horizontally storing wine The rack can also hold an egg carton Position the rack to rest on the left hand side of a refrigerator shelf Egg Cradle The Egg Cradle style may vary holds a quotdozenplusquot eggs It can be removed to carry to work area or to be washed
  • Page 16 - English - : FREEZER FEATURES Upper Wire Basket To Remove Pull upper basket out to full extension and lift out to remove To Install Slide upper basket into freezer Make sure that rear of basket hooks behind rail catch Note Lower Freezer Drawer See page 5 for lower basket and complete pullout drawer instructions Accessories Ice Bin The Ice Bin provides storage for ice Lower Basket Tray The Basket Tray is a removable plastic item that rests on the bottom of the lower pullout basket to catch spills and small food items before they can fall through to the freezer corn partment The tray can be removed for easy cleaning by lifting the tray from the basket Lower Basket Divider The Lower Basket Divider allows the option to organize the basket area into sections To remove and replace divider To remove pull divider straight up To install hook top corners of divider over top horizontal basket rungs
  • Page 17 - English - : 12828119 JennAir Trio Eng 11405 853 AM Page 17 ICE AND WATER Automatic Ice Maker Connect the ice maker to the water supply as instructed on page 9 Proper water flow and a level refrigerator are essential for optimal ice maker performance Operating Instructions Confirm ice bin is in place and ice maker arm is down After freezer section reaches between 0 to 2 F 18 to 17 C ice maker fills with water and begins operating You will have a complete harvest of ice approximately every three hours Allow approximately 24 hours after installation to receive first harvest of ice Discard ice created within first 12 hours of operation to assure system is flushed of impurities Stop ice production by raising ice maker arm until click is heard Ice maker will remain in the off position until arm is pushed down The first one or two batches will probably contain undersized and irregular cubes because of air in the supply line When the ice cubes are ejected it is normal for several cubes to be joined together at the ends They can easily be broken apart The ice maker will continue to make ice until the supply of ice cubes raises the ice maker arm shutting the ice maker off Certain sounds may accompany the various cycles of the ice maker The motor may have a slight hum the cubes will rattle as they fall into an empty storage pan and the water valve may click or quotbuzzquot occasionally If the ice is not used frequently the ice cubes will become cloudy shrink stick together and taste stale Empty the ice storage bin periodically and wash it in lukewarm water Be sure to dry the bin thoroughly before replacing it Beverages and foods should not be placed in the ice storage bin for quick chilling These items can block the ice maker arm causing the ice maker to malfunction Turn off arm up the ice maker when the water supply is to be shut off for several hours To Remove the Ice Bin Pull it forward away from the ice maker To avoid the ice maker dumping ice while the bin is removed turn the ice maker off by raising the icemaker arm To Install the Ice Bin Reverse the above procedure Turn the ice maker on by lowering the ice maker arm Water Dispenser The Water Dispenser is located on the left side wall of the fresh food section This design is for cold water dispensing only To Dispense Water Hold container under spout and press dispenser pad
  • Page 18 - English - : 12828119 JennAir Trio Eng 11405 853 AM Page 18 WATER FILTER Removal and Installation Initial Installation The water filter is located in the upper right hand corner of the fresh food compartment 1 Remove blue bypass cap and retain for later use 2 Remove sealing label from end of filter and insert into filter head 3 Rotate gently clockwise until filter stops Snap filter cover closed Reduce water spurts by flushing air from system Run water continuously for two minutes through dispenser until water runs steady During initial use allow about a one to twominute delay in water dispersal to allow internal water tank to fill Additional flushing may be required in some households where water is of poor quality Replacing Water Filter IMPORTANT Air trapped in system may cause water and cartridge to eject Always dispense water for two minutes before removing the filter for any reason Use caution when removing 1 Turn filter counterclockwise until it releases from filter head 2 Drain water from filter into sink and dispose of filter in normal household trash 3 Wipe up excess water in filter cover and continue with Initial Installation steps 2 through 4 The filter should be changed at least every 12 months Important Condition of water and amount used determines life span of water filter cartridge If water use is high or if water is of poor quality replacement may need to take place more often To purchase a replacement water filter cartridge call 1800JENNAIR 18005366247 USA and Canada The dispenser feature may be used without a water filter cartridge If you choose this option replace filter with blue bypass cap
  • Page 19 - English - : 12828119 JennAir Trio Eng 11405 853 AM Page 19 WATER FILTER PuriQe fquot System Specification and Performance Data Sheet Refrigerator Water Filter Cartridge Model UKF8001AXX Specifications Service Flow Rate Maximum 078 GPM 29 Lrain Rated Service Life UKF8001AXX750 Maximum 750 gallons2838 liters Maximum Operating Temperature 100 F38 C Minimum Pressure Requirement 35 psi241 kPA Minimum Operating Temperature 33 F1 C Maximum Operating Pressure 120 psi 827 kPA 000ApolloRoad agan Minnesota 551212240 6514504913 EPA EST 35917MN1 Performance Data Parameter Chlorine TampO Particulate 100834B USEPA MCL Standard No 42 Aesthetic Effects Influent Challenge Concentration 20 mgL 10 Influent Average 188 mgL Effluent Average Maximum lt005136364 mgL 006 RIgL Min Required Reduction 50 Reduction Average Minimum gt972600 9684 9952o0 9894 at least 10000 particlesml 5700000 ml 30583 ml 69000 ml 85 Parameter Turbidi b Cysts Asbestos Lead at pH 65 Lead at pH 85 Mercury at pH 65 Mercury at pH 85 Atrazine Benzene Carbofuran pDichlorobenzene Lindane Toxaphene USEPA MCL 1 NTU 995 Reduction 99 Reduction 0015 mgL 0015 mgL 0002mgL 0002mgL 0003mgL 0005mgL 004 mgL 0075 mgL 00002 mgL 0003mgL Standard No 53 Health Effects Influent Challenge Concentration 11 1 NTU Minimum 50000L 10710Bfi berslibers gt10 nicrometers in length 015 mgL 10 015 mgL 10 006 mgL 10 006 mgL 10 0009 mgL 10 0015 mgL 10 008 mgL 10 225 nlL 10oo 0002 mgL 10 0015 10oo Influent Average 107 NTU 166500 L 155MFL 0153 mgL 0150 mgL 0006 mgL 0006 mgL 0009 mgL 0014 mgL 0081 mgL 0208 mgL 0002 mgL 0015 mgL Effluent Average Maximum 031 NTU 049 NTU lt1 L lt1 L lt1 MFL lt1 MFL lt001 mgL lt001 mgL lt001 mgL lt001 mgL 00003 mgL 00005 mgL 00008 mgL 00015 mgL lt0002 mgL 0002 mgL 00006 mgL 00011 mgL lt0001 mgL lt0001 mgL lt00005 mgL lt00005 mgL 0000 mgL lt00001 mgL lt0001 mgL lt0001 mgL Reduction Average Minimum 9709 9520 gt9999 gt9999 gt9999 gt9999 gtg935 gtgg29 gt9933 gt9929 g570 g091 8622 7593 76g9 7531 9571oo 9214 9874 9846oo 9976 9974 9872 9650oo 92970o 9167 Min Required Reduction 05 NTU gt9995 99 010 mgL 010 mgL 0002 mgL 0002 mgL 0003 mgL 0005 mgL 004 mgL 0075 mgL 00002 mgL 0003 mgL Tested using a flow rate of 078 gpm pressure of 60 psig pH of 75 05 temp of 68 5 F 20 3 C Measurement in ParticlesmL Particles used were 05 1 microns NTU Nephelometric Turbidi b Units Standard No 42 Aesthetic Effects Taste and Odor Reduction Chlorine Taste amp Odor Mechanical Filtration Unit Particulate Reduction Class 1 Tested and certified by NSF IntemaUonal against ANSINSF Standards 42 amp 53 in models UKFS00tAXX750 for the reduction of Standard No 53 Health Effects Chenlical Reduction Unit Lead Atrazine Lindane Benzene Carbofuran pDichlorobenzene MercLuy amp Toxaphene Reduction Mechanical Filtration Unit Cyst Turbidity and Asbestos Reduction General Use Conditions Read this Performance Data Sheet and compare the capabilities of this unit with your actual water treatment needs DO NOT use this product where water is microbiologic ally unsafe or of unknown quality without adequate disinfection before or after the system System certified for cyst reduction may be used on disinfected water that may contain filterable cysts USE ONLY WITH COLD WATER SUPPLY CHECK FOR COMPLIANCE WITH THE STATEAND LOCAL LAWS AND REGULATIONS The PuriCleanII retractable water filtration system uses a UKF8001AXX replacement cartridge Timely replacement of filter cartridge is essential for performance satisfaction from this filtration system Please refer to the applicable section of your Use amp Care Guide for general operation maintenance requirements and troubleshooting Suggested retail price of replacement water filter is 3999 This system has been tested according to ANSINSF 42 and 53 for reduction of the substance listed above The concentration of the indicated substancesin water entering the system was reduced to a concentration less than or equal to the permissible limit for water leaving the system as specified in ANSINSF 42 and 53
  • Page 20 - English - : 12828119 JennAir Trio Eng 11405 853 AM Page 20 WATER FILTER State of California Department of Health Services Water Treatment Device Certificate Number 03 1583 Date Issued September 16 2003 Date Revised April 22 2004 TrademarkModel Designation UKFS001AXX750 469006750 67003523750 Replacement Elements UKFS001AXX 46 9006 Manufacturer PentaPure Inc The water treatment devicet s J listed on this certificate have met the testing requirements pursuant to Section 116830 of the Health and Safety Code for the following health related contaminants Microbiological Contaminants and Turbidity Cysts Turbidity InorganicRadiological Contaminants Asbestos Lead Mercury Organie Contaminants Atrazine Lindane Benzene Carboturan pdichlorobenzene Toxaphene Rated Service Capacity 750 gal Rated Service Flow 078 gpm Conditions of Certification Do not use where water is microbiologically unsafe or with water of unknown quality except that systelns certified for cyst reduction may be used on disinfected waters that may contain filterable cysts
  • Page 21 - English - : 12828119 JennAir Trio Eng 11405 853 AM Page 21 FOOD STORAGE TIPS Fresh Food Storage The fresh food compartment of a refrigerator should be kept between 34040 F 14 C with an optimum temperature of 37 F 3 C To check the temperature place an appliance thermometer in a glass of water and place in the center of the refrigerator Check after 24 hours If the temperature is above 40 F 4 C adjust the controls as explained on pages 1012 Avoid overcrowding the refrigerator shelves This reduces the circulation of air around the food and results in uneven cooling Fruits and Vegetables Storage in the crisper drawers traps humidity to help preserve the fruit and vegetable quality for longer time periods see page 14 Sort fruits and vegetables before storage and use bruised or soft items first Discard those showing signs of decay Always wrap odorous foods such as onions and cabbage so the odor does not transfer to other foods While vegetables need a certain amount of humidity to remain fresh too much humidity can shorten storage times especially leafy vegetables Drain vegetables well before storing Wait to wash fresh produce until right before use Meat and Cheese Raw meat and poultry should be wrapped securely so leakage and contamination of other foods or surfaces does not occur Occasionally mold will develop on the surface of hard cheeses Swiss Cheddar Parmesan Cut off at least an inch around and below the moldy area Keep your knife or instrument out of the mold itself Do not try to save individual cheese slices soft cheese cottage cheese cream sour cream or yogurt when mold appears Dairy Food Most dairy foods such as milk yogurt sour cream and cottage cheese have freshness dates on their cartons for appropriate length of storage Store these foods in the original carton and refrigerate immediately after purchasing and after each use Frozen Food Storage The freezer compartment of a refrigerator should be kept at approximately 0 F 18 C To check the temperature place an appliance thermometer between the frozen packages and check after 24 hours If the temperature is above 0 F 18 C adjust the control as described on pages 1012 A freezer operates more efficiently when it is at least twothirds full Packaging Foods for Freezing To minimize dehydration and quality deterioration use aluminum foil freezer wrap freezer bags or airtight containers Force as much air out of the packages as possible and be sure they are tightly sealed Trapped air can cause the food to dry out change color and develop an offflavor freezer burn Overwrap fresh meats and poultry with suitable freezer wrap prior to freezing Do not refreeze meat that has completely thawed Loading the Freezer Avoid adding too much warm food to the freezer at one time This overloads the freezer slows the rate of freezing and can raise the temperature of frozen foods Leave space between the packages so cold air can circulate freely allowing food to freeze as quickly as possible Avoid storing hardtofreeze foods such as ice cream and orange juice on the freezer door shelves These foods are best stored in the freezer interior where the temperature varies less with door openings Refer to the Food Storage Chart on pages 21 and 22 for approximate storage times
  • Page 22 - English - : 12828119 JennAir Trio Eng 11405 853 AM Page 22 FOOD STORAGE TIPS Food Storage Chart Storage times are approximate and may vary depending on type of packaging storage temperature and the quality of the food when purchased DAI RY P ROD UCTS Butter I month 6 to 9 months Wrap tightly or cover Milk and cream 1 week Not recommended Check carton date Close tightly Dont return unused portions to original container Dont freeze cream unless whipped Cream cheese cheese 1 to 2 weeks Not recommended Wrap tightly spread and cheese food Cottage cheese 3 to 5 days Not recommended Store in original carton Check carton date Sour cream 10 days Not recommended Store in original carton Check carton date Hard cheese 1 to 2 months 4 to 6 months Wrap tightly Swiss Cheddar and Parmesan May become Cut off any mold crumbly EGGS Eggs in the shell 3 weeks Not recommended Refrigerate small ends down Leftover yolks or whites 2 to4 days 9 to 12 months For each cup of yolks to be frozen add 1 tsp sugar for use in sweet or 1 tsp salt for nonsweet dishes FRUITS Apples 1 month 8 months cooked May also store unripe or hard apples at 60 to 70 F 16 to 21 C Bananas 2 to4 days 6 months Ripen at room temperature before wholepeeled refrigerating Bananas darken when refrigerated Pears plums avocados 3 to4 days Not recommended Ripen at room temperature before refrigerating Avocados darken when refrigerated Berries cherries apricots 2 to 3 days 6 months Ripen at room temperature before refrigerating Grapes 3 to 5 days 1 month whole Ripen at room temperature before refrigerating Citrus fruits 1 to 2 weeks Not recommended May also store at 60 to 70 F 16 to 21 C If refrigerated store uncovered Pineapples cut 2 to 3 days 6 to 12 months Will not ripen after purchase Use quickly
  • Page 23 - English - : 12828119 JennAir Trio Eng 11405 853 AM Page 23 FOOD STORAGE TIPS VE GETABLES Asparagus I to 2 days 8 to 10 months Do not wash before refrigerating Store in crisper Brussels sprouts broccoli 3 to 5 days 8 to 10 months Wrap odorous foods cauliflower green peas Leave peas in pods lima beans onions peppers Cabbage celery 1 to 2 weeks Not recommended Wrap odorous foods and refrigerate in crisper 7 to 10 days 8 to 10 months Remove tops Wrap odorous foods and refrigerate in the crisper 7 to 10 days Not recommended Carrots parsnips beets and turnips Lettuce POULTRY and FISH Chicken and Turkey whole Chicken and Turkey pieces Fish I to 2 days I to 2 days I to 2 days 12 months 9 months 2 to 6 months Keep in original packaging for refrigeration Place in the meat and cheese drawer When freezing longer than two weeks overwrap with freezer wrap M EATS Bacon 7 days 1 month Beef or lamb ground 1 to 2 days 3 to4 months Fresh meats can be kept in original packaging for refrigeration Beef or lamb roast and steak 3 to 5 days 6 to 9 months Place in the meat and cheese drawer When freezing longer than two weeks overwrap with freezer wrap Ham fully cooked whole 7 days 1 to 2 months half 5 days 1 to 2 months slices 3 days 1 to 2 months Luncheon meat 3 to 5 days 1 to 2 months Unopened vacuumpacked luncheon meat may be kept up to two weeks in the meat and cheese drawer Pork roast 3 to 5 days 4to 6 months Pork chops 3 to 5 days 4months Sausage ground 1 to 2 days 1 to 2 months Sausage smoked 7 days 1 to 2 months Veal 3 to 5 days 4to 6 months Frankfurters 7 days 1 month Processed meats should be tightly wrapped and stored in the meat and cheese drawer Sources United States Department of Agriculture Food Marketing Institute Cooperative Extension Service Iowa State University
  • Page 24 - English - : 2828119 JennAir Trio Eng 11405 853 AM Page 24 CARE AND CLEANING Refrigerator Cleaning Chart Cabinet Interior Stainless Steel Doors and Exterior selectmodels IM PORTAN1quotquot Damage to stainless steel finish due to improper use of cleaning products or nonrecommended products is not covered under this products warranty Glass Doors selectmodels Condenser Coil Remove base grille m access Condenser Fan Outlet Grille See back of refrigerator Accessories Shelvesbuckets drawers etc Abrasive or harsh cleaners Ammonia Chlorine bleach Concentrated detergents or solvents Metal or plastictextured scouring pads Abrasive or harsh cleaners Ammonia Chlorine bleach Concentrated detergents or solvents Metal or plastictextured scouring pads Vinegarbased products Citrusbased cleaners Avoid using excessive amounts of water which may seep under or behind glass causing staining Abrasive or harsh cleaners Do not use abrasive materials such as scouring pads steel wool or powdered cleaners as they will scratch glass Use 4 tablespoons of baking soda dissolved in 1 quart 1 liter warm soapy water Rinse surfaces with clean warm water and dry immediately to avoid water spots Use warm soapy water and a soft clean cloth or sponge Rinse surfaces with clean warm water and dry immediately to avoid water spots To polish and help prevent finger prints follow with Stainless Steel Magic Spray part no 20000008quot Wash with soap and water Rinse with clear water and dry Glass cleaner can be used if sprayed on a cloth firsL Door Gaskets Metal or plastictextured Use warm soapy water and a soft clean scouring pads cloth or sponge Anything other than a vaccuum cleaner Use a vacuum cleaner hose nozzle To order call 1800JENNAIR A dishwasher 18005366247 USA and Canada Use a vacuum cleaner hose nozzle with brush attachmenL Follow removal and installation instructions from appropriate feature section Allow items to adjust to room temperature Dilute mild detergent and use a soft clean cloth or sponge for cleaning Use a plastic bristle brush to get into crevices Rinse surfaces with clean warm water Dry glass and clear items immediately to avoid spots
  • Page 25 - English - : 2828119 JennAir Trio Eng 11405 853 AM Page 25 CARE AND CLEANING Removing Odors From Refrigerator 1 Remove all food and turn the refrigerator OFF 2 Disconnect power to the refrigerator 3 Clean the walls floor ceiling of cabinet interior drawers shelves and gaskets according to the instructions on page 23 4 Dilute mild detergent and brush solution into crevices using a plastic bristle brush Let stand for 5 minutes Rinse surfaces with warm water Dry surfaces with a soft clean cloth 5 Wash and dry all bottles containers and jars Discard spoiled or expired items 6 Wrap or store odorcausing foods in tightly sealed containers to prevent recurring odors 7 Reconnect power to refrigerator and return food to refrigerator 8 Allow the refrigerator to cool 9 After 24 hours check if odor has been eliminated If odor is still present 1 Remove drawers and place on top shelf of refrigerator 2 Pack refrigerator and freezer sections including doors with crumpled sheets of black and white newspaper 3 Place charcoal briquettes randomly on crumpled newspaper in both freezer and refrigerator compartments 4 Close doors and let stand 24 to 48 hours Energy Saving Tips Avoid overcrowding refrigerator shelves Overcrowding reduces air circulation around food and causes refrigerator to run longer Avoid adding too much warm food to refrigerator at one time This overloads compartments and slows rate of cooling Do not use aluminum foil wax paper or paper toweling as shelf liners This decreases air flow and causes refrigerator to run less efficiently A freezer that is twothirds full runs most efficiently Locate refrigerator in coolest part of room Avoid areas of direct sunlight or near heating ducts registers or other heat producing appliances If this is not possible isolate exterior by using a section of cabinet or an added layer of insulation Clean door gaskets every three months according to cleaning instructions This will assure that door seals properly and refrigerator runs efficiently Take time to organize items in refrigerator to reduce time that door is open Be sure your doors are closing securely by leveling refrigerator as instructed in your installation instructions Clean condenser coils as indicated in the cleaning instructions every three months This will increase energy efficiency and cooling performance
  • Page 26 - English - : 2828119 JennAir Trio Eng 11405 853 AM Page 26 CARE AND CLEANING Replacing Light Bulbs Fresh Food Section style of light shield varies Slide clear light shield toward back of comlartment to release from light assembly Remove light bulbs Replace with appliance bulbs no greater than 40 watts Replace light bulb cover by inserting tabs on light shield into liner holes on each side of light assembly Slide shield toward front of refrigerator until it locks into place Do not force shield beyond locking point Doing so may damage light shield Freezer style of light shield varies 1 Reach behind the light cover 2 With firm pressure press forward on the notches at the back of the cover and pull down The cover will open from the back 3 Remove the cover 4 Remove light bulb Replace bulb with appliance bulb no greater than 40 watts Insert front tabs of light cover into slots in freezer liner and snap rear portion over light assembly until rear tab engages Glass Doors selectmodels To protect the glass doors 1 Do not use abrasive cleaning agents such as steel wool scouring pads or powdered cleaners as they may scratch the glass 2 Do not hit 1he glass with pots pans furniture toys or cther objects 3 Do not close the door until the shelves and drawers are in place Scratching hitting jarring or stressing the glass may weaken its structure causing an increased risk of breakage at a later date
  • Page 27 - English - : 2828119 JennAir Trio Eng 11405 854 AM Page 27 CARE AND CLEANING Preparing for Vacation For short vacations or absences three months or less 1 Remove all perishables 2 If no one will be checking in on the refrigerator during your absence remove all frozen items also 3 If your refrigerator has an automatic ice maker Shut off the water supply to the ice maker at least one day ahead of time After the last load of ice drops raise the wire shut off arm to the OFF position Empty the ice bin 4 If the room temperature will drop below 55 F 13 C follow the instructions for longer absences For long vacations absences more than three months OR if the room temperature will drop below 55 F 13 C 1 Remove food 2 If your refrigerator has an automatic ice maker Shut off the water supply to the ice maker at least one day ahead of time After the last load of ice drops raise the wire shut off arm to the OFF position Empty the ice bin If your refrigerator has a dispenser system with water filter remove the water filter cartridge and install the filter bypass Dispose of the used cartridge Turn the freezer control to OFF Unplug the refrigeratoF Thoroughly clean lhe interior of both compartments with a baking soda solution and a clean soft cloth four tablespoons of baking soda in one quart of warm water 7 Dry thoroughly 8 Leave the doors open to prevent the formation of mold and mildew Upon your return After a short vacation or absence For models with automatic ice makers or dispensers Reconnect the water supply and turn on supply valve see page 9 Monitor water connection for 24 hours and correct leaks if necessary Run 1015 glasses of water from the dispenser to flush out the system Restart the ice maker by lowering the ice maker arm Discard at least the first three ice harvests After a long vacation or absence Reconnect the water supply and turn on supply valve see page 9 Plug the refrigerator back in and reset controls see pages 1012 Monitor water connection for 24 hours and correct leaks if necessary For dispenser models run water through the dispenser for at least three minutes with the filter bypass in place then install water filter see page 17 Afterinstalling the water filter run water through the dispenser continuously for at least two minutes or until water runs steady Initially you may notice a one to two minute delay in water dispersal as the internal tanks fills Restart the ice maker by lowering the ice maker arm Discard ice produced within the first 12 hours at least the first three harvests Preparing to move Follow the above instructions for long vacationsabsences through step 7 Secure alllooseitemssuch as shelvesand drawers by tapingthem securelyinplaceto preventdamage Tape the doors shuL Use an appliancedollywhen moving the refrigerator Always truck the refrigerator from its side or back never from its front Be sure the refrigerator stays in an upright position during moving
  • Page 28 - English - : 12828119 JennAir Trio Eng 11405 854 AM Page 28 OPERATING SOUNDS Improvements in refrigeration design may produce sounds in your new refrigerator that are different or were not present in an older model These improvements were made to create a refrigerator that is better at preserving food is more energy efficient and is quieter overall Because new refrigerators run quieter sounds may be detected that were present in older refrigerators but were masked by higher sound levels Many of these sounds are normal Please note that the surfaces adjacent to a refrigerator such as hard walls floors and cabinetry may make these sounds seem even louder The following are some of the normal sounds that may be noticed in a new refrigerator Clicking Freezer control A clicks when starting or stopping compressor Motorized device B sounds like an electric clock and snaps in and out Air rushing or Freezer fan C and condenser fan D make whirring this noise while operating Gurgling or Evaporator E and heat exchanger F boiling sound refrigerant makes this noise when flowing Thumping Ice cubes from ice maker select models drop into ice bucket G Vibrating noise Compressor H makes a pulsating sound while running Refrigerator is not level Buzzing Ice maker water valve I hookup select models buzzes when ice maker fills with water Normal operation Normal operation Normal operation Normal operation Normal operation Normal operation See page4 for details on how to level your refrigerator Normal operation Humming Ice maker J is in the on position without Stop sound by raising ice maker arm water connection to OFF position see page 16 Compressor H can make a highpitched hum Normal operation while operating Hissing or Defrost heater K hisses sizzles or pops when Normal operation popping operational
  • Page 29 - English - : 12828119 JennAir Trio Eng 11405 854 AM Page 29 TROUBLESHOOTING iiiiiiiiiiiiiiiiiiiiiiiiiiiiiiiiiiiiiiiiiiiiiiiiiiiiiiiiiiiiiiiiiiiiiiiiiiiiIiiliiiiiiiiiiiiiiiiiiiiiiiiiiiiiiiiiiiiiiiiiiiiiiiiiiiiiiiiiiiiiiiiiiiiiiiiiiiiiiiiiiiiiiiiiiiiiiiiiiiiiiiiiiiiiiiiiiiiiiiiiiiiiiiiiiiiiiiiiiiiiiiiiiiiiiiiiiiiiiiiiiiiiiiiiiiiiiiiiiiiiiiiiiiiiiiiiiiiiiiiiiiiiiiiiiiiiiiiiiiiiliiliiiiiiliiliiiiiiliiliiiiiiliiliiiiiiliiliiiiiiliiliiiiiiliiliiiiiiliiliiiiiiliiliiiiiiliiliiiiiiliiliiiiiiliiliiiiiiliiliiiiiiliiliiiiiiliiliiiiiiliiliiiiiiliiliiiiiiliiliiiiiiliiliiiiiiliiliiiiiiliiliiiiiiliiliiiiiiliiliiiiiiiiii Freezer control and Refrigerator is in defrost mode Normal operation lights are on hut Wait 40 minutes to see if refrigerator restarts compressor is not operating Crisper drawer Control settings are too low See pages 1012 to adjust controls temperature is too warm Refrigerator does Refrigerator is not plugged in Plug in refrigerator not operate Control is not on See pages 1012 to adjust your controls Fuse is blown or circuit breaker needs Replace any blown fuses to be reset Check circuit breaker and reset if necessary Power outage has occurred Call local power company listing to report outage Refrigerator still Refrigerator is malfunctioning Unplug refrigerator and transfer food to another wont operate refrigerator If another refrigerator is not available place dry ice in freezer section to preserve food Warranty does not cover food loss Contact service for assistance Food temperature Condenser coils are dirty Clean according to the chart on page 23 is too cold Refrigerator or freezer controls are set See pages 1012 to adjust your controls too high Door is not closing properly Food temperature is too warm Refrigerator is not level See page 4 for details on flow to level your refrigerator Check gaskets for proper seal Clean if necessary according to the chart on page 23 Check for internal obstructions that are keeping door from closing properly ie improperly closed drawers ice buckets oversized or improperly stored containers etc Controls need to be adjusted See pages 1012 to adjust your controls Condenser coils are dirty Clean according to the chart on page 23 Rear air grille is blocked Check the positioning of food items in refrigerator to make sure grille is not blocked Rearair grilles are located under crisper drawers Door has been opened frequently or has Reduce time door is open been opened for long periods of time Organize food items efficiently to assure door is open for as short a time as possible Food has recently been added Allow time for recently added food to reach refrigerator or freezer temperature Refrigerator has Compartment is dirty or has odor Clean according to instructions on page 23 an odor causing food Water droplets Check gaskets for proper seal Clean according to the chart on page 23 form on outside Humidity levels are high Hot humid weather carl increase condensation of refrigerator Controls require adjustment See pages 1012 to adjust your controls
  • Page 30 - English - : 12828119 JennAir Trio Eng 11405 854 AM Page 30 TROUBLESHOOTING Water droplets form Humidity levels are high or door has See pages 1012 to adjust your controls on inside of been been opened frequently Reduce time door is open refrigerator Organize food items efficiently to assure door is open for as short a time as possible Check gaskets for proper seal Clean if necessary according to the chart on page 23 Refrigerator or ice Normal operation See page 16 maker makes unfamiliar sounds or seems too loud Crisper drawers Contents of drawer or positioning of Reposition food items and containers to avoid do not close freely items in the surrounding compartment interference with the drawers could be obstructing drawer Drawer is not in proper position Refrigerator is not level Drawer channels are dirty or need treatment Refrigerator runs too frequently Doors have been opened frequently or for long periods of time See page 14 for proper drawer placement See page 4 for details on how to level your refrigerator Clean drawer channels with warm soapy water Rinse and dry thoroughly Apply a thin layer of petroleum jelly to drawer channels Reduce time door is open Organize food items efficiently to assure door is open for as short a time as possible Allow interior environment to adjust for period the door has been opened Humidity or heat in surrounding area is Normal operation high Food has recently been added Refrigerator is exposed to heat by environment or by appliances nearby Condenser coils are dirty Controls need to be adjusted Door is not closing properly Normal Operation Allow time for recently added food to reach refrigerator or freezer temperature Evaluateyour refrigerators environment Refrigerator may need to be moved to run more efficiently Clean if necessary according to the chart on page 23 See pages 1012 to adjust your controls Refrigerator is not level See page 4 for details on how to level your refrigerator Check gaskets for proper seal Clean if necessary according to the chart on page 23 Check for internal obstructions that are keeping door from closing properly ie improperly closed drawers ice buckets oversized or improperly stored containers etc See Operating Sounds on page 2Z
  • Page 31 - English - : 12828119 JennAir Trio Eng 11405 854 AM Page 31 TROUBLESHOOTING Ice and Water Refrigerator is Plastic tubing was used to complete The manufacturer recommends using copper tubing leaking water water connection for installation Plastic is less durable and can cause Ice forms in inlet tube to ice maker Improper water valve was installed Water pressure is low Freezer temperature is too high Water pressure is low Improper water valve was installed Copper tubing has kinks Water filter is clogged or needs to be changed Water flow is slower than normal leakage The manufacturer is not responsible for property damage due to improper installation or water connection Check water connection procedure see page 9 Self piercing and 3saddle valves cause low water pressure and may clog tile line over time The manufacturer is not responsible for property damage due to improper installation or water connection Water pressure must be between 35 to 100 pounds per square inch to function properly A minimum pressure of 35 pounds per square inch is recommended for refrigerators with water filters Adjust freezer control see pages 1012 Freezer is recommended to be approximately 0 F18 C Water pressure must be between 35 to 100 pounds per square inch to function properly A minimum pressure of 35 pounds per square inch is recommended for refrigerators with water filters Check water connection procedure see page 9 Self piercing and quot saddle valves cause low water The manufacturer is not responsible for property damage due to improper installation or water connection Turn off water supply and remove kinks If kinks cannot be removed replace tubing Change water filter see page 17
  • Page 32 - English - : 2828119 JennAir Trio Eng 11405 854 AM Page 32 WARRANTY amp SERVICE What is Not Covered By These Warranties 1Conditions and damages resulting fmomany cf tile follcwing a Improper installation delivery or maintenance b Any repair modification alteration or adjustment net authorized by the manufacturer or an authorized servicer c Misuse abuse accidents or unreasonable use d Incorrect electric current voltage or supply e Improper setting of any control 2 Warranties are void if the original serial numbers have been removed allered or cannot be readily determined 3 Light bulbs 4 Products purchased for commercial or industrial use 5 The cost of service or service call to a Correct intallation errors b Inslruct the user on the proper use of tile product c Transport the appliance to the servicer 6 Consequential or incidental damages sustained by any person as a result of any breach of these warranties Some states do not allow the exclusion or limitation of consequential or incidental damages so the above exclusion may not apply If You Need Service Call the dealer from whom your appliance was purchased or call Maytag ServicessMJennAir Customer Assistance at 1800JENNAIR 18005366247 USAand Canada to locate an authorized servicen Be sure to retain proof of purchase to verify warranty status Refer to Warrantyfor further information on owners responsibilities for warranty service If the dcaler or service company cannot resolve the problem write to Maytag ServicessMAttn CAIR Center POBox 2370Cleveland TN 373202370 or call 180OJENNAIR 18005366247 USA and Canada UScustomers using TTY for deaf hearing impaired or speech impaired call 18006882080 Use amp Care Guides service manuals and parts information are aailable from Maytag ServicessMJennAir Customer Assistance Note Whenwriting or calling about a service problem please include the following information a Your name address and telephone number b Model number and serial number c Name and address of your dealer or servicer d A clear description of the problem you are having e Proofof purchase sales receipt
  • Page 33 - French - : 12828119 JennAir Trio FR 11405 835 AM Page 1 RCFRIGCRATEUR DE PORTE FRANOAISE JENNAIR mJENNAIR Commandes de temperature 4244 Caracteristiques compartiment refrigerateur 4546 Caracteristiques compartiment congelateur 47 Eau et glaons 48 Filtre eau 4951 Conseils pour la conservation des aliments 5254 Entretien et nettoyage 5558 Bruits de fonctionnement 59 Recherche des pannes 6062 Garantie et service apresvente 63 Guia Uso y Cuidado 64
  • Page 34 - French - : 12828119 JennAir Trio FR 11405 835 AM Page 2 INSTRUCTIONS DE SI CURITI IMPORTANTES Ce que vous devez savoir sur les instructions de s curit Les instructions de securite importantes et les avertissements paraissant dans ce guide ne sont pas destines a couvrir routes les situations et conditions eventuellesqui peuvent se presenter II faut faire preuve de bon sens et de prudence Iors de Iinstallation de Ientretien ou de Iutilisation de cet appareil Prenez toujours contact avec le fabricant au sujet de problemes ou conditions que vous ne comprenez pas Reconnaissez les tiquettes phrases ou symboles sur la scurit Cet appareil est dote dune fiche de branchement a 3 broches pour liaison la terre ce qui assure une protection adequate contre les risques de chocs electriques On doit brancher Iappareil uniquement sur une prise de courant reliee a la terre Si la prise de courant disponible ne comporte que deux alveoles cest au client quincombent la responsabilite et Iobligation personnelle de la faire remplacer par une prise de courant a 3 alveoles convenablement reliee la terre On ne doit jamais quelles que soient les circonstances couper ou arracher la troisieme broche liaison a la terre de la fiche de branchement II ne faut jamais utiliser une fiche dadaptation Cordon dalimentation avec fiche de branchement trois broches Prise de courant murale reliee a la terre
  • Page 35: 12828119 JennAir Trio FR 11405 835 AM Page 3 INSTRUCTIONS DE SICURITI IMPORTANTES CONSERVEZ CES INSTRUCTIONS
  • Page 36 - French - : 12828119 JennAir Trio FR 11405 835 AM Page 4 I NSTALLATI ON Votre refrigerateur a ete soigneusement emballe pour Iexpedition Retirez et jetez le materiau demballage et le ruban adhesif des clayettes et etageres Nenlevez pas la plaque signaletique Emplacement dinstallation Ninstallez pas le refrigerateur pres dun four radiateur ou dune autre source de chaleur Si cela nest pas possible protegezle avec du materiau de Iarmoire Ne Iinstallez pas dans un endroit oQ la temperature descend en dessous de 13 C 55 FJou monte au dessus de 43C 110 F A cette temperature il pourrait real fonctionner Le r4frig4rateur est pr4vu seulement pour une application domestique Iint4rieur Mesure de Iouverture Lors de Iinstallation de votre appareil mesurez bien cet espace Prevoyez un espace de 12 cm 2po en haut et de 12 cm 2po derriere le couvercle du compartiment machine situe a Iarriere pour assurer une bonne circulation de Iair Les revetements de sol tapis carreaux bois peuvent diminuer les dimensions de Iouverture Un degagement supplementaire peut etre obtenu en ayant recours a la methode presentee dans la section Aplomb du rfrigrateur IMPORTANT Si le refrigerateur doit etre installe dans une enceinte ou sa partie superieure se trouverait completement recouverte mesurez la distance entre le plancher et le haut du couvrecharniere pour verifier le bon degagement Transport du r4frigdrateur NE transportez JAMAIS le refrigerateur sur le cote Sil nest pas possible de le mettre a la verticale posezle sur Iarriere Laissez le refrigerateur la verticale pendant environ 30 minutes avant de le brancher pour etre sQr que Ihuile revienne au compresseur Le branchement immediat du refrigerateur pourrait endommager les pieces internes Servezvous dun chariot ou diable pour deplacer le refrigerateur Transportez TOUJOURS le refrigerateur par un cote ou par Iarriere et JAMAIS par Iavant Protegez le fini exterieur du refrigerateur Iors du transport en enveloppant la caisse de couvertures ou en ajoutant du rembourrage entre le refrigerateur et le diable Assujettissez fermement le refrigerateur au diable Iaide de sangles ou de cordons elastiques Fakes passer les sangles par les poignees si possible Ne serrez pas trop Un serrage excessif pourrait endommager Iexterieur du fini Panneaux de porte en verre certains modbles
  • Page 37 - French - : 2828119 JennAir Trio FR 11405 835 AM Page 5 INSTALLATION Aplomb du r frig mteur Pour optimiser Iesthetique ct la performance du refrigerateur il faLt le placer daplomb 3 A Iaide dun toumeecrou hex tournez les vis de reglage avant A de chaque cote pour relever ou baisser Iavant du refrigerateur Remarque Terminez au besoin Iinversion des portes Iintallation des panneaux etou le raccordement Ialimentation en eau avant la mise daplomb Materiel ncessaire Tourneecrou hex de 38po Niveau bulle 1 Retirez la grille inferieure Saisissezla fermement et tirezla pour Ienlever 2 Retirez les cachesinferieurs Placez Iextremite gomme dun crayon ou outil semblable non pointu dans Iencoche du cache Emplacement de Appuyez legerement pour soulever le cache Continuez a maintenir une pression vers le bas du cOte de Iencoche tout en faisant pivoter le cache pour Ienlever Remarque Certains modeles noNt que des vis de reglage ltA gtgt 4 Certains modeles ont aussi des vis de reglage arriere B A Iaide du tourneecrou hex tournez chacune de ces vis de reglage B pour relever ou baisser Iarriere du rdrigerateur 5 A Iaide du niveau a bulle assurezvous que Iavant du refrigerateur est releve de 6 mm Y4po ou dquot2 bulle par rapport Iarriere du refrigerateur et que le refrigerateur est bien a niveau lateralemenL 6 Toumez les pieds stabilisateurs C droite jusqua ce quils reposent fermement sur le sol 7 Toumez les vis de reglage A vers la gauche pour que tout le poids du refrigerateur repose sur les pieds stabilisateurs 8 Remettez en place les caches Placez le cache dans le bord exterieur de la charniere Fakes pivoter le cache vers la caisse et enclenchezle en place Remettez la grille inferieure en place Remarque Pour que la reinstallation se fasse bien suivez le repere lttop gtgta Iinterieur de la grille inferieure Alignez les attaches de montage de la grille inferieure avec les fentes a la partie inferieure de la caisse Poussez fermement la grille inferieure en place jusqua ce quelle senclenche
  • Page 38 - French - : 12828119 JennAir Trio FR 11405 835 AM Page 6 I NSTALLATI 0 N Ddpose des portes et du tiroir Certaines installations necessitent que les portes le tiroir soient retires pour transporter le refrigerateur son emplacement definitif 1 Debranchez le cordon electrique de la prise 2 Retirez la grille inferieure et les charnieres inferieurs page 36 3 Retirez le couvrecharniere superieur de porte du rdrigerateur en retirant la vis Phillips Conservez la vis et le couvre charniere pour les reutiliser plustard 4 Dvissez les vis tete hexagonale de 56po de la charniere superieure pour retirer la charniere Conservez routes l esvis pour les reutiliser plus tard 5 Soulevez la porte du refrigerateur cote droit de Iaxe de charniere centrale Enlevez Iembout fermoir de Iaxe de charniere centrale sur le cote droit et conservezle pour le reutiliser plus tard 9 Debranchez le faisceau de fils sur le dessus de la charniere superieure de porte du rdrigerateur c6te gauche Debranchez le connecteur deux broches en appuyant au point de raccordement Iaide dun tournevis plat ou dun ongle Le fil de terre vert reste fixe la charniere Devissez les vis 9 tete hexagonale de 56po de la charniere superieure pour I retirer la charniere et conservezles pour les reutiliser plus tard Soulevez la porte du refrigerateur cote gauche avec la charniere superieure de Iaxe de charniere centrale r Retirez Iaxe de charniere centrale Ji Iaide dun tourneecrou hex de 56po iJ et conservez Iaxe de charniere pour le reutiliser plus tard Retirez les vis Phillips pour enlever les charnieres gauche et droite et conservez routes les vis pour les reutiliser plus tard Retirez les deux pieds stabilisateurs 9 Iaide dun tourneecrou hex de poet conservez les vis pour les reutiliser plus tard
  • Page 39 - French - : 12828119 JennAir Trio FR 11405 835 AM Page 7 I NSTALLATI 0 N Tiroir coulissant congdlateur tiroir certains modles Installation 1 Tirez les deux glissieres au ITlaxilTIUm Tout en retenant le devant de la porte accrochez les supports en plaant leurs crochets dans les fentes Iinterieur de chaque glissiere Remarque Les quatre supports du tiroir doivent etre bien installes dans les fentes appropriees pour que le tiroir coulisse correctement Dpose 1 Tirez le tiroir au maximum Inclinez le panier inferieur vers Iavant puis soulevezle pour le retirer Sur chaque glissiere laterale se trouve un support pour le panier avec deux crochets Pour liberer chacun des supports ouvrez les crochets en les poussant vers Iinterieur Iecart du systeme de glissieres Soulevez les supports pour les sortir des glissieres Enlevez la vis Phillips de chacune des glissieres du tiroir certains modeles Soulevez le haut de Iavant du tiroir pour defaire ce dernier des glissieres Retirez la porte en relevant sa pattie avant Baissez la faade du tiroir a son emplacement definitif Remettez les vis Phillips qui ont ete retirees de chacune des glissieres du tiroir et serrezles certains modeles Remettez les supports de panier sur les glissieres du tiroir Alignez les fermoirs des supports de panier avec les fentes des supports du tiroir et appuyez sur chaque fermoir et ce vers les supports jusqua ce que chacun senclenche Crochets des supports de panier 6 Inclinez vers le basle devant du partier inferieur et placezle dans les supports de panier
  • Page 40 - French - : 12828119 JennAir Trio FR 11405 835 AM Page 8 I NSTALLATI 0 N Remise en place des portes 1 Installation des ensembles de charniere Installez la charniere centrale a Iaide de vis Phillips 2 Placer le cote charnieres de la porte du refrigerateur sur Iaxe de charniere centrale Installez la charniere superieure Iaide de vis a tete hexagonale de 56po 3 Tenez la porte du congelateur a la verticale tout en installant Iaxe de charniere centrale Iaide dun tourne ecrou hex de 65po 4 Rebranche le connecteur a deux broches 5 Remettez en place le couvrecharniere Poignde le modele change par le modele Ce style de poignee est installe Iusine Materiel necessaire Cle Allen de 332po Depose Retirez la vis de pression du support de montage de la poignee a Iaide de la cle Allen de 32po Repetez la methode sur tous les supports afin de retirer la poignee Installation Alignez la poignee avec les supports de montage Serrez bien toutes les vis pour bien fixer la poignee en place Ouverture et Fermeture des Portes du Rdfrigerateur Votre refrigerateur est dune conception unique avec 2 portes de compartiment pour aliments frais Chacune de ces portes souvre ou se ferme independamment II existe un volet vertical articule sur la porte gauche pour aliments frais Quand la porte gauche est fermee le volet forme automatiquement une etancheite entre les deux portes quand toutes deux sont fermees Quand la porte gauche est ouverte le volet articule se replie automatiquement vers Iinterieur afin de ne pas gener
  • Page 41 - French - : 12828119 JennAir Trio FR 11405 835 AM Page 9 I NSTALLATI 0 N Pose de Poignes montes sur le devant dun modble en acier inoxydable 1 Desserrez Iattache inf6rieure de la porte a Iaide dun tournevis Phillips i i 2 Reperer le trou perc6 la base de la poign6e et enclencher Iextr6mit6 creuse de la poignee sur le clip inferieur de la porte Pose de poignes montes sur le devant dun porte de conglateur en acier inoxydable 1 Desserrez Iattache inf6rieure de la porte a Iaide dun tournevis Phillips 2 Reperez le trou a la base de la poignee et emboftez Iextremite creuse de la poignee sur Iattache de retenue gauche de la porte 4 Inserer Iautre extremite de la quot lt pmgnee sur le chp superteur de la porte et la faire glisser aussi loin que possible REMARQUE Si le haut de la poignee ne s insere pas sur le clip 1 superteur ouvrtr un peu plus le Lo clip inferieur jusqu a ce que la poignee puisse s inserer en place Pour serrer a v s nserez e quotLquot tournevis Phillips dans les trous de montage situes la base de la poignee Inserez le bouchon de plastique dans le trou 5 Repeter les 6tapes cidessus pour Iautre poign6e Retrez de poignes montes sur le devant dun modble en acier inoxydable 1 Enlevez Iobturateur en plastique a la base de la poignee Iaide dun tres petit tournevis plat Inserer dun tournevis Phillips dans le trou perc6 dans la poignee pour enlever la vis 2 Faire glisser la poignee vers le bas et la retirer du clip de la porte 3 Repeter les 6tapes cidessus pour rautre poignee 3 Mettez Iautre extremit6 de la f poignee sur Iattache de retenue gauche et faites gaucheglisserlaaupoign6emaximumVersla REMARQUE Si Iextremit6 de la poignee ne senclenche pas sur Iattache gauche desserrez davantage Iattache droite jusqua obtention dune adaptation appropriee 4 Pour serrer la vis inserez le tournevis Phillips dans le trou situ6 a Iextr6mit6 de la poignee Inserez le bouchon en plastique dans le trou Retrez de poignes montes sur le devant dun porte de conglateur en acier inoxydable 1 Enlevez Iobturateur en plastique la base de la poignee a raide dun tres petit tournevis plat Inserer dun tournevis Phillips dans le trou perc6 dans la poignee pour enlever la vis 2 Faire glisser la poign6e vers le bas et la retirer du clip de la porte 4O
  • Page 42 - French - : 2828119 JennAir Trio FR 11405 835 AM INSTALLATION Raccordement de Ialimentation en eau Page I0 Matdel ncessaire Tubeen cuivre flexible de 4po de diametre exterieur Robinet darret necessite un trou de 64 mm 4po percer dans le tuyau dalimentation en eau avant de fixer le robine0 Cle a molette Toumeecrou hex de Y4po Remarques Vous devriez seulement utiliser la tuyauterie de cuivre pour Iinstallation Le plastique est moins durable et peut endommager Ajoutez 250m 8 P0 la bngueur de tube necessairepour atteindre Ialimentationen eau afin dbbtenir une bngueur suffisanteen cas de reparation 1 Creez une boucle diametre minimum de 60 cm2 pi avec le tube en cuivre Ivitez dentortiller le tube en cuivre en IenroulanL Ne pas utilisez le tube en plastique 2 Retirez le capuchon en plastique de Ibrifice darrivee du robinet deau diam6tre minimum de 60 cm2 pi Placez la virole A et Iecrou en laiton 13sur Iextremite du tube en cuivre comme il est illustre Rappel Ne reutilisez pas une A ancienne virole La virole et Iecrou sont fournee en la packet de utilisation et entretien 45quilPlacezIextremiteetvissez Iecrou dansCulissezldficelegerementlepenetredansdardveelecrutubeduenduldficedarriveesansmbinetdeaUlaitontube enlorificePardessuslentrtillercuivredardveeFannezdanSlaserrezPUrvirole Iecrou a la de ImportantNe serrez pas trop IIy risque sinon de fausser le filetage Tirez sur le tube pour confirmer que le raccordement est bien fail Raccordez le tube au chassis 8 Iaide dun collier C et ouvrez Ieau Verifiez Iabsence de fuite et corrigez la situation le cas echeanL Continuez observer le raccordement en eau pendant deux 8 trois heures avant de deplacer le refrigerateur a son emplacement permanent Surveillez le raccordement de Ieau pendant 24 heures Corrigez les fuites le cas echeanL
  • Page 43 - French - : 12828119 JennAir Trio FR 11405 835 AM Page Ii COMMANDES DE TEMPI RATURE Commandes touche Les commandes sont situees en haut sur le devant du compartiment de refrigeration Commandes Rglage initial Apres avoir branche le rdrigerateur reglez les commandes Appuyez sur V ou A pour ajuster les commandes au reglage desire La gamme des commandes de temperature pour les deux compartiments va de 1 7 temperature la plus basse Reglez la commande du congelateur sur4 Reglez la commande du refrigerateur sur 4 Laissez le refrigerateur fonctionner pendant au moins 8 12 heures avant dy placer des aliments Surfaces de la caisse chaudes Occasionnellement la face avant de la caisse du refrigerateur peut etre chaude au toucher II sagit dun effet normal qui empeche la condensation dhumidite sur la caisse Ceci se remarque particulierement Iors de la raise en marche initiale du rdrigerateur par temps chaud ou apres une periode prolongee ou excessive douverture des portes Ajustage des commandes 24 heures apres Iaddition daliments il est possible de decider sil convient dajuster la temperature dans Iun ou rautre ou les deux compartiments Dans ce cas ajustez la ou les commandes selon les indications du tableau Guide dajustage des temperatures cidessous Voyez a la page 52 les instructions sur la verification de la temperature des compartiments Saul Iors de la raise en marche initiale du refrigerateur ne changez pas la commande de plus dune unite a la lois Laissez les temperatures se stabiliser pendant 24 heures Changer rune ou Iautre commande aura un certain effet sur la temperature de Iautre compartiment Guide dajustage des temperatures Compartiment de refrigeration trop chaud Reglez la commande du refrigerateur vers le chiffre superieur en appuyant sur la toucheA Compartiment de refrigeration trop froid Reglez la commande du refrigerateur vers le chiffre inferieur en appuyant sur la touche V Compartiment de congelation trop chaud Reglez la commande du congelateur vers le chiffre superieur en appuyant sur la touche A Compartiment de congelation trop froid ARRFT du refrigerateur Reglez la commande du congelateur vers le chiffre inferieur en appuyant sur la touche r Appuyez sur la touche du refrigerateur ou du congelateur jusqua ce que paraisse Iafficheur Commande climatique de la temperature Trisensor certains modeles Cette commande est situee en haut a Iavant du compartiment refrigerateur Commande Reglage initial de la temperature Les temperatures sont prereglees Iusine Celle du refrigerateur est reglee a 38 F 3 C et celle du congelateur 0 F 18 C Ajustement de la commande II est possible que au bout de 24 heures vous decidiez que la temperature de run des deux compartiments devrait etre moins basse ou plus basse Si cela est le cas ajustez la commande de la fagon indiquee ci dessous dans le guide dajustement des temperatures
  • Page 44 - French - : 12828119 JennAir Trio FR 11405 835 AM Page 12 COMMANDES DE TEMPI RATURE Lorsque vous appuyez la touche V ou A la premiere fois la temperature actuelle saffiche La nouvelle temperature enregistree saffichera pour environ trois secondes puis la temperature actuelle du compartiment reapparaftra Ne changez pas Iune des temperatures des compartiments de plus de un degre a la fois Laissez la temperature se stabiliser pour 24 heures avant de la reajuster Guide dajustage des temperatures Compartiment rfrigrateur trop froid Compartiment rfrigrateur trop chaud Compartiment conglateur trop froid Compartiment congelateur trop chaud Arret du rfrigrateur OFF Reglez la temperature du refrigerateur un degre superieur en appuyant sur la touche A Reglez la temperature du refrigerateur un degre inferieur en appuyant sur la touche V Reglez la temperature du congelateur un degre superieur en appuyant sur la touche A Reglez la temperature du congelateur un degre inferieur en appuyant sur la touche Appuyez sur la touche IL du congelateur jusqua ce que ltltOFF gtgtapparaisse Appuyez sur la touche du congelateur ou du refrigerateur pour le remettre en marche Dispositif Speed Ice Une fois le reglage Speed Ice Glace rapide active la temperature du congelateur est baissee au reglage optimal pour 24 heures afin de produire plus de glace Remaue Lorsque la fonction Speed Ice est activee les touches A et 1 du congelateur ne sont pas fonctionnelles Rinitialisation du filtre certains modbles Lorsquun refrigerateur est dote dun filtre eau le temoin lumineux jaune Order sallume Iorsque 90 0odu volume deau pour lequel le filtre ete conu est filtre OU 11 mois apres Iinstallation du filtre Le temoin lumineux rouge Replace sallumera Iorsque le volume deau maximum aura ete filtre OU 12 mois apres Iinstallation du filtre Lorsque le temoin lumineux rouge Replace sallume un nouveau filtre doit etre installe immediatement Apres avoir remplace le filtre appuyez sur la touche Reset Filter pendant trois secondes Les temoins lumineux Order et Replace seteindront Mode Congas Le mode Conges fait en sorte que le congelateur se degivre moins souvent reduisant ainsi la consommation denergie Le temoin du mode Conges sallumera Iorsque la fonction est activee Pour la desactiver reappuyez sur la touche Vacation Mode OU ouvrez la porte Le temoin seteindra Remarques Les ouvertures de porte ne desactivent pas le mode Conges pendant environ 1 heure apres Iactivation Si vous avez Iintention detre absent pour plus de quelques jours reportezvous a la section prevue cet effet la page 58 Alarme de temperature Lalarme de temperature vous avertira si les temperatures des compartiments refrigerateur ou congelateur depassent les temperatures normales de fonctionnement en raison de panne de courant ou dune autre raison Lorsque le dispositif Temp Alarm est active son temoin lumineux sallume Si les temperatures des compartiments congelateur et refrigerateur ont depasse les normes les temperatures actuelles et les temperatures les plus elevees atteintes Iors de la panne de courant seront affichees en alternance Un signal sonore se fera entendre de faon repetitive Appuyez sur la touche Temp Alarm une fois pour arreter le signal sonore Le temoin de Ialarme de temperature continuera a clignoter et les temperatures vont varier en alternance jusqua ce quelles se stabilisent Appuyez sur la touche Temp Alarm pendant trois secondes pour arreter la fonction Le temoin seteindra
  • Page 45 - French - : 12828119 JennAir Trio FR 11405 835 AM Page 13 COMMANDES DE TEMPI RATURE Alarme de porte Lalarme de porte vous avertira si Iune des deux portes est demeuree ouverte pendant plus de 5 minutes consecutives Un signal sonore se fera donc entendre jusqua ce que la porte soit fermee OU si la fonction est desactivee en appuyant sur la touche Door Alarm Max Cool Lorsque la fonction Max Cool est activee les temperatures du refrigerateur et du congelateur diminuent aux reglages minimaux Ceci permet de refroidir les deux compartiments si les portes sont demeurees ouvertes tres Iongtemps ou apres avoir range des aliments chauds Remarque Lorsque la fonction Max Cool est activee les touches A et V du refrigerateur et du congelateur ne sont pas fonctionnelles Pour activer la fonction appuyez sur la touche Max Cool Max Cool se desactivera automatiquement apres 12 heures OU si Ion appuie sur la touche Max Cool Preferences de Iutilisateur Lon doit acceder au menu des preferences de Iutilisateur pour Activez ou arretez le reglage Super CoolTres froid certains modeles Modifier Iaffichage de la temperature F en C Activez ou desactivez les alarmes sonores Ajuster le degre de luminosite de la lampe du distributeur si cette fonction est activee sur le distributeur deau et de glaons certains modeles Activer le mode sabbat Pour acceder au menu des preferences de Iutilisateur appuyez sur la touche Door Alarm pendant trois secondes Le nora des fonctions du menu des preferences de Iutilisateur apparaitra a Iaffichage du congelateur et Ietat actuel des fonctions apparaitra Iaffichage du refrigerateur 1 Servezvous de la touche ltltUp gtgtet ltltDown gtgtdu congelateur pour faire defiler les fonctions 2 Lorsque la fonction desiree apparaft servezvous de la touche ltltUp gtgtet ltltDown gtgtdu refrigerateur pour la modifier 3 Une fois les modifications terminees appuyez sur la touche Door Alarm pendant trois secondes OU fermez la porte du refrigerateur Super CoolTrbs froid CO certains modbles Lorsque le reglage Super Cool est en marche ON un ventilateur est active dans le compartiment des aliments frais pour ameliorer la circulation de Iair et la regulation des temperatures Pour economiser Ienergie cette caracteristique peut etre desactivee en la mettant a Iarret OFF Affichage de la temperature FC Modifiez Iaffichage des temperatures en degres Fahrenheit en degres Celsius Alarme AL Lorsque le mode Alarme est Iarret OFF toutes les alarmes sonores sont desactivees jusqua ce que ce mode soit remis en marche Slection du niveau de luminosit LL certains modbles Cette fonction ajuste le degre de luminosite du distributeur Iorsque le capteur detecte que la luminosite de la piece est faible Le reglage 1 est le degre le plus sombre et le reglage 9 est le degre le plus clair Remarque Cette fonction certains modeles doit etre activee partir du distributeur deau et de glaons Mode sabbat SAB Lorsque le mode Sabbat est en marche ON tous les voyants et la veilleuse sont desactives jusqua ce que cette caracteristique soit arretee OFF Le mode Sabbat ne desactive pas les lampes interieures Appuyez sur nimporte quelle touche pour reinitialiser les temoins des commandes Surfaces chaudes de la caisse Parfois il se peut que le devant du refrigerateur soit chaud au toucher Cela est normal et empeche la condensation de Ihumidite sur Iappareil Ce phenomene sera plus apparent Iors de la raise en marche initiale du refrigerateur Iorsque la temperature exterieure est elevee ou si la porte est demeuree ouverte pendant Iongtemps
  • Page 46 - French - : 12828119 JennAir Trio FR 11405 835 AM Page 14 CARACTI RISTIQUES COMPARTIMENT RI FRIGI RATEUR I tag res Placez la main sous le cadre pour sortir le verre Soulevez le verre Soulevez le cadre des glissieres du refrigerateur Installation Remplacez Iarmature dans des rails de recouvrement de refrigerateur Remplacez soigneusement le verre dans Iarmature Votre refrigerateur comporte de tagre en verre Spillproof Les etagres Spillproof ont un rebord de retenue qui facilite le nettoyage Certaines sont aussi equipees de la caracteristique coulisser Pour faire coulisser Ietagere prenezla par Iavant et tirezla Poussezla pour la remettre sa position dorigine Pour enlever une tagbre Relevez legerement Iavant et soulevez Iarriere de Ietagere puis tirez Ietagere tout droit pour la sortir Pour verrouiller Itagbre amp une autre place Relevez le bord avant de Ietagere Introduisez les crochets dans les ouvertures desirees du cadre et laissez Ietagere se mettre en place Assurezvous que Ietagere est bien verrouillee Iarriere Rallonges D6tag6re Arri6re Les Rallonges Dtagbre Arribre empechent los articles de tomber a Iarriere de Ietagere Dpose et installation dune rallonge dtagre Pour la retirer soulevezla a la verticale a partir de Iarriere Pour Iinstaller enfoncez les tenons de Ietagere dans les trous situes dans le cadre de Ietagere L6tagere audessus du bac sert detagere inferieure pour les aliments frais Dpose de Itagre audessus du bac Retirez les etagere audessus du bacs Rangement dans la contreporte Centre laitier w Le centre laitier permet de ranger des articles tartiner tels que le beurre et la margarine II peut etre deplace a differents endroits selon les besoins Pour utiliser le centre laitier relevez le couvercle Dpose Relevez le couvercle tirez le centre laitier a la verticale et penchezle pour le sortir Installation Glissez le centre de laiterie dedans et vers le bas jusque fermement a assis dans le recouvrement de porte Balconnets Les balconnets peuvent etre deplaces selon les besoins particuliers de rangement Dpose Coulissez le balconnet vers le haut et tirezle tout droit Installation Coulissez le balconnet vers le bas jusqua ce quil soit fermement installe dans la doublure de porte Bacs amp legumes Les bacs Igumes procurent un environnement humidite plus elevee pour les legumes et les fruits frais Commandos Ces commandos permettent de contr61er le niveau hygrometrique dans le bac Coulissez la commande vers le reglage Fruit fruit pour les legumes peau Coulissez la commande vers le reglage Vegetables lgumes pour les legumes a feuilles
  • Page 47 - French - : 12828119 JennAir Trio FR 11405 835 AM Page 15 CARACTIRISTIQUES COMPARTIMENT RIFRIGIRATEUR Depose Tirez le bac au maximum Relevez Iavant du bac et tirez le bac tout droit Installation Introduisez le bac dans les glissieres du cadre et poussezle en place Remarque Pour de meilleurs resultats les bacs legumes doivent etre bien fermes Gourmet Bay Mc Le tiroir du chef Gourmet Bay Mcest un tiroir pleine largeur avec commande de temperature reglable Ce tiroir peut etre utilise pour les grands plateaux les charcuteries les boissons ou des articles divers et comprend un diviseur pour separer le tiroir en sections si vous le desirez Une commande de temperature ajuste la quantite dair froid admise dans le tiroir du chef Gourmet BayMCLa commande est situee a la droite du tiroir Mettez la commande sur cold froid ou A pour une temperature de refrigerateur A normale Mettez la commande sur coldest A plus froid ou Iorsquune temperature A inferieure celle du compartiment de amp refrigeration principal est souhaitee Utilisez A le reglage plus froid pour la conservation de 1 viandes Remarques Lair froid dirige vers le tiroir du chef Gourmet BayMcpeut faire baisser la temperature dans le refrigerateur II peut alors etre necessaire dajuster la commande du refrigerateur Ne mettez pas de legumes a feuilles dans le tiroir du chef Gourmet BayMCLes temperatures plus basses qui y regnent pourraient endommager ces prod u its Dpose Relevez le couvercle Tirez le tiroir au maximum Relevez Iavant du tiroir et tirezle tout droit Installation Poussez les glissieres metalliques vers Iarriere du rdrigerateur Mettez le tiroir sur les glissieres et repoussezle jusqua ce quil retombe en place Dpose Tirez completement le tiroir et relevez Iavant du diviseur pour le decrocher de la paroi arriere du tiroir puis sortezle Installation Accrochez le diviseur sur la paroi arriere du tiroir et baissezle en place Accessoires PortebouteillesSupport canettes certains modeles Le portebouteillessupport canettes est un accessoire qui sinstalle dans le tiroir du chef Chefs Pantry Mcou sur une etagere Les bouteilles et les canettes peuvent etre rangees transversalement ou une seule bouteille peut etre placee dans la depression centrale Plateau du Gourmet Bay Mc Le plateau du Gourmet Bay Moest amovible et se range dans le tiroir de rangement pleine largeur Portebouteille Le portebouteille permet de ranger horizontalement une bouteille II peut permettre aussi le rangement dune bofte doeufs Placez le portebouteille sur le cote gauche dune etagere du refrigerateur Oeufrier Leeufrier le style peut varie0 permet le rangement dune douzaine doeufs et plus II peut etre enleve pour etre transporte sur le plan de travail ou pour etre lave
  • Page 48 - French - : 12828119 JennAir Trio FR 11405 835 AM Page 16 CARACTI RISTIQUES COMPARTIMENT CONGI LATEUR Panier m tallique supdrieur Dpose Tirez le panier au maximum et soulevezle pour Ienlever Installation Glissez le panier superieur dans le congelateur Assurezvous quarriere des crochets de panier derriere le crochet de rail Remarque Pour les modbles avec cong4lateurtiroir Voyez en page 38 le panier inferieur et les instructions completes sur le tiroir coulissant Accessoires Bac glaqon Le bac a glaons sert Ientreposage de glace Plateau de panier infrieur Le plateau de panier est un article en plastique amovible qui repose au fond du panier inferieur et qui permet de recueillir les prod uits renverses et les petits articles avant quils ne tombent dans le compartiment congelateur Le plateau peut etre enleve pour etre nettoye facilement en le soulevant du panier Diviseur de panier infbrieur Le diviseur de panier infrieur permet de sarer la zone de rangement en differentes sections Dpose et remise en place du diviseur Pour Ienlever tirez le diviseur a la verticale Pour Iinstaller accrochez les coins superieurs du diviseur pardessus les barreaux horizontaux superieurs du panier
  • Page 49 - French - : 12828119 JennAir Trio FR 11405 836 AM Page 17 EAU ET GLA ONS Machine gla ons automatique Raccordez la machine glaons la canalisation deau comme il est indique la page 41 Une henne circulatien deau et la raise b niveau du rbfrigerateur sent essentielles b des performances optimales de la machine b glaons Instructions de fonctionnement Assurezvous que le bac glaons est en place et que le bras de detection est en bas Une fois que le compartiment congelateur atteint une temperature denviron 18 C 0 F la machine glaons se remplit deau et se met en marche II est possible de recueillir un lot complet de glaons environ toutes les trois heures Attendez 24 heures environ apres Iinstallation pour recueillir le premier lot de glaons Jetez les glaons obtenus les 12 premieres heures de fonctionnement pour vous assurer que le systeme ne comporte pas dimpuretes ArrCtez la production de glaons en relevant le bras jusqu ce quun declic se fasse entendre La machine glaons reste IarrCt tant que le bras nest pas pousse vers le bas Le premier ou les deux premiers lots seront probablement constitues de glaons de petite taille et irreguliers du fait de la presence dair dans la canalisation Lors de ejection des gla9ons il est normal que plusieurs gla9ons soient colles ensemble aux extremites II est facile de les sarer La machine gla9ons continuera produire des glaons jusqu ce que Iaccumulation de glaons releve le bras de detection ce qui arrte la machine glaons Certains sons peuvent accompagner les diverses phases de la production de glaons leger bourdonnement du moteur chute de glaons dans le bac glaons vide et declic de Ielectrovanne ou de temps 9 autre bourdonnement Si la consommation de glaons est faible les glaons accumules vont prendre un aspect trouble se contracter coller ensemble et prendre un goOtVidez periodiquement le bac pour le laver 9 Ieau tiede Veillez 9 bien le secher avant de le reinstaller Ne placez dans le bac 9 glaons aucun aliment ou liquide pour un refroidissement rapide Ces articles entraveraient les mouvements du bras de detection ce qui entrainerait un mauvais fonctionnement de la machine 9 glamns Lorsque Iarrivee deau doit tre interrompue pendant plusieurs heures arrtez la machine glaons en relevant le bras de detection Depose du bac glagons Tirez le bac 9 glaons vers Iavant puis enlevezle de la machine glaons Pour empcher que la machine glaons ne produise des glagons alors que le bac est enleve arrCtez la machine glagons en relevant le bras de detection Installation du bac glagons Inversez la methode cidessus Remettez en marche la machine glaons en baissant le bras de detection Distributeur deau Le distributeur deau se trouve sur la paroi gauche du compartiment refrigerateur Cette conception ne permet que la distribution deau froide Pour se servir en eau Tenez le contenant sous le bec verseur et appuyez sur la touche du distributeur
  • Page 50 - French - : 2828119 JennAir Trio FR 11405 836 AM Page 18 FILTREA EAU Ddpose et installation Installation initiale Le filtre a eau est situe au coin droit superieur du compartiment de refrigeration 1 0tez et conservez le bouchon bleu dobturation 2 Enlevez Ietiquette de protection Iextremite du filtre inserez le filtre dans la base de connexion 3 Faitesle tourner doucement dans le sens horaire jusqua la position de butee et emboftez les deux parties du corps de filtre pour la fermeture Expulsez Iair du circuit pour que Ieau puisse couler librement laissez Ieau couler sans interruption pendant deux minutes par le distributeur jusqua ce que le debit soit stable Lors de Iutilisation initiale prevoyez une periode dattente de une a deux minutes pour que Ieau puisse remplir le reservoir interne de Iappareil Une purge additionnelle peut etre necessaire si la qualite de Ieau est mediocre Remplacement du flltre amp eau IMPORTANT Lair rsiduel du systbme peut provoquer rjection deau et de la cattouche Faites toujours couler Ieau pendant deux minutes avant denlever le filtre quelle quen soit la raison Procdez prudemment pour la dpose 1 Faites tourner le filtre dans le sens antihoraire jusqua ce quil se separe de la base 2 Laissez Ieau residuelle du filtre secouler dans Ievier jetez le filtre a la poubelle 3 Enlevez Iexces deau dans le corps du filtre et procedez en suivant les etapes 2 au 4 de la section Installation initiale On devrait changer le filtrela cattouche de filtration au moins tousles 12 mois IMPORTANT La Iongevite de la cartouche de filtration depend de la qualite de Ieau a filtrer ct de la quantite deau puisee Si on puise une quantite deau importante ou si la qualite de Ieau est mediocre il sera necessaire de remplacer la cattouche de filtration plus frequemment Pour acheter une ca rtouche de filtration de rechange prenez contact avec votre detaillant ou composez le 1800JENNAIR 18005366247 aux EU et Canada Vous pouvez utiliser le distributeur deau sans y installer une cartouche de filtration Dans ce cas remplacez le filtre par le bouchon bleu dobturation de la base du filtre