Loading ...
Loading ...
Loading ...
6
9
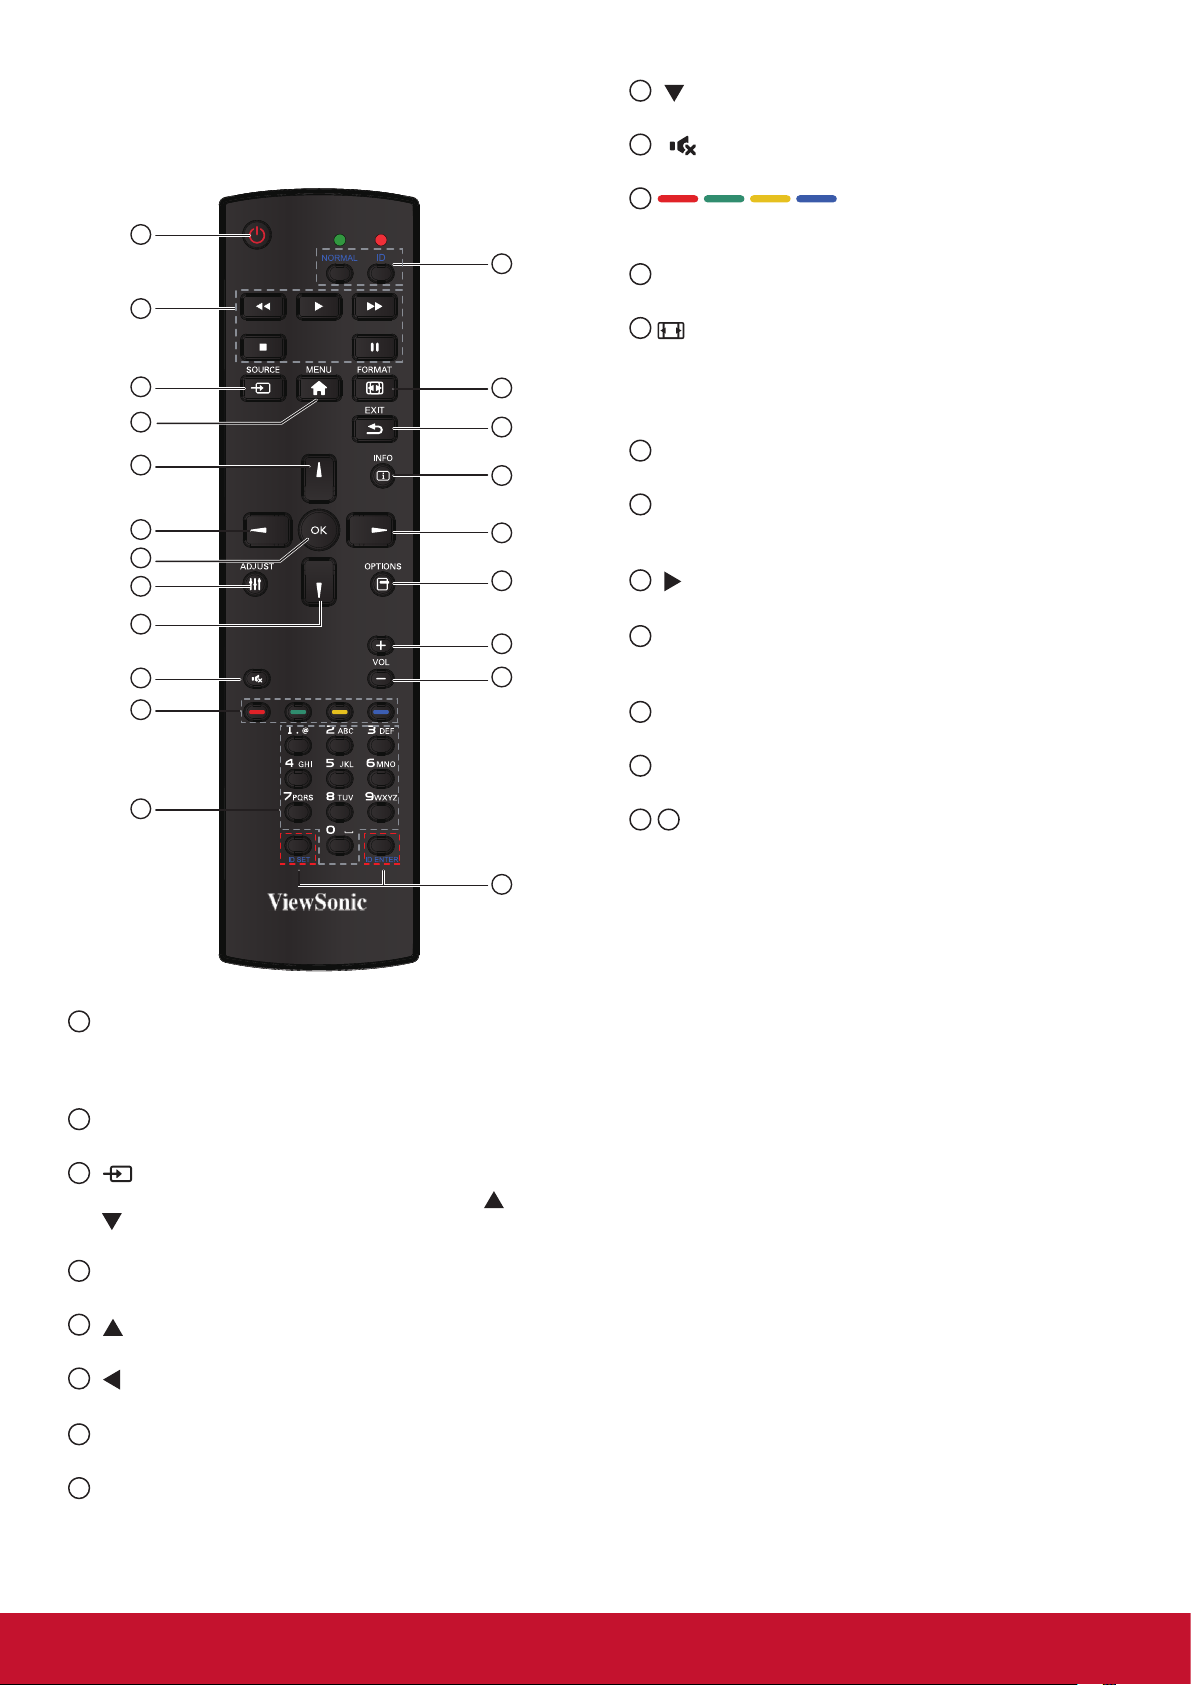
[ ] button
Press to move the se
lec
tion down in OSD menu.
10
[ ] MUTE button
Press to turn the mute function on/off.
11
COLOR buttons (CDE Not
Support)
Select tasks or options.
12
[NUMERIC] buttons (CDE Not Support)
Enter text for network setting.
13
Format button
Press to switch screen aspect ratio.
• For PC signal: NORMAL, CUSTOM, and REAL.
• For Video signal: FULL, NORMAL, DYNAMIC,
CUSTOM, and REAL.
14
[EXIT] button
Press to turn back to the previous OSD menu.
15
[INFO] button
Press to turn on/off the information OSD displayed
on the upper right corner of the screen.
16
[ ] button
Press to increase the value in OSD menu.
17
[OPTION] button (CDE Not Support)
Access currently available options, picture and
sound menus.
18
[+] Volume up button
Press to increase the audio output level.
19
[-] Volume down button
Press to decrease the audio output level.
20
21
[ID SET] button
If a single large- screen matrix (video wall) is
created, set ID key to control each dispaly.
ID Remote Control:
You can set the remote control ID when you want to use
this remote control on one of several different displays.
Press [ID] button. The red LED blinks twice.
1. Press [ID SET] button for more than 1 second to
enter the ID ode. The red LED lights up.
Press the [ID SET] button again will exit the ID
Mode. The red LED lights off.
Press the digit number [0] ~ [9] to select the display
you want to control.
For example: press [0] and [1] for display No.1,
press [1] and [1] for display No. 11.
The numbers available are from [01] ~[255].
2. Not pressing any button within 10 seconds will exit
the ID Mode.
3. If an error pressing of buttons other than the digits
occurred, wait 1 second after the red LED lights
off and then lights up again, then press the correct
digits again.
4. Press [ID ENTER] button to conrm. The red LED
blinks twice and then lights off.
NOTE:
• Press [NORMAL] button. The green LED blinks
twice, indicating the display is in normal operation.
• It is ncecssary to set up the ID number for each
display before selecting its ID number.
2.3. Remote Control
2.3.1. General functions
1
13
20
14
15
16
17
18
19
2
3
4
5
6
7
8
9
11
10
12
21
1
[POWER] button
Press to switch on the display from standby mode.
Press again to turn it off and back into standby
mode.
2
[PLAY] button
Control playback of media les.
3
[ SOURCE] button
Press to toggle Video Source Menu. Press [
] or
[ ] button to select one of the video sources among
VGA, HDMI 1 or HDMI 2. Press [OK] button.
4
[MENU] button
Press to turn the OSD menu on/off.
5
[ ] button
Press to mo
ve
the selection up in OSD menu.
6
[ ] button
Press to decrease the value in OSD menu.
7
[OK] button
Press to activate the setting inside the OSD menu.
8
[ADJUST] button (CDE not Support)
Press to run the Auto Adjust function.
NOTE: This button is functional for VGA input only.
Loading ...
Loading ...
Loading ...