Loading ...
Loading ...
5
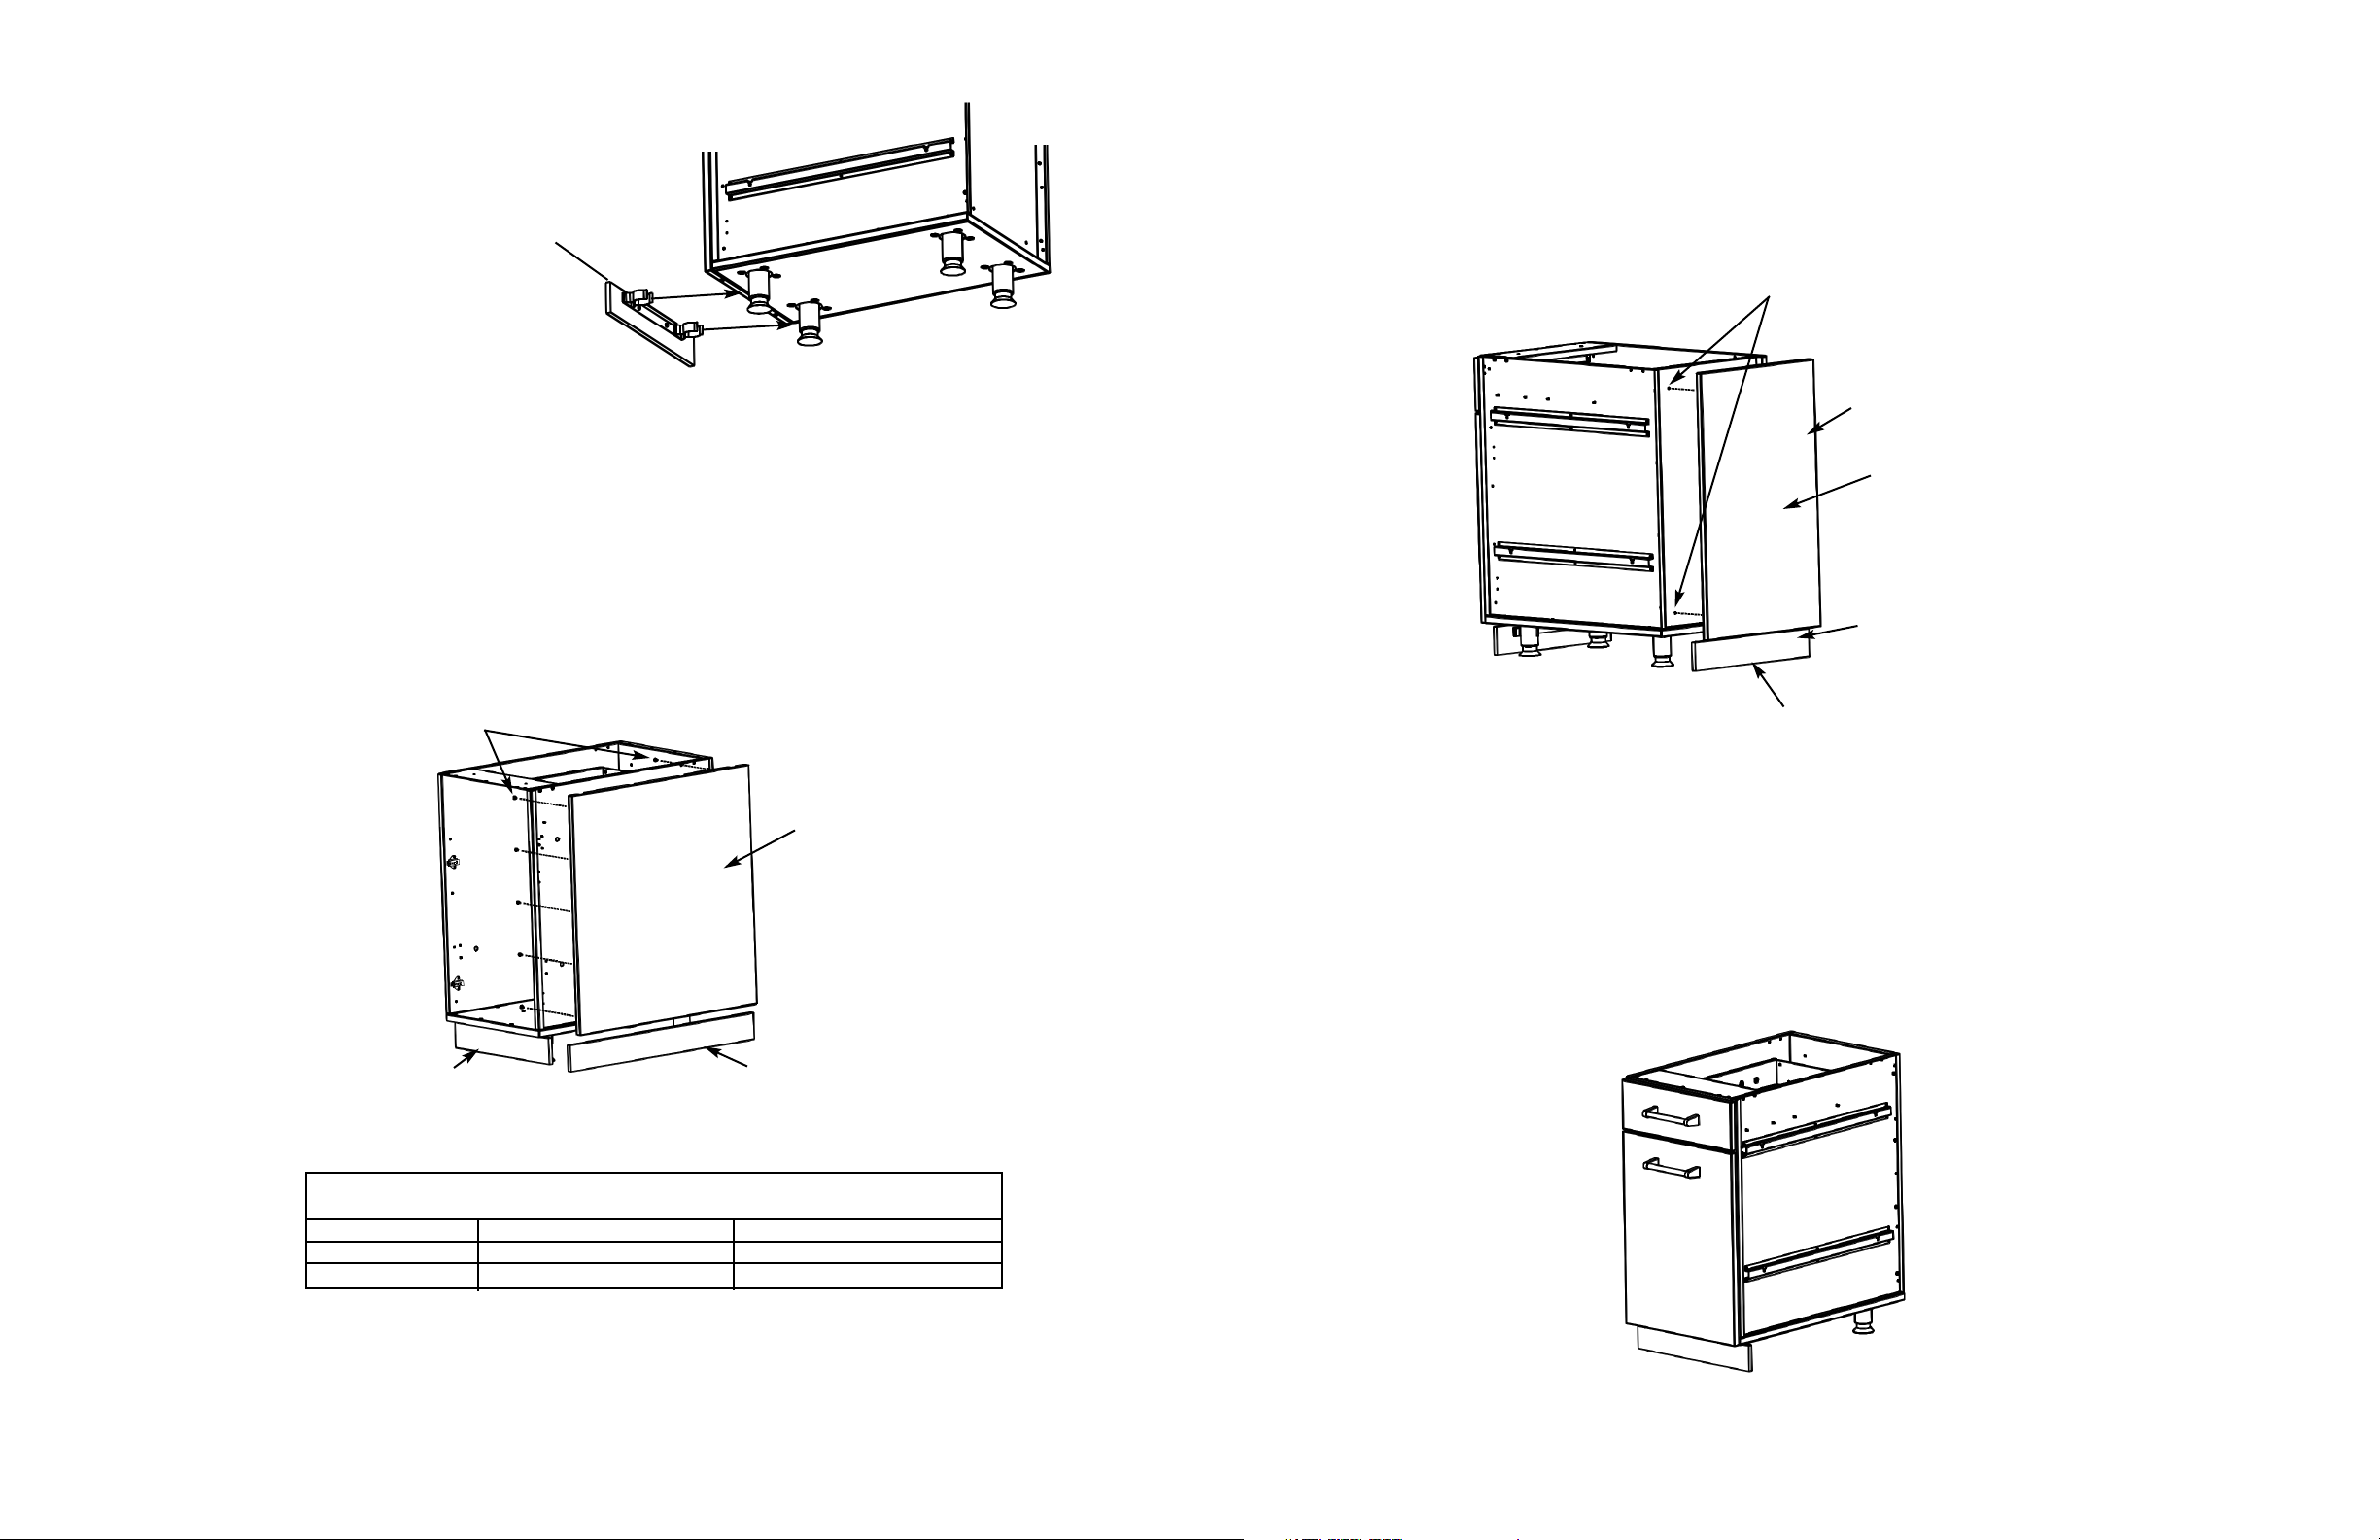
10. BACK PANEL INSTALLATION
•Remove all protective covering from panel and install using the #10 x 1/2” tek screws provided. (See
Illustration #8).
•Attach rear toe kick to legs. (See illustration #8).
NOTE: For end of the run panels, the rear, front, and side toe kicks must be modified. (See illustrations #7 & #8)
2. Fasten from inside with (4) 1/2” tek screws provided
Back panel
1. Place back panel onto cabinet area
3. After modifying rear toe kick (See dimension
chart at the bottom of page 4) - snap toe
kick into place
Rear toe kick
11. INSTALL LOCALLY SUPPLIED COUNTERTOP
Viking outdoor cabinets are designed for a minimum countertop thickness of 1 1/8” (2.9 cm) such as you would
find with granite or quartz material. If a countertop material thicker than 1 1/2” (3.8 cm) is used, the appliances
should be shimmed to the proper height. For examples of common installations, see the Viking Stainless Steel
Planning Guide.
12. Install Viking appliances per each appliance's installation instructions.
Complete Cabinet
Illustration #8
4
8. If desired, snap toe kick
included with each unit to
front legs. (See illustration
#6).
Illustration #6
Illustration #7
Snap toe kick to front
legs
9. SIDE PANEL INSTALLATION (End of Run Only)
•Remove all drawers. (If applicable)
•Remove all protective covering from panel and install using the #10 x 1/2” tek screws provided. (See
Illustration #7)
•Attach toe kick to legs (See Illustration #6).
NOTE:
FOR WALL INSTALLATIONS:
The front portion of the side toe kick must be shortened to match the front toe kick. (See Illustration #7).
The plastic material can be cut with any common type wood saw blade.
FOR ISLAND INSTALLATIONS:
The side, front, and rear toe kick must be modified (See Illustration #7)
2. Attach from inside (front and rear)
1. Place side panel into area of
the cabinet
Side toe kick (B)Front toe kick (A)
LH Side Panel Installation
(RH installs the same way)
Toe Kick Dimensions
Wall Installation Island Installation
Front Toe Kick (A)16 3/4” (42.5 cm) 16 3/4” (42.5 cm)
Side Toe Kick (B) 27 1/4” (61.6 cm) 25 1/2” (64.8 cm)
Rear Toe Kick (C) N/A 16 3/4” (42.5 cm)
Loading ...