Loading ...
Loading ...
Loading ...
49-2000884 Rev. 0 23
CARE AND CLEANING: Oven Door
Cleaning the Oven Door
Cleaning the Door Interior
Do not allow excess water to run into any holes or slots
in the door .
Wipe dish soap over any baked-on spatters on the glass.
8VHDVLQJOHVLGHGVDIHW\UD]RUEODGHWRFOHDQLWRII7KHQ
wipe over the glass with a soapy cloth to remove any
residue and dry off.
The area outside the gasket can be cleaned with a soap-
filled plastic scouring pad. Do not rub or clean the door
gasket - it has an extremely low resistance to abrasion.
If you notice the gasket becoming worn, frayed or
damaged in any way or if it has become displaced on the
door, you should have it replaced.
Cleaning the Door Exterior
If a stain on the door vent trim is persistent, use a mild
abrasive cleaner and a sponge-scrubber for best results.
Do not use this method on any other surface.
Stainless Steel Surfaces
Do not use a steel wool pad; it will scratch the surface.
To clean the stainless steel surface, use warm sudsy
water or a stainless steel cleaner or polish. Always wipe
the surface in the direction of the grain. Follow the cleaner
instructions for cleaning the stainless steel surface.
To inquire about purchasing cleaning products
including stainless steel appliance cleaner or polish,
see the Accessories and Consumer Support sections
at the end of this manual.
Oven Door
Lift-Off Lower Oven Door
The door is very heavy. Be careful when removing and lifting the door. Do not lift door by the handle.
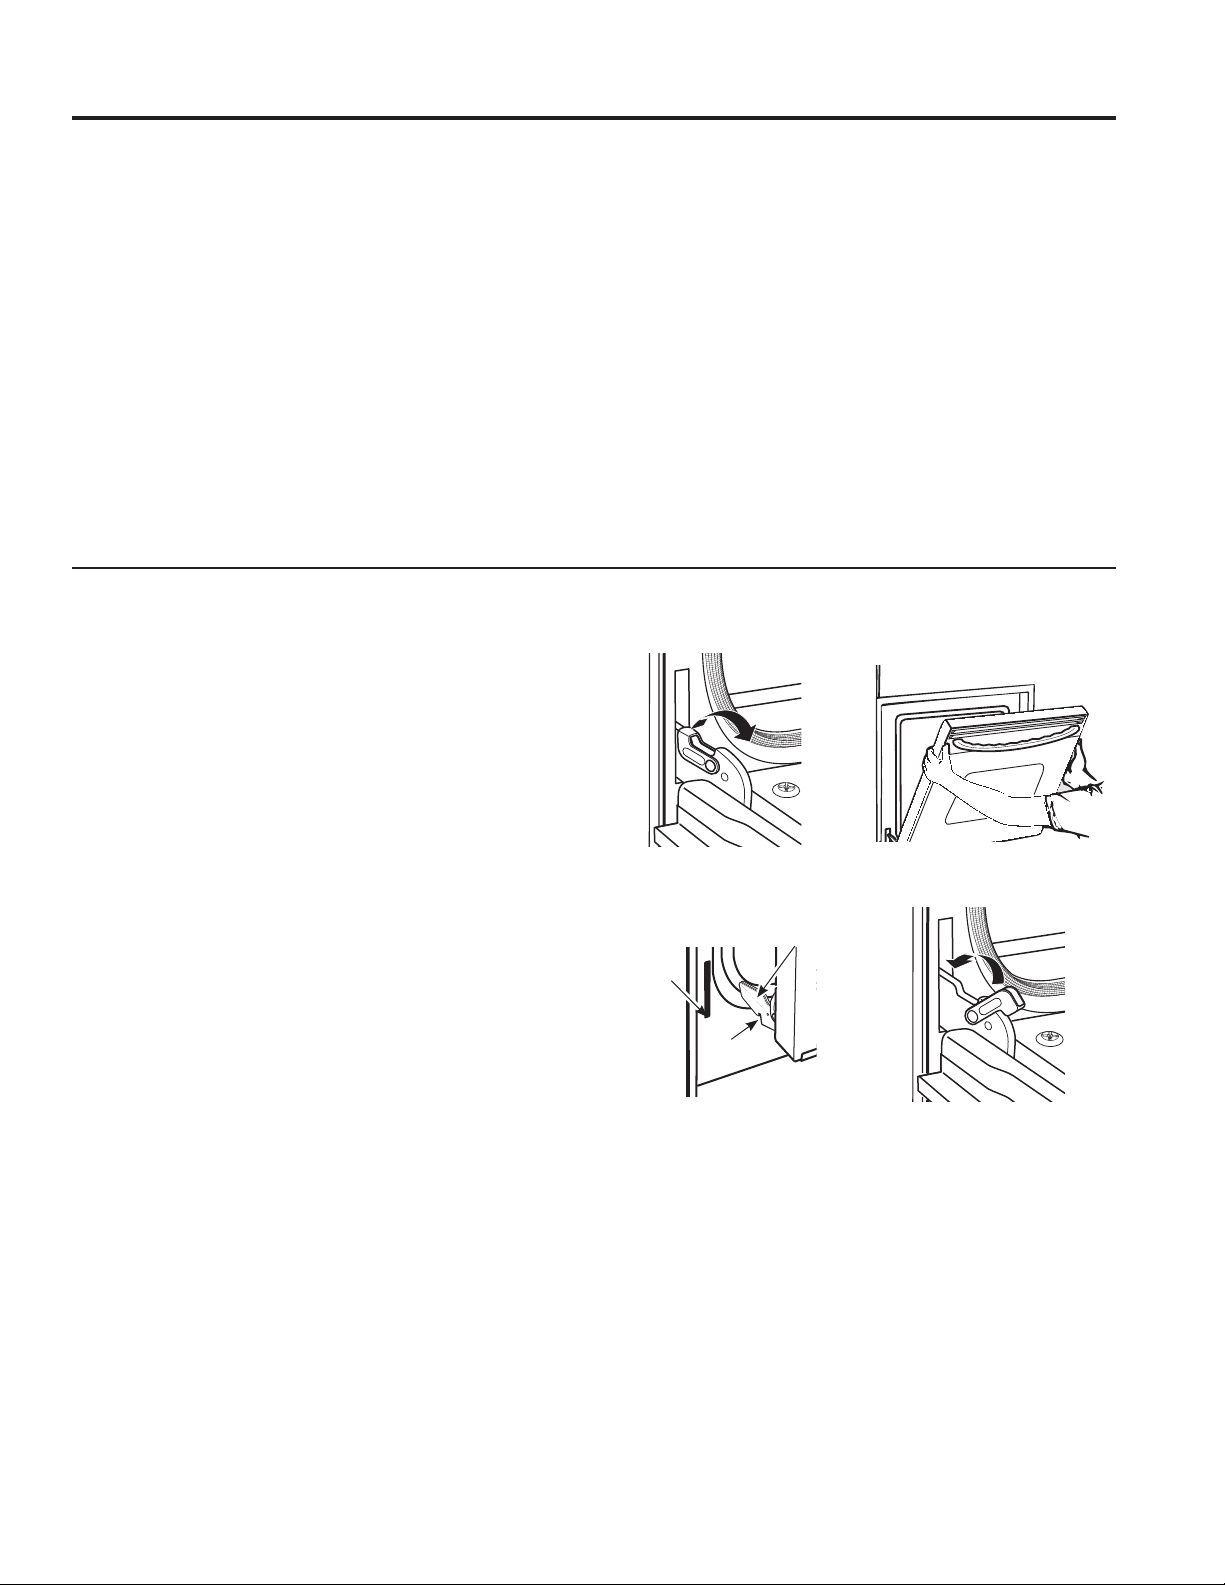
To Remove the Door:
)XOO\RSHQWKHGRRU
3XOOWKHKLQJHORFNVXSDQGDZD\IURPWKHUDQJH
frame to the unlocked position.
3. Firmly grasp both sides of the door near the top.
4. Close door until the top of the door is approximately
6” from the range frame.
5. Lift door up and away from the range until both hinge
arms are clear of the slots in the range frame.
To Replace the Door:
)LUPO\JUDVSERWKVLGHVRI WKHGRRUQHDUWKHWRS
2. With the door at the same angle as the removal
position, rest the notch on the underside of the left
hinge arm on the bottom edge of the left hinge slot.
The notch in the hinge arm must be fully seated into
the bottom of the slot. Repeat for the right side.
3. Fully open the door. If the door will not fully open, the
notches in the bottoms of the hinge arms have not
seated correctly in the bottom edge of the slot. Lift the
door off the range and repeat previous step.
3XVKWKHKLQJHORFNVWRZDUGWKHUDQJHFDYLW\DQG
down to the locked position.
5. Close the oven door.
Removal position3XOOKLQJHORFNVXSWRXQORFN
3XVKKLQJHORFNVGRZQWRORFNRest notch on bottom edge
of hinge slot
Notch
Bottom
edge of
slot
Hinge arm
Loading ...
Loading ...
Loading ...