This guide will walk you through the following steps:
Remove your old thermostat
Record existing wiring & disconnect
Attach your new Lyric thermostat
You can use this guide to remove your old thermostat and mount your new one.
You will need the Lyric app to complete setup.
Compatibility
The Lyric thermostat works with common 24 volt systems such as forced air, hydronic, heat pump, oil, gas and electric.
Does not work with electric baseboard heat (120/240V).
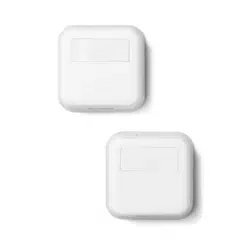
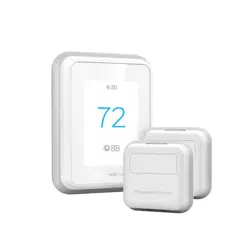
Included in your box:
1. Turn OFF power
Important! To protect yourself and your equipment, turn OFF the power at the breaker box or switch that controls your heating/ cooling system.
WARNING Make sure the power is OFF
Try turning ON your heating/ cooling system by changing the temperature. If you can’t get the system to turn ON in 5 minutes, you’ll know the power is OFF.
2. Take the faceplate off your old thermostat
On most thermostats, you can take off the faceplate by grasping and gently pulling or popping it off. Some thermostats may have screws, buttons, or clasps holding the faceplate on.
3. Take a picture of how your wiring looks right now
This picture will come in handy when you’re installing your new Lyric thermostat.
4. Make sure there are no 120/240V wires
Do you have thick black wires with wire nuts? Is your thermostat 120V or higher? If yes, you have a line voltage system, and the Lyric thermostat will not work.
5. Record any jumpers & R-wire configuration
A jumper is a connector between two terminals. Do not use any jumpers with Lyric, they’re not needed. Record any jumpers
Check the box that applies to you. You will need this information in Step 9:
I only have one R-wire and it is connected to the R or RC or RH terminal
I have one wire connected to R and one wire connected to RC
6. Record existing wires & disconnect
Use the space below to record the color of the wires that are plugged into the terminals of your old thermostat wallplate.
Note: You will need to refer to this information in Steps 9 and 10
Tip: You can also use the wiring guide in the Lyric app to create a diagram of how to wire your new wallplate.
7. Disconnect wires & remove the old thermostat’s wallplate
Make sure the power is OFF.
Tip: To prevent wires from falling back into the wall, wrap the wires around your ballpoint pen.
Optional: Attach the trim ring to your wallplate
Attach your optional trim ring to the wallplate by snapping the two together.
8. Bundle and insert wires through the wallplate
Gather your wires together and guide them through the hole on the back of the wallplate. Do not remove the clear, rubber wire holder
9. Set R slider tab
If you selected Option A in Step 5, keep the slider tab in the R position and insert your R or RC or RH wire into the R terminal.
If you selected Option B in Step 5, move the slider tab to the R & RC position and insert your R wire into the R terminal and RC into the RC terminal
Tip: Make sure at least 3/8” of the wire is exposed.
Tip: You can use a needle-nose pliers to push the wires gently into the terminals all the way
10. Connect wires
Connect the remaining wires according to terminals you recorded in Step 5.
WARNING Confirm the wires are firmly attached by gently tugging on them.
Tip: You can use a ballpoint pen to release misplaced wires by pushing down on the terminals.
11. Mount the wallplate
Mount the wallplate for your Lyric thermostat using the provided screws. Make sure the wallplate is level by keeping the bubble between the two lines.
12. Attach your Lyric thermostat
Align your Lyric thermostat onto the wallplate and firmly snap it into place. The thermostat will glow and pulse for up to 3 minutes while it starts up.
13. Turn your power ON
Turn ON the power at the breaker box or switch that controls your heating/cooling system.
Congratulations! You’ve successfully installed your Lyric thermostat.
14. Download the app
To configure your new thermostat and finish setup, download the app by searching for Honeywell Lyric in the App Store or Google Play. After downloading, follow the instructions in the app and skip the install step.
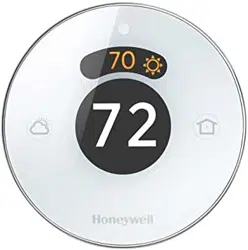
#1 I see two model numbers out there for the Lyric. Can anyone tell me the diference if there is one?
I have an RC model, and TH. The newest appears to be the TH model. The wiring connections are easier in the TH model. On the RC model, I accidentally broke a couple of the push in tabs. Honeywell support was awesome. I inquired about purchasing a replacement wiring portion - and an entire new model was on my front porch the next morning. Note - JUST PUSH THE WIRES IN - you don't have to push the tabs in like much older thermostats. I am very pleased. Note I did have a problem configuring it with a Samsung S4. Likely due to security settings, I used a generic Android tablet, and works like a champ. Also keep in mind - you do need a common wire for this to work.
#2 Does this thermostat require a C wire (Common Wire) for powering the unit, as most other digital WiFi enabled units do?
This unit doesn't require a c wire. I've estimared that the battery will last approx 75 days. I've only had the system installed since mid November and only experienced a wifi control command issue once and that was due to honeywells servers having an issue. I hope this helps.
#3 What generation is this lyric and is it warranted by Honeywell?
Not sure about the generation of my lyric. It is updated online every once in awhile but that does not seem to cure the connectivity problem. Unless you are online you are very limited on what you can do with this thermostat. It is warranted but Honeywell would rather offer a fix that does not work than a refund. I would not recommend this thermostat!
#4 Does the geofencing feature require my iPhone's gps to stay on all the time? If so, won't that drastically reduce my cell phone battery?
Geofencing uses location services on iOS which uses a combination of GPS, Wifi and Cell triangulation. It doesn't use much battery at all since it only checks/updates your location if you're moving. You need to make sure Lyric has access to location services and Background App Refresh turned on for it. No idea how this is accomplished on Android.
#5 How do I change the geofence distance between 0.5 miles and 7 miles? I can't find that toggle option?
The current iPhone Lyric program allows a choice of four setting options; ¼ mile, 2 miles, 4 miles and 7 miles. To make a change, first select the iPhone Settings app. This is the Apple iPhone app you use for controlling settings on multiple different installed programs. It has a picture of a gear on your iPhone screen. (Note this is not the Lyric app with a sunburst picture.) Scroll down through the list of programs in the iPhone Settings app until you find Lyric and select it. Near the bottom of the Lyric settings screen is the choice Settings - Geofence Radius. Open that, then select your desired Geofencing distance.
#6 Can this thermostat control 2-stage or multi-stage furnaces?
The Lyric thermostat is designed to work on most low voltage systems, including gas and oil furnaces, heat pumps, and hot water systems. The thermostat can also support multi-stage systems with more than one stage of heating and cooling. The Lyric thermostat does not work on 110V line voltage systems.
#7 How big is the wall plate? (need to know if it can cover the space of my old thermostat where it is not painted)
I believe the wall plate will cover any "old" thermostat space- I didn't have to use it to cover ours.
#8 Is this compatible with the Smartthings hub/controller?
It is now. It's one of the preprogrammed items in the Smartthings app that is very easy to install.
#9 Does the product need a "c" wire to run. My system only has a white and red wire. Will it run the wifi?
Yes it will work without the c wire. However the display will go to sleep when no motion is detected . With the c wire the display stays lit at all the time. I have two of these one with a c wire and one without and both connect to wifi fine with the only difference in the display backlight.