Loading ...
Loading ...
Loading ...
Version 03/15- Page 10
Turn the power supply on. Turn on blower and light. If the rangehood does not operate, check that the circuit breaker is not tripped
or the house fuse blown. If the unit still does not operate, disconnect the power supply and check that the wiring
connections have been made properly. Install Grease Filters
NOTE: Use 2 hands to install lter, one to pull and turn the knob, the other to hold the lter in place so that it doesn’t fall.
1. Insert back edge of lter into rear channel of the lter opening.
2. Pull out on knob and turn counterclockwise, position front
edge into place and release knob.
3. Repeat for remaining lters.
USE AND CARE INFORMATION
This rangehood system is designed to remove smoke, cooking vapors and odors from
the cooktop area.
For Best Results
Start the rangehood several minutes before cooking to develop proper airow. Allow the
unit to operate for several minutes after cooking is complete to clear all smoke and odors
from the kitchen.
Cleaning
The metal grease lters should be cleaned frequently in hot detergent solution or washed
in the dishwasher. Stainless steel cleaner should be used on stainless rangehoods.
Abrasives and scouring agents can scratch stainless steel nishes and should not be
used to clean nished surfaces.
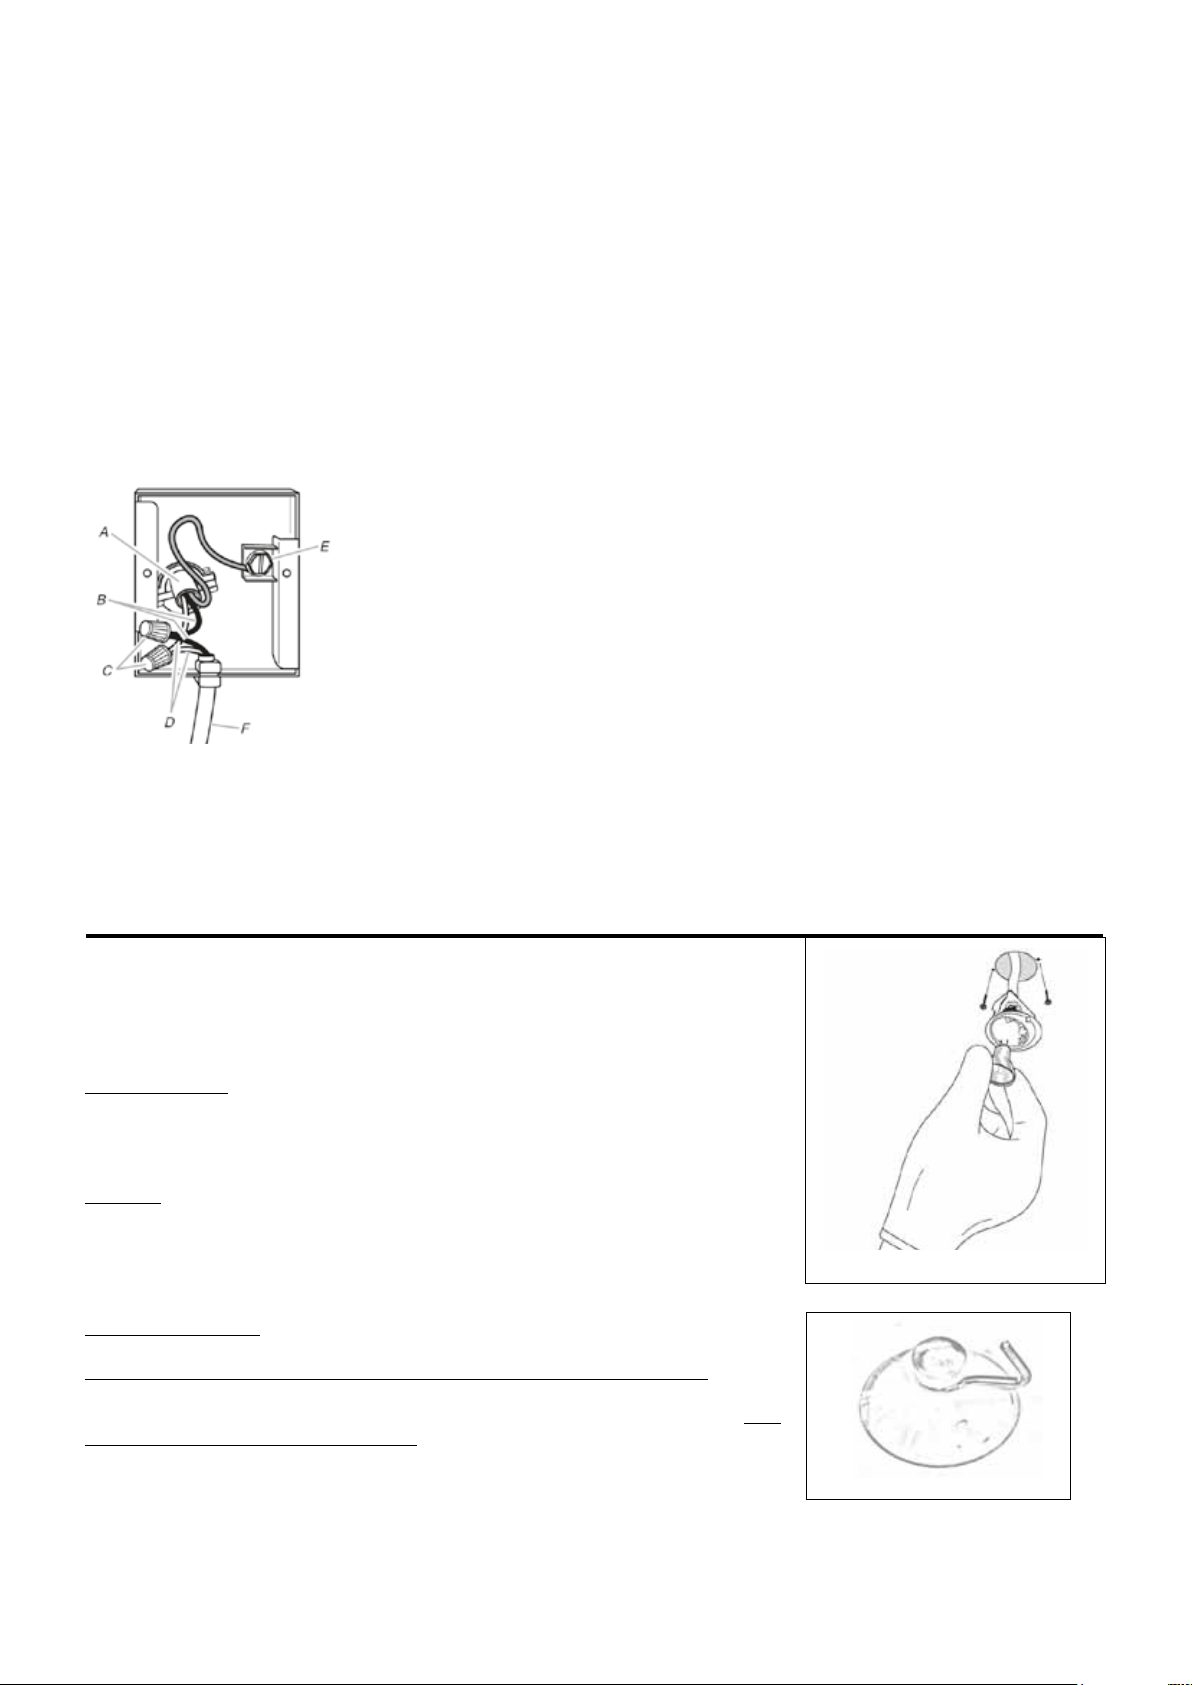
Replacing the Lamps
Purchase halogen bulb - (Max 20W, 12V, type MR11 bulb with glass lens)
Before attempting to replace the lamps, make sure that the light switch is turned off, USE
CAUTION AS THE BULB MAY BE HOT. Remove the 2 screws (FIGURE right) that
hold the light support and gently pull the support down from the hood. Remove the lamp
from the light support and replace with new lamp. Replace the light support and x it into
place with the 2 screws.
An alternative method to replace the lamps is to use a 1 1/4" suction cup (FIGURE right).
Attach the suction cup to the bulb and pull rmly down on the bulb and replace with a
new lamp.
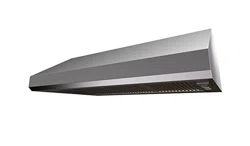
1. Remove the cover from the eld wiring compartment. Remove
the wiring electrical knockout using a at-blade screwdriver. Feed
the Power Supply Cable through the electrical knockout.
2. Connect the Power Supply Cable to the rangehood.
Attach the White lead of the power supply (A) to the White lead
of the rangehood (D) with a twist-on type wire connector (C).
Attach the Black lead of the power supply to the Black lead of
the rangehood (B) with a twist-on type wire connector (C).
If optional heat lamp kit is used, connect black wires from
heat lamp with black wires from home power with UL listed
wire connectors. Connect white wires from optional heat
lamp kit to home power with UL listed wire connectors. Connect
the Green (E) (Green and Yellow) ground wire under the Green
grounding screw.
ELECTRICAL CONNECTION
A. Home power supply cable
B. Black wires
C. UL listed wire connectors
D.White wires
E. Green (or bare) ground wire from home
power supply connected to green ground screw
F. Range hood power supply cable
Loading ...
Loading ...
Loading ...