Loading ...
Loading ...
Loading ...

5
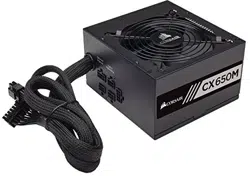
PSU MANUAL
WARNING: The detachable four-pin from the 24-pin main connector is not a “P4”
or “+12V” connector. Serious damage can be caused if you use it in place of a “P4”
or “+12V” connector.
Installation
Before proceeding with installation, please read this manual in its entirety.
Step A: Removing your existing power supply
If you are building a new system, skip to Step B.
1. Disconnect the AC power cord from your wall outlet or UPS and from the existing
power supply.
2. Disconnect all the power cables from your video card, motherboard and all other
peripherals.
3. Follow the directions in your chassis manual and uninstall your existing power supply.
4. Proceed to Step B.
Step B: Installing the Corsair power supply
1. Make sure the power supply’s AC power cable is not connected.
2. Follow the directions in your chassis manual and install the power supply with
the screws provided.
3. Connect the main 24-pin power cable. The main 24-pin power cable has a detachable
4-pin mechanism in order to support either a 24-pin or a 20-pin socket on the
motherboard.
A. If your motherboard has a 24-pin socket, you may connect the 24-pin main
power cable from the power supply directly to your motherboard.
B. If your motherboard has a 20-pin socket, you must detach the four-pin
cable from the 24-pin connector, and then plug the 20-pin cable onto your
motherboard without connecting the four-pin connector.
4. Connect the eight-pin +12V (EPS12V) cable to the motherboard.
A. If your motherboard has an eight-pin +12V socket, connect the eight-pin
cable directly to your motherboard.
B. If your motherboard has a four-pin socket, detach the four-pin from the
eight-pin cable, and then plug this four-pin cable directly to your motherboard.
5. Connect the peripheral cables, PCI-Express cables, and SATA cables.
A. Connect the peripherals cables to your hard drive and CD-ROM/DVD-ROM
power sockets.
B. Connect the SATA cables to your SATA SSD or hard drive’s power sockets.
C. Connect the PCI-Express cables to the power sockets of your PCI-Express
video cards if required.
D. Connect the peripheral cables to any peripherals requiring a small 4-pin connector.
E. Make sure all the cables are tightly connected. Be sure to save any unused modular
cables for future component additions.
6. Connect the AC power cord to the power supply and turn it on by pushing the switch
to the ON position (marked with “I”).
Congratulations! You have completed installation of your new Corsair power supply and
your system is ready to go!
Loading ...