Loading ...
Loading ...
Loading ...
8
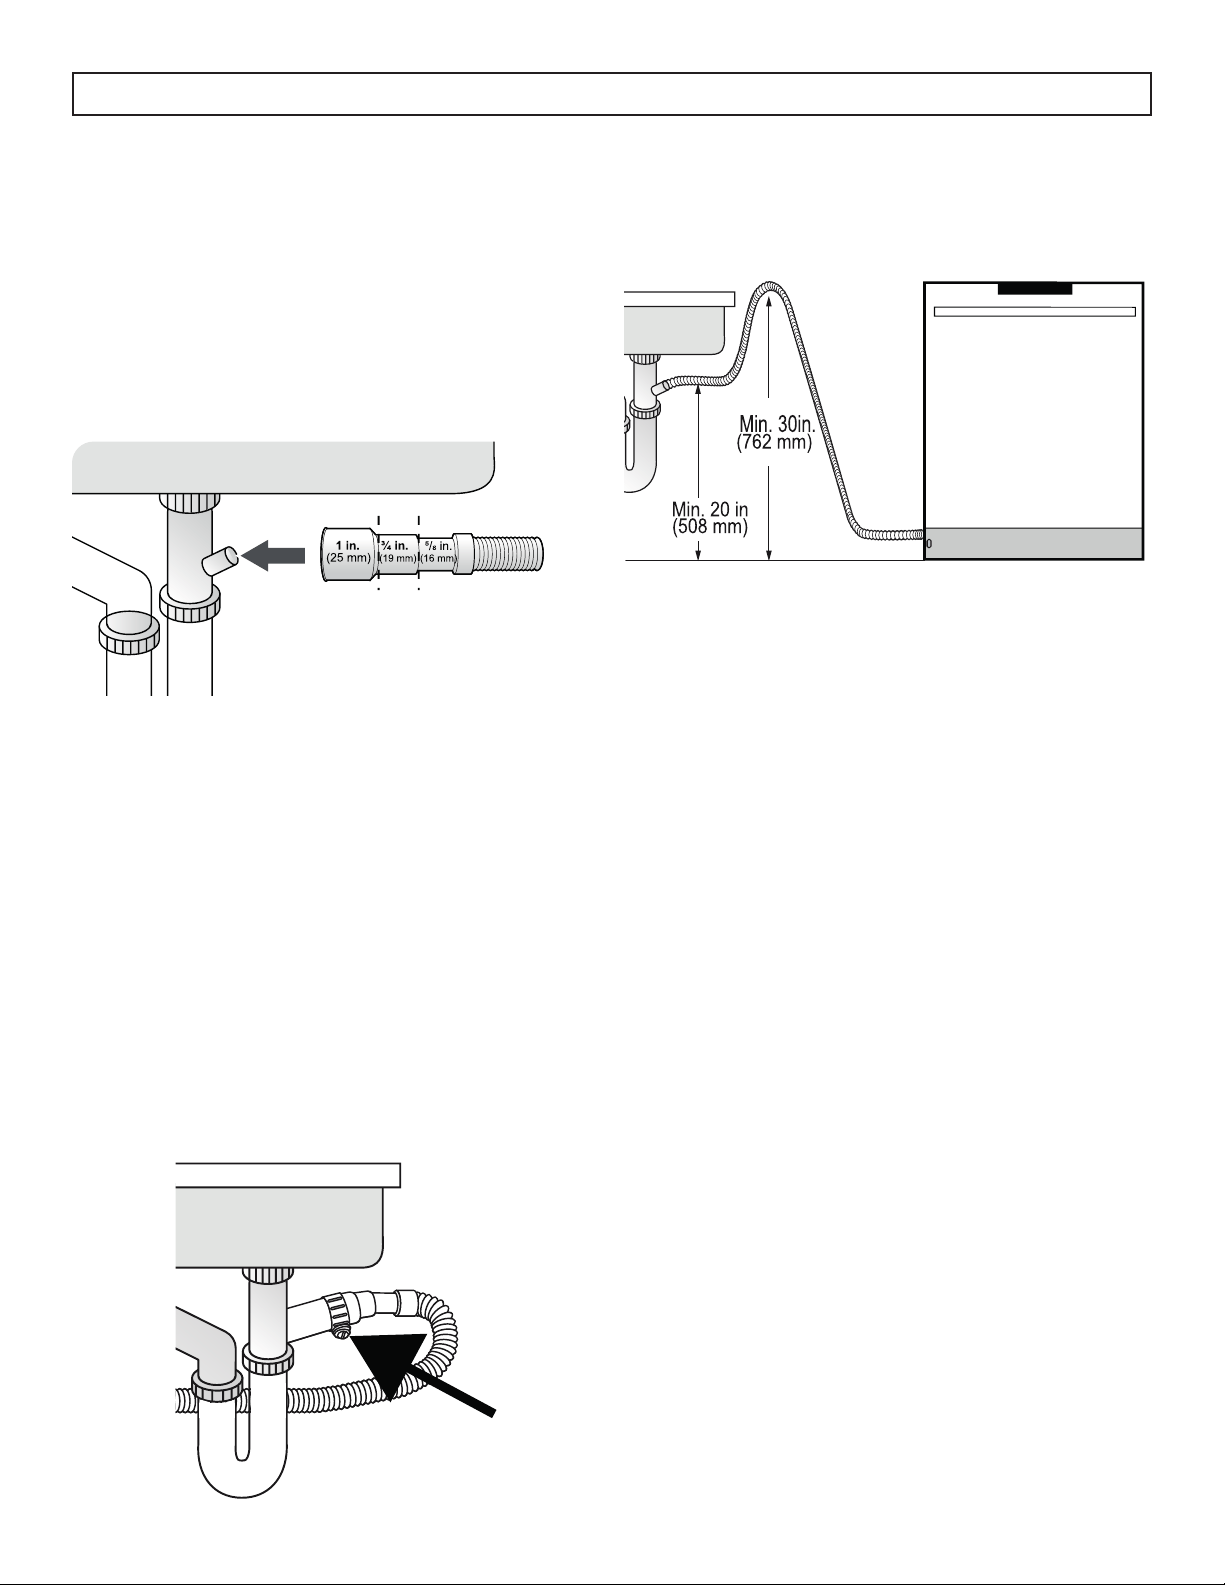
DRAIN HOSE CONNECTION
Check the size of the sink’s drain hose connector.
If needed, cut the drain hose on one of the dotted
lines so its end fi ts onto the sink connector (5/8”,
3/4” or 1”). If the end of the drain hose does not
fi t onto the drain hose connector of the sink, use an
adapter purchasable at a plumbing or hardware
supply store.
INSTALLATION INSTRUCTIONS
Be careful when cutting off the end of the drain hose
as there is a risk of injury. Clean around the sink’s
drain connection so that it does not damage the
hose. Check for any foreign items in the drain hose
and remove them. Make sure the drain hose is not
cut or damaged by any sharp edges. A damaged
drain hose can leak.
Slide a hose clamp over the end of the drain hose.
Attach the drain hose to the sink connector, slide the
hose clamp to the end of the hose and then tighten
the hose clamp. Note, you must use a hose clamp.
Failure to do so can cause leaks.
If there is no air gap make sure to hang the middle
of the drain hose well above the sink cabinet base
to prevent back fl ow.
When drilling a hole for the drain hose in the
cabinet wall, take caution not to damage the drain
hose by sharp edges of the hole. On wooden walls,
use sanding to soften the edges. On metal walls,
use insulation tape or duct tape to cover the sharp
edges around the hole.
Be careful not to damage the drain hose when
installing the dishwasher. To prevent leaks or
drainage problems make sure the drain hose is not
damages, kinked or twisted.
Do not cut the wrinkled area of the drain hose to fi t
the size. When arranging the drain hose, take care
not to let it touch sharp edges of the cabinet or sink.
Loading ...
Loading ...
Loading ...