Loading ...
Auto Calibration/Calibración automática
English
Calibrating the speaker settings automatically
You can set up the speakers to obtain the sound you want from all connected speakers
automatically by using the Auto Calibration function. The Auto Calibration function will:
• Check the connection between each speaker and the receiver.
• Adjust the speaker level.
• Measure the distance of each speaker from your listening position.
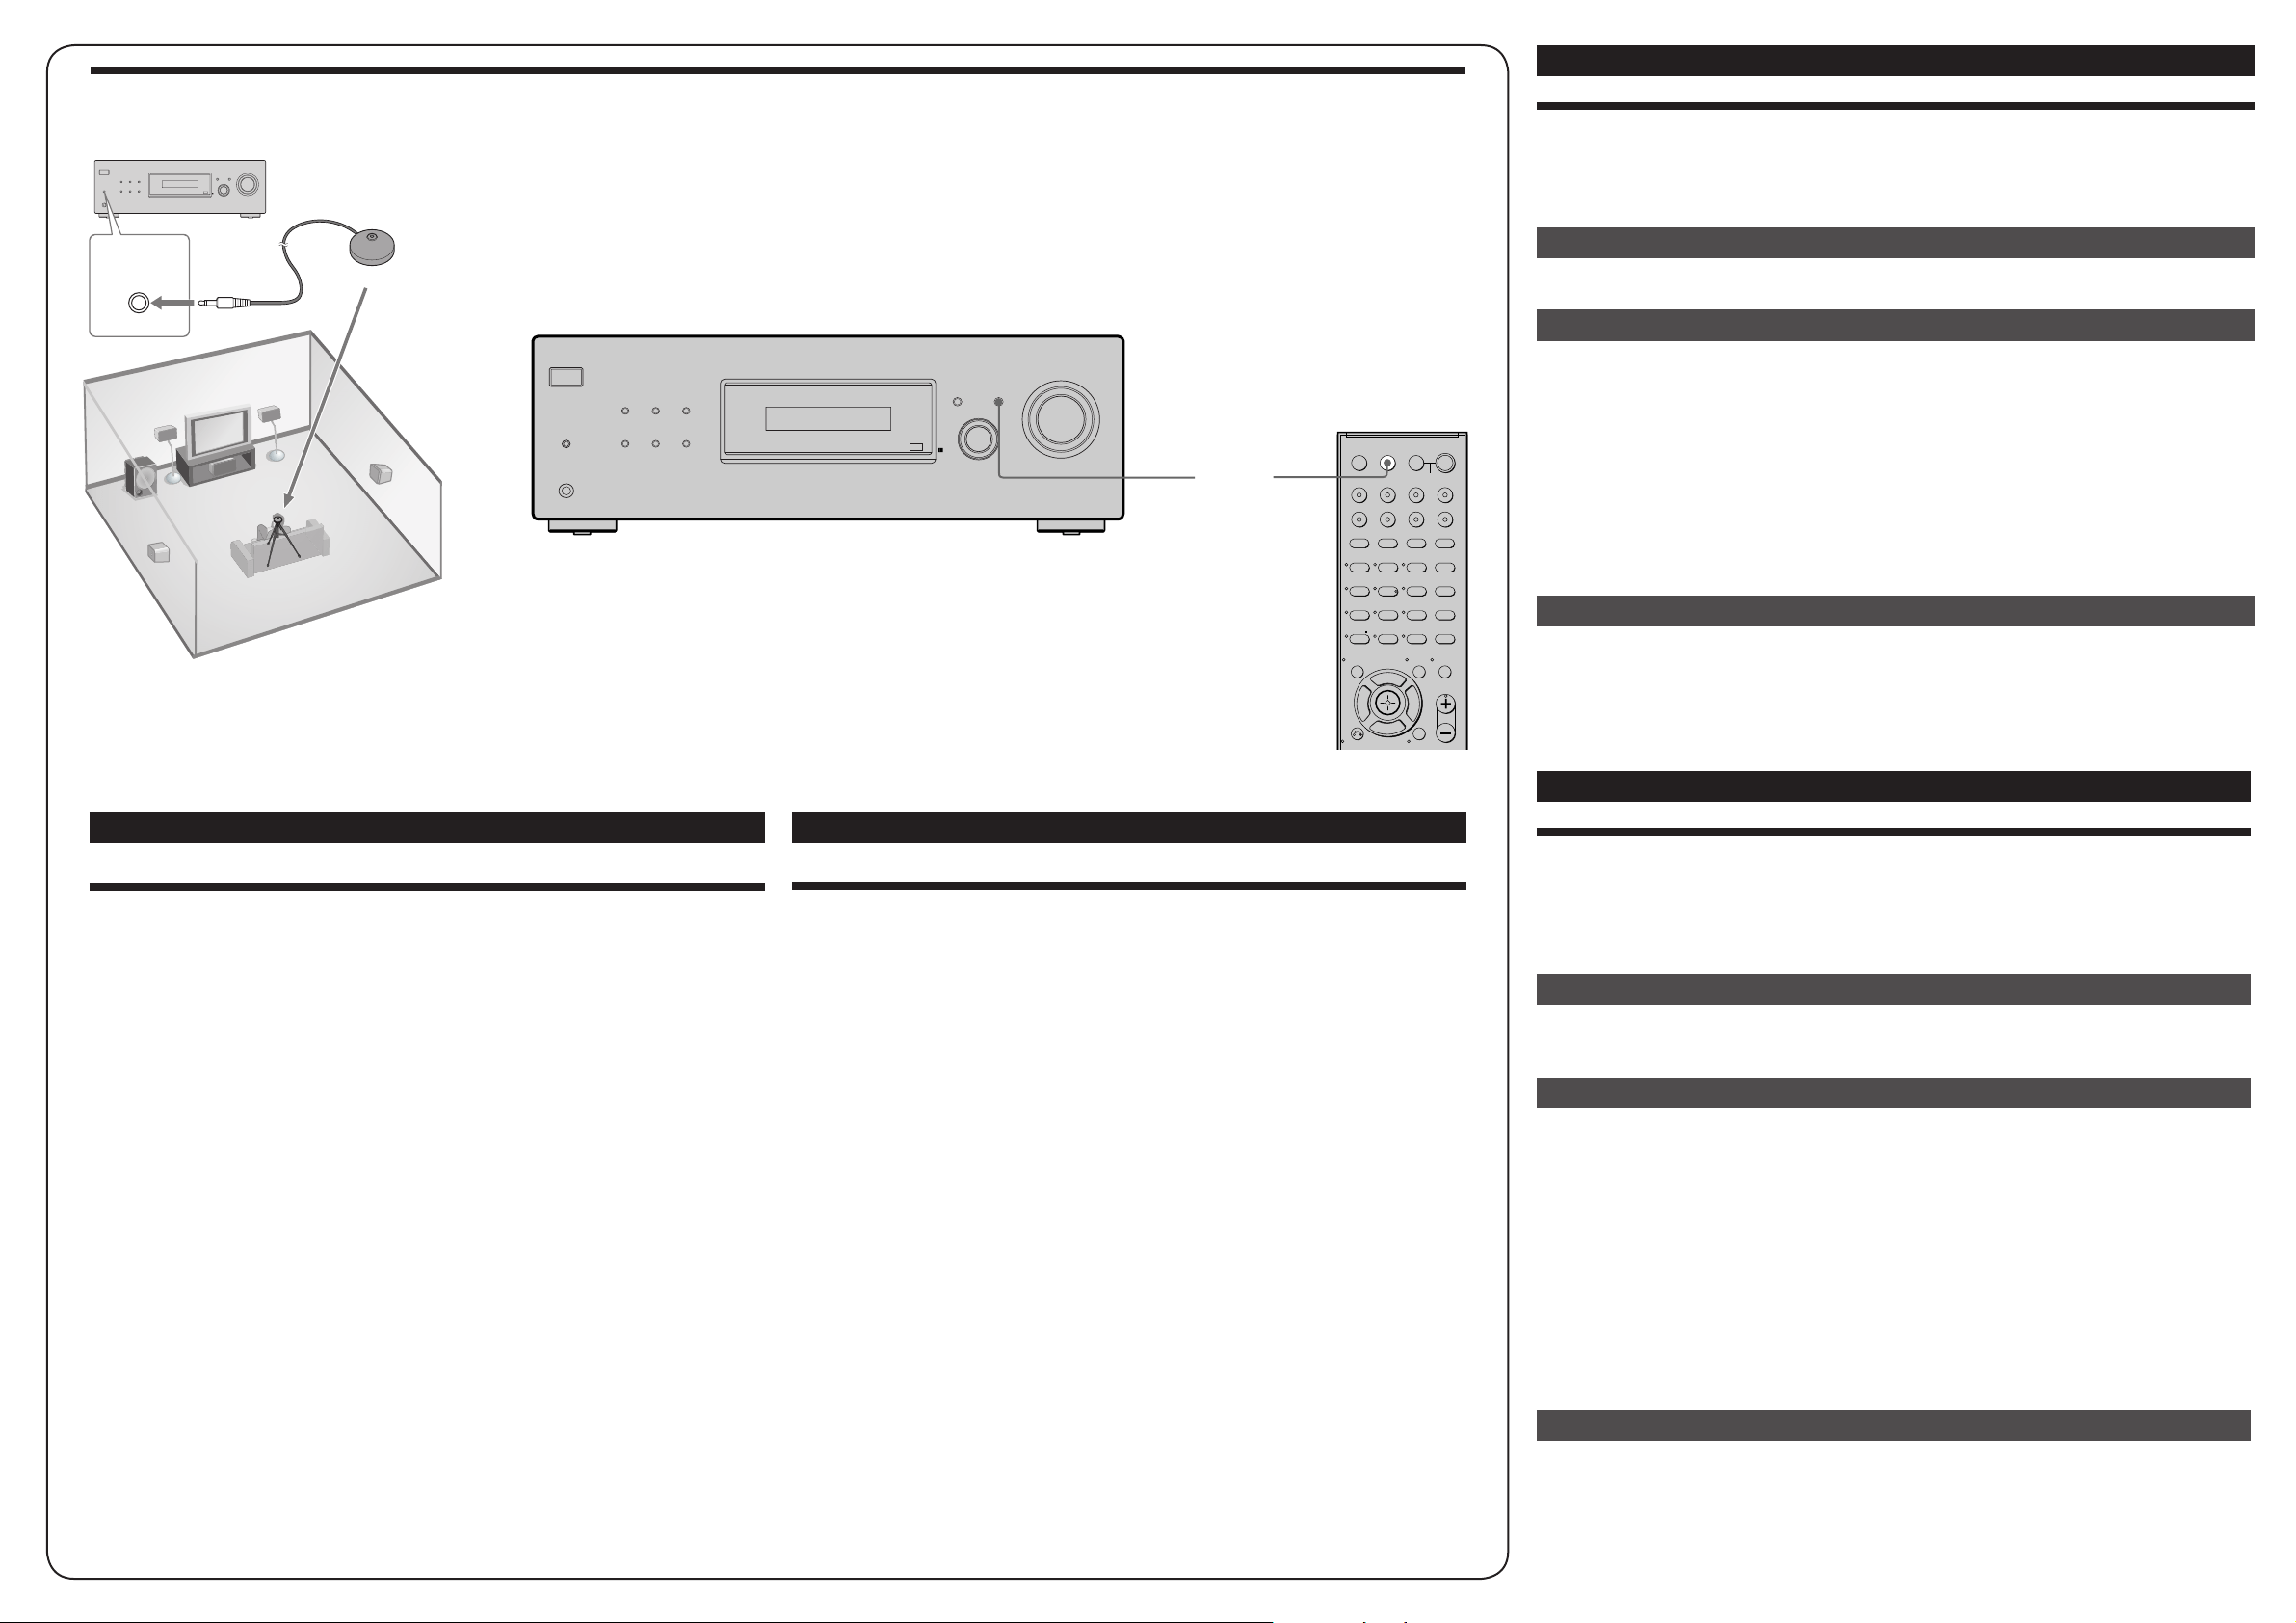
1 Connect the supplied optimizer microphone to the VIDEO 1 IN/
PORTABLE AUDIO IN/AUTO CAL MIC jack on the receiver.
2 Set up the optimizer microphone.
Place the optimizer microphone at your listening position.You can also use a stool or tripod
so that the optimizer microphone remains at the same height as your ears.
3 Press AUTO CAL.
The Auto Calibration function starts.
For details on the Auto Calibration function, refer to step 6 of “Getting started” of the operating
instructions supplied with this receiver.
Notes
• If there are any obstacles in the path between the optimizer microphone and the speakers, the calibration
cannot be performed correctly. Remove any obstacles from the measurement area to avoid measurement
error.
• The Auto Calibration function cannot detect the sub woofer. Therefore, all sub woofer settings will be
maintained.
Optimizer microphone (supplied)/
Micrófono optimizador (suministrada)
DIMMER
VIDEO 1 IN/
PORTABLE AUDIO IN/
AUTO CAL MIC
PHONES
SLEEP
DISPLAY
INPUT SELECTOR
MASTER VOLUME
AUTO CAL
2CH
A.F.D. MOVIE MUSIC
?/1
VIDEO 1 IN/
PORTABLE AUDIO IN/
AUTO CAL MIC
English
Setting up other components
You should set up each component so that the sound is output from the speakers correctly when you
play back a connected component. The following case describes Sony components. Refer to the
operating instructions supplied with each component.
Sony TV
Switch the input of the TV so that an image of the video component you selected is displayed on the TV.
Sony DVD player
1 Select “AUDIO SETUP” on the setup display of the DVD player.
2 Set “AUDIO DRC” to “WIDE RANGE”.
3 Set “DIGITAL OUT” to “ON”.
4 Set “DOLBY DIGITAL” to “DOLBY DIGITAL”.
5 Set “DTS” to “ON” or “DTS”. (Select the setting depending on the model.)
Note
Set up the audio format of the playback disc to listen to multi channel sound.
Sony Super Audio CD player
Select a suitable playback area (multi channel or 2 channel). Sound may come out from only the front
speaker left/right when 2 channel is selected.
After the setting
The receiver is now ready to use. Refer to the operating instructions supplied with the receiver for details.
Español
Confi guración de otros componentes
Es necesario confi gurar cada componente para que el sonido se emita correctamente a través de los
altavoces al reproducir un componente conectado. En el caso siguiente, se describe la confi guración
de componentes Sony. Consulte el manual de instrucciones suministrado con cada componente en
cuestión.
Televisor Sony
Cambie la entrada del televisor para que se visualice en el mismo una imagen del componente de
vídeo seleccionado.
Reproductor de DVD Sony
1 Seleccione “AUDIO SETUP” en la pantalla de confi guración del
reproductor de DVD.
2 Ajuste “AUDIO DRC” en “WIDE RANGE”.
3 Ajuste “DIGITAL OUT” en “ON”.
4 Ajuste “DOLBY DIGITAL” en “DOLBY DIGITAL”.
5 Ajuste “DTS” en “ON” o bien en “DTS”. (Seleccione el ajuste en función del
modelo.)
Nota
Confi gure el formato de audio del disco que vaya a reproducir para escuchar sonido multicanal.
Reproductor de Super Audio CD Sony
Seleccione un área de reproducción adecuada (multicanal o bien de 2 canales). Es posible que el
sonido se emita únicamente a través de los altavoces delanteros izquierdo y derecho si se selecciona el
ajuste de 2 canales.
Tras realizar el ajuste
El receptor está listo para utilizarse. Consulte el manual de instrucciones suministrado con el receptor
para obtener más información.
Español
Calibración automática de los ajustes del altavoz
Puede instalar los altavoces para obtener automáticamente el sonido que desee a través de
todos los altavoces conectados mediante la función de calibración automática. La función de
calibración automática:
• Compruebe las conexiones entre cada altavoz y el receptor.
• Ajuste el nivel del altavoz.
• Calculará la distancia existente entre cada altavoz y la posición de escucha.
1 Conecte el micrófono optimizador a la toma VIDEO 1 IN/PORTABLE
AUDIO IN/AUTO CAL MIC del receptor.
2 Ajuste el micrófono optimizador.
Coloque el micrófono optimizador en su posición de escucha. Puede utilizar también una
banqueta o trípode para que el micrófono optimizador quede a la altura de los oídos.
3 Pulse AUTO CAL.
Se iniciará la función de calibración automática.
Para obtener más información sobre la función de calibración automática, consulte el paso 6 de
“Procedimientos iniciales” del manual de instrucciones suministrado con el receptor.
Notas
• Si hay obstáculos entre el micrófono optimizador y los altavoces, es posible que la calibración no se lleve a
cabo correctamente. Retire los obstáculos de la zona de medición para evitar errores.
• La función de calibración automática no puede detectar el altavoz potenciador de graves. Por lo tanto, todos
los ajustes del altavoz potenciador de graves se mantendrán.
DIMMER
VIDEO 1 IN/
PORTABLE AUDIO IN/
AUTO CA L M IC
PHONES
SLEEP
DISPLAY
INPUT SELECTOR
MASTER VOLUME
AUTO CAL
2CH
A.F.D. MOVIE MUSIC
?/1
123
46
78
0/10
ENTER
9
SYSTEM STANDBY
TV INPUT
SLEEP
AUTO
CAL
TV
?/1
AV
?/1
VIDEO 1 VIDEO 2 VIDEO 3 DVD
2CH A.F.D.
RETURN/EXIT
MENU
MOVIE MUSIC
MEMORY DVD MENU
CLEAR
TOOLSDISPLAY
MUTING
TV VOL
MASTER VOL
FM MODE
D.TUNING
D.SKIP
AMP MENU
SAT TV SA-CD/CD TUNER
?/1
-
F
Gg
f
5
>10/
AUTO CAL
3094336711_DDW795_USES.indd 23094336711_DDW795_USES.indd 2 12/28/2006 2:48:22 PM12/28/2006 2:48:22 PM