Loading ...
Loading ...
Loading ...
10
Dishwasher Installation
CONNECT POWER SUPPLY
If a power cord with plug is already installed
proceed to Step 14.
• Remove junction box cover.
• Secure house wiring to the back of the junction box
with a strain relief.
• Locate the 3 dishwasher wires, (white, black and
green) with the stripped ends coming out of the AC
jumper. Use UL listed wire nuts of appropriate size to
connect incoming ground to green, white to white and
black to black.
• Replace the junction box cover using the screw.
Check to be sure that wires are not pinched under
the cover.
• If using a Power Cord Kit, use GE Appliances part
number WX09X70910 or WX09X70911 and refer to
the included instructions.
NOTE: Do not remove the Junction Box Bracket.
NOTE: All ground screws, brackets and wires must
remain intact.
If house wiring is not 2-wire with ground, a ground
must be provided by the installer. When house wiring
is aluminum, be sure to use UL-Listed anti-oxidant
compound and aluminum-to-copper connectors.
WARNING
STEP 13
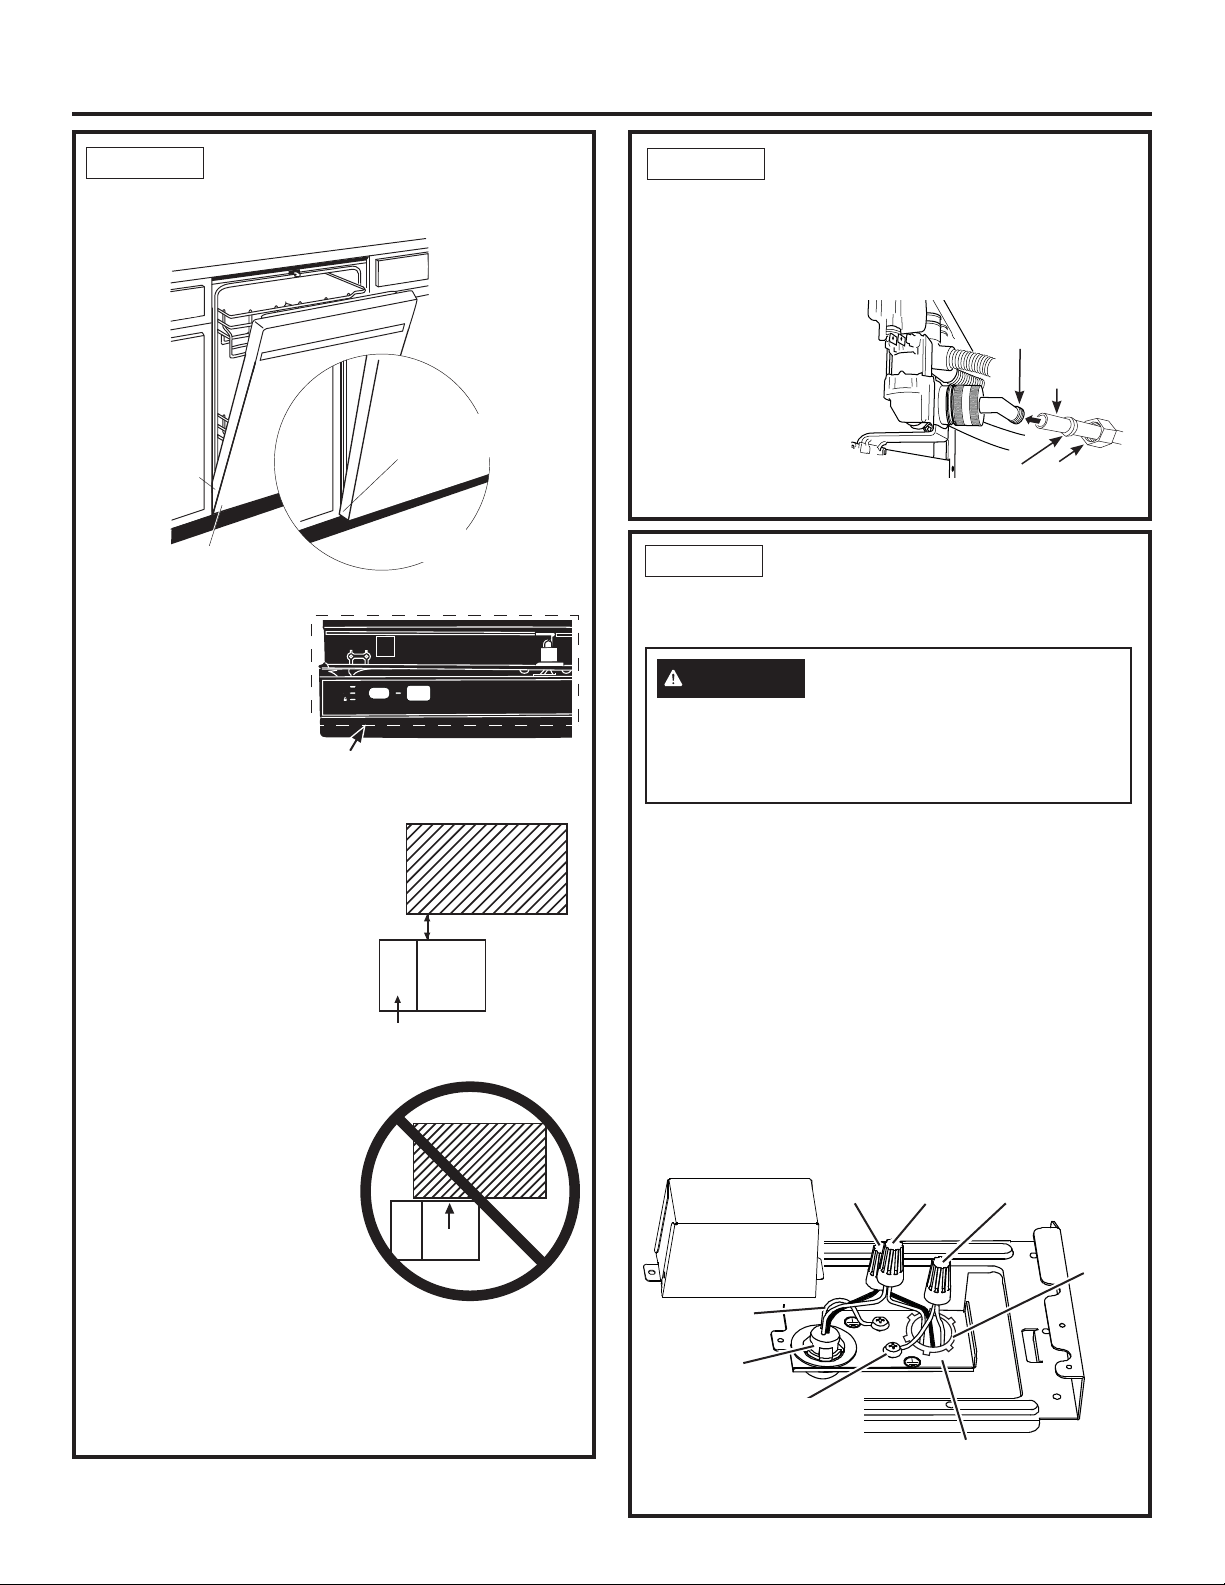
POSITION DISHWASHER
UNDER COUNTERTOP
(CONT.)
The controls on these
models are designed
to be hidden by your
countertop. Align the
dishwasher as shown in
figure.
Leave a 1/2” minimum gap
between the underside of the
countertop and the top of the
dishwasher door as shown in
figure.
NOTE: If the drain hose
gets trapped behind the unit
it can prevent the controls
from being hidden by the
countertop.
Tip: The leveling legs can
be used to increase or
decrease the amount of gap
between the controls and
the countertop affecting the
visibility of the controls.
IMPORTANT– Leave a 1/2”
minimum gap between the
controls and the underside
of the countertop to prevent
condensation and damage
to the control panel from
screwheads.
NOTE: If this dishwasher is replacing an existing
dishwasher, the old countertop bracket screw holes
may not be in the correct position to accept a top-
control model. New holes may be required.
STEP 11
Countertop
Control
Panel
Countertop
Dishwasher
Door
1/2”
Min.
Front
View
Door
Fits and
Swings
Back
Behind
Cabinet
Frame
Correct
Alignment
Door Catches
on Cabinet Frame
Incorrect
Alignment
Sanitized
Clean
Start
Hold 3 Sec To Cancel
TOP VIEW
Controls Hidden by Countertop
CONNECT WATER
SUPPLY
Connect water supply line to 90° elbow.
If using a flexible braided hose connection:
• Attach nut to 90° elbow using an adjustable wrench.
If using a copper
tubing connection:
• Slide compression nut,
then ferrule over end
of water line.
• Insert water line into
90° elbow.
• Slide ferrule against
elbow and secure with compression nut.
STEP 12
Ferrule Compression
Nut
Hot Water
Supply Line
90° Elbow
Black White
Ground/
Green
Dishwasher
Ground Wire
and Screw
Dishwasher
Wires
Junction Box Bracket
UL Listed Wire Nuts
House
Wiring
with
Strain
Relief
Junction Box
Cover
Dishwasher Ground
Wire and Screw
Loading ...
Loading ...
Loading ...