Loading ...
Loading ...
Loading ...
10
Step-by-step installation instructions.
Filter Cartridge Installation or Replacement
Customer Service Troubleshooting Tips Operating Instructions Safety InstructionsInstallation InstructionsCustomer Service Troubleshooting Tips Installation Instructions Safety InstructionsOperating InstructionsCustomer Service Troubleshooting Tips Installation Instructions Safety InstructionsOperating Instructions
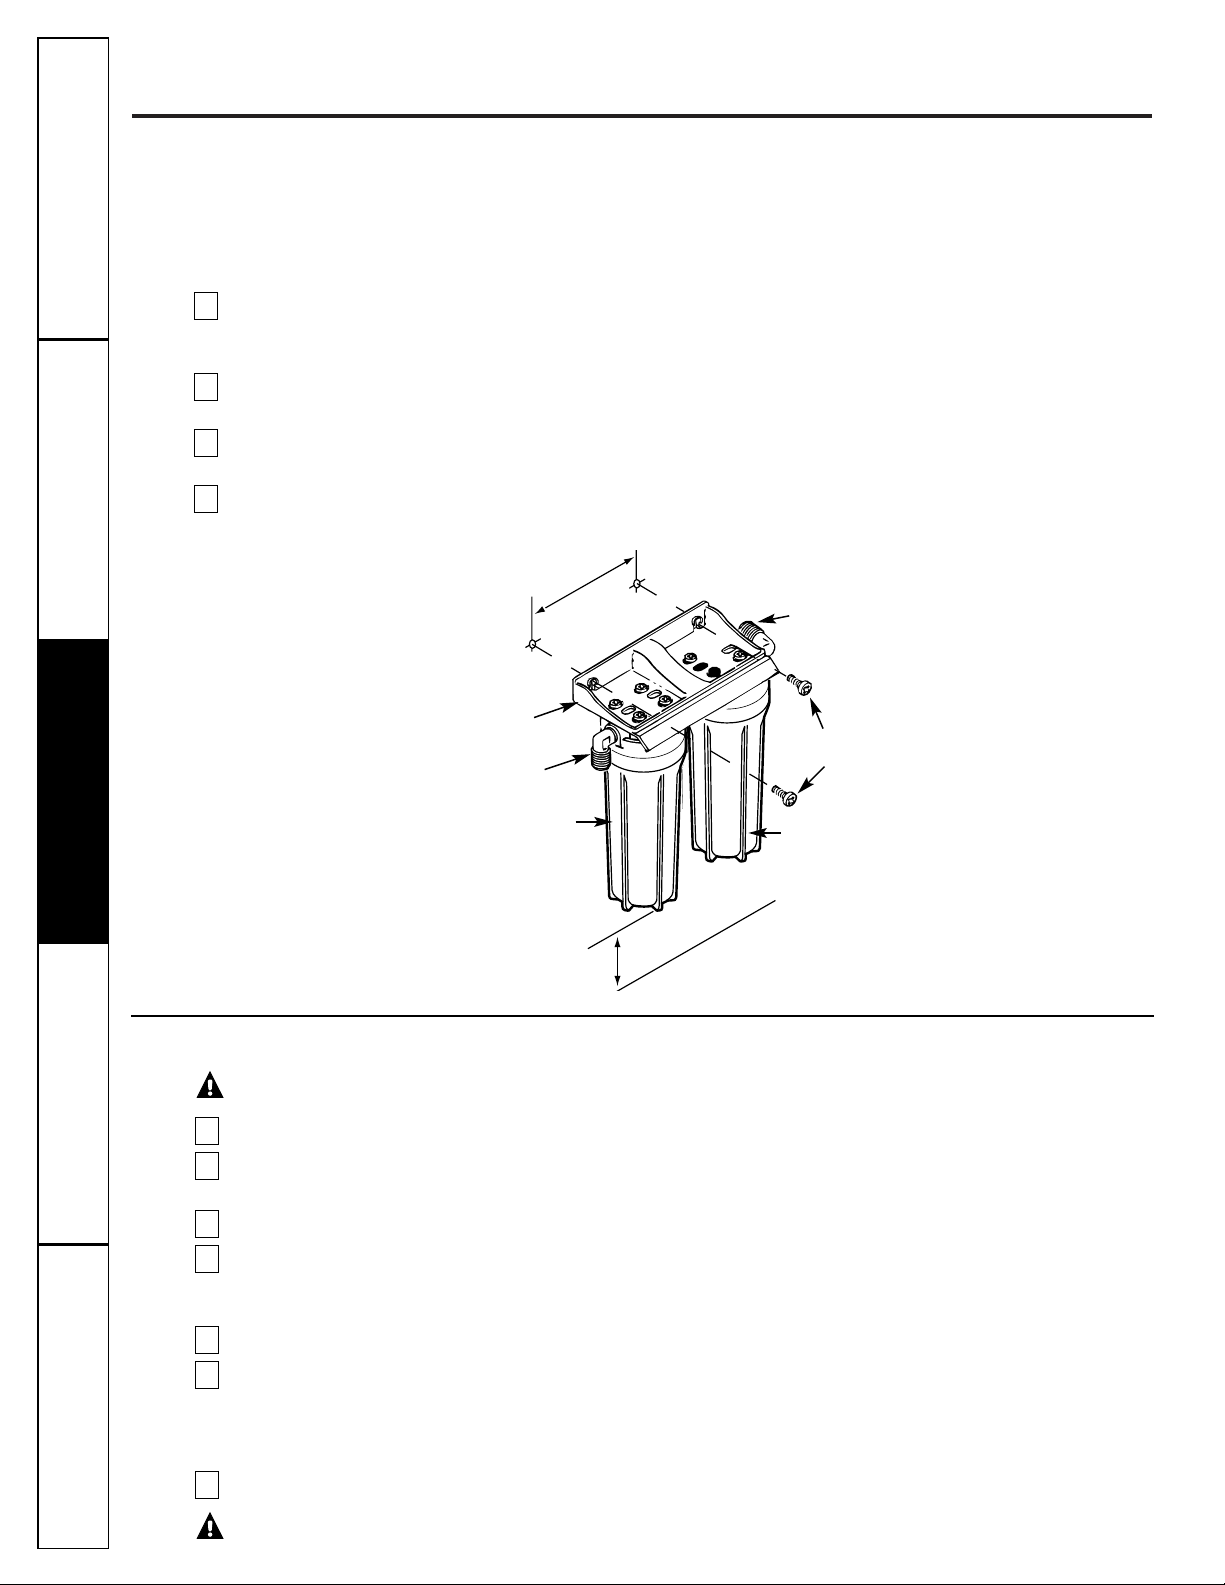
Mounting Bracket to Cabinet Wall
The bracket can be used as a template for marking the location of the mounting screws. When determining the
location of the bracket make sure you leave 1-1 ⁄ 2″ to 2″ of free area under the sumps to allow for sump removal and
enough space on either side to make the tubing connections.
Make Tubing Connections
Run the length of 3⁄8″ tubing, connected to the bottom of faucet, to the filter system outlet, Fig.1 in the
Installation Overview
section. Allow enough slack in the tubing to be able to place the system on the floor in front
of the sink. Measure and cut the end of the tubing square.
Slide a compression nut onto the end of the tubing and push a tubing insert into the tubing.
Connect the tubing and tighten the compression nuts securely.
Repeat the preceding steps to connect a length of tubing between the filter system inlet and the water
supply/saddle valve, Fig. 1 in the
Installation Overview
section.
4
3
2
1
CAUTION:
Never remove sumps with water pressure in the Water Filtration system.
Close the water supply/saddle valve (Fig. 1 and 2A) to the filter.
Open the filtered water faucet.
Turn the sump off of the filter head as shown (use the sump wrench provided). Be careful, the sump
is full of water. Locate and save the large o-ring seal. Remove and discard the used filter cartridge.
Be sure the inside of the sump is clean. Thoroughly wash with hot, soapy water and rinse.
Remove the wrapper and labels from the new filter cartridge and insert the
filter cartridge in the sump.
Some
cartridges fit either way, while others fit only one way. Observe markings on the end of the cartridge. The sediment
(FXUSB)
filter cartridge should always be placed in the Filter I sump.
Lightly lubricate the o-ring seal, in the sump, with clean silicone grease. Be sure it is fully seated in its groove.
Hold the sump up to the filter head, aligning the center hole in the cartridge with the protrusion on the bottom
of the head.
NOTE:
If the sump will not tighten up to the head, you may have the cartridge in upside down. Take the cartridge
out and check the markings on the end of the cartridge for correct orientation.
Being careful not to cross-thread, turn the sump onto the filter head and hand tighten securely (see Fig. 5).
CAUTION:
If using the sump wrench to tighten the sump, do not overtighten.
7
6
5
4
3
2
1
Fig. 4
Filter
I
Filter
II
Sump
Mounting
screws
Tubing
connector
Tubing
connector
Mounting
bracket
Sump
7-9⁄16″
1-1⁄2″to 2″
Loading ...
Loading ...
Loading ...