
Loading ...
Loading ...
Loading ...
en Shelf supports
16
Note:Reddish marks may appear on the self-clean-
ing surfaces. This is residue from food. These spots
are not harmful and are not rust. These marks do
not impair the cleaning ability of the self-cleaning
surfaces.
9.
Attach the rails.
11 Shelf supports
To clean the rails and the cooking compartment, or to
replace the rails, you can remove these.
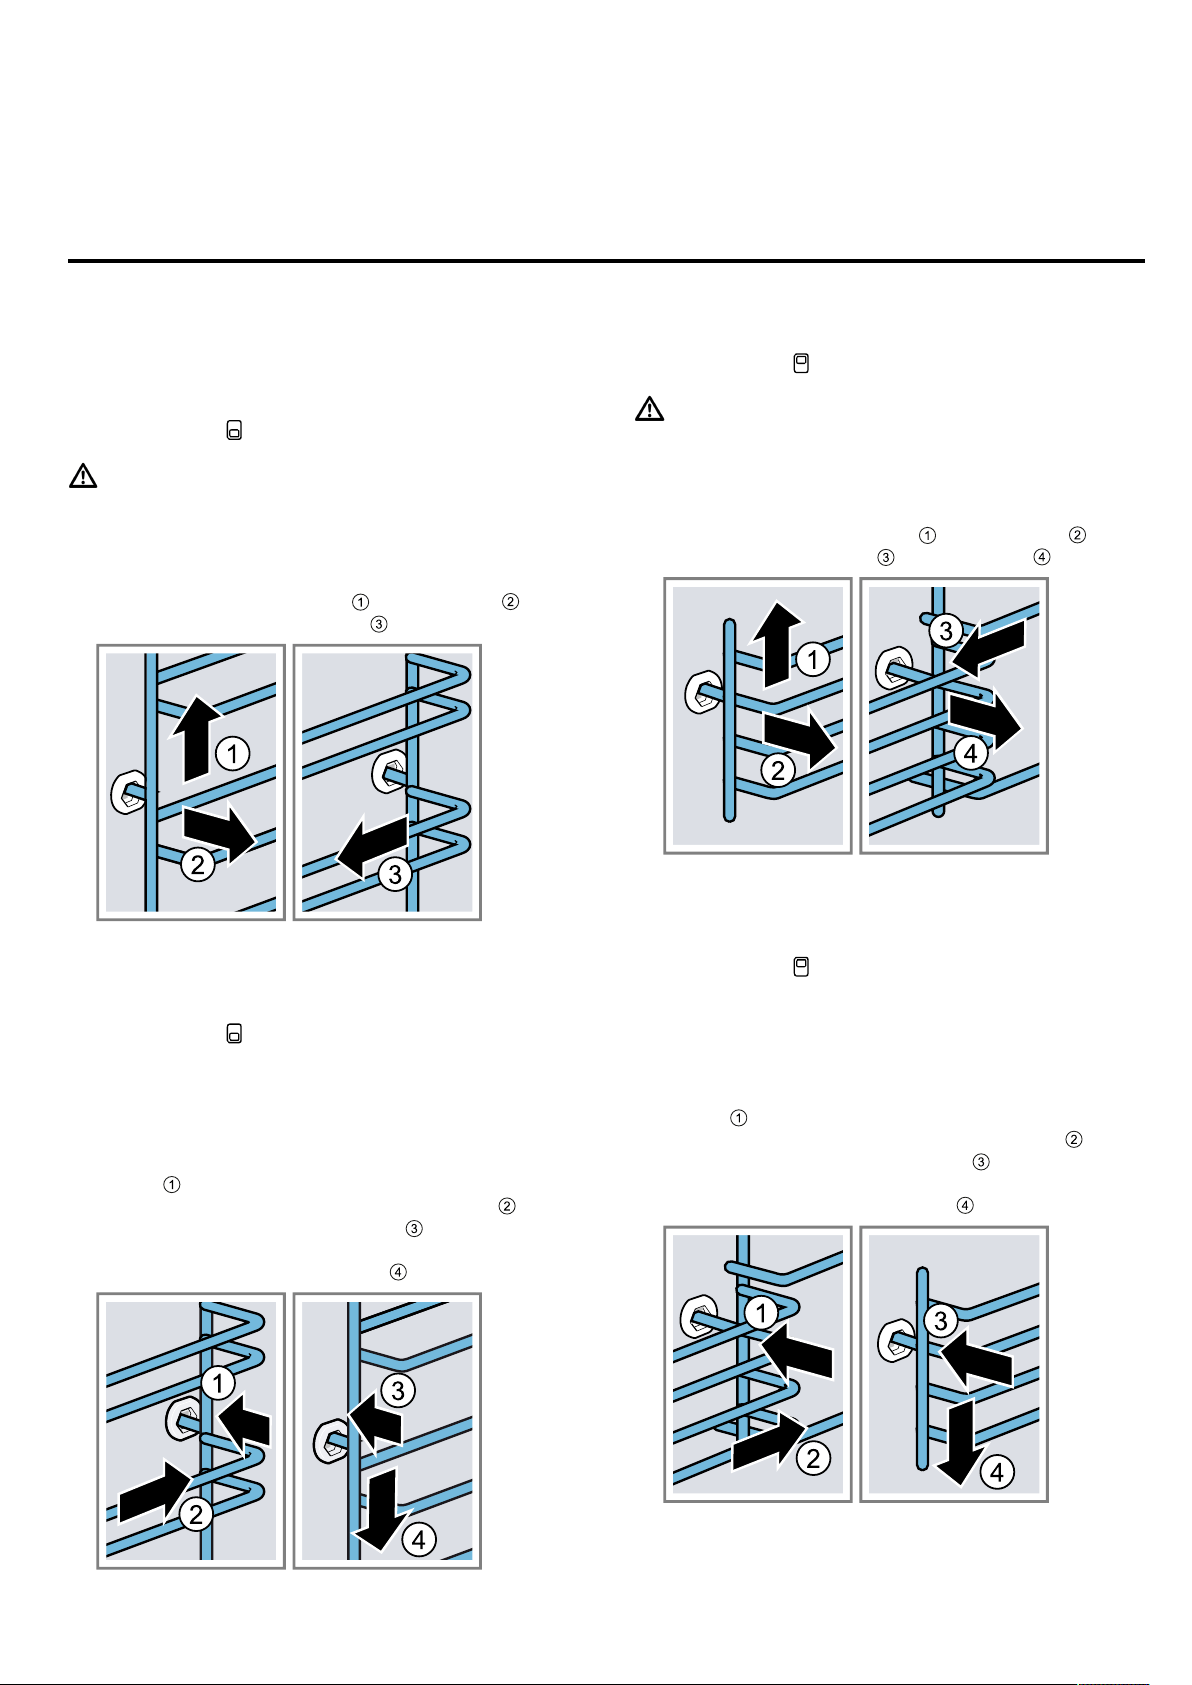
11.1 Detach the rails in the main cooking
compartment
WARNING‒Risk of burns!
The shelf supports get very hot
▶
Never touch the shelf supports when hot.
▶
Always allow the appliance to cool down.
▶
Keep children at a safe distance.
1.
Lift the rail forwards slightly and detach it .
2.
Pull the whole rail to the front and remove it.
3.
Clean the rail.
→"Cleaning products", Page14
11.2 Attaching the rails in the main cooking
compartment
Notes
¡ The rails only fit on the right or left.
¡ For both rails, ensure that the curved rods are at the
front.
1.
First, push the rail into the middle of the rear
socket until the rail rests against the cooking
compartment wall, and then push this back .
2.
Push the rail into the front socket until the rail
also rests against the cooking compartment wall,
and then press this downwards .
11.3 Detaching the rails in the top cooking
compartment
WARNING‒Risk of burns!
The shelf supports get very hot
▶
Never touch the shelf supports when hot.
▶
Always allow the appliance to cool down.
▶
Keep children at a safe distance.
1.
Lift the rail forwards slightly and detach it .
2.
Pull the rail to the front and remove it .
3.
Clean the rail.
→"Cleaning products", Page14
11.4 Attaching the rails in the top cooking
compartment
Notes
¡ The rails only fit on the right or left.
¡ For both shelf supports, ensure that the hooks that
are attached at the rear are pointing upwards.
1.
First, push the rail into the middle of the rear
socket until the rail rests against the cooking
compartment wall, and then push this back .
2.
Push the rail into the front socket until the rail
also rests against the cooking compartment wall,
and then press this downwards .
Loading ...
Loading ...
Loading ...