i-Manual
Print
Font Size
Basic Operations
Parts Description
Watching TV
Enjoying
Movies/Music/Photos
Using Internet
Services and
Applications
Watching TV with
Friends Far and
Near
Using Other
Devices
Using BRAVIA
Sync Devices
Useful Functions
Connecting to the
Internet
Using Home
Network
Configuring
Various Settings
Troubleshooting
How to Use
Bookmarks
Top Page
KDL-70W850B/60W850B/50W850B
KDL-70W840B/60W840B/50W840B
KDL-70W830B/60W830B/50W830B
KDL-70W800B/60W800B/50W800B
KDL-55W800B
List of Contents© 2014 Sony Corporation

Table Of Contents
BRAVIA KDL-70W850B/60W850B/50W850B i.................................................................................
Basic Operations 1............................................................................................................................
How to Use Remote 22...............................................................................................................
Finding Contents More Easily (“Discover” Screen) 25...............................................................
Home Menu Screen 27................................................................................................................
Adjusting various picture settings (e.g. picture brightness/color) 30...........................................
How to Use the i-Manual 34........................................................................................................
Watch Connected Device 37.......................................................................................................
Enjoying a Chat with Your Friends while Watching TV 38..........................................................
Using Applications 40..................................................................................................................
Parts Description 2............................................................................................................................
Front 42.......................................................................................................................................
Control buttons on the rear 44.....................................................................................................
Terminals on the rear (bottom) 45...............................................................................................
Terminals on the rear (center) 46................................................................................................
Terminals on the rear (right) 48...................................................................................................
Top 49.........................................................................................................................................
Upper 50......................................................................................................................................
Middle 51.....................................................................................................................................
Lower 52......................................................................................................................................
Bottom 53....................................................................................................................................
Upper 54......................................................................................................................................
Lower 55......................................................................................................................................
Displaying the Screen Key Pad 56..............................................................................................
Finding Contents More Easily (“Discover” Screen) 25...............................................................
Home Menu Screen 27................................................................................................................
Watching TV 3...................................................................................................................................
Selecting Channels 57.................................................................................................................
Enjoying Football More 59...........................................................................................................
Using the TV Guide Search Function 61.....................................................................................
Watching in 3D 63.......................................................................................................................
Displaying picture-in-picture (PIP) 68..........................................................................................
Displaying left-and-right pictures (P&P) 70..................................................................................
Display information 72.................................................................................................................
Subtitles/Closed captions 73.......................................................................................................
Screen format/Wide mode 74......................................................................................................
Audio (for analog mode) 77.........................................................................................................
Enjoying Movies/Music/Photos 4.......................................................................................................
TOC-1

Enjoying Movies 78.....................................................................................................................
Enjoying Music 79.......................................................................................................................
Enjoying Photos 80......................................................................................................................
Using Internet Services and Applications 5.......................................................................................
Using Applications 40..................................................................................................................
Browsing Websites 81.................................................................................................................
Watching Internet Videos 82.......................................................................................................
Performing initial setup 84...........................................................................................................
Making a call 86...........................................................................................................................
Watching TV with Friends Far and Near 6........................................................................................
Enjoying a Chat with Your Friends while WatchingTV 38...........................................................
Inviting Friends while Watching TV 89........................................................................................
Inviting Friends Using the Program Guide 91..............................................................................
Using Other Devices 7.......................................................................................................................
HDMI connection 93....................................................................................................................
Component video connection 94.................................................................................................
Composite connection 95............................................................................................................
Digital Still Camera/Camcorder 96..............................................................................................
USB Device 97............................................................................................................................
PC 99...........................................................................................................................................
HDMI connection 101..................................................................................................................
Optical audio connection 103......................................................................................................
Audio cable connection 104........................................................................................................
MHL Device (Smartphone, Tablet, etc.) 105...............................................................................
Wireless Subwoofer (Optional) 107.............................................................................................
Playable File Formats (DLNA, USB devices, etc.) 109...............................................................
Using BRAVIA Sync Devices 8.........................................................................................................
Setting BRAVIA Sync 110...........................................................................................................
Using the Sync Menu 113...........................................................................................................
Setting Buttons to Control an HDMI/MHL Device 115.................................................................
Displaying the BRAVIA Sync Device List 117.............................................................................
Useful Functions 9.............................................................................................................................
Selecting a picture and sound setting suitable for the content 118.............................................
Automatically adjusting picture brightness according to ambient light 120.................................
Adding Favorite Applications 121................................................................................................
Current View Information Search 122.........................................................................................
Keyword Search 124...................................................................................................................
Saving power by picture brightness 125......................................................................................
Saving power by automatically adjusting the backlight drive 127................................................
Turning the TV off by monitoring idle time 128............................................................................
TOC-2

Turning the TV off by monitoring input signal 129.......................................................................
Setting the current time manually 130.........................................................................................
Setting the on timer 131..............................................................................................................
Setting the sleep timer 132..........................................................................................................
Connecting to the Internet 10............................................................................................................
Wireless Connection (Built-in Wireless LAN) 133........................................................................
Wired Connection (with a LAN Cable) 135..................................................................................
Setting IPv6 137..........................................................................................................................
Using Home Network 11....................................................................................................................
Playing Content on a PC 138......................................................................................................
Enabling the renderer function 140.............................................................................................
Allowing/blocking access from controller 141..............................................................................
Making advanced renderer settings 142.....................................................................................
Selecting servers to display 143..................................................................................................
Checking the server connection 144...........................................................................................
Connecting via Wi-Fi Direct (without a wireless router) 145........................................................
Playing Content with the Renderer Function 148........................................................................
Using a Smartphone/Tablet as a Remote 149............................................................................
Displaying the Smartphone’s Screen on the TV (One-touch mirroring) 151...............................
Displaying the Smartphone’s Screen on the TV (Screen mirroring) 153....................................
Sharing Photos 156.....................................................................................................................
Configuring Various Settings 12........................................................................................................
Selecting picture mode 158.........................................................................................................
Locking picture adjustment 160...................................................................................................
Setting the screen size/position 161............................................................................................
Adjusting various sound settings (e.g. bass/treble/balance) 164................................................
Setting the sound according to the TV position 166....................................................................
Checking signal information 167.................................................................................................
Selecting the cable/antenna signal 168.......................................................................................
Tuning channels automatically 169.............................................................................................
Adding digital channels 170.........................................................................................................
Setting channels to surf with the CH +/- buttons 171..................................................................
Editing channel labels 172...........................................................................................................
Fine adjusting analog channels 173............................................................................................
Setting the information banner 174.............................................................................................
Setting closed captions 175.........................................................................................................
Setting the parental lock password 176.......................................................................................
Setting a viewing restriction 177..................................................................................................
Blocking specific channels 179....................................................................................................
Turning off the key tone of remote control operations 180..........................................................
TOC-3

Turning off the start-up logo 181.................................................................................................
Turning on/off and adjusting the brightness of the illumination 182............................................
Setting the menu language 183...................................................................................................
Setting your region 184...............................................................................................................
Setting Touchpad Remote Control 185.......................................................................................
Setting a Bluetooth Device 186...................................................................................................
Selecting speakers to output sound 187.....................................................................................
Outputting sound from headphones or another audio system 188..............................................
Controlling the volume of an audio system with the TV’s remote control 189.............................
Setting the headphone speaker link 190.....................................................................................
Setting sound for Home Theater Control 191..............................................................................
Managing external inputs 192.....................................................................................................
Switching the video input 193......................................................................................................
Making detailed settings of video input 194.................................................................................
Setting the IR Blaster 196............................................................................................................
Running Initial Set-up 197...........................................................................................................
Checking Sony contact information 198......................................................................................
Uploading operation history 199..................................................................................................
Updating broadcast/service software 200...................................................................................
Updating the TV’s software 201..................................................................................................
Troubleshooting 14............................................................................................................................
Self Diagnostics 202....................................................................................................................
Power Symptoms 203.................................................................................................................
Picture/Screen Symptoms 204....................................................................................................
Broadcast Reception Symptoms 208..........................................................................................
3D Picture/Glasses Symptoms 211.............................................................................................
Sound Symptoms 214.................................................................................................................
Connected Device Symptoms 216..............................................................................................
Network Connectivity Test Results 219.......................................................................................
Network/Application Symptoms 221............................................................................................
Home Network Symptoms 224....................................................................................................
Remote Control Symptoms 226..................................................................................................
Touchpad Remote Control Symptoms 227.................................................................................
Bluetooth Mouse Symptoms 229.................................................................................................
Screen mirroring Symptoms 230.................................................................................................
One-touch mirroring Symptoms 232............................................................................................
TV SideView Symptoms 233.......................................................................................................
Photo Share Symptoms 235........................................................................................................
Notes 236....................................................................................................................................
How to Use Bookmarks 15................................................................................................................
TOC-4

i-Manual
Print
Font Size
Basic Operations
Parts Description
Watching TV
Enjoying
Movies/Music/Photos
Using Internet
Services and
Applications
Watching TV with
Friends Far and
Near
Using Other
Devices
Using BRAVIA
Sync Devices
Useful Functions
Connecting to the
Internet
Using Home
Network
Configuring
Various Settings
Troubleshooting
How to Use
Bookmarks
Top Page > Basic Operations
Basic Operations
How to Use Remote
Enjoy “Discover”
Home Menu Screen
Picture Adjustment
How to Use the i-Manual
Watch Connected Device
Enjoy Social Viewing
Using Applications
List of Contents© 2014 Sony Corporation
Top of Page
1
i-Manual
Print
Font Size
Basic Operations
Parts Description
Watching TV
Enjoying
Movies/Music/Photos
Using Internet
Services and
Applications
Watching TV with
Friends Far and
Near
Using Other
Devices
Using BRAVIA
Sync Devices
Useful Functions
Connecting to the
Internet
Using Home
Network
Configuring
Various Settings
Troubleshooting
How to Use
Bookmarks
Top Page > Parts Description
Parts Description
TV Set
Front
Control buttons on the rear
Terminals on the rear (bottom)
Terminals on the rear (center)
Terminals on the rear (right)
Remote Control
Top
Upper
Middle
Lower
Bottom
Touchpad Remote Control (Optional)
Upper
Lower
Displaying the Screen Key Pad
Finding Contents More Easily (“Discover” Screen)
Home Menu Screen
List of Contents© 2014 Sony Corporation
Top of Page
2
i-Manual
Print
Font Size
Basic Operations
Parts Description
Watching TV
Enjoying
Movies/Music/Photos
Using Internet
Services and
Applications
Watching TV with
Friends Far and
Near
Using Other
Devices
Using BRAVIA
Sync Devices
Useful Functions
Connecting to the
Internet
Using Home
Network
Configuring
Various Settings
Troubleshooting
How to Use
Bookmarks
Top Page > Watching TV
Watching TV
Selecting Channels
Enjoying Football More
Using the TV Guide Search Function
Watching in 3D
Watching Twin Picture
Displaying picture-in-picture (PIP)
Displaying left-and-right pictures (P&P)
Changing Display Info/Pic. Size/Audio
Display information
Subtitles/Closed captions
Screen format/Wide mode
Audio (for analog mode)
List of Contents© 2014 Sony Corporation
Top of Page
3
i-Manual
Print
Font Size
Basic Operations
Parts Description
Watching TV
Enjoying
Movies/Music/Photos
Using Internet
Services and
Applications
Watching TV with
Friends Far and
Near
Using Other
Devices
Using BRAVIA
Sync Devices
Useful Functions
Connecting to the
Internet
Using Home
Network
Configuring
Various Settings
Troubleshooting
How to Use
Bookmarks
Top Page > Enjoying Movies/Music/Photos
Enjoying Movies/Music/Photos
Enjoying Movies
Enjoying Music
Enjoying Photos
List of Contents© 2014 Sony Corporation
Top of Page
4
i-Manual
Print
Font Size
Basic Operations
Parts Description
Watching TV
Enjoying
Movies/Music/Photos
Using Internet
Services and
Applications
Watching TV with
Friends Far and
Near
Using Other
Devices
Using BRAVIA
Sync Devices
Useful Functions
Connecting to the
Internet
Using Home
Network
Configuring
Various Settings
Troubleshooting
How to Use
Bookmarks
Top Page > Using Internet Services and Applications
Using Internet Services and Applications
Using Applications
Browsing Websites
Watching Internet Videos
Using Skype
Performing initial setup
Making a call
List of Contents© 2014 Sony Corporation
Top of Page
5
i-Manual
Print
Font Size
Basic Operations
Parts Description
Watching TV
Enjoying
Movies/Music/Photos
Using Internet
Services and
Applications
Watching TV with
Friends Far and
Near
Using Other
Devices
Using BRAVIA
Sync Devices
Useful Functions
Connecting to the
Internet
Using Home
Network
Configuring
Various Settings
Troubleshooting
How to Use
Bookmarks
Top Page > Watching TV with Friends Far and Near
Watching TV with Friends Far and Near
Enjoying a Chat with Your Friends while Watching TV
Inviting Friends while Watching TV
Inviting Friends Using the Program Guide
List of Contents© 2014 Sony Corporation
Top of Page
6
i-Manual
Print
Font Size
Basic Operations
Parts Description
Watching TV
Enjoying
Movies/Music/Photos
Using Internet
Services and
Applications
Watching TV with
Friends Far and
Near
Using Other
Devices
Using BRAVIA
Sync Devices
Useful Functions
Connecting to the
Internet
Using Home
Network
Configuring
Various Settings
Troubleshooting
How to Use
Bookmarks
Top Page > Using Other Devices
Using Other Devices
BD/DVD Player
HDMI connection
Component video connection
Composite connection
Digital Still Camera/Camcorder
USB Device
PC
Audio System
HDMI connection
Optical audio connection
Audio cable connection
MHL Device (Smartphone, Tablet, etc.)
Wireless Subwoofer (Optional)
Playable File Formats (DLNA, USB devices, etc.)
List of Contents© 2014 Sony Corporation
Top of Page
7
i-Manual
Print
Font Size
Basic Operations
Parts Description
Watching TV
Enjoying
Movies/Music/Photos
Using Internet
Services and
Applications
Watching TV with
Friends Far and
Near
Using Other
Devices
Using BRAVIA
Sync Devices
Useful Functions
Connecting to the
Internet
Using Home
Network
Configuring
Various Settings
Troubleshooting
How to Use
Bookmarks
Top Page > Using BRAVIA Sync Devices
Using BRAVIA Sync Devices
Setting BRAVIA Sync
Using the Sync Menu
Setting Buttons to Control an HDMI/MHL Device
Displaying the BRAVIA Sync Device List
List of Contents© 2014 Sony Corporation
Top of Page
8
i-Manual
Print
Font Size
Basic Operations
Parts Description
Watching TV
Enjoying
Movies/Music/Photos
Using Internet
Services and
Applications
Watching TV with
Friends Far and
Near
Using Other
Devices
Using BRAVIA
Sync Devices
Useful Functions
Connecting to the
Internet
Using Home
Network
Configuring
Various Settings
Troubleshooting
How to Use
Bookmarks
Top Page > Useful Functions
Useful Functions
Picture/Sound Auto Adjustment
Selecting a picture and sound setting suitable for the
content
Automatically adjusting picture brightness according
to ambient light
Adding Favorite Applications
Using Search Function
Current View Information Search
Keyword Search
Saving Power Consumption
Saving power by picture brightness
Saving power by automatically adjusting the backlight
drive
Turning the TV off by monitoring idle time
Turning the TV off by monitoring input signal
Using Clock/Timers
Setting the current time manually
Setting the on timer
Setting the sleep timer
List of Contents© 2014 Sony Corporation
Top of Page
9
i-Manual
Print
Font Size
Basic Operations
Parts Description
Watching TV
Enjoying
Movies/Music/Photos
Using Internet
Services and
Applications
Watching TV with
Friends Far and
Near
Using Other
Devices
Using BRAVIA
Sync Devices
Useful Functions
Connecting to the
Internet
Using Home
Network
Configuring
Various Settings
Troubleshooting
How to Use
Bookmarks
Top Page > Connecting to the Internet
Connecting to the Internet
Wireless Connection (Built-in Wireless LAN)
Wired Connection (with a LAN Cable)
Setting IPv6
List of Contents© 2014 Sony Corporation
Top of Page
10

i-Manual
Print
Font Size
Basic Operations
Parts Description
Watching TV
Enjoying
Movies/Music/Photos
Using Internet
Services and
Applications
Watching TV with
Friends Far and
Near
Using Other
Devices
Using BRAVIA
Sync Devices
Useful Functions
Connecting to the
Internet
Using Home
Network
Configuring
Various Settings
Troubleshooting
How to Use
Bookmarks
Top Page > Using Home Network
Using Home Network
Playing Content on a PC
Home Network Settings
Enabling the renderer function
Allowing/blocking access from controller
Making advanced renderer settings
Selecting servers to display
Checking the server connection
Connecting via Wi-Fi Direct (without a wireless router)
Playing Content with the Renderer Function
Using a Smartphone/Tablet as a Remote
Displaying the Smartphone’s Screen on the TV (One-
touch mirroring)
Displaying the Smartphone’s Screen on the TV (Screen
mirroring)
Sharing Photos
List of Contents© 2014 Sony Corporation
Top of Page
11

i-Manual
Print
Font Size
Basic Operations
Parts Description
Watching TV
Enjoying
Movies/Music/Photos
Using Internet
Services and
Applications
Watching TV with
Friends Far and
Near
Using Other
Devices
Using BRAVIA
Sync Devices
Useful Functions
Connecting to the
Internet
Using Home
Network
Configuring
Various Settings
Troubleshooting
How to Use
Bookmarks
Top Page > Configuring Various Settings
Configuring Various Settings
Picture/Screen Settings
Selecting picture mode
Adjusting various picture settings (e.g. picture
brightness/color)
Locking picture adjustment
Setting the screen size/position
Sound Settings
Adjusting various sound settings (e.g.
bass/treble/balance)
Setting the sound according to the TV position
Channel Settings
Checking signal information
Selecting the cable/antenna signal
Tuning channels automatically
Adding digital channels
Setting channels to surf with the CH +/- buttons
Editing channel labels
Fine adjusting analog channels
Program Information & Service Settings
Setting the information banner
Setting closed captions
Setting Parental Control
Setting the parental lock password
Setting a viewing restriction
Blocking specific channels
12

General Settings
Turning off the key tone of remote control operations
Turning off the start-up logo
Turning on/off and adjusting the brightness of the
illumination
Setting the menu language
Setting your region
Setting Touchpad Remote Control
Setting a Bluetooth Device
External Sound Output Settings
Selecting speakers to output sound
Outputting sound from headphones or another audio
system
Controlling the volume of an audio system with the
TV’s remote control
Setting the headphone speaker link
Setting sound for Home Theater Control
External Input Settings
Managing external inputs
Switching the video input
Making detailed settings of video input
Setting the IR Blaster
Running Initial Set-up
Support
Checking Sony contact information
Uploading operation history
Software Update
Updating broadcast/service software
Updating the TV’s software
List of Contents© 2014 Sony Corporation
Top of Page
13
i-Manual
Print
Font Size
Basic Operations
Parts Description
Watching TV
Enjoying
Movies/Music/Photos
Using Internet
Services and
Applications
Watching TV with
Friends Far and
Near
Using Other
Devices
Using BRAVIA
Sync Devices
Useful Functions
Connecting to the
Internet
Using Home
Network
Configuring
Various Settings
Troubleshooting
How to Use
Bookmarks
Top Page > Troubleshooting
Troubleshooting
Self Diagnostics
Power Symptoms
Picture/Screen Symptoms
Broadcast Reception Symptoms
3D Picture/Glasses Symptoms
Sound Symptoms
Connected Device Symptoms
Network Connectivity Test Results
Network/Application Symptoms
Home Network Symptoms
Remote Control Symptoms
Touchpad Remote Control Symptoms
Bluetooth Mouse Symptoms
Screen mirroring Symptoms
One-touch mirroring Symptoms
TV SideView Symptoms
Photo Share Symptoms
Notes
List of Contents© 2014 Sony Corporation
Top of Page
14
i-Manual
Print
Font Size
Basic Operations
Parts Description
Watching TV
Enjoying
Movies/Music/Photos
Using Internet
Services and
Applications
Watching TV with
Friends Far and
Near
Using Other
Devices
Using BRAVIA
Sync Devices
Useful Functions
Connecting to the
Internet
Using Home
Network
Configuring
Various Settings
Troubleshooting
How to Use
Bookmarks
Top Page > How to Use Bookmarks
How to Use Bookmarks
You can save frequently viewed pages in this manual. Use the color
buttons indicated at the bottom of the screen.
To save a page
In the page to bookmark, press the red button that corresponds to [Add
Bookmark] at the bottom of the screen.
(When using the Touchpad Remote Control, press the Control Bar (
),
slide to highlight the red button, then press the touchpad to select.)
To access the bookmarked page
Press the blue button that corresponds to [Show Bookmark] at the
bottom of the screen to display the bookmark list. (When using the
Touchpad Remote Control, press the Control Bar (
), slide the
touchpad to highlight the blue button, then press the touchpad to select.)
Select the desired title.
To return to the previous screen
Press the RETURN button.
To remove a bookmark
In a bookmarked page, press the red button that corresponds to
[Remove Bookmark] at the bottom of the screen.
(When using the Touchpad Remote Control, press the Control Bar ( ),
slide to highlight the red button, then press the touchpad to select.)
List of Contents© 2014 Sony Corporation
Top of Page
15
i-Manual
Print
Font Size
Top of Page
Top Page > List of Contents
Basic Operations
How to Use Remote
Enjoy “Discover”
Home Menu Screen
Picture Adjustment
How to Use the i-Manual
Watch Connected Device
Enjoy Social Viewing
Using Applications
Parts Description
TV Set
Front
Control buttons on the rear
Terminals on the rear (bottom)
Terminals on the rear (center)
Terminals on the rear (right)
Remote Control
Top
Upper
Middle
Lower
Bottom
Touchpad Remote Control (Optional)
Upper
Lower
Displaying the Screen Key Pad
Finding Contents More Easily (“Discover” Screen)
16

Top of Page
Top of Page
Top of Page
Top of Page
Home Menu Screen
Watching TV
Selecting Channels
Enjoying Football More
Using the TV Guide Search Function
Watching in 3D
Watching Twin Picture
Displaying picture-in-picture (PIP)
Displaying left-and-right pictures (P&P)
Changing Display Info/Pic. Size/Audio
Display information
Subtitles/Closed captions
Screen format/Wide mode
Audio (for analog mode)
Enjoying Movies/Music/Photos
Enjoying Movies
Enjoying Music
Enjoying Photos
Using Internet Services and Applications
Using Applications
Browsing Websites
Watching Internet Videos
Using Skype
Performing initial setup
Making a call
Watching TV with Friends Far and Near
Enjoying a Chat with Your Friends while Watching TV
Inviting Friends while Watching TV
17

Top of Page
Top of Page
Top of Page
Inviting Friends Using the Program Guide
Using Other Devices
BD/DVD Player
HDMI connection
Component video connection
Composite connection
Digital Still Camera/Camcorder
USB Device
PC
Audio System
HDMI connection
Optical audio connection
Audio cable connection
MHL Device (Smartphone, Tablet, etc.)
Wireless Subwoofer (Optional)
Playable File Formats (DLNA, USB devices, etc.)
Using BRAVIA Sync Devices
Setting BRAVIA Sync
Using the Sync Menu
Setting Buttons to Control an HDMI/MHL Device
Displaying the BRAVIA Sync Device List
Useful Functions
Picture/Sound Auto Adjustment
Selecting a picture and sound setting suitable for the content
Automatically adjusting picture brightness according to ambient light
Adding Favorite Applications
Using Search Function
Current View Information Search
Keyword Search
Saving Power Consumption
18

Top of Page
Top of Page
Top of Page
Saving power by picture brightness
Saving power by automatically adjusting the backlight drive
Turning the TV off by monitoring idle time
Turning the TV off by monitoring input signal
Using Clock/Timers
Setting the current time manually
Setting the on timer
Setting the sleep timer
Connecting to the Internet
Wireless Connection (Built-in Wireless LAN)
Wired Connection (with a LAN Cable)
Setting IPv6
Using Home Network
Playing Content on a PC
Home Network Settings
Enabling the renderer function
Allowing/blocking access from controller
Making advanced renderer settings
Selecting servers to display
Checking the server connection
Connecting via Wi-Fi Direct (without a wireless router)
Playing Content with the Renderer Function
Using a Smartphone/Tablet as a Remote
Displaying the Smartphone’s Screen on the TV (One-touch mirroring)
Displaying the Smartphone’s Screen on the TV (Screen mirroring)
Sharing Photos
Configuring Various Settings
Picture/Screen Settings
Selecting picture mode
Adjusting various picture settings (e.g. picture brightness/color)
19

Locking picture adjustment
Setting the screen size/position
Sound Settings
Adjusting various sound settings (e.g. bass/treble/balance)
Setting the sound according to the TV position
Channel Settings
Checking signal information
Selecting the cable/antenna signal
Tuning channels automatically
Adding digital channels
Setting channels to surf with the CH +/- buttons
Editing channel labels
Fine adjusting analog channels
Program Information & Service Settings
Setting the information banner
Setting closed captions
Setting Parental Control
Setting the parental lock password
Setting a viewing restriction
Blocking specific channels
General Settings
Turning off the key tone of remote control operations
Turning off the start-up logo
Turning on/off and adjusting the brightness of the illumination
Setting the menu language
Setting your region
Setting Touchpad Remote Control
Setting a Bluetooth Device
External Sound Output Settings
Selecting speakers to output sound
Outputting sound from headphones or another audio system
Controlling the volume of an audio system with the TV’s remote control
Setting the headphone speaker link
Setting sound for Home Theater Control
External Input Settings
Managing external inputs
20

Top of Page
List of Contents© 2014 Sony Corporation
Switching the video input
Making detailed settings of video input
Setting the IR Blaster
Running Initial Set-up
Support
Checking Sony contact information
Uploading operation history
Software Update
Updating broadcast/service software
Updating the TV’s software
Troubleshooting
Self Diagnostics
Power Symptoms
Picture/Screen Symptoms
Broadcast Reception Symptoms
3D Picture/Glasses Symptoms
Sound Symptoms
Connected Device Symptoms
Network Connectivity Test Results
Network/Application Symptoms
Home Network Symptoms
Remote Control Symptoms
Touchpad Remote Control Symptoms
Bluetooth Mouse Symptoms
Screen mirroring Symptoms
One-touch mirroring Symptoms
TV SideView Symptoms
Photo Share Symptoms
Notes
Top of Page
21
i-Manual
Print
Font Size
Basic Operations
Parts Description
Watching TV
Enjoying
Movies/Music/Photos
Using Internet
Services and
Applications
Watching TV with
Friends Far and
Near
Using Other
Devices
Using BRAVIA
Sync Devices
Useful Functions
Connecting to the
Internet
Using Home
Network
Configuring
Various Settings
Troubleshooting
How to Use
Bookmarks
Top Page > Basic Operations > How to Use Remote
How to Use Remote
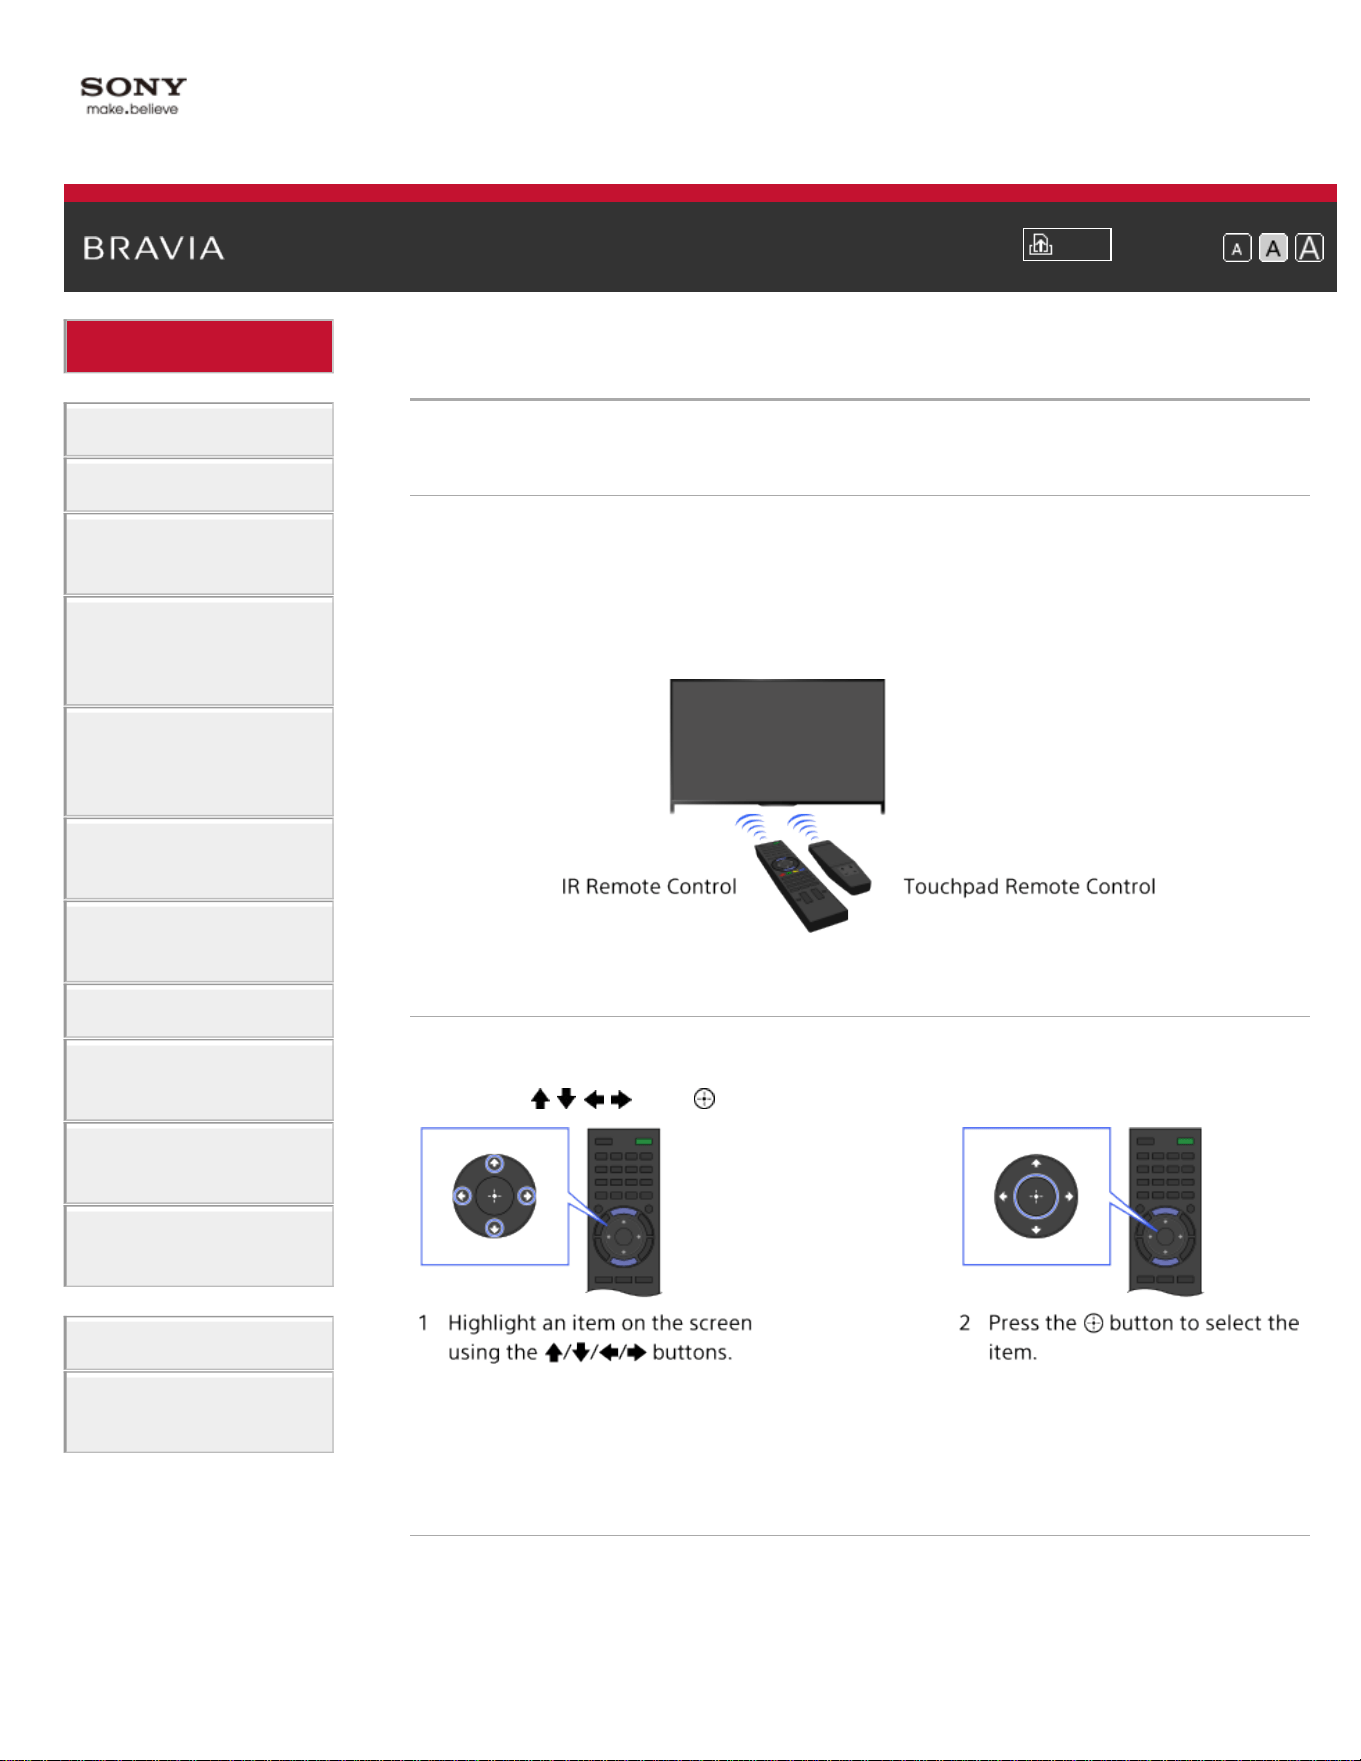
Two Remote Controls
To operate the TV, you can use either the IR (infrared) Remote Control
or the Touchpad Remote Control. The supply of a Touchpad Remote
Control with the TV depends on your model/region/country. An optional
Touchpad Remote Control is available.
Using the IR Remote Control
Basic operation of this TV’s functions and settings can be made by
using the
/ / / and buttons.
To return to the previous screen
Press the RETURN button.
Using the Touchpad Remote Control
Basic operation of this TV’s functions and settings can be made by
sliding and pressing the touchpad. To use buttons that are not on the
Touchpad Remote Control, use the Screen Key Pad. You need to
22
register your Touchpad Remote Control with the TV before use.
To return to the previous screen
Press the RETURN button.
To register the Touchpad Remote Control to the TV
Press the HOME button of the IR Remote Control, select [Settings]
→
[Preferences] → [Touchpad Remote Control Setup], then follow the
on-screen instructions.
To customize the Touchpad Remote Control
You can adjust the touchpad sensitivity and enable/disable the
Touchpad Operation Guide. Press the HOME button, then select
[Settings] → [Preferences] → [Touchpad configurations] → the desired
item.
To start the tutorial for the Touchpad Remote Control
You need to register your Touchpad Remote Control to the TV before
going through the tutorial.
Press the HOME button, then select [Settings] → [Preferences] →
[Touchpad configurations] → [Start Tutorial].
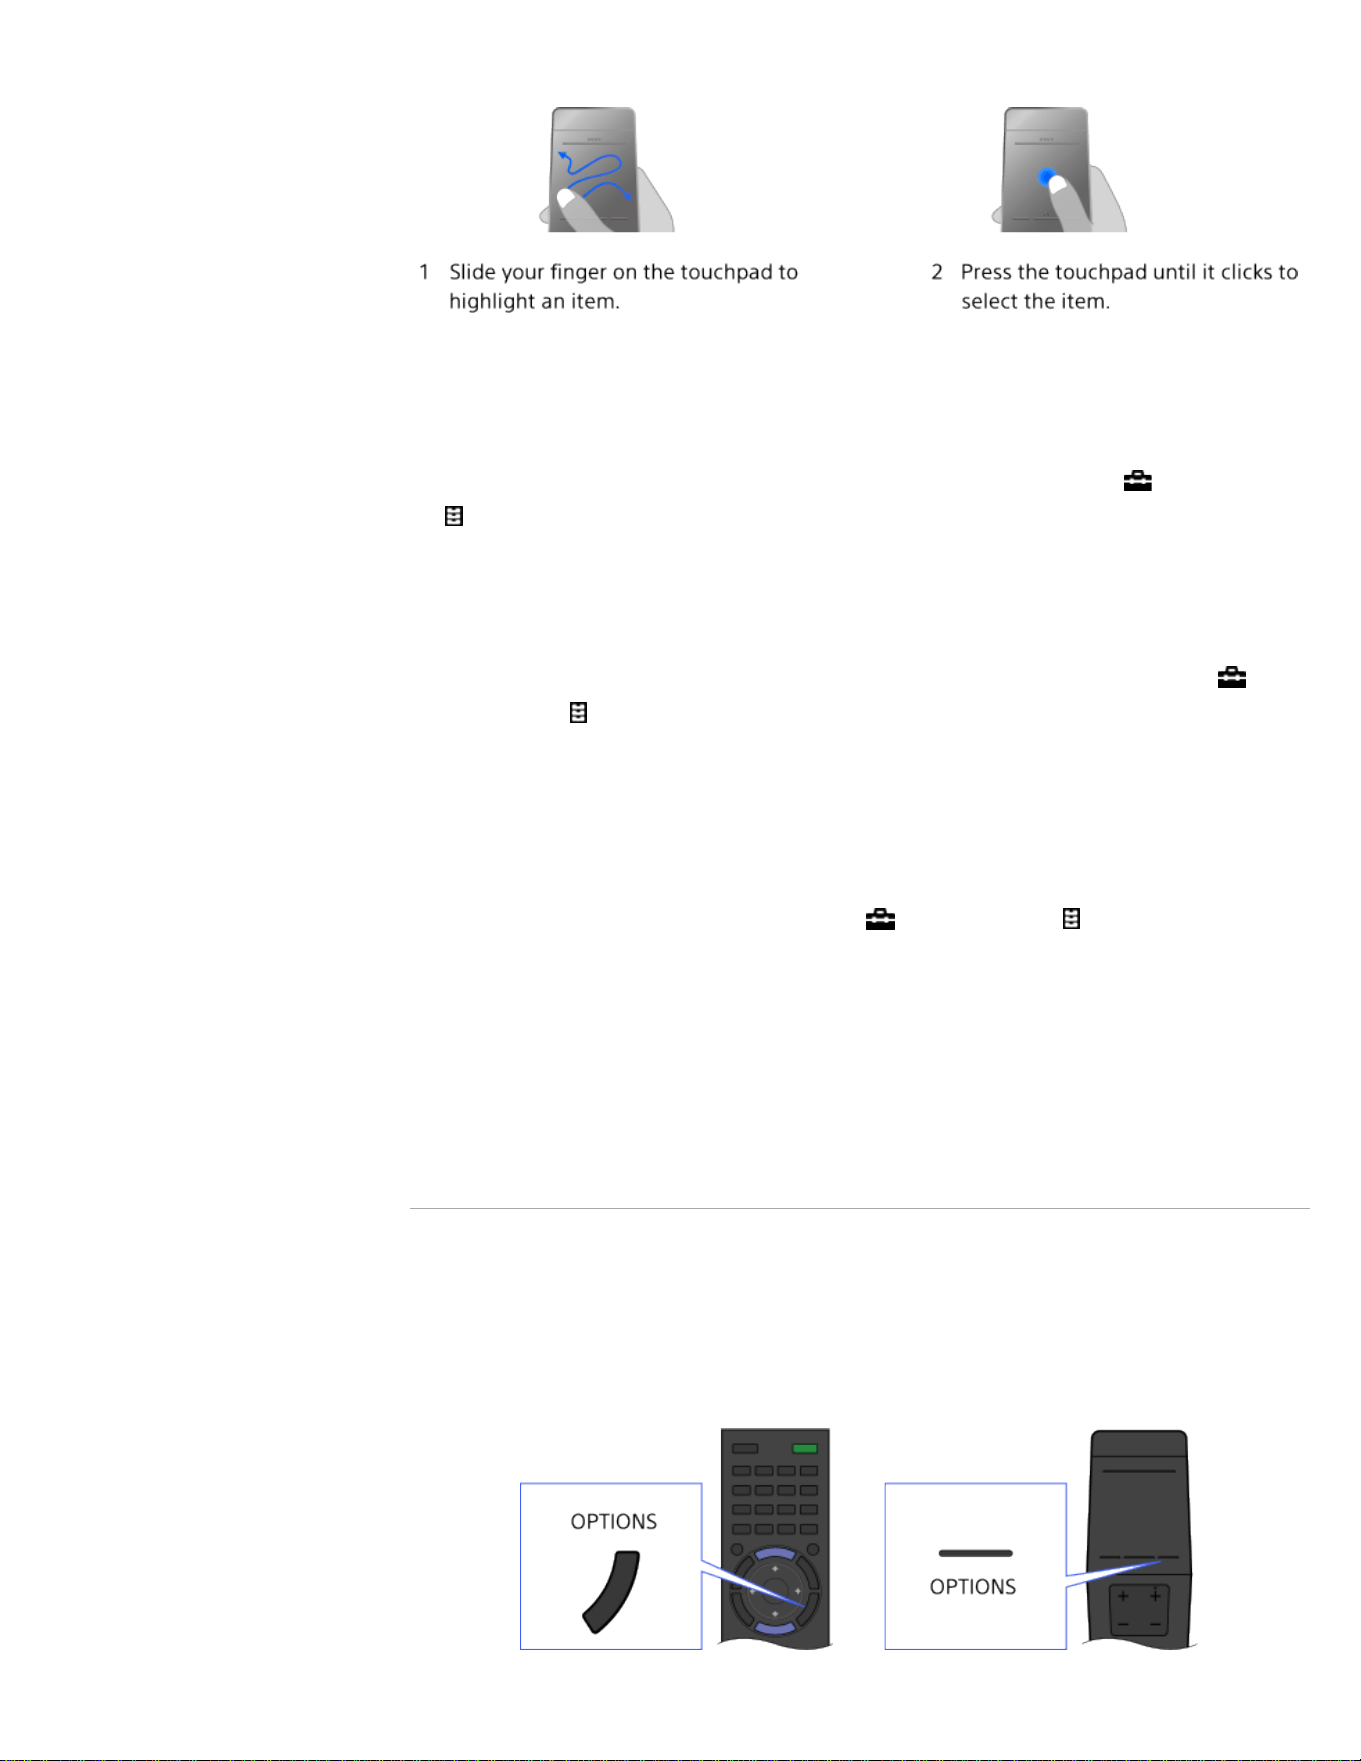
To view the Touchpad Operation Guide
Touch and keep your finger on the center of the touchpad to display the
Touchpad Operation Guide, which shows gestures that are available for
the current TV screen.
OPTIONS button
By pressing the OPTIONS button, the Options Menu appears and
provides quick access to the functions that are available for the currently
displayed screen. (The items in the Options Menu differ depending on
the selected screen.) This provides faster access to functions than from
the Home Menu.
23
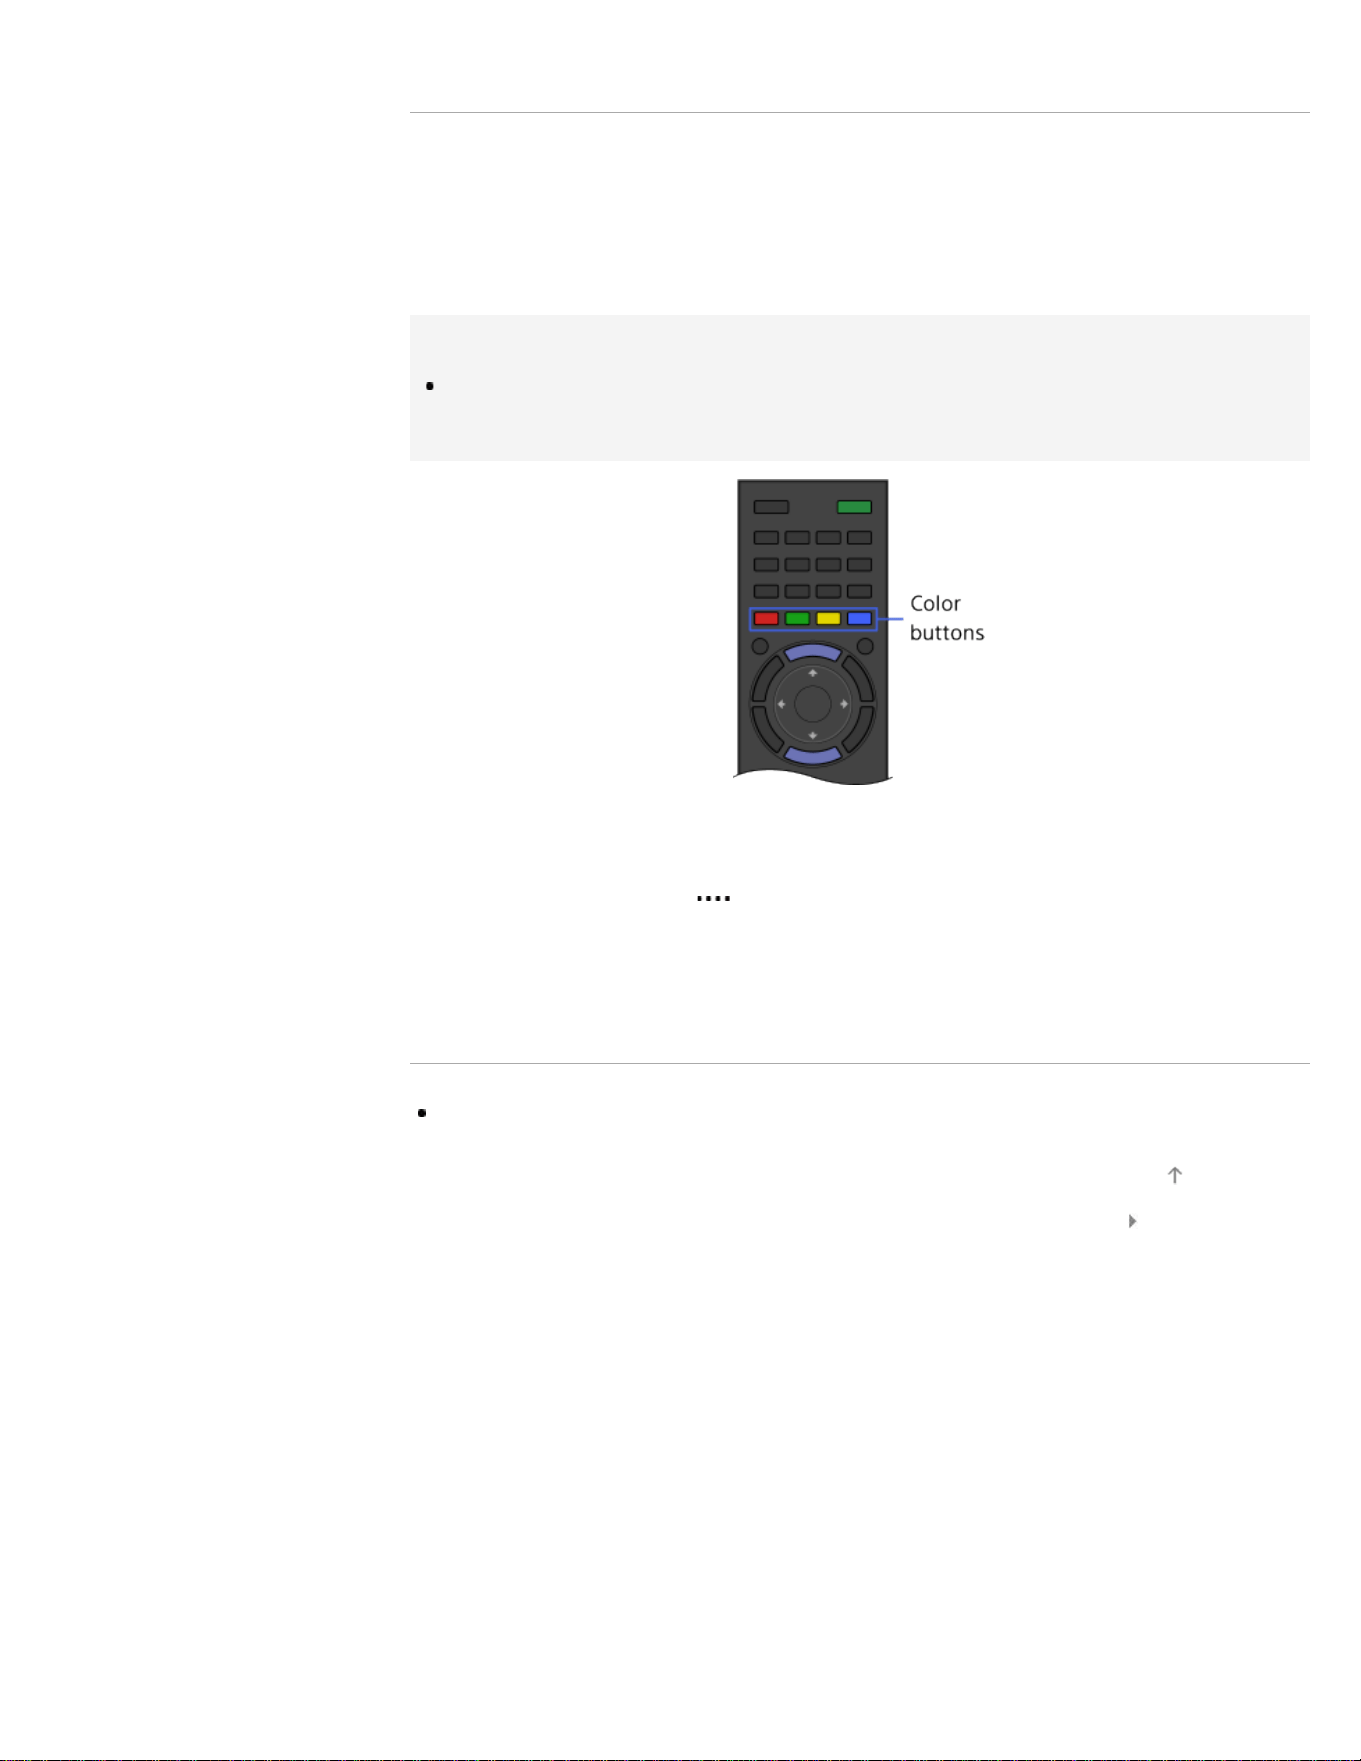
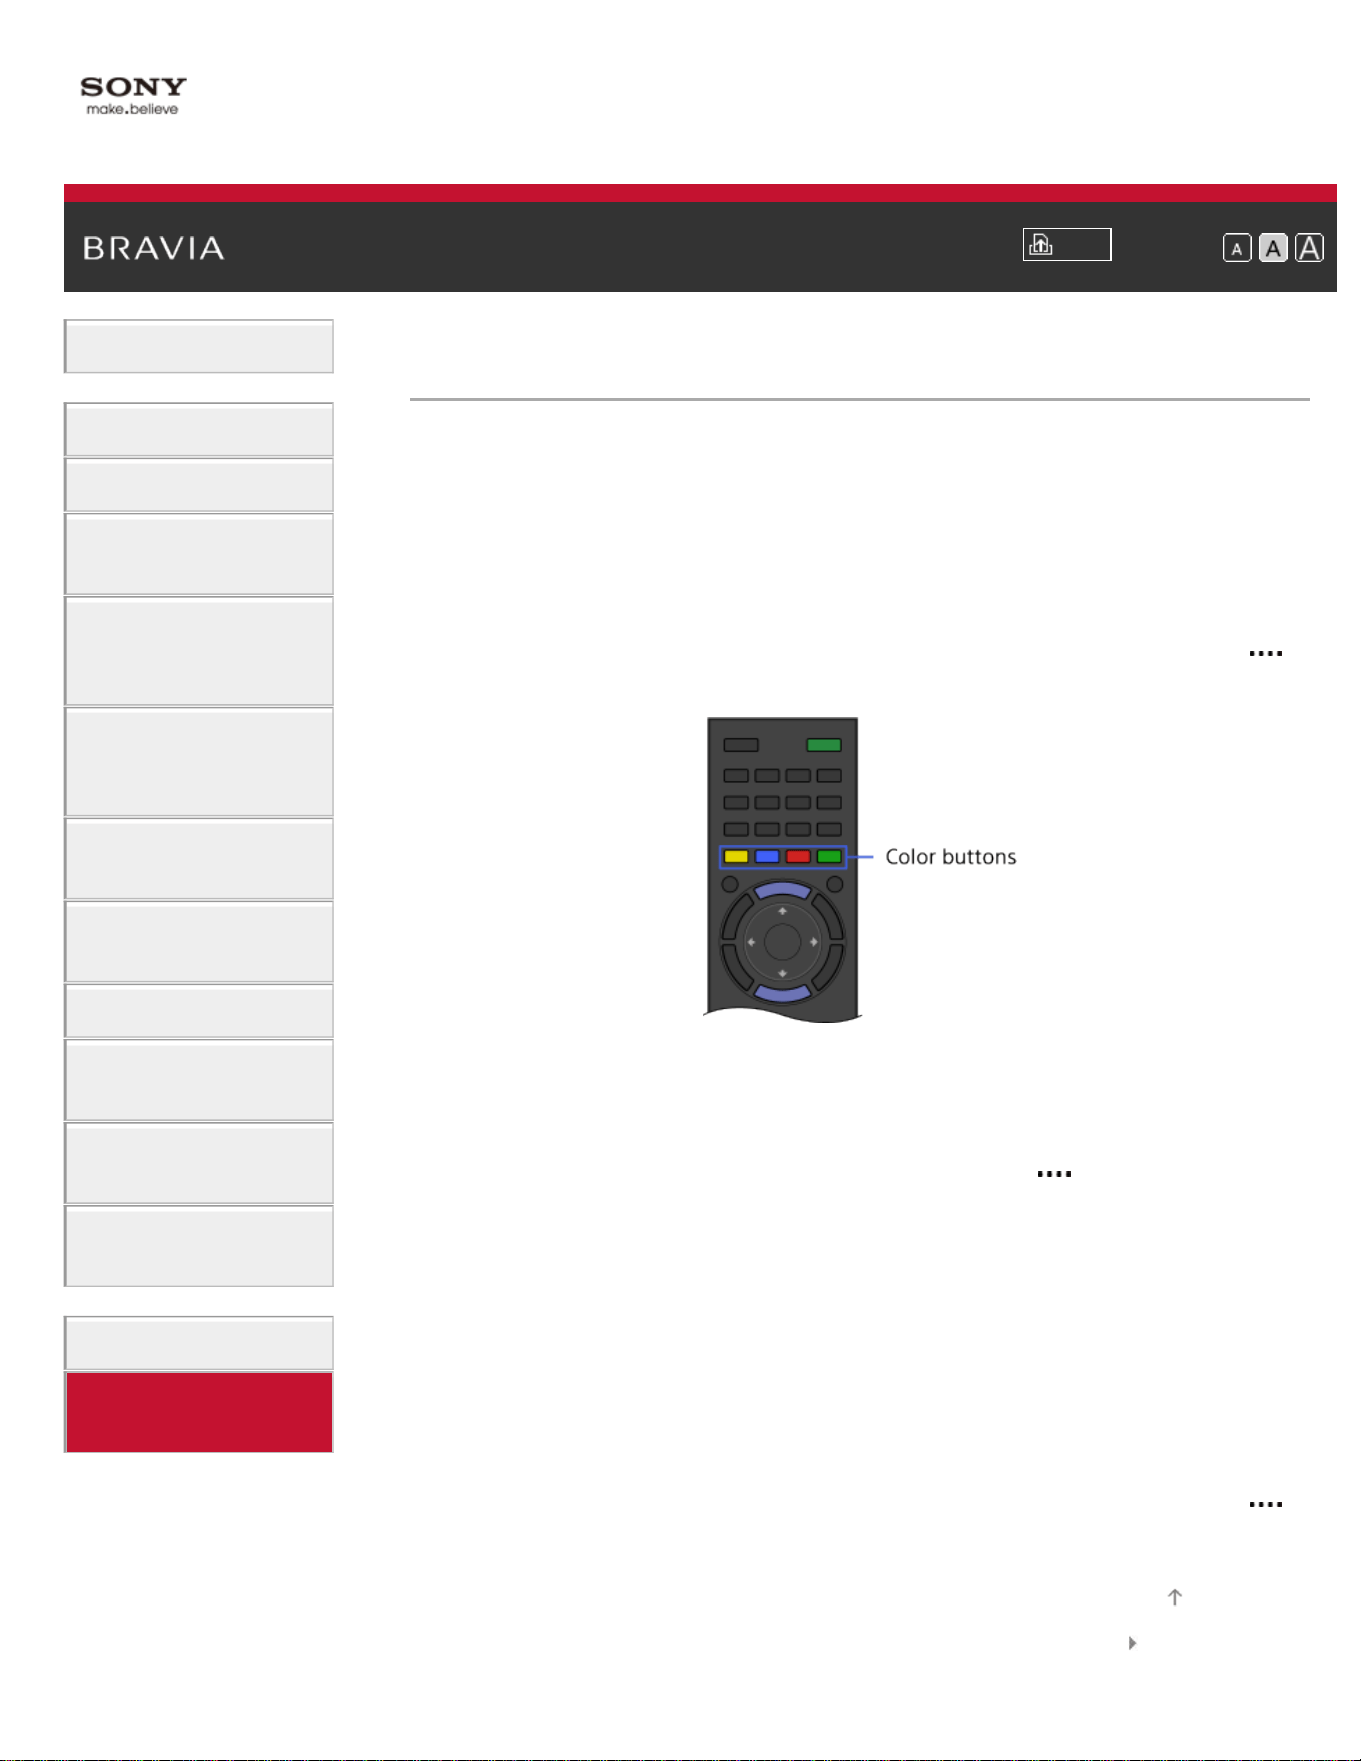
Operating Functions by the Color Buttons
The color buttons and available functions are indicated at the bottom of
the screen.
Press the color button that corresponds to the function you want to use.
The available functions differ depending on the screen.
Tips
The illustration to the right is an example. The order of the color buttons
varies depending on your region/country.
To use the color buttons with the Touchpad Remote
Control
Press the Control Bar ( ) to open the Screen Key Pad, slide the
touchpad to highlight the desired color button, then press the touchpad
to select.
Related Information
How to Use the i-Manual
List of Contents© 2014 Sony Corporation
Top of Page
24
i-Manual
Print
Font Size
Basic Operations
Parts Description
Watching TV
Enjoying
Movies/Music/Photos
Using Internet
Services and
Applications
Watching TV with
Friends Far and
Near
Using Other
Devices
Using BRAVIA
Sync Devices
Useful Functions
Connecting to the
Internet
Using Home
Network
Configuring
Various Settings
Troubleshooting
How to Use
Bookmarks
Top Page > Parts Description > Finding Contents More Easily (“Discover” Screen)
Finding Contents More Easily (“Discover” Screen)
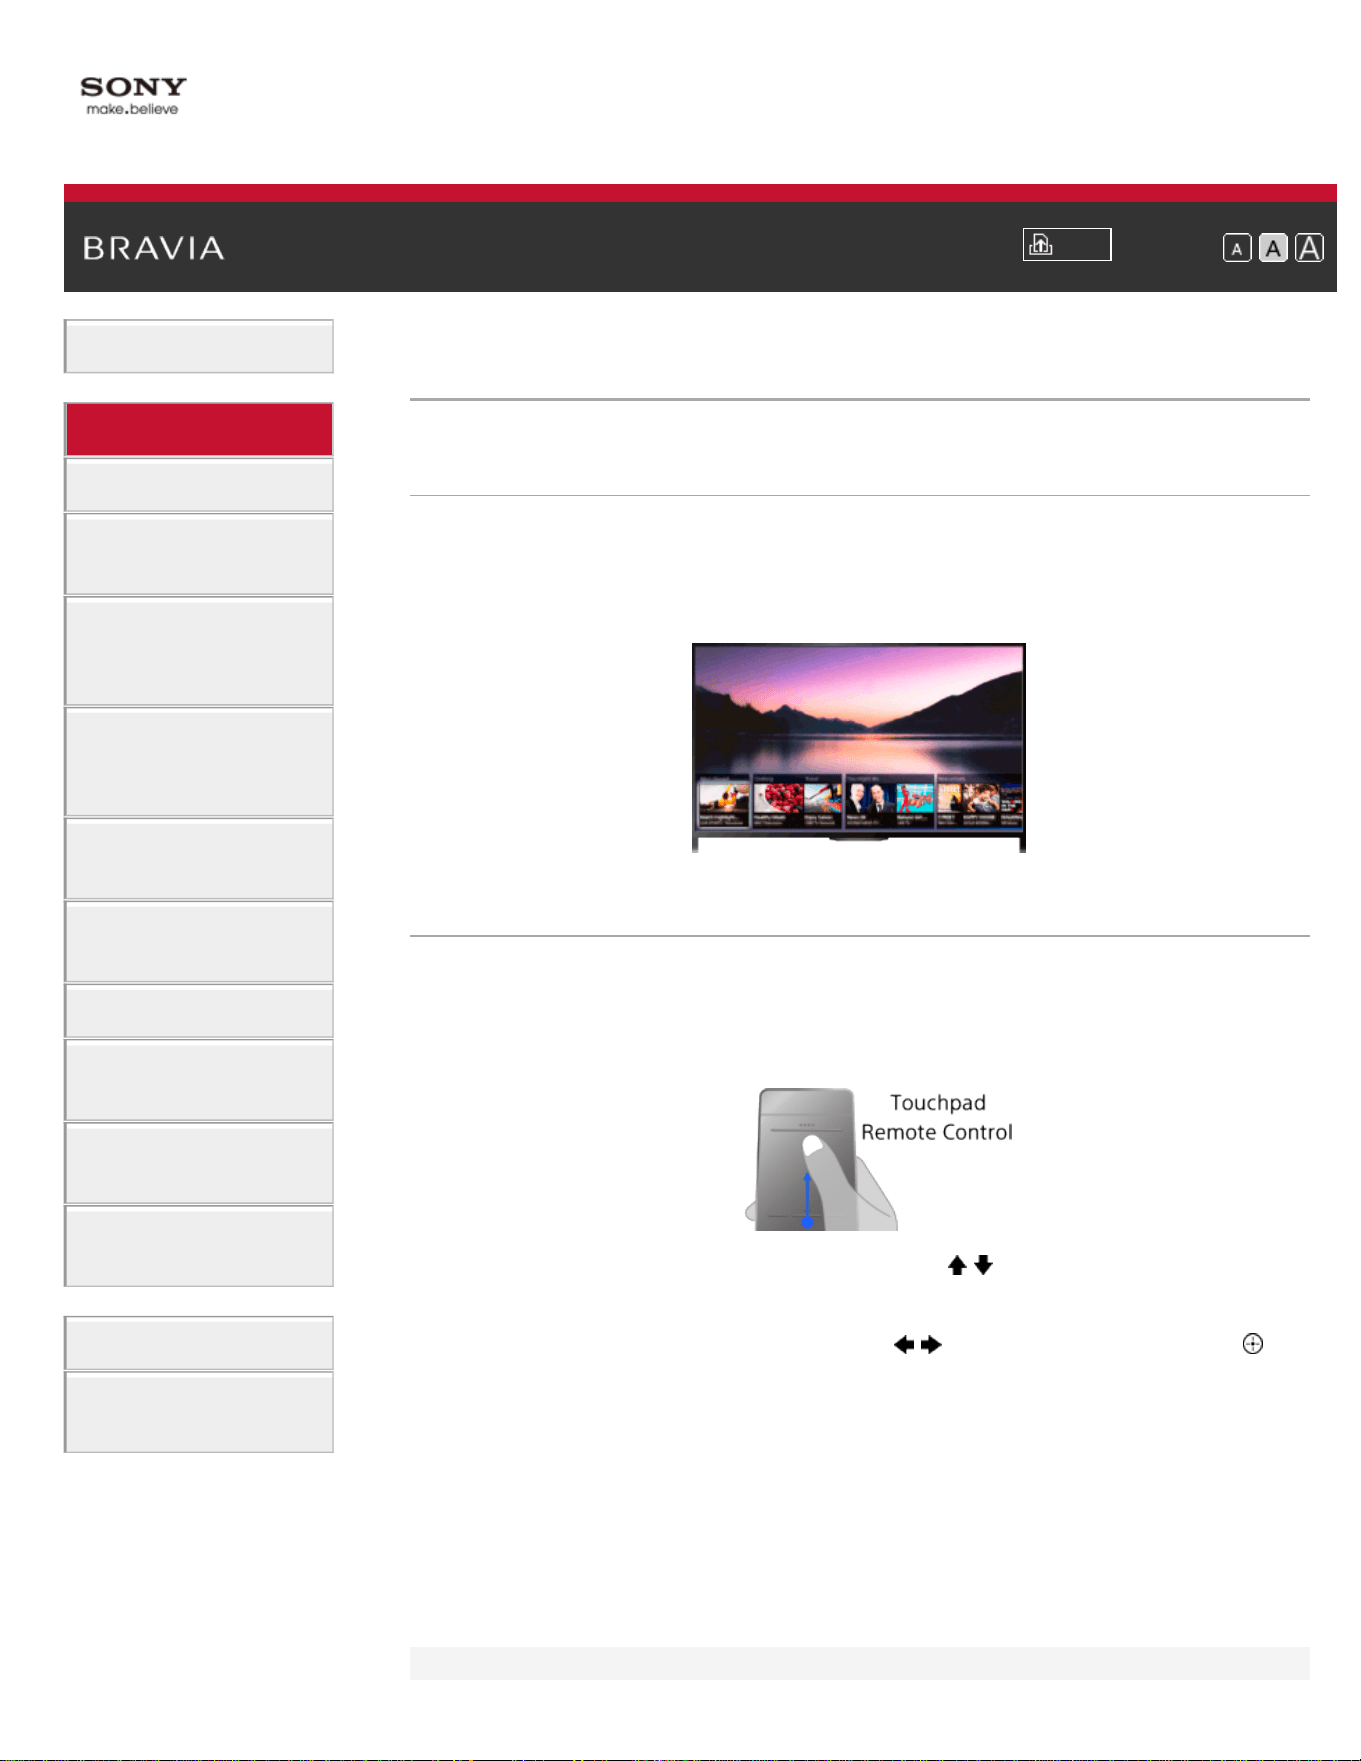
Overview
You can use Discover to search for content (such as TV programs,
Internet contents, etc.). Contents that appear in Discover vary
depending on your model/region/country.
Steps
1.
Press the DISCOVER button to launch the Discover app.
(When using the Touchpad Remote Control, touch and slide up your
finger from the bottom area.)
2. Highlight the desired category using the / buttons.
(When using the Touchpad Remote Control, flick up/down.)
3. Highlight the desired item using the / buttons, then press the
button to select.
(When using the Touchpad Remote Control, slide left/right to
highlight the item, then press the touchpad to select.)
The selected content is displayed.
To change the Discover settings
To change the Discover settings, press the OPTIONS button while
Discover is displayed, then select the desired item.
25

i-Manual
Print
Font Size
Basic Operations
Parts Description
Watching TV
Enjoying
Movies/Music/Photos
Using Internet
Services and
Applications
Watching TV with
Friends Far and
Near
Using Other
Devices
Using BRAVIA
Sync Devices
Useful Functions
Connecting to the
Internet
Using Home
Network
Configuring
Various Settings
Troubleshooting
How to Use
Bookmarks
Top Page > Parts Description > Home Menu Screen
Home Menu Screen
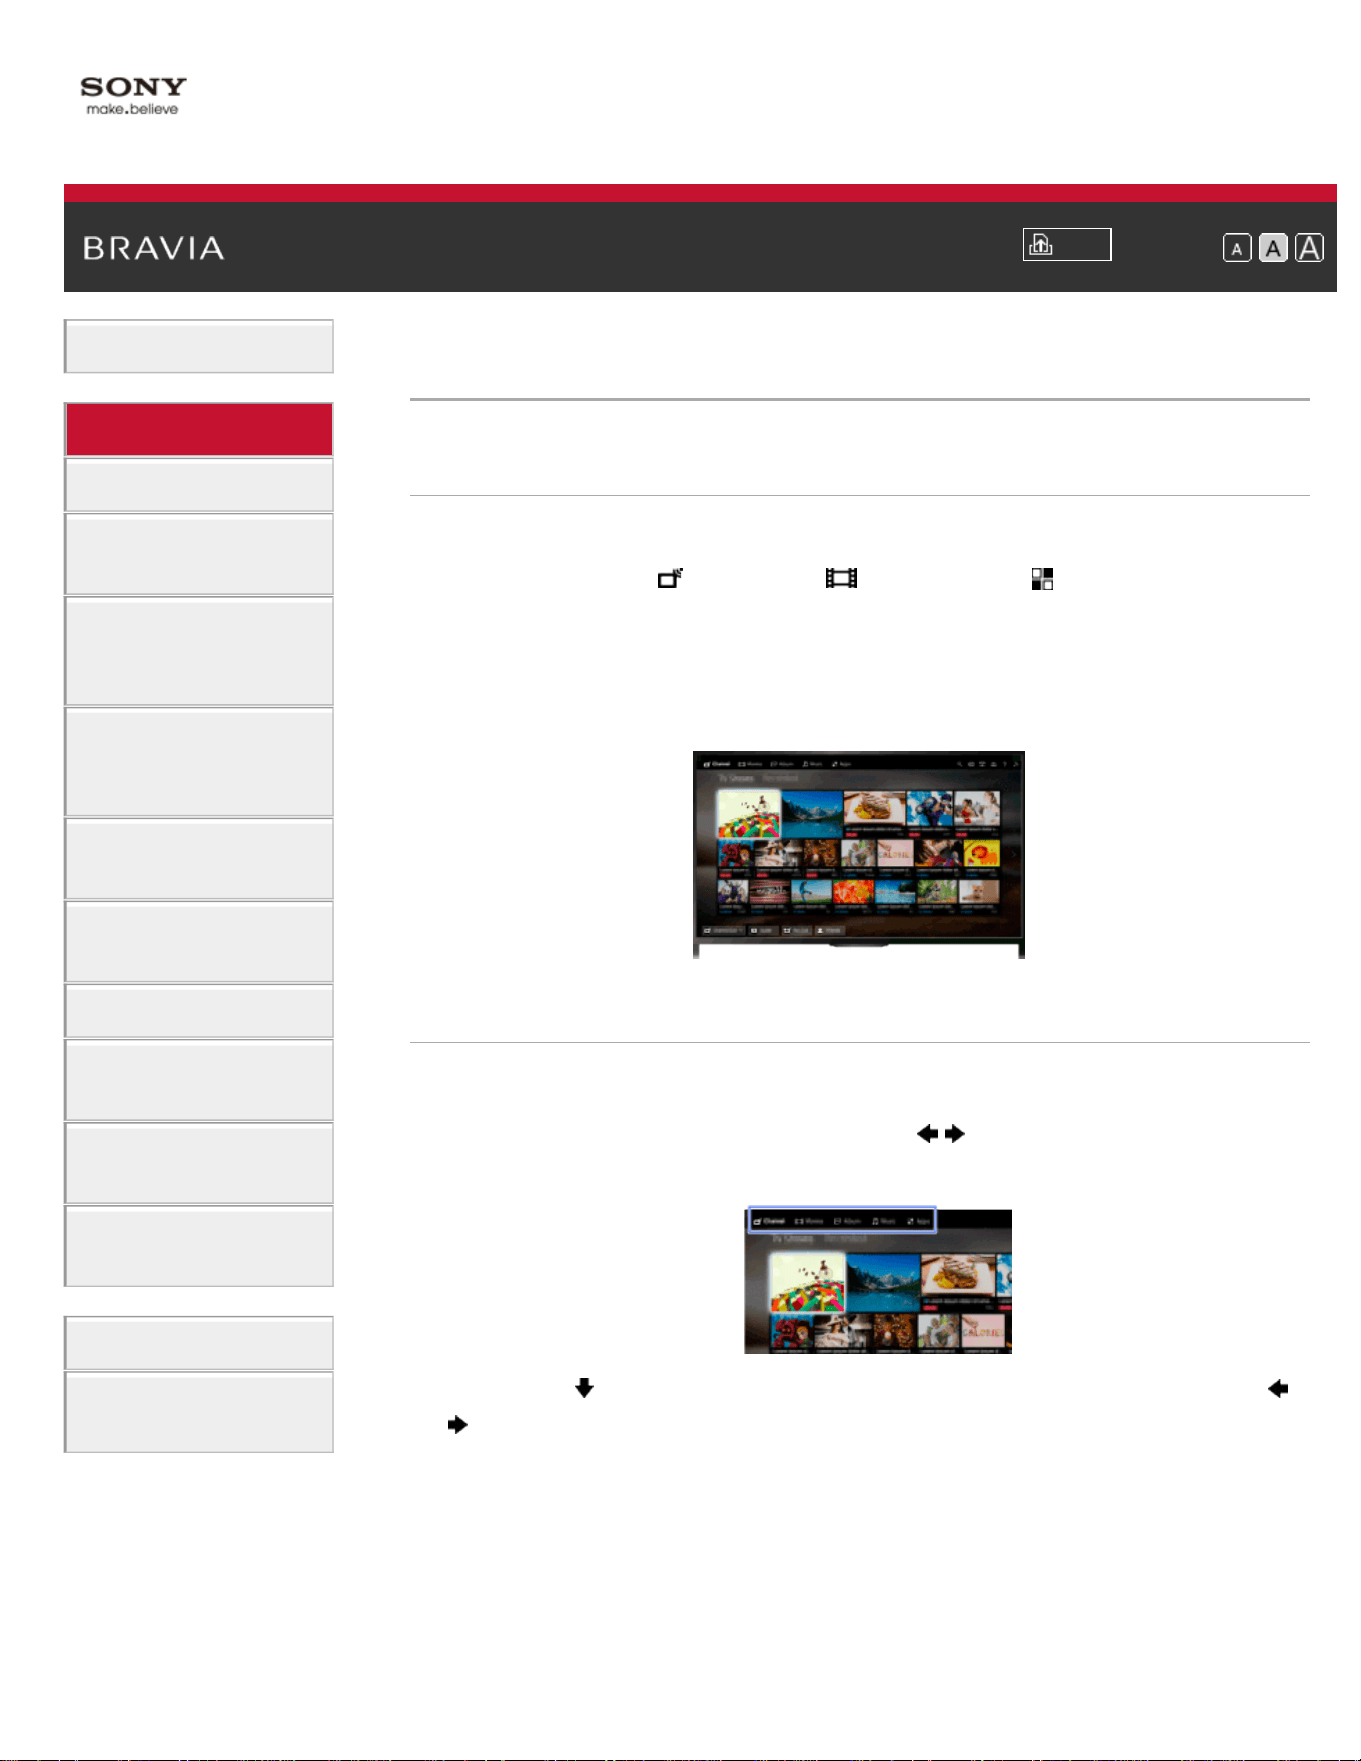
Overview
The Home Menu can be displayed by pressing the HOME button.
Categories such as
[Channel], [Movies] and [Apps] are
displayed at the top of the Home Menu. You can play back content by
selecting its thumbnail in a subcategory. You can also use functions
(such as setting change) by selecting its icon. The number of categories
and available items vary depending on your region/country.
Steps
1.
Press the HOME button.
2. Select the desired category using the / buttons.
(When using the Touchpad Remote Control, slide left/right.)
3. Press the button, then select the desired subcategory using the /
buttons.
(When using the Touchpad Remote Control, slide down, then slide
left/right.)
When you move the cursor beyond the left/right edge of the
subcategory, the next subcategory is displayed.
27
4. Select the thumbnail of the desired content.
The content is played back.
Categories in the Home Menu
[Channel]
You can view thumbnails of live and future broadcasts and recorded
content. Select the desired subcategory to change the source. You can
also change the broadcast system by using [Channel List] at the bottom
of the Home Menu.
[Movies]
You can watch movies from online movie service providers, connected
USB devices, or your home network. Select the desired subcategory to
change the source.
[Album]
You can view photos from online service providers, connected USB
devices, or your home network. Select the desired subcategory to
change the source.
[Music]
You can play back music content from online music service providers,
connected USB devices, or your home network. Select the desired
subcategory to change the source.
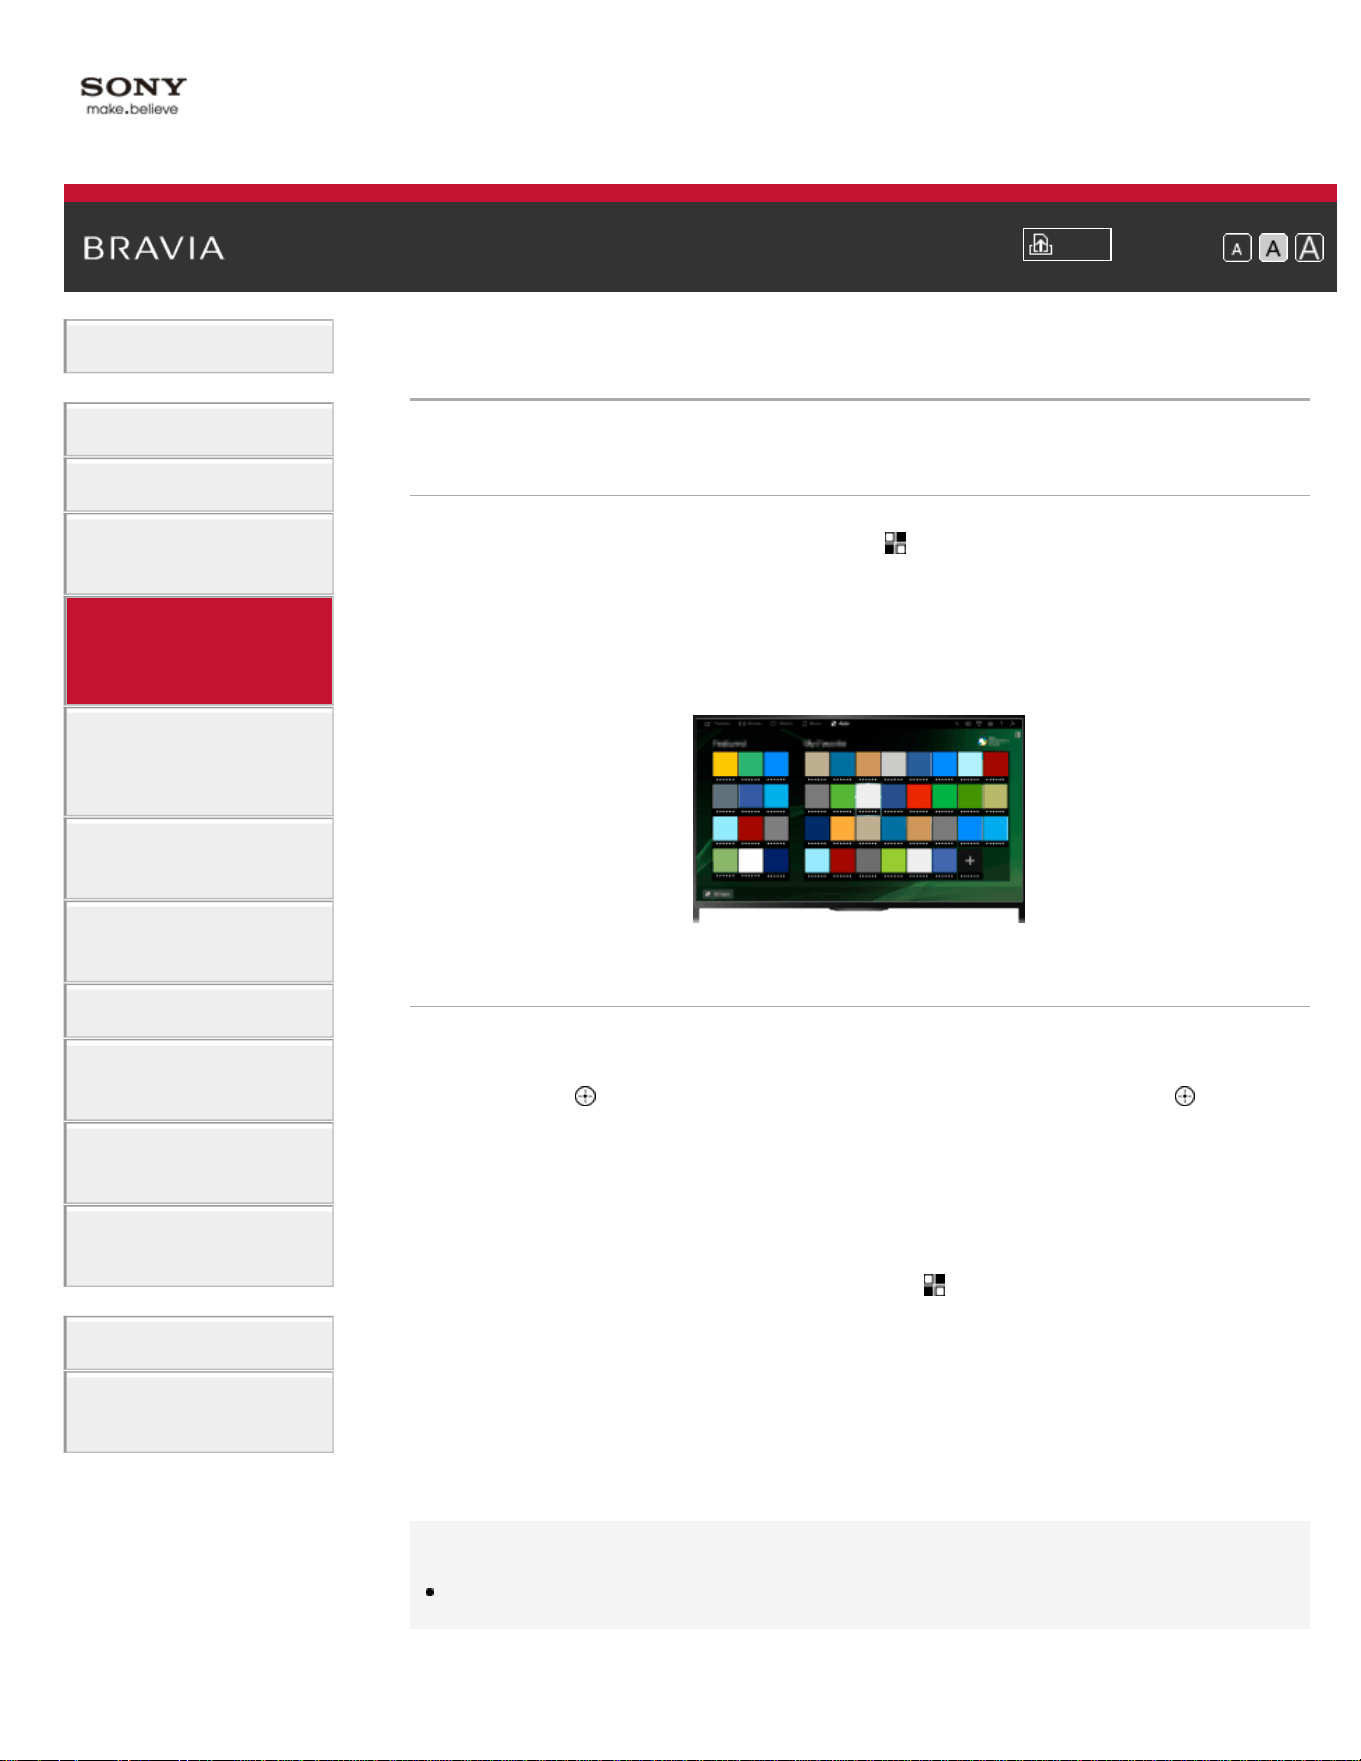
[Apps]
You can launch applications. Thumbnails of featured applications
([Featured]) and your favorite applications ([My Apps]) are displayed. To
view all applications, select [All Apps] at the bottom of the Home Menu.
Tips
Subcategories may be subject to change without notice.
Icons in the Home Menu
[Search]
You can input a keyword to search for content. You can also select
keywords searched in the past.
(The availability of this function depends on your region/country.)
28
[Inputs]
You can select an input device connected to the TV.
[Media Server]
You can select a media server (e.g. USB flash drive, home network) to
browse its content using the Media Player.
[Settings]
You can change TV settings (e.g. Picture & Display, Sound, Channel).
[Help]
You can view information about self diagnostics and customer support.
You can also view this i-Manual.
/ / [Network Status]
You can view the network connection status.
You can view a description of the network connection status by selecting
the icon.
: Connected to a wired LAN.
: Connected to a wireless LAN. The number of wave lines indicates the
signal strength.
: Connected to a mobile network. The number of bars indicates the
signal strength. (This function is available depending on your
region/country.)
The following marks are added to the icon to indicate a specific status.
: This mark indicates a network connection error. This mark also
appears when the network setup was not completed. (In this case, the
tooltip shows [No network setup].)
: This mark indicates that the TV is connected to your home network
but cannot connect to the Internet.
: This mark indicates that the TV is temporarily disconnected from your
network, or currently trying to connect to the network. If the network is
correctly set up, the connection will recover automatically.
If
or is displayed, check your network settings and status. Press the
HOME button, then select
[Settings] → [Network] → [Network
Setup] → [View Network settings and status].
Related Information
Enjoying Music
Enjoying Photos
Using Applications
List of Contents© 2014 Sony Corporation
Top of Page
29
i-Manual
Print
Font Size
Basic Operations
Parts Description
Watching TV
Enjoying
Movies/Music/Photos
Using Internet
Services and
Applications
Watching TV with
Friends Far and
Near
Using Other
Devices
Using BRAVIA
Sync Devices
Useful Functions
Connecting to the
Internet
Using Home
Network
Configuring
Various Settings
Troubleshooting
How to Use
Bookmarks
Top Page > Configuring Various Settings > Adjusting various picture settings (e.g. picture
brightness/color)
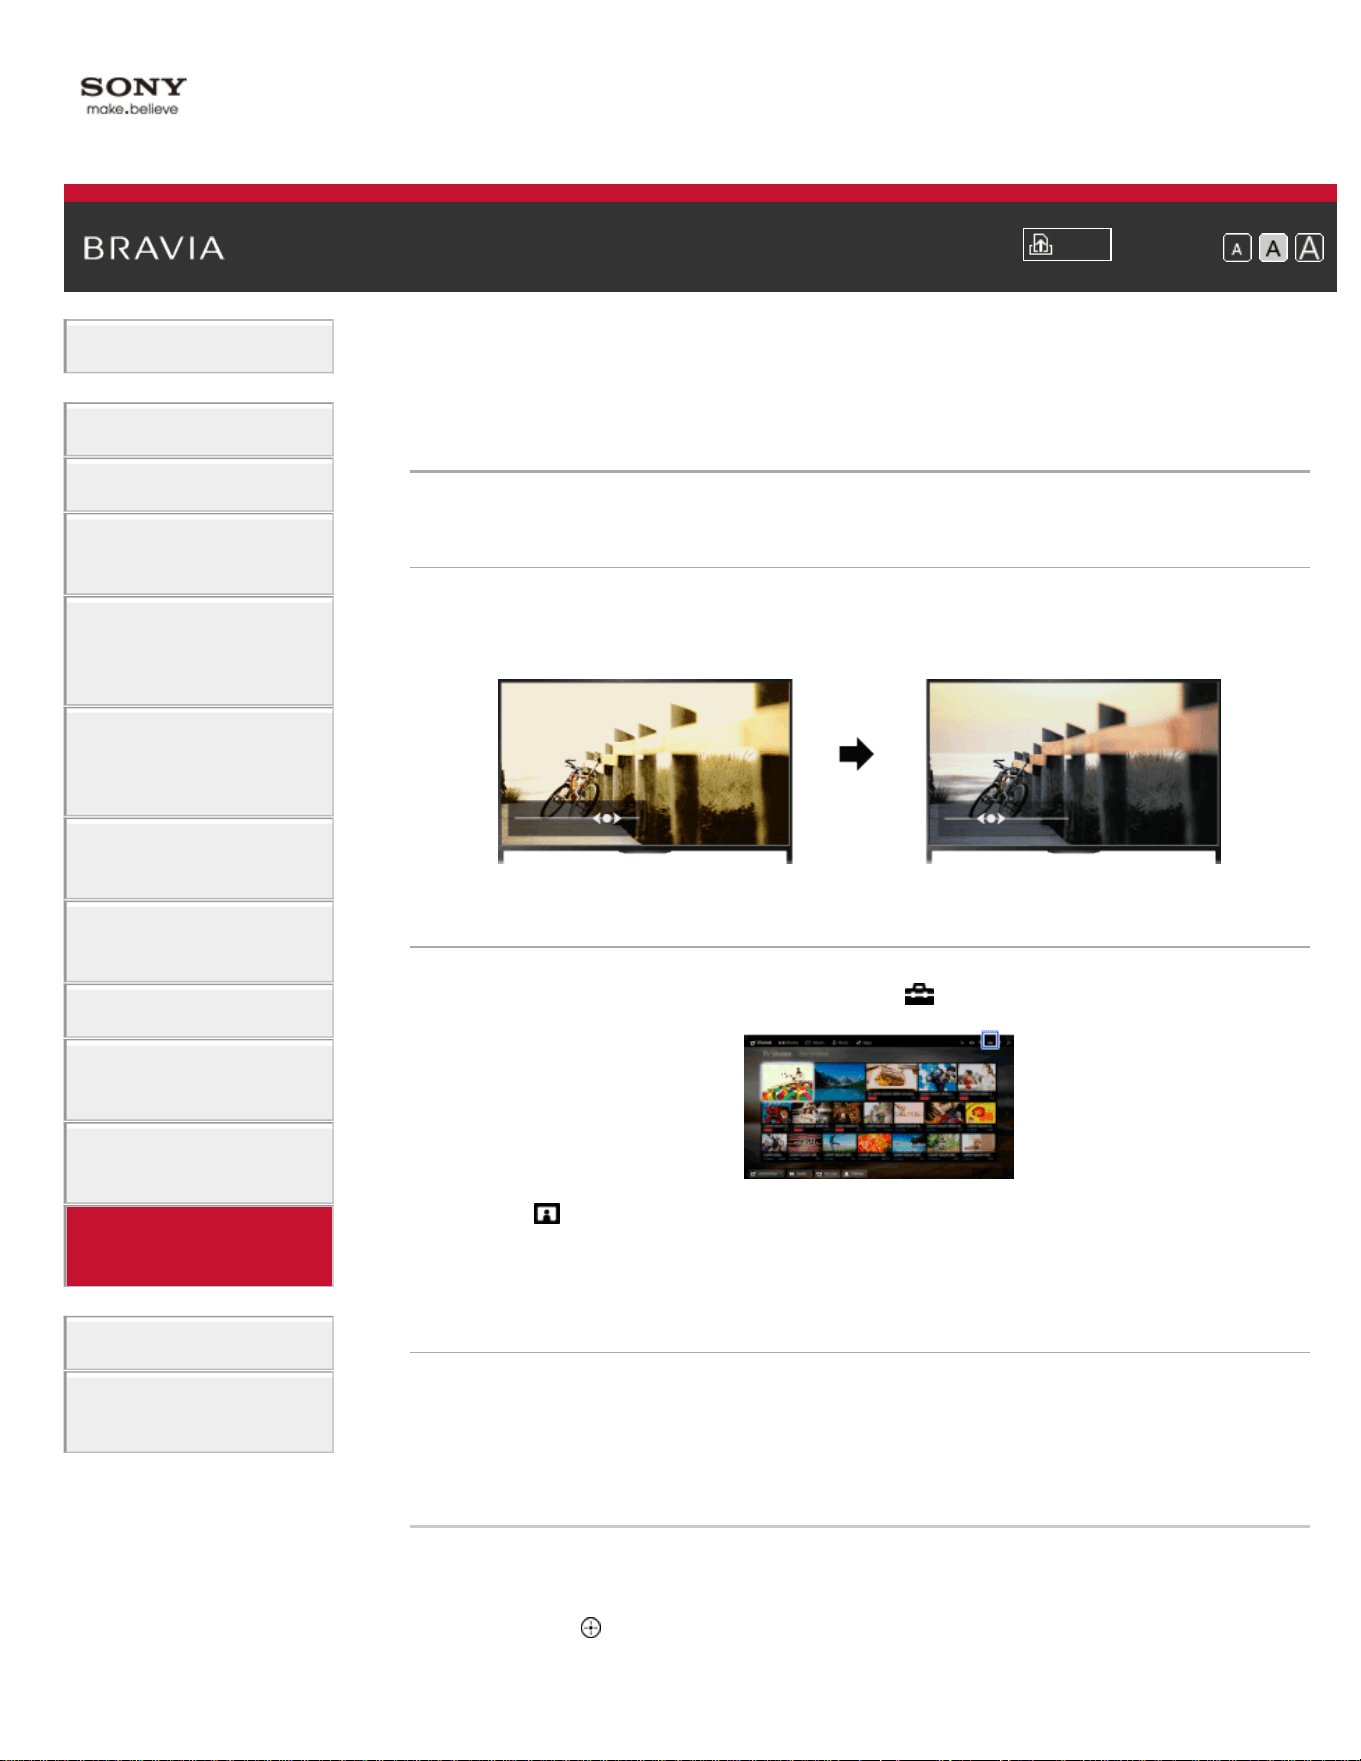
Adjusting various picture settings (e.g. picture
brightness/color)
Overview
You can adjust various picture settings, such as picture
brightness/color, etc.
Steps
1.
Press the HOME button, then select [Settings].
2. Select [Picture & Display] → [Picture Adjustments] → the desired
option.
Available Options
[Setting Memory]
Applies custom picture settings to the current input or to common
memory shared by other inputs. To use the same picture settings for
more than one input, select [Common] and adjust the picture settings.
[Picture Mode]
Enables selection of a picture mode according to your preference.
Press the
button (or press the touchpad on the Touchpad Remote
Control) to jump to “Selecting picture mode” for details.
30

Jump to the page
[Reset]
Resets all the [Picture Adjustments] settings to the factory settings
excluding [Setting Memory], [Picture Mode] and [Advanced Settings].
[Backlight]
Adjusts the brightness of the backlight. Reducing the brightness of the
screen will reduce the power consumption.
[Picture]
Adjusts picture contrast.
[Brightness]
Adjusts the brightness of the picture.
[Color]
Adjusts color intensity.
[Hue]
Adjusts green and red tones.
([Hue] is available depending on the color system.)
[Color Temperature]
Adjusts the whiteness of the picture.
[Cool]: Gives white colors a bluish tint.
[Neutral]: Gives white colors a neutral tint.
[Warm 1]/[Warm 2]: Gives white colors a reddish tint. [Warm 2] gives a
redder tint than [Warm 1].
[Sharpness]
Adjusts the sharpness of the picture.
[Noise Reduction]
[Auto]: Automatically reduces picture noise.
[High]/[Medium]/[Low]: Modifies the effect of noise reduction.
[Intelligent]: Automatically optimizes picture quality with noise reduction.
(This function is available only for the analog RF input and the
composite video input.)
It is recommended to select [Intelligent] for a low quality analog input
signal.
[Off]: Turns off the function.
[MPEG Noise Reduction]
[Auto]: Automatically reduces noise in MPEG-compressed videos.
[High]/[Medium]/[Low]: Reduces noise in MPEG-compressed videos.
[Off]: Turns off the function.
[Dot Noise Reduction]
31

[Auto]: Automatically reduces dot noise.
[Off]: Turns off the function.
[Reality Creation]
Adjusts detail and noise for a realistic picture.
[Resolution]
Adjusts the detail and clarity of the picture.
[Noise Filtering]
Adjusts to reduce noise of the picture.
[Smooth Gradation]
Creates smooth gradations on flat surfaces of the picture.
[Motionflow]
[Smooth]: Provides smoother picture movement; especially effective for
film-based content.
[Standard]: Provides smoother picture movement for standard use.
[Clear]: Reduces motion blur while maintaining brightness for high-
speed picture content.
[Clear Plus]: Reduces motion blur for high-speed picture content more
than [Clear].
[Impulse]: Provides for a cinema-like picture, which may flicker.
[True Cinema]: Images, such as a movie created in 24 frames per
second, are reproduced at the original framerate.
[Off]: Use this setting if [Smooth], [Standard], [Clear], [Clear Plus],
[Impulse] or [True Cinema] results in a distorted picture.
(Depending on the picture content, you may not see the effect visually
even if you have changed the settings.)
[CineMotion]
[Auto]: Displays film-based content with picture expression close to the
original by applying a film-specific process.
[Off]: Turns off the function.
(If the image contains irregular signals or too much noise, this setting is
automatically turned off even if [Auto] is selected.)
[Advanced Settings]
[Reset]: Resets all [Advanced Settings] to the default values (except for
[White Balance]).
[Black Corrector]: Enhances black areas of the picture for stronger
contrast.
[Adv. Contrast Enhancer]: Automatically optimizes [Backlight] and
[Picture] according to the brightness of the screen. This setting is
effective for dark images and scenes.
[Gamma]: Adjusts the balance between light and dark areas of the
picture.
[LED Dynamic Control]: Optimizes contrast by adjusting brightness in
32

individual sections of the screen. ([LED Dynamic Control] is available
depending on the TV model.)
[Auto Light Limiter]: Reduces glare such as in scenes where the entire
screen is white.
[Clear White]: Emphasizes whiteness in the picture.
[Live Color]: Makes colors more vivid.
[White Balance]: Adjusts the red, green and blue level of the picture.
[Detail Enhancer]: Enhances the details of the picture.
[Edge Enhancer]: Enhances the edges of the picture.
[Skin Naturalizer]: Detects faces and reproduces natural skin tone.
[Display Speed Preference]: Reduces the picture delay to optimize the
response to game controllers/PC mouse operation by selecting [On].
List of Contents© 2014 Sony Corporation
Top of Page
33
i-Manual
Print
Font Size
Basic Operations
Parts Description
Watching TV
Enjoying
Movies/Music/Photos
Using Internet
Services and
Applications
Watching TV with
Friends Far and
Near
Using Other
Devices
Using BRAVIA
Sync Devices
Useful Functions
Connecting to the
Internet
Using Home
Network
Configuring
Various Settings
Troubleshooting
How to Use
Bookmarks
Top Page > Basic Operations > How to Use the i-Manual
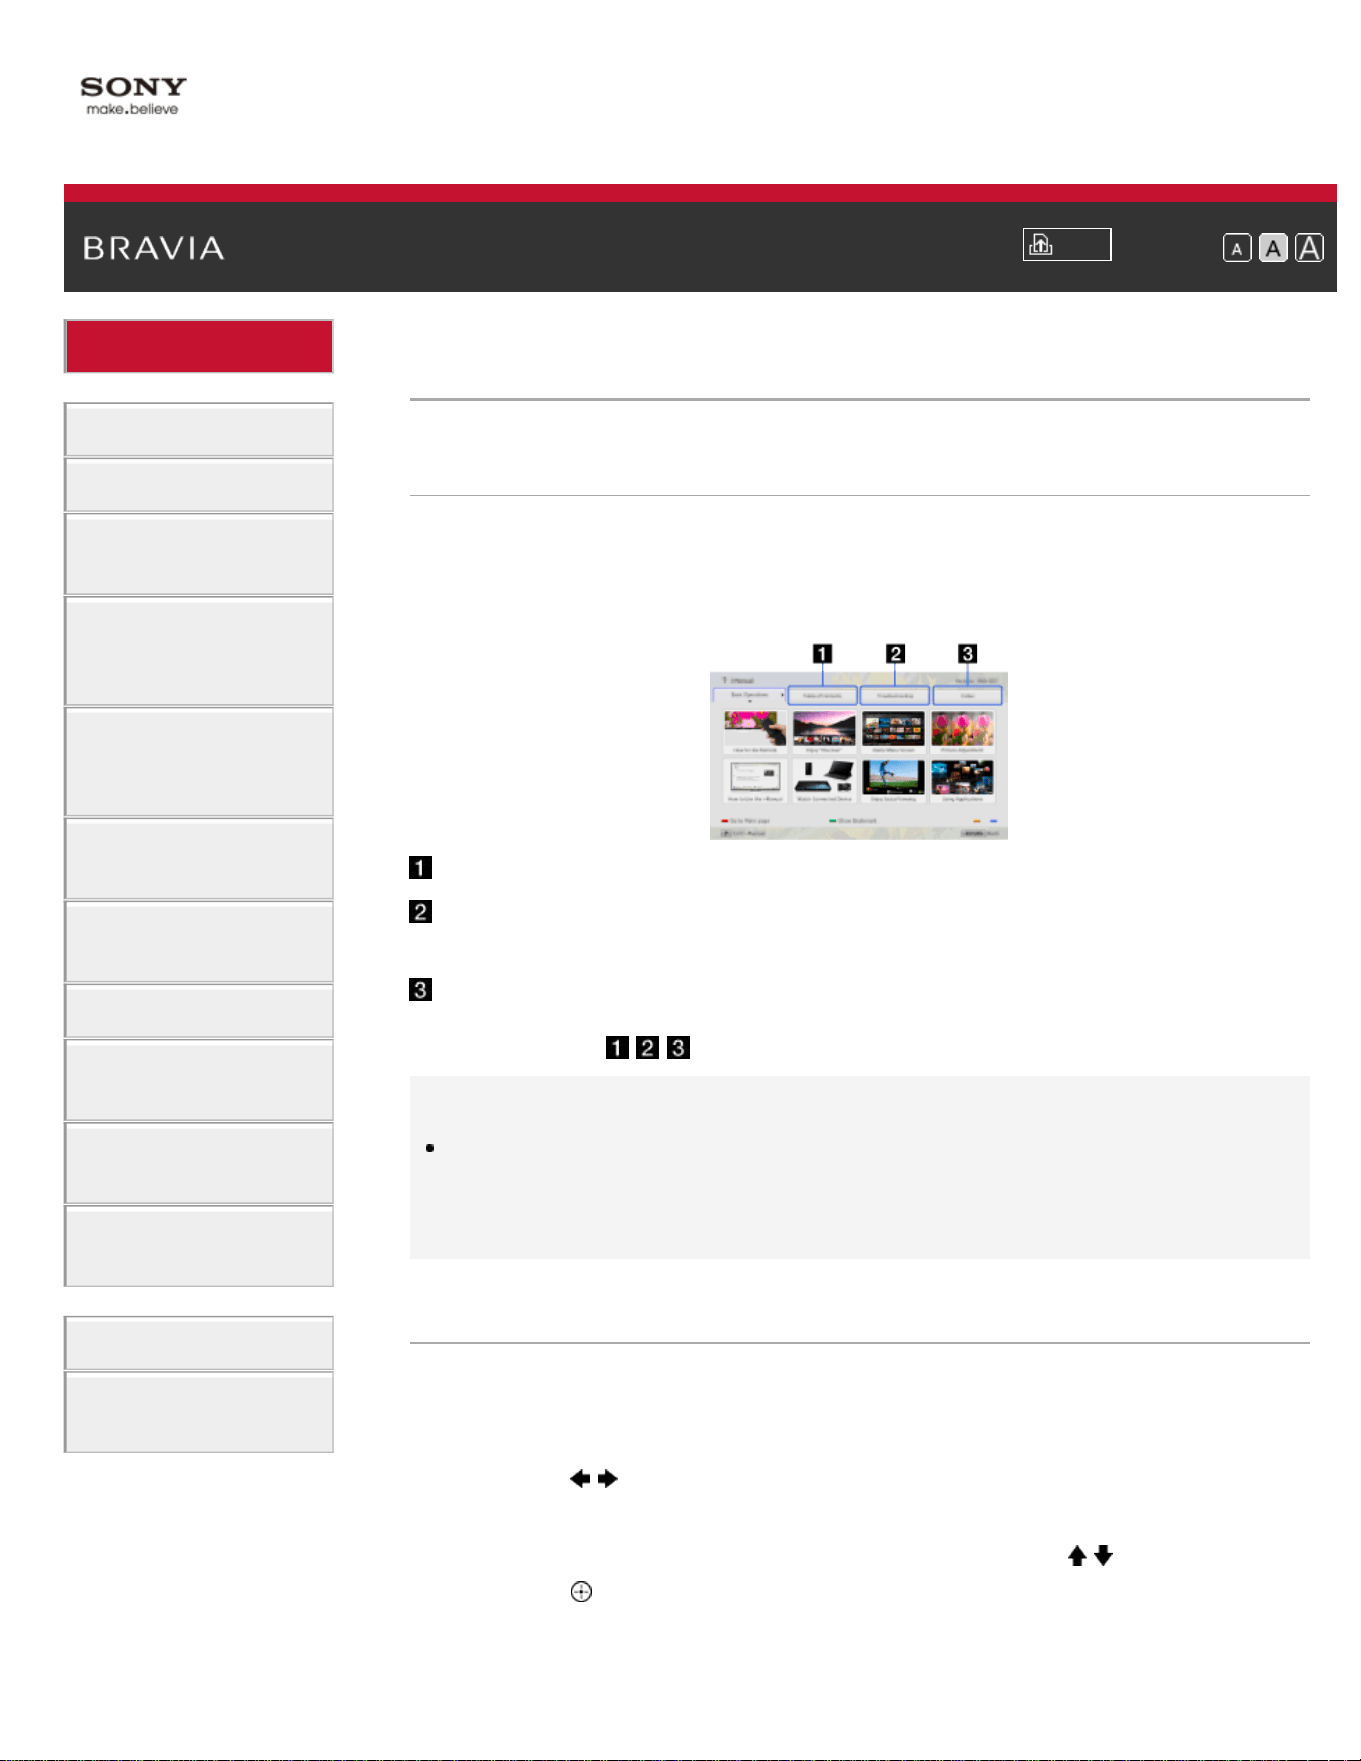
How to Use the i-Manual
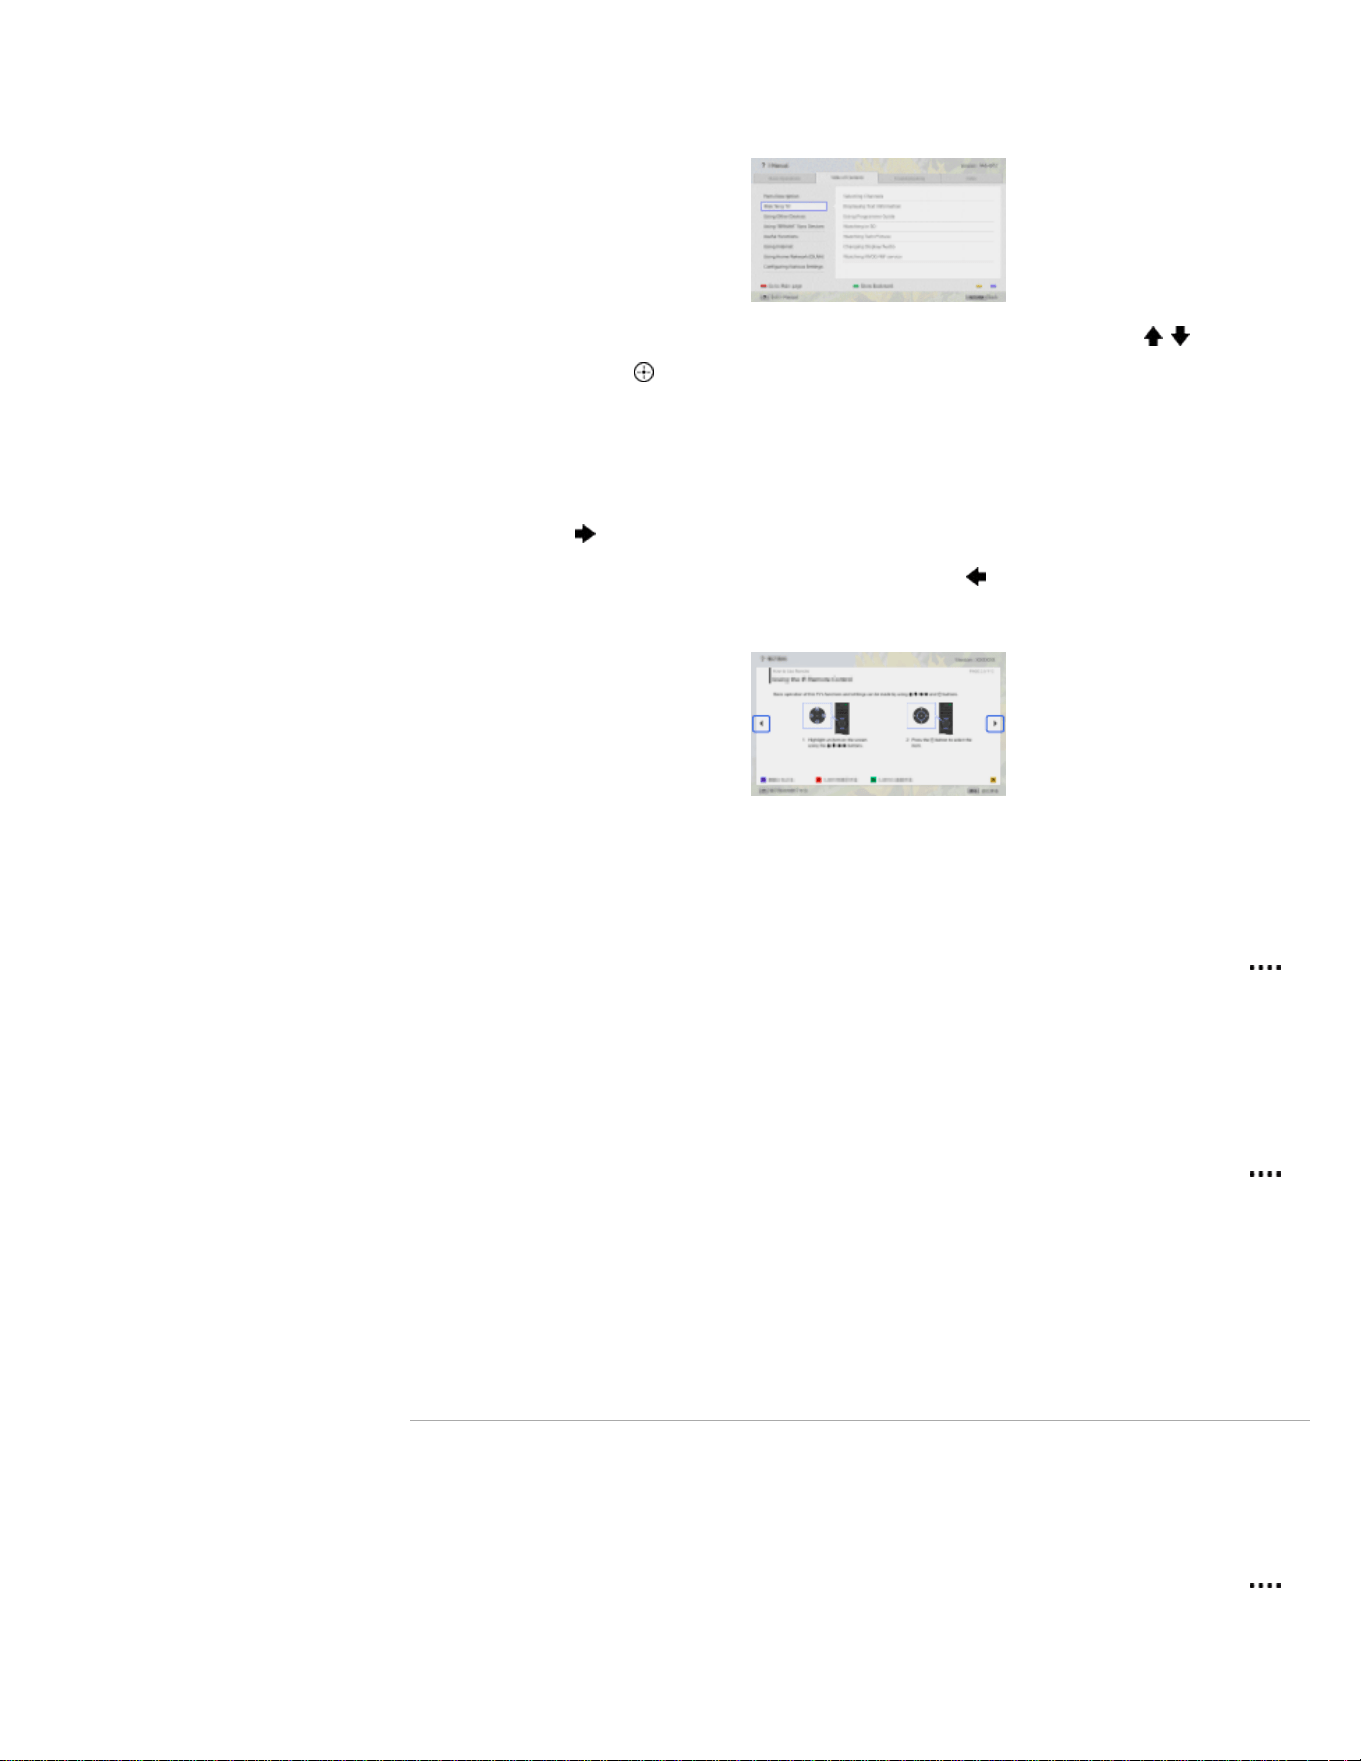
Searching for Information
This i-Manual explains how to use the TV's functions. On the main page
of the i-Manual, you can select the desired method to search for
information.
Table of Contents: Searches from a title list.
Troubleshooting: Searches for solutions to
problems.
Index: Searches by function/feature name.
Select from the
/ / tabs.
Tips
The supplied paper manual contains important information such as
cautions and operating instructions to prevent accidents. Read the
supplied paper manual thoroughly for safe use.
Steps
Procedure example: “Table of Contents” search
1. In the main page of this manual, highlight the “Table of Contents” tab
using the
/ buttons.
(When using the Touchpad Remote Control, slide left/right.)
2. Highlight a title on the left of the screen using the / buttons, then
press the
button to select.
(When using the Touchpad Remote Control, slide up/down to
highlight a title, then press the touchpad to select.)
34
The titles on the right side of the screen change according to the title
selected on the left side of the screen.
3. Highlight a title on the right side of the screen using the / buttons,
then press the
button to select.
(When using the Touchpad Remote Control, slide up/down to
highlight a title, then press the touchpad to select.)
The page of the selected title appears.
4. Press the button to proceed to the next page.
To return to the previous page, press the
button.
(When using the Touchpad Remote Control, slide left/right.)
To go to the main page
Press the corresponding color button indicated at the bottom of the
screen.
(When using the Touchpad Remote Control, press the Control Bar ( )
to open the Screen Key Pad, then select the corresponding color
button.)
To close the i-Manual
Press the i-MANUAL button.
(When using the Touchpad Remote Control, press the Control Bar (
)
to open the Screen Key Pad, then select the i-MANUAL button.)
If you press the i-MANUAL button again, the previously displayed page
reappears. If you press the i-MANUAL button after the TV is turned off
and on again, the main page appears.
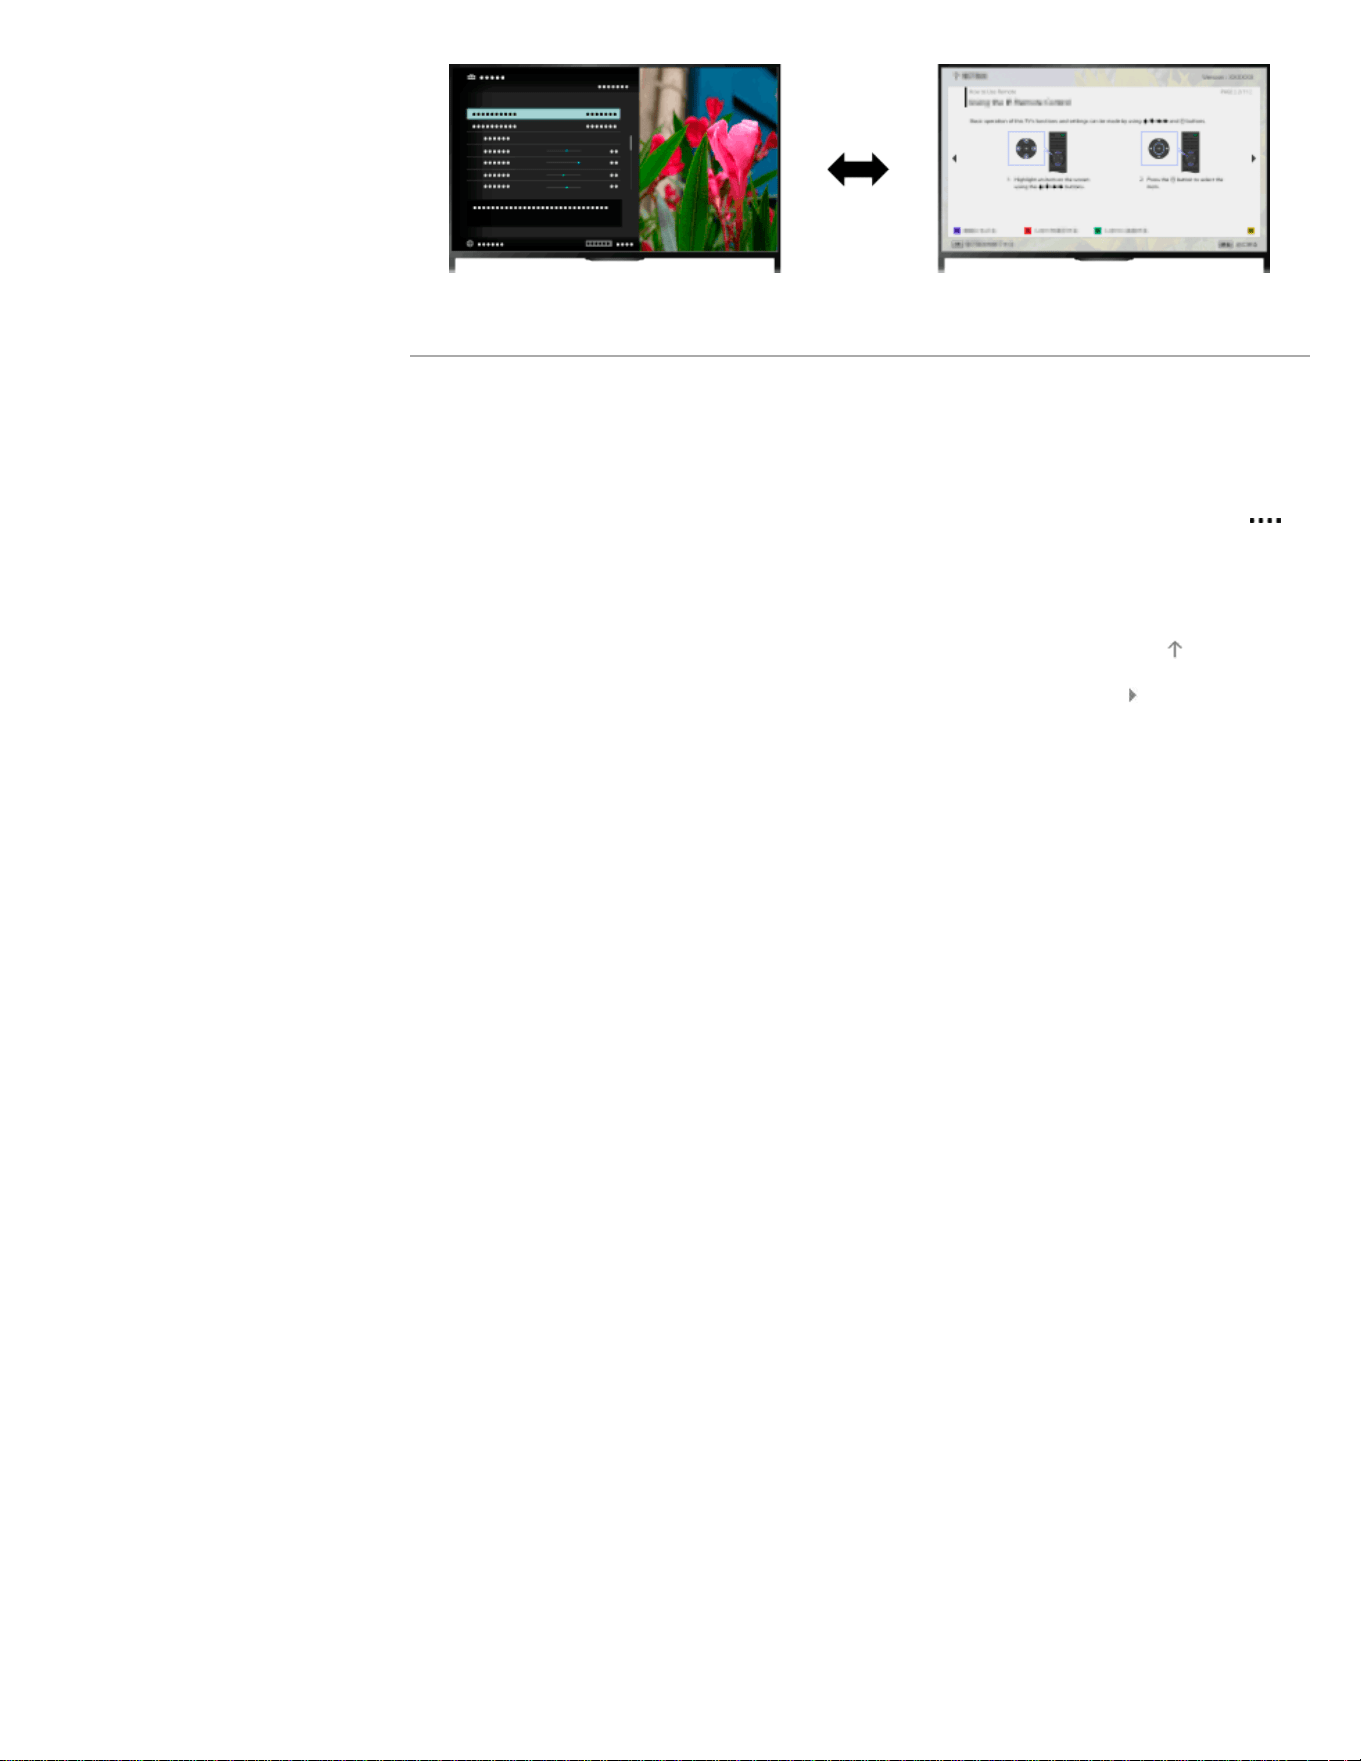
Displaying the Page Again While Operating the TV
Press the i-MANUAL button repeatedly to toggle between the TV screen
and the previously displayed page of the i-Manual. In this way, you can
refer to the i-Manual while operating the TV.
(When using the Touchpad Remote Control, press the Control Bar (
),
slide the touchpad to highlight the i-MANUAL button, then press the
touchpad to select.)
35
Saving Frequently Viewed Pages (Bookmark)
You can save frequently viewed pages in this manual using a color
button. For details on how to bookmark, press the color button that
corresponds to [Show Bookmark] at the bottom of the screen.
(When using the Touchpad Remote Control, press the Control Bar (
),
slide the touchpad to highlight the color button that corresponds to
[Show Bookmark], then press the touchpad to select.)
List of Contents© 2014 Sony Corporation
Top of Page
36

i-Manual
Print
Font Size
Basic Operations
Parts Description
Watching TV
Enjoying
Movies/Music/Photos
Using Internet
Services and
Applications
Watching TV with
Friends Far and
Near
Using Other
Devices
Using BRAVIA
Sync Devices
Useful Functions
Connecting to the
Internet
Using Home
Network
Configuring
Various Settings
Troubleshooting
How to Use
Bookmarks
Top Page > Basic Operations > Watch Connected Device
Watch Connected Device
Overview
Connect various devices (e.g. BD recorder, digital still camera, PC,
smartphone, tablet) to the TV. You can enjoy playing content such as
pictures and music on the connected device.
There are two ways to connect.
List of Contents© 2014 Sony Corporation
Top of Page
37
i-Manual
Print
Font Size
Basic Operations
Parts Description
Watching TV
Enjoying
Movies/Music/Photos
Using Internet
Services and
Applications
Watching TV with
Friends Far and
Near
Using Other
Devices
Using BRAVIA
Sync Devices
Useful Functions
Connecting to the
Internet
Using Home
Network
Configuring
Various Settings
Troubleshooting
How to Use
Bookmarks
Top Page > Watching TV with Friends Far and Near > Enjoying a Chat with Your Friends
while Watching TV
Enjoying a Chat with Your Friends while Watching
TV
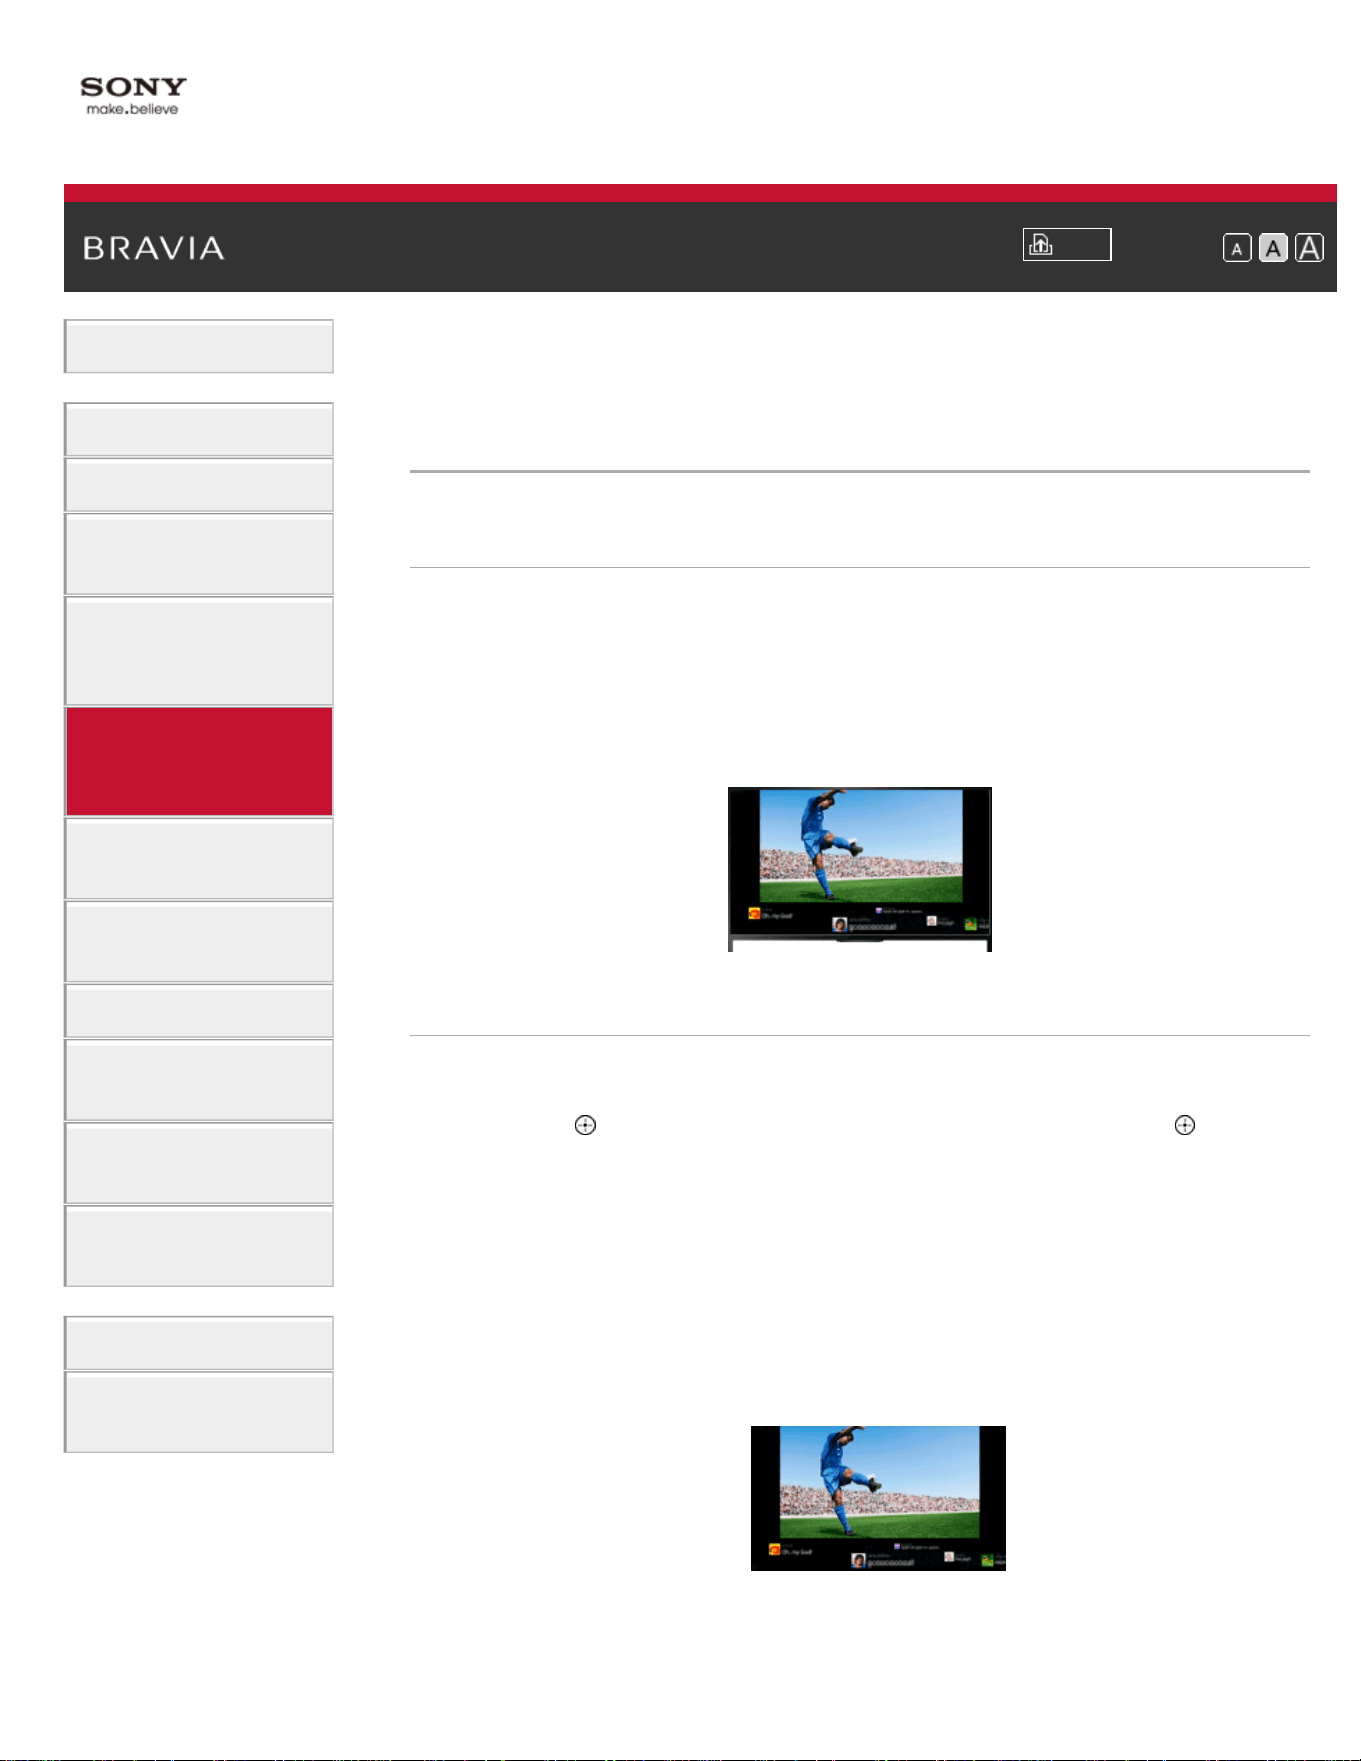
Overview
Social Viewing allows you to use your social network services while
watching content on your TV. Enjoy chatting with your friends and check
what others are saying about the show from on-screen comments.
(Features that can be used with Social Viewing vary depending on your
model/region/country.)
Steps
1.
Connect to a broadband Internet connection.
Press the
button to jump to the title list. Then, press the button
again to go to “Connecting to the Internet” for details.
(When using the Touchpad Remote Control, press the touchpad.
Then, press the touchpad again to go to “Connecting to the Internet”
for details.)
2. Press the SOCIAL VIEW button to start Social Viewing.
The Social Viewing screen appears. (The image size of the program
you are watching is reduced and the tweets area appears.)
3. Press the SOCIAL VIEW button again to open the menu screen,
then log in to the desired social network service.
38
After logging in, your account name is displayed next to the service
name in the menu screen.
To stop Social Viewing, while the Social Viewing screen is displayed,
press the SOCIAL VIEW button to open the menu screen, then press
the SOCIAL VIEW button again.
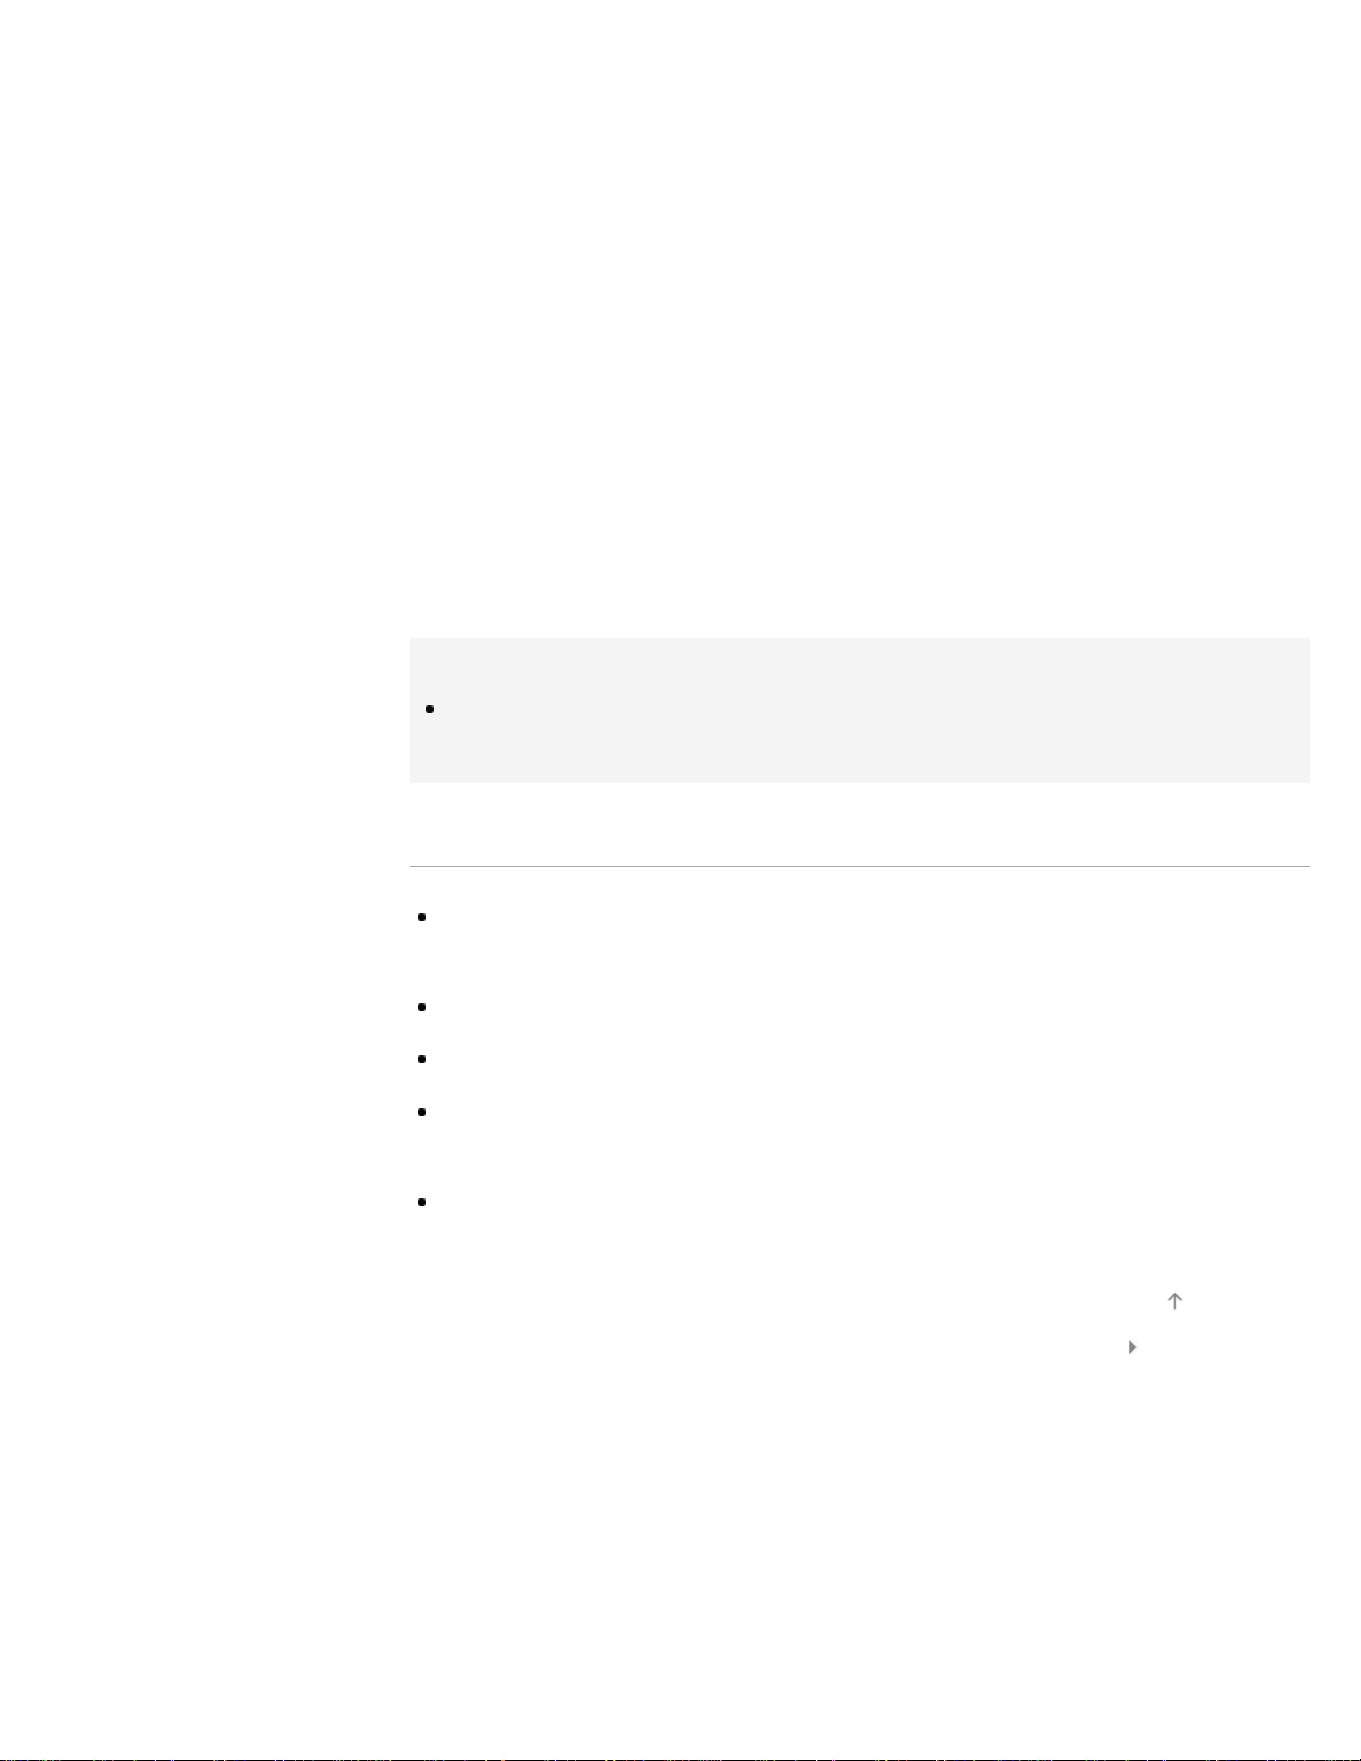
To view the program in full screen
Press the SOCIAL VIEW button to open the menu screen, then select
[Layout] → [Screen:] → [Overlay].
To enter a search keyword
The social network service area shows tweets related to the program
you are watching. You can also enter a search keyword. While the
Social Viewing screen is displayed, press the SOCIAL VIEW button to
open the menu screen, select [Set Twitter Search Keyword], then enter
the desired keyword.
Tips
You can enjoy Twitter without logging in; however, you can use
additional features of Twitter and enjoy it more if you log in to it.
Notes
If you do not have a social network service account, create one using a
computer.
3D images cannot be displayed during Social Viewing.
[Wide Mode] is changed to [Full] during Social Viewing.
When you launch the Discover app during Social Viewing, some
categories will not be displayed.
A BRAVIA Sync device cannot be controlled via the TV’s remote control
during Social Viewing. Use the device’s own remote control to control it.
List of Contents© 2014 Sony Corporation
Top of Page
39
i-Manual
Print
Font Size
Basic Operations
Parts Description
Watching TV
Enjoying
Movies/Music/Photos
Using Internet
Services and
Applications
Watching TV with
Friends Far and
Near
Using Other
Devices
Using BRAVIA
Sync Devices
Useful Functions
Connecting to the
Internet
Using Home
Network
Configuring
Various Settings
Troubleshooting
How to Use
Bookmarks
Top Page > Using Internet Services and Applications > Using Applications
Using Applications
Overview
Press the SEN/APPS button or select [Apps] from the Home Menu to
open the Apps category, which serves as a gateway to Internet content.
From this screen, you can access various services and applications.
The items on the Apps category differ depending on your
region/country, and are subject to change.
Steps
1.
Connect to a broadband Internet connection.
Press the
button to jump to the title list. Then, press the button
again to go to “Connecting to the Internet” for details.
(When using the Touchpad Remote Control, press the touchpad.
Then, press the touchpad again to go to “Connecting to the Internet”
for details.)
2. Press the SEN/APPS button or select [Apps] from the Home Menu
to open the Apps category.
3. Select the desired thumbnail to run the application.
You can select [All Apps] at the bottom of the Home Menu to view all
applications.
Tips
Depending on the service, registration may be required before use.
To add an application to [My Apps]
40

i-Manual
Print
Font Size
Basic Operations
Parts Description
Watching TV
Enjoying
Movies/Music/Photos
Using Internet
Services and
Applications
Watching TV with
Friends Far and
Near
Using Other
Devices
Using BRAVIA
Sync Devices
Useful Functions
Connecting to the
Internet
Using Home
Network
Configuring
Various Settings
Troubleshooting
How to Use
Bookmarks
Top Page > Parts Description > Front
Front
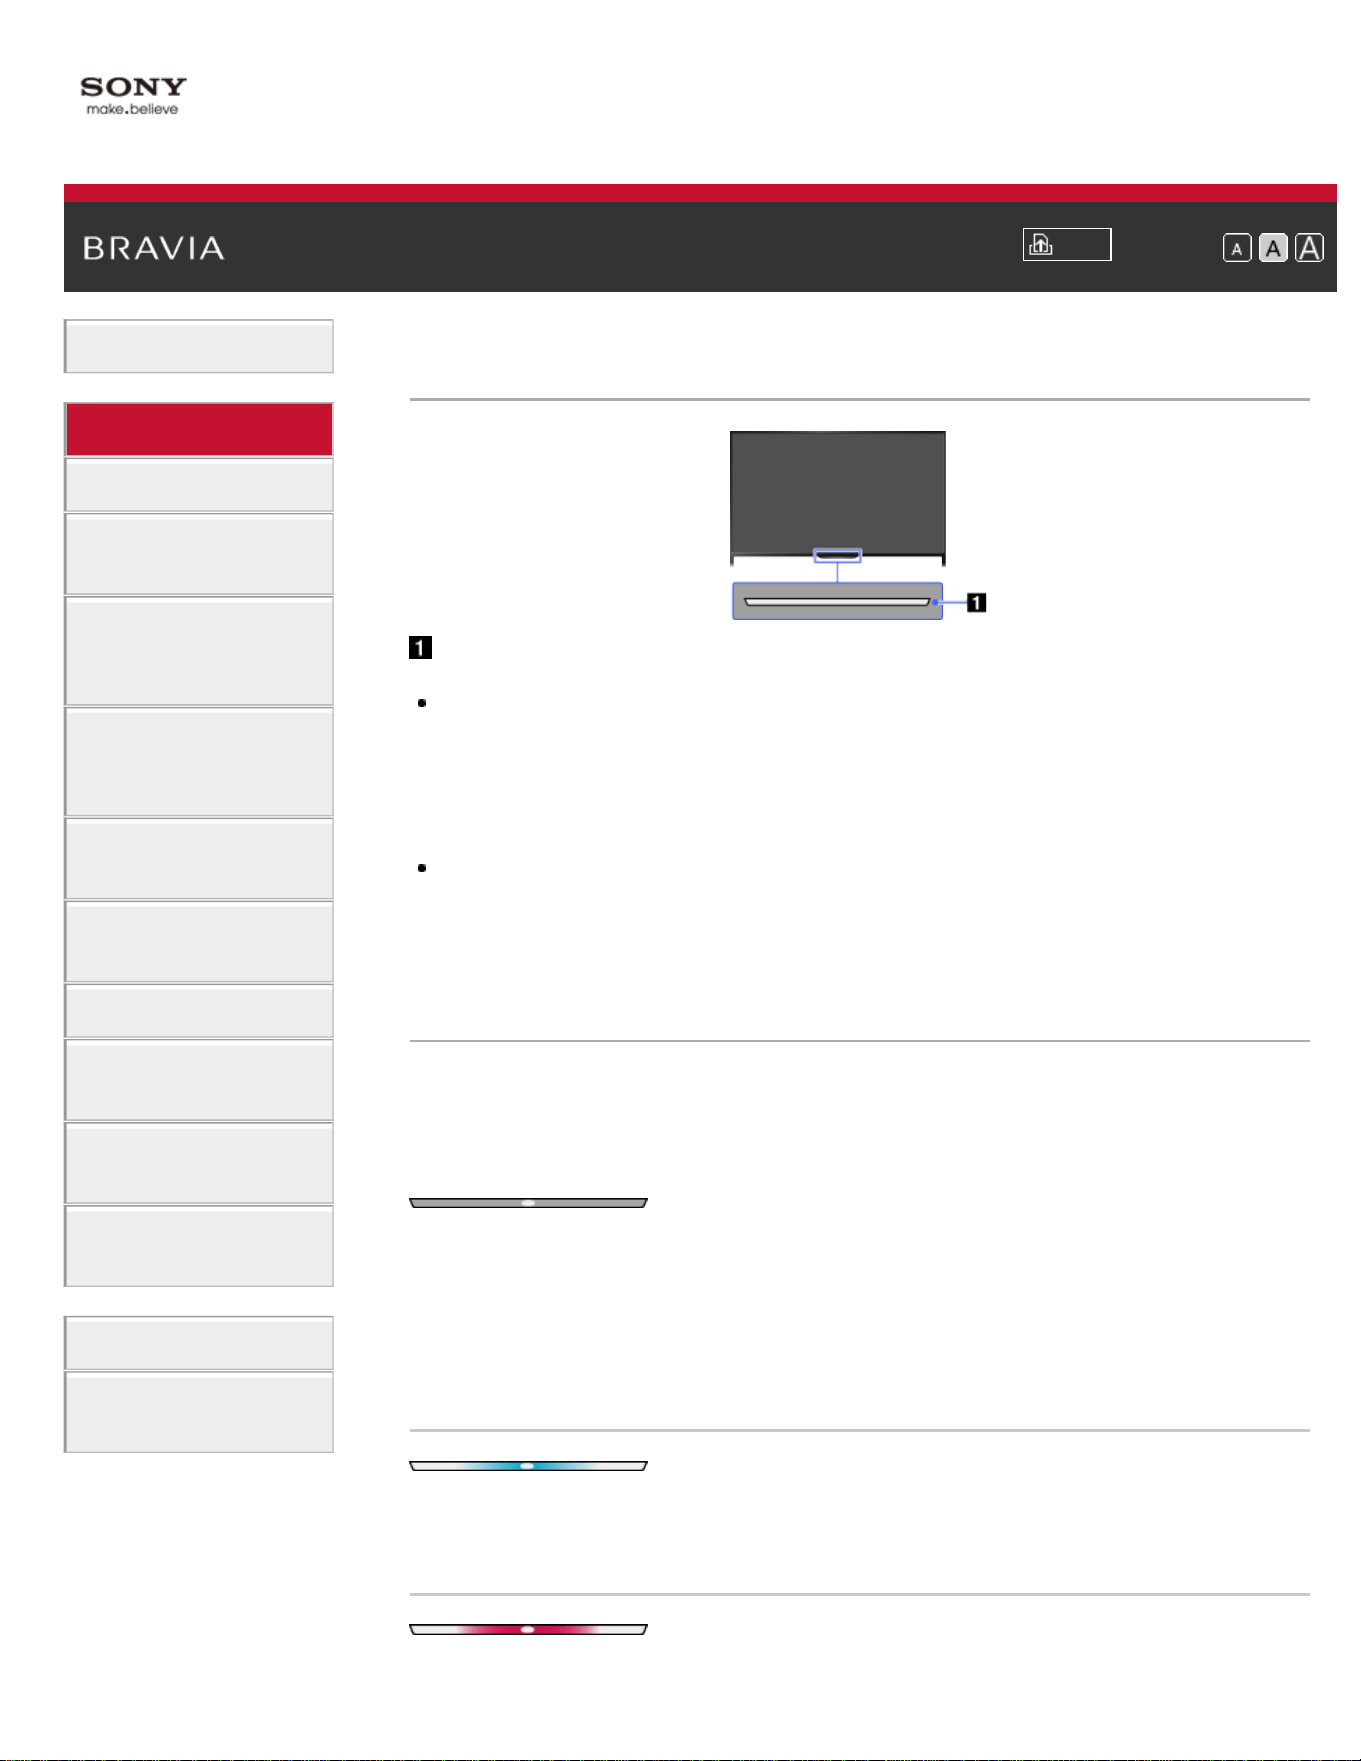
Sensors and Illumination
Remote control sensor
Receives signals from the remote control.
Point the remote control at the Sony logo to operate the TV.
Do not place anything near the sensor. Doing so may affect its function.
Light sensor
Senses the room light level and adjusts the screen brightness accordingly.
Do not place anything near the sensor. Doing so may affect its function.
Illumination LED
The Illumination LED lights up or blinks in response to remote control
operations and lights up in different colors according to the status of the
TV.
Blinking
(Blinking speed depends on status)
The TV is turned on
The TV is receiving an incoming call *2
The TV is in Picture off mode
Software update is in progress
Blinking
When the TV and a mobile device (e.g. smartphone) are connected
wirelessly
*1
42

During recording (including SCART REC) or the TV is in pause mode *2
*1
The following Timer functions are set:
On Timer, Sleep Timer, Reminder (*2), REC Timer (*2)
For simultaneous conditions, the upper condition in the table has priority.
The Illumination LED does not light up when the TV is in standby mode,
except when a recording is in progress or the timer is set.
*1: If [Simple Response] is selected in [Illumination LED], the
illumination LED does not light continuously but blinks as feedback for
operations.
*2: This function is available depending on your region/country.
List of Contents© 2014 Sony Corporation
Top of Page
43
i-Manual
Print
Font Size
Basic Operations
Parts Description
Watching TV
Enjoying
Movies/Music/Photos
Using Internet
Services and
Applications
Watching TV with
Friends Far and
Near
Using Other
Devices
Using BRAVIA
Sync Devices
Useful Functions
Connecting to the
Internet
Using Home
Network
Configuring
Various Settings
Troubleshooting
How to Use
Bookmarks
Top Page > Parts Description > Control buttons on the rear
Control buttons on the rear
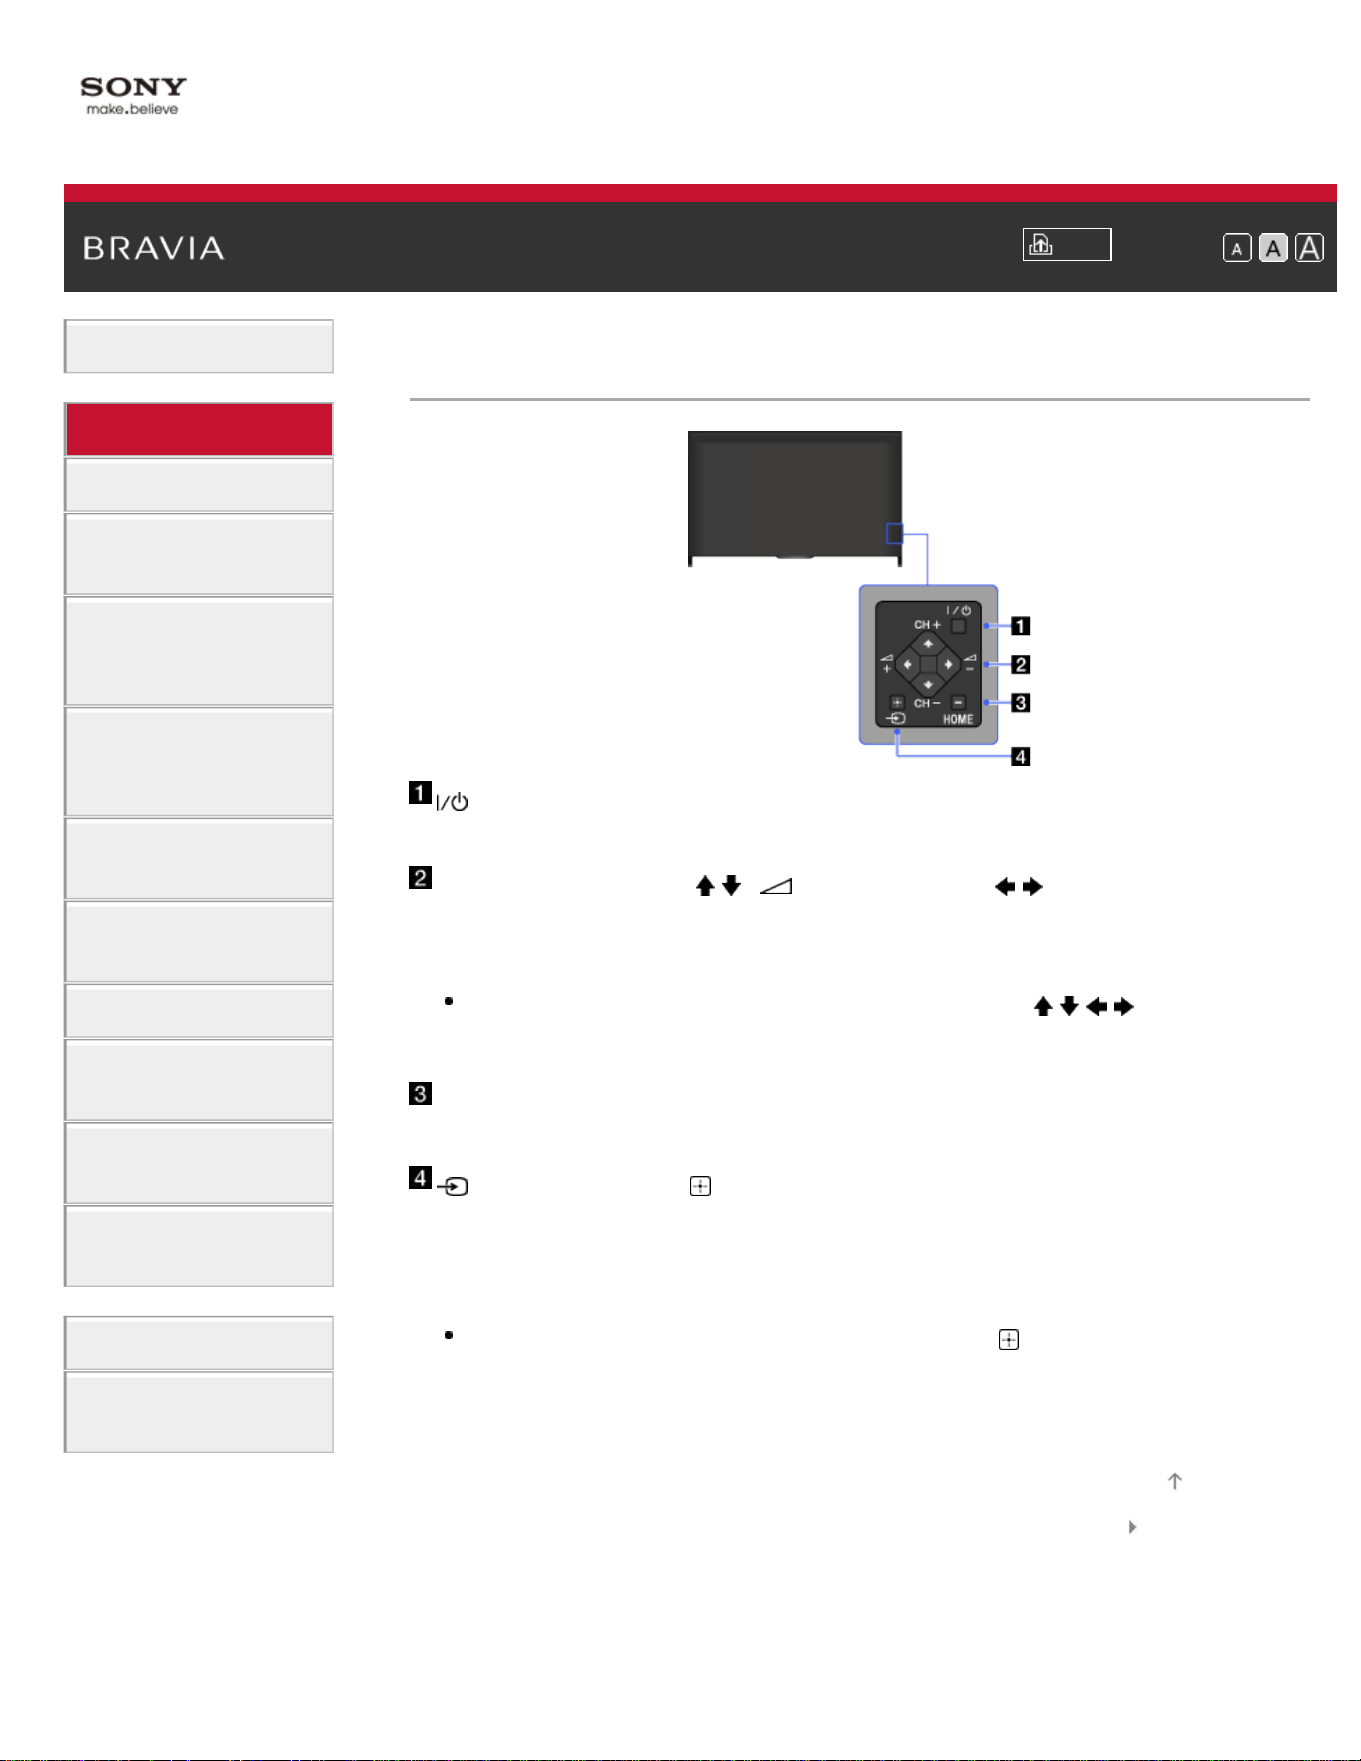
(Power)
Press to turn on the TV or to enter standby mode.
CH +/– (Channel)/ / , +/– (Volume)/ /
Press to select the next (+) or previous (–) channel.
Press to adjust the volume.
In the TV Home Menu, these buttons will work as
/ / /
.
HOME
Press to display the TV Home Menu.
(Input select)/ (Select/Confirm)
Press to display a list of inputs.
To select a connected device input, press this button
repeatedly.
In the TV Home Menu, this button will work as
(select/confirm).
List of Contents© 2014 Sony Corporation
Top of Page
44
i-Manual
Print
Font Size
Basic Operations
Parts Description
Watching TV
Enjoying
Movies/Music/Photos
Using Internet
Services and
Applications
Watching TV with
Friends Far and
Near
Using Other
Devices
Using BRAVIA
Sync Devices
Useful Functions
Connecting to the
Internet
Using Home
Network
Configuring
Various Settings
Troubleshooting
How to Use
Bookmarks
Top Page > Parts Description > Terminals on the rear (bottom)
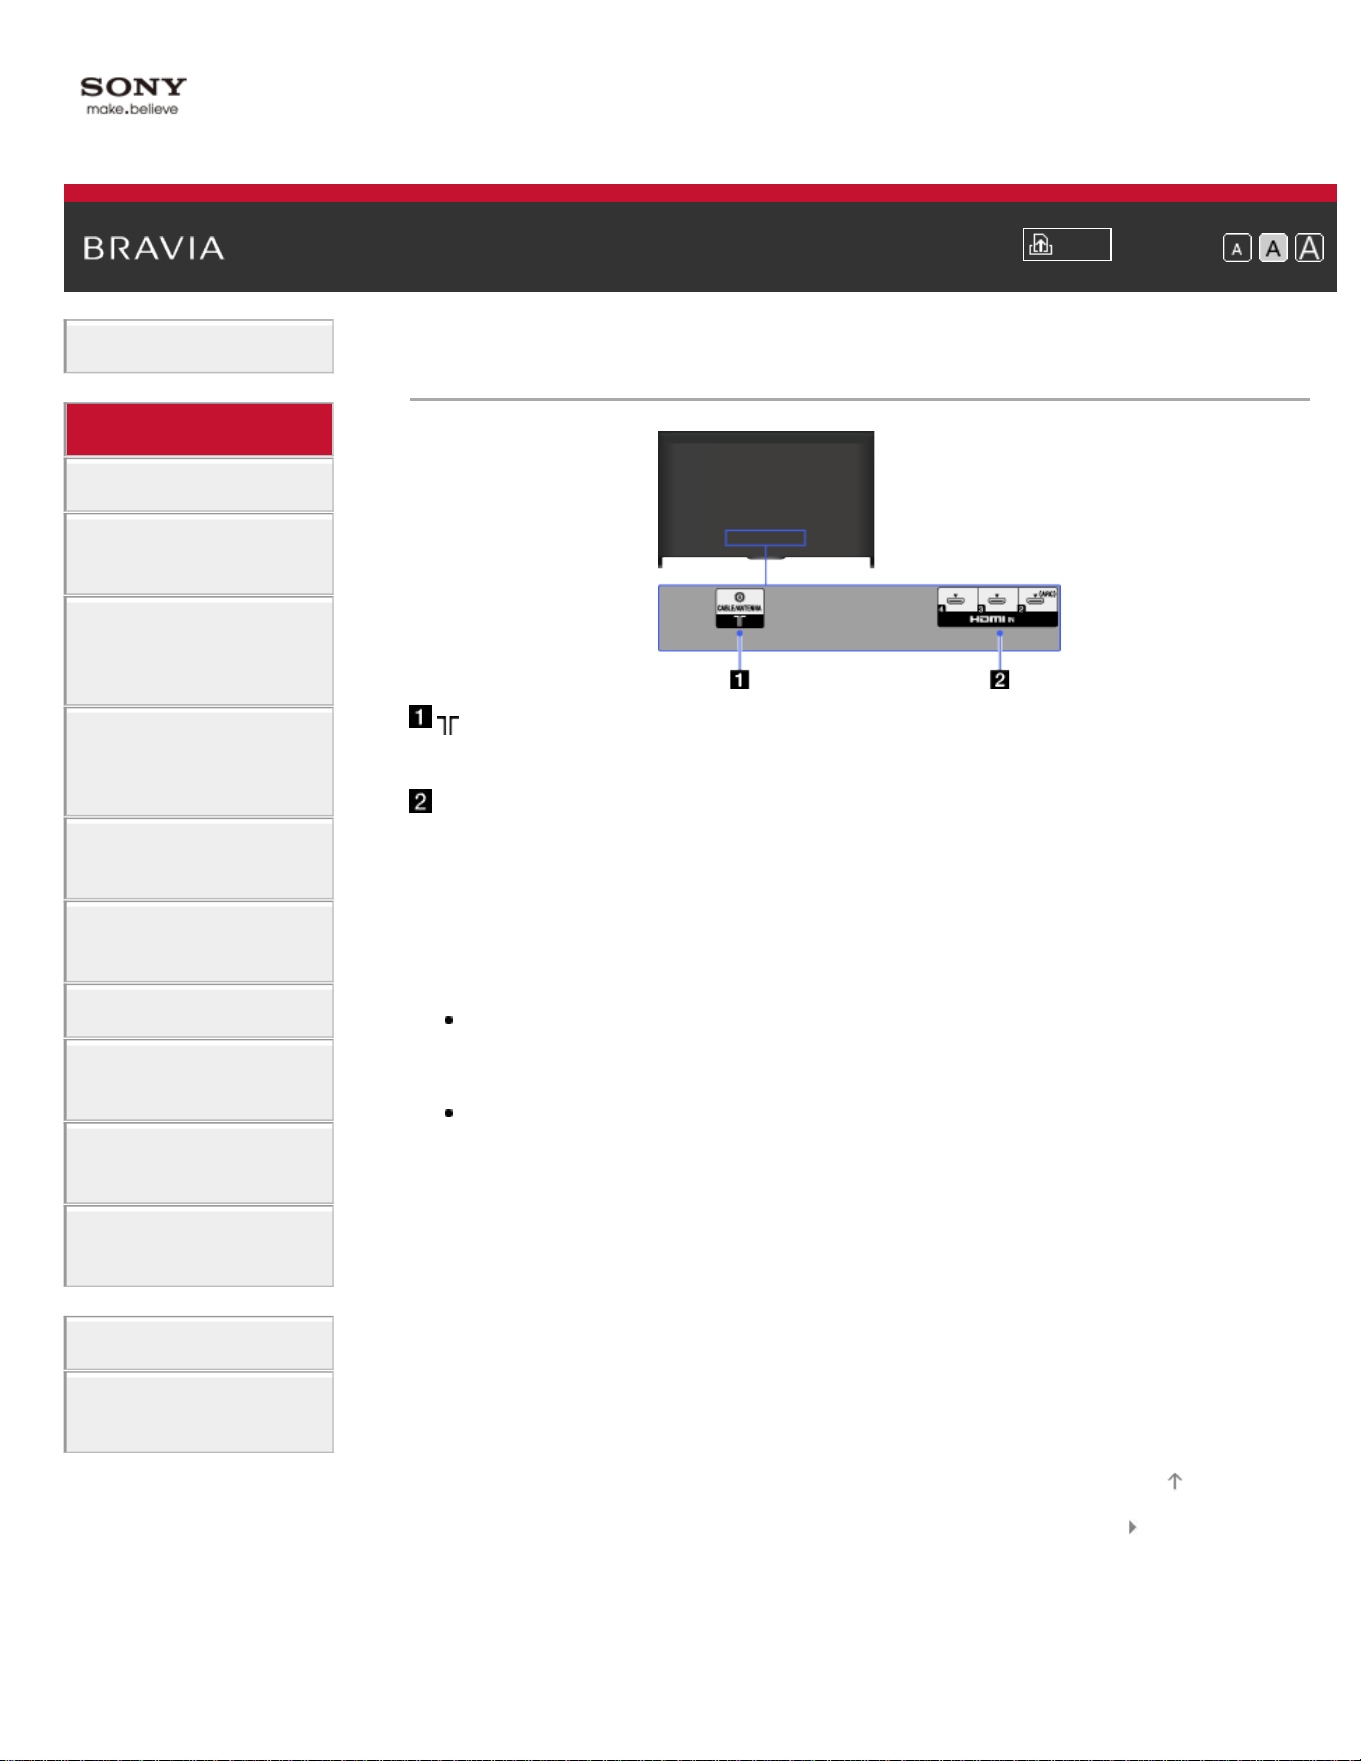
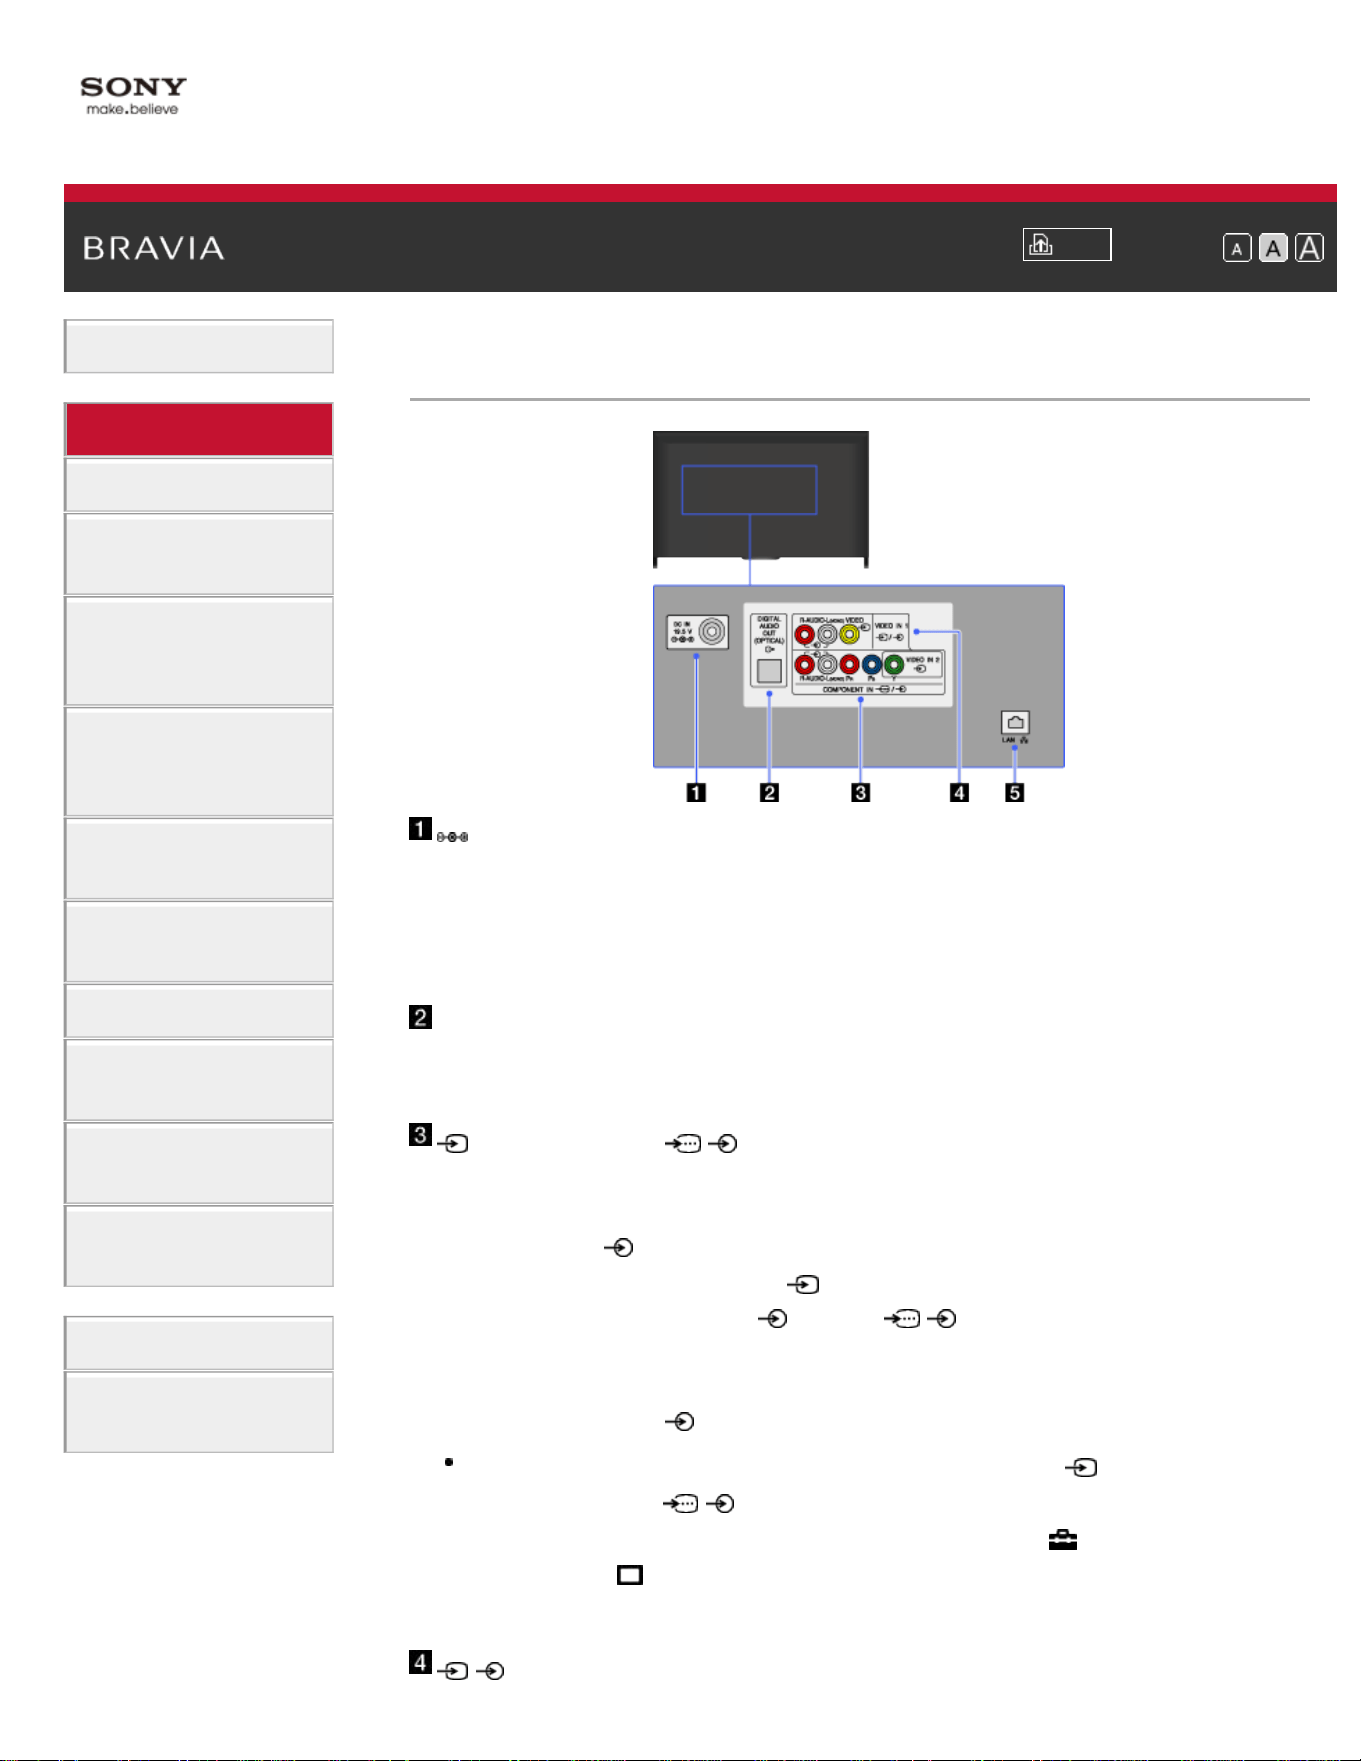
Terminals on the rear (bottom)
RF input that connects to your cable or antenna.
HDMI IN 2/3/4
HDMI (High-Definition Multimedia Interface) provides an
uncompressed, all-digital audio/video interface between this
TV and an HDMI-equipped audio/video device. In addition,
when you connect a BRAVIA Sync-compatible device,
communication with the connected device is supported.
Be sure to use an authorized HIGH SPEED HDMI cable
bearing the HDMI logo.
If connecting a digital audio system that is compatible with
Audio Return Channel (ARC) technology, use HDMI IN 2. If
not, an additional connection with DIGITAL AUDIO OUT
(OPTICAL) is necessary.
List of Contents© 2014 Sony Corporation
Top of Page
45
i-Manual
Print
Font Size
Basic Operations
Parts Description
Watching TV
Enjoying
Movies/Music/Photos
Using Internet
Services and
Applications
Watching TV with
Friends Far and
Near
Using Other
Devices
Using BRAVIA
Sync Devices
Useful Functions
Connecting to the
Internet
Using Home
Network
Configuring
Various Settings
Troubleshooting
How to Use
Bookmarks
Top Page > Parts Description > Terminals on the rear (center)
Terminals on the rear (center)
DC IN 19.5 V
Connects the supplied mains adapter.
Depending on the model of your TV, it may not be equipped
with this jack. In this case, the mains adaptor will also not be
supplied.
DIGITAL AUDIO OUT (OPTICAL)
You can listen to the TV’s sound on a connected home theater
system with digital audio input (optical).
VIDEO IN 2, / COMPONENT IN
This input can be used as a composite video input or as a
component video input. When connecting a mono device,
connect to the
L (MONO) audio jack.
For composite connection, use
VIDEO IN 2 for video
signals, and also connect to
(L/R) of / COMPONENT
IN for audio signals.
For component connection, use Y, PB, PR for video signals,
and also connect to
(L/R) for audio signals.
The TV will automatically detect and switch between
VIDEO IN 2 and / COMPONENT IN. To manually set
the input type, press the HOME button, then select
[Settings] → [Channels & Inputs]/[Channels,
Inputs & Ginga] → [Video 2/Component Selection].
46


i-Manual
Print
Font Size
Basic Operations
Parts Description
Watching TV
Enjoying
Movies/Music/Photos
Using Internet
Services and
Applications
Watching TV with
Friends Far and
Near
Using Other
Devices
Using BRAVIA
Sync Devices
Useful Functions
Connecting to the
Internet
Using Home
Network
Configuring
Various Settings
Troubleshooting
How to Use
Bookmarks
Top Page > Parts Description > Terminals on the rear (right)
Terminals on the rear (right)
HDMI IN 1/MHL
HDMI (High-Definition Multimedia Interface) provides an
uncompressed, all-digital audio/video interface between this
TV and an HDMI-equipped audio/video device. You can also
connect your MHL (Mobile High-definition Link) device using
an MHL cable. In addition, when you connect a BRAVIA Sync-
compatible device, communication with the connected device
is supported.
Be sure to use an authorized HIGH SPEED HDMI cable
bearing the HDMI logo.
If connecting a digital audio system that is compatible with
Audio Return Channel (ARC) technology, use HDMI IN 2
on the bottom of the TV. If not, an additional connection
with DIGITAL AUDIO OUT (OPTICAL) is necessary.
AUDIO OUT/
Connect your headphones or stereo system to listen to the
TV’s sound through the connected equipment.
To listen to the TV’s sound through the connected equipment,
press the HOME button, then select
[Settings] → [Sound]
→ [Headphone/Audio Out] → [Headphone] or [Audio Out].
When you set [Audio Out] in [Headphone/Audio Out],
select [Fixed] or [Variable], press the HOME button, then
select
[Settings] → [Sound] → [Audio Out].
USB 1/2
You can enjoy photo, music and video files stored on a USB
device.
48
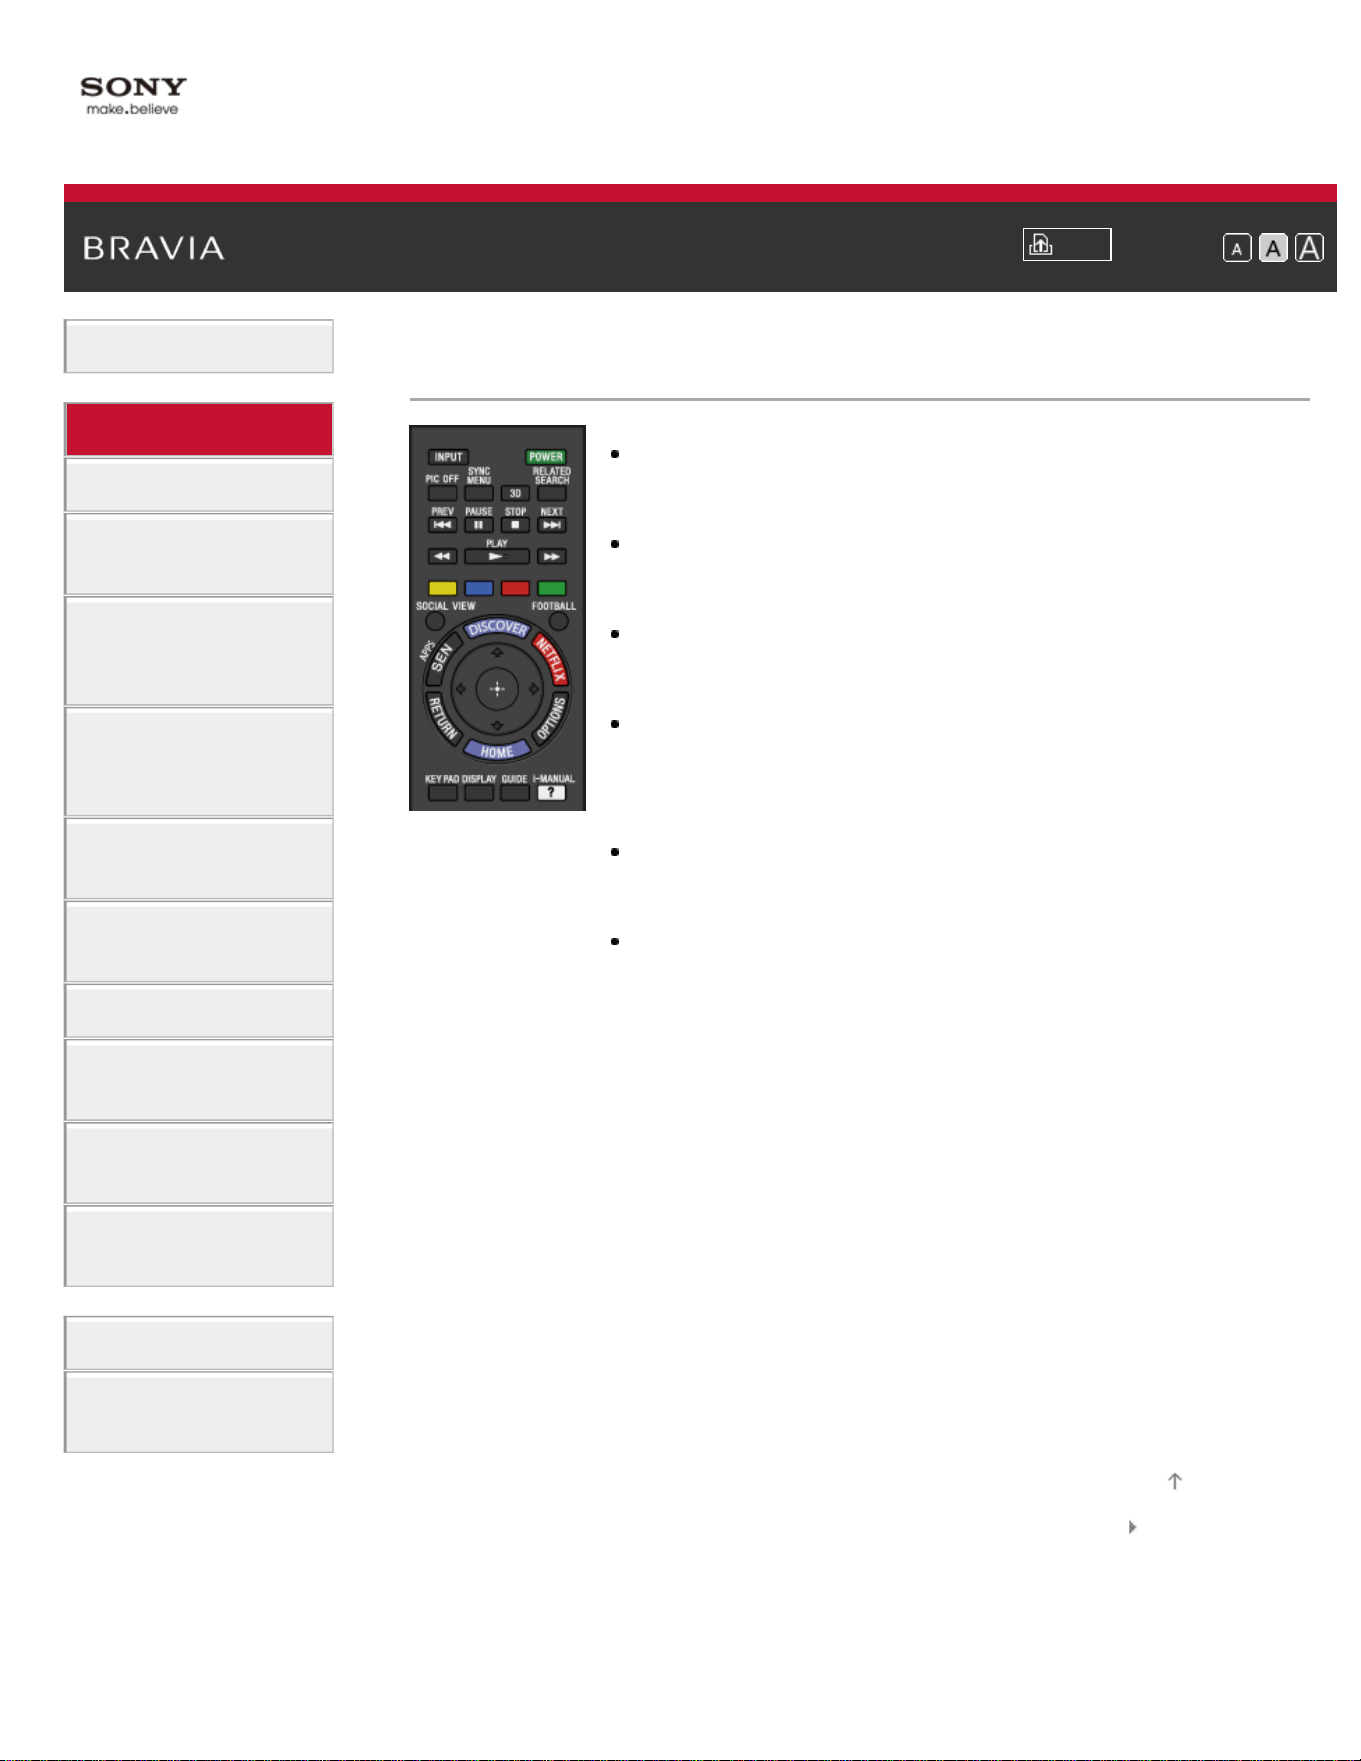
i-Manual
Print
Font Size
Basic Operations
Parts Description
Watching TV
Enjoying
Movies/Music/Photos
Using Internet
Services and
Applications
Watching TV with
Friends Far and
Near
Using Other
Devices
Using BRAVIA
Sync Devices
Useful Functions
Connecting to the
Internet
Using Home
Network
Configuring
Various Settings
Troubleshooting
How to Use
Bookmarks
Top Page > Parts Description > Top
INPUT
Press to display a list of inputs.
POWER
Press to turn on or to turn off the TV (standby mode).
PIC OFF
Press to turn the picture off, while sound remains on.
SYNC MENU
Press to display the BRAVIA Sync Menu to operate a
connected BRAVIA Sync-compatible device.
3D
Press to select the 3D display mode.
RELATED SEARCH
When the TV is connected to the Internet, you can search
for related content while watching various content on the
TV. (What you can search depends on your
region/country or other circumstances.)
Top
List of Contents© 2014 Sony Corporation
Top of Page
49

i-Manual
Print
Font Size
Basic Operations
Parts Description
Watching TV
Enjoying
Movies/Music/Photos
Using Internet
Services and
Applications
Watching TV with
Friends Far and
Near
Using Other
Devices
Using BRAVIA
Sync Devices
Useful Functions
Connecting to the
Internet
Using Home
Network
Configuring
Various Settings
Troubleshooting
How to Use
Bookmarks
Top Page > Parts Description > Upper
Buttons for connected devices
Use these buttons to operate a connected BRAVIA Sync-
compatible device.
Color buttons
When the color buttons are available, an operation guide
appears on the screen.
Follow the operation guide to perform a selected
operation.
SOCIAL VIEW
You can enjoy watching TV with friends far and near,
using social network services.
FOOTBALL
Press to change the Live Football Mode.
Upper
List of Contents© 2014 Sony Corporation
Top of Page
50
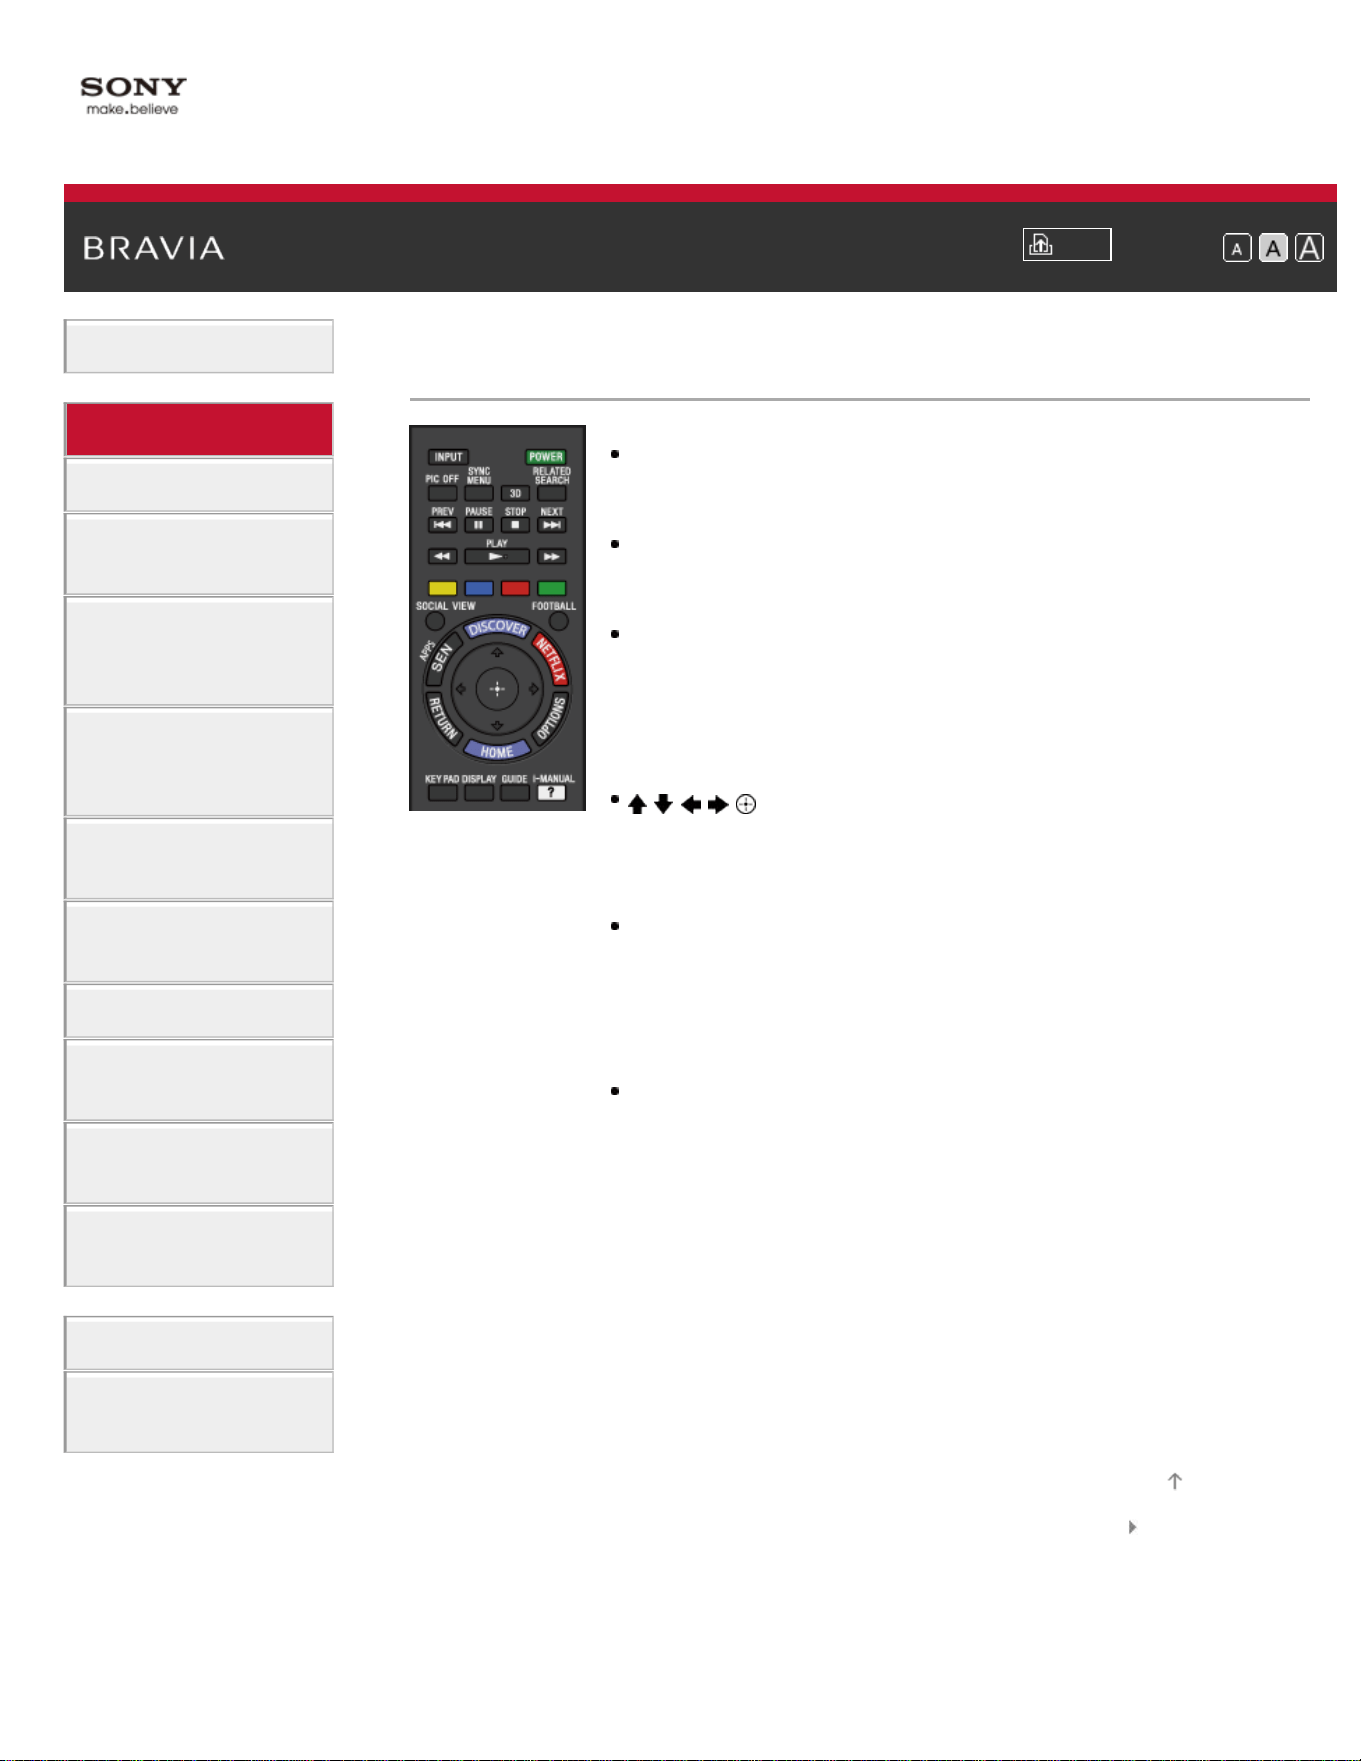
i-Manual
Print
Font Size
Basic Operations
Parts Description
Watching TV
Enjoying
Movies/Music/Photos
Using Internet
Services and
Applications
Watching TV with
Friends Far and
Near
Using Other
Devices
Using BRAVIA
Sync Devices
Useful Functions
Connecting to the
Internet
Using Home
Network
Configuring
Various Settings
Troubleshooting
How to Use
Bookmarks
Top Page > Parts Description > Middle
DISCOVER
Press to bring up Discover to search for content.
SEN/APPS
Press to open the Apps category of the Home Menu.
NETFLIX
Press to access the “NETFLIX” online service.
This feature (button) may not be available in some
regions/countries.
/ / / / /RETURN
Press to select/confirm a highlighted item and return to
the previous screen, or exit from a menu.
OPTIONS
Press to display a list of convenient functions and menu
shortcuts. The menu items vary based on the current
input and/or content.
HOME
Press to display the TV Home Menu.
Middle
List of Contents© 2014 Sony Corporation
Top of Page
51

i-Manual
Print
Font Size
Basic Operations
Parts Description
Watching TV
Enjoying
Movies/Music/Photos
Using Internet
Services and
Applications
Watching TV with
Friends Far and
Near
Using Other
Devices
Using BRAVIA
Sync Devices
Useful Functions
Connecting to the
Internet
Using Home
Network
Configuring
Various Settings
Troubleshooting
How to Use
Bookmarks
Top Page > Parts Description > Lower
KEY PAD
Press to open the Screen Key Pad at the top of the TV
screen. You can use the
/ buttons to operate the
Screen Key Pad.
DISPLAY
Press once to display information about the
channel/program/input you are viewing. Press again to
exit.
GUIDE
Press to display the digital program guide.
The Guide feature may not be available in some
regions/countries.
i-MANUAL
Press to display the on-screen instruction manual (this
manual).
0-9
Press the 0-9 buttons to select a channel.
Use with the 0-9 buttons to select digital channels. For
example, to enter 2.1, press 2,
, 1.
CC/SUBTITLE
Press to turn closed captions/subtitles on or off (when the
feature is available).
Lower
List of Contents© 2014 Sony Corporation
Top of Page
52
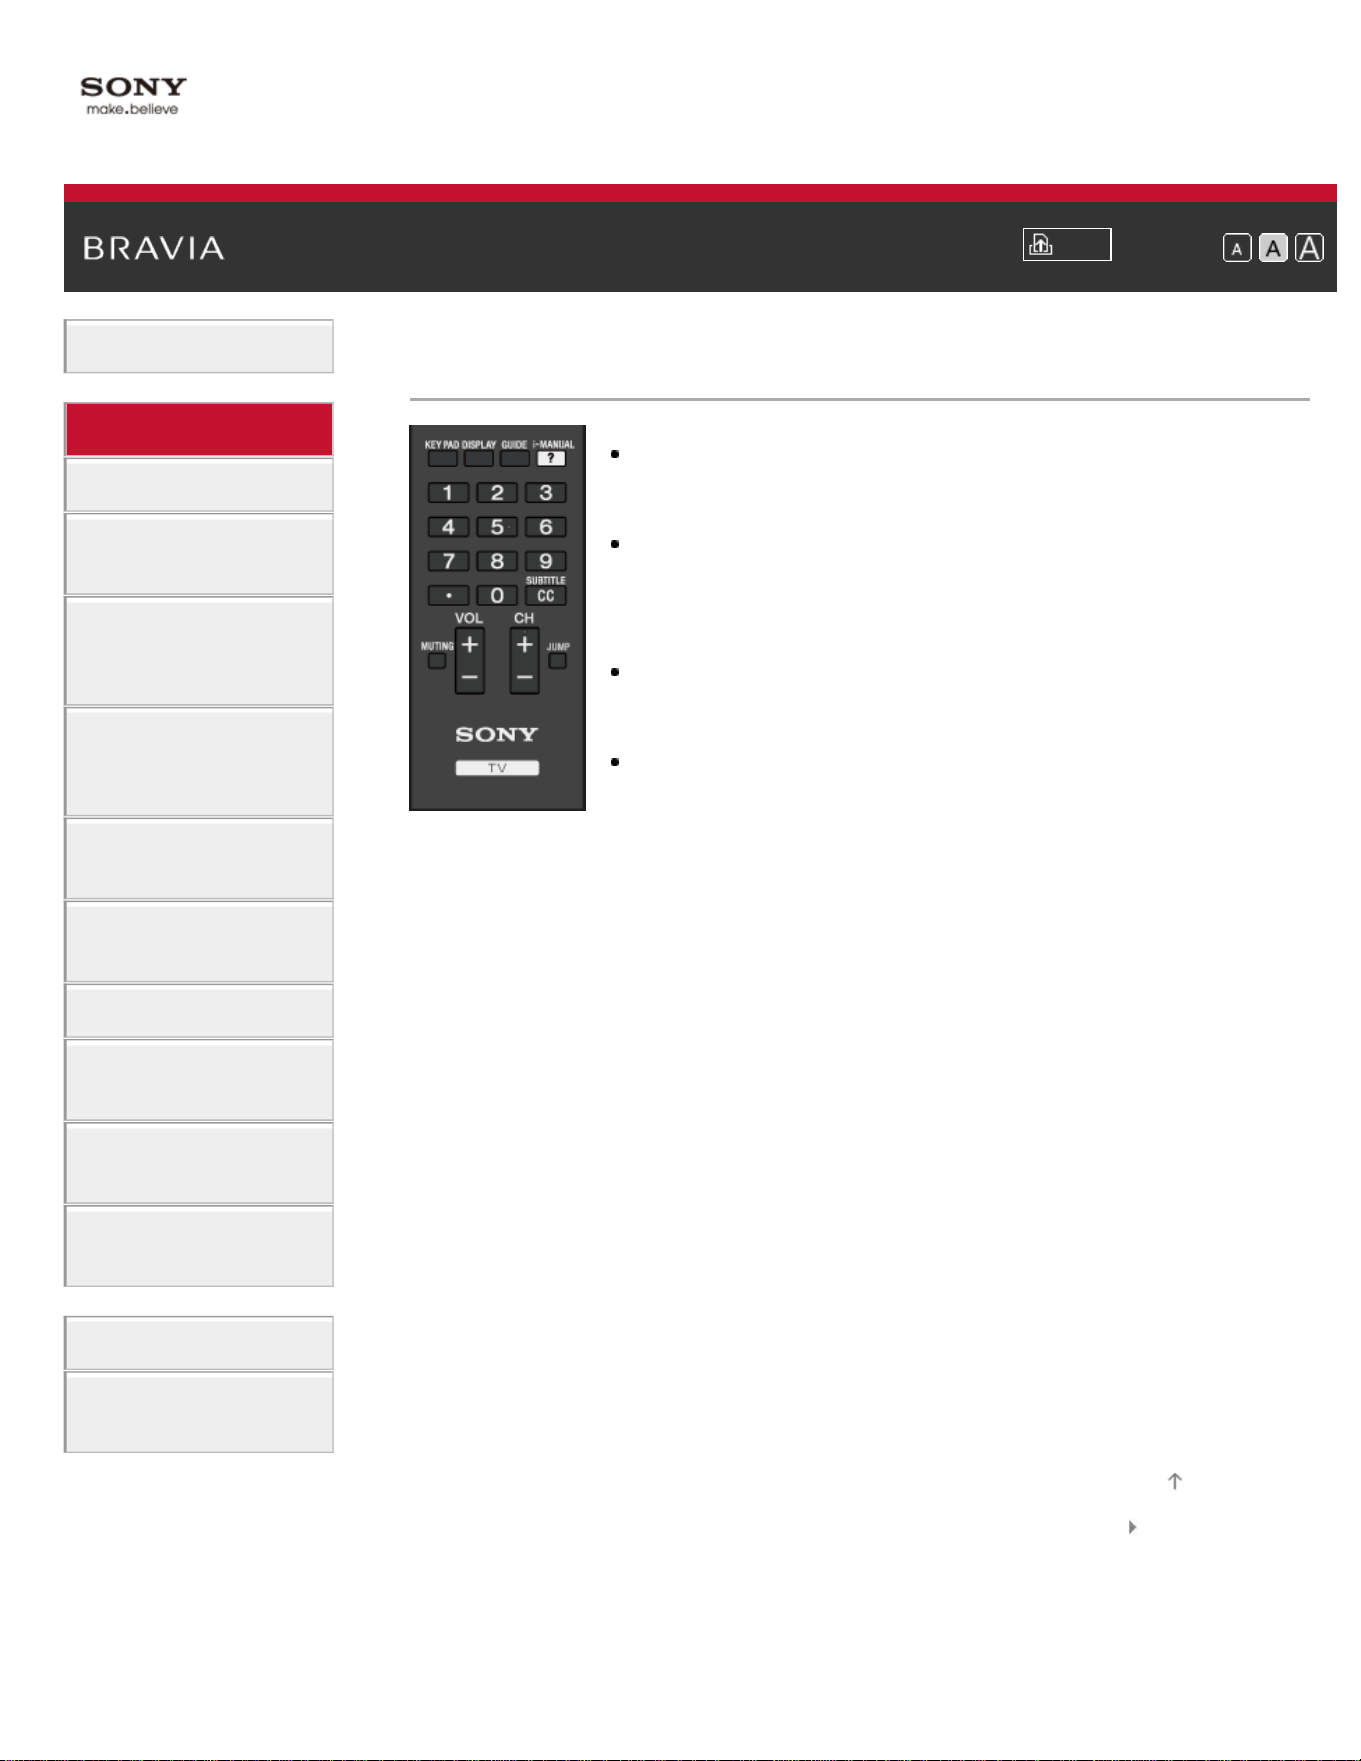
i-Manual
Print
Font Size
Basic Operations
Parts Description
Watching TV
Enjoying
Movies/Music/Photos
Using Internet
Services and
Applications
Watching TV with
Friends Far and
Near
Using Other
Devices
Using BRAVIA
Sync Devices
Useful Functions
Connecting to the
Internet
Using Home
Network
Configuring
Various Settings
Troubleshooting
How to Use
Bookmarks
Top Page > Parts Description > Bottom
VOL +/–
Press to adjust the volume.
MUTING
Press to mute the sound. Press again to restore the
sound.
CH +/–
Press to select the next (+) or previous (–) channel.
JUMP
Press to jump back and forth between two channels or
inputs. The TV alternates between the current channel or
input and the last channel or input that was selected.
Bottom
List of Contents© 2014 Sony Corporation
Top of Page
53
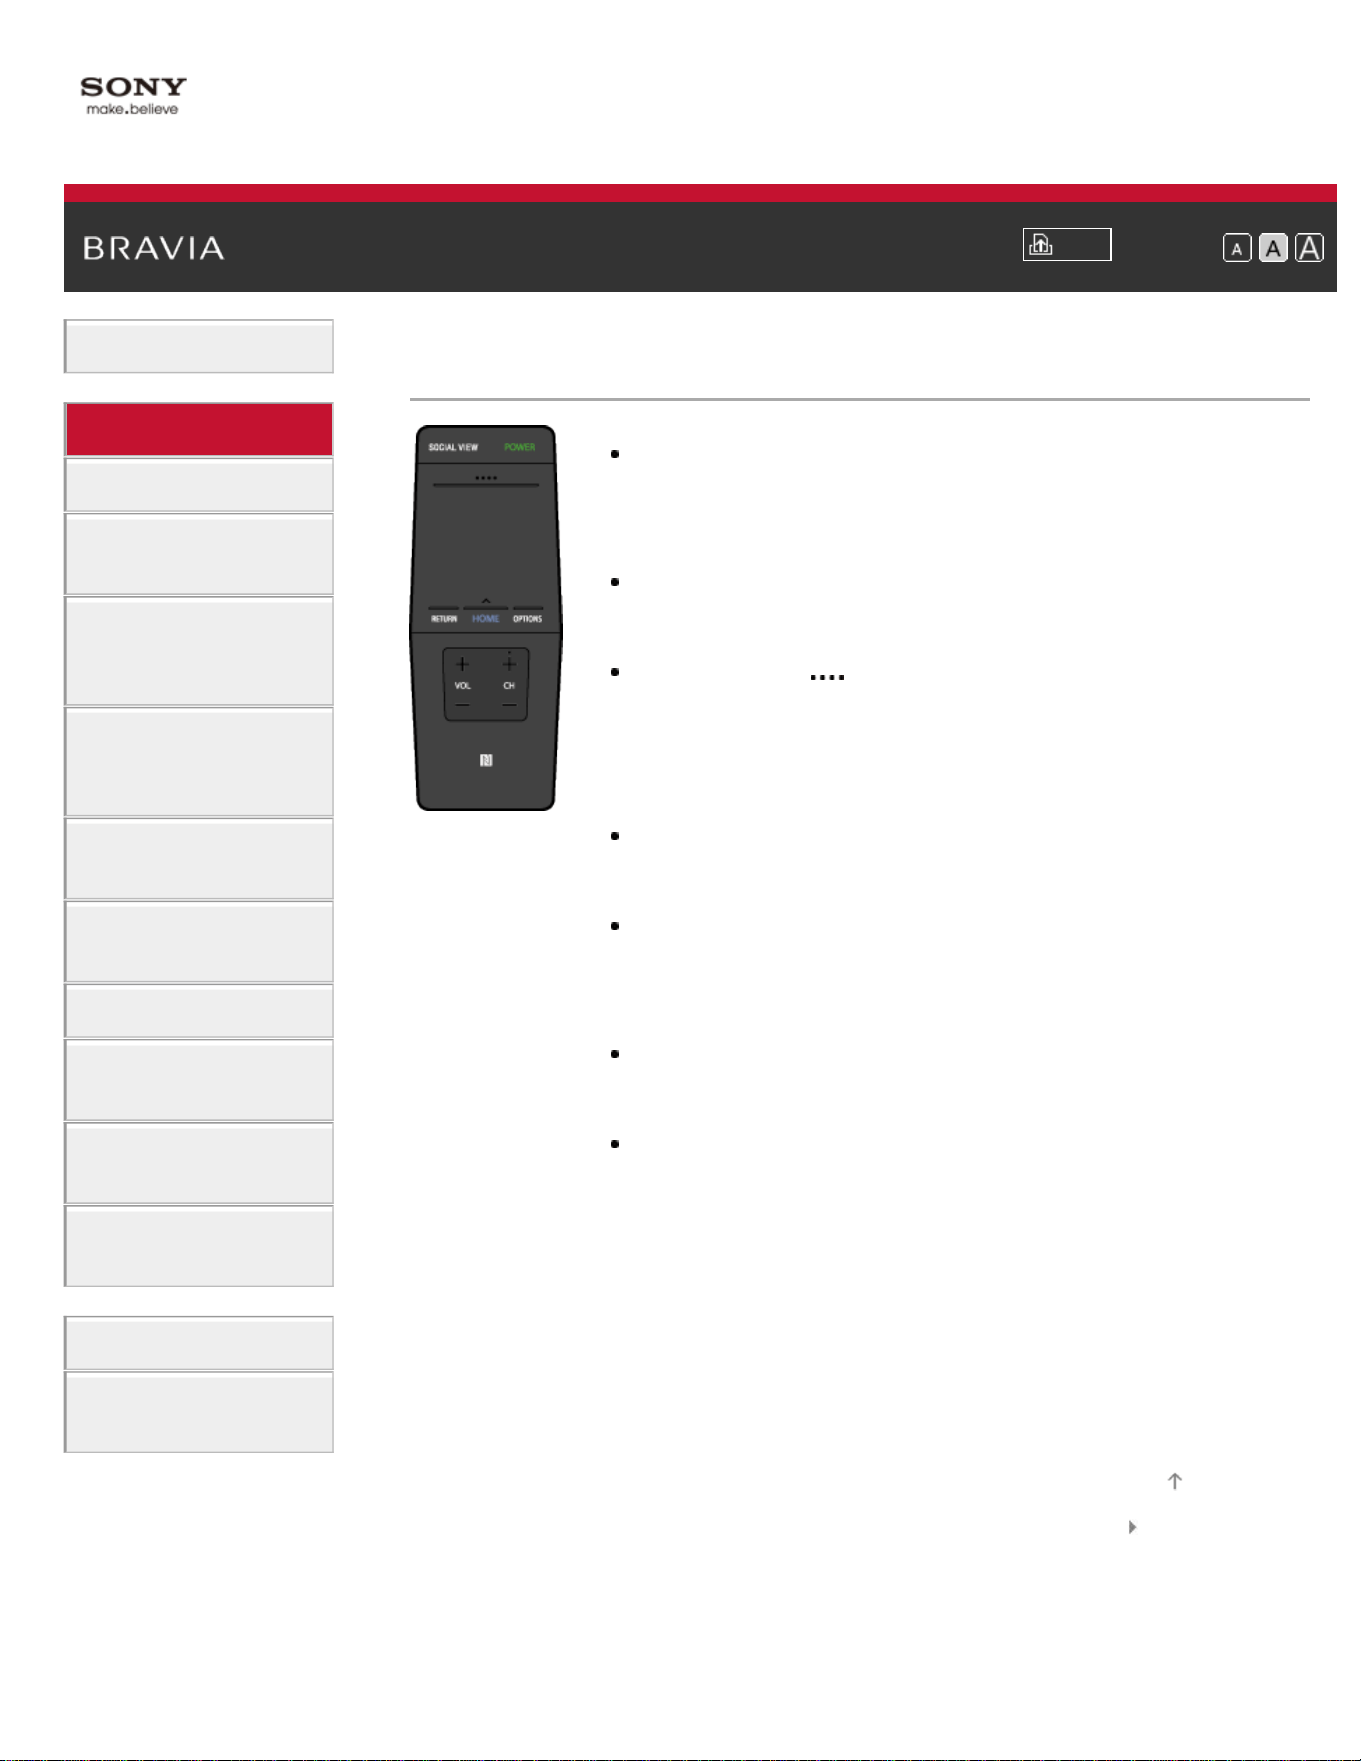
i-Manual
Print
Font Size
Basic Operations
Parts Description
Watching TV
Enjoying
Movies/Music/Photos
Using Internet
Services and
Applications
Watching TV with
Friends Far and
Near
Using Other
Devices
Using BRAVIA
Sync Devices
Useful Functions
Connecting to the
Internet
Using Home
Network
Configuring
Various Settings
Troubleshooting
How to Use
Bookmarks
Top Page > Parts Description > Upper
SOCIAL VIEW
You can enjoy watching TV with friends far and near,
using social network services.
POWER
Press to turn the TV on or off (Standby mode).
Control Bar (
)
Press to open the Screen Key Pad at the top of the TV
screen. Slide left/right to move left/right, then press the
touchpad to select a key.
Touchpad
Press or slide to operate the TV with the touchpad.
RETURN
Press to return to the previous screen, or exit from a
menu.
HOME
Press to display the TV Home Menu.
OPTIONS
Press to display a list of convenient functions and menu
shortcuts. The menu items vary based on the current
input and/or content.
Upper
List of Contents© 2014 Sony Corporation
Top of Page
54

i-Manual
Print
Font Size
Basic Operations
Parts Description
Watching TV
Enjoying
Movies/Music/Photos
Using Internet
Services and
Applications
Watching TV with
Friends Far and
Near
Using Other
Devices
Using BRAVIA
Sync Devices
Useful Functions
Connecting to the
Internet
Using Home
Network
Configuring
Various Settings
Troubleshooting
How to Use
Bookmarks
Top Page > Parts Description > Lower
VOL +/–
Press to adjust the volume.
CH +/–
Press to select the next (+) or previous (–) channel.
(NFC)
Touch the device (e.g. some models of Xperia)
corresponding to the One-touch mirroring function, then
its screen is displayed on the TV.
Lower
List of Contents© 2014 Sony Corporation
Top of Page
55
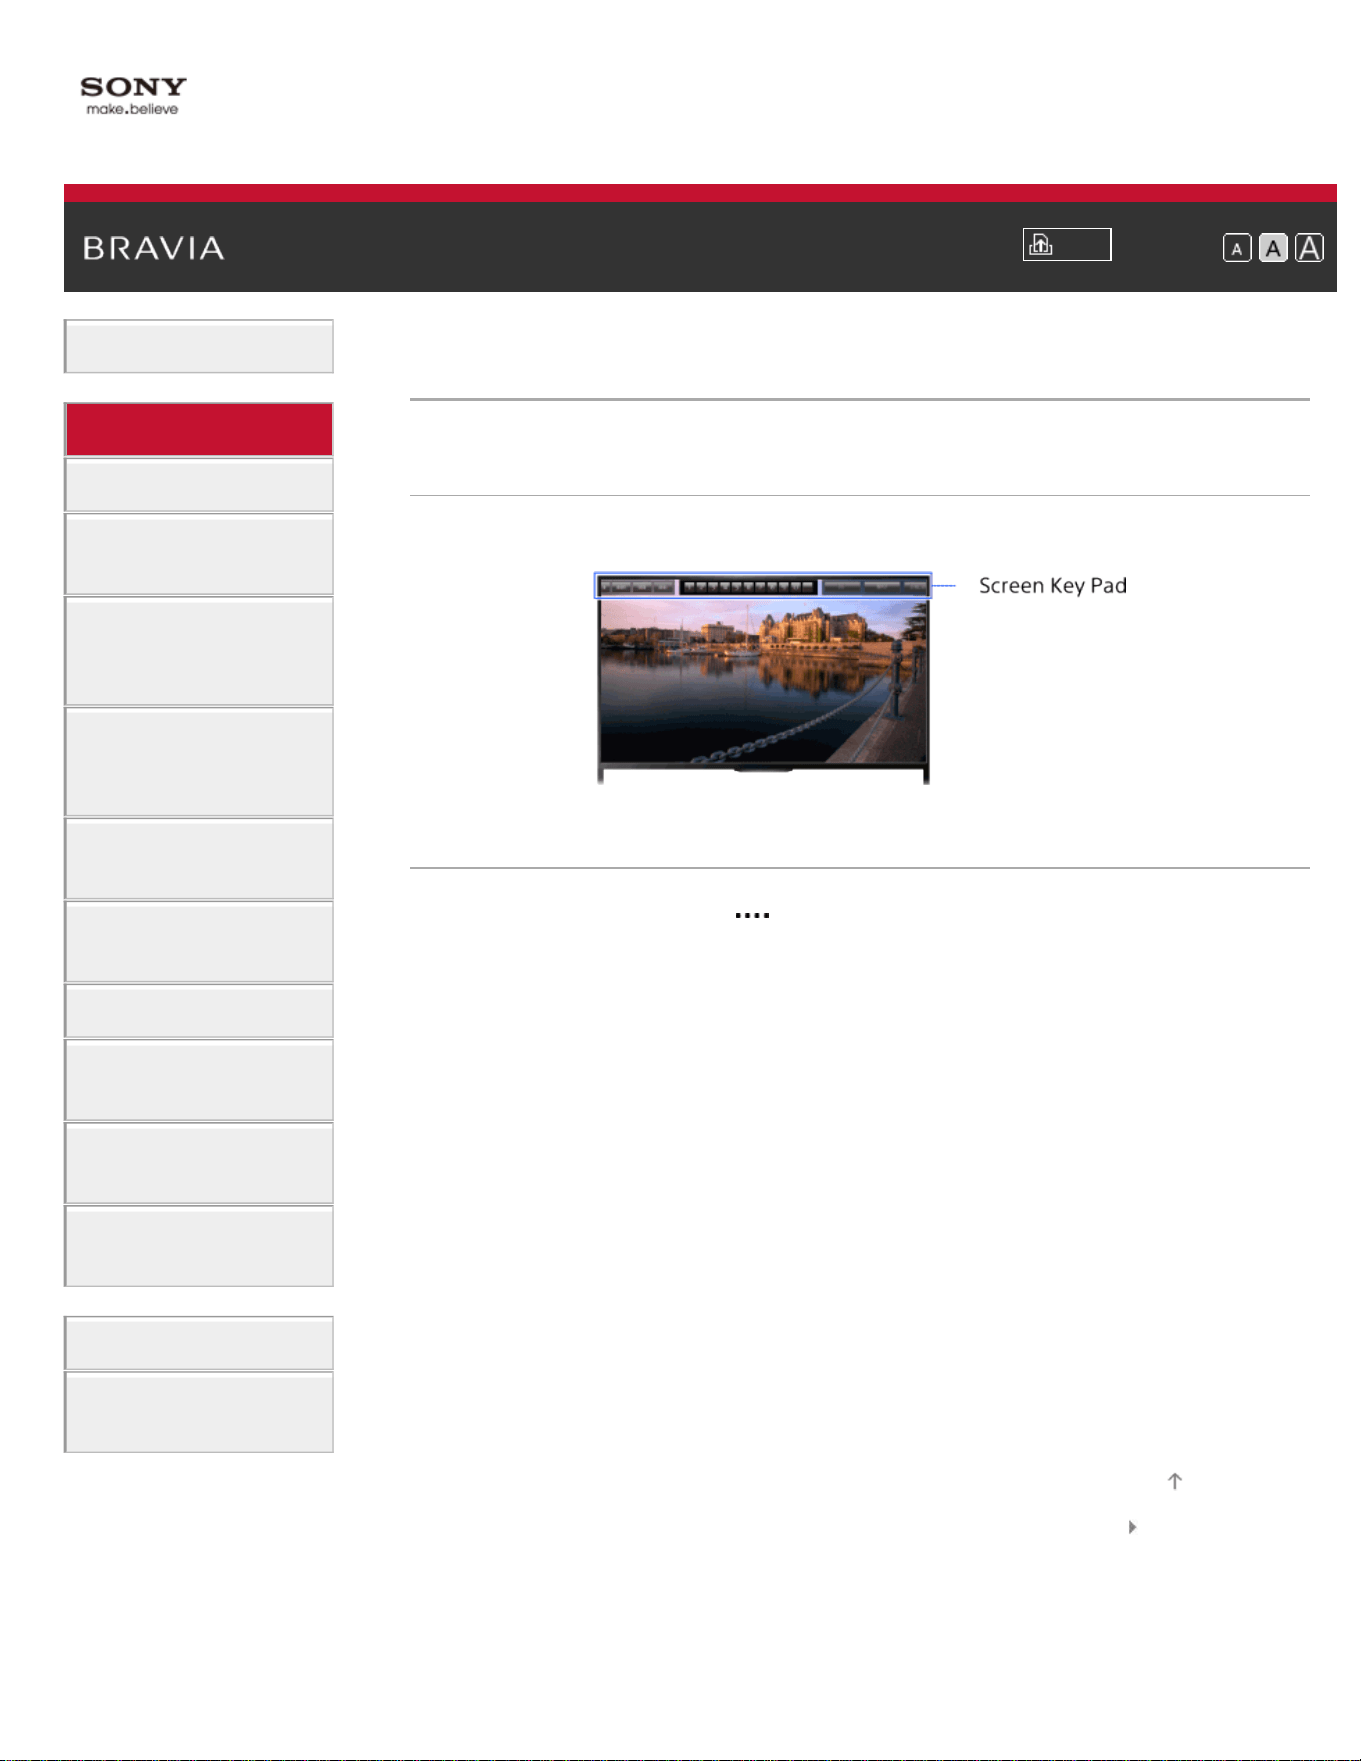
i-Manual
Print
Font Size
Basic Operations
Parts Description
Watching TV
Enjoying
Movies/Music/Photos
Using Internet
Services and
Applications
Watching TV with
Friends Far and
Near
Using Other
Devices
Using BRAVIA
Sync Devices
Useful Functions
Connecting to the
Internet
Using Home
Network
Configuring
Various Settings
Troubleshooting
How to Use
Bookmarks
Top Page > Parts Description > Displaying the Screen Key Pad
Displaying the Screen Key Pad
Overview
You can display the Screen Key Pad.
Steps
1.
Press the Control Bar ( ) on the Touchpad Remote Control.
The Screen Key Pad is displayed on the screen.
2. Slide left/right to select a button, then press the touchpad.
List of Contents© 2014 Sony Corporation
Top of Page
56
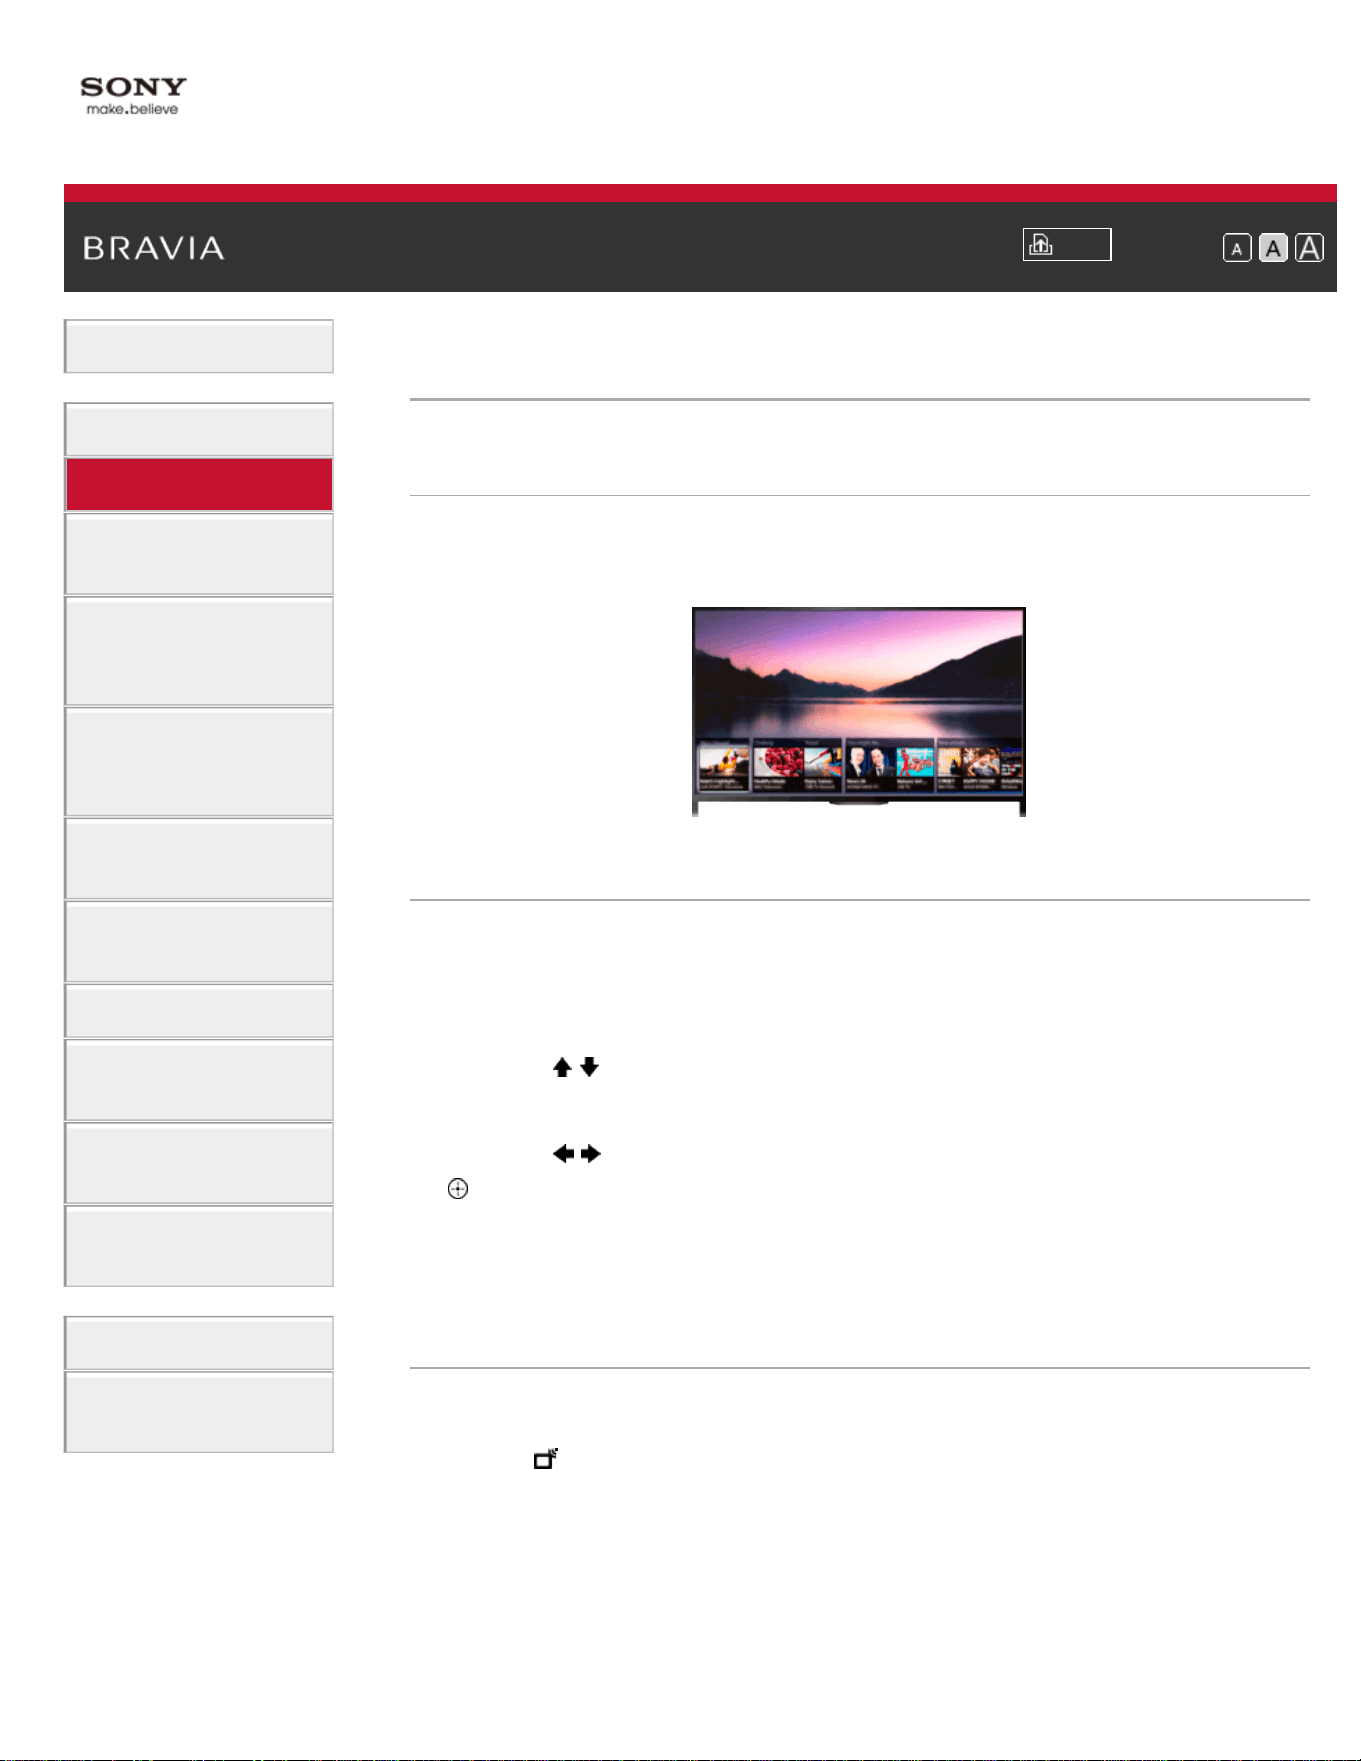
i-Manual
Print
Font Size
Basic Operations
Parts Description
Watching TV
Enjoying
Movies/Music/Photos
Using Internet
Services and
Applications
Watching TV with
Friends Far and
Near
Using Other
Devices
Using BRAVIA
Sync Devices
Useful Functions
Connecting to the
Internet
Using Home
Network
Configuring
Various Settings
Troubleshooting
How to Use
Bookmarks
Top Page > Watching TV > Selecting Channels
Selecting Channels
Overview
You can select channels using Discover, the Home Menu, or number
buttons.
Selecting channels using Discover
1.
Press the DISCOVER button to launch the Discover app.
(When using the Touchpad Remote Control, touch and slide up your
finger from the bottom area.)
2. Use the / buttons to select the desired TV broadcast system.
(When using the Touchpad Remote Control, flick up/down.)
3. Use the / buttons to select the desired thumbnail, then press the
button.
(When using the Touchpad Remote Control, slide left/right to
highlight the thumbnail, then press the touchpad to select.)
Selecting channels using the Home Menu
1.
Press the HOME button.
2. Select [Channel] at the top of the Home Menu.
3. Select the desired broadcast system using [Channel List] at the
bottom of the Home Menu.
4. Select the desired channel.
Selecting channels using the number buttons
57

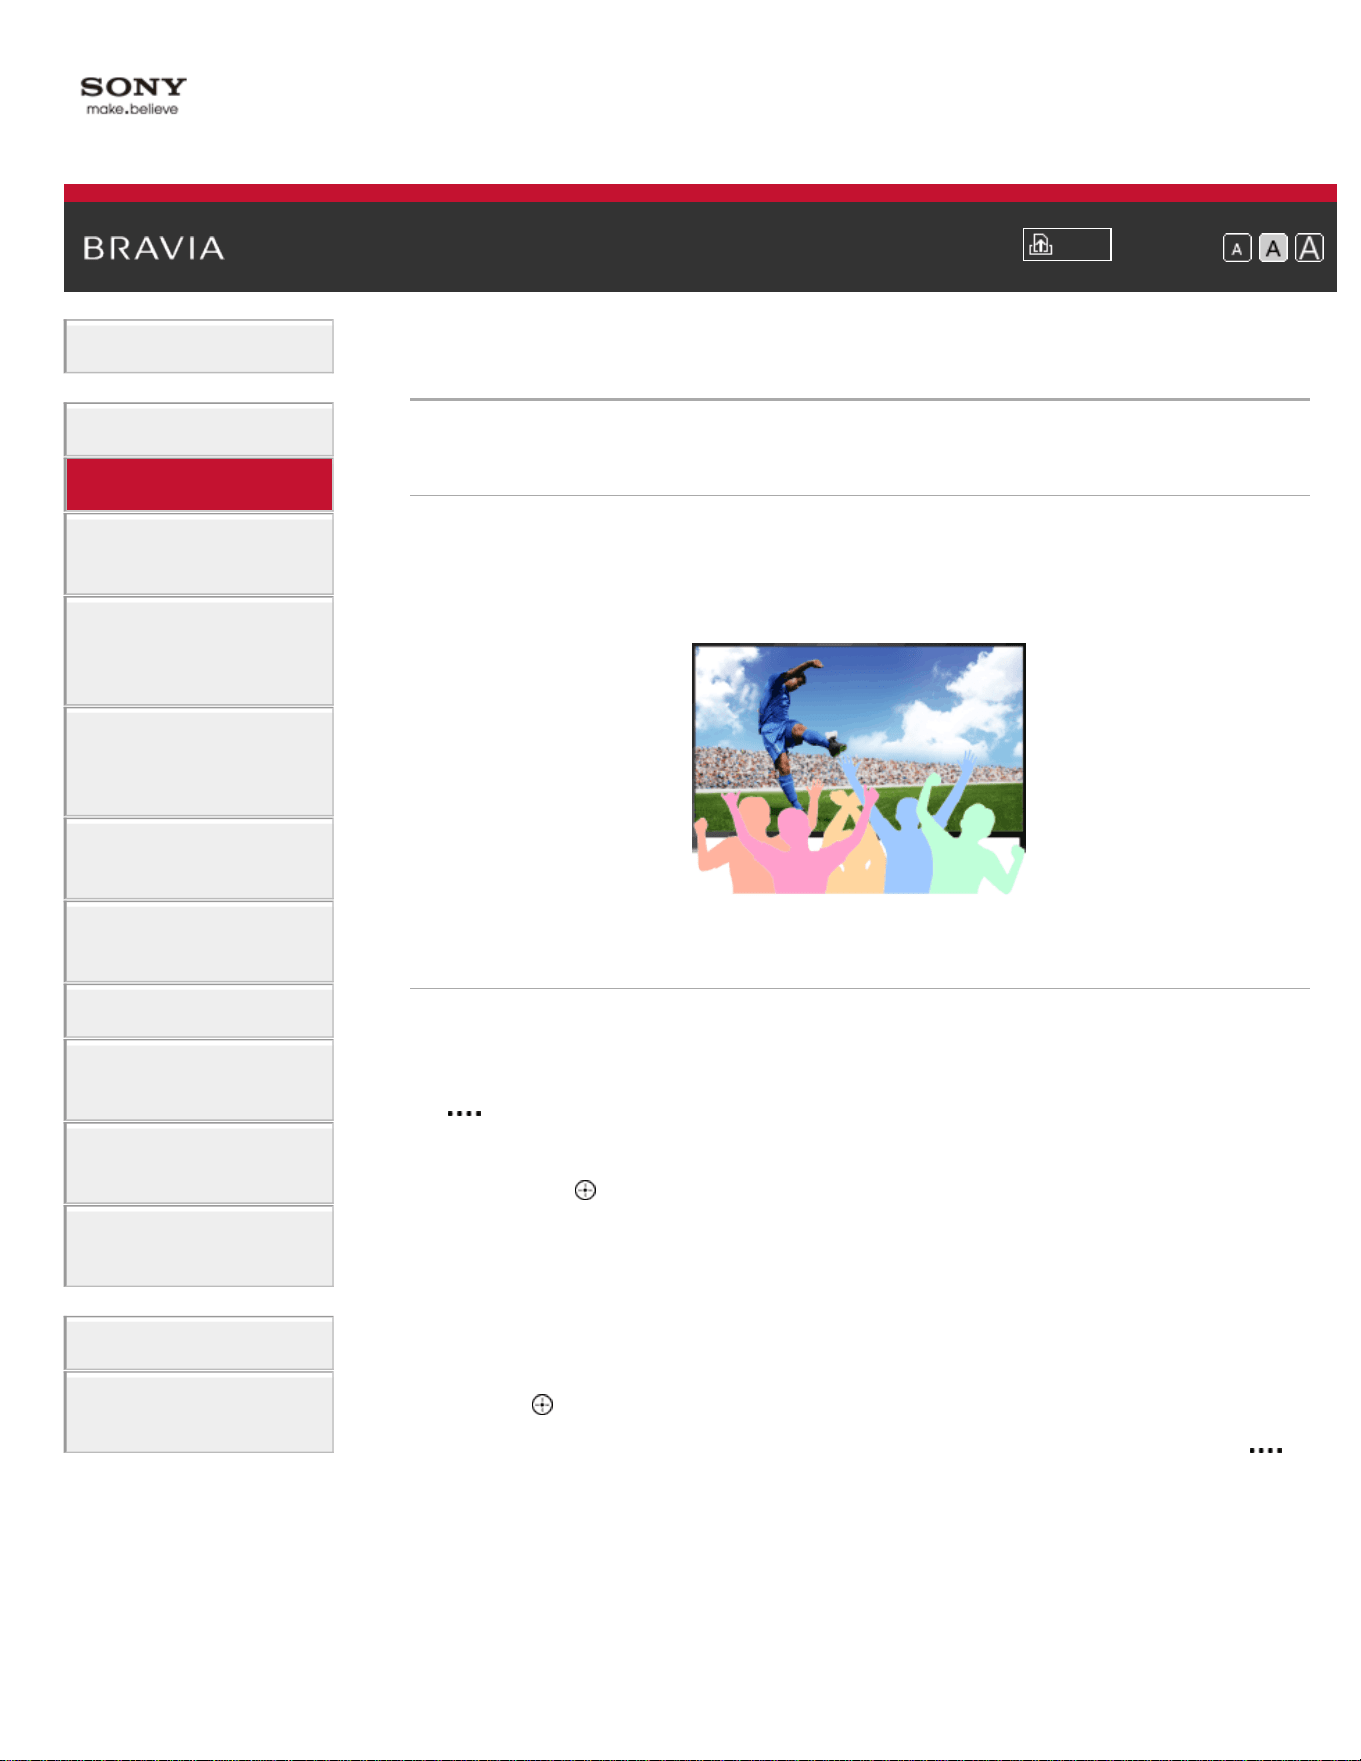
i-Manual
Print
Font Size
Basic Operations
Parts Description
Watching TV
Enjoying
Movies/Music/Photos
Using Internet
Services and
Applications
Watching TV with
Friends Far and
Near
Using Other
Devices
Using BRAVIA
Sync Devices
Useful Functions
Connecting to the
Internet
Using Home
Network
Configuring
Various Settings
Troubleshooting
How to Use
Bookmarks
Top Page > Watching TV > Enjoying Football More
Enjoying Football More
Overview
You can obtain more realistic picture and audio, as though you are
watching from the stands of the stadium. You can also view movies and
information related to football.
Steps
1.
Press the FOOTBALL button.
(When using the Touchpad Remote Control, press the Control Bar (
), slide the touchpad to highlight the FOOTBALL button, then
press the touchpad.)
2. Press the button.
(When using the Touchpad Remote Control, press the touchpad.)
The Live Football Mode is turned on. The roar of the crowd is
emphasized, and [Picture Mode] is set to [Vivid] or [Standard].
To turn off the Live Football Mode, press the FOOTBALL button, then
press the
button.
(When using the Touchpad Remote Control, press the Control Bar (
),
slide the touchpad to highlight the FOOTBALL button, press the
touchpad, then press the touchpad again.)
The Live Football Mode is turned off. [Scene Select] is restored to its
original state.
To view movies and information related to football
59

Press the FOOTBALL button, then select the desired service (such as
[Football Videos]).
(When using the Touchpad Remote Control, press the Control Bar (
),
slide the touchpad to highlight the FOOTBALL button, press the
touchpad, slide the touchpad to highlight the desired service, then press
the touchpad.)
An Internet connection is required to use this feature.
Services may be changed or discontinued without notice.
List of Contents© 2014 Sony Corporation
Top of Page
60
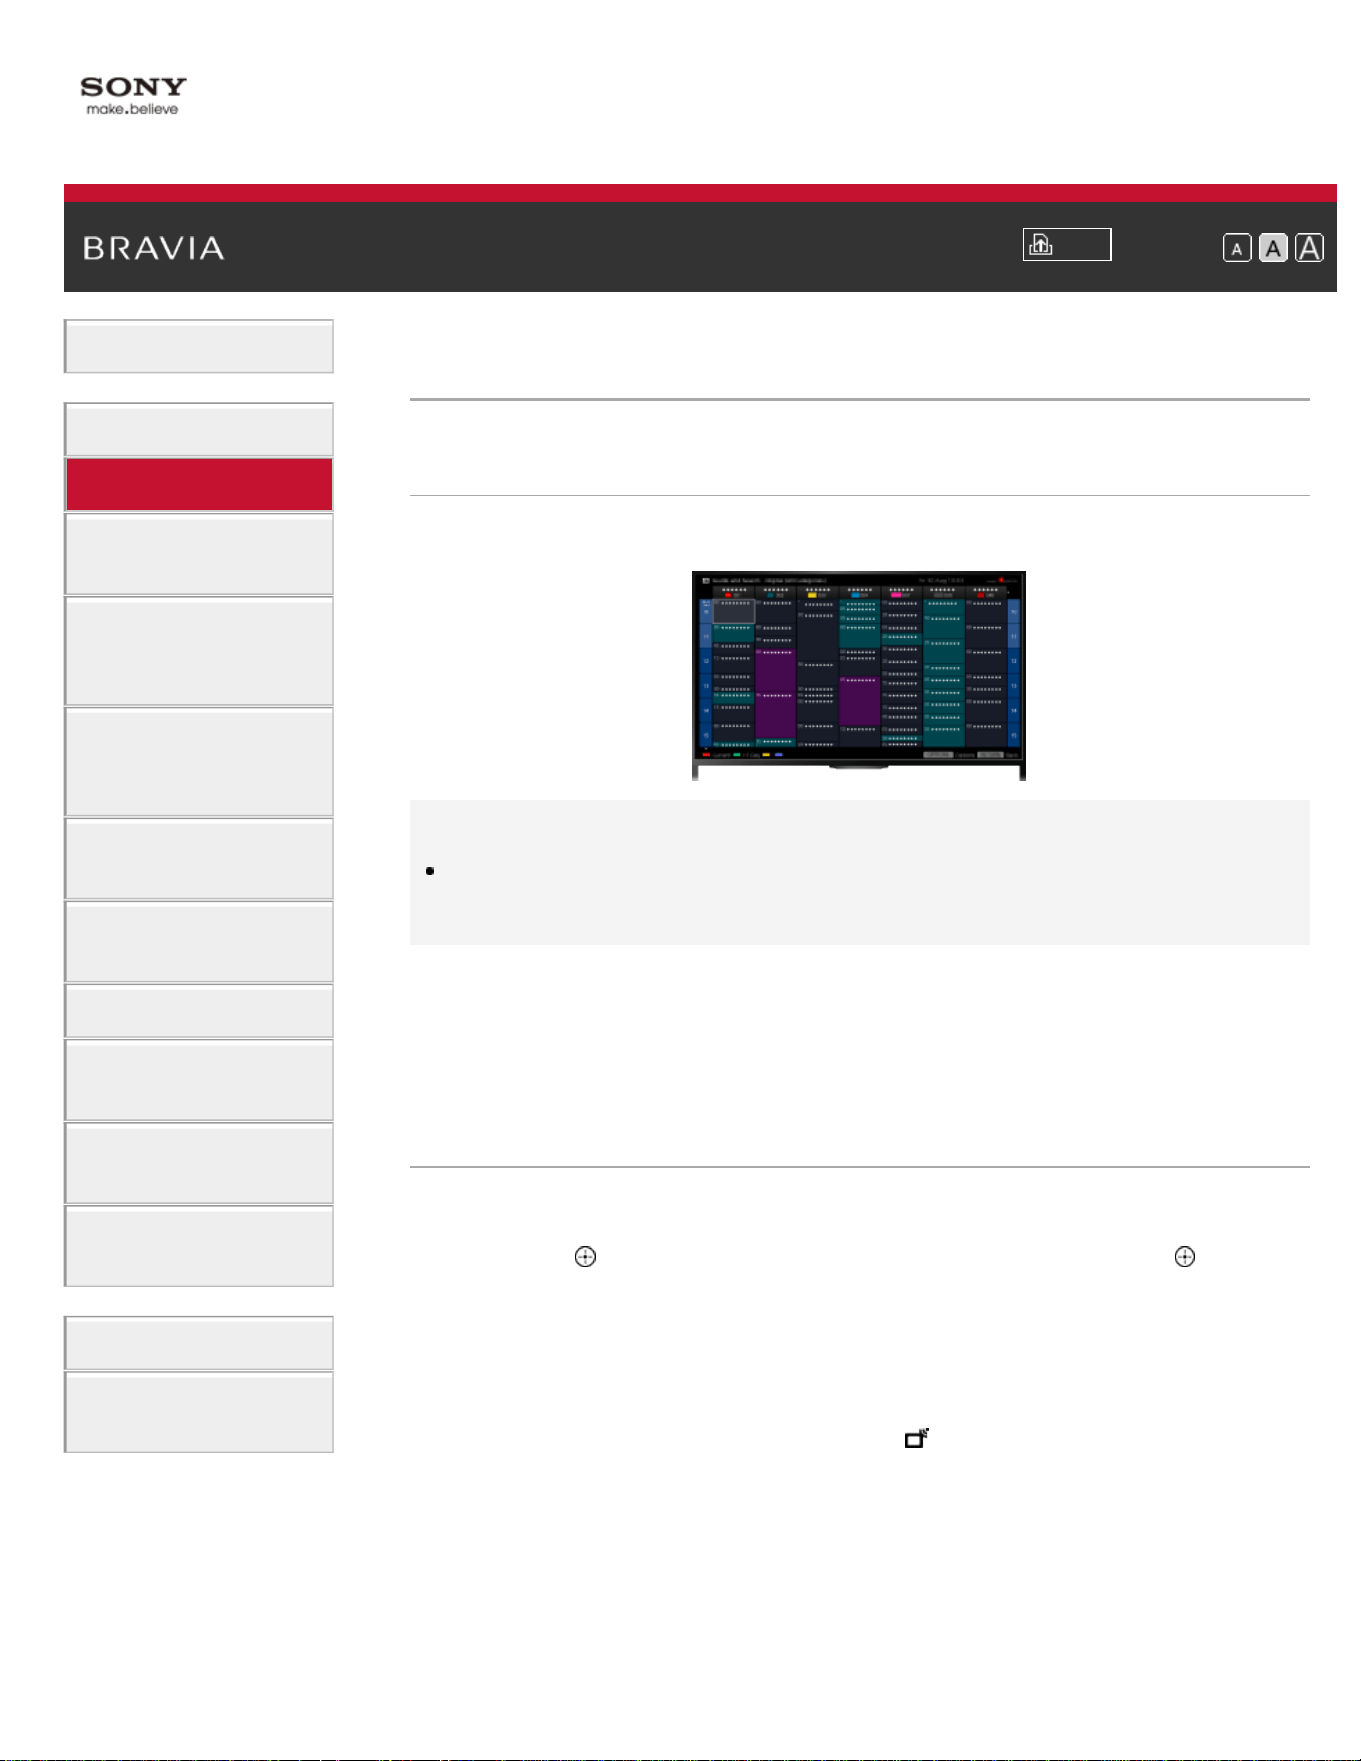
i-Manual
Print
Font Size
Basic Operations
Parts Description
Watching TV
Enjoying
Movies/Music/Photos
Using Internet
Services and
Applications
Watching TV with
Friends Far and
Near
Using Other
Devices
Using BRAVIA
Sync Devices
Useful Functions
Connecting to the
Internet
Using Home
Network
Configuring
Various Settings
Troubleshooting
How to Use
Bookmarks
Top Page > Watching TV > Using the TV Guide Search Function
Using the TV Guide Search Function
Overview
You can search for information on TV programs, and cast/crew details.
Tips
As of March 2014, this function is available in the following
regions/countries.
Czech Rep. / Denmark / Germany / Switzerland / Austria / United
Kingdom / Ireland / Spain / France / Italy / Netherlands / Belgium /
Luxembourg / Norway / Poland / Russia / Slovakia / Finland /
Sweden / New Zealand / Australia / United States / Canada / Brazil
Steps
1.
Connect to a broadband Internet connection.
Press the
button to jump to the title list. Then, press the button
again to go to “Connecting to the Internet” for details.
(When using the Touchpad Remote Control, press the touchpad.
Then, press the touchpad again to go to “Connecting to the Internet”
for details.)
2. Press the HOME button, then select [Channel].
3. Select [Guide].
Displays detailed information about TV programs.
To return to the last viewed source, press the RETURN button a few
times.
61

Notes
Guide and Search can launch only when [Cable/Antenna] is set to
[Antenna] or a set-top box via an IR Blaster is ready.
To search for TV programs by entering a keyword.
You can select [Program Search] from the Options menu to search for
TV programs by entering a keyword (title, etc.).
Tips
If the displayed channel differs from the selected channel, select [Assign
Channel] by pressing the OPTIONS button, then select the desired
channel from the channel list. If the desired channel is not in the list,
search by entering a keyword (broadcaster name). This function is not
available on channels on a set-top box.
While displaying the Program guide, by pressing the OPTIONS button,
you can switch between the Digital/Set-top box program guides.
Digital/Set-top box program guide switching is only available on IR
Blaster compatible models.
Notes
A TV program will appear blank if no data is contained in a channel.
Channel information may not be displayed correctly.
List of Contents© 2014 Sony Corporation
Top of Page
62
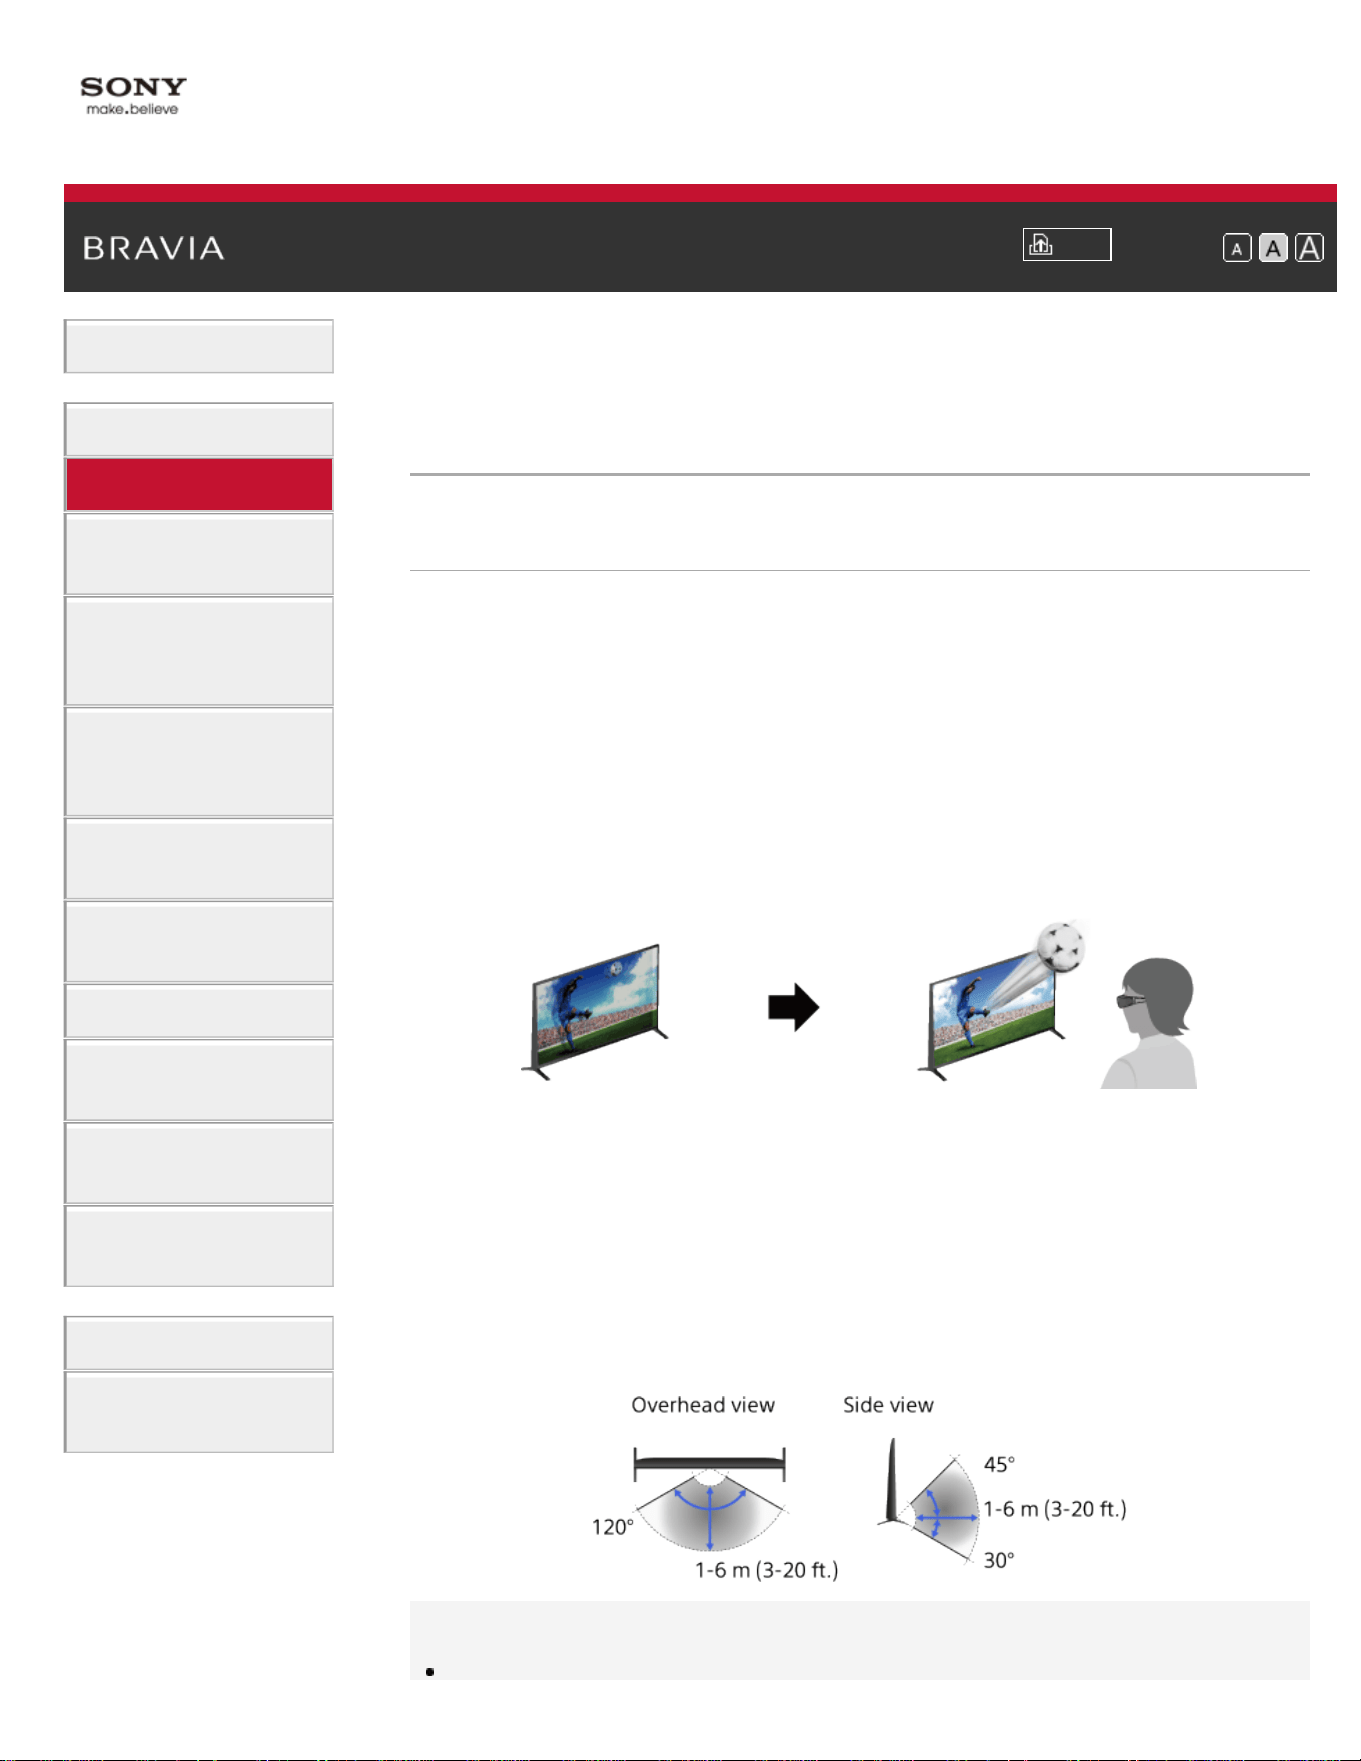
i-Manual
Print
Font Size
Basic Operations
Parts Description
Watching TV
Enjoying
Movies/Music/Photos
Using Internet
Services and
Applications
Watching TV with
Friends Far and
Near
Using Other
Devices
Using BRAVIA
Sync Devices
Useful Functions
Connecting to the
Internet
Using Home
Network
Configuring
Various Settings
Troubleshooting
How to Use
Bookmarks
Top Page > Watching TV > Watching in 3D
Watching in 3D
( This function is available depending on your
model/region/country.)
Overview
You can experience powerful 3D entertainment, such as stereoscopic
3D games and Blu-ray 3D Discs. You can also watch regular 2D
content with a 3D effect.
To watch in 3D, connect a 3D-compatible device directly to the TV via
an authorized HIGH SPEED HDMI cable bearing the HDMI logo.
Use of Active 3D Glasses with this TV requires registration in advance.
If you use the Active 3D Glasses with another TV, you will need to re-
register.
TV and Active 3D Glasses communication range
The preferred viewing position needs to be kept within the proper range.
See the following chart.
The recommended minimum viewing distance is 3 times the screen
height.
The working distance depends on obstacles (person, metal, walls, etc.)
and/or electromagnetic interference.
Tips
63
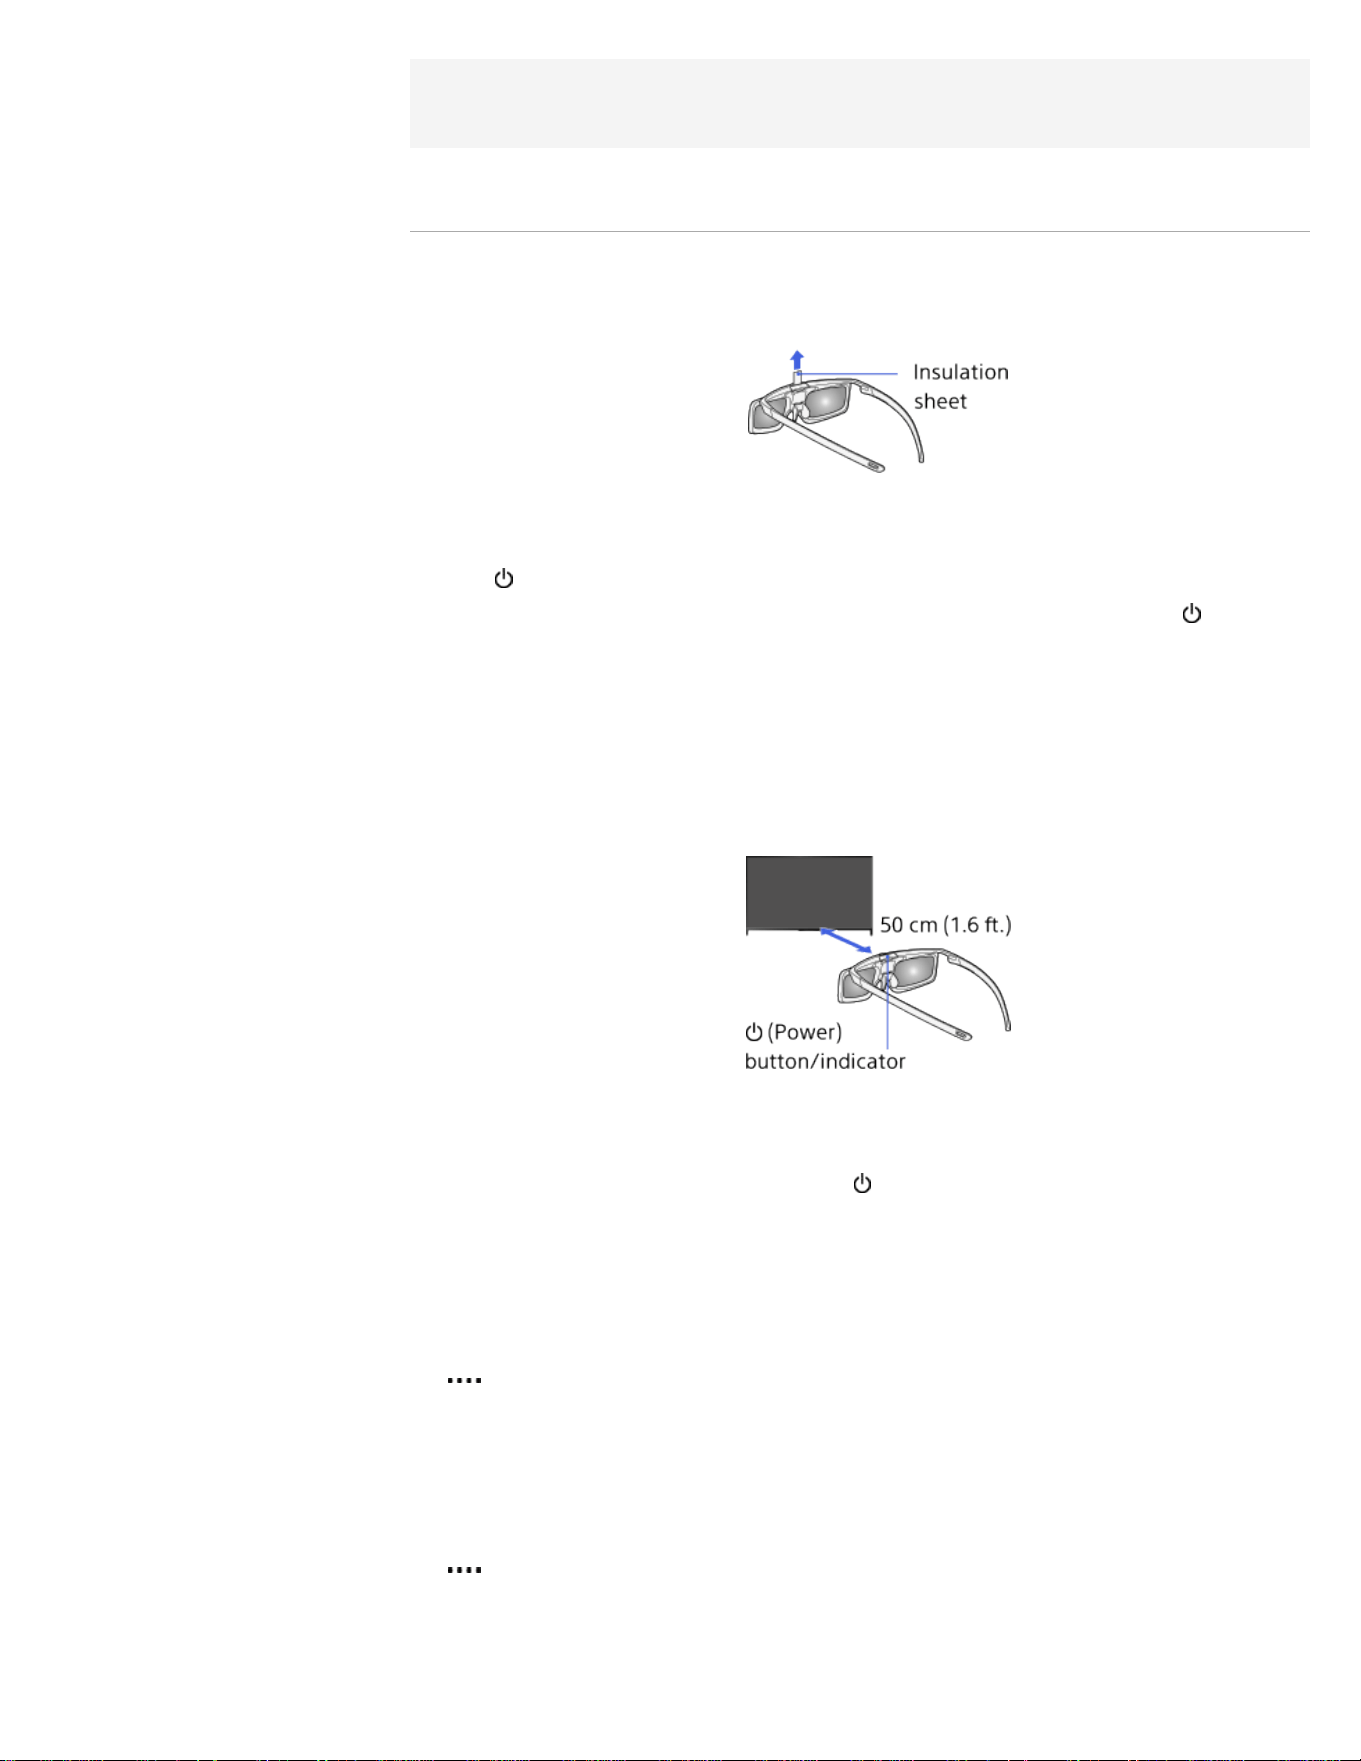
If you purchase the optional Active 3D Glasses, choose model TDG-
BT500A.
Steps
1.
When using the Active 3D Glasses for the first time, remove the
battery’s insulation sheet.
2. When using the Active 3D Glasses for the first time, hold the glasses
within 50 cm (1.6 ft.) of the TV, turn on the TV, then press and hold
the
(Power) button/indicator on the glasses for 2 seconds.
The Active 3D Glasses turn on and registration starts (The
(Power)
button/indicator blinks green and yellow). When registration is
finished, a message appears in the bottom right corner of the TV
screen for 5 seconds, and the indicator will light up in green for 3
seconds. This process is only required one time.
If registration fails, the Active 3D Glasses will turn off automatically.
In this case, repeat the above procedure.
3. Display the content to watch in 3D on the TV screen.
4. Put the Active 3D Glasses on.
While watching a 3D image, the
(Power) indicator blinks green
every 2 seconds.
If no 3D effect is achieved, perform the following steps.
5. Press the 3D button to display the [3D Display] screen.
(When using the Touchpad Remote Control, press the Control Bar (
), slide the touchpad to highlight the 3D button, then press the
touchpad to select.)
6. Press the 3D button repeatedly to select the [3D Display] mode to
suit the displayed content.
(When using the Touchpad Remote Control, press the Control Bar (
), slide the touchpad to highlight the 3D button, press the
touchpad, slide the touchpad to highlight the desired [3D Display]
mode, then press the touchpad.)
64
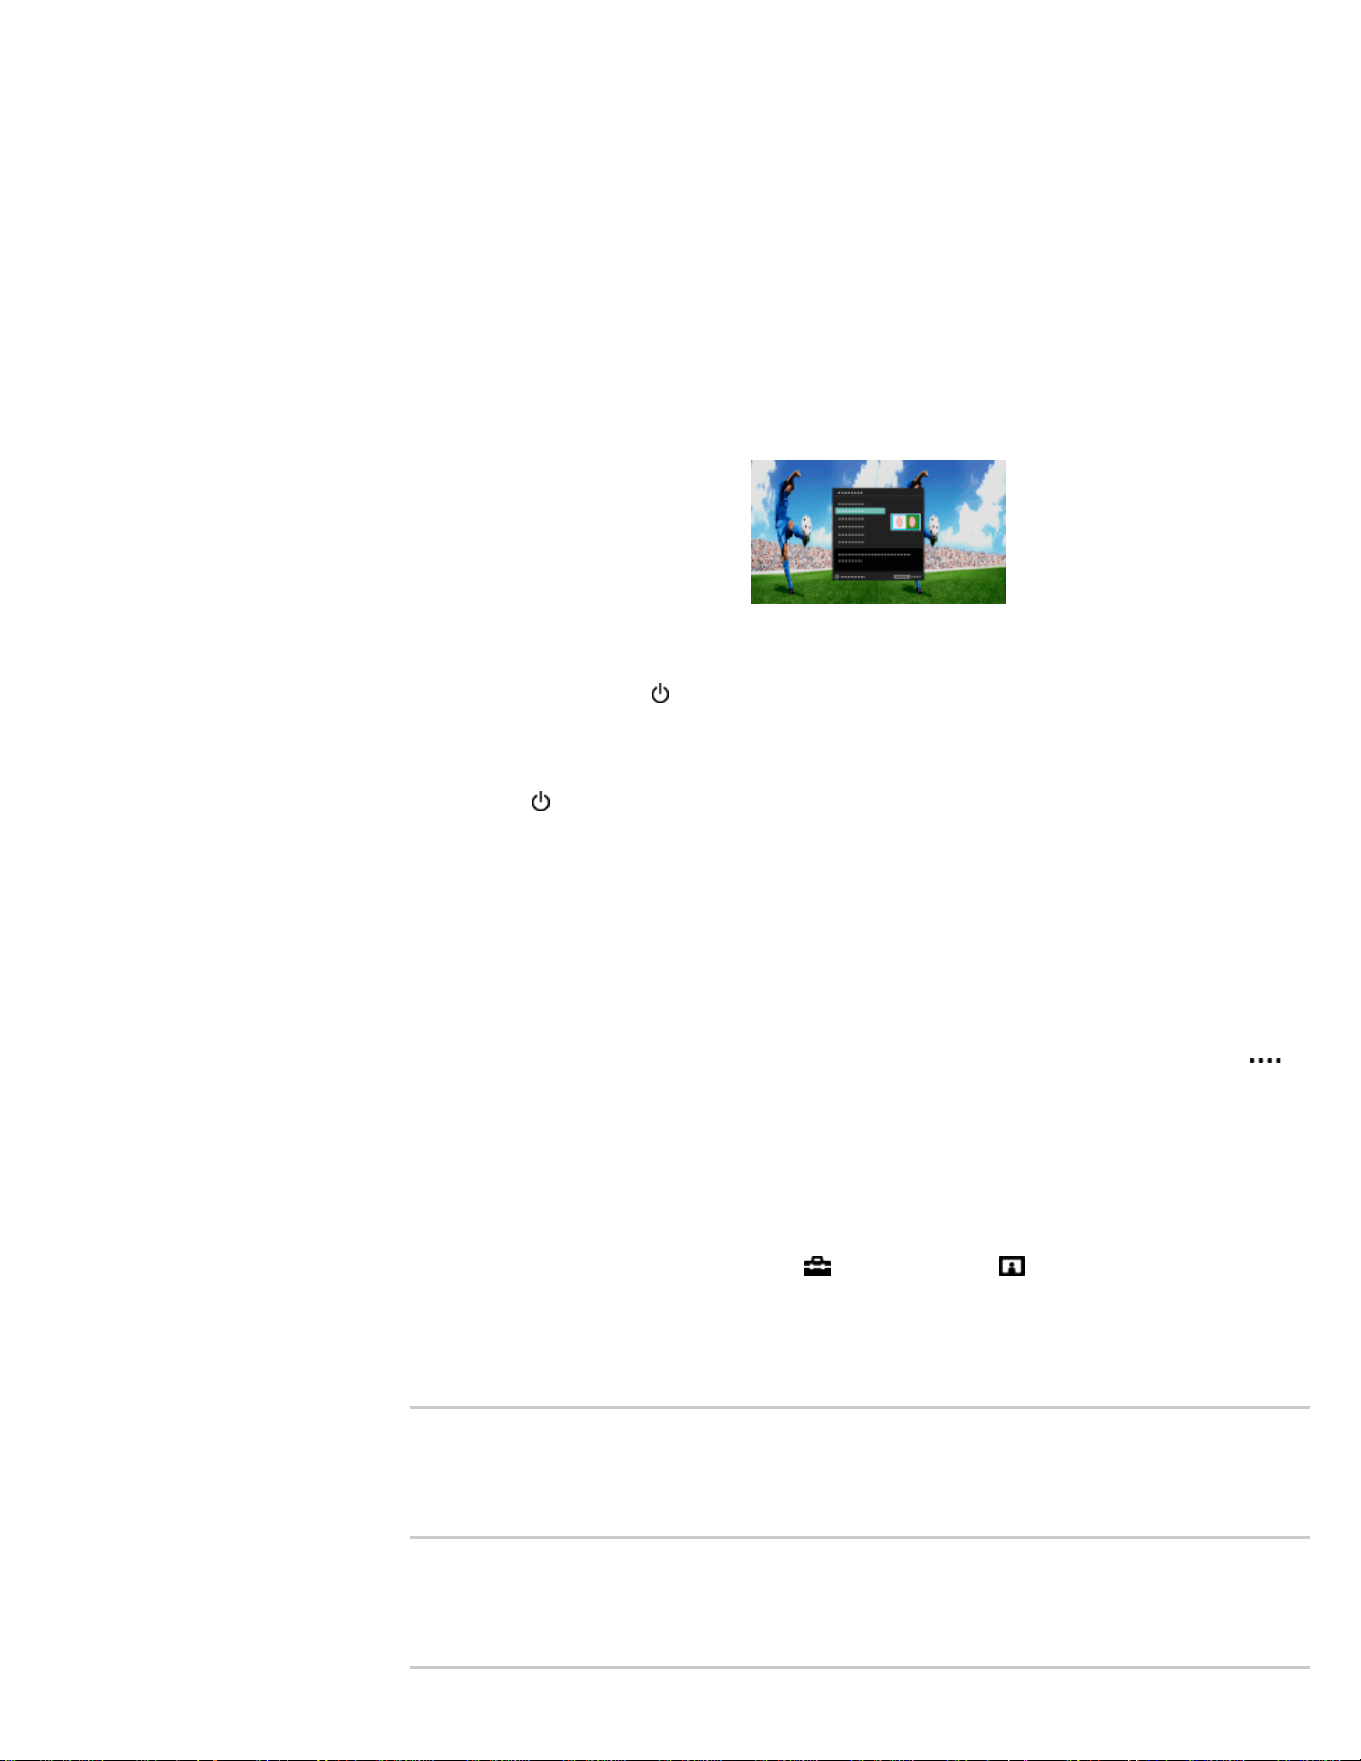
[3D (Side-by-Side)]: Displays side-by-side pictures in 3D.
[3D (Over-Under)]: Displays over-under pictures in 3D.
[3D (Simulated 3D)]: Displays regular 2D pictures in simulated 3D.
[2D (Left-Only)]: When the same picture is side-by-side, the left side
picture is shown expanded, in 2D.
[2D (Top-Only)]: When the same picture is over-under, the upper
picture is shown expanded, in 2D.
Depending on the input signal or format, [3D (Side-by-Side)]/[3D
(Over-Under)]/[2D (Left-Only)]/[2D (Top-Only)] may not be
selectable.
To turn off the Active 3D Glasses
Press down on the (power) button of the Active 3D Glasses for 2
seconds. If no signal from the TV is detected for more than 1 minute,
the Active 3D Glasses will turn off automatically. To turn them on again,
press the (power) button.
To use the Active 3D Glasses with another TV
It is required to re-register the Active 3D Glasses. Turn off the Active 3D
Glasses, then perform step 2.
To deactivate the 3D effect
Press the 3D button repeatedly to select [Off] in [3D Display].
(When using the Touchpad Remote Control, press the Control Bar (
),
slide the touchpad to highlight the 3D button, press the touchpad, slide
the touchpad to highlight [Off] in [3D Display], then press the touchpad.)
To adjust the 3D settings
You can adjust the following 3D settings.
Press the HOME button, select
[Settings] → [Picture & Display] →
[3D Settings] → the desired option.
[3D Display]
Opens [3D Display] to switch the display modes.
[3D Depth Adjustment]
Adjusts the depth of 3D pictures on the screen (available only for
content with 3D signals). You can manually set the adjustment value.
[Simulated 3D Effect]
Heightens/lessens the 3D effect when you display 2D pictures in
simulated 3D.
65
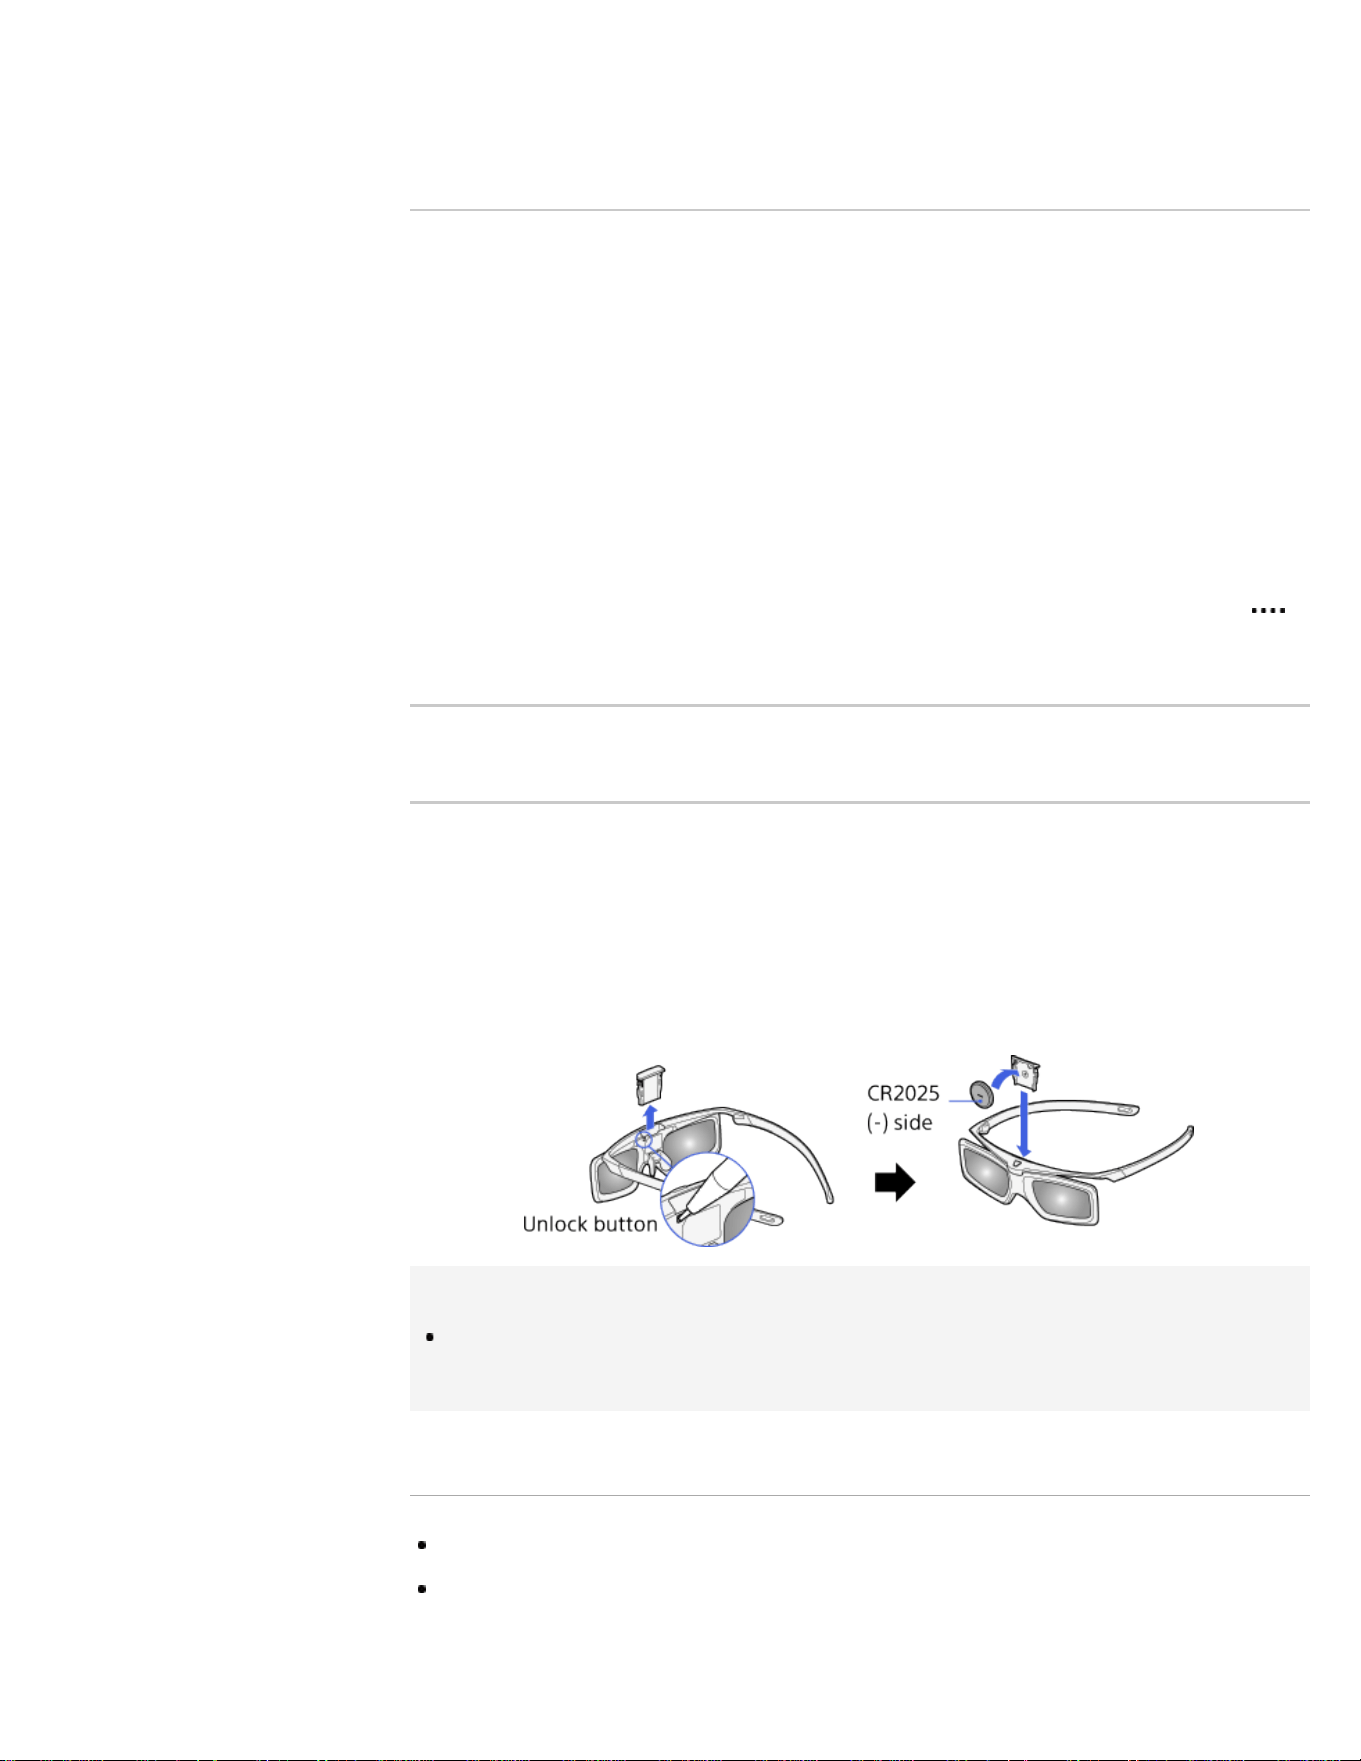
[3D Glasses Brightness]
Sets the image brightness when using the 3D display mode. By
selecting [Auto], image brightness through the Active 3D Glasses is
automatically adjusted in conjunction with the [Picture Mode] setting.
[Auto 3D]
Select [Auto 1] to switch the 3D display mode automatically when a 3D
signal is detected.
If no 3D signal is detected, select [Auto 2], which will analyze the image
for 3D information and switch the 3D display mode automatically.
Select [Off] to prevent the 3D display mode from being automatically
selected.
Depending on the input signal or format, the 3D display mode may not
switch automatically.
In such a case, press the 3D button to select the 3D display mode
manually.
(When using the Touchpad Remote Control, press the Control Bar (
),
slide the touchpad to highlight the 3D button, then press the touchpad to
select.)
[3D Signal Notification]
Notifies when a 3D signal is detected.
To replace the battery
If the LED indicates low battery power (indicator blinks green 3 times
every 2 seconds), replace the battery. Use a CR2025 battery only.
Press the unlock button with the tip of a pen, etc, and take out the
battery case, then replace the battery with a new one. After that, be
sure to lock the battery case again.
Tips
If you wear glasses, remove the nose pad from the Active 3D Glasses by
pulling it down, then wear them over your glasses.
Notes
3D effect is available only when pictures are displayed in full screen.
If [Motionflow] is set to other than [Off], the smooth movement of the
picture may be lost as the picture process to minimize screen flicker is
applied. In such a case, set [Motionflow] to [Off] to display the original
66

picture.
Recommended viewing angle and distance may vary depending on the
TV’s location and room conditions.
Simulated 3D effect may be less pronounced with some picture sources.
Perceived simulated 3D effect may vary from person to person.
Maintenance of your glasses
- Wipe the glasses gently with a soft cloth.
- Stubborn stains may be removed with a cloth slightly moistened with a
solution of mild soap and warm water.
- If using a chemically pretreated cloth, be sure to follow the instructions
provided on the package.
- Never use strong solvents such as a thinner, alcohol or benzene for
cleaning.
List of Contents© 2014 Sony Corporation
Top of Page
67
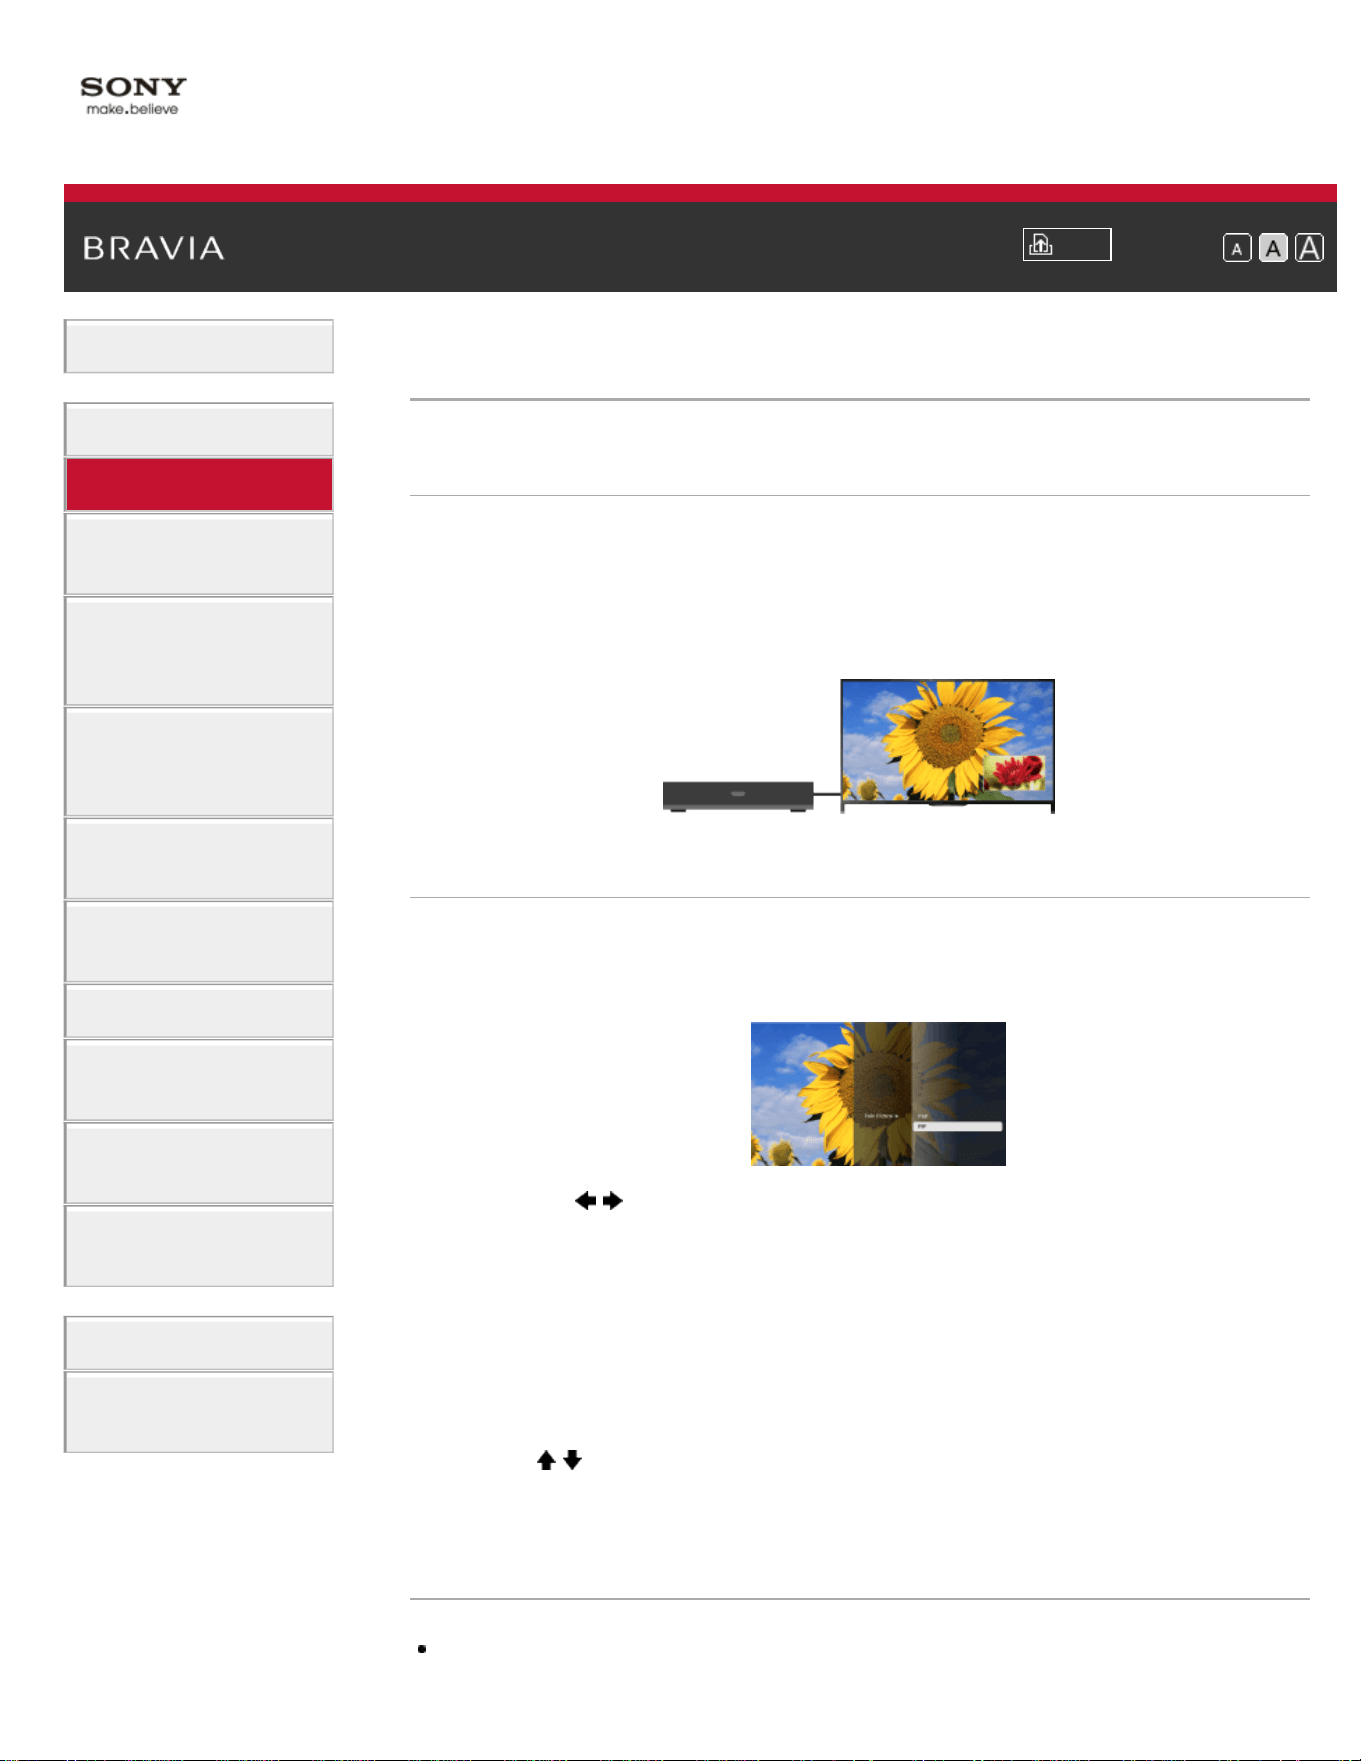
i-Manual
Print
Font Size
Basic Operations
Parts Description
Watching TV
Enjoying
Movies/Music/Photos
Using Internet
Services and
Applications
Watching TV with
Friends Far and
Near
Using Other
Devices
Using BRAVIA
Sync Devices
Useful Functions
Connecting to the
Internet
Using Home
Network
Configuring
Various Settings
Troubleshooting
How to Use
Bookmarks
Top Page > Watching TV > Displaying picture-in-picture (PIP)
Displaying picture-in-picture (PIP)
Overview
You can watch two pictures (main and sub) simultaneously. The main
picture can be displayed in full screen, and the sub picture can be
displayed in an inset window (e.g. HDMI input (PC format) and TV
program).
Steps
1.
Press the OPTIONS button, then select [Twin Picture].
If the displayed source is other than a PC, select [PIP].
2. Press the / buttons to switch the audio output between the two
pictures.
(When using the Touchpad Remote Control, slide left/right to switch
the audio output.)
To exit the PIP mode, press the RETURN button.
To move the inset window
Press the / buttons.
(When using the Touchpad Remote Control, slide up/down.)
Available Combinations of Two Pictures
When the main picture source is a TV program or video input, the sub
68

picture source can be:
- HDMI input (video format)
When the main picture source is an HDMI input (video format or PC
format), the sub picture source can be:
- TV program
- Video input
Notes
If two pictures with different vertical frequency signals (e.g. a picture in full
screen with 24p and a picture in an inset window with 60i) are displayed
simultaneously, the smooth movement of the picture in the inset window
may be lost.
If [Motionflow] is set to other than [Impulse]/[Off], the smooth movement of
the picture in an inset window may be lost. (For [Motionflow] compatible
models only.) To remedy this, set to [Off]. Press the OPTIONS button,
then select [Picture Adjustments] → [Motionflow] → [Off].
List of Contents© 2014 Sony Corporation
Top of Page
69
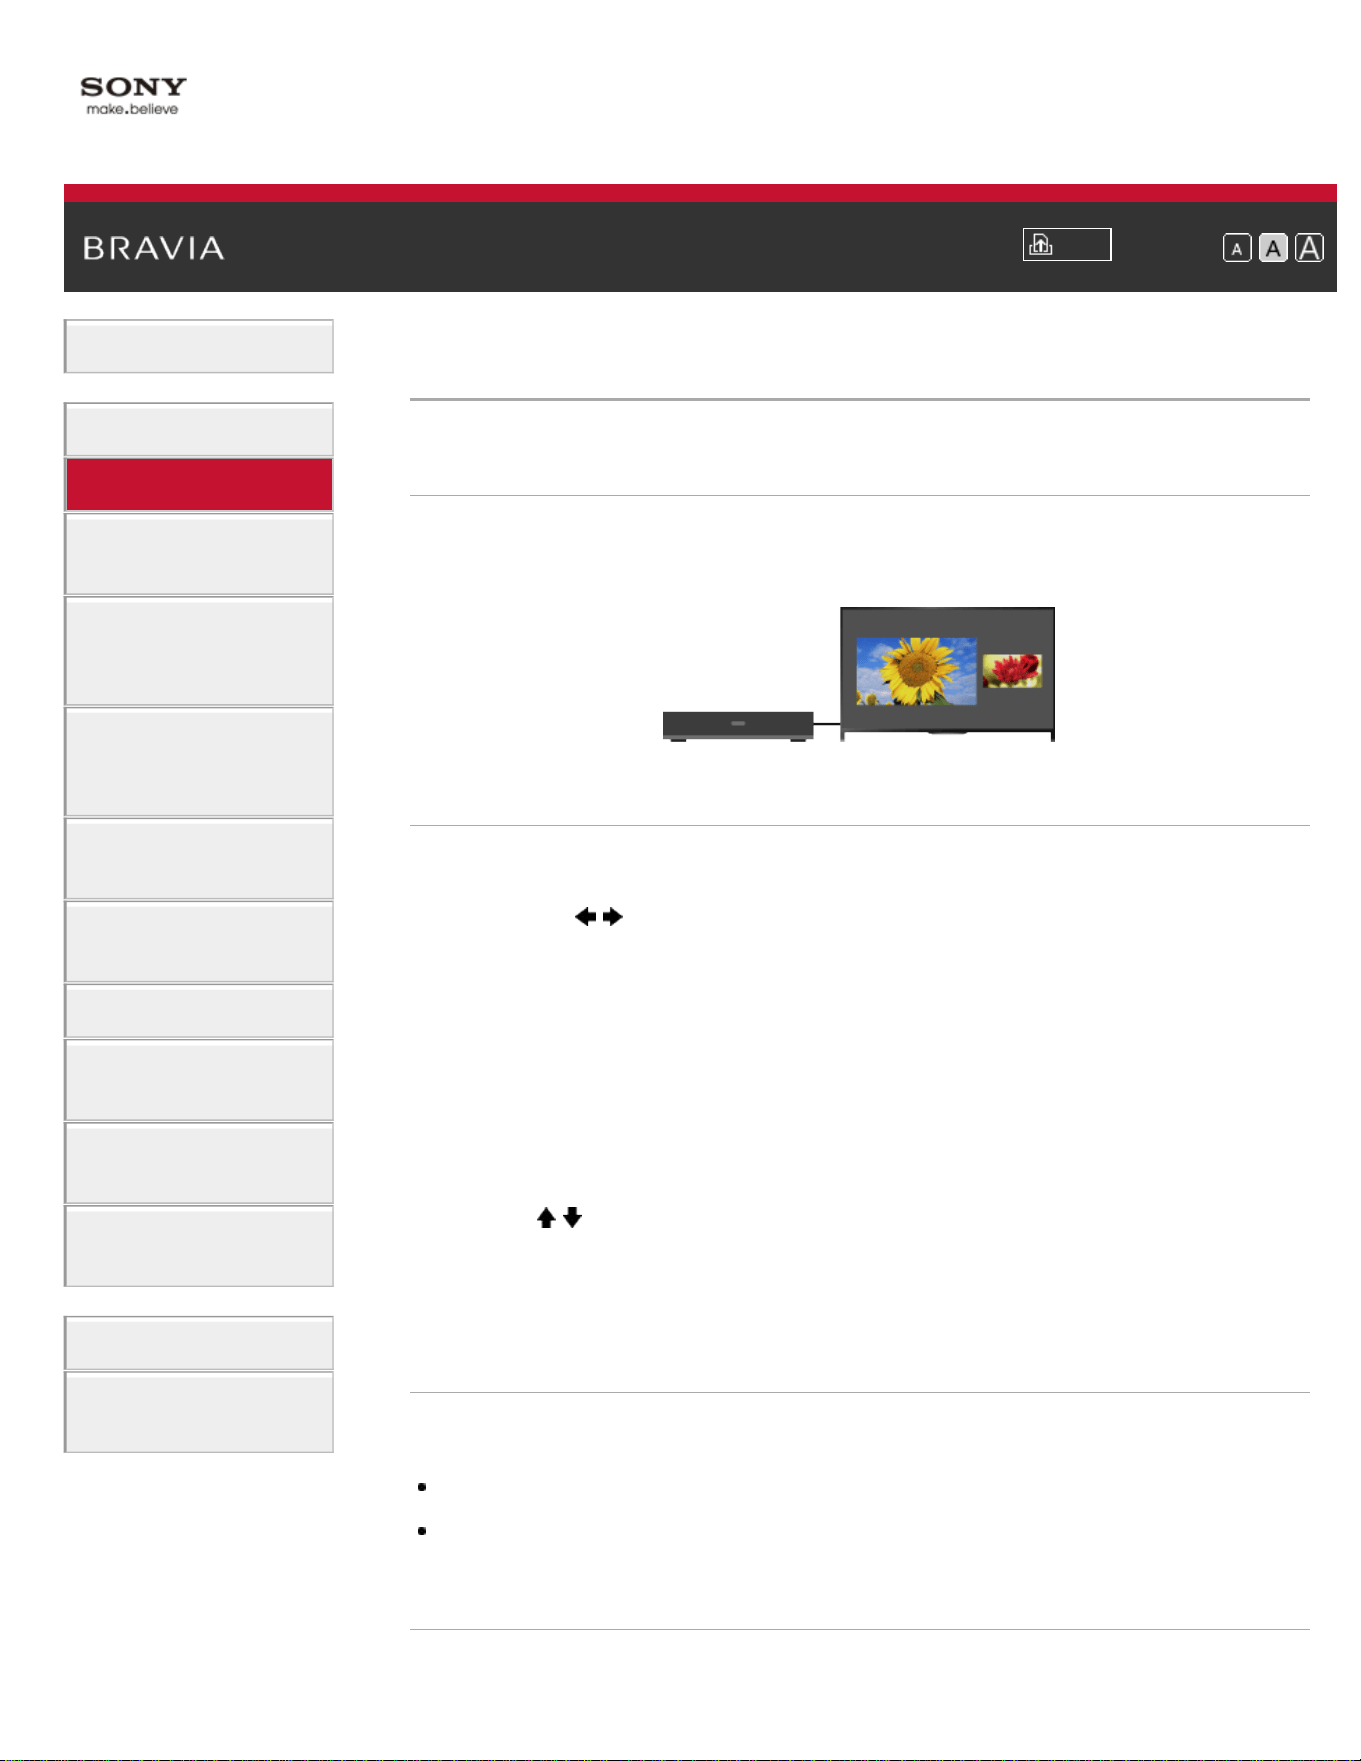
i-Manual
Print
Font Size
Basic Operations
Parts Description
Watching TV
Enjoying
Movies/Music/Photos
Using Internet
Services and
Applications
Watching TV with
Friends Far and
Near
Using Other
Devices
Using BRAVIA
Sync Devices
Useful Functions
Connecting to the
Internet
Using Home
Network
Configuring
Various Settings
Troubleshooting
How to Use
Bookmarks
Top Page > Watching TV > Displaying left-and-right pictures (P&P)
Displaying left-and-right pictures (P&P)
Overview
You can watch two pictures (left and right) simultaneously (e.g.
connected device and TV program).
Steps
1.
Press the OPTIONS button, then select [Twin Picture] → [P&P].
2. Press the / buttons to switch the audio output between the two
pictures.
(When using the Touchpad Remote Control, slide left/right to switch
the audio output.)
The highlighted picture is audible.
To exit the P&P mode, press the RETURN button.
To change the picture size
Press the / buttons repeatedly to change the size.
(When using the Touchpad Remote Control, slide up/down repeatedly to
change the size.)
Available Combinations of Two Pictures
(Left and right, or vice versa)
TV program and HDMI input (video format)
Video input and HDMI input (video format)
Notes
70

This function is not available with PC format signals.
If two pictures with different vertical frequency signals (e.g. a left picture
with 24p and a right picture with 60i) are displayed side-by-side, the
smooth movement of the right picture may be lost.
List of Contents© 2014 Sony Corporation
Top of Page
71

i-Manual
Print
Font Size
Basic Operations
Parts Description
Watching TV
Enjoying
Movies/Music/Photos
Using Internet
Services and
Applications
Watching TV with
Friends Far and
Near
Using Other
Devices
Using BRAVIA
Sync Devices
Useful Functions
Connecting to the
Internet
Using Home
Network
Configuring
Various Settings
Troubleshooting
How to Use
Bookmarks
Top Page > Watching TV > Display information
Display information
Steps
While watching a program, press the DISPLAY button.
(When using the Touchpad Remote Control, press the Control Bar (
),
slide the touchpad to highlight the DISPLAY button, then press the
touchpad to select.)
The information about the current channel/program/input appears. The
information will time out in a few seconds or press the DISPLAY button
again to exit.
(When using the Touchpad Remote Control, press the Control Bar (
),
slide the touchpad to highlight the DISPLAY button, then press the
touchpad to select.)
List of Contents© 2014 Sony Corporation
Top of Page
72

i-Manual
Print
Font Size
Basic Operations
Parts Description
Watching TV
Enjoying
Movies/Music/Photos
Using Internet
Services and
Applications
Watching TV with
Friends Far and
Near
Using Other
Devices
Using BRAVIA
Sync Devices
Useful Functions
Connecting to the
Internet
Using Home
Network
Configuring
Various Settings
Troubleshooting
How to Use
Bookmarks
Top Page > Watching TV > Subtitles/Closed captions
Subtitles/Closed captions
Steps
While watching a program with subtitles/closed captions, press the
CC/SUBTITLE button to turn the subtitles/closed captions on or off.
(When using the Touchpad Remote Control, press the Control Bar ( ),
slide the touchpad to highlight the CC/SUBTITLE button, then press the
touchpad to select.)
List of Contents© 2014 Sony Corporation
Top of Page
73
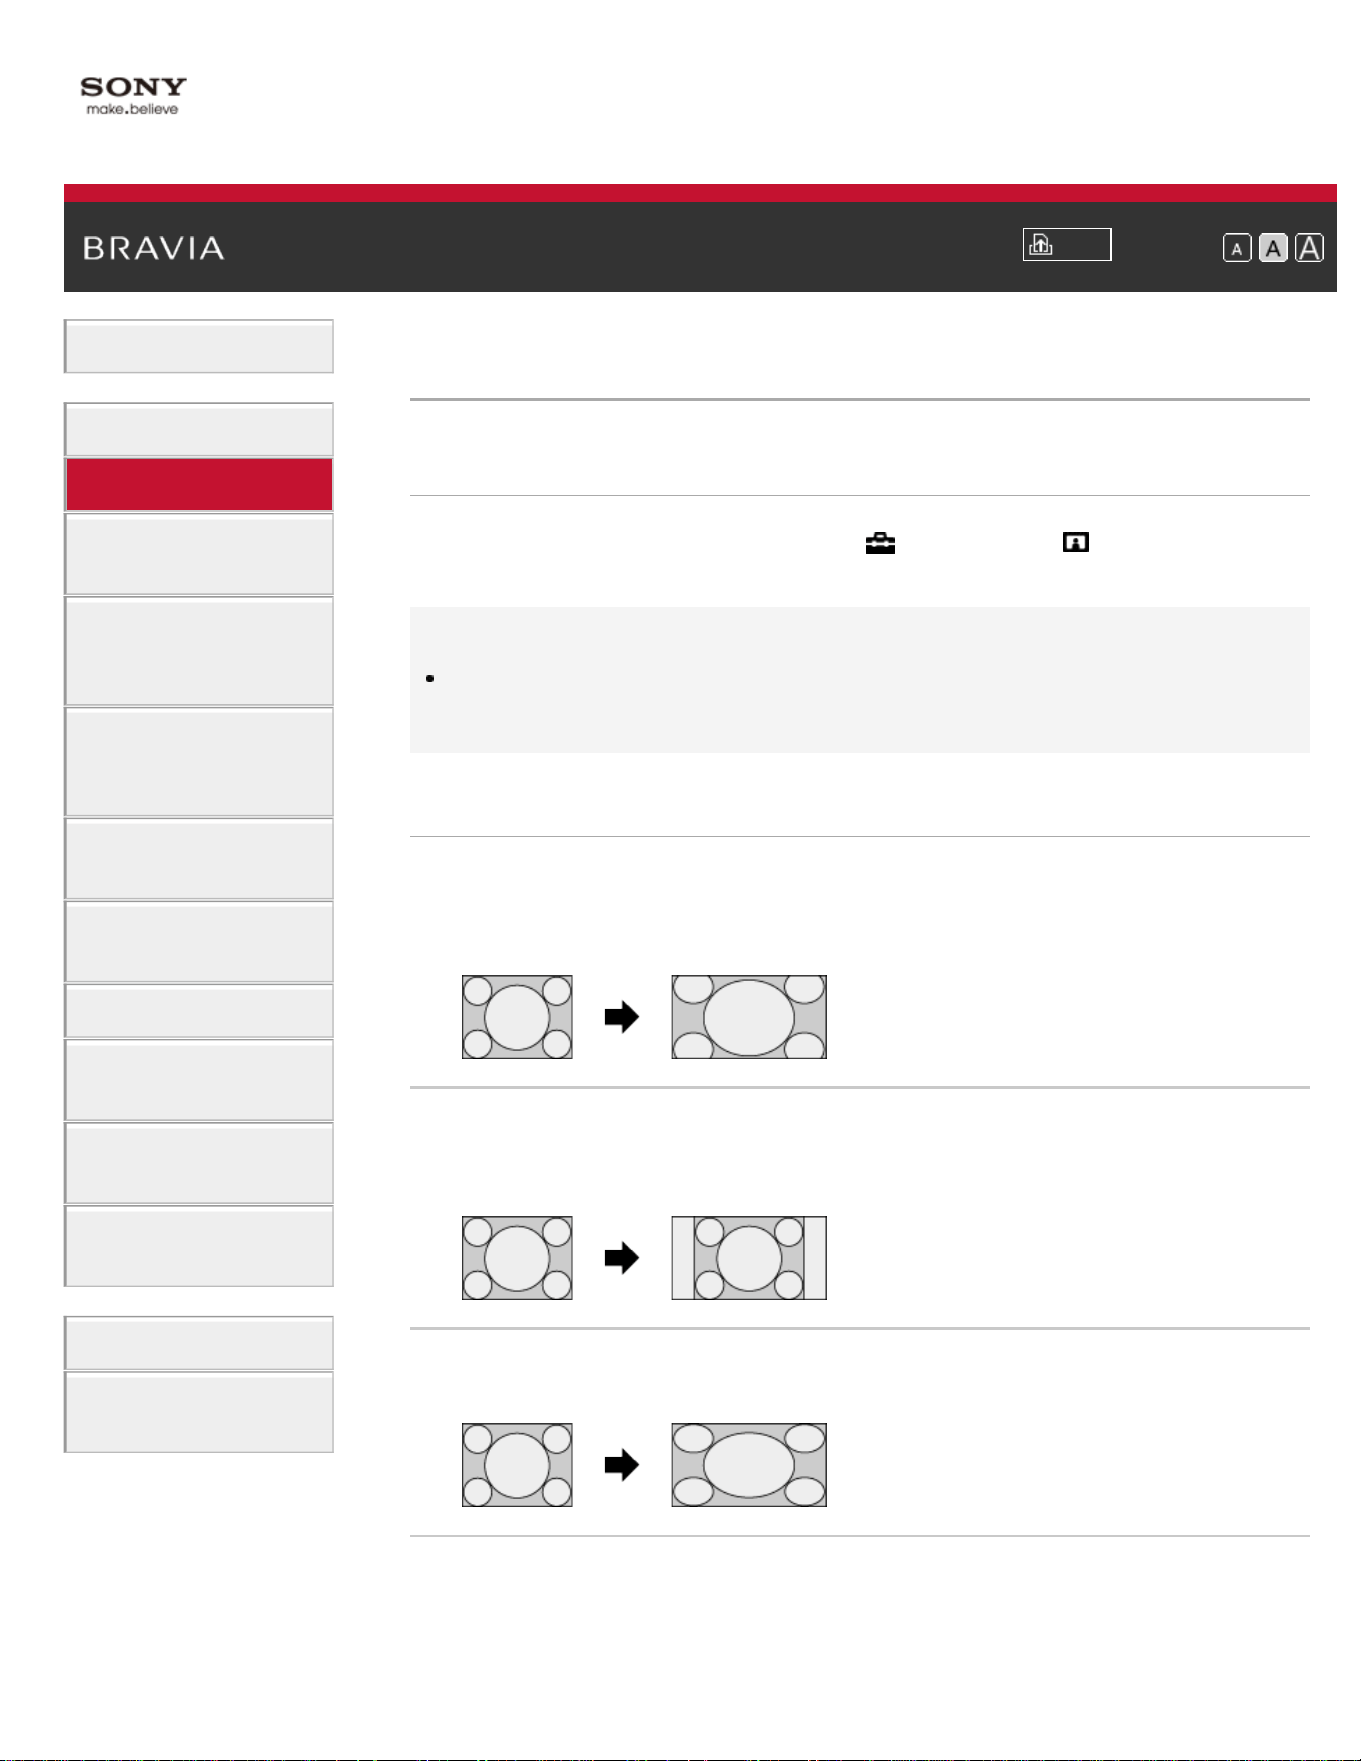
i-Manual
Print
Font Size
Basic Operations
Parts Description
Watching TV
Enjoying
Movies/Music/Photos
Using Internet
Services and
Applications
Watching TV with
Friends Far and
Near
Using Other
Devices
Using BRAVIA
Sync Devices
Useful Functions
Connecting to the
Internet
Using Home
Network
Configuring
Various Settings
Troubleshooting
How to Use
Bookmarks
Top Page > Watching TV > Screen format/Wide mode
Screen format/Wide mode
Steps
Press the HOME button, then select [Settings] →
[Picture & Display] → [Screen] → [Wide Mode] → the desired option.
Tips
Based on the original signal source, a black frame or black bars may
surround the picture.
Available Options (4:3 Original Source)
[Wide Zoom]
Enlarges the picture to fill a 16:9 screen, preserving the original picture
as much as possible.
[Normal]
Displays a 4:3 picture in its original size. Side bars are shown to fill the
16:9 screen.
[Full]
Stretches a 4:3 picture horizontally, to fill the 16:9 screen.
[Zoom]
Displays a 16:9 picture that has been converted into 4:3 letter box
format, in the correct aspect ratio.
74
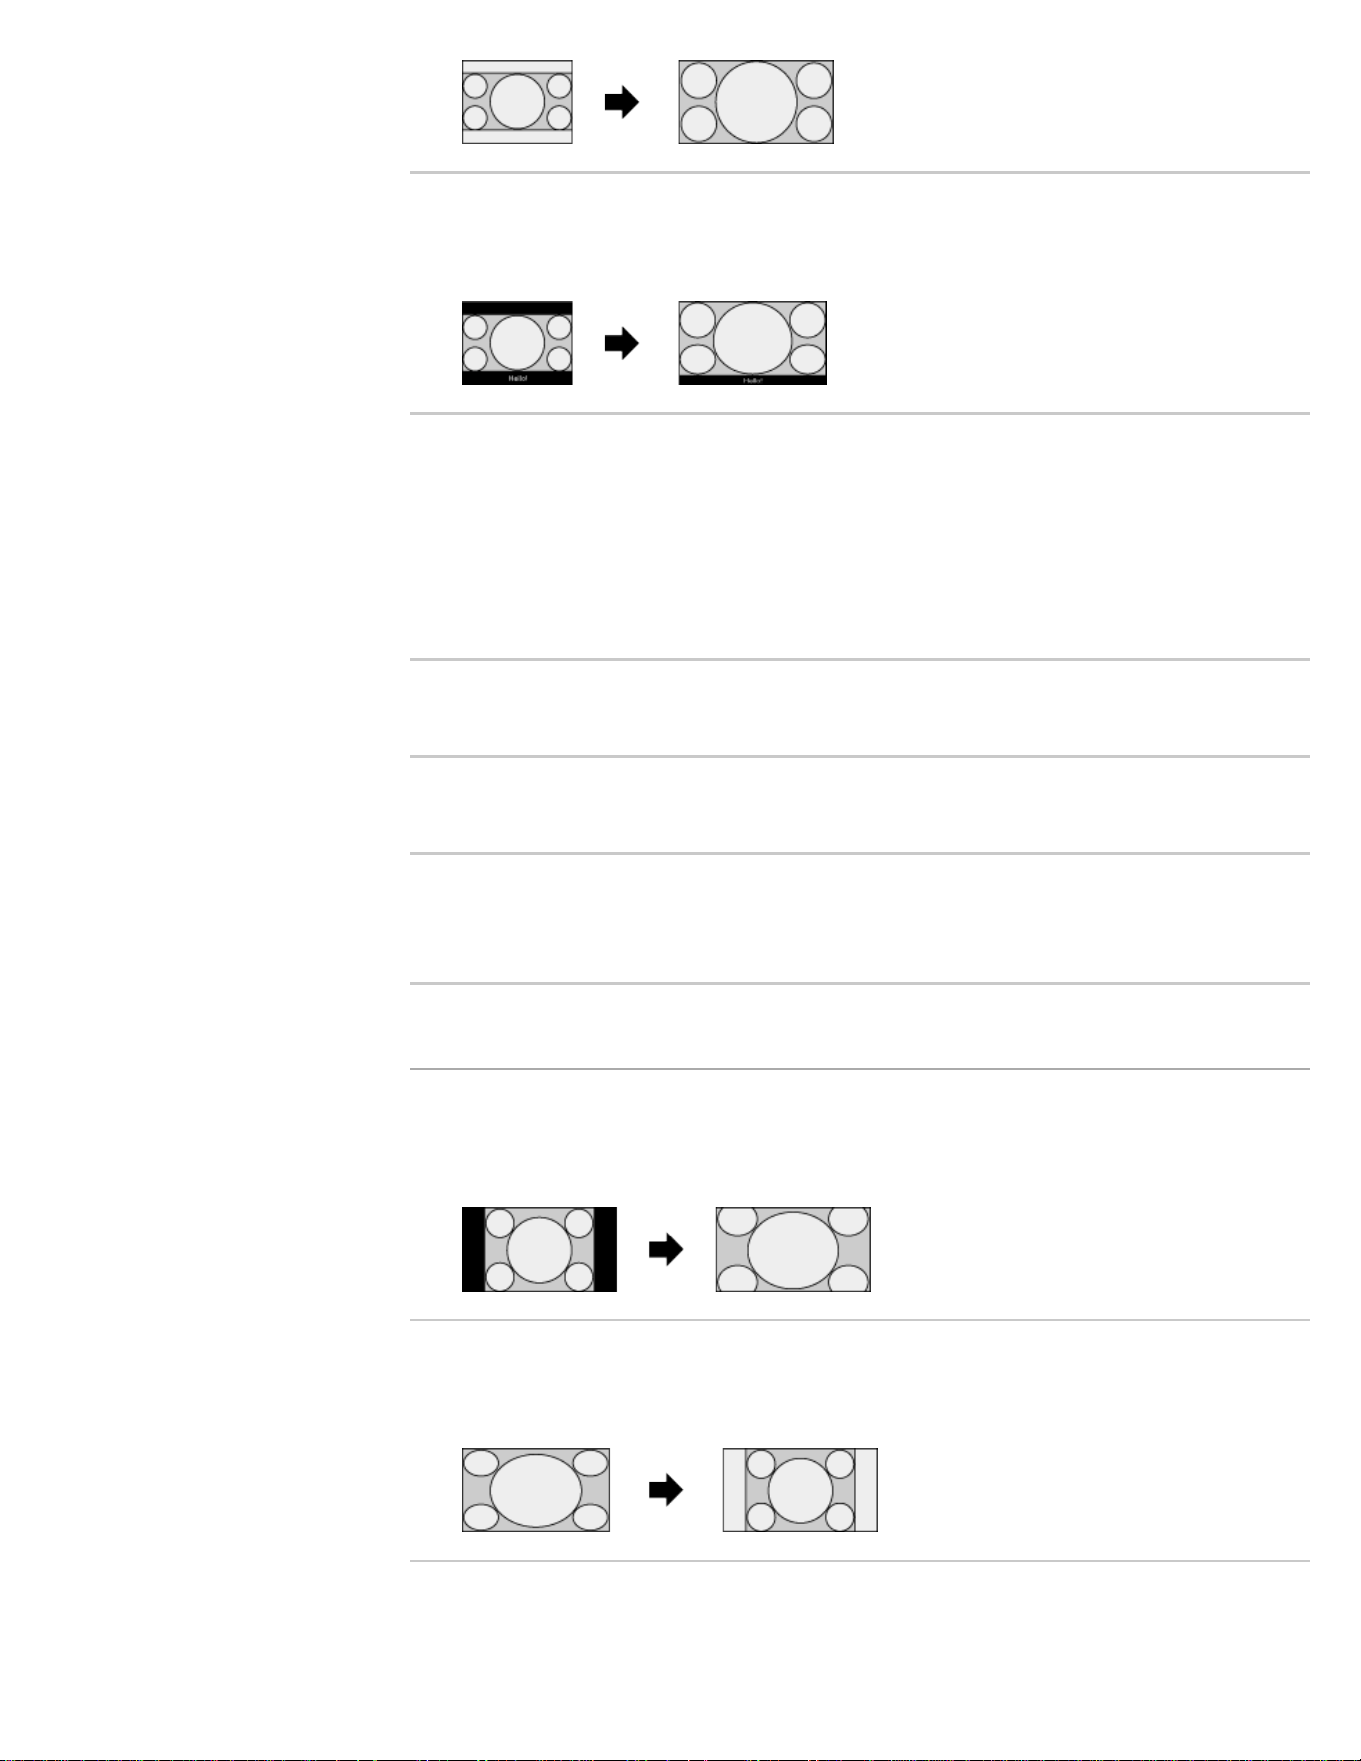
[Captions]
Stretches the picture horizontally to fill a 16:9 screen, while fitting
captions in the screen.
If component input (480p) is selected and [Scene Select] is set to
[Game] or [Graphics], the available options change to [Fine-
Normal]/[Fine-Full]/[Portable Game 1]/[Portable Game 2].
[Fine-Normal]
Displays a 4:3 picture in its original size. Side bars are shown to fill the
16:9 screen.
[Fine-Full]
Stretches a 4:3 picture horizontally, to fill the 16:9 screen.
[Portable Game 1]
Stretches a black-framed game picture from PlayStation®Portable.
[Portable Game 2]
Stretches a black-framed picture (e.g. browser) from
PlayStation®Portable.
Available Options (16:9 Original Source)
[Wide Zoom]
Enlarges the picture, preserving the original picture as much as
possible.
[Normal]
Displays a 4:3 picture that has been horizontally stretched to 16:9, in 4:3
format.
[Full]
Displays a 16:9 picture in its original size.
75
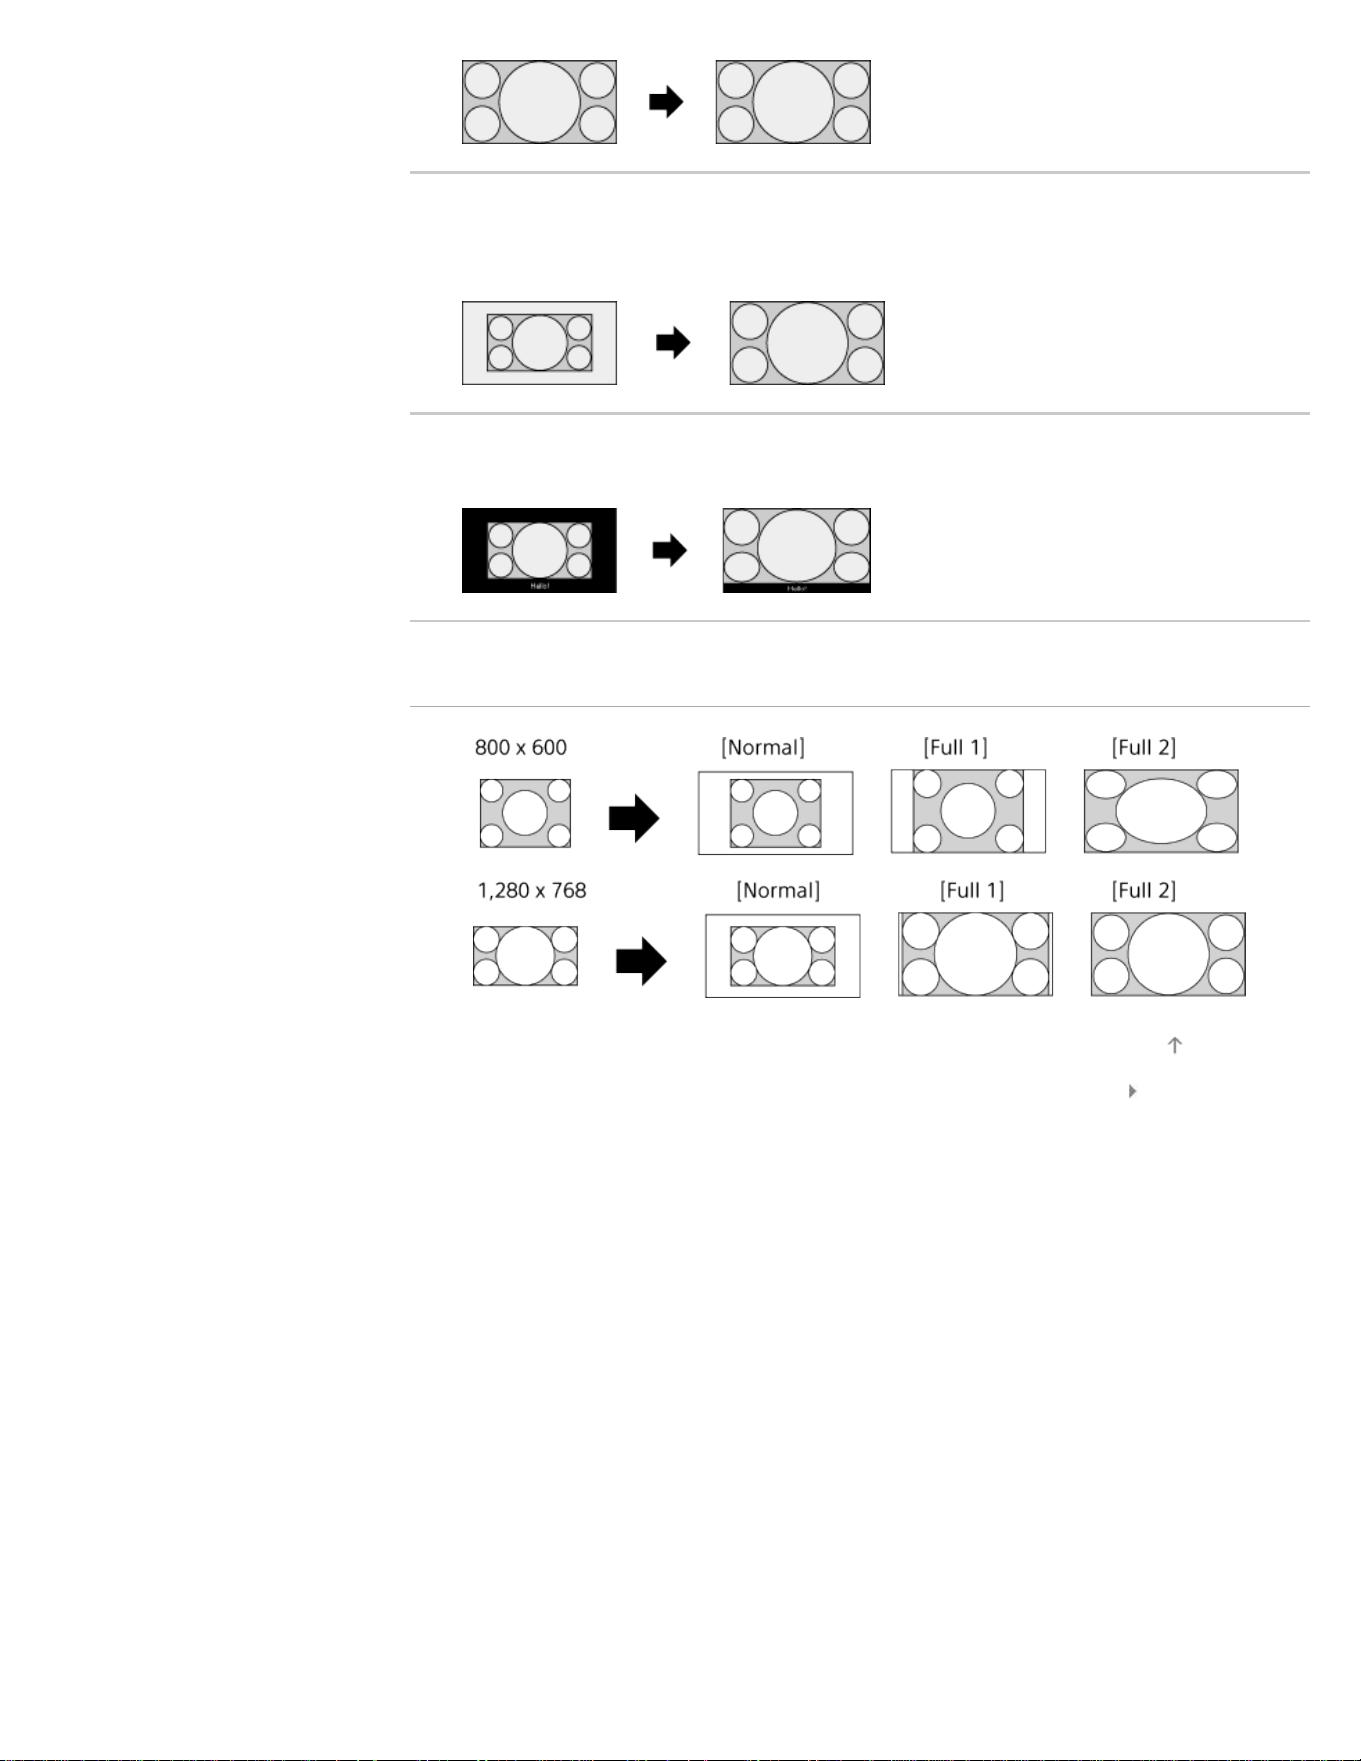
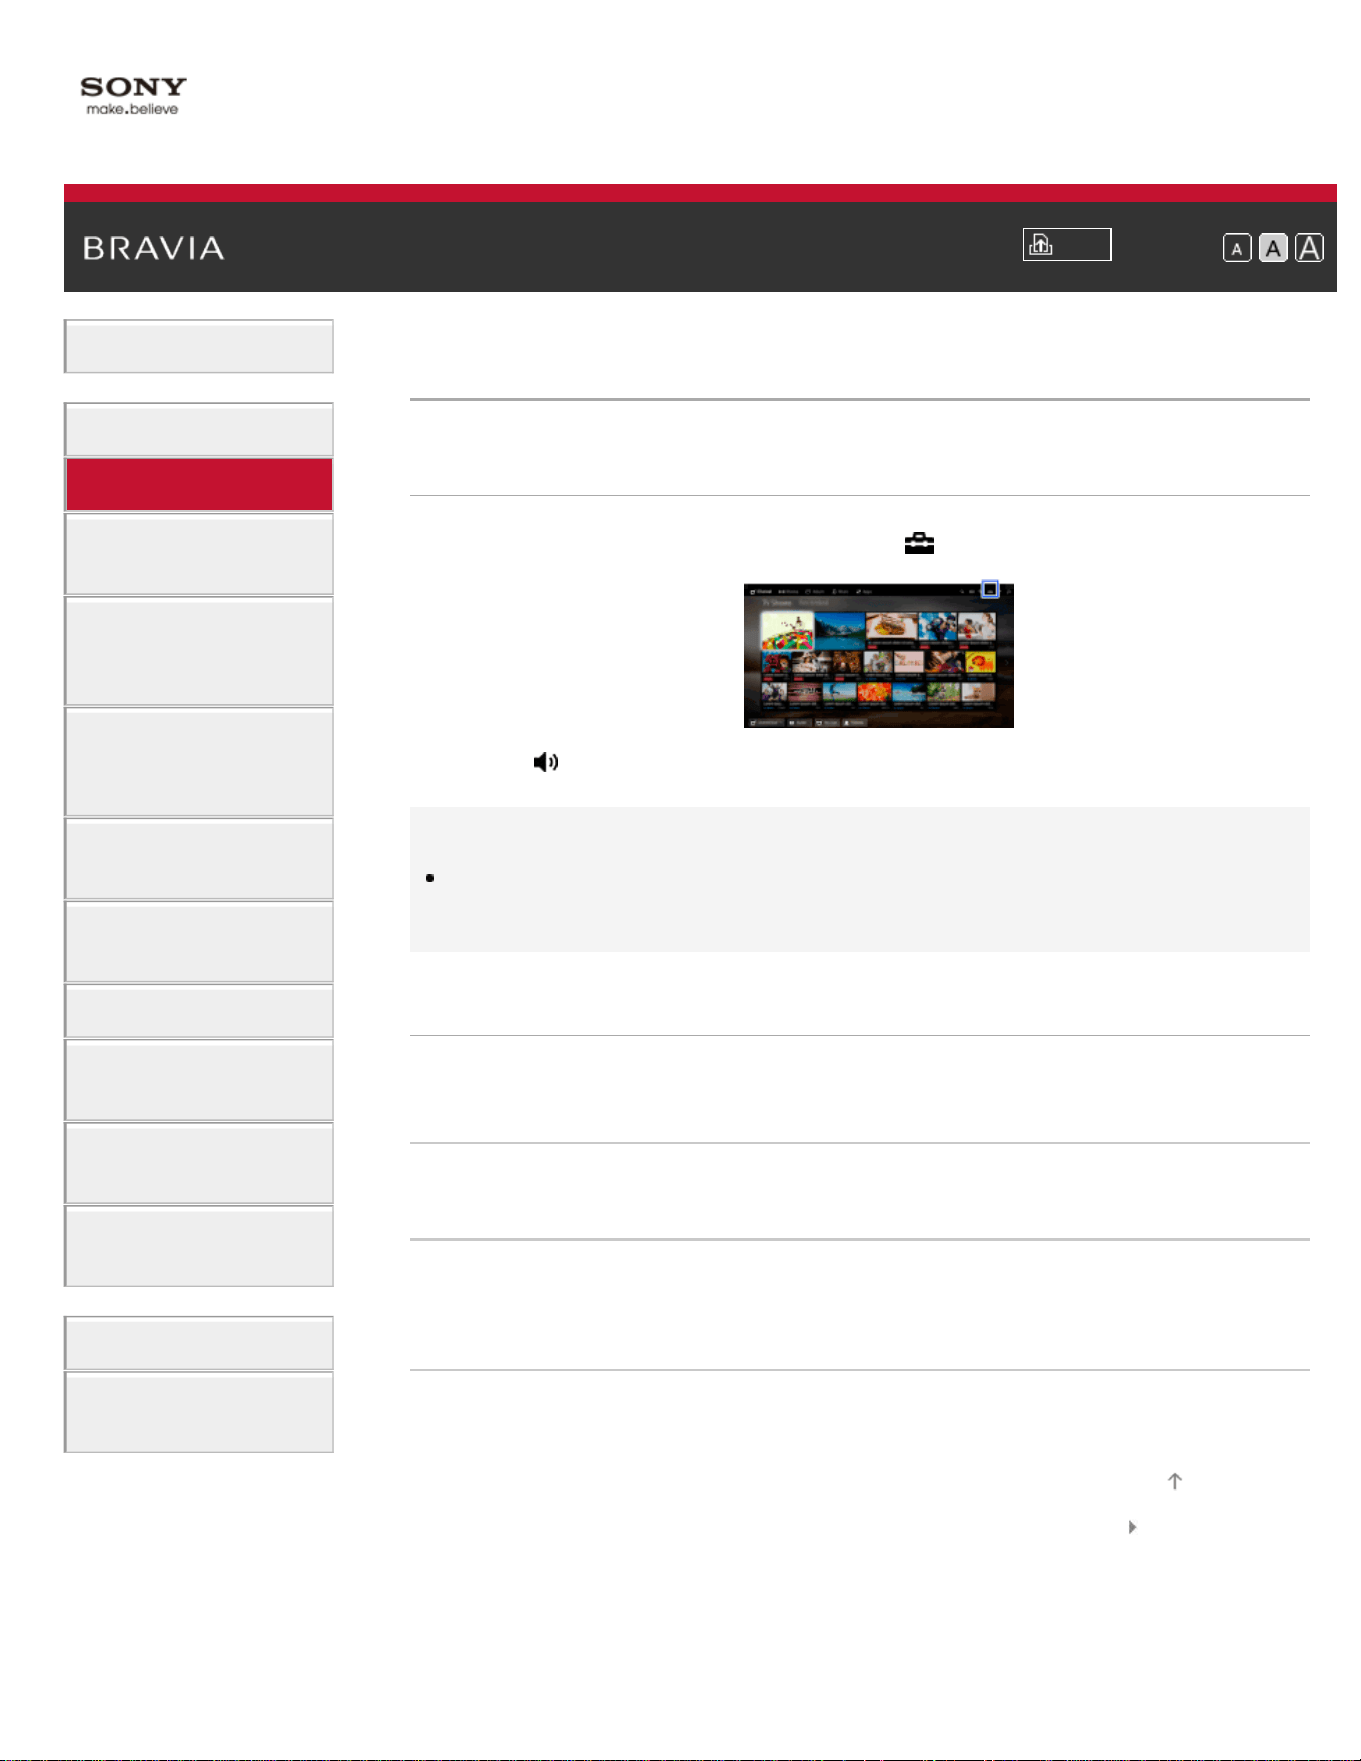
i-Manual
Print
Font Size
Basic Operations
Parts Description
Watching TV
Enjoying
Movies/Music/Photos
Using Internet
Services and
Applications
Watching TV with
Friends Far and
Near
Using Other
Devices
Using BRAVIA
Sync Devices
Useful Functions
Connecting to the
Internet
Using Home
Network
Configuring
Various Settings
Troubleshooting
How to Use
Bookmarks
Top Page > Watching TV > Audio (for analog mode)
Audio (for analog mode)
Steps
1.
Press the HOME button, then select [Settings].
2. Select [Sound] → [MTS Audio] → the desired option.
Tips
To select sound on digital channels, press the OPTIONS button, then
select [Alternate Audio].
Available Options
[Stereo]
Adjusts sound for stereo reception.
[Auto SAP]
Adjusts sound for second channel audio of programs such as bilingual.
[Mono]
Adjusts sound for monaural reception. Use this option when the stereo
signal is unstable.
List of Contents© 2014 Sony Corporation
Top of Page
77
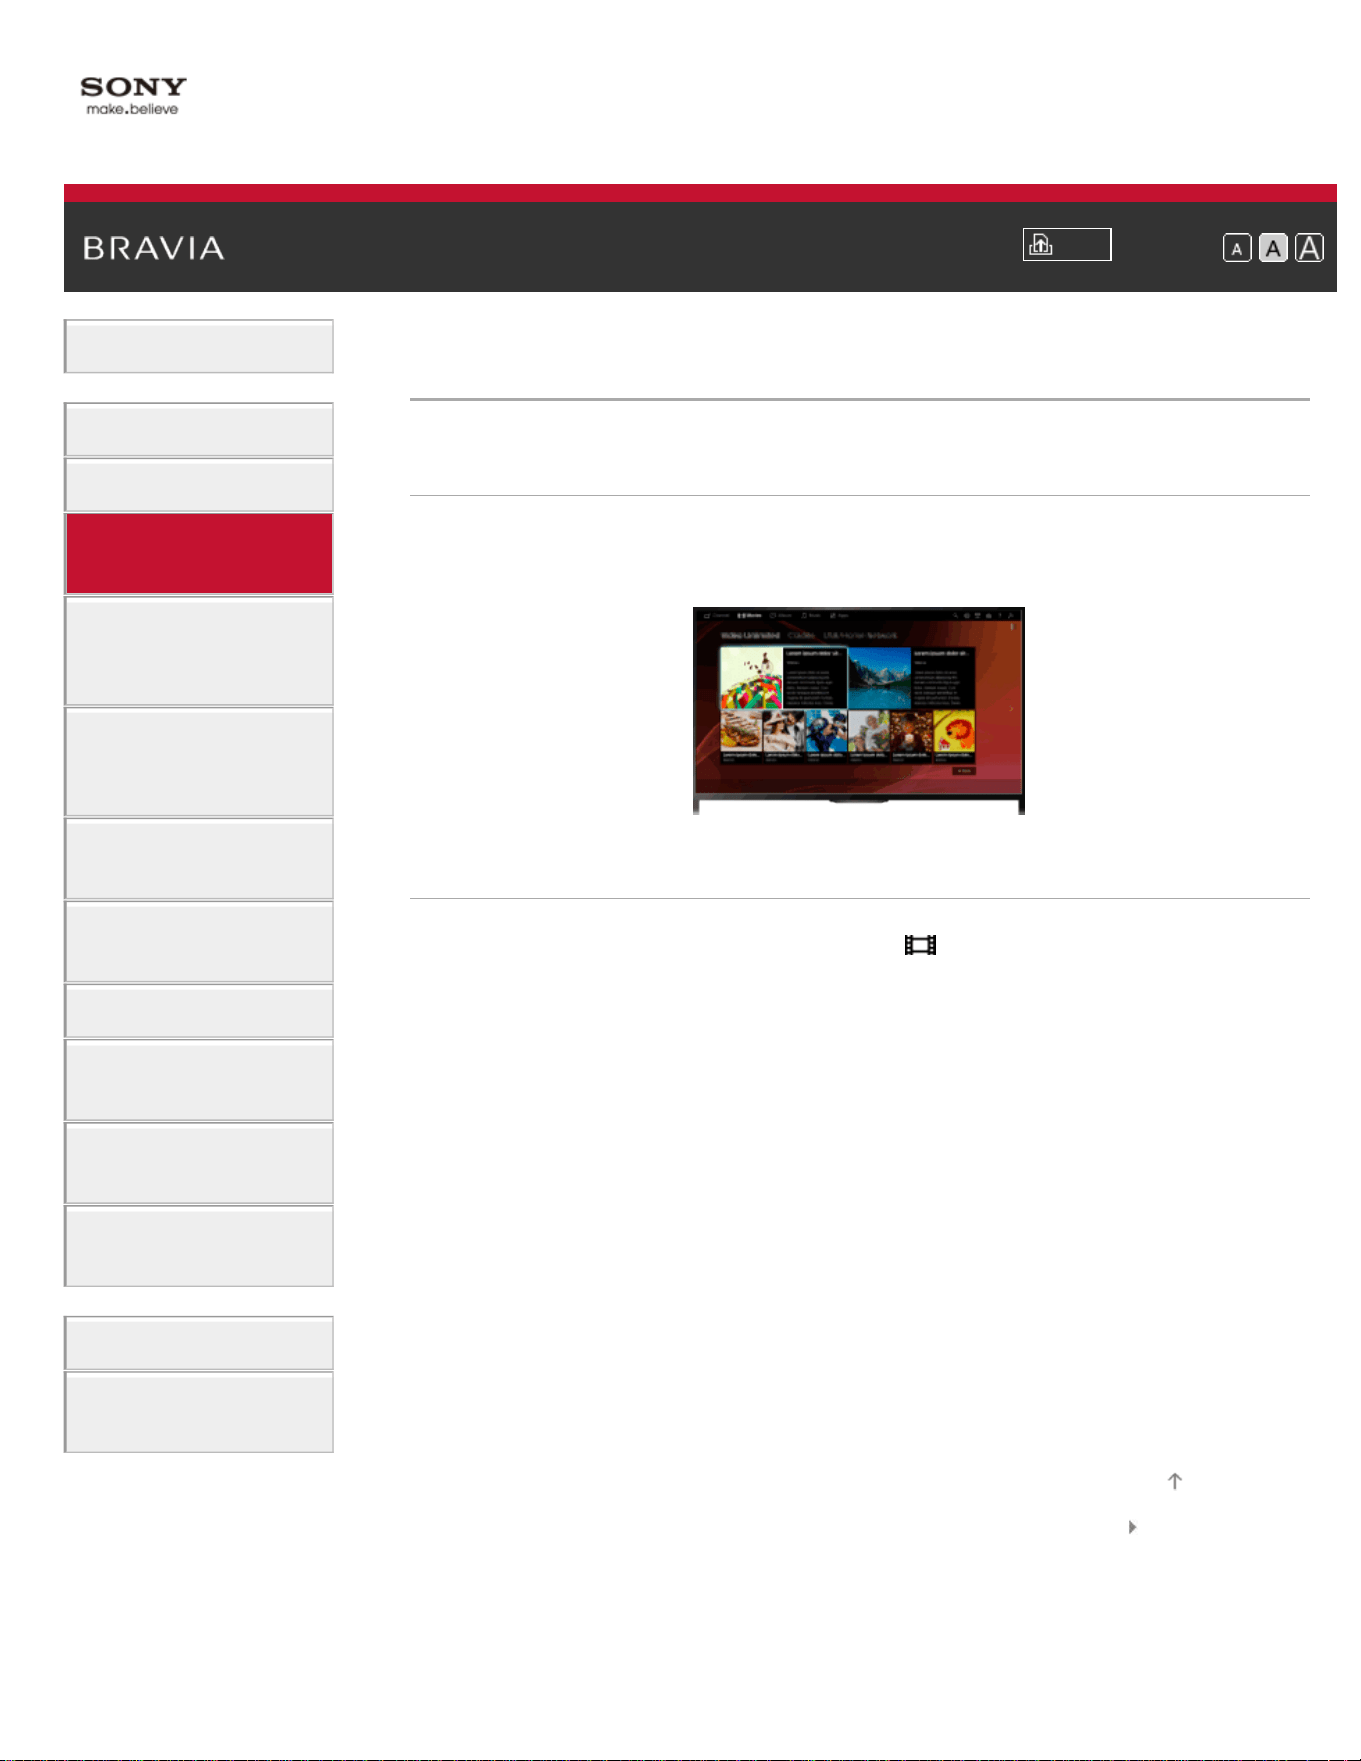
i-Manual
Print
Font Size
Basic Operations
Parts Description
Watching TV
Enjoying
Movies/Music/Photos
Using Internet
Services and
Applications
Watching TV with
Friends Far and
Near
Using Other
Devices
Using BRAVIA
Sync Devices
Useful Functions
Connecting to the
Internet
Using Home
Network
Configuring
Various Settings
Troubleshooting
How to Use
Bookmarks
Top Page > Enjoying Movies/Music/Photos > Enjoying Movies
Enjoying Movies
Overview
You can watch movies from online service providers, connected USB
devices or your home network.
Steps
1.
Press the HOME button, then select [Movies].
2. Select the desired subcategory.
3. Select the desired thumbnail to watch the movie.
List of Contents© 2014 Sony Corporation
Top of Page
78
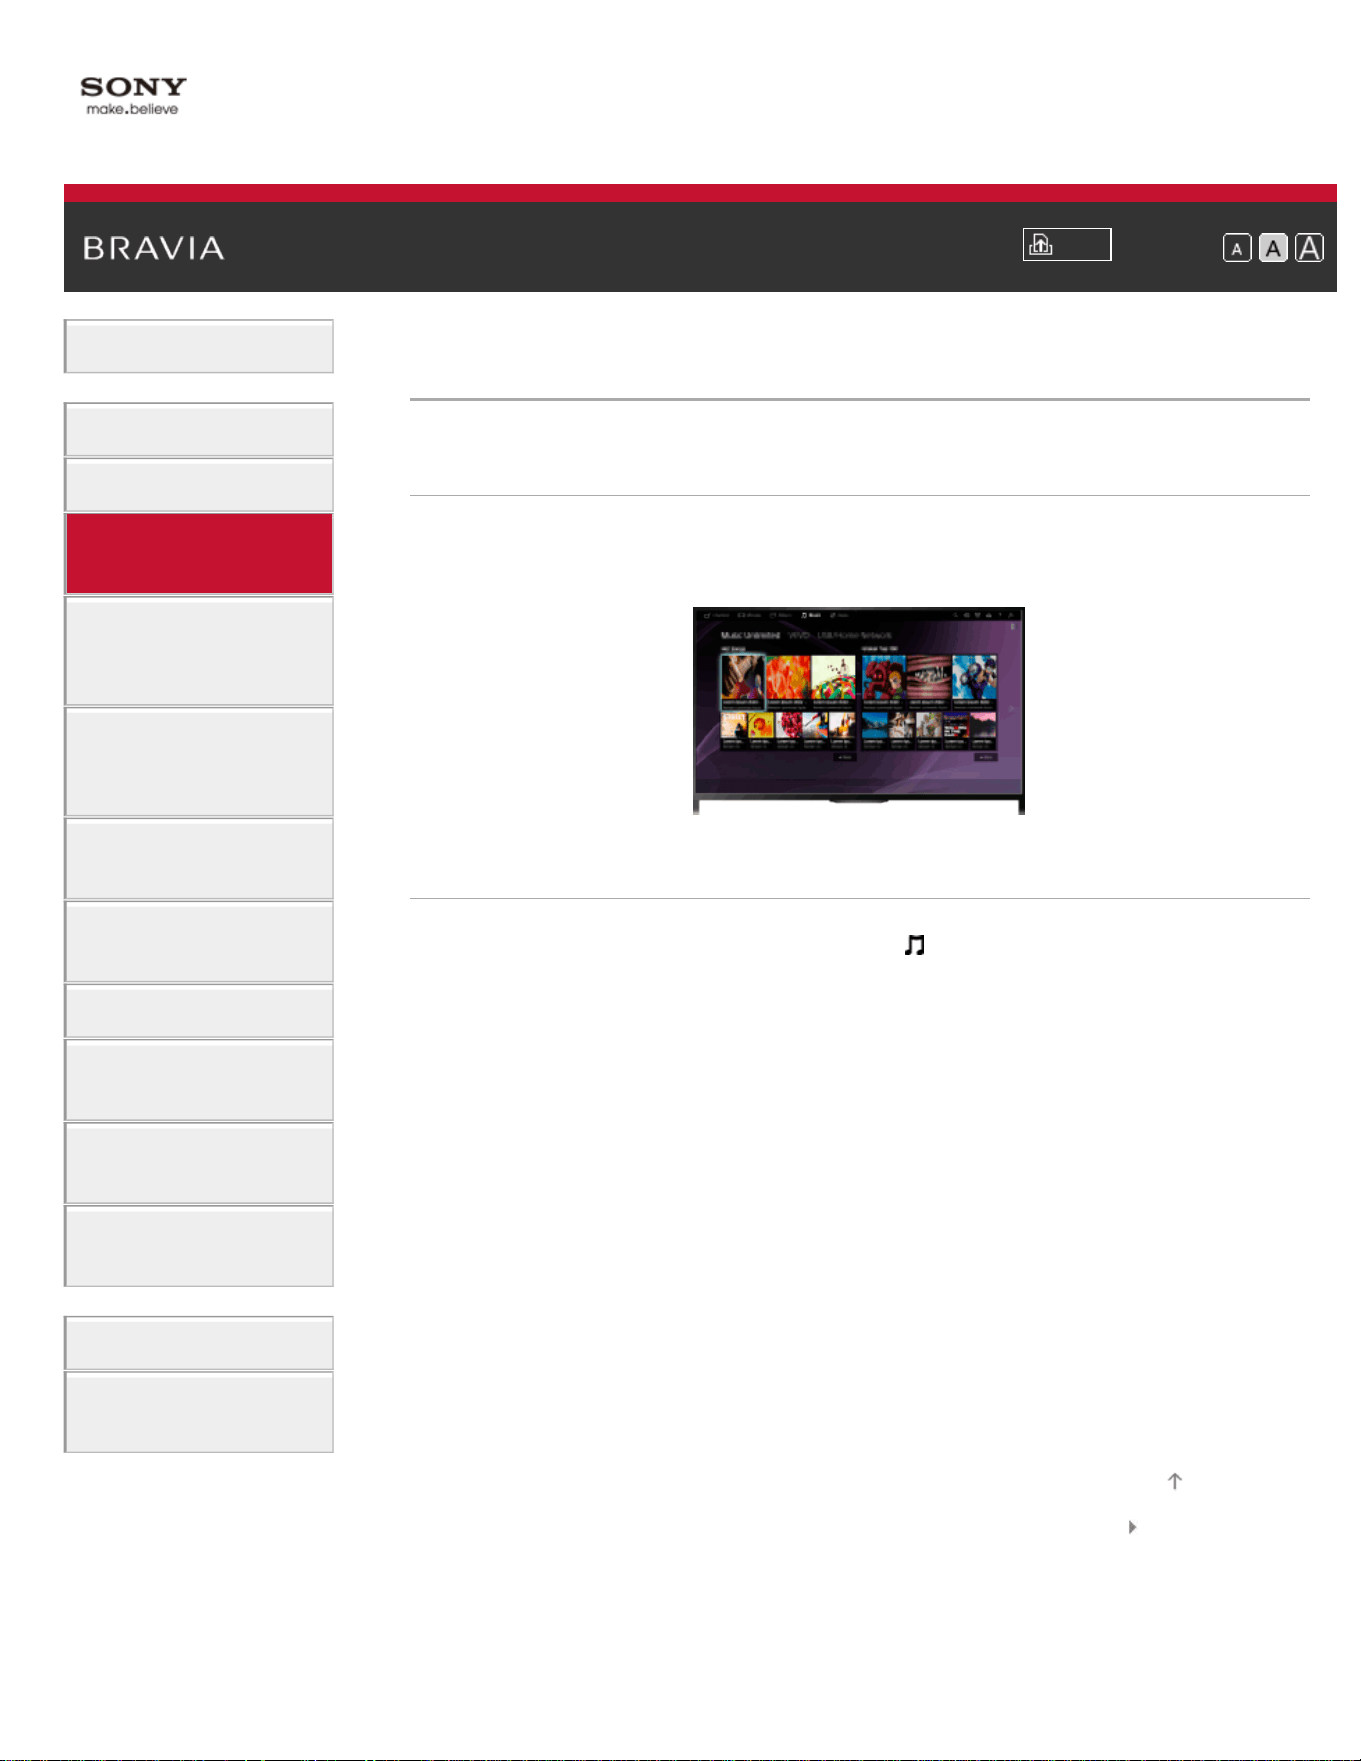
i-Manual
Print
Font Size
Basic Operations
Parts Description
Watching TV
Enjoying
Movies/Music/Photos
Using Internet
Services and
Applications
Watching TV with
Friends Far and
Near
Using Other
Devices
Using BRAVIA
Sync Devices
Useful Functions
Connecting to the
Internet
Using Home
Network
Configuring
Various Settings
Troubleshooting
How to Use
Bookmarks
Top Page > Enjoying Movies/Music/Photos > Enjoying Music
Enjoying Music
Overview
You can play back music content from online music service providers,
connected USB devices, or your home network.
Steps
1.
Press the HOME button, then select [Music].
2. Select the desired subcategory.
3. Select the desired thumbnail to play back the music content.
List of Contents© 2014 Sony Corporation
Top of Page
79
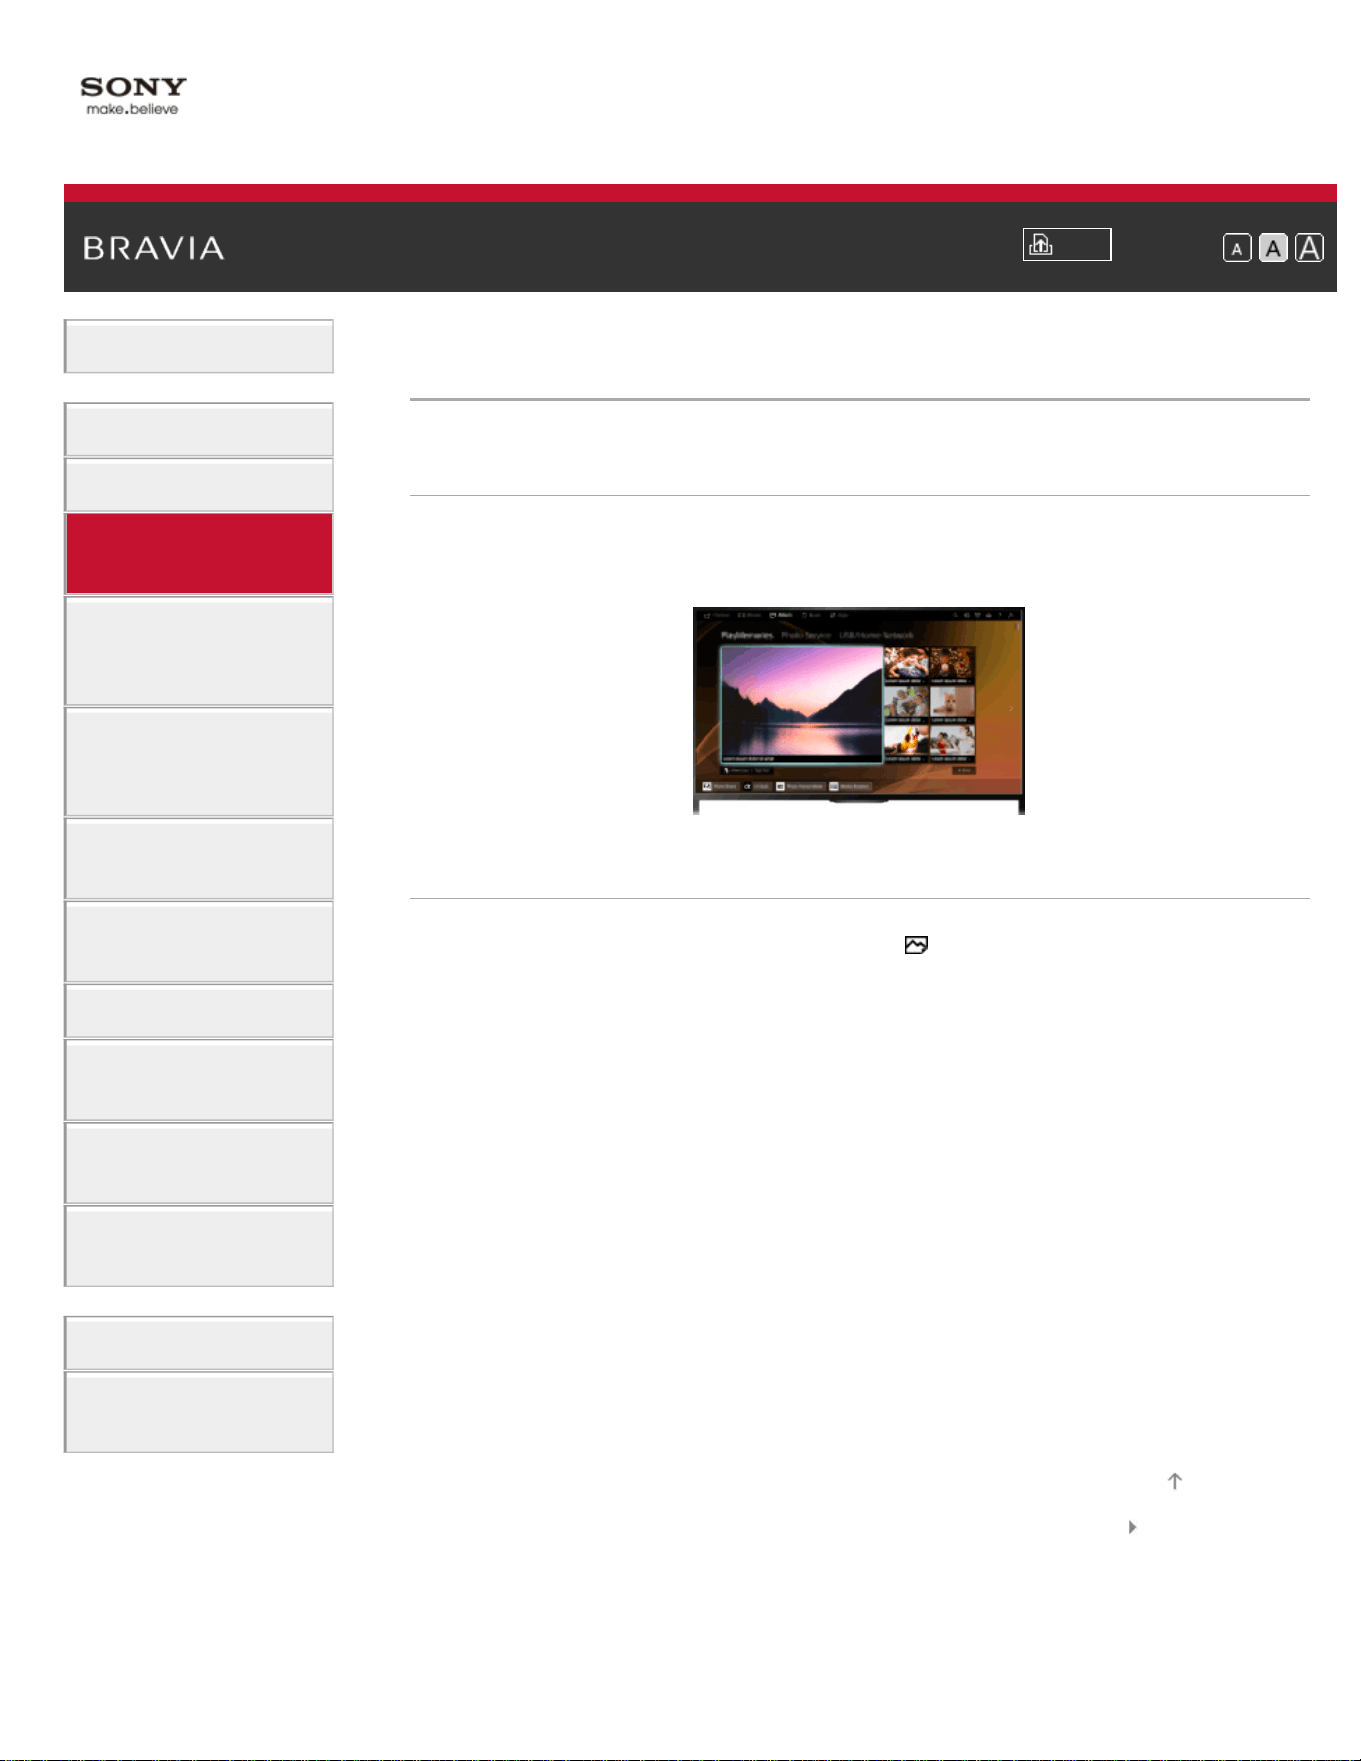
i-Manual
Print
Font Size
Basic Operations
Parts Description
Watching TV
Enjoying
Movies/Music/Photos
Using Internet
Services and
Applications
Watching TV with
Friends Far and
Near
Using Other
Devices
Using BRAVIA
Sync Devices
Useful Functions
Connecting to the
Internet
Using Home
Network
Configuring
Various Settings
Troubleshooting
How to Use
Bookmarks
Top Page > Enjoying Movies/Music/Photos > Enjoying Photos
Enjoying Photos
Overview
You can view photos from online service providers, connected USB
devices or your home network.
Steps
1.
Press the HOME button, then select [Album].
2. Select the desired subcategory.
3. Select the desired thumbnail to view the content.
List of Contents© 2014 Sony Corporation
Top of Page
80

i-Manual
Print
Font Size
Basic Operations
Parts Description
Watching TV
Enjoying
Movies/Music/Photos
Using Internet
Services and
Applications
Watching TV with
Friends Far and
Near
Using Other
Devices
Using BRAVIA
Sync Devices
Useful Functions
Connecting to the
Internet
Using Home
Network
Configuring
Various Settings
Troubleshooting
How to Use
Bookmarks
Top Page > Using Internet Services and Applications > Browsing Websites
Browsing Websites
Overview
When the TV is connected to the Internet, you can browse websites.
Steps
1.
Connect to a broadband Internet connection.
Press the
button to jump to the title list. Then, press the button
again to go to “Connecting to the Internet” for details.
(When using the Touchpad Remote Control, press the touchpad.
Then, press the touchpad again to go to “Connecting to the Internet”
for details.)
2. Press the HOME button, then select [Apps].
3. Select [All Apps] → [Internet Browser].
To return to the last viewed source, press the HOME button.
To change the character size
Press the OPTIONS button, select [Zoom], then the desired option.
Notes
If the TV does not support the functions provided by certain Internet
services (e.g. Adobe Flash Player, PDF viewer), web content may not be
displayed correctly, or some functions may not work properly. Also, the TV
may not support functions developed in the future.
In no event shall Sony be liable for any damage caused or associated with
the use of the Internet browser, malfunction (including software) or
communication failure.
81

i-Manual
Print
Font Size
Basic Operations
Parts Description
Watching TV
Enjoying
Movies/Music/Photos
Using Internet
Services and
Applications
Watching TV with
Friends Far and
Near
Using Other
Devices
Using BRAVIA
Sync Devices
Useful Functions
Connecting to the
Internet
Using Home
Network
Configuring
Various Settings
Troubleshooting
How to Use
Bookmarks
Top Page > Using Internet Services and Applications > Watching Internet Videos
Watching Internet Videos
Overview
You can enjoy Internet video content, including movies and cartoons, by
accessing a gateway that delivers a variety of on-demand
entertainment.
Steps
1.
Connect to a broadband Internet connection.
Press the
button to jump to the title list. Then, press the button
again to go to “Connecting to the Internet” for details.
(When using the Touchpad Remote Control, press the touchpad.
Then, press the touchpad again to go to “Connecting to the Internet”
for details.)
2. Press the HOME button, then select [Apps].
3. Select [All Apps] → the desired service → the desired content.
To seek forward/backward in video content
Press the buttons on the remote control that correspond with the control
indications on the screen.
(When using the Touchpad Remote Control, press the Control Bar (
),
slide the touchpad to highlight the buttons that correspond with the
control indications on the screen, then press the touchpad to select.)
To avoid video/sound interruption
Depending on your network environment or the data size of content,
video or sound interruption may occur.
The interruption can be avoided by temporarily storing the content on a
USB device (not supplied), and you can enjoy smooth video playback.
This function is available with services that are indicated by the icon
when you select them.
82

Perform the following to use this function.
USB device connection
Connect a USB device that supports USB 2.0 or higher to the TV’s USB
port.
USB device registration
Press the HOME button, then select
[Settings] → [Preferences] →
[Seamless Streaming Setting] → [Register USB device].
Note that a USB device will be formatted once registered, and all the
stored data will be deleted.
To deregister a USB device, select [Deregister USB device].
When you view content of an available service, connect a registered
USB device to the TV’s USB port. The content will be stored temporarily
on the USB device should an interruption occur during playback.
This registered USB device will not appear in the list of devices
connected to the TV.
To update Internet Video content services
Press the HOME button, then select [Settings] → [Network] →
[Refresh Internet Content].
Tips
Information about the highlighted icon appears in the information banner.
The interface to Internet content depends on the Internet content
providers.
Notes
If you experience difficulties, check that the Internet connection is set up
properly.
Services block video content based on the [Parental Lock] setting of the
TV. Some service providers do not support this function.
List of Contents© 2014 Sony Corporation
Top of Page
83
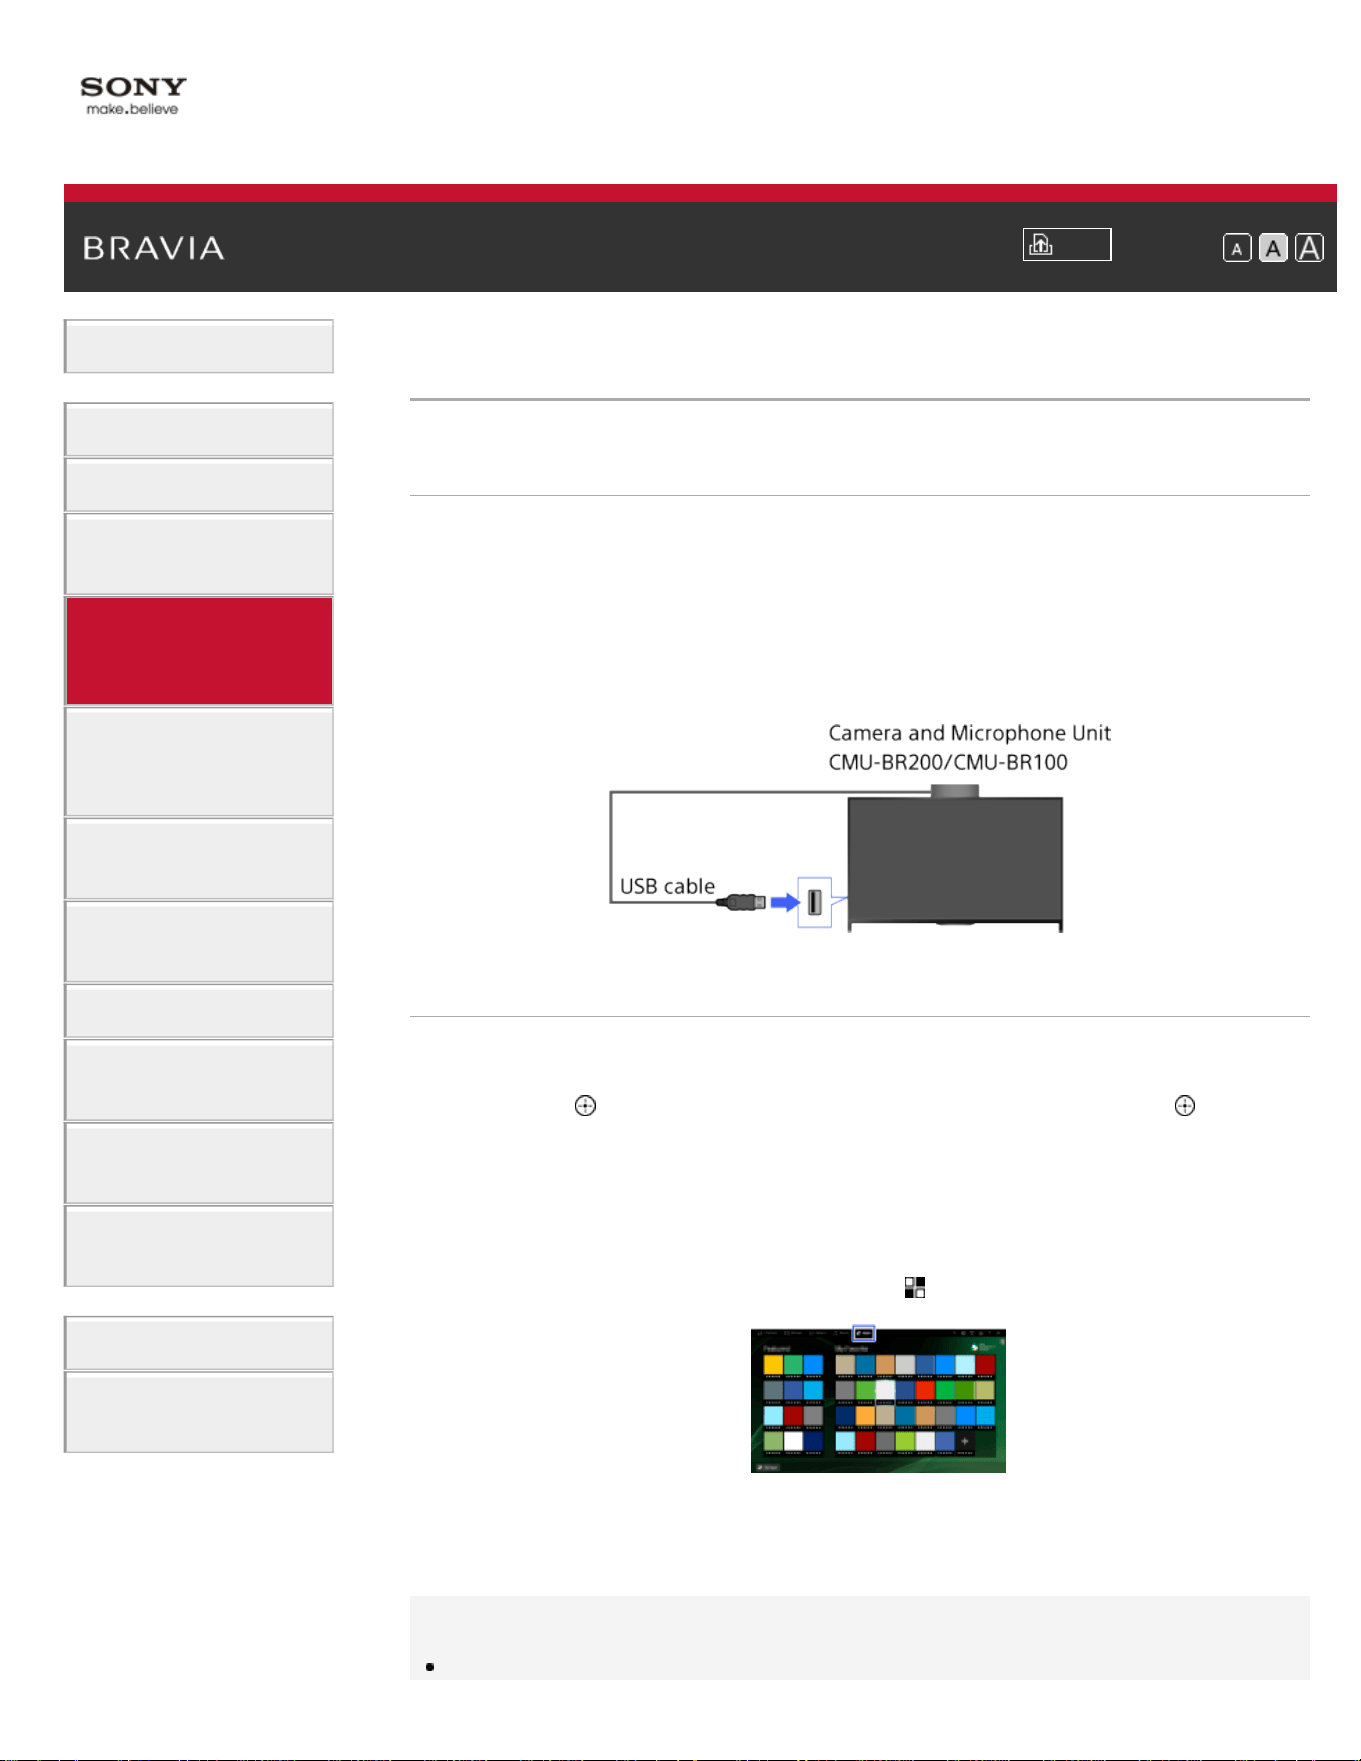
i-Manual
Print
Font Size
Basic Operations
Parts Description
Watching TV
Enjoying
Movies/Music/Photos
Using Internet
Services and
Applications
Watching TV with
Friends Far and
Near
Using Other
Devices
Using BRAVIA
Sync Devices
Useful Functions
Connecting to the
Internet
Using Home
Network
Configuring
Various Settings
Troubleshooting
How to Use
Bookmarks
Top Page > Using Internet Services and Applications > Performing initial setup
Performing initial setup
Making a Connection
Enjoy widescreen video calls by connecting the optional Camera and
Microphone Unit CMU-BR200/CMU-BR100.
Attach the camera to the TV, then connect the USB cable to the TV’s
USB port. For details on how to attach the camera, refer to the
instruction manual supplied with the camera.
Steps
1.
Connect to a broadband Internet connection.
Press the
button to jump to the title list. Then, press the button
again to go to “Connecting to the Internet” for details.
(When using the Touchpad Remote Control, press the touchpad.
Then, press the touchpad again to go to “Connecting to the Internet”
for details.)
2. Press the HOME button, then select [Apps].
3. Select [All Apps] → [Skype].
4. Follow the on-screen instructions to create your account.
Tips
84

Although you can create a new account using the TV, it is recommended
that you use a computer to create a new account.
Tips
For more information on Skype, please visit
http://www.Skype.com/
This product includes SkypeKit 4.5.1
(c) 2003-2014, Skype
Patents Pending
Skype, associated trade marks and logos and the “S” logo are trade
marks of Skype.
Although this product has been tested and met our certification
standards for audio and video quality, it is not endorsed by Skype, Skype
Communications S.a.r.l. or any of their related companies.
Notes
You can only use the optional Camera and Microphone Unit CMU-
BR200/CMU-BR100. Other models are not supported.
No emergency calls. Skype is not a replacement for your telephone and
cannot be used for emergency calling.
Skype may not be available while some other applications are being used.
Use of a wireless network connection may cause audio/video degradation.
Connect the optional Camera and Microphone Unit directly to the TV’s
USB port. Do not connect it via a USB hub.
Audio and video calls are free to other people on Skype. For other Skype
services such as low cost calls to mobile phones and landlines, Skype
Credit or a subscription is required.
The sound quality of the microphone may deteriorate in a noisy
environment.
A ringtone does not sound from the HDMI Audio Return Channel (ARC)
and optical digital audio output. To sound a ringtone, press the HOME
button, then select
[Settings] → [Sound] → [Speakers] → [TV
Speakers].
List of Contents© 2014 Sony Corporation
Top of Page
85
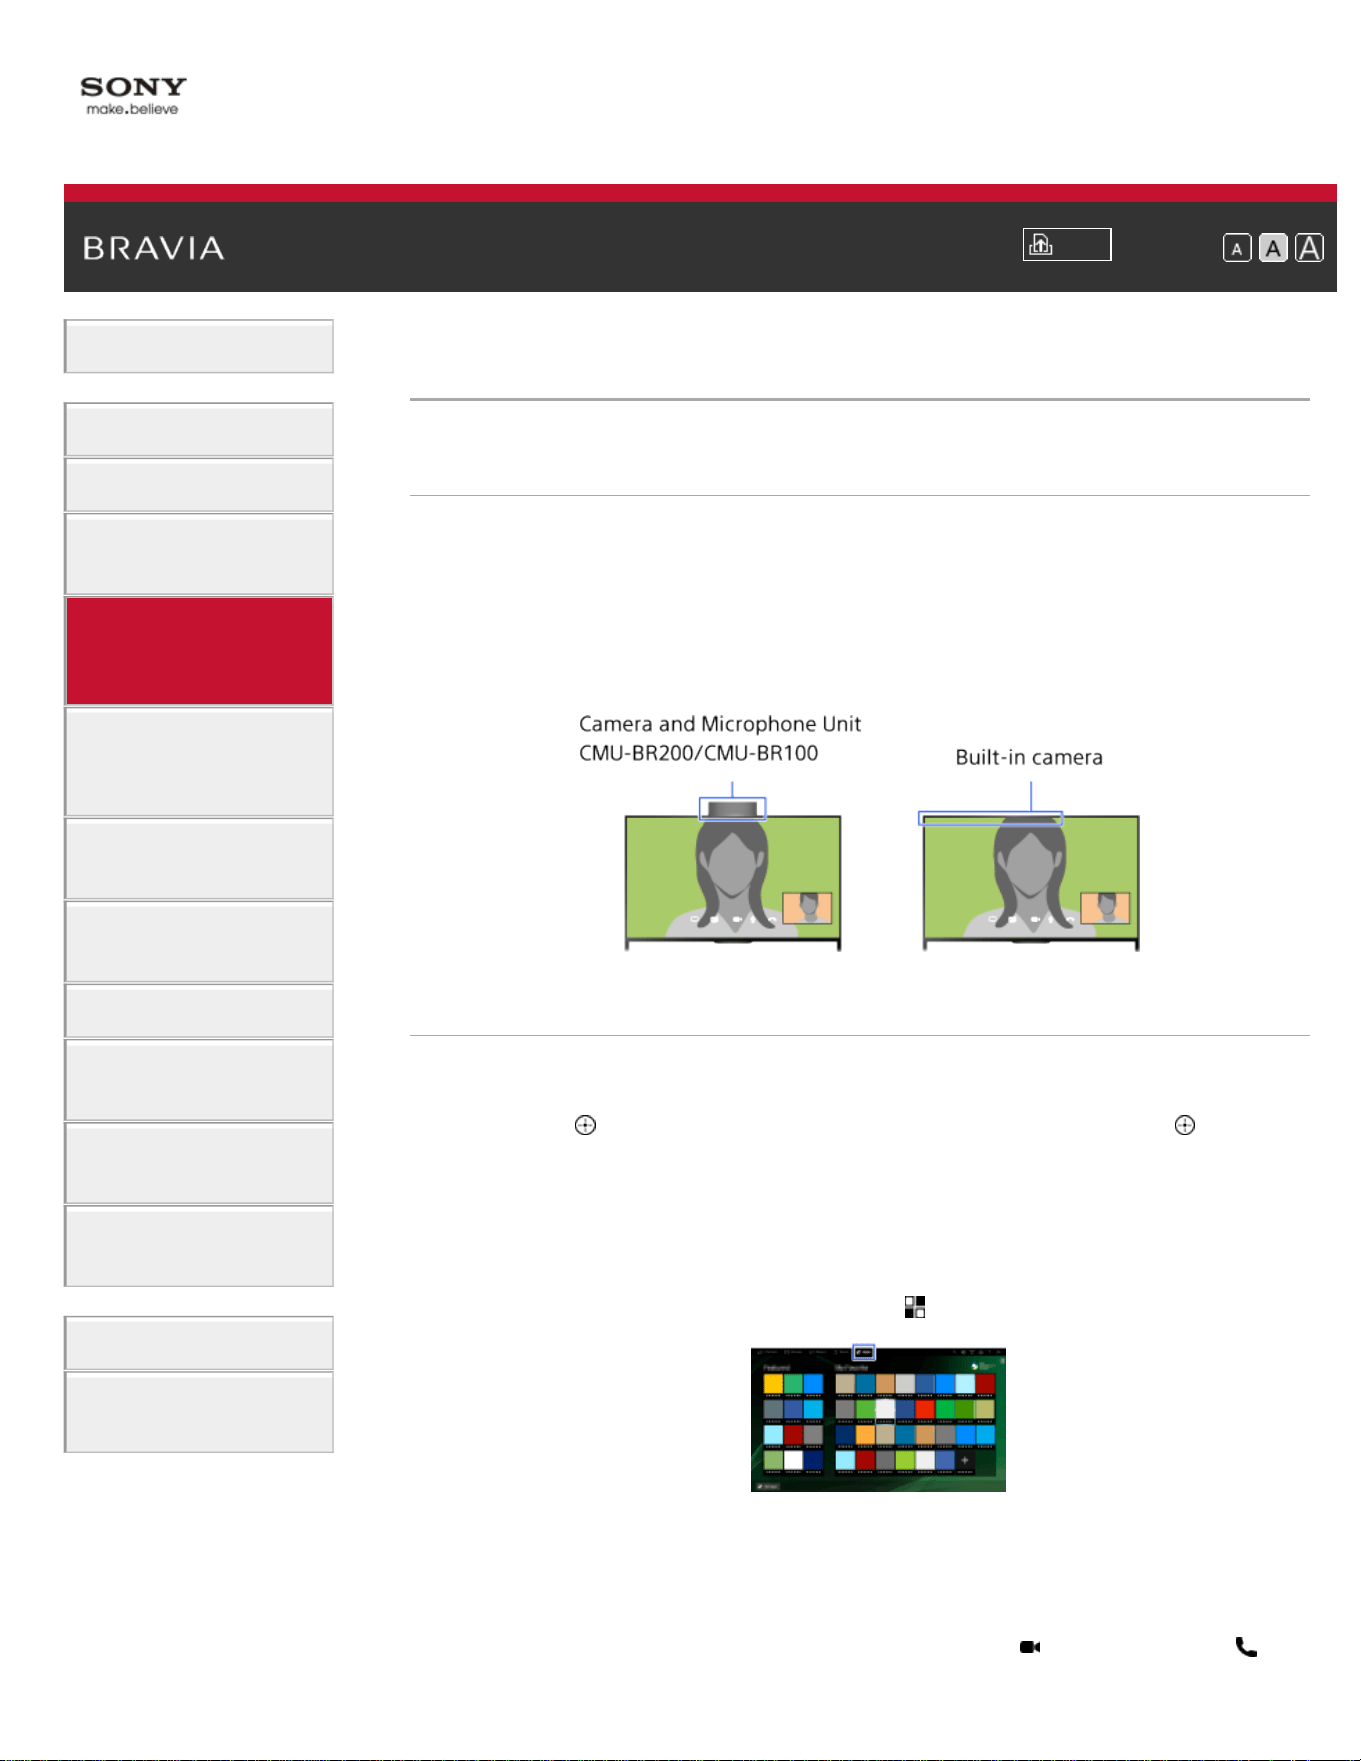
i-Manual
Print
Font Size
Basic Operations
Parts Description
Watching TV
Enjoying
Movies/Music/Photos
Using Internet
Services and
Applications
Watching TV with
Friends Far and
Near
Using Other
Devices
Using BRAVIA
Sync Devices
Useful Functions
Connecting to the
Internet
Using Home
Network
Configuring
Various Settings
Troubleshooting
How to Use
Bookmarks
Top Page > Using Internet Services and Applications > Making a call
Making a call
Overview
You can make free video and voice calls to friends and family anywhere
in the world from the comfort of your living room. If you want to call a
friend who is not on Skype, you can call them on their landline or mobile
using Skype. CMU-BR200/CMU-BR100 (not supplied) cannot be used
with a built-in camera model.
Steps
1.
Connect to a broadband Internet connection.
Press the
button to jump to the title list. Then, press the button
again to go to “Connecting to the Internet” for details.
(When using the Touchpad Remote Control, press the touchpad.
Then, press the touchpad again to go to “Connecting to the Internet”
for details.)
2. Press the HOME button, then select [Apps].
3. Select [All Apps] → [Skype] → [Contacts] or [History].
Select [Contacts] to use your Skype contact list. Select [History] to
use the call history list.
4. Select the contact or phone number to call → (Video Call) or
86
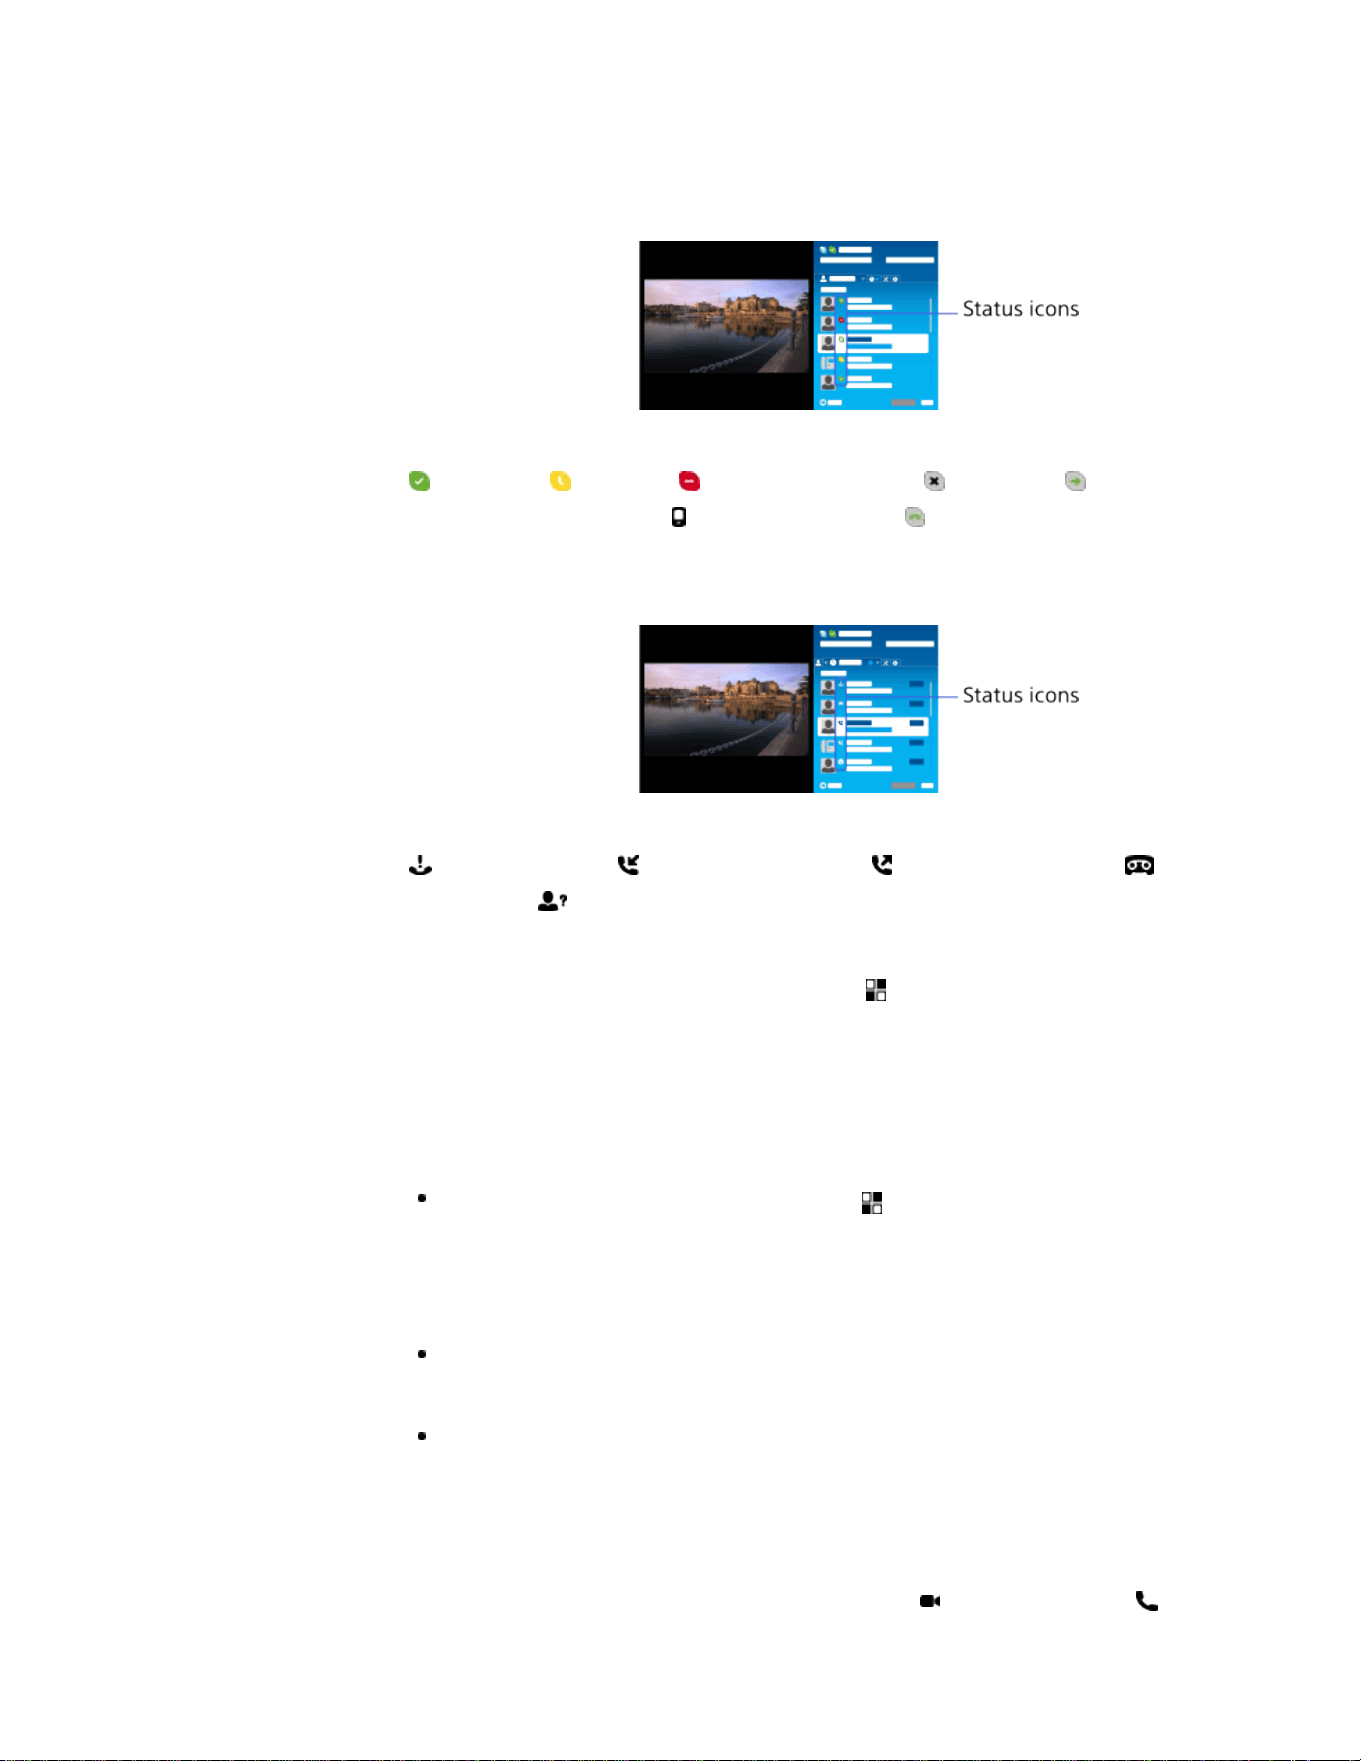
(Voice Call).
About the status icons in the contact list
A status icon is displayed next to your contacts, so you know if they are
available to have a conversation.
The list below indicates their availability:
: Online, : Away, : Do Not Disturb, : Offline, : Offline (with call
forwarding enabled),
: Phone contact, : Offline (with voice mail
enabled)
About the status icons in the call history list
The icons in the history list indicate the following:
: Missed Call, : Incoming Call..., : Outgoing Call..., : Voice
message,
: Contact Request
To call by entering a phone number
Press the HOME button, then select [Apps] → [All Apps] → [Skype] →
[Tools] → [Call Phone Number]. Enter a phone number, then select
[Call].
To add contacts to the contact list
You can add contacts in the following ways:
Press the HOME button, then select [Apps] → [All Apps] → [Skype] →
[Tools] → [Find Contacts]. Enter a Skype name, full name or e-mail
address, select [Search], the Skype name/full name to call, then select
[Add to Contacts].
From the call history list, select the contact or phone number, then [Add to
Contacts].
After entering a phone number, select [Save], then the desired option.
To receive a call
You can receive a call while watching TV or using other applications.
When the illumination LED on the front of the TV blinks and/or the
incoming call notification appears, select
(Video Call) or (Voice
Call) to answer.
87
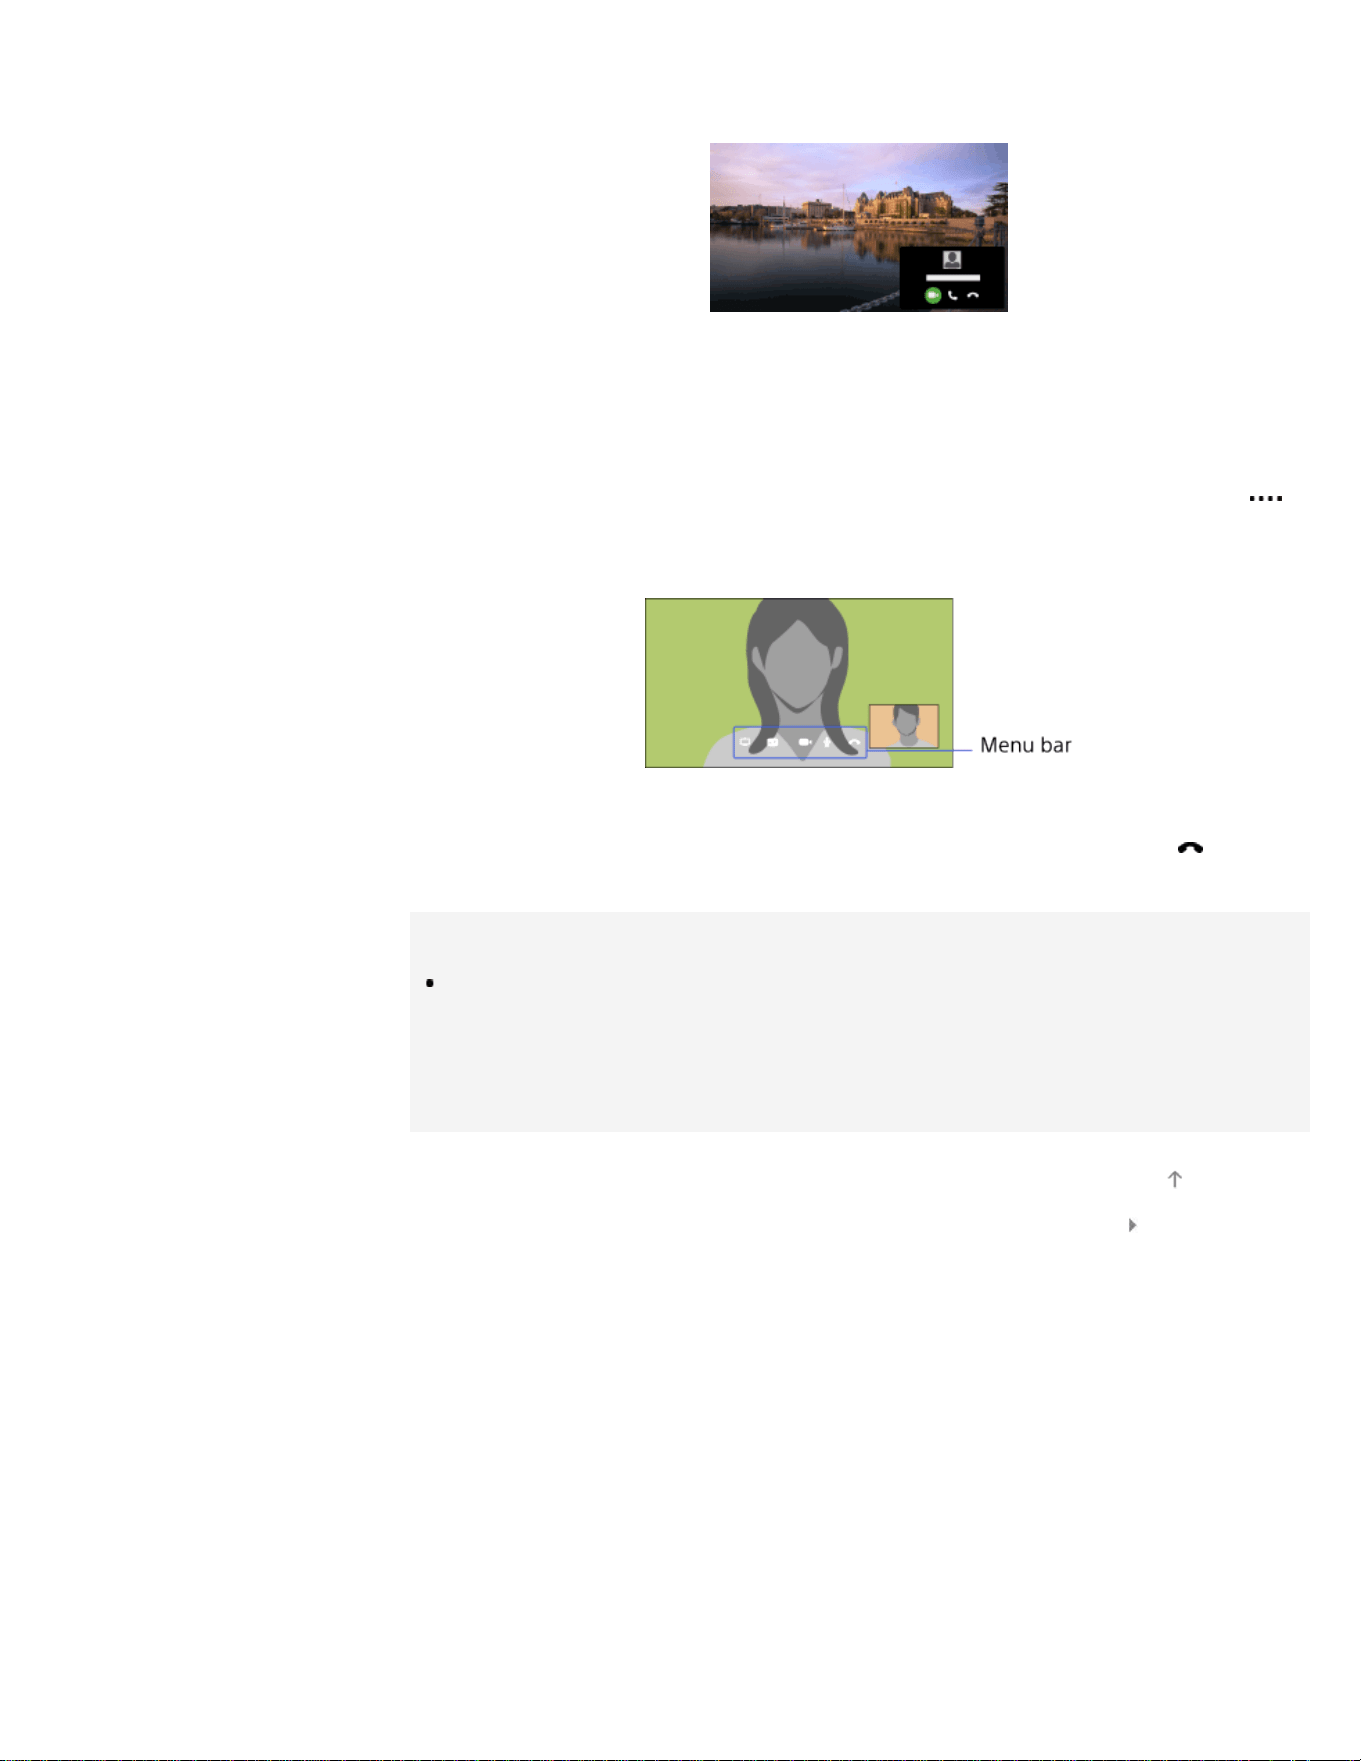
(While using another application, an incoming call notification is
displayed full screen.)
To use call options during a call
Use the menu bar at the bottom of the screen.
When the other party is displayed in full screen, you can show/hide the
menu bar by pressing the DISPLAY button.
(When using the Touchpad Remote Control, press the Control Bar ( ),
slide the touchpad to highlight the DISPLAY button, then press the
touchpad to select.)
To end a call
Press the DISPLAY button to open the menu bar, then select [End
Call].
Tips
For the best audio quality during a Skype call, use the speakers that are
built into the TV instead of using an external audio system. To use the
TV speakers, press the OPTIONS button, then select [Speakers] → [TV
Speakers].
List of Contents© 2014 Sony Corporation
Top of Page
88
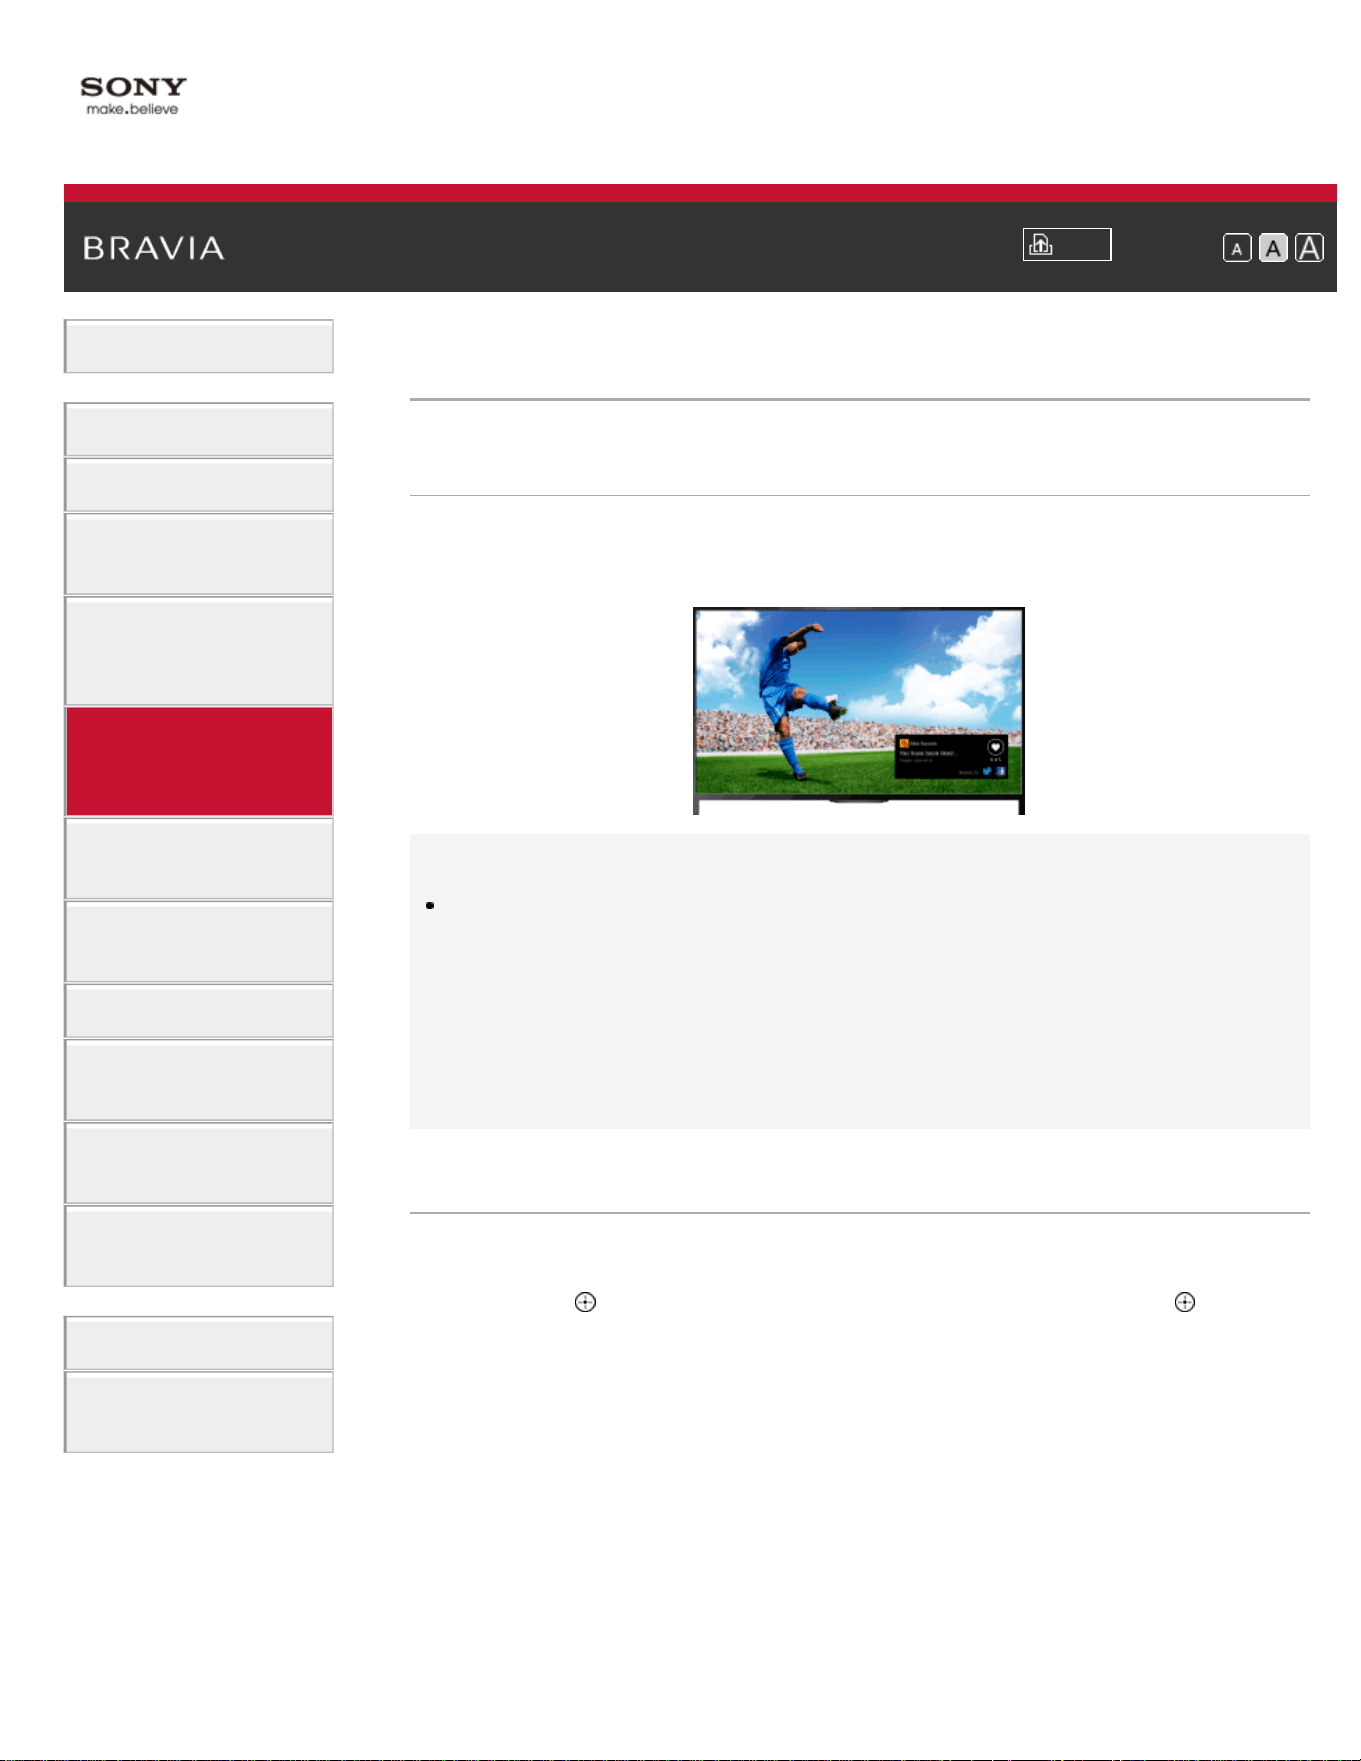
i-Manual
Print
Font Size
Basic Operations
Parts Description
Watching TV
Enjoying
Movies/Music/Photos
Using Internet
Services and
Applications
Watching TV with
Friends Far and
Near
Using Other
Devices
Using BRAVIA
Sync Devices
Useful Functions
Connecting to the
Internet
Using Home
Network
Configuring
Various Settings
Troubleshooting
How to Use
Bookmarks
Top Page > Watching TV with Friends Far and Near > Inviting Friends while Watching TV
Inviting Friends while Watching TV
Overview
While watching a program, you can express that you like the program.
You can also invite friends to watch the same program.
Tips
As of March 2014, this function is available in the following
regions/countries.
Czech Rep. / Denmark / Germany / Switzerland / Austria / United
Kingdom / Ireland / Spain / France / Italy / Netherlands / Belgium /
Luxembourg / Norway / Poland / Russia / Slovakia / Finland / Sweden /
New Zealand / Australia / United States / Canada / Brazil
Steps
1.
Connect to a broadband Internet connection.
Press the
button to jump to the title list. Then, press the button
again to go to “Connecting to the Internet” for details.
(When using the Touchpad Remote Control, press the touchpad.
Then, press the touchpad again to go to “Connecting to the Internet”
for details.)
2. While watching TV, press the OPTIONS button, then select [Love].
3. Follow the on-screen instructions to log in to your Facebook account.
89

Tips
You can register up to six Facebook accounts with the TV.
After your account is registered, you can select it from the account list to
log in.
To invite friends to watch the same program
While watching a program, press the OPTIONS button, then select
[Invite Friends] to invite friends to watch the same program.
To view your history
Press the HOME button, then select [Channel] → [Friends] at the
bottom of the Home Menu → [Love] or [Invitation].
List of Contents© 2014 Sony Corporation
Top of Page
90
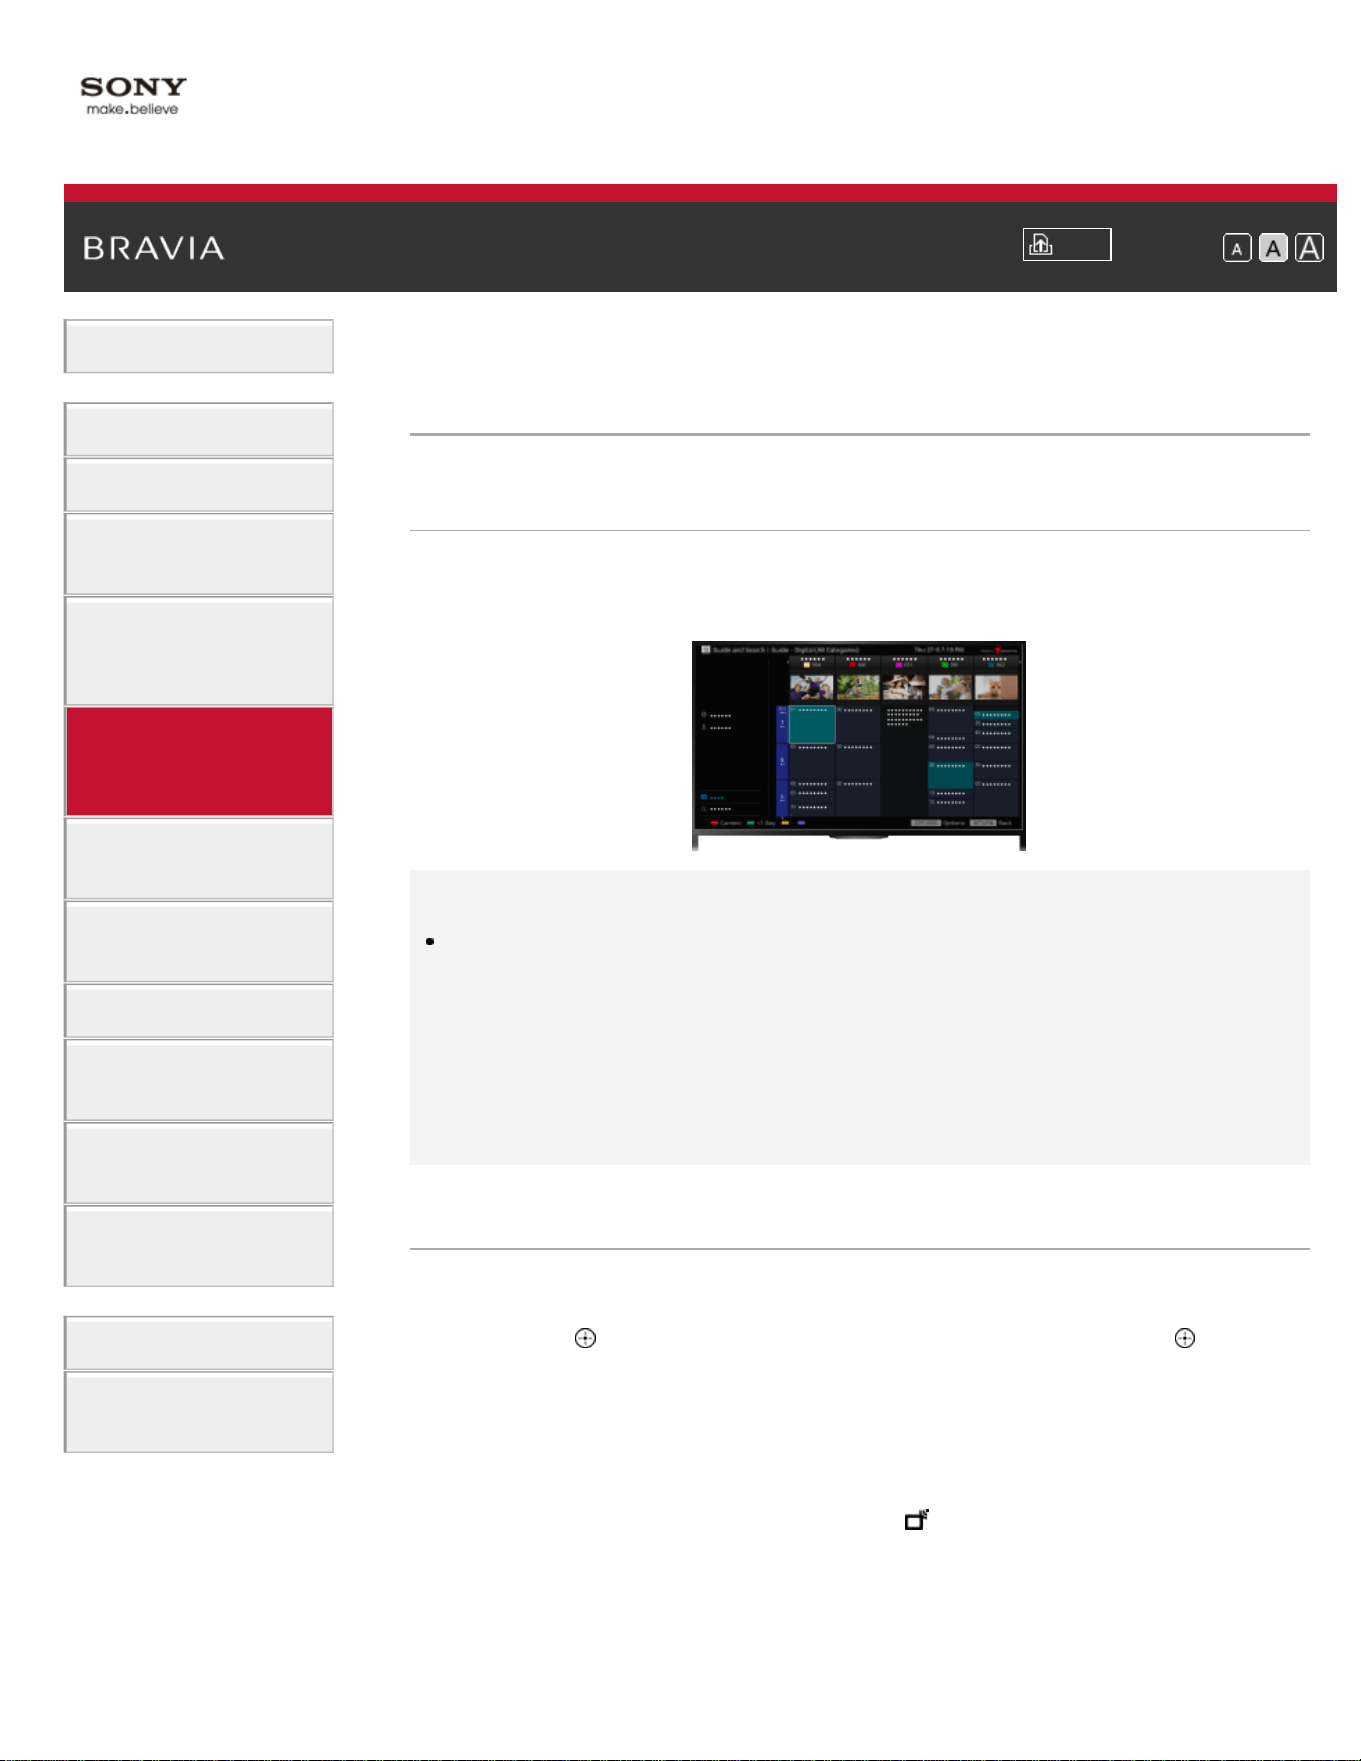
i-Manual
Print
Font Size
Basic Operations
Parts Description
Watching TV
Enjoying
Movies/Music/Photos
Using Internet
Services and
Applications
Watching TV with
Friends Far and
Near
Using Other
Devices
Using BRAVIA
Sync Devices
Useful Functions
Connecting to the
Internet
Using Home
Network
Configuring
Various Settings
Troubleshooting
How to Use
Bookmarks
Top Page > Watching TV with Friends Far and Near > Inviting Friends Using the Program
Guide
Inviting Friends Using the Program Guide
Overview
You can use the program guide to invite friends to watch the same
program or express that you like certain programs.
Tips
As of March 2014, this function is available in the following
regions/countries.
Czech Rep. / Denmark / Germany / Switzerland / Austria / United
Kingdom / Ireland / Spain / France / Italy / Netherlands / Belgium /
Luxembourg / Norway / Poland / Russia / Slovakia / Finland / Sweden /
New Zealand / Australia / United States / Canada / Brazil
Steps
1.
Connect to a broadband Internet connection.
Press the
button to jump to the title list. Then, press the button
again to go to “Connecting to the Internet” for details.
(When using the Touchpad Remote Control, press the touchpad.
Then, press the touchpad again to go to “Connecting to the Internet”
for details.)
2. Press the HOME button, then select [Channel].
3. Select [Guide].
Detailed information about TV programs is displayed.
4. Select the desired program.
91

The detailed information of the program appears.
5. Select [Invite Friends].
6. Follow the on-screen instructions to log in to the TV with your
Facebook account.
The friend selection screen appears.
7. Follow the on-screen instructions to send invitations.
Tips
You can register up to six accounts with the TV.
After your account is registered, you can select it from the account list to
log in.
Notes
Guide and Search can launch only when [Cable/Antenna] is set to
[Antenna] or a set-top box via an IR Blaster is ready.
List of Contents© 2014 Sony Corporation
Top of Page
92
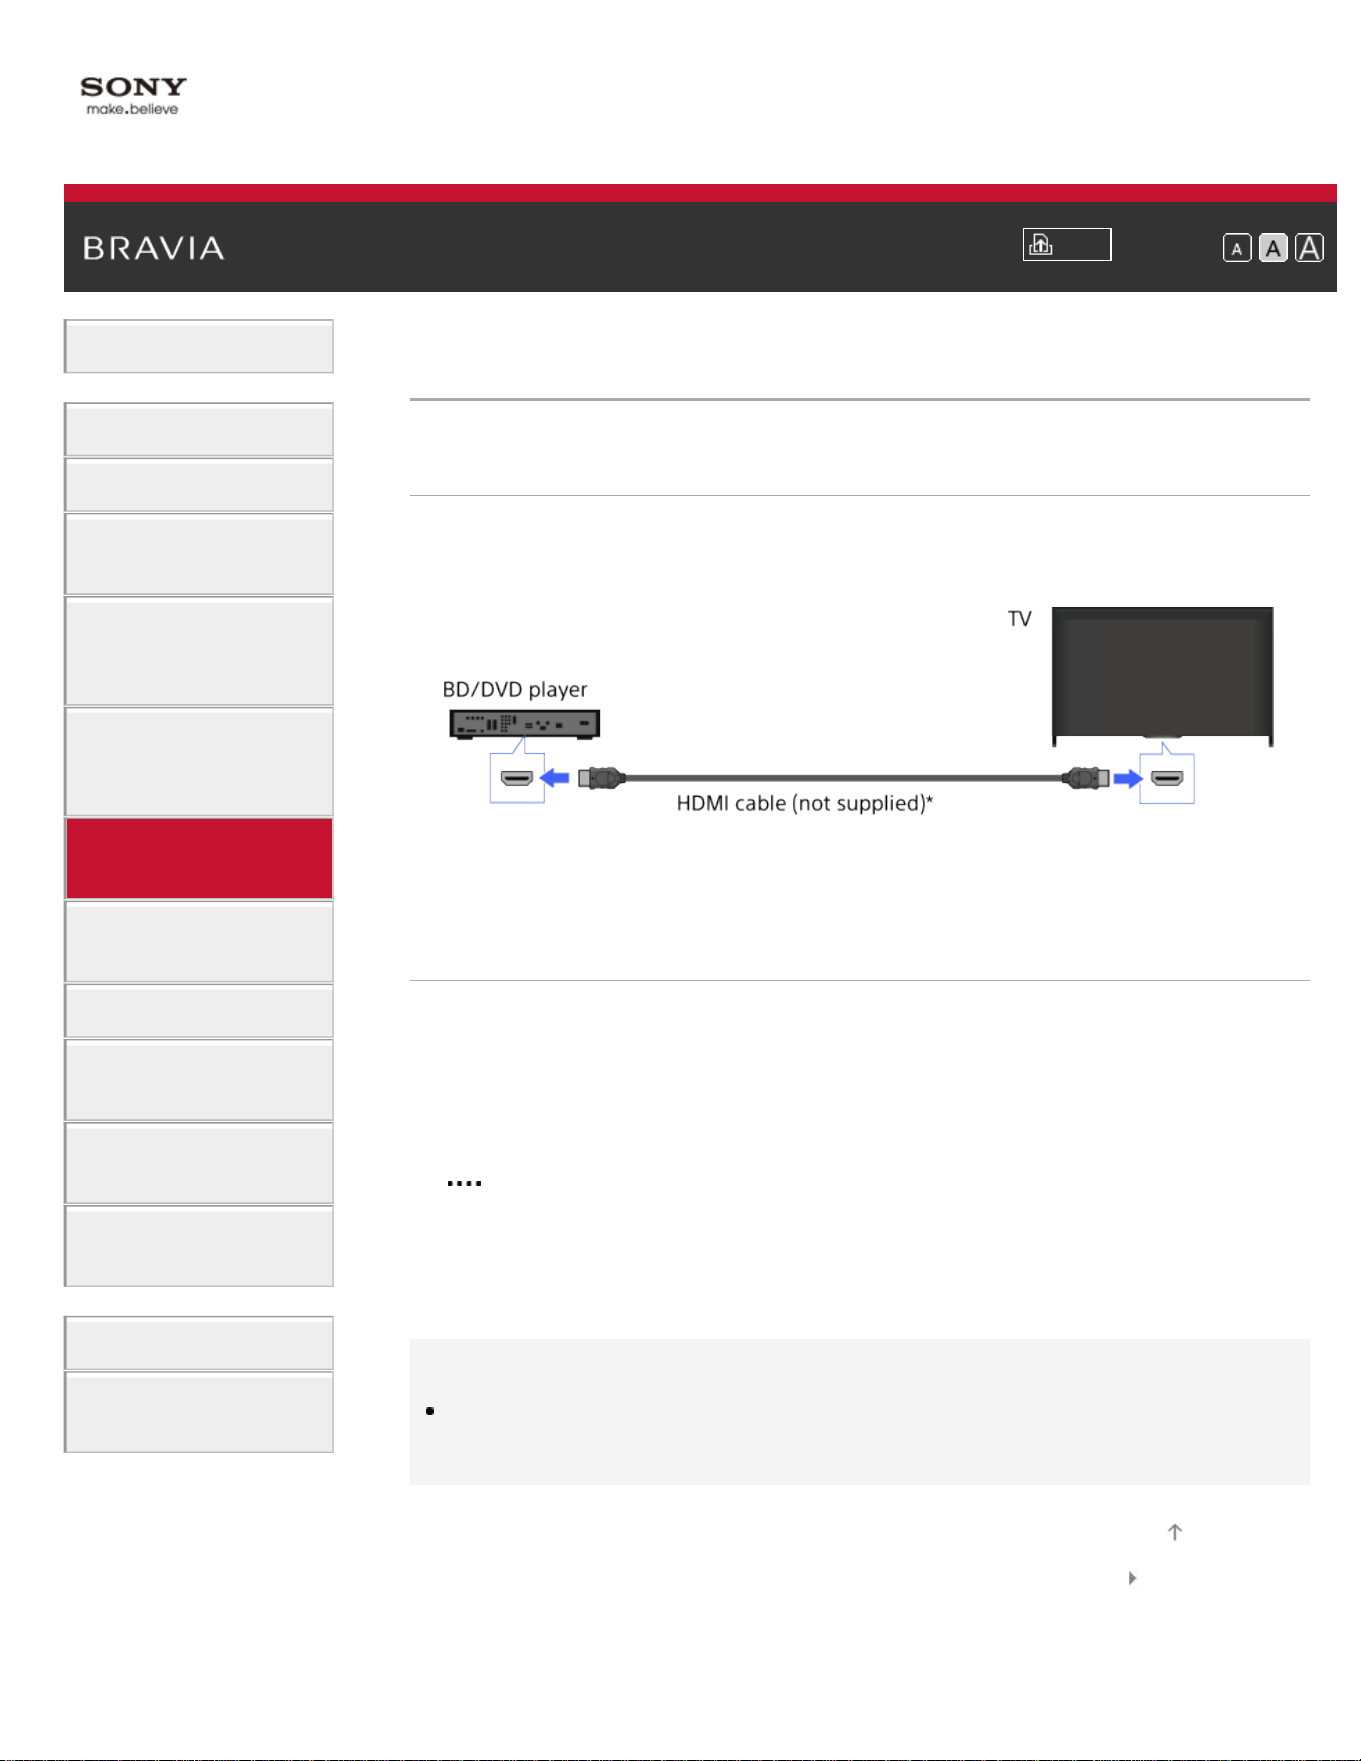
i-Manual
Print
Font Size
Basic Operations
Parts Description
Watching TV
Enjoying
Movies/Music/Photos
Using Internet
Services and
Applications
Watching TV with
Friends Far and
Near
Using Other
Devices
Using BRAVIA
Sync Devices
Useful Functions
Connecting to the
Internet
Using Home
Network
Configuring
Various Settings
Troubleshooting
How to Use
Bookmarks
Top Page > Using Other Devices > HDMI connection
HDMI connection
Making a Connection
HDMI connection is recommended for optimum picture quality. If your
BD/DVD player has an HDMI jack, connect it using an HDMI cable.
* Be sure to use an authorized HIGH SPEED HDMI cable bearing the
HDMI logo.
Steps
1.
After making a connection, turn on the connected BD/DVD player.
2. Press the INPUT button repeatedly to select the connected BD/DVD
player.
(When using the Touchpad Remote Control, press the Control Bar (
), slide the touchpad to highlight the INPUT button, press the
touchpad, slide the touchpad to highlight the connected BD/DVD
player, then press the touchpad.)
3. Start playback on the connected BD/DVD player.
Tips
If you connect a BRAVIA Sync-compatible device, you can control it by
simply using the TV’s remote control.
List of Contents© 2014 Sony Corporation
Top of Page
93
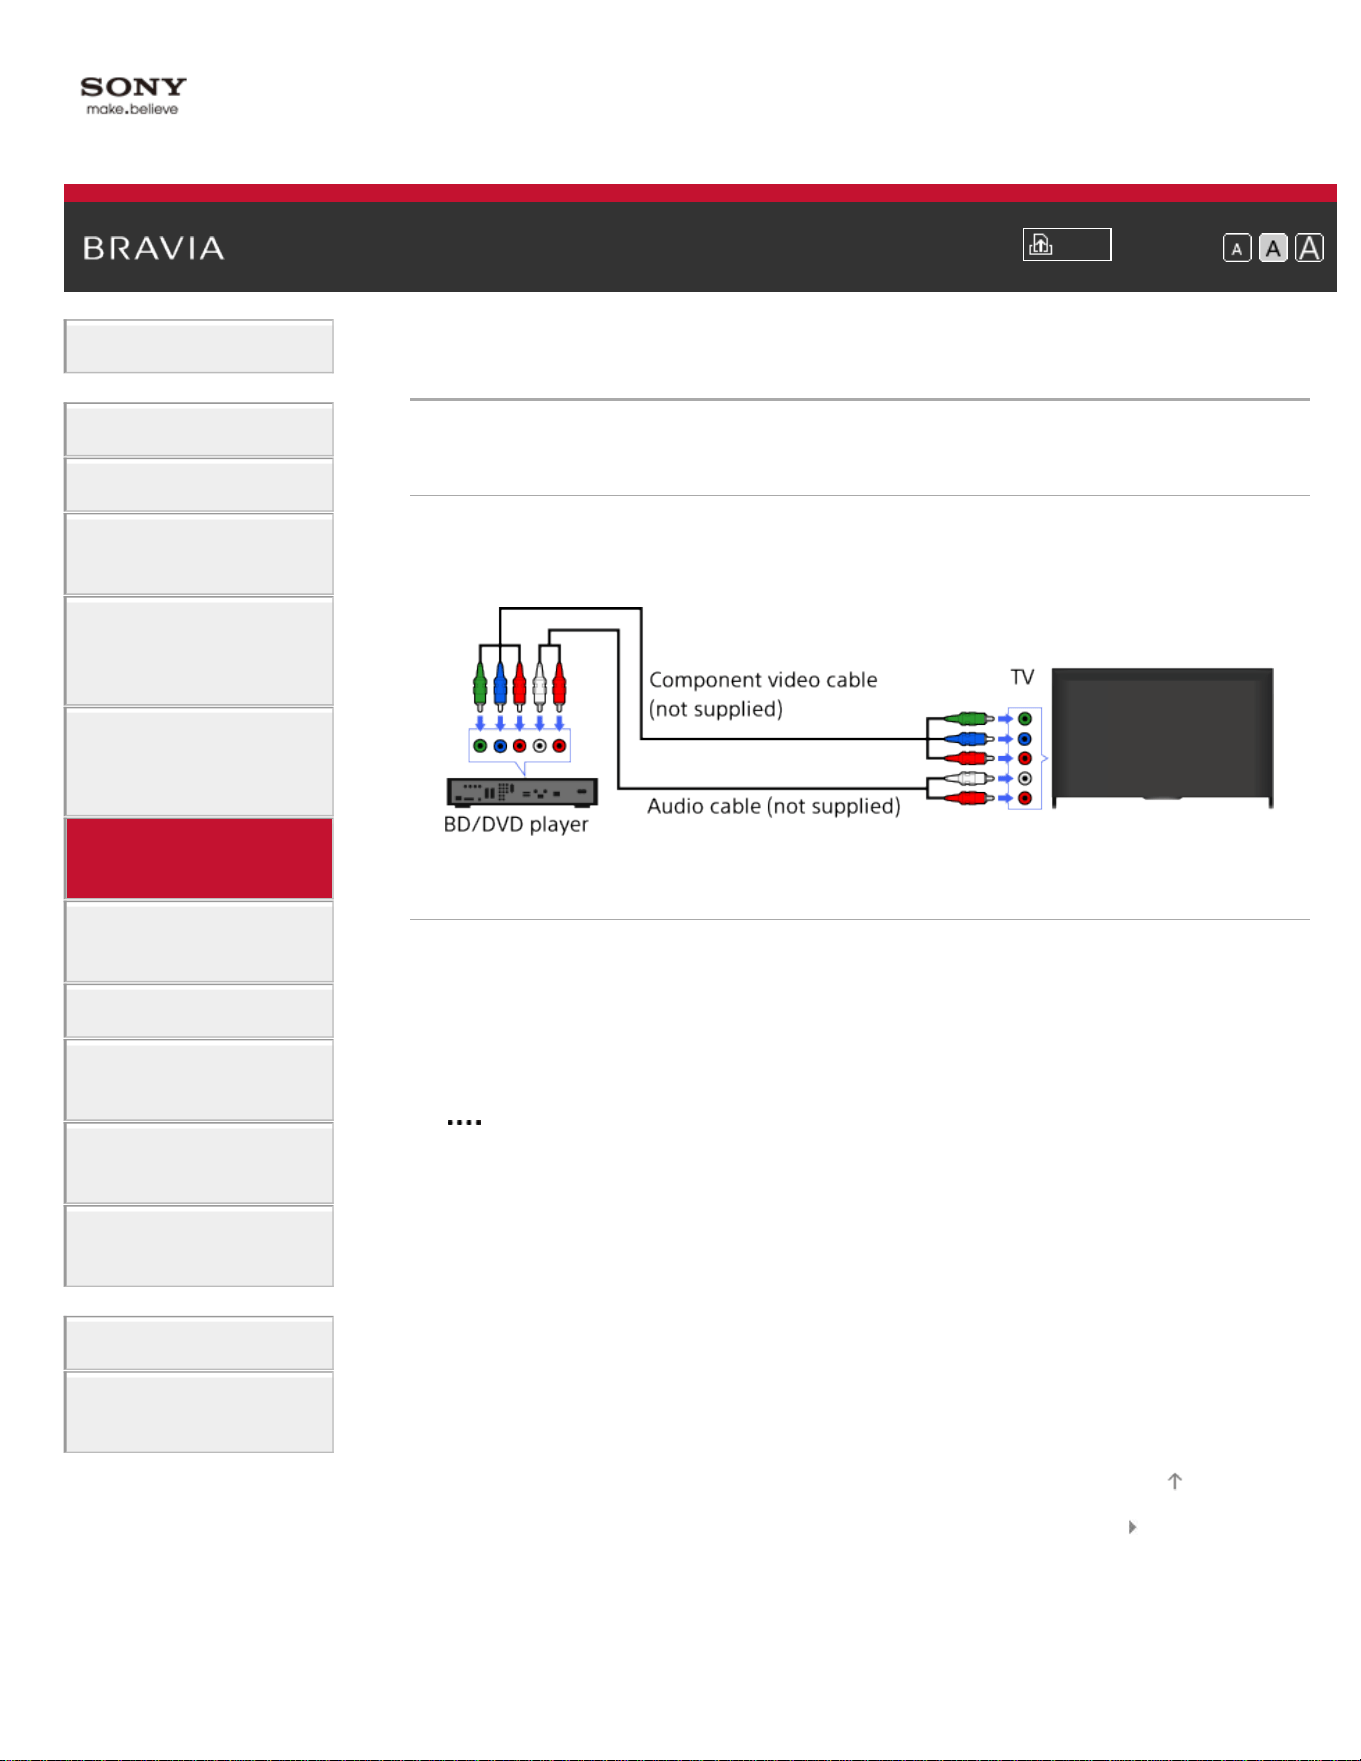
i-Manual
Print
Font Size
Basic Operations
Parts Description
Watching TV
Enjoying
Movies/Music/Photos
Using Internet
Services and
Applications
Watching TV with
Friends Far and
Near
Using Other
Devices
Using BRAVIA
Sync Devices
Useful Functions
Connecting to the
Internet
Using Home
Network
Configuring
Various Settings
Troubleshooting
How to Use
Bookmarks
Top Page > Using Other Devices > Component video connection
Component video connection
Making a Connection
If your BD/DVD player has component video jacks, connect it to the TV,
using a component video cable and an audio cable.
Steps
1.
After making a connection, turn on the connected BD/DVD player.
2. Press the INPUT button repeatedly to select the connected BD/DVD
player.
(When using the Touchpad Remote Control, press the Control Bar (
), slide the touchpad to highlight the INPUT button, press the
touchpad, slide the touchpad to highlight the connected BD/DVD
player, then press the touchpad.)
3. Start playback on the connected BD/DVD player.
List of Contents© 2014 Sony Corporation
Top of Page
94
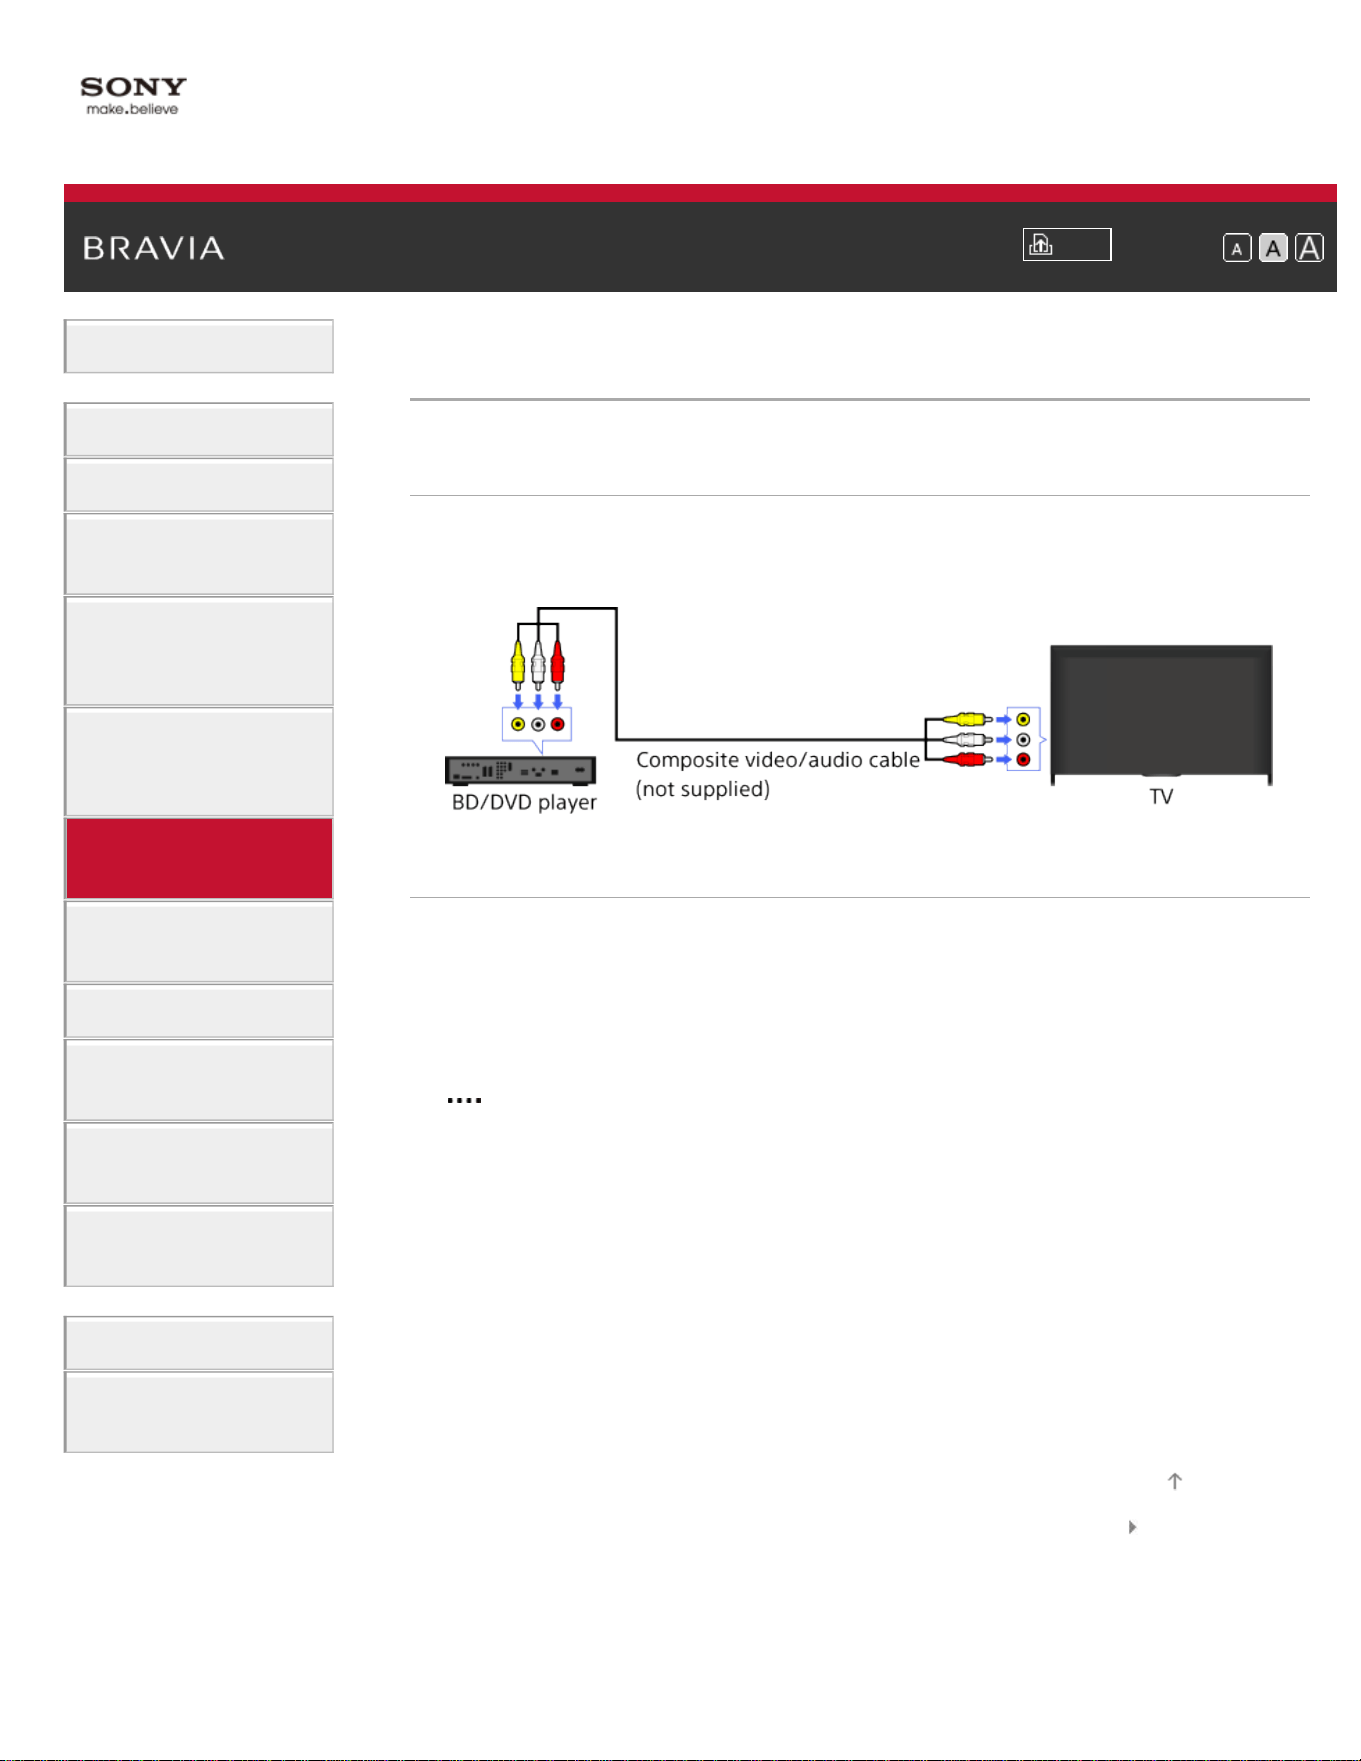
i-Manual
Print
Font Size
Basic Operations
Parts Description
Watching TV
Enjoying
Movies/Music/Photos
Using Internet
Services and
Applications
Watching TV with
Friends Far and
Near
Using Other
Devices
Using BRAVIA
Sync Devices
Useful Functions
Connecting to the
Internet
Using Home
Network
Configuring
Various Settings
Troubleshooting
How to Use
Bookmarks
Top Page > Using Other Devices > Composite connection
Composite connection
Making a Connection
If your BD/DVD player has composite jacks, connect it using a
composite video/audio cable.
Steps
1.
After making a connection, turn on the connected BD/DVD player.
2. Press the INPUT button repeatedly to select the connected BD/DVD
player.
(When using the Touchpad Remote Control, press the Control Bar (
), slide the touchpad to highlight the INPUT button, press the
touchpad, slide the touchpad to highlight the connected BD/DVD
player, then press the touchpad.)
3. Start playback on the connected BD/DVD player.
List of Contents© 2014 Sony Corporation
Top of Page
95

i-Manual
Print
Font Size
Basic Operations
Parts Description
Watching TV
Enjoying
Movies/Music/Photos
Using Internet
Services and
Applications
Watching TV with
Friends Far and
Near
Using Other
Devices
Using BRAVIA
Sync Devices
Useful Functions
Connecting to the
Internet
Using Home
Network
Configuring
Various Settings
Troubleshooting
How to Use
Bookmarks
Top Page > Using Other Devices > Digital Still Camera/Camcorder
Digital Still Camera/Camcorder
Making a Connection
Connect your Sony digital still camera or camcorder using an HDMI
cable. Use a cable that has an HDMI mini jack for digital still
camera/camcorder end, and a standard HDMI jack for the TV end.
* Be sure to use an authorized HIGH SPEED HDMI cable bearing the
HDMI logo.
Steps
1.
After making a connection, turn on the connected digital still
camera/camcorder.
2. Press the INPUT button repeatedly to select the connected digital
still camera/camcorder.
(When using the Touchpad Remote Control, press the Control Bar (
), slide the touchpad to highlight the INPUT button, press the
touchpad, slide the touchpad to highlight the connected digital still
camera/camcorder, then press the touchpad.)
3. Start playback on the connected digital still camera/camcorder.
Tips
If you connect a BRAVIA Sync-compatible device, you can control it by
simply using the TV’s remote control. Make sure that the device is
BRAVIA Sync-compatible. Some devices may not be compatible with
BRAVIA Sync even though they have an HDMI jack.
96
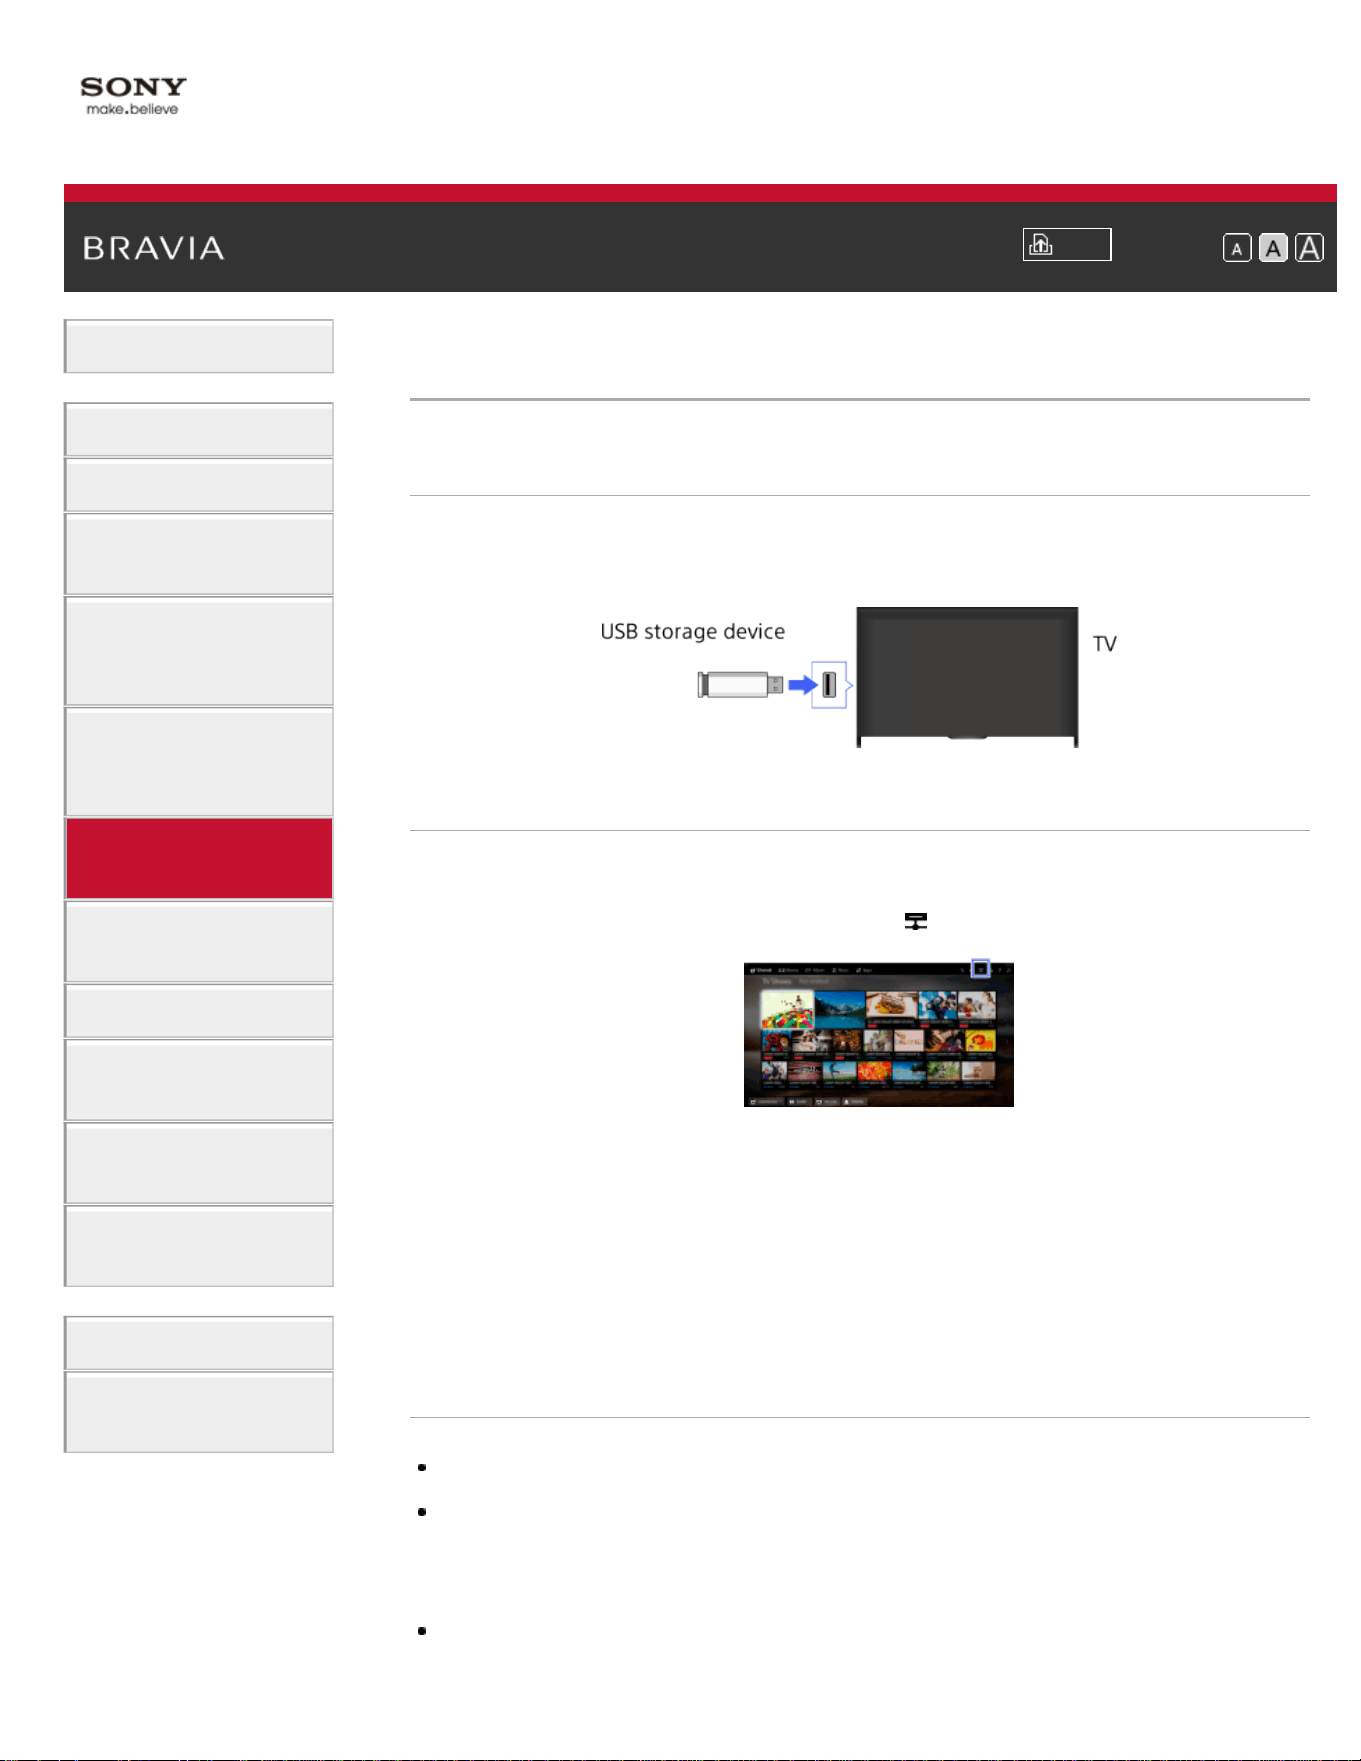
i-Manual
Print
Font Size
Basic Operations
Parts Description
Watching TV
Enjoying
Movies/Music/Photos
Using Internet
Services and
Applications
Watching TV with
Friends Far and
Near
Using Other
Devices
Using BRAVIA
Sync Devices
Useful Functions
Connecting to the
Internet
Using Home
Network
Configuring
Various Settings
Troubleshooting
How to Use
Bookmarks
Top Page > Using Other Devices > USB Device
USB Device
Making a Connection
Connect a USB storage device to enjoy photo, music and video files
stored in the device.
Steps
1.
After making a connection, turn on the connected USB device.
2. Press the HOME button, then select [Media Server].
3. Select [USB] → the folder or file from the list.
If you select a folder, select the desired file.
Playback starts.
To check the supported file formats
Codec List
Notes
USB viewer supports FAT16, FAT32 and exFAT file systems.
When connecting a Sony digital still camera to the TV with a USB cable,
USB connection settings on your camera need to be set to [Auto] or [Mass
Storage] mode.
If your digital still camera does not work with your TV, try the following:
97

Set the USB connection settings on your camera to [Mass Storage].
Copy the files from the camera to a USB flash drive, then connect the
drive to the TV.
[Face Zoom] and [Expanded] in the option menu of [Display Size] may not
work for some image files.
Only panoramic JPEG files in the following horizontal/vertical sizes can be
scrolled. (If the JPEG file is edited on a PC, etc., scrolling may not be
possible.)
- For horizontal scroll: 4912/1080, 7152/1080, 3424/1920, 4912/1920,
12416/1856, 8192/1856, 5536/2160, 3872/2160, 10480/4096, 11520/1080
- For vertical scroll: 1080/4912, 1080/7152, 1920/3424, 1920/4912,
1856/12416, 1856/8192, 2160/5536, 2160/3872, 4096/10480, 1080/11520
Video files are located in the following folder structure (hierarchal position):
/AVCHD/BDMV/STREAM/00000.MTS
/PRIVATE/AVCHD/BDMV/STREAM/00000.MTS
/MP_ROOT/100ANV01/MAHA0001.MP4
Avoid losing your files by backing up all your media files stored on a USB
device. Sony cannot accept responsibility for lost or damaged data stored
on a USB device.
Depending on the file, playback may not be possible even when using the
supported formats.
List of Contents© 2014 Sony Corporation
Top of Page
98
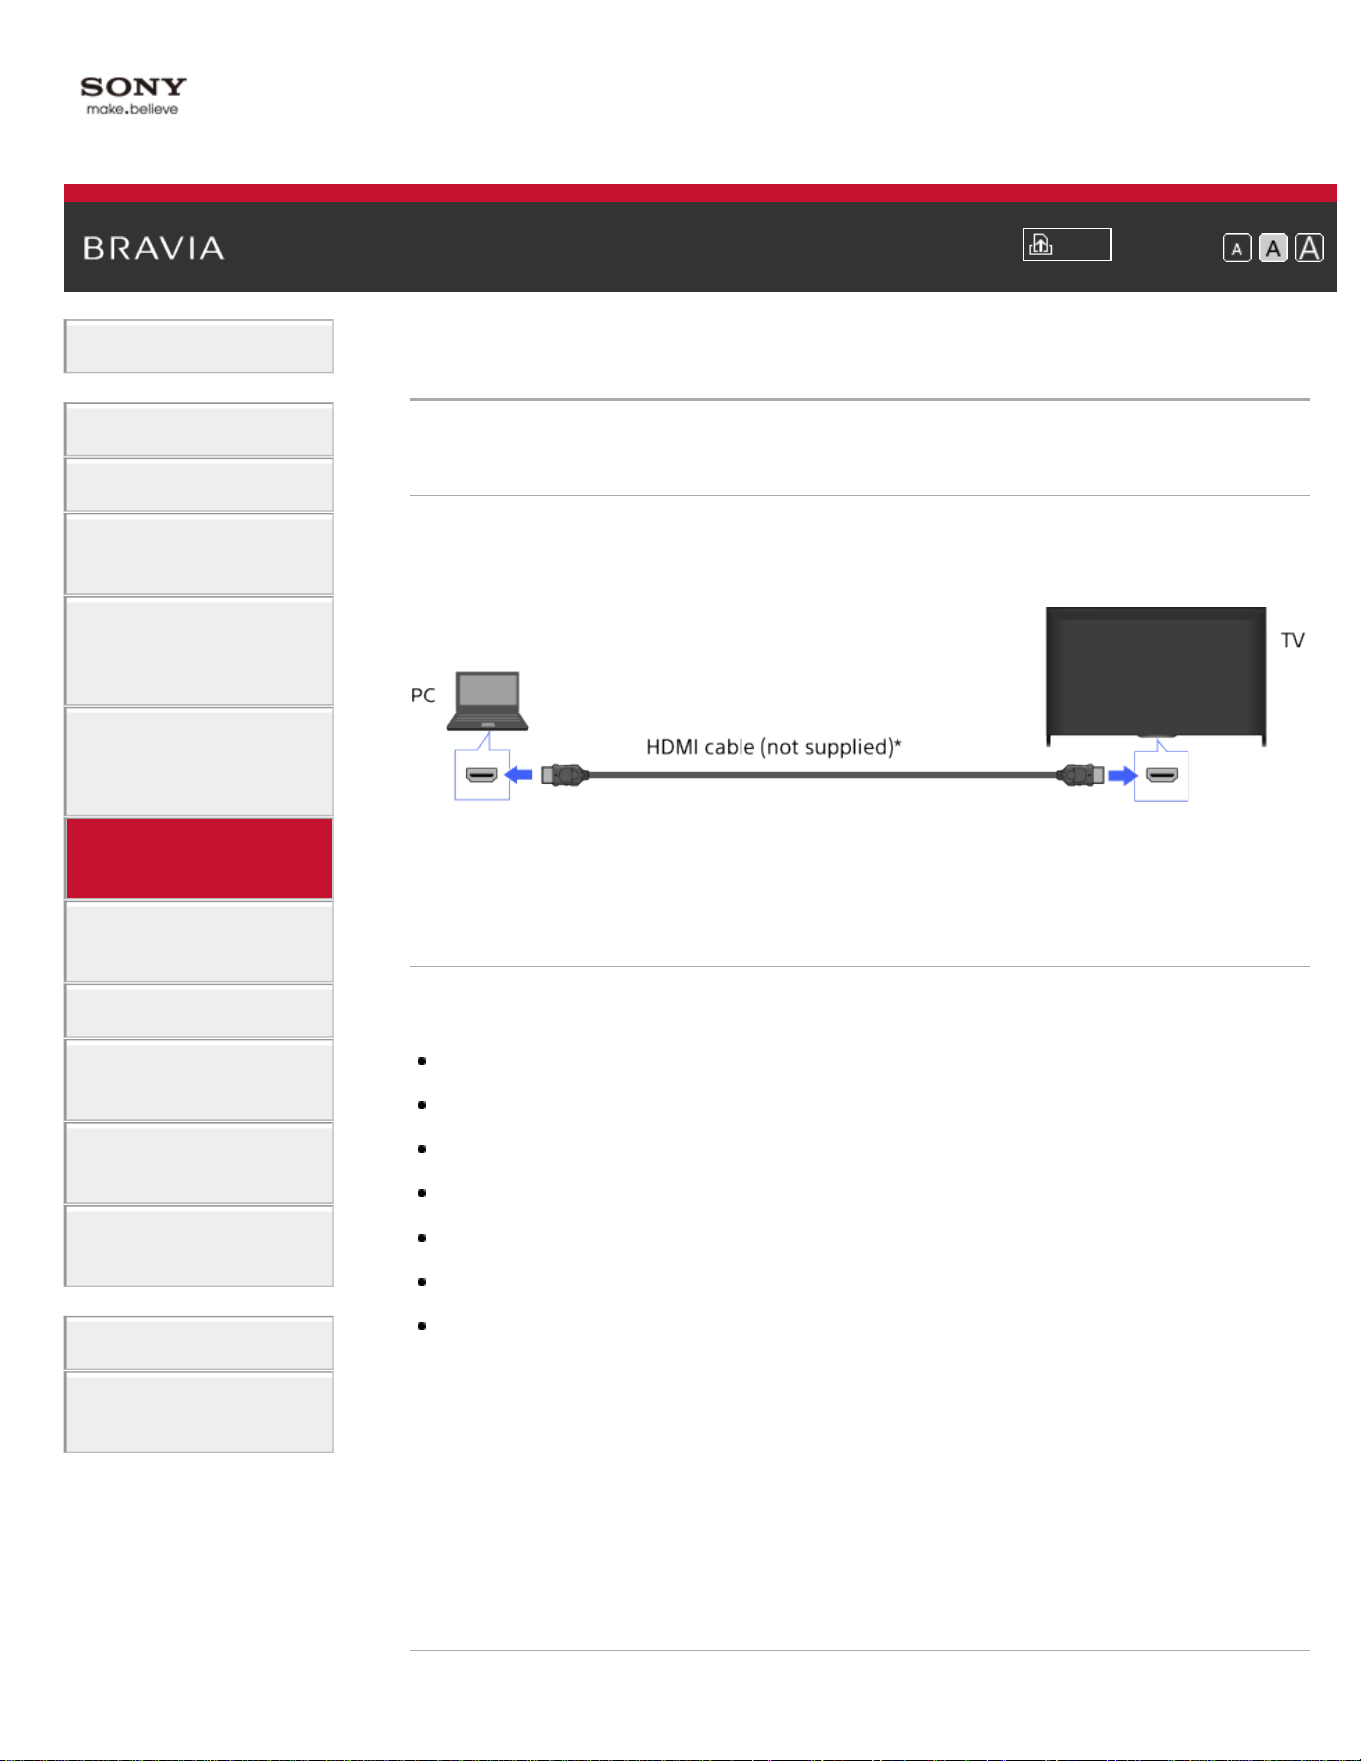
i-Manual
Print
Font Size
Basic Operations
Parts Description
Watching TV
Enjoying
Movies/Music/Photos
Using Internet
Services and
Applications
Watching TV with
Friends Far and
Near
Using Other
Devices
Using BRAVIA
Sync Devices
Useful Functions
Connecting to the
Internet
Using Home
Network
Configuring
Various Settings
Troubleshooting
How to Use
Bookmarks
Top Page > Using Other Devices > PC
PC
Making a Connection
Connect your PC with an HDMI cable to enjoy music, pictures and other
content stored in it.
* Be sure to use an authorized HIGH SPEED HDMI cable bearing the
HDMI logo.
Corresponding PC input signal
(Resolution, Horizontal frequency/Vertical frequency)
640 x 480, 31.5 kHz/60 Hz
800 x 600, 37.9 kHz/60 Hz
1024 x 768, 48.4 kHz/60 Hz
1280 x 768, 47.4 kHz/60 Hz and 47.8 kHz/60 Hz
1360 x 768, 47.7 kHz/60 Hz
1280 x 1024, 64.0 kHz/60 Hz (Full HD model only)
1920 x 1080, 67.5 kHz/60 Hz (Full HD model only)*
* The 1080p timing, when applied to the HDMI input, will be treated as a
video timing and not a PC timing. This will affect the [Preferences] and
[Picture & Display] settings. To view PC content, set [Scene Select] to
[Graphics], [Wide Mode] to [Full], and [Display Area] to [Full Pixel].
([Display Area] is configurable only when [Auto Display Area] is set to
[Off].)
Notes
99

This TV does not support interlaced signals.
For optimum picture quality, it is recommended that you use the signals in
the chart. In plug and play, signals with a 60 Hz vertical frequency will be
detected automatically. (PC reboot may be necessary.)
Depending on the connection status, the image may be blurred or
smeared. In this case, change the PC’s settings, then select another input
signal in “Corresponding PC input signal”.
1920 pixel x 1080 line/60Hz output may not be available, depending on
your PC. Even if 1920 pixel x 1080 line/60Hz output is selected, the actual
output signal may differ. In this case, change the PC’s settings, then select
another input signal in “Corresponding PC input signal”.
List of Contents© 2014 Sony Corporation
Top of Page
100
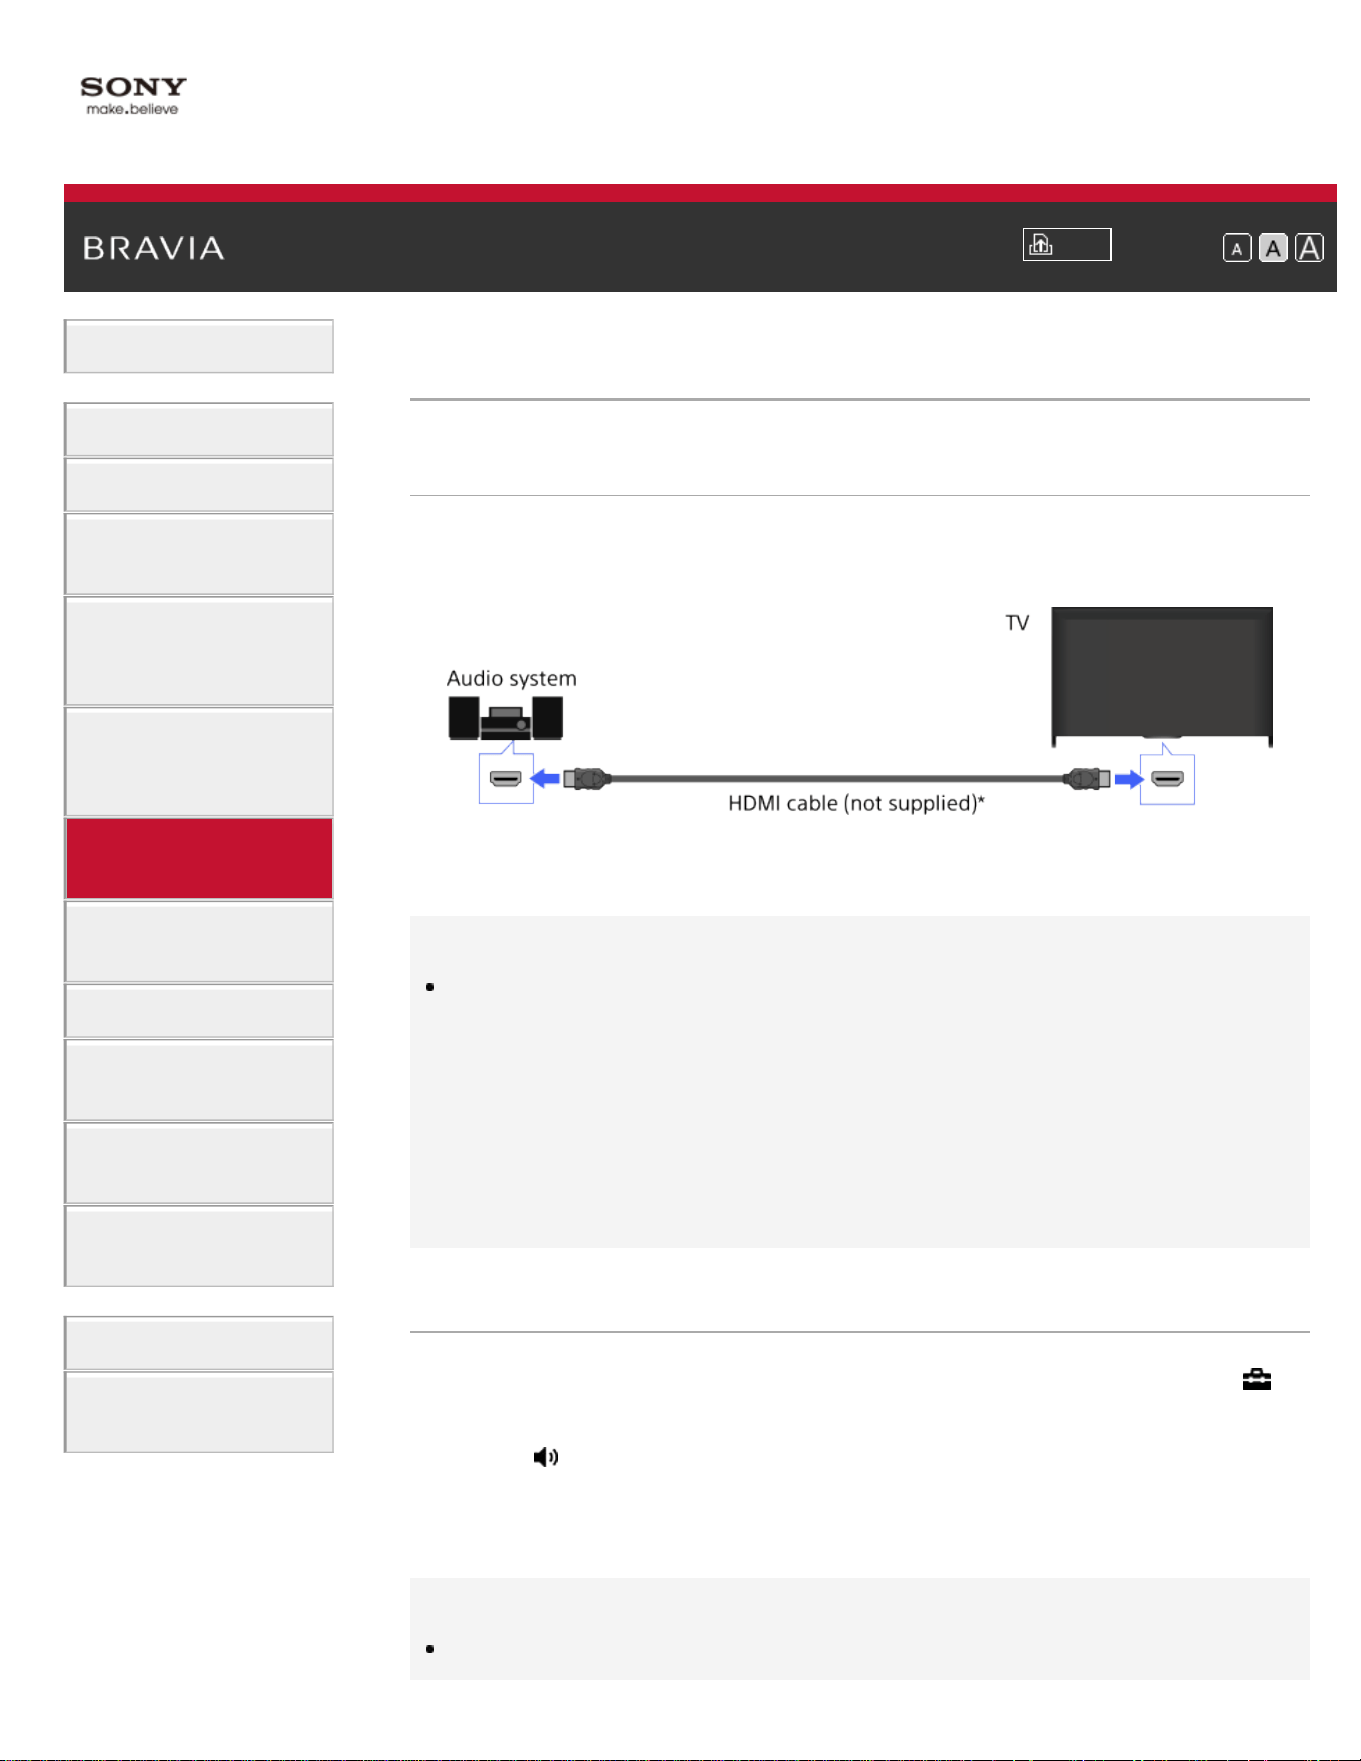
i-Manual
Print
Font Size
Basic Operations
Parts Description
Watching TV
Enjoying
Movies/Music/Photos
Using Internet
Services and
Applications
Watching TV with
Friends Far and
Near
Using Other
Devices
Using BRAVIA
Sync Devices
Useful Functions
Connecting to the
Internet
Using Home
Network
Configuring
Various Settings
Troubleshooting
How to Use
Bookmarks
Top Page > Using Other Devices > HDMI connection
HDMI connection
Making a Connection
Connect an audio system (e.g. home theater system) with HDMI output
to the TV, using an HDMI cable.
* Be sure to use an authorized HIGH SPEED HDMI cable bearing the
HDMI logo.
Tips
When connecting a BRAVIA Sync-compatible digital audio system with
Audio Return Channel (ARC) technology, find the HDMI jack that carries
the “ARC” mark (HDMI IN 1 or HDMI IN 2, depending on your
model/region/country), then connect to that HDMI jack with an HDMI
cable. However, if connecting a system that is not BRAVIA Sync-
compatible or Audio Return Channel capable, an additional audio
connection via DIGITAL AUDIO OUT (OPTICAL) is necessary.
Steps
1.
After making a connection, press the HOME button, then select
[Settings].
2. Select [Sound] → [Speakers] → [Audio System].
The connected audio system is turned on automatically. The volume
can be controlled using the TV’s remote control.
Tips
If you connect a BRAVIA Sync-compatible device, you can control it by
101

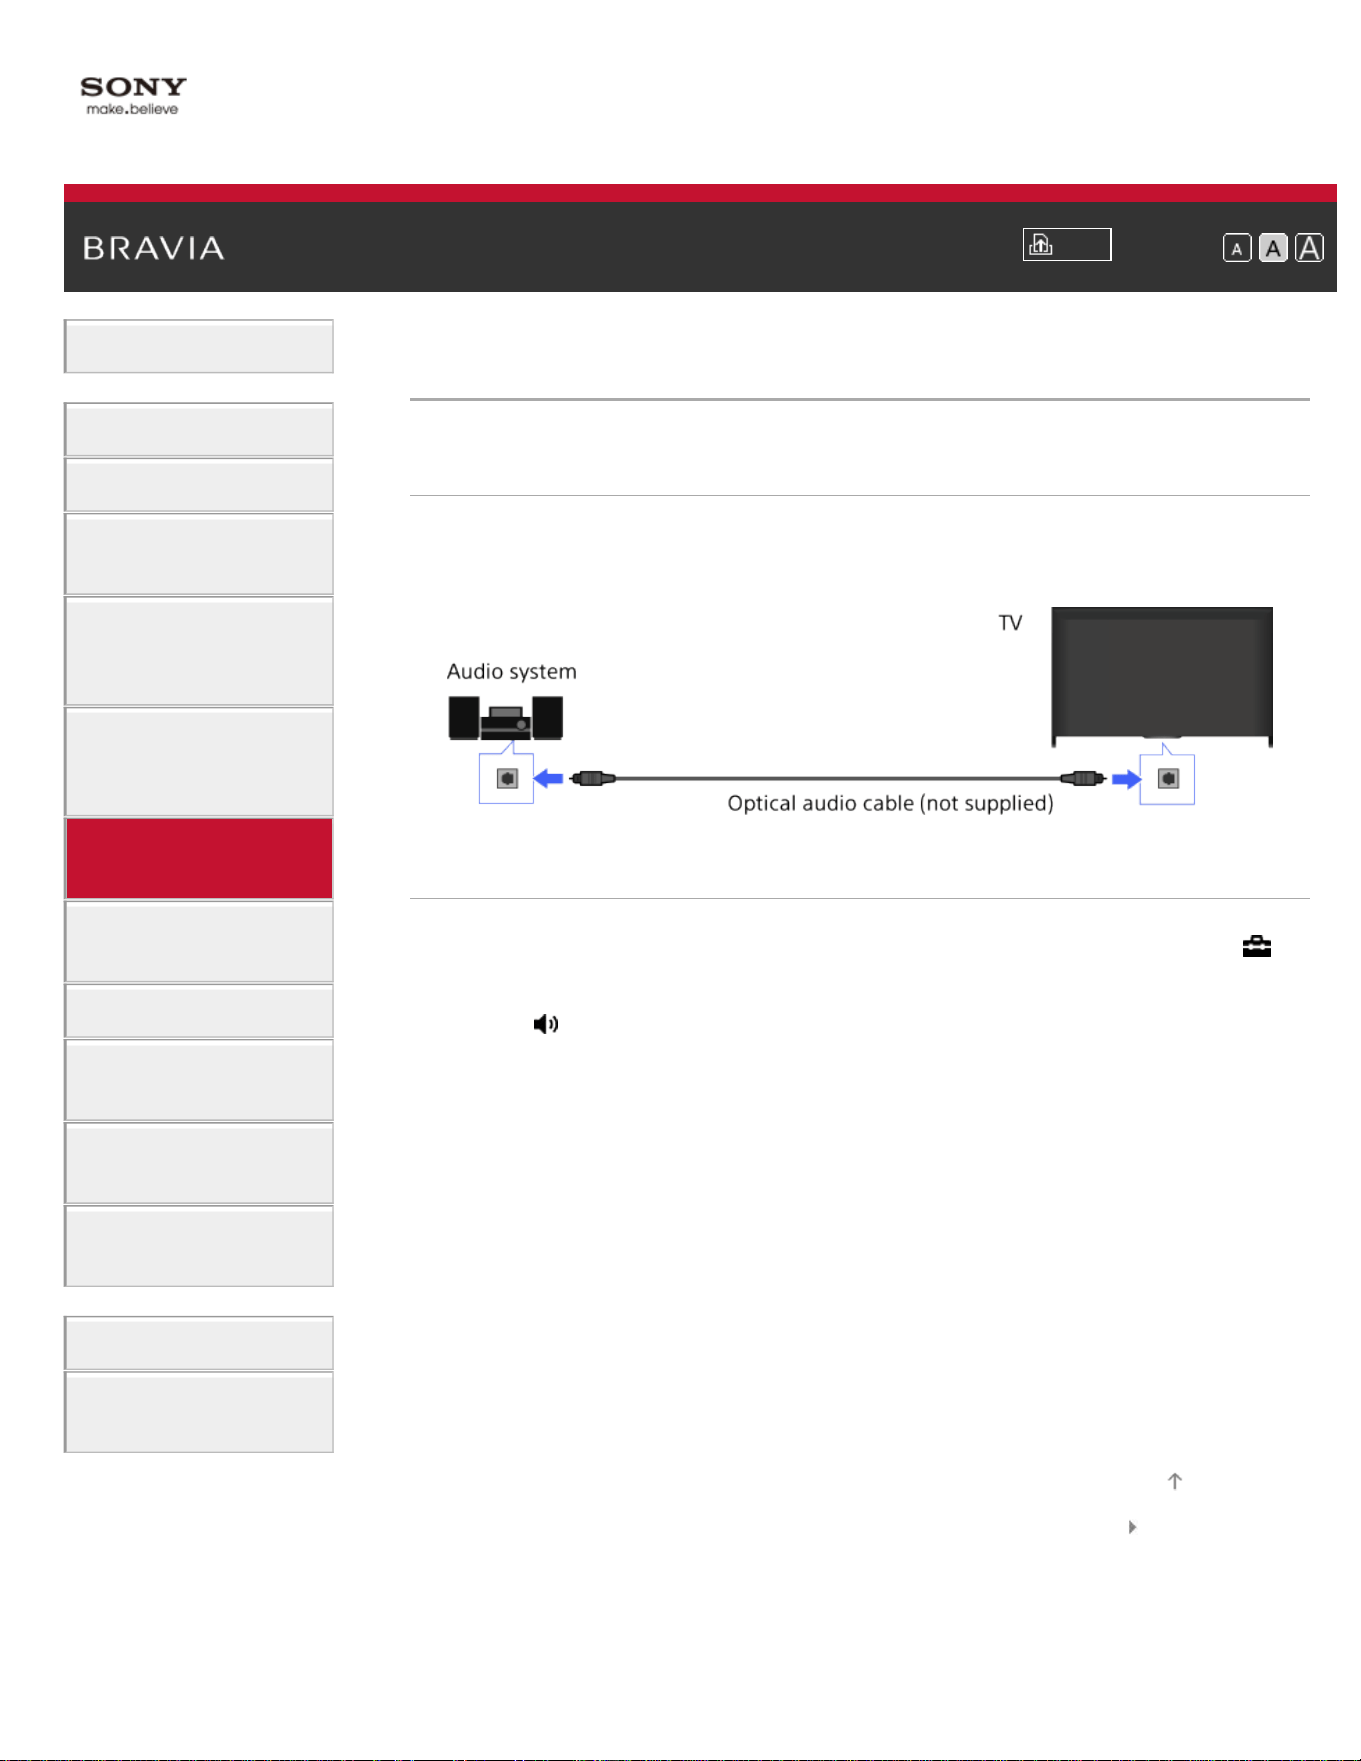
i-Manual
Print
Font Size
Basic Operations
Parts Description
Watching TV
Enjoying
Movies/Music/Photos
Using Internet
Services and
Applications
Watching TV with
Friends Far and
Near
Using Other
Devices
Using BRAVIA
Sync Devices
Useful Functions
Connecting to the
Internet
Using Home
Network
Configuring
Various Settings
Troubleshooting
How to Use
Bookmarks
Top Page > Using Other Devices > Optical audio connection
Optical audio connection
Making a Connection
Connect an audio system (e.g. home theater system) with digital input
to the TV, using an optical audio cable.
Steps
1.
After making a connection, press the HOME button, then select
[Settings].
2. Select [Sound] → [Speakers] → [Audio System].
3. Press the HOME button twice to return to the last viewed source.
4. Turn on the connected audio system, then adjust the volume.
List of Contents© 2014 Sony Corporation
Top of Page
103
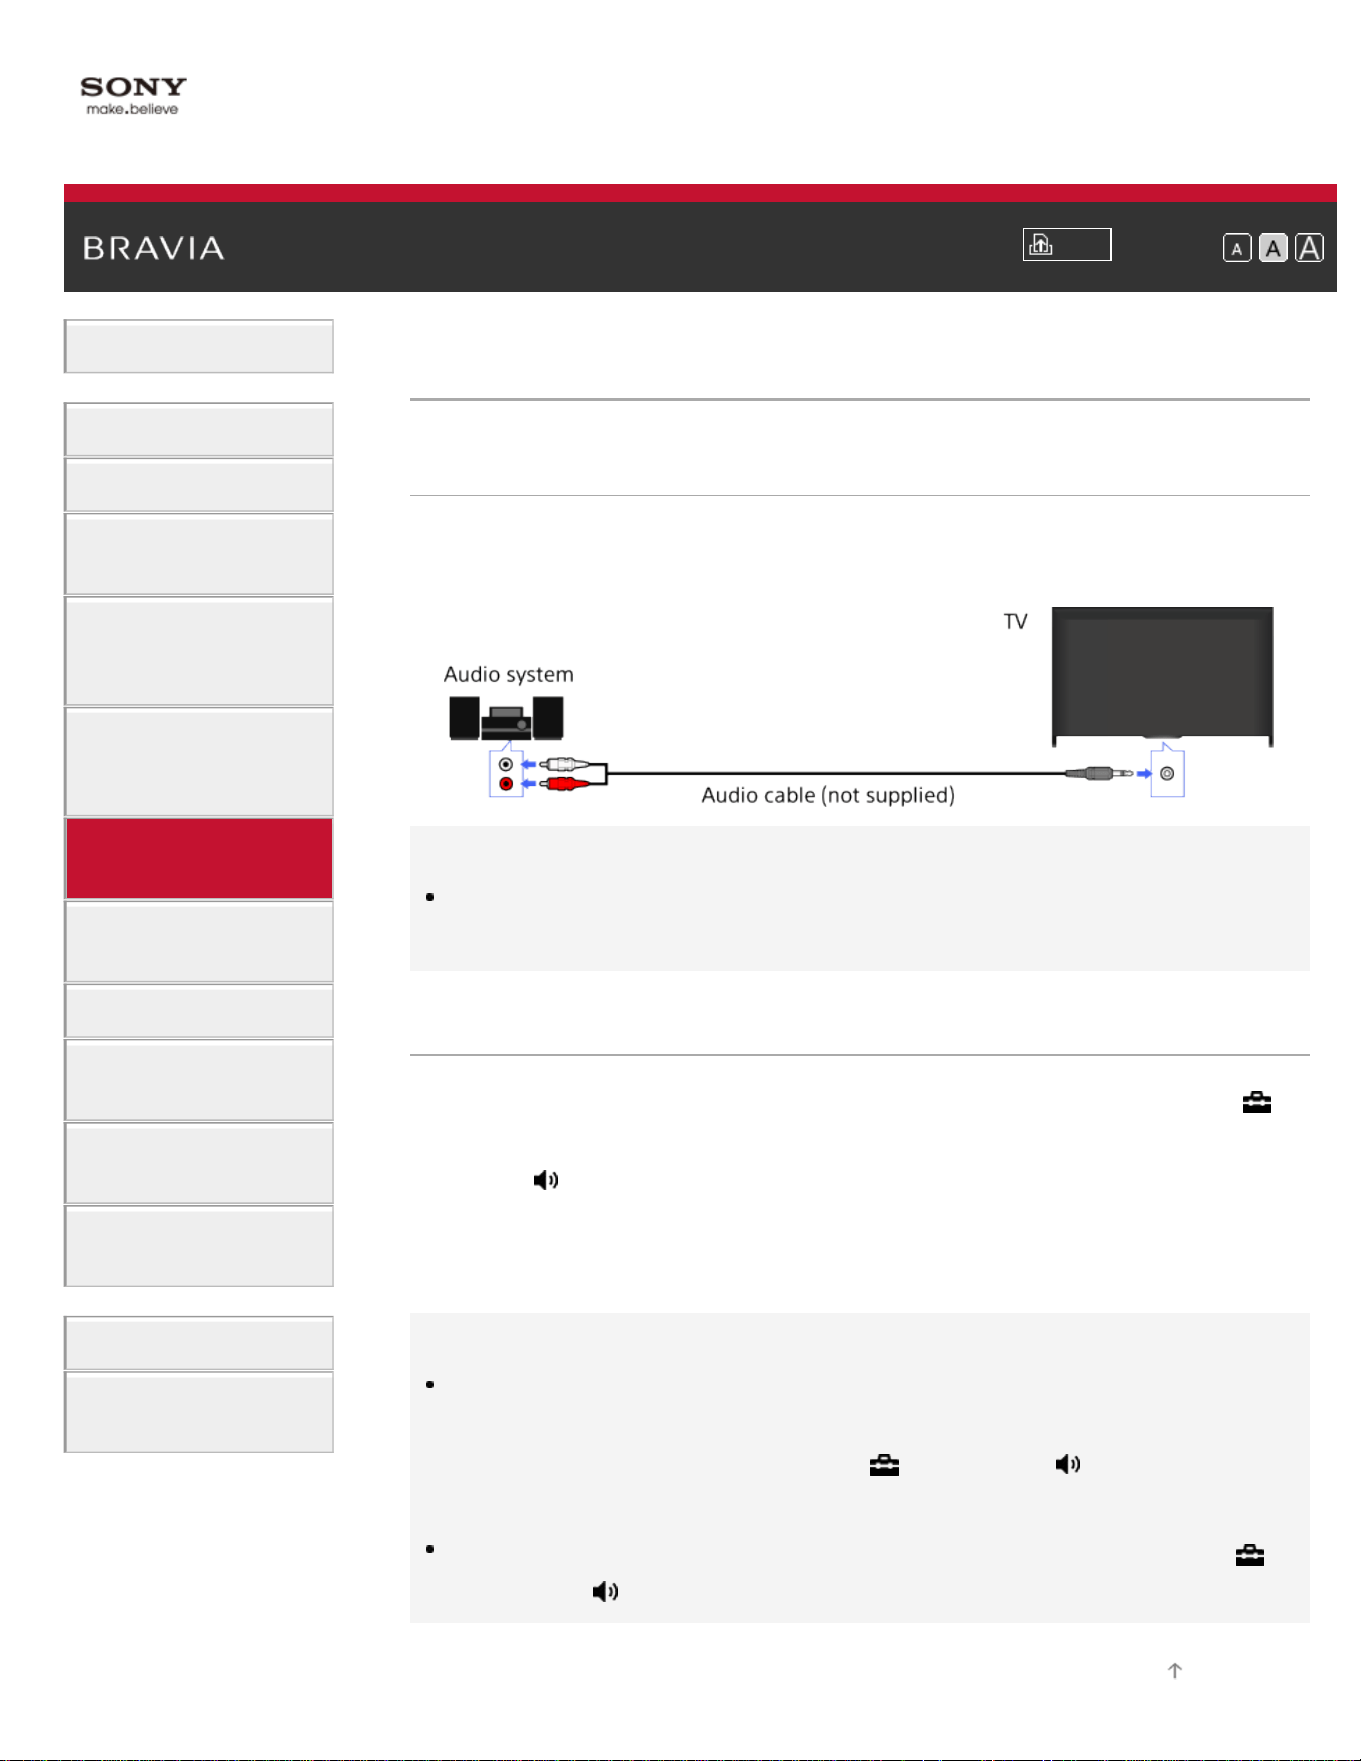
i-Manual
Print
Font Size
Basic Operations
Parts Description
Watching TV
Enjoying
Movies/Music/Photos
Using Internet
Services and
Applications
Watching TV with
Friends Far and
Near
Using Other
Devices
Using BRAVIA
Sync Devices
Useful Functions
Connecting to the
Internet
Using Home
Network
Configuring
Various Settings
Troubleshooting
How to Use
Bookmarks
Top Page > Using Other Devices > Audio cable connection
Audio cable connection
Making a Connection
Connect an audio system (e.g. amplifier) to the TV, using an audio
cable.
Tips
See the instruction manual of the audio system for details on connection
of other devices and for the setup before use.
Steps
1.
After making a connection, press the HOME button, then select
[Settings].
2. Select [Sound] → [Headphone/Audio Out] → [Audio Out].
3. Press the HOME button twice to return to the last viewed source.
4. Turn on the connected audio system, then adjust the volume.
Tips
When using an external audio system, the audio out of the TV can be
controlled using the TV’s remote control if [Audio Out] is set to [Variable].
Press the HOME button, then select
[Settings] → [Sound] → [Audio
Out] → [Variable].
When connecting a subwoofer, press the HOME button, then select
[Settings] → [Sound] → [Headphone/Audio Out] → [Subwoofer].
Top of Page
104
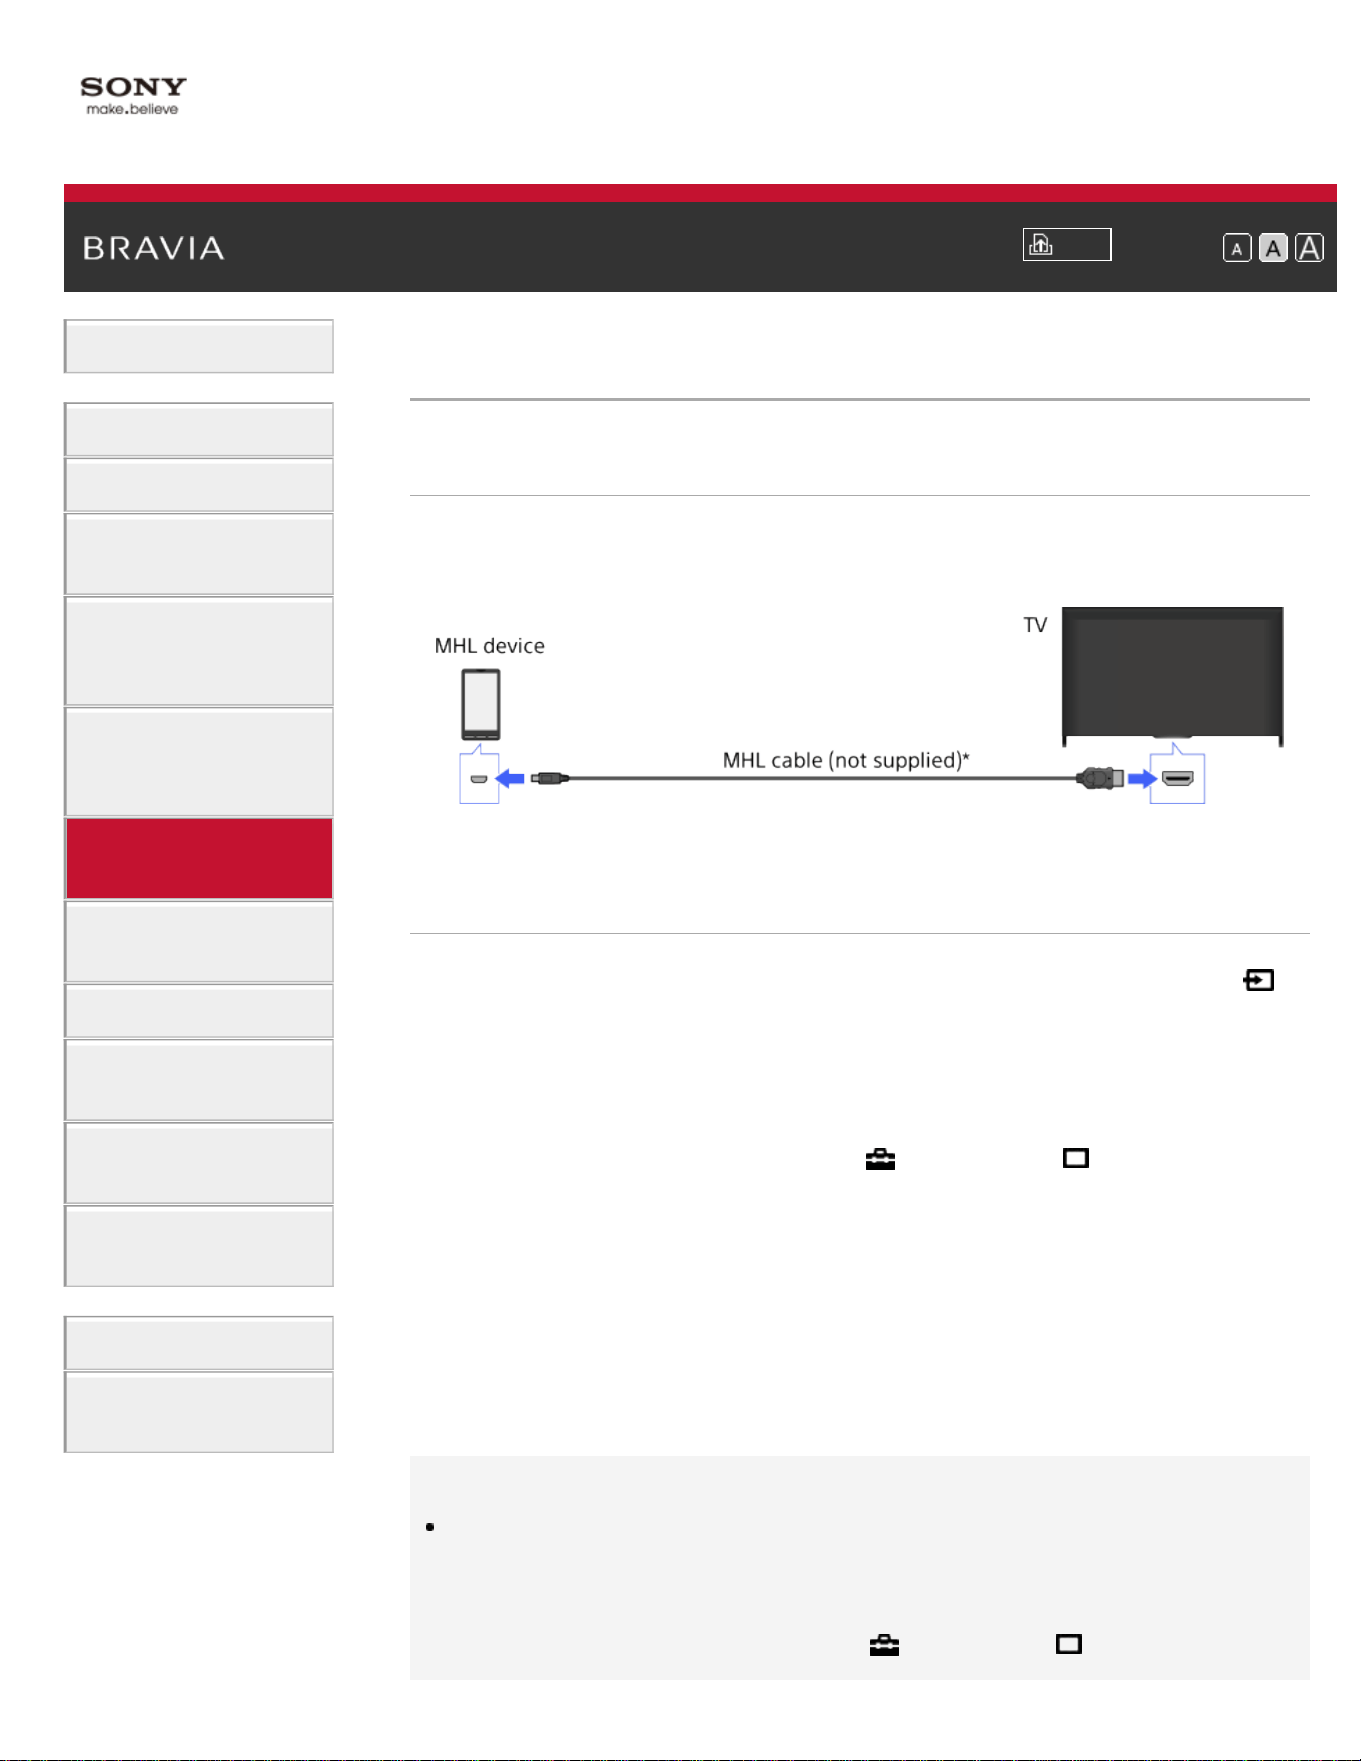
i-Manual
Print
Font Size
Basic Operations
Parts Description
Watching TV
Enjoying
Movies/Music/Photos
Using Internet
Services and
Applications
Watching TV with
Friends Far and
Near
Using Other
Devices
Using BRAVIA
Sync Devices
Useful Functions
Connecting to the
Internet
Using Home
Network
Configuring
Various Settings
Troubleshooting
How to Use
Bookmarks
Top Page > Using Other Devices > MHL Device (Smartphone, Tablet, etc.)
MHL Device (Smartphone, Tablet, etc.)
Making a Connection
Connect your MHL device (e.g. smartphone, tablet) with MHL output to
the TV's HDMI IN 1/MHL port, using an MHL cable.
* Be sure to use an authorized MHL 2 cable bearing the MHL logo.
Steps
1.
After making a connection, press the HOME button, then select
[Inputs].
2. Select [HDMI 1/MHL].
To switch to the MHL input automatically
Press the HOME button, then select [Settings] →
[Channels & Inputs]/[Channels, Inputs & Ginga] → [BRAVIA Sync
Settings] → [Auto Input Change(MHL)] → [On]. (Depending on the MHL
device, input may not be switched.) If the TV is in standby mode, it will
not switch automatically.
To charge an MHL device
When the TV is on, an MHL device can be charged from the TV, using
an MHL cable.
Tips
When the TV is in standby mode, if [Charge MHL during Power Off] is set
to [On], an MHL device can also be charged from the TV, using an MHL
cable.
Press the HOME button, then select
[Settings] →
105

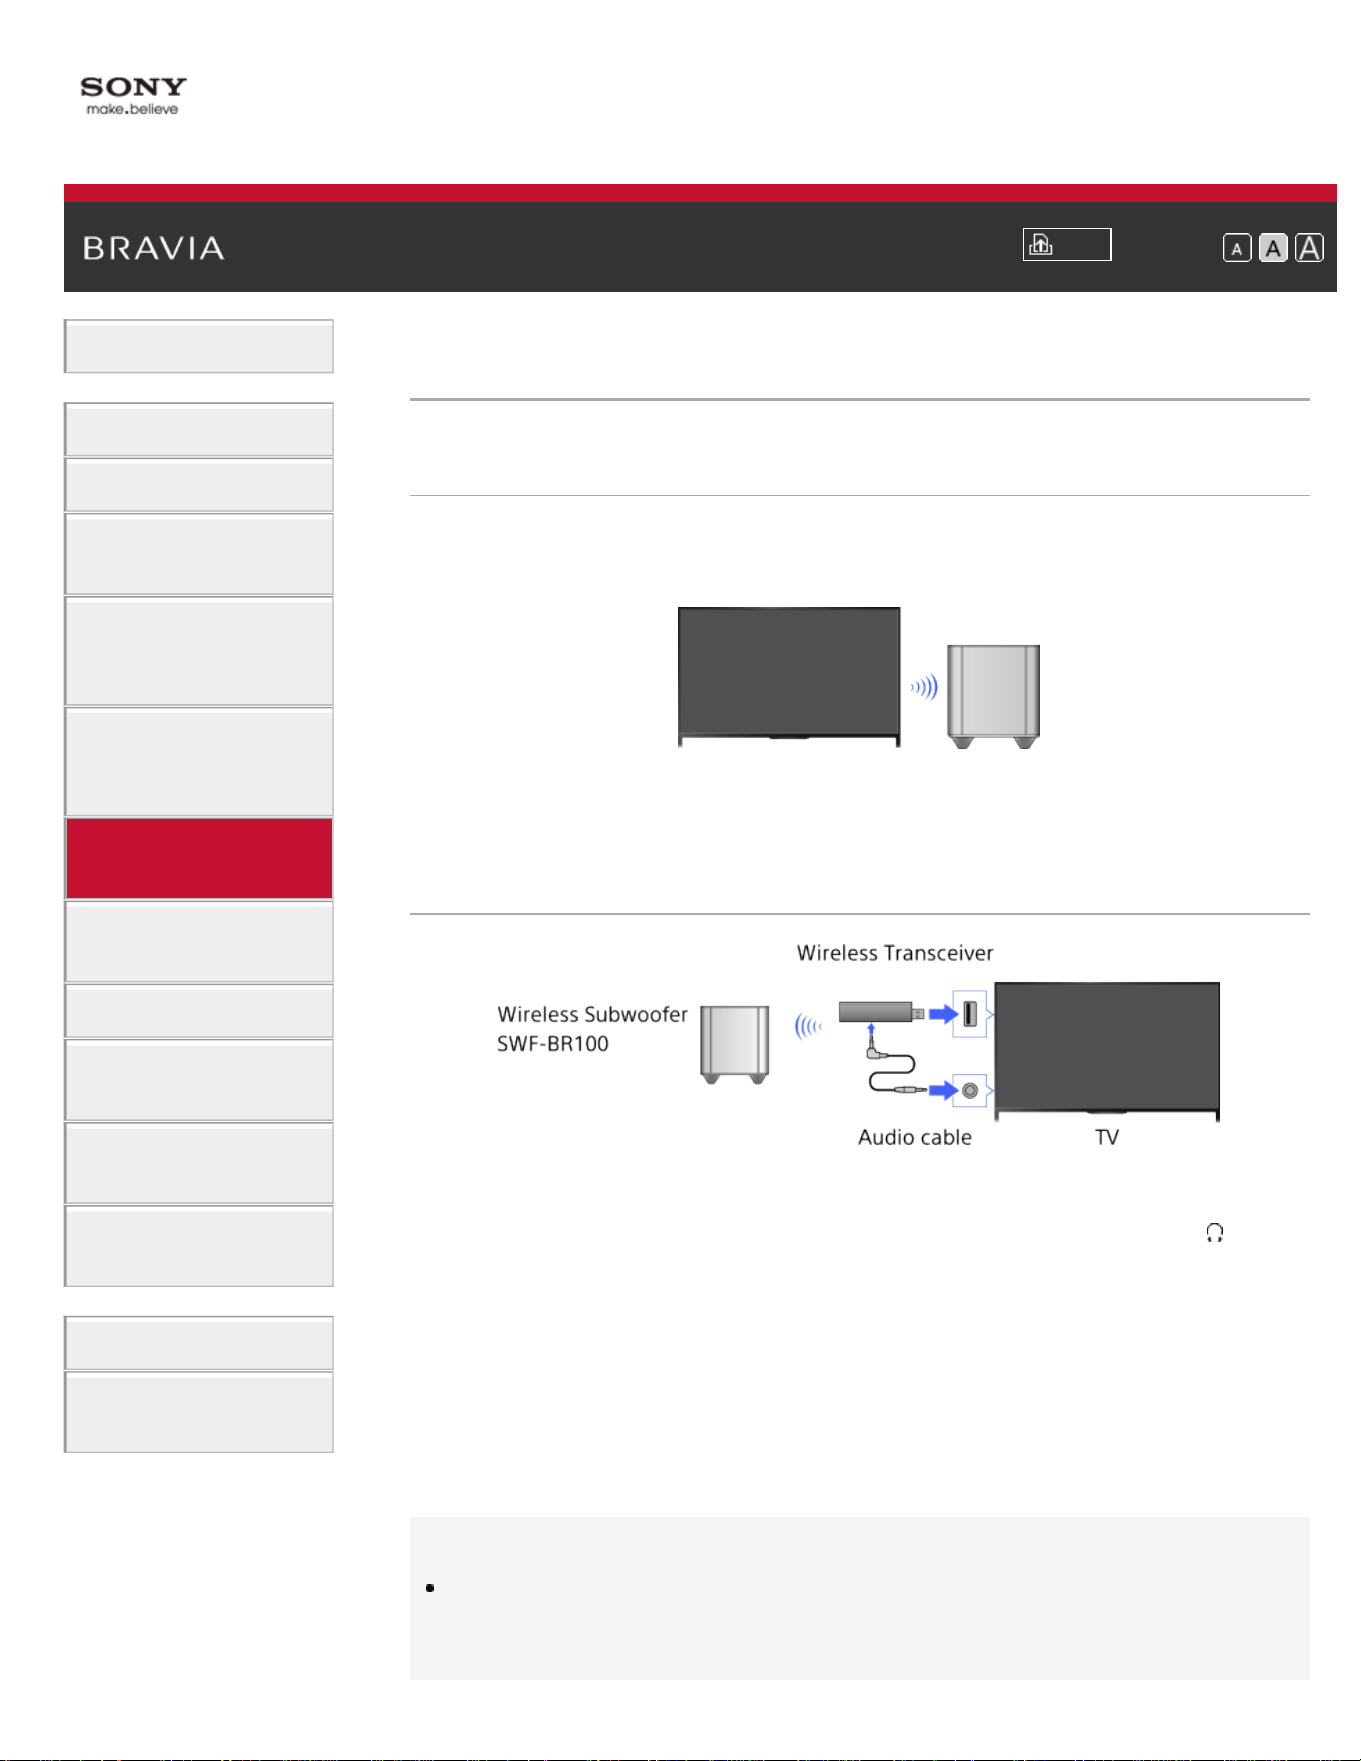
i-Manual
Print
Font Size
Basic Operations
Parts Description
Watching TV
Enjoying
Movies/Music/Photos
Using Internet
Services and
Applications
Watching TV with
Friends Far and
Near
Using Other
Devices
Using BRAVIA
Sync Devices
Useful Functions
Connecting to the
Internet
Using Home
Network
Configuring
Various Settings
Troubleshooting
How to Use
Bookmarks
Top Page > Using Other Devices > Wireless Subwoofer (Optional)
Wireless Subwoofer (Optional)
Overview
You can use the optional Wireless Subwoofer SWF-BR100 to extend
the bass response of the TV’s sound.
Connect the Wireless Transceiver supplied with the Wireless Subwoofer
SWF-BR100 to use the Wireless Subwoofer.
Making a Connection
1. Connect the audio cable (supplied) to the Wireless Transceiver.
2. Connect the other end of the audio cable to the AUDIO OUT/ jack
of the TV.
3. Connect the Wireless Transceiver to the USB port of the TV.
[Headphone/Audio Out] is automatically set to [Subwoofer].
4. Position the Wireless Subwoofer and connect it to the AC power.
It is recommended that the Wireless Subwoofer be placed as close
as possible to the TV.
Tips
When the Wireless Transceiver is disconnected, [Headphone/Audio Out]
is automatically restored to its original setting.
107

For details on how to set up the Wireless Subwoofer, refer to the
instruction manual supplied with the Wireless Subwoofer.
Steps
1.
Press the HOME button, then select [Settings].
2. Select [Sound] → [Wireless Subwoofer].
Available Options
The recommended values for your TV have already been set.
[Subwoofer Level]
Adjusts the volume level of the Wireless Subwoofer.
[Cut Off Frequency]
Adjusts the cutoff frequency of the Wireless Subwoofer.
[Phase]
Sets the phase polarity.
Select the setting based on your preference.
[Power]
Sets the power control method of the Wireless Subwoofer.
When you do not use the Wireless Subwoofer, select [Off].
You can also set this option using the Options menu.
[Reset]
Resets the Wireless Subwoofer settings to their initial values.
List of Contents© 2014 Sony Corporation
Top of Page
108
i-Manual
Print
Font Size
Basic Operations
Parts Description
Watching TV
Enjoying
Movies/Music/Photos
Using Internet
Services and
Applications
Watching TV with
Friends Far and
Near
Using Other
Devices
Using BRAVIA
Sync Devices
Useful Functions
Connecting to the
Internet
Using Home
Network
Configuring
Various Settings
Troubleshooting
How to Use
Bookmarks
Top Page > Using Other Devices > Playable File Formats (DLNA, USB devices, etc.)
Playable File Formats (DLNA, USB devices, etc.)
Checking supported file formats
Codec List
List of Contents© 2014 Sony Corporation
Top of Page
109
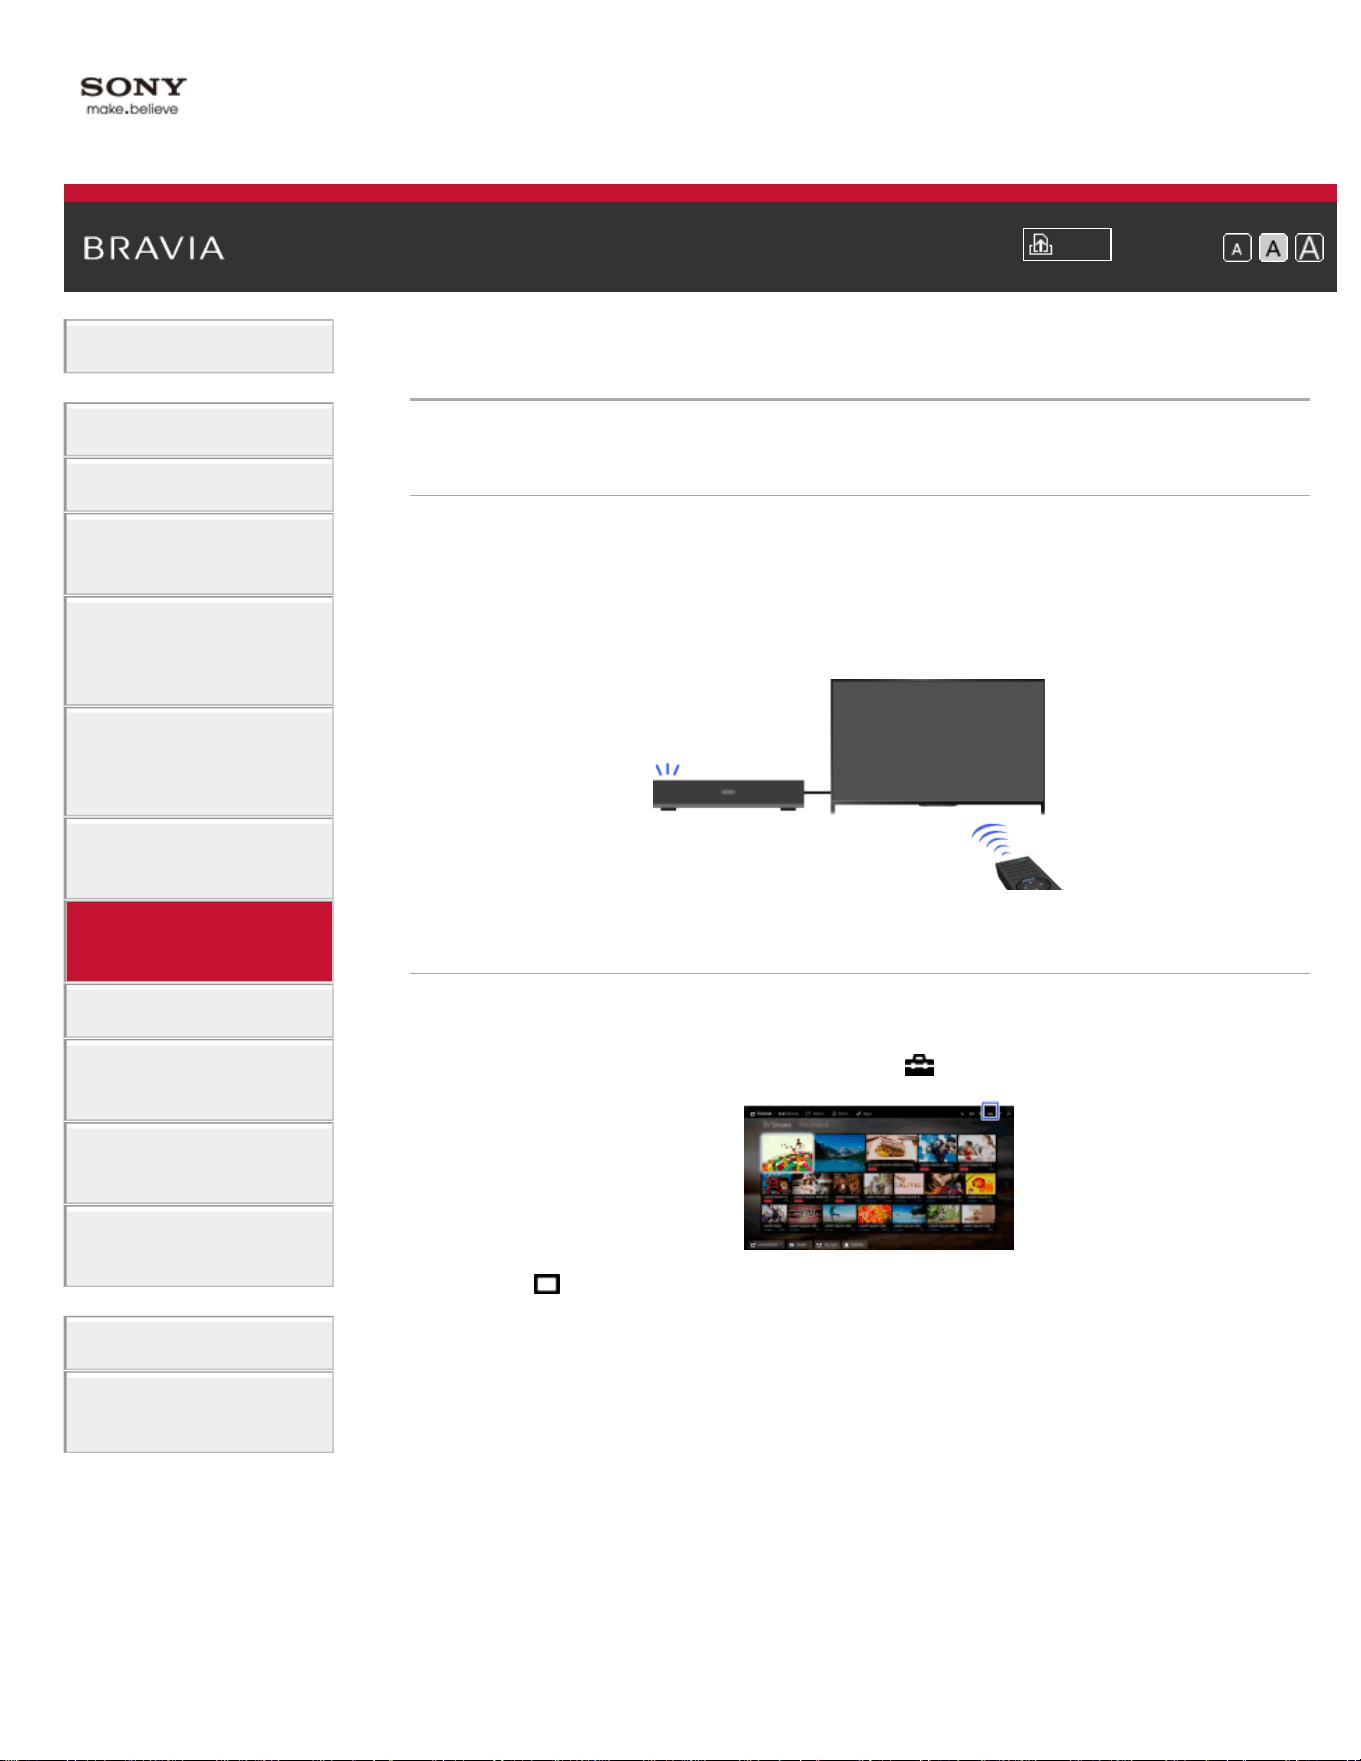
i-Manual
Print
Font Size
Basic Operations
Parts Description
Watching TV
Enjoying
Movies/Music/Photos
Using Internet
Services and
Applications
Watching TV with
Friends Far and
Near
Using Other
Devices
Using BRAVIA
Sync Devices
Useful Functions
Connecting to the
Internet
Using Home
Network
Configuring
Various Settings
Troubleshooting
How to Use
Bookmarks
Top Page > Using BRAVIA Sync Devices > Setting BRAVIA Sync
Setting BRAVIA Sync
Overview
If a BRAVIA Sync-compatible device (e.g. BD player, AV amplifier) is
connected with an HDMI cable, or a BRAVIA Sync-compatible device
(e.g. smartphone, tablet) is connected with an MHL cable, this TV
allows you to control the device with the TV’s remote control.
Steps
1.
Turn on the connected device.
2. Press the HOME button, then select [Settings].
3. Select [Channels & Inputs]/[Channels, Inputs & Ginga]* →
[BRAVIA Sync Settings] → [BRAVIA Sync Control] → [On].
4. Activate BRAVIA Sync on the connected device.
When a specific Sony BRAVIA Sync-compatible device is connected
and powered on, and [BRAVIA Sync Control] is set to [On], BRAVIA
Sync is automatically activated on that device.
For details, refer to the instruction manual of the connected device.
* Option name differs depending on your region/country.
To not turn off the connected device automatically
when turning off the TV
110

Press the HOME button, then select [Settings] →
[Channels & Inputs]/[Channels, Inputs & Ginga]* → [BRAVIA Sync
Settings] → [Device Auto Power Off] → [Off].
* Option name differs depending on your region/country.
To not turn on the TV automatically when turning on
the connected device
Press the HOME button, then select [Settings] →
[Channels & Inputs]/[Channels, Inputs & Ginga]* → [BRAVIA Sync
Settings] → [TV Auto Power On] → [Off].
* Option name differs depending on your region/country.
To switch the TV input to the corresponding device
connected with an MHL cable
Press the HOME button, then select [Settings] →
[Channels & Inputs]/[Channels, Inputs & Ginga]* → [BRAVIA Sync
Settings] → [Auto Input Change(MHL)] → [On].
* Option name differs depending on your region/country.
Available BRAVIA Sync Operations
BD/DVD player
Automatically turns the BRAVIA Sync-compatible device on and switches
the input to that device when you select it from the Home Menu or Sync
Menu.
Automatically turns the TV on and switches the input to the connected
device when the device starts to play.
Automatically turns the connected device off when you turn the TV off.
Controls menu operation (
/ / / buttons), playback (e.g. button) and
channel selection of the connected device through the TV’s remote
control.
AV amplifier
Automatically turns the connected AV amplifier on and switches the sound
output from the TV speaker to the audio system when you turn the TV on.
This function is only available if you have previously used the AV amplifier
to output the TV’s sound.
Automatically switches the sound output to the AV amplifier by turning the
AV amplifier on when the TV is turned on.
Automatically turns the connected AV amplifier off when you turn the TV
off.
Adjusts the volume (VOL +/– buttons) and mutes the sound (MUTING
button) of the connected AV amplifier through the TV’s remote control.
111

Video camera
Automatically turns the TV on and switches the input to the connected
video camera when the connected video camera is turned on.
Automatically turns the connected video camera off when you turn the TV
off.
Controls menu operation (
/ / / buttons), playback (e.g. button) and
channel selection of the connected video camera through the TV’s remote
control.
Notes
“BRAVIA Sync Control” (BRAVIA Sync) is only available for a connected
BRAVIA Sync-compatible device that has the BRAVIA Sync logo.
List of Contents© 2014 Sony Corporation
Top of Page
112
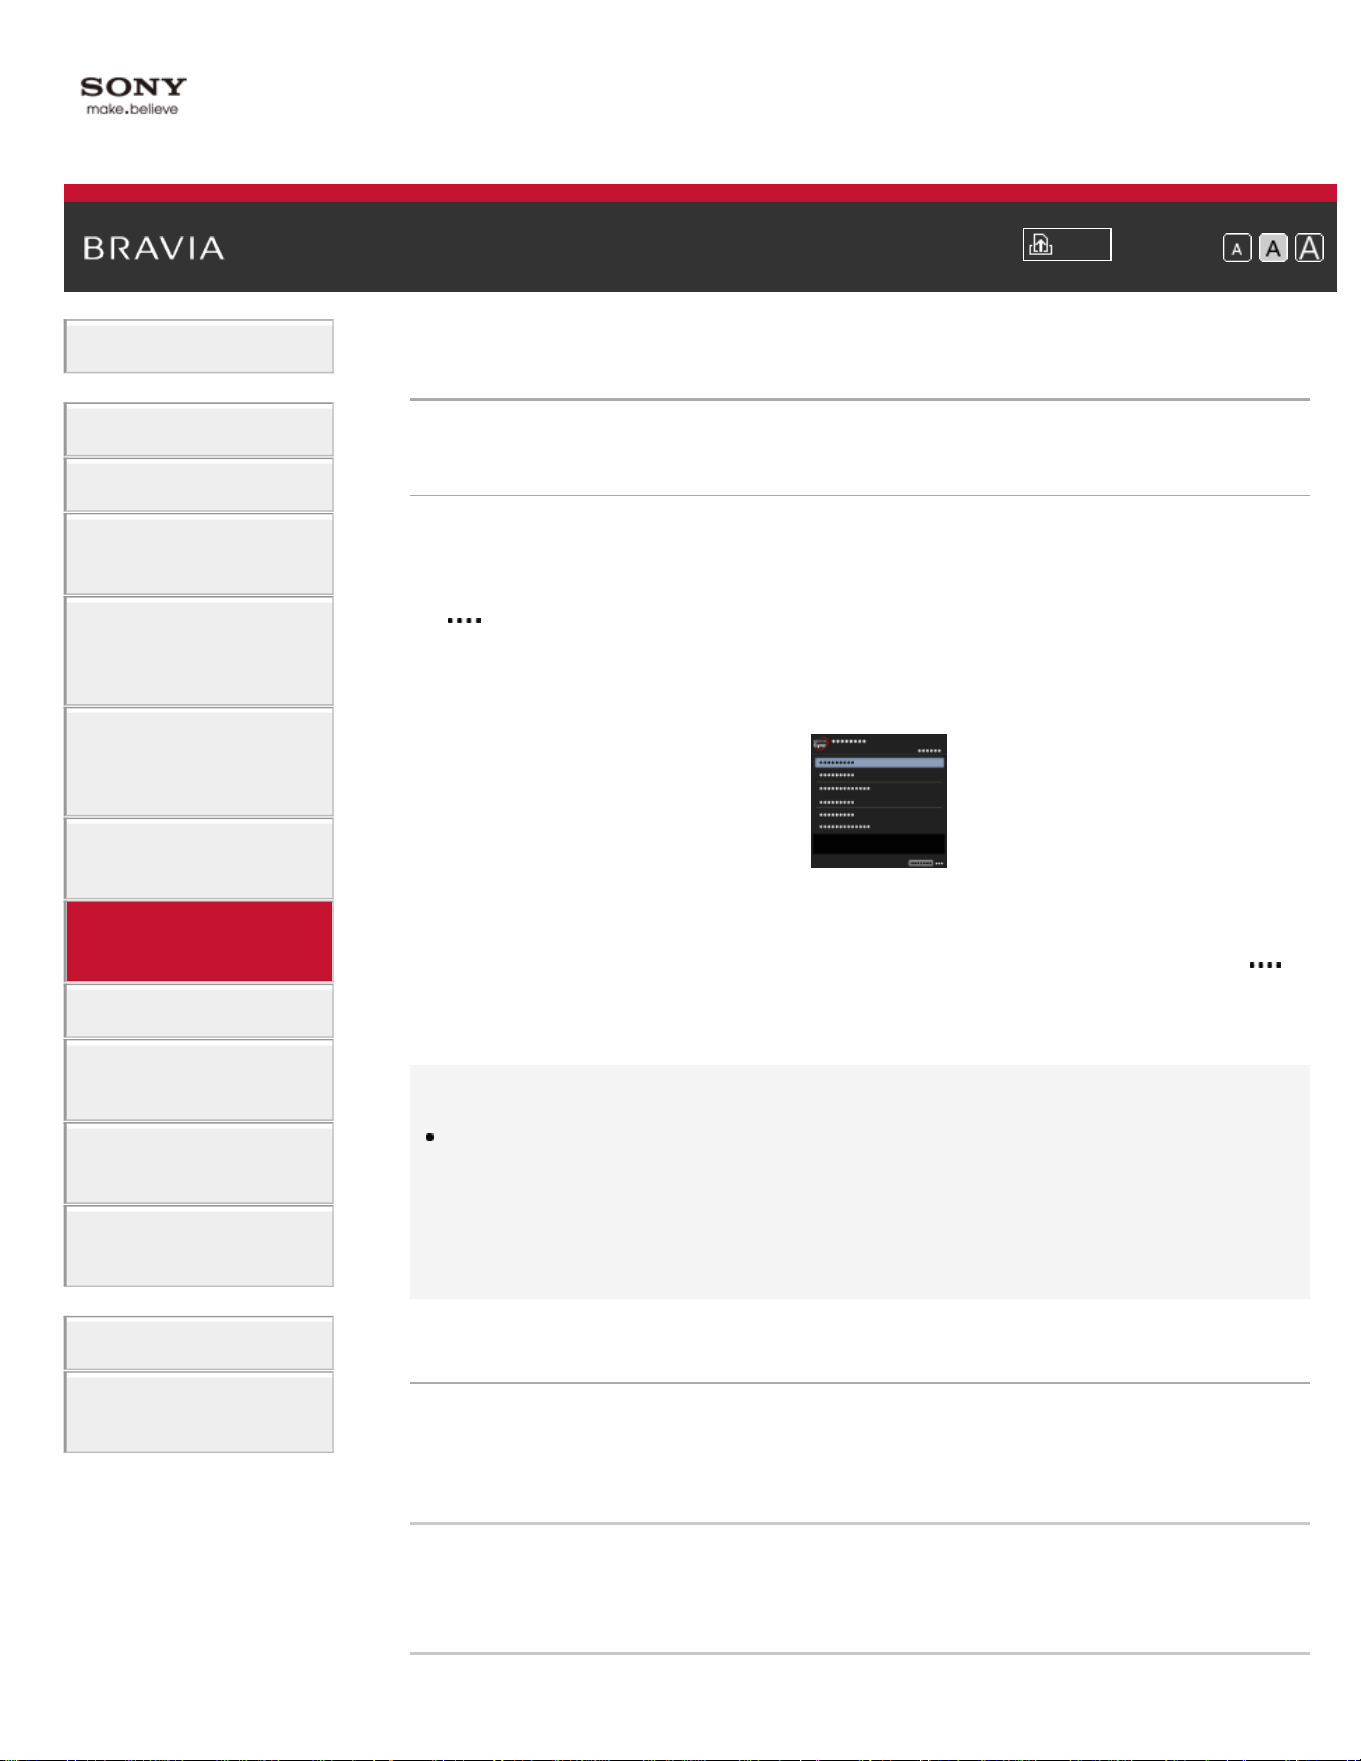
i-Manual
Print
Font Size
Basic Operations
Parts Description
Watching TV
Enjoying
Movies/Music/Photos
Using Internet
Services and
Applications
Watching TV with
Friends Far and
Near
Using Other
Devices
Using BRAVIA
Sync Devices
Useful Functions
Connecting to the
Internet
Using Home
Network
Configuring
Various Settings
Troubleshooting
How to Use
Bookmarks
Top Page > Using BRAVIA Sync Devices > Using the Sync Menu
Using the Sync Menu
Steps
1.
Press the SYNC MENU button.
(When using the Touchpad Remote Control, press the Control Bar (
), slide the touchpad to highlight the SYNC MENU button, then
press the touchpad to select.)
2. Select the desired item in the Sync Menu.
To exit the Sync Menu, press the SYNC MENU button.
(When using the Touchpad Remote Control, press the Control Bar (
),
slide the touchpad to highlight the SYNC MENU button, then press the
touchpad to select.)
Tips
If you press the SYNC MENU button, the promotion screen is displayed
in the following cases.
- An HDMI or MHL device is not connected.
- [BRAVIA Sync Control] is set to [Off].
Available Items
[Device Selection]
Enables selection of a BRAVIA Sync-compatible device to be controlled
by the TV’s remote control.
[Device Control]
Displays the menu, options and title list of the connected device, or turns
the device off.
113
[Use TV speakers to output sound]/[Use audio system for
audio output]
Switches the speaker output between the TV and the connected audio
device.
[TV Control]
Displays the menu and options of the TV, or shows/hides the display
items on the TV screen.
[Return to TV]
Returns to TV channels.
[TV control with the TV remote]/[Device control with the TV
remote]
Switches the device to be controlled by the TV’s remote control,
between the TV and the connected device.
Tips
Any BRAVIA Sync-compatible device (except an audio system) is listed
as a new input source under
[Inputs] in the Home Menu.
List of Contents© 2014 Sony Corporation
Top of Page
114
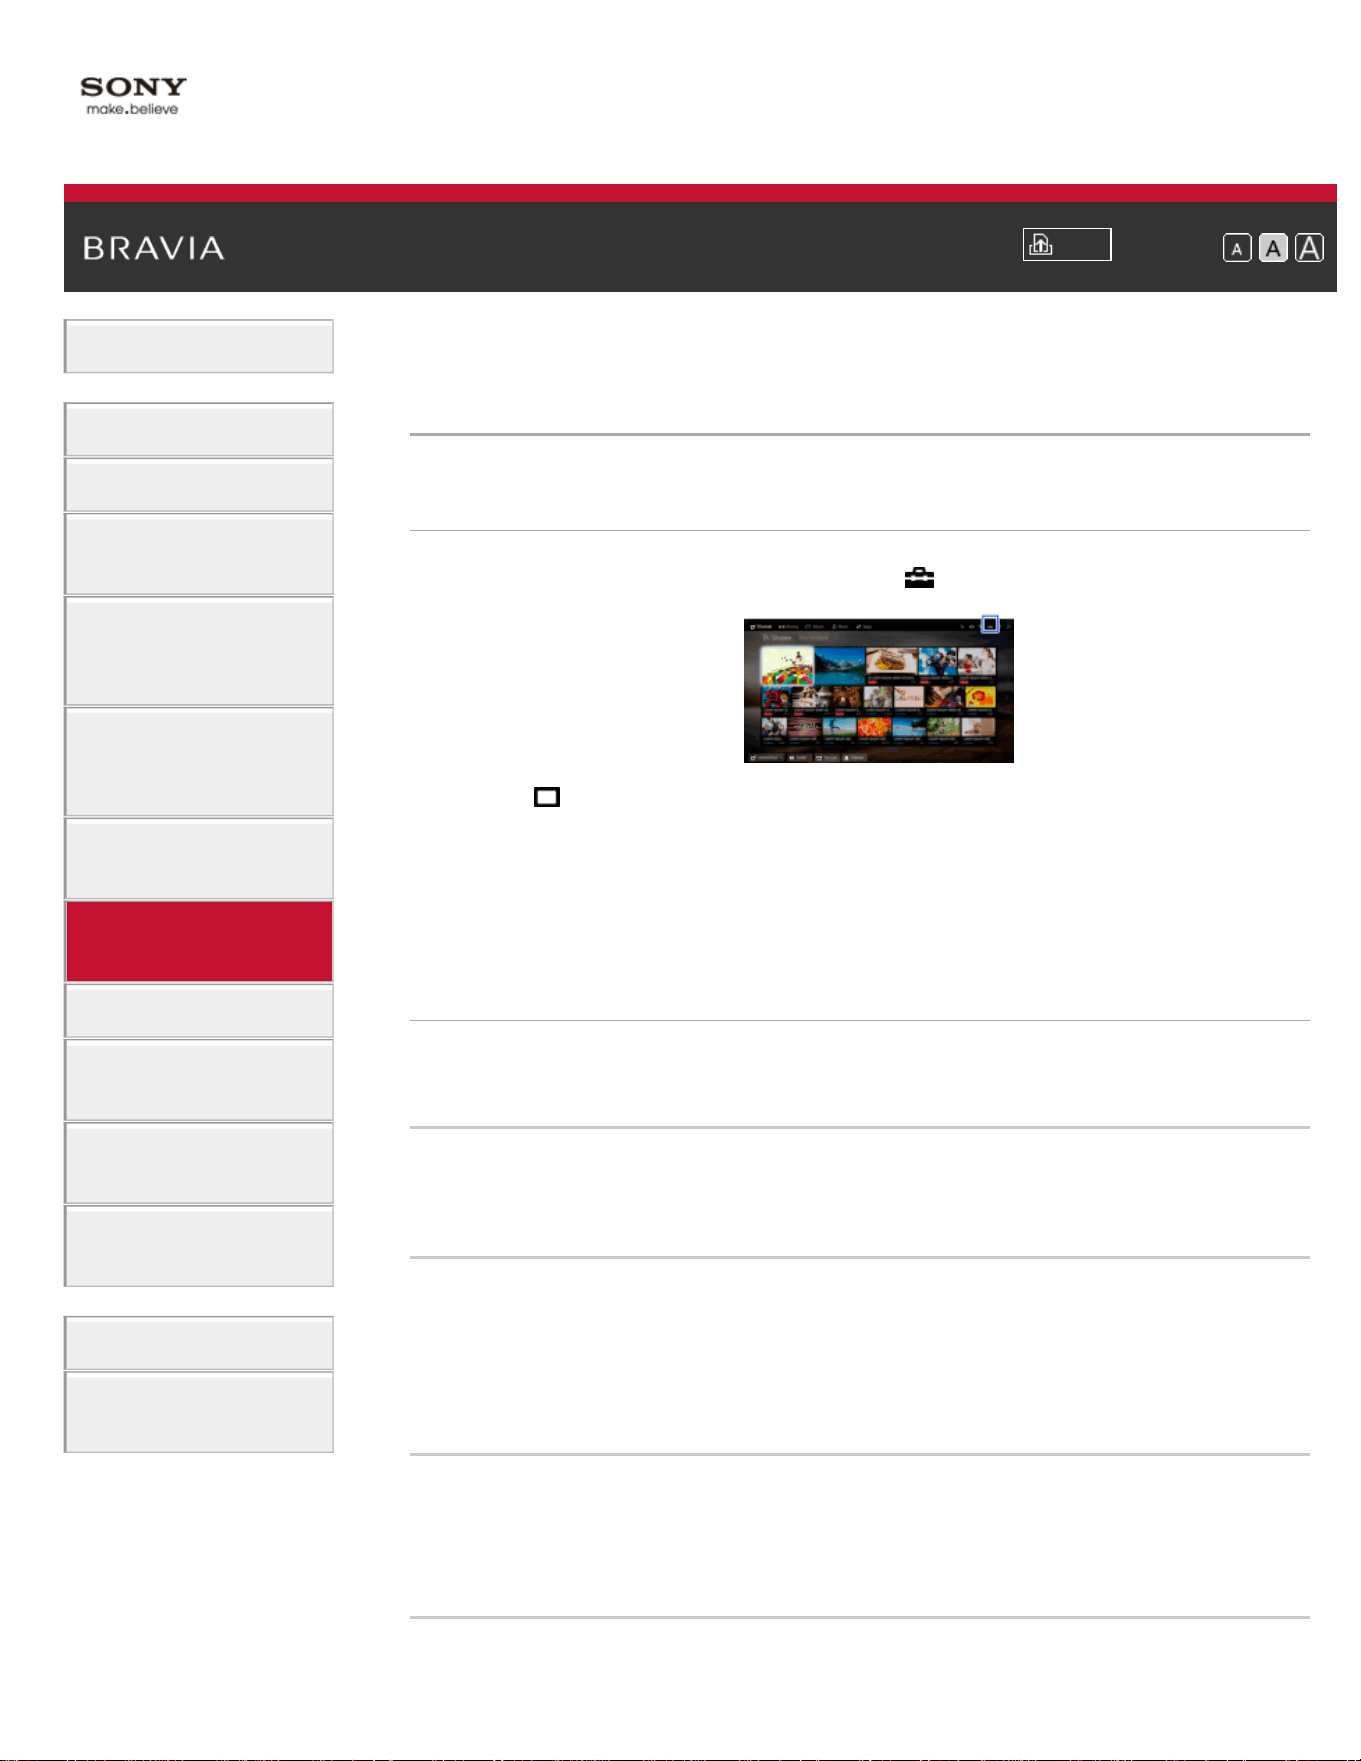
i-Manual
Print
Font Size
Basic Operations
Parts Description
Watching TV
Enjoying
Movies/Music/Photos
Using Internet
Services and
Applications
Watching TV with
Friends Far and
Near
Using Other
Devices
Using BRAVIA
Sync Devices
Useful Functions
Connecting to the
Internet
Using Home
Network
Configuring
Various Settings
Troubleshooting
How to Use
Bookmarks
Top Page > Using BRAVIA Sync Devices > Setting Buttons to Control an HDMI/MHL
Device
Setting Buttons to Control an HDMI/MHL Device
Steps
1.
Press the HOME button, then select [Settings].
2. Select [Channels & Inputs]/[Channels, Inputs & Ginga]* →
[BRAVIA Sync Settings] → [Device Control Keys] → the desired
option.
* Option name differs depending on your region/country.
Available Options
[None]
Deactivates control by the TV’s remote control.
[Normal]
Enables basic operations, such as navigation buttons (up, down, left or
right, etc.).
[Tuning Keys]
Enables basic operations and operation of channel-related buttons,
such as the CH +/– buttons or the 0 - 9 buttons, etc.
Useful when you control a tuner or set-top box, etc., via the remote
control.
[Menu Keys]
Enables basic operations and operation of the HOME/OPTIONS
buttons.
Useful when you control BD player menus, etc., via the remote control.
[Tuning and Menu Keys]
115

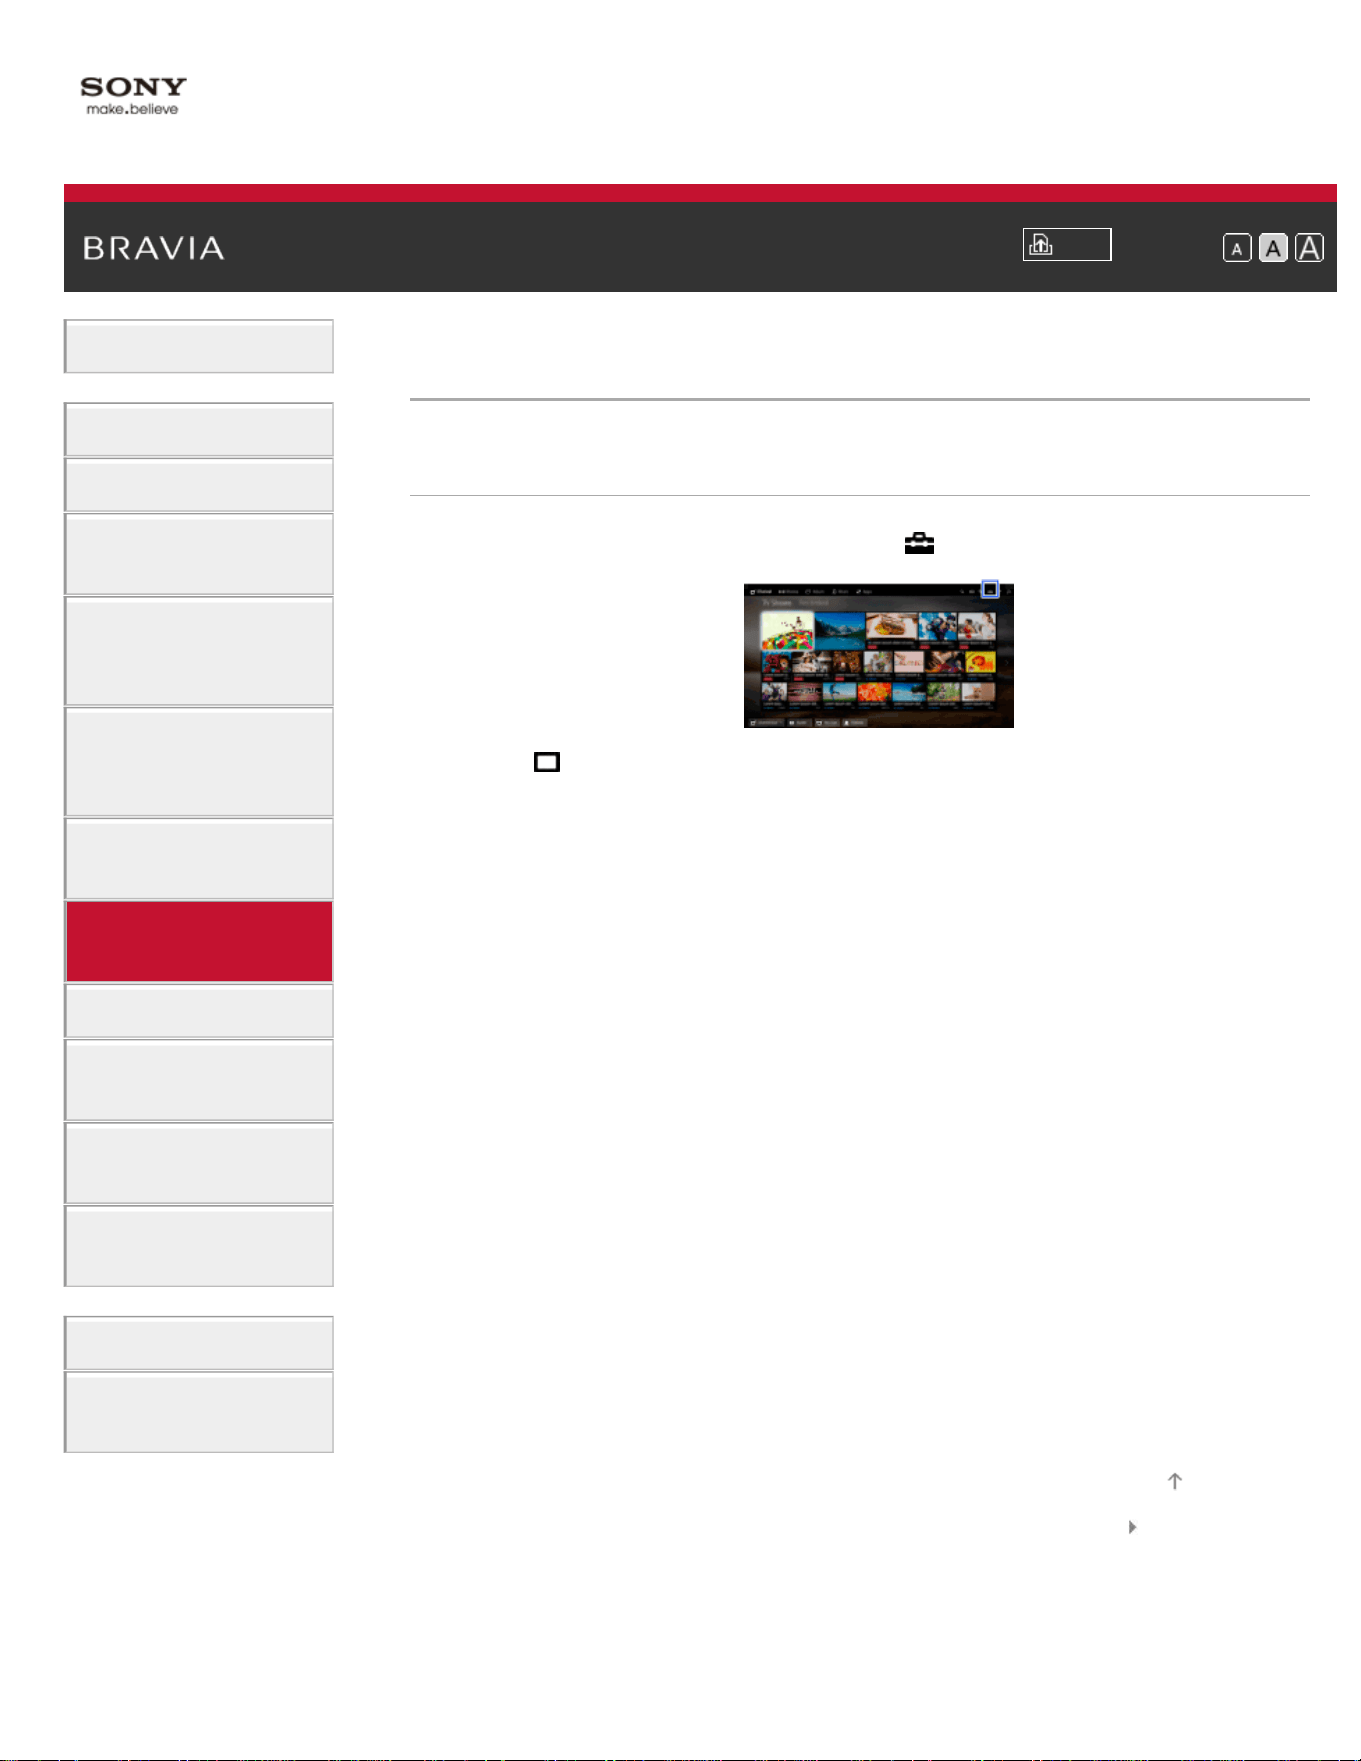
i-Manual
Print
Font Size
Basic Operations
Parts Description
Watching TV
Enjoying
Movies/Music/Photos
Using Internet
Services and
Applications
Watching TV with
Friends Far and
Near
Using Other
Devices
Using BRAVIA
Sync Devices
Useful Functions
Connecting to the
Internet
Using Home
Network
Configuring
Various Settings
Troubleshooting
How to Use
Bookmarks
Top Page > Using BRAVIA Sync Devices > Displaying the BRAVIA Sync Device List
Displaying the BRAVIA Sync Device List
Steps
1.
Press the HOME button, then select [Settings].
2. Select [Channels & Inputs]/[Channels, Inputs & Ginga]* →
[BRAVIA Sync Settings] → [BRAVIA Sync Device List].
* Option name differs depending on your region/country.
List of Contents© 2014 Sony Corporation
Top of Page
117
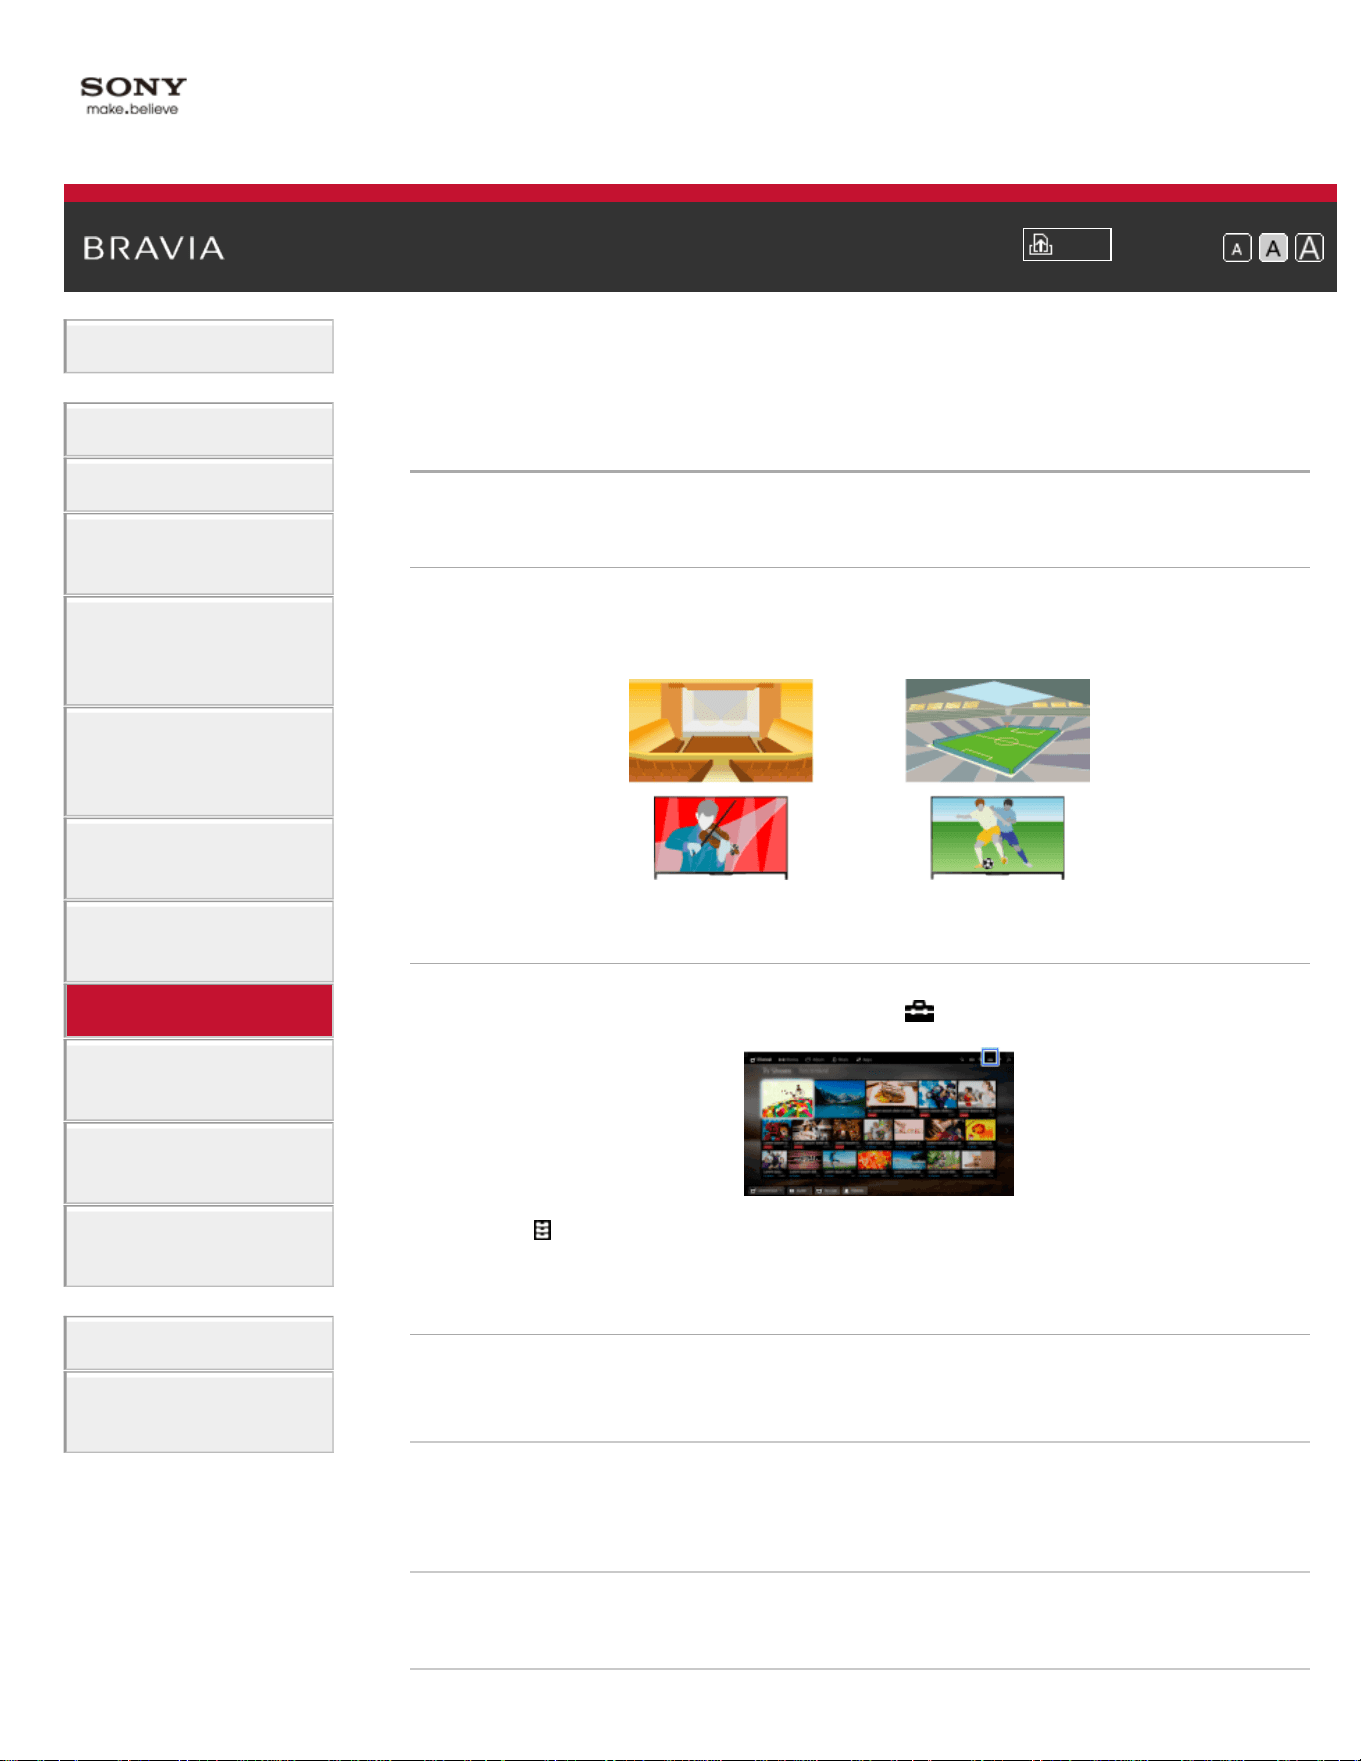
i-Manual
Print
Font Size
Basic Operations
Parts Description
Watching TV
Enjoying
Movies/Music/Photos
Using Internet
Services and
Applications
Watching TV with
Friends Far and
Near
Using Other
Devices
Using BRAVIA
Sync Devices
Useful Functions
Connecting to the
Internet
Using Home
Network
Configuring
Various Settings
Troubleshooting
How to Use
Bookmarks
Top Page > Useful Functions > Selecting a picture and sound setting suitable for the
content
Selecting a picture and sound setting suitable for
the content
Overview
You can select a preset picture and sound setting (e.g. [Auto], [Cinema],
[Sports]) that suits the content.
Steps
1.
Press the HOME button, then select [Settings].
2. Select [Preferences] → [Scene Select] → the desired option.
Available Options
[Auto]
Automatically selects the scene based on the viewing content.
[Auto (24p Sync)]
Automatically selects "Cinema" for 24Hz signal content. Behaves as
"Auto" for all other signals.
[General]
Turn off Scene Select for general content.
118

[Cinema]
Optimal picture and sound for watching movies.
[Sports]
Optimal picture and sound for watching sports.
[Music]
Optimal sound for listening to music.
[Animation]
Optimal picture for watching animation.
[Photo]
Optimal picture for viewing photos. This setting will apply to 1080i/p
(50/60Hz) and 480/576p formats only. (1080i/p (50Hz) and 576p are
available depending on your region/country.)
[Game]
Optimal picture and sound for playing video games.
[Graphics]
Optimal picture for viewing tables and characters.
List of Contents© 2014 Sony Corporation
Top of Page
119
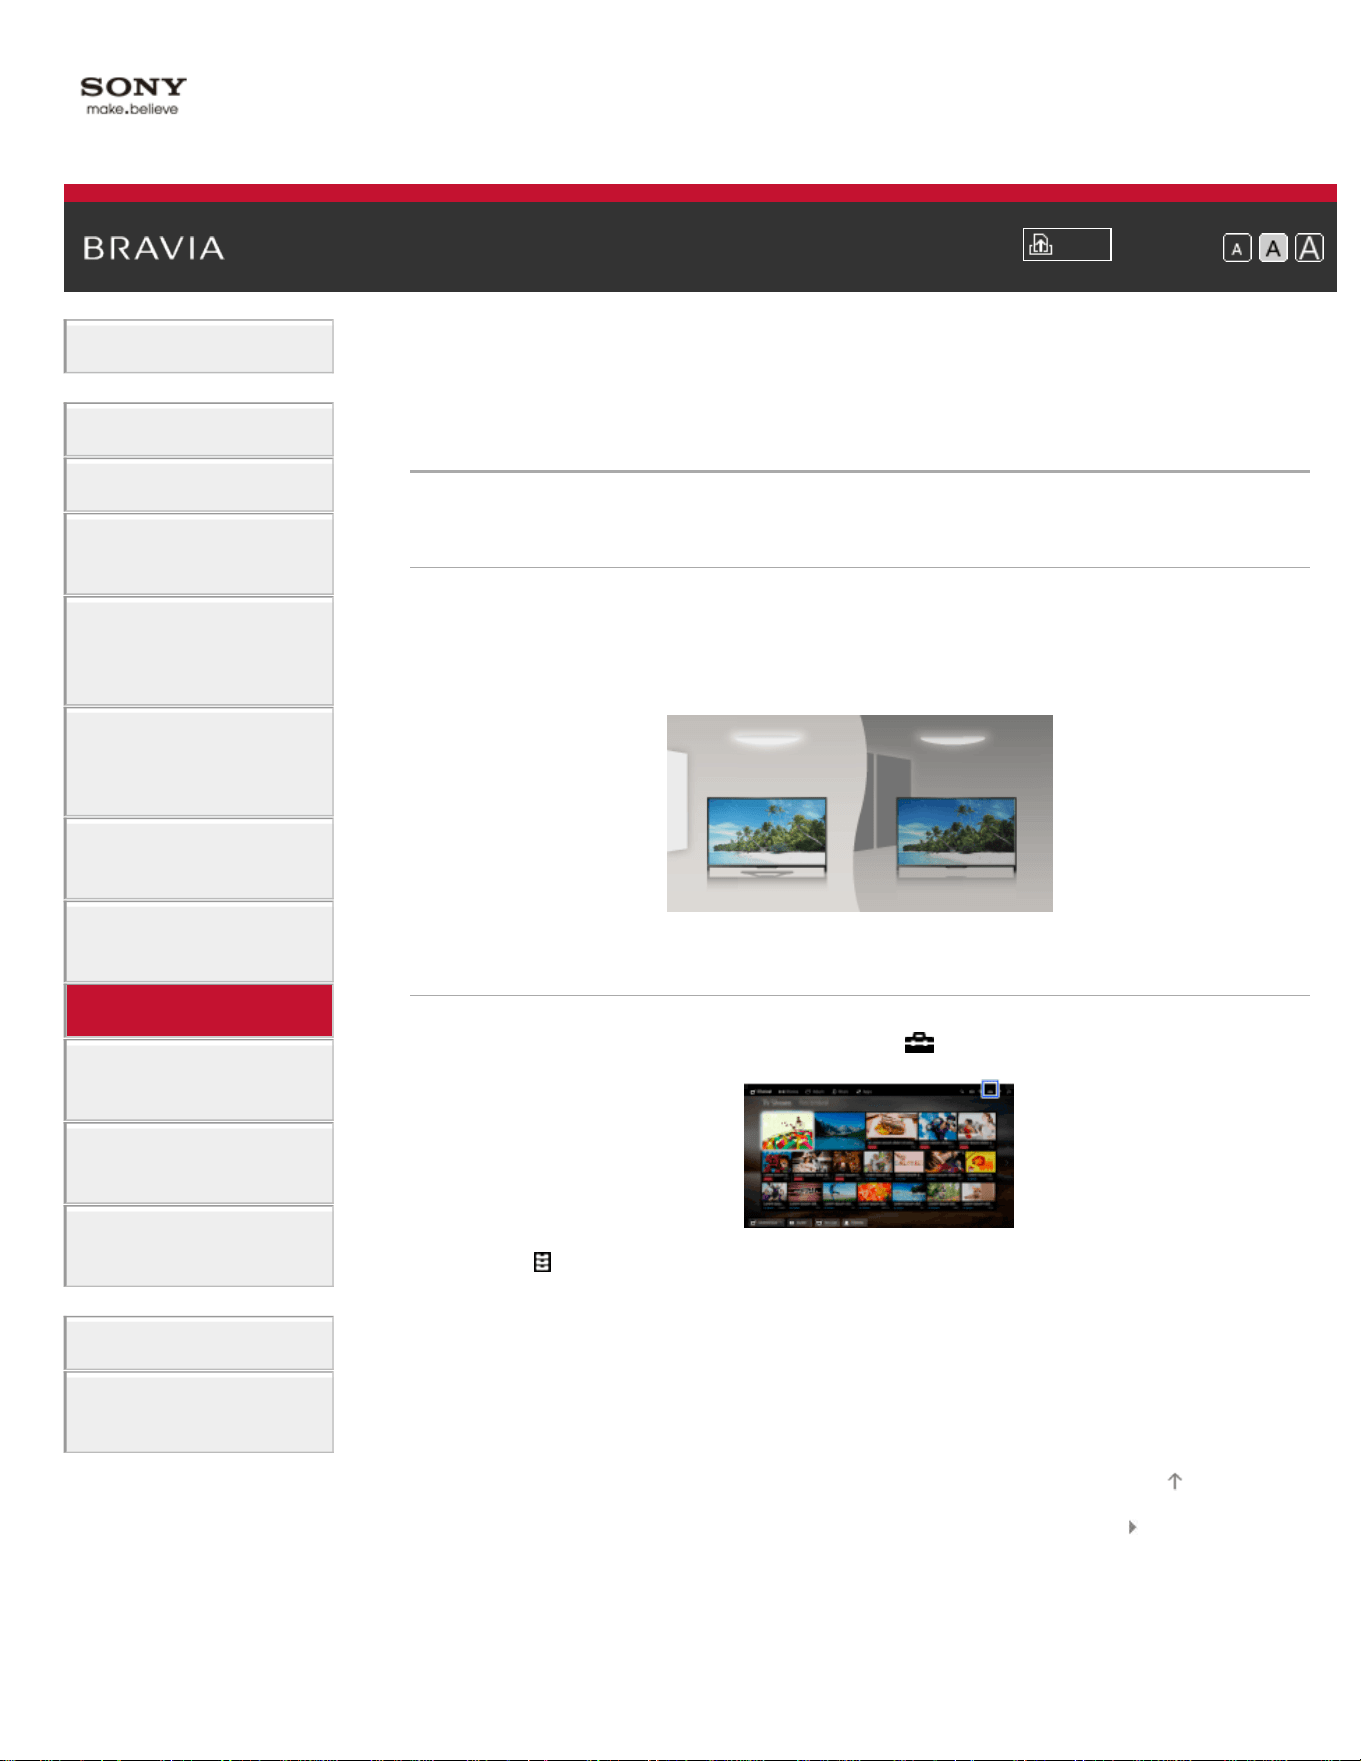
i-Manual
Print
Font Size
Basic Operations
Parts Description
Watching TV
Enjoying
Movies/Music/Photos
Using Internet
Services and
Applications
Watching TV with
Friends Far and
Near
Using Other
Devices
Using BRAVIA
Sync Devices
Useful Functions
Connecting to the
Internet
Using Home
Network
Configuring
Various Settings
Troubleshooting
How to Use
Bookmarks
Top Page > Useful Functions > Automatically adjusting picture brightness according to
ambient light
Automatically adjusting picture brightness
according to ambient light
Overview
The picture brightness can be automatically adjusted according to the
ambient light. You can save power consumption with an optimized
picture brightness.
Steps
1.
Press the HOME button, then select [Settings].
2. Select [Preferences] → [Eco] → [Light Sensor] → [On].
List of Contents© 2014 Sony Corporation
Top of Page
120
i-Manual
Print
Font Size
Basic Operations
Parts Description
Watching TV
Enjoying
Movies/Music/Photos
Using Internet
Services and
Applications
Watching TV with
Friends Far and
Near
Using Other
Devices
Using BRAVIA
Sync Devices
Useful Functions
Connecting to the
Internet
Using Home
Network
Configuring
Various Settings
Troubleshooting
How to Use
Bookmarks
Top Page > Useful Functions > Adding Favorite Applications
Adding Favorite Applications
Steps
1.
Display an application to add to [My Apps].
Press the HOME button, then select
[Apps] → [All Apps] → the
desired application.
2. Press the button, then select [Add to My Apps].
(When using the Touchpad Remote Control, press the touchpad.)
To access items added to [My Apps]
Press the HOME button, select [Apps], then the desired item.
To remove an item from [My Apps]
Display the item to delete, press the OPTIONS button, then select
[Remove from My Apps].
To sort the list of applications
Press the HOME button, then select [Apps].
Highlight the desired item, press the OPTIONS button, then select
[Move Application]. The selected applications move to the desired
positions by using the
/ / / buttons at the sorting applications
screen.
(When using the Touchpad Remote Control, slide left/right/up/down to
move to the desired positions.)
List of Contents© 2014 Sony Corporation
Top of Page
121
i-Manual
Print
Font Size
Basic Operations
Parts Description
Watching TV
Enjoying
Movies/Music/Photos
Using Internet
Services and
Applications
Watching TV with
Friends Far and
Near
Using Other
Devices
Using BRAVIA
Sync Devices
Useful Functions
Connecting to the
Internet
Using Home
Network
Configuring
Various Settings
Troubleshooting
How to Use
Bookmarks
Top Page > Useful Functions > Current View Information Search
Current View Information Search
Overview
This feature searches for information about the TV program you are
watching, or the currently playing music title/artist name on your TV,
from an Internet database. Music playing on a device connected to the
TV can also be searched.
You can also search for related information from your search results.
Tips
As of March 2014, this function is available in the following
regions/countries.
Czech Rep. / Denmark / Germany / Switzerland / Austria / United
Kingdom / Ireland / Spain / France / Italy / Netherlands / Belgium /
Luxembourg / Norway / Poland / Russia / Slovakia / Finland / Sweden /
New Zealand / Australia / United States / Canada / Brazil
Steps
1.
Connect to a broadband Internet connection.
Press the
button to jump to the title list. Then, press the button
again to go to “Connecting to the Internet” for details.
(When using the Touchpad Remote Control, press the touchpad.
Then, press the touchpad again to go to “Connecting to the Internet”
for details.)
2. While a TV program, video or music is playing, press the RELATED
SEARCH button.
When watching a TV program, information related to the program
will appear. Move to step 4.
For content other than TV programs, information related to the
music that is currently playing will appear. Move to step 3.
122

3.
After a message appears in the bottom right corner of the screen
stating the search is complete, press the
button.
(When using the Touchpad Remote Control, press the touchpad.)
4. Detailed information about the currently playing program or music will
appear.
To view related detailed information, switch the tabs using the
/
buttons.
(When using the Touchpad Remote Control, slide left/right to switch
the tabs.)
To operate the search result
You can use various operations (e.g. [Play] and [Tune]). The available
operations depend on the conditions.
Notes
Information may not be obtainable depending on what you watch.
When watching TV via an external input, you cannot search information on
TV programs.
For customers in the USA or Canada: When watching TV by a cable
signal, you cannot search information on TV programs.
List of Contents© 2014 Sony Corporation
Top of Page
123
i-Manual
Print
Font Size
Basic Operations
Parts Description
Watching TV
Enjoying
Movies/Music/Photos
Using Internet
Services and
Applications
Watching TV with
Friends Far and
Near
Using Other
Devices
Using BRAVIA
Sync Devices
Useful Functions
Connecting to the
Internet
Using Home
Network
Configuring
Various Settings
Troubleshooting
How to Use
Bookmarks
Top Page > Useful Functions > Keyword Search
Keyword Search
Overview
You can search for information on TV programs, music, and videos by
entering a keyword (track title, album name, video title, etc.). You can
also search and play Internet video. The search target may differ
depending on your region/country.
Steps
1.
Connect to a broadband Internet connection.
Press the
button to jump to the title list. Then, press the button
again to go to “Connecting to the Internet” for details.
(When using the Touchpad Remote Control, press the touchpad.
Then, press the touchpad again to go to “Connecting to the Internet”
for details.)
2. Press the HOME button, then select [Search].
3. Select the text input area, enter a keyword, then select [Enter].
You can also select keywords searched in the past.
The search result will be categorized by the type of content, then
displayed. Select a category to display the search results for that
category.
4. Select a search result.
To return to the last viewed source, press the RETURN button a few
times.
List of Contents© 2014 Sony Corporation
Top of Page
124
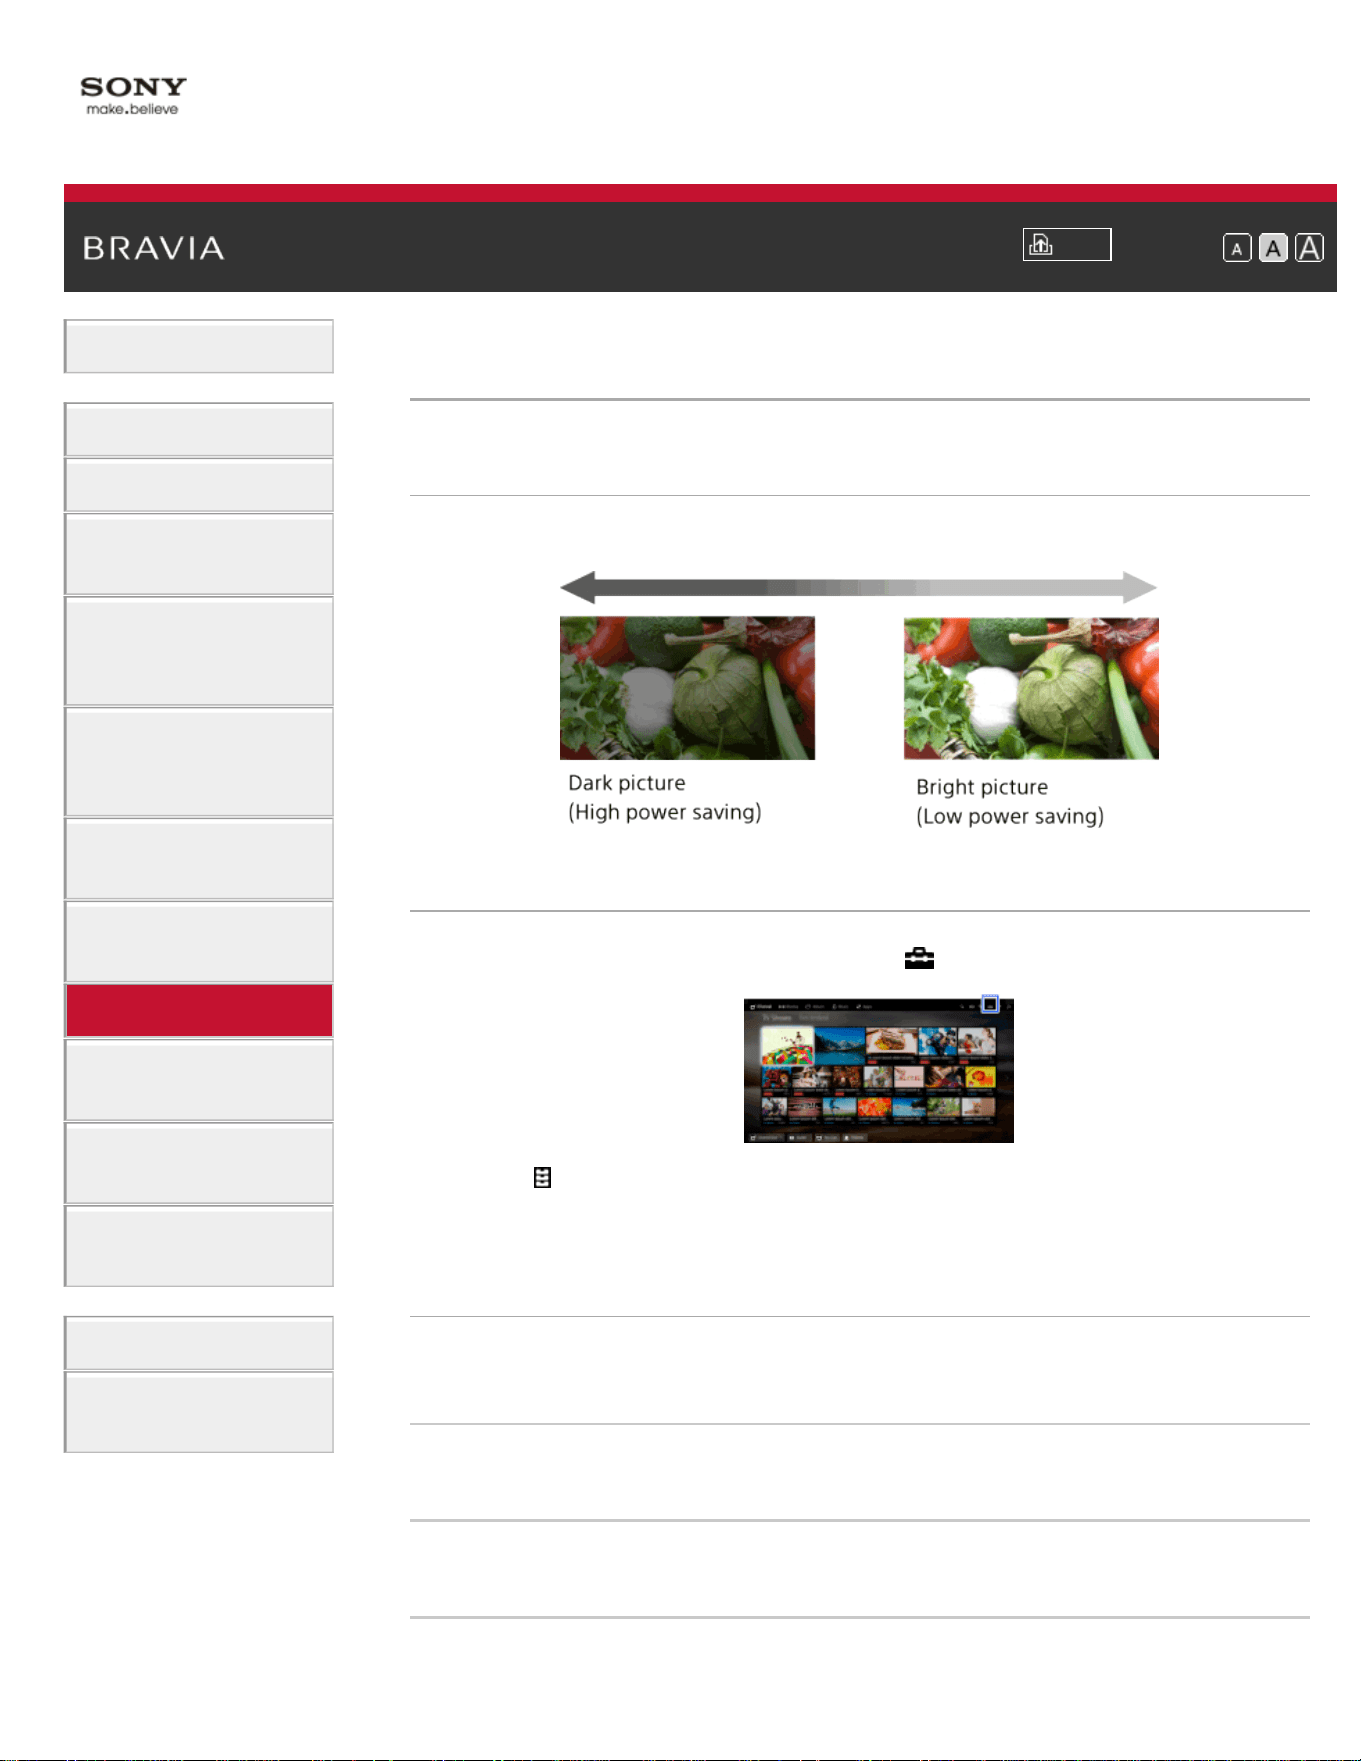
i-Manual
Print
Font Size
Basic Operations
Parts Description
Watching TV
Enjoying
Movies/Music/Photos
Using Internet
Services and
Applications
Watching TV with
Friends Far and
Near
Using Other
Devices
Using BRAVIA
Sync Devices
Useful Functions
Connecting to the
Internet
Using Home
Network
Configuring
Various Settings
Troubleshooting
How to Use
Bookmarks
Top Page > Useful Functions > Saving power by picture brightness
Saving power by picture brightness
Overview
You can reduce power consumption by changing the picture brightness.
Steps
1.
Press the HOME button, then select [Settings].
2. Select [Preferences] → [Eco] → [Power Saving] → the desired
option.
Available Options
[Picture Off]
Maximum power saving. Picture turns off; sound remains on.
[High]
High power saving. Picture darkens.
[Low]
Low power saving. Picture darkens slightly.
[Off]
125

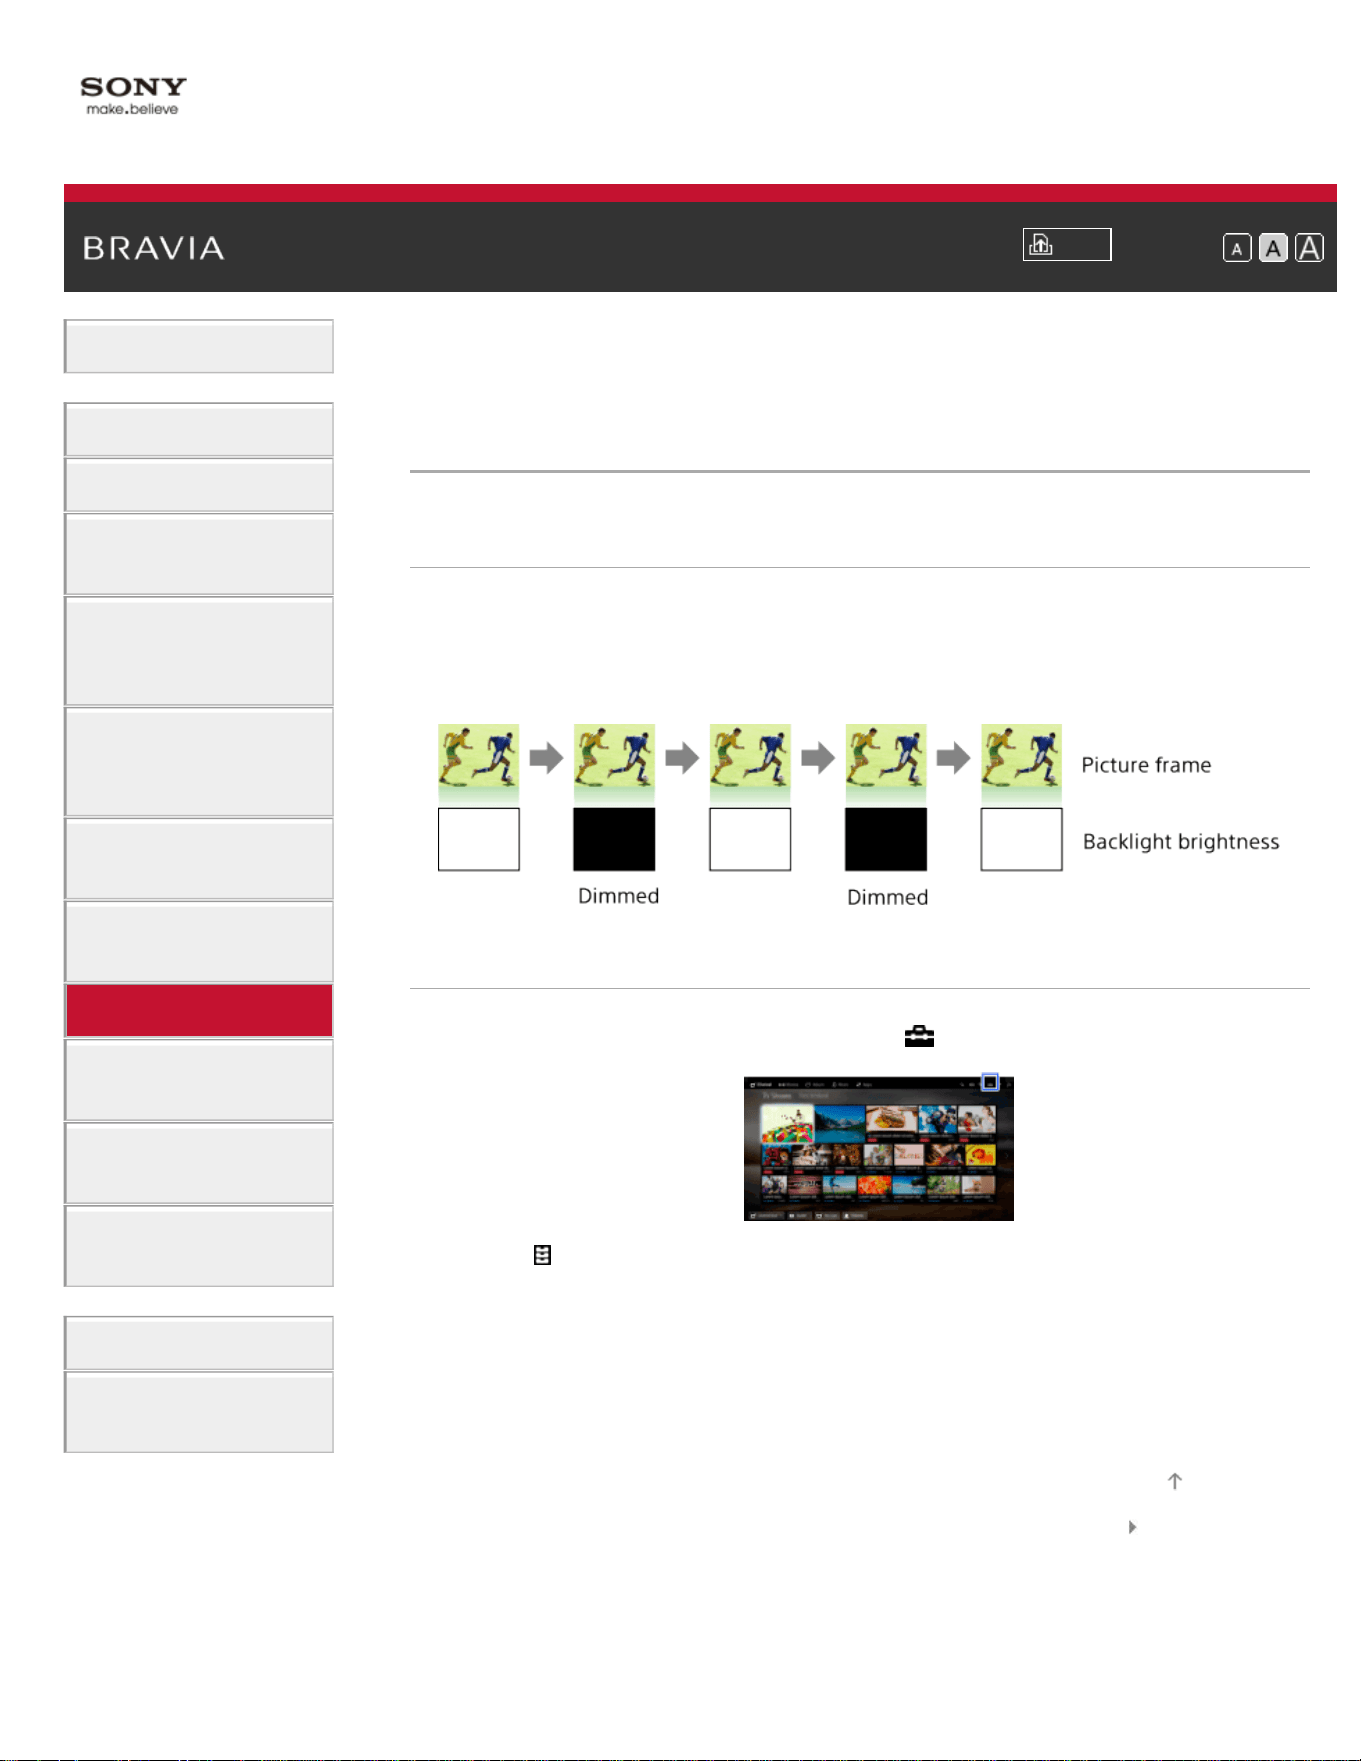
i-Manual
Print
Font Size
Basic Operations
Parts Description
Watching TV
Enjoying
Movies/Music/Photos
Using Internet
Services and
Applications
Watching TV with
Friends Far and
Near
Using Other
Devices
Using BRAVIA
Sync Devices
Useful Functions
Connecting to the
Internet
Using Home
Network
Configuring
Various Settings
Troubleshooting
How to Use
Bookmarks
Top Page > Useful Functions > Saving power by automatically adjusting the backlight
drive
Saving power by automatically adjusting the
backlight drive
Overview
The TV adjusts the backlight brightness according to the [Scene Select]
setting. You can save power by enabling this function.
Example of backlight adjustment:
Steps
1.
Press the HOME button, then select [Settings].
2. Select [Preferences] → [Eco] → [Scene Select Sync] → [On].
List of Contents© 2014 Sony Corporation
Top of Page
127

i-Manual
Print
Font Size
Basic Operations
Parts Description
Watching TV
Enjoying
Movies/Music/Photos
Using Internet
Services and
Applications
Watching TV with
Friends Far and
Near
Using Other
Devices
Using BRAVIA
Sync Devices
Useful Functions
Connecting to the
Internet
Using Home
Network
Configuring
Various Settings
Troubleshooting
How to Use
Bookmarks
Top Page > Useful Functions > Turning the TV off by monitoring idle time
Turning the TV off by monitoring idle time
Overview
You can set the TV to automatically turn off after it has been idle for a
preset period of time.
Steps
1.
Press the HOME button, then select [Settings].
2. Select [Preferences] → [Eco] → [Idle TV Standby] → the period.
When the set time passes, power will turn off automatically. If [Off] is
selected, power will not turn off.
List of Contents© 2014 Sony Corporation
Top of Page
128

i-Manual
Print
Font Size
Basic Operations
Parts Description
Watching TV
Enjoying
Movies/Music/Photos
Using Internet
Services and
Applications
Watching TV with
Friends Far and
Near
Using Other
Devices
Using BRAVIA
Sync Devices
Useful Functions
Connecting to the
Internet
Using Home
Network
Configuring
Various Settings
Troubleshooting
How to Use
Bookmarks
Top Page > Useful Functions > Turning the TV off by monitoring input signal
Turning the TV off by monitoring input signal
Overview
You can set the TV to automatically turn off when no broadcast or
external input signal is detected for 15 minutes.
Steps
1.
Press the HOME button, then select [Settings].
2. Select [Preferences] → [Eco] → [Auto Shut-off] → [On].
List of Contents© 2014 Sony Corporation
Top of Page
129
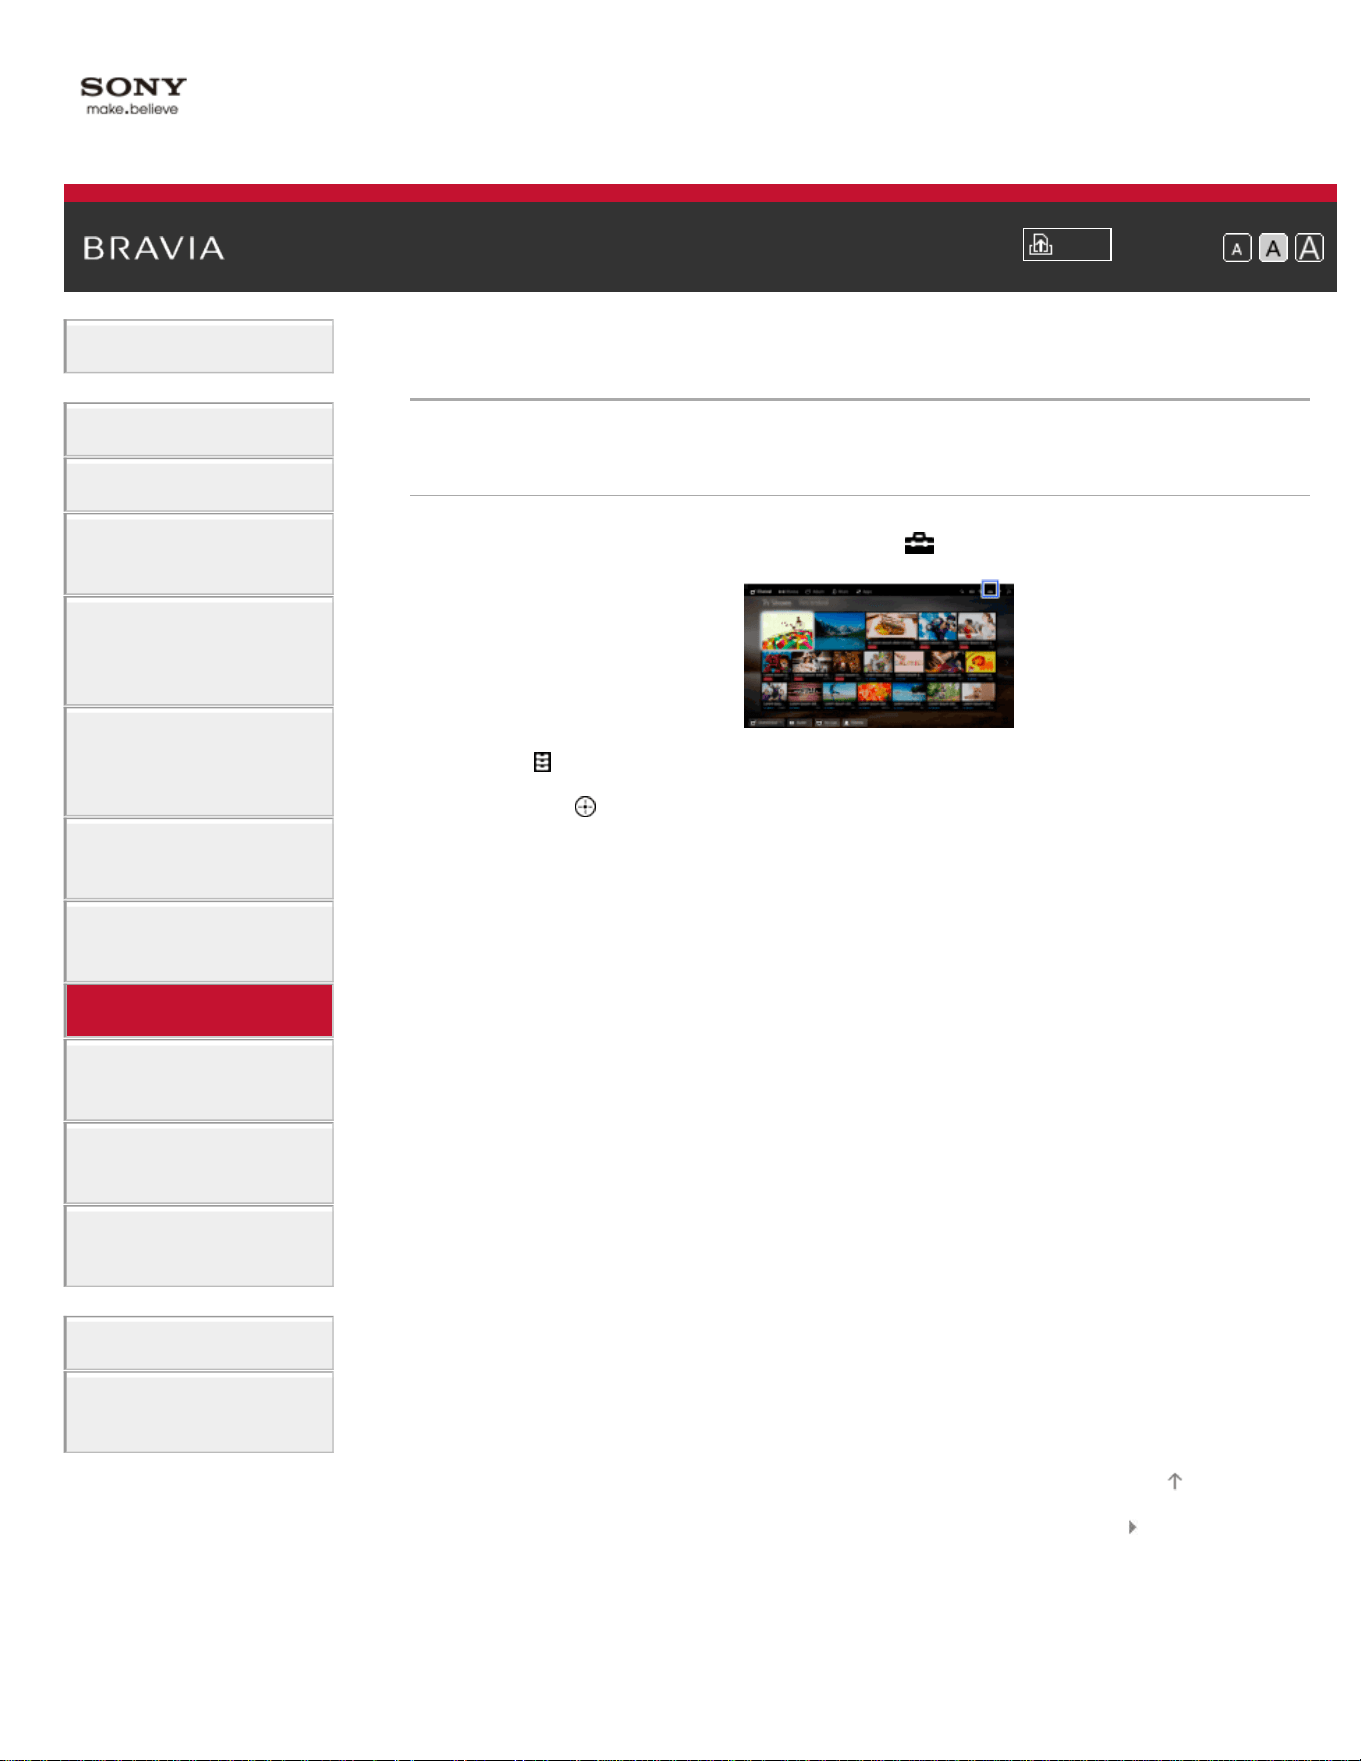
i-Manual
Print
Font Size
Basic Operations
Parts Description
Watching TV
Enjoying
Movies/Music/Photos
Using Internet
Services and
Applications
Watching TV with
Friends Far and
Near
Using Other
Devices
Using BRAVIA
Sync Devices
Useful Functions
Connecting to the
Internet
Using Home
Network
Configuring
Various Settings
Troubleshooting
How to Use
Bookmarks
Top Page > Useful Functions > Setting the current time manually
Setting the current time manually
Steps
1.
Press the HOME button, then select [Settings].
2. Select [Preferences] → [Clock/Timers] → [Current Time].
3. Press the button in [Date (Month/Day/Year)], then set the date →
select [Time Zone] → set the time zone → select [DST] → set the
DST setting → select [Time] → set the time.
(When using the Touchpad Remote Control, press the touchpad in
[Date (Month/Day/Year)].)
List of Contents© 2014 Sony Corporation
Top of Page
130
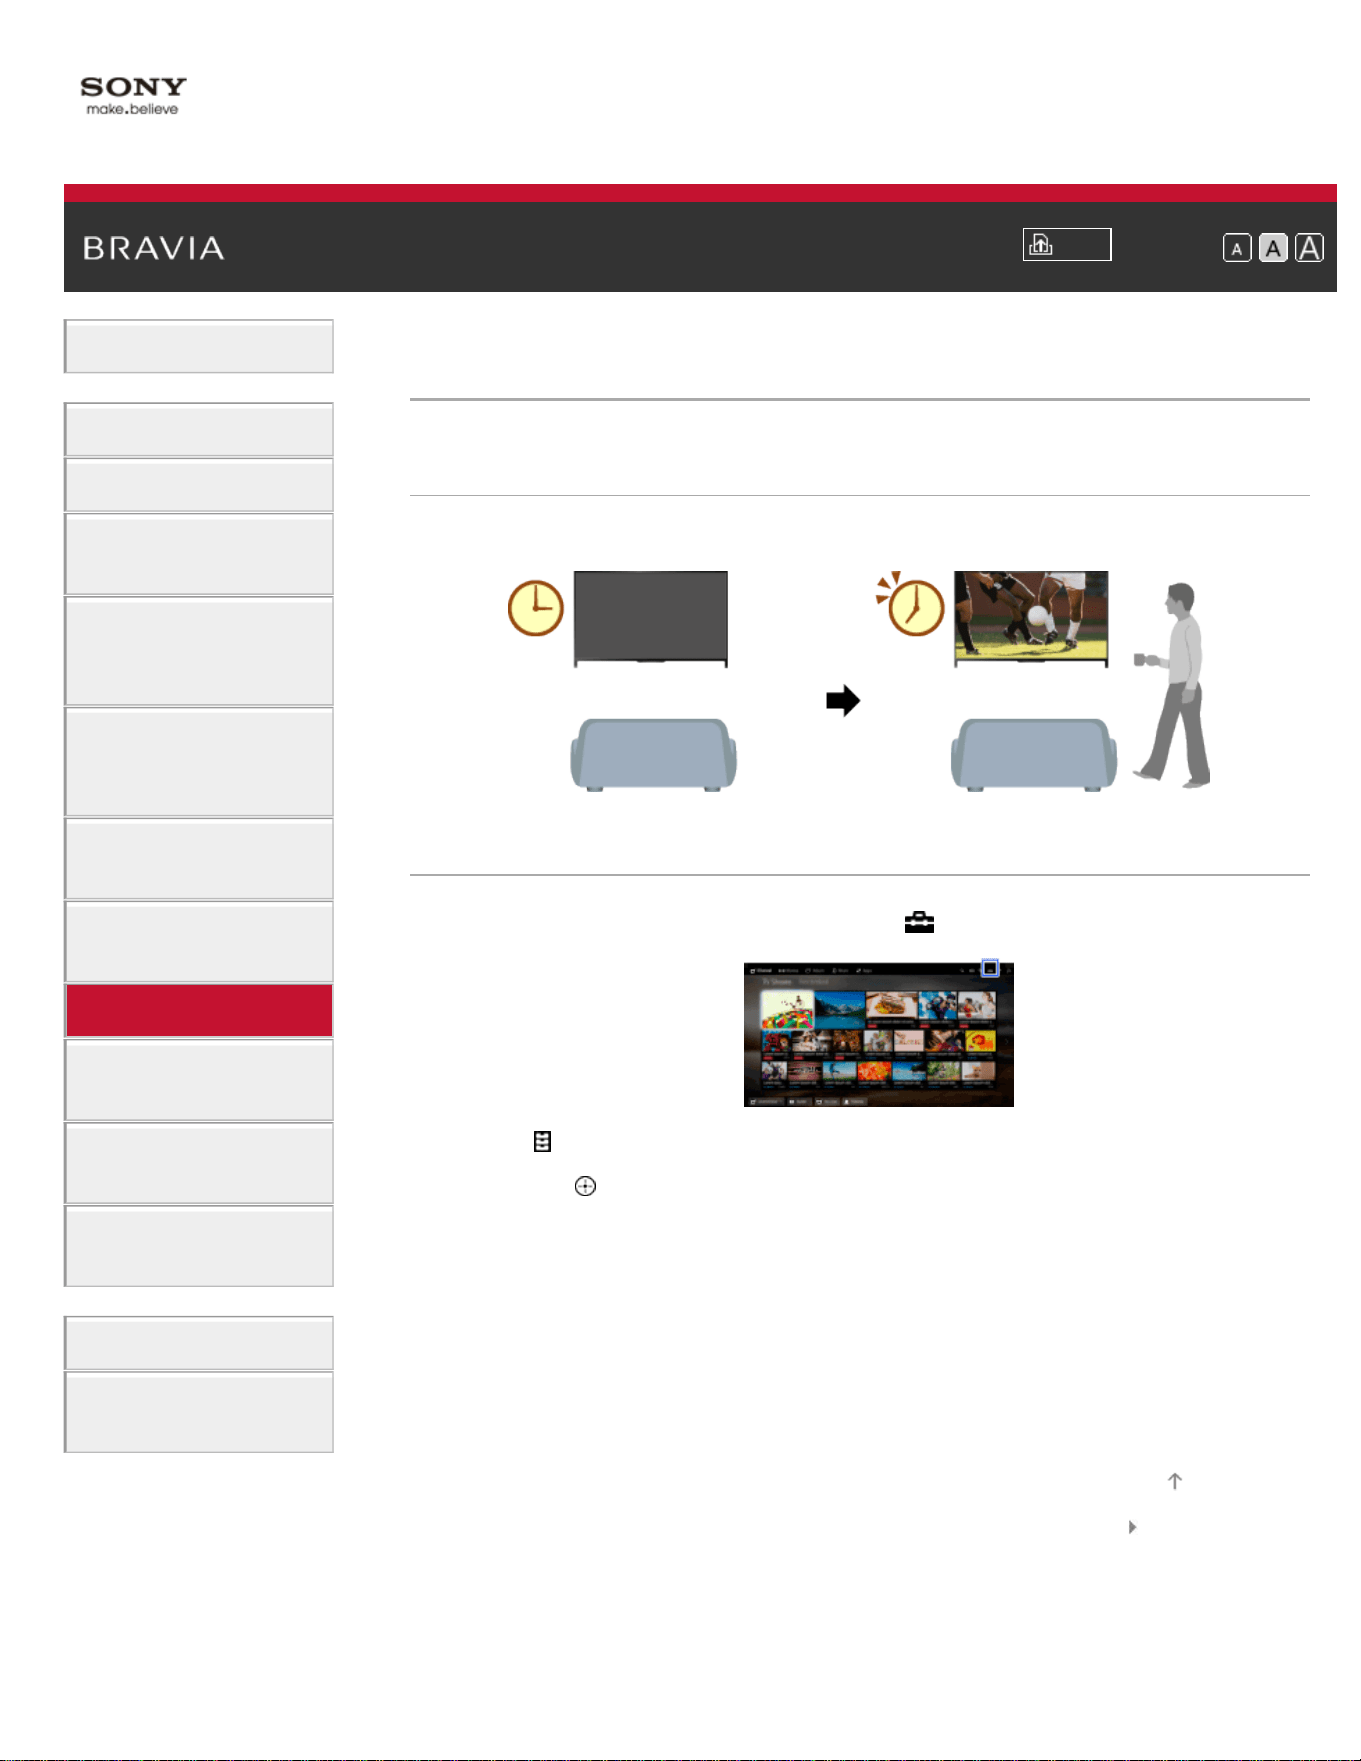
i-Manual
Print
Font Size
Basic Operations
Parts Description
Watching TV
Enjoying
Movies/Music/Photos
Using Internet
Services and
Applications
Watching TV with
Friends Far and
Near
Using Other
Devices
Using BRAVIA
Sync Devices
Useful Functions
Connecting to the
Internet
Using Home
Network
Configuring
Various Settings
Troubleshooting
How to Use
Bookmarks
Top Page > Useful Functions > Setting the on timer
Setting the on timer
Overview
You can set the TV to turn on from standby mode at a selected time.
Steps
1.
Press the HOME button, then select [Settings].
2. Select [Preferences] → [Clock/Timers] → [Timer].
3. Press the button in [Timer], then select [On] → the setting item →
set the item.
(When using the Touchpad Remote Control, press the touchpad in
[Timer].)
List of Contents© 2014 Sony Corporation
Top of Page
131
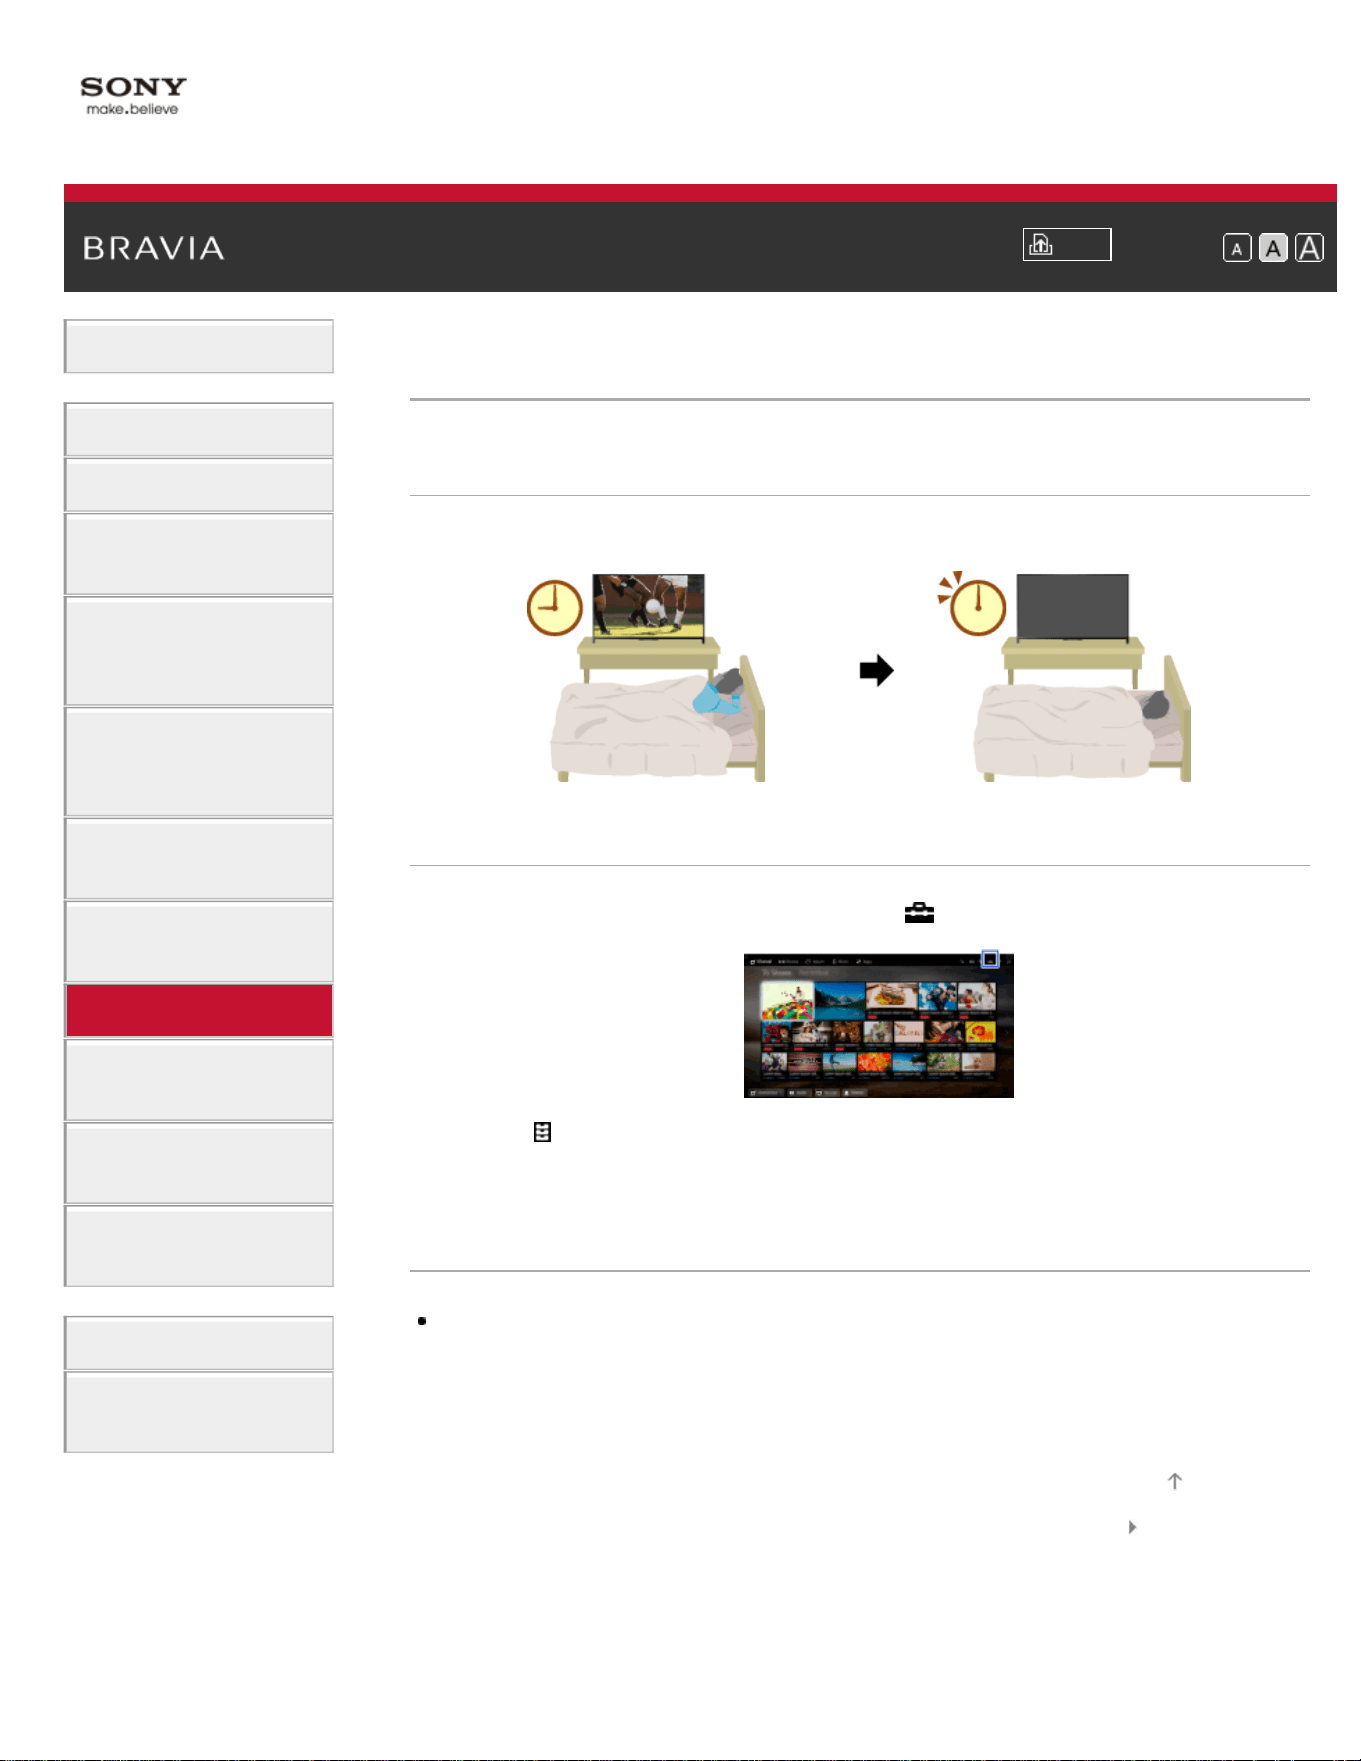
i-Manual
Print
Font Size
Basic Operations
Parts Description
Watching TV
Enjoying
Movies/Music/Photos
Using Internet
Services and
Applications
Watching TV with
Friends Far and
Near
Using Other
Devices
Using BRAVIA
Sync Devices
Useful Functions
Connecting to the
Internet
Using Home
Network
Configuring
Various Settings
Troubleshooting
How to Use
Bookmarks
Top Page > Useful Functions > Setting the sleep timer
Setting the sleep timer
Overview
You can set the TV to turn off after a preset period.
Steps
1.
Press the HOME button, then select [Settings].
2. Select [Preferences] → [Clock/Timers] → [Sleep Timer] → the
desired option.
Notes
When you turn off the TV and turn it on again, [Sleep Timer] is reset to
[Off].
List of Contents© 2014 Sony Corporation
Top of Page
132
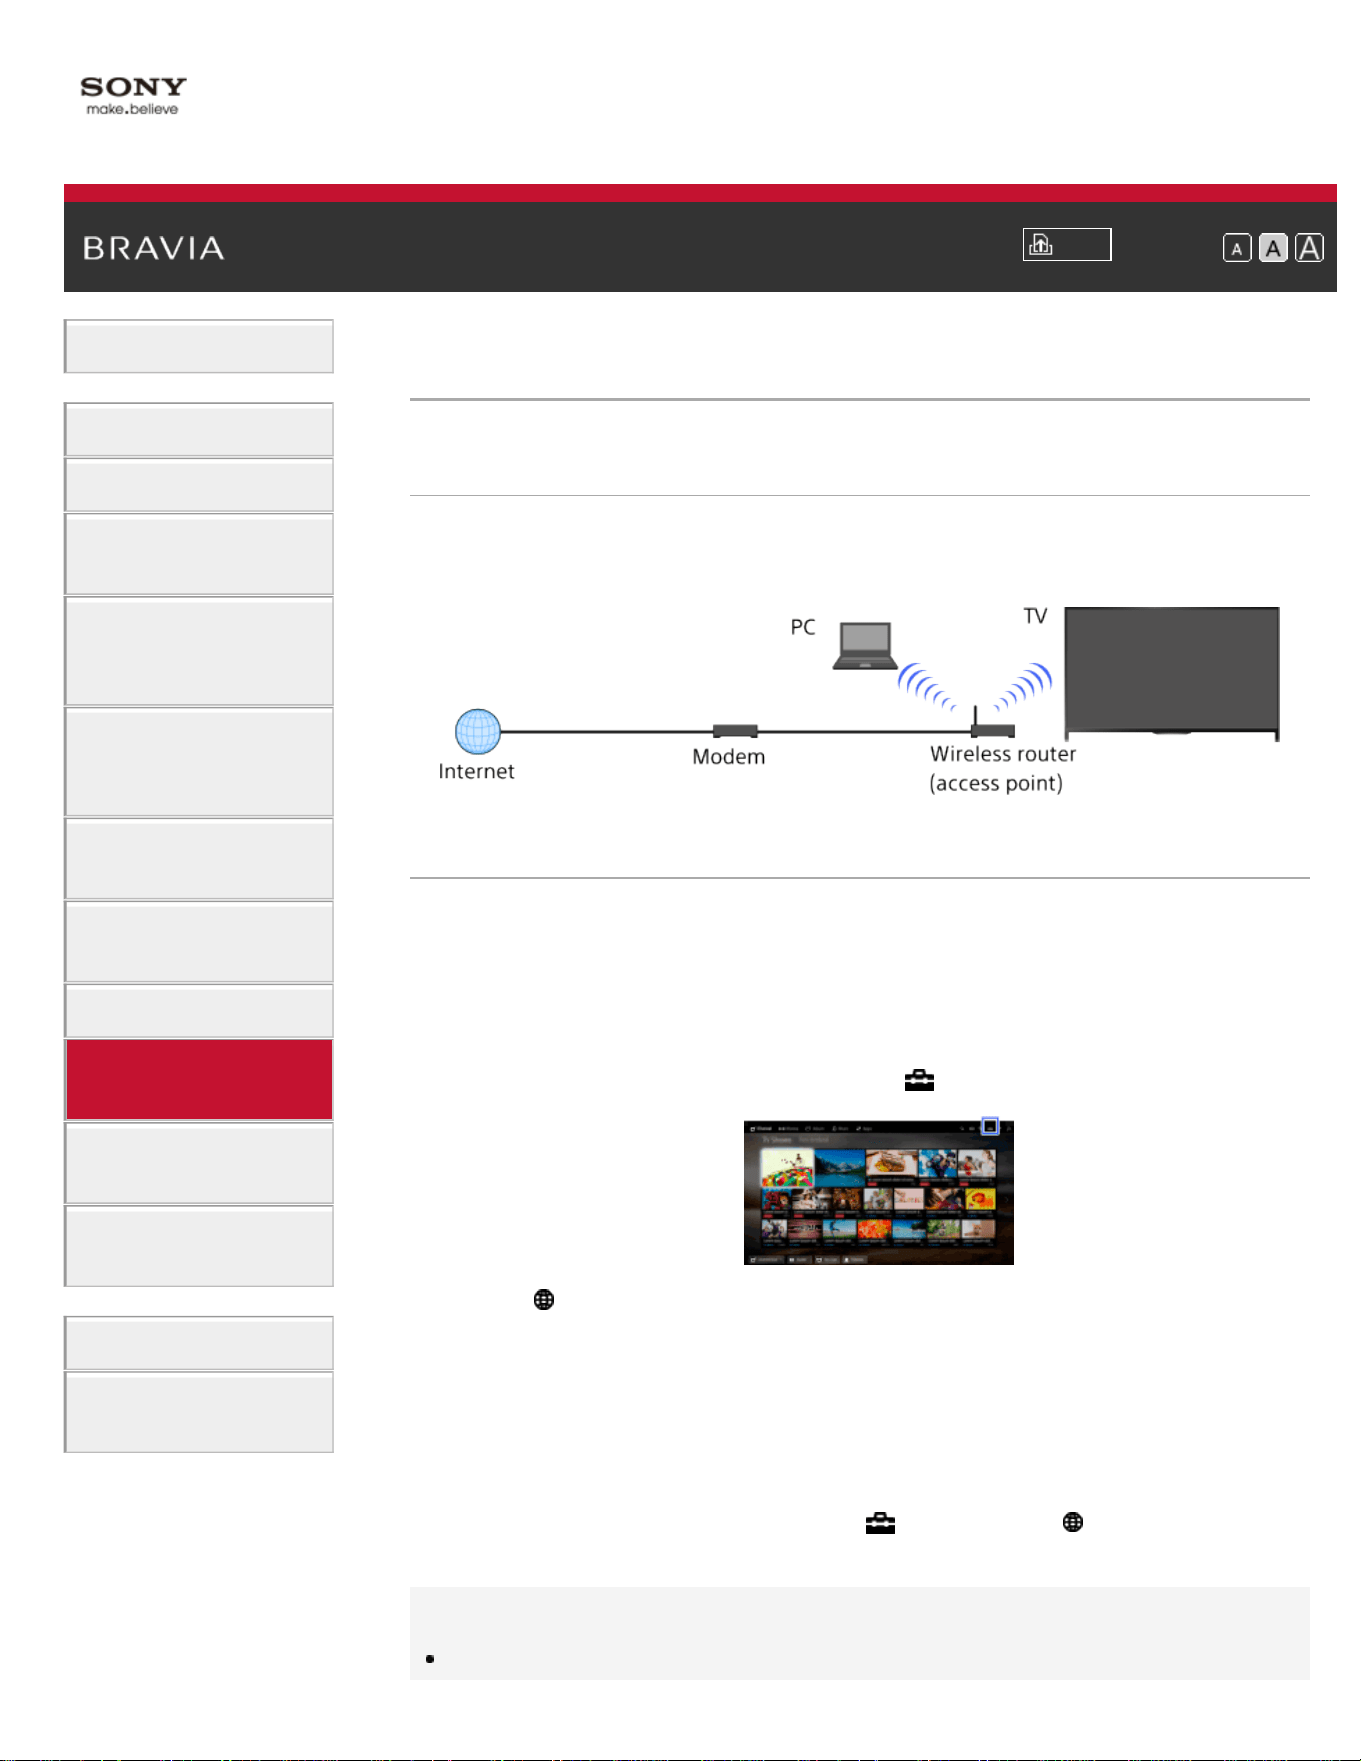
i-Manual
Print
Font Size
Basic Operations
Parts Description
Watching TV
Enjoying
Movies/Music/Photos
Using Internet
Services and
Applications
Watching TV with
Friends Far and
Near
Using Other
Devices
Using BRAVIA
Sync Devices
Useful Functions
Connecting to the
Internet
Using Home
Network
Configuring
Various Settings
Troubleshooting
How to Use
Bookmarks
Top Page > Connecting to the Internet > Wireless Connection (Built-in Wireless LAN)
Wireless Connection (Built-in Wireless LAN)
Making a Connection
The built-in wireless LAN device allows you to access the Internet and
enjoy the benefits of networking in a cable-free environment.
Steps
1.
Set up your wireless router (or access point).
For details, refer to the instruction manual of your wireless router (or
access point), or contact the person who set up the network (network
administrator).
2. Press the HOME button, then select [Settings].
3. Select [Network] → [Network Setup] → [Set up network
connection] → [Easy].
4. Follow the on-screen instructions to complete the setup.
5. After completing the setup, select [Refresh Internet Content].
To turn off the built-in wireless LAN
Press the HOME button, then select [Settings] → [Network] →
[Built-in Wi-Fi] → [Off].
Tips
For smooth video streaming:
133

- Change the setting of your wireless router (or access point) to 802.11n
if possible. For details on how to change the setting, refer to the
instruction manual of your wireless router (or access point), or contact
the person who set up the network (network administrator).
- If the above does not bring any improvement, change the setting of
your wireless router (or access point) to 5GHz, which may help improve
the video streaming quality.
- The 5GHz band may not be supported depending on your
region/country. If the 5GHz band is not supported, the TV can only
connect to a wireless router (access point) using the 2.4GHz band.
To use WEP security with a wireless router (or access point), select
[Expert] → [Wi-Fi Setup] → [Scan].
To use the WPS PIN method, select [Expert] → [Wi-Fi Setup] → [WPS
(PIN)].
Notes
The setting items (e.g. IP address, subnet mask, DHCP) may vary
depending on the Internet service provider or router. For details, refer to
the instruction manuals provided by the Internet service provider, or those
supplied with the router. Or contact the person who set up the network
(network administrator).
List of Contents© 2014 Sony Corporation
Top of Page
134
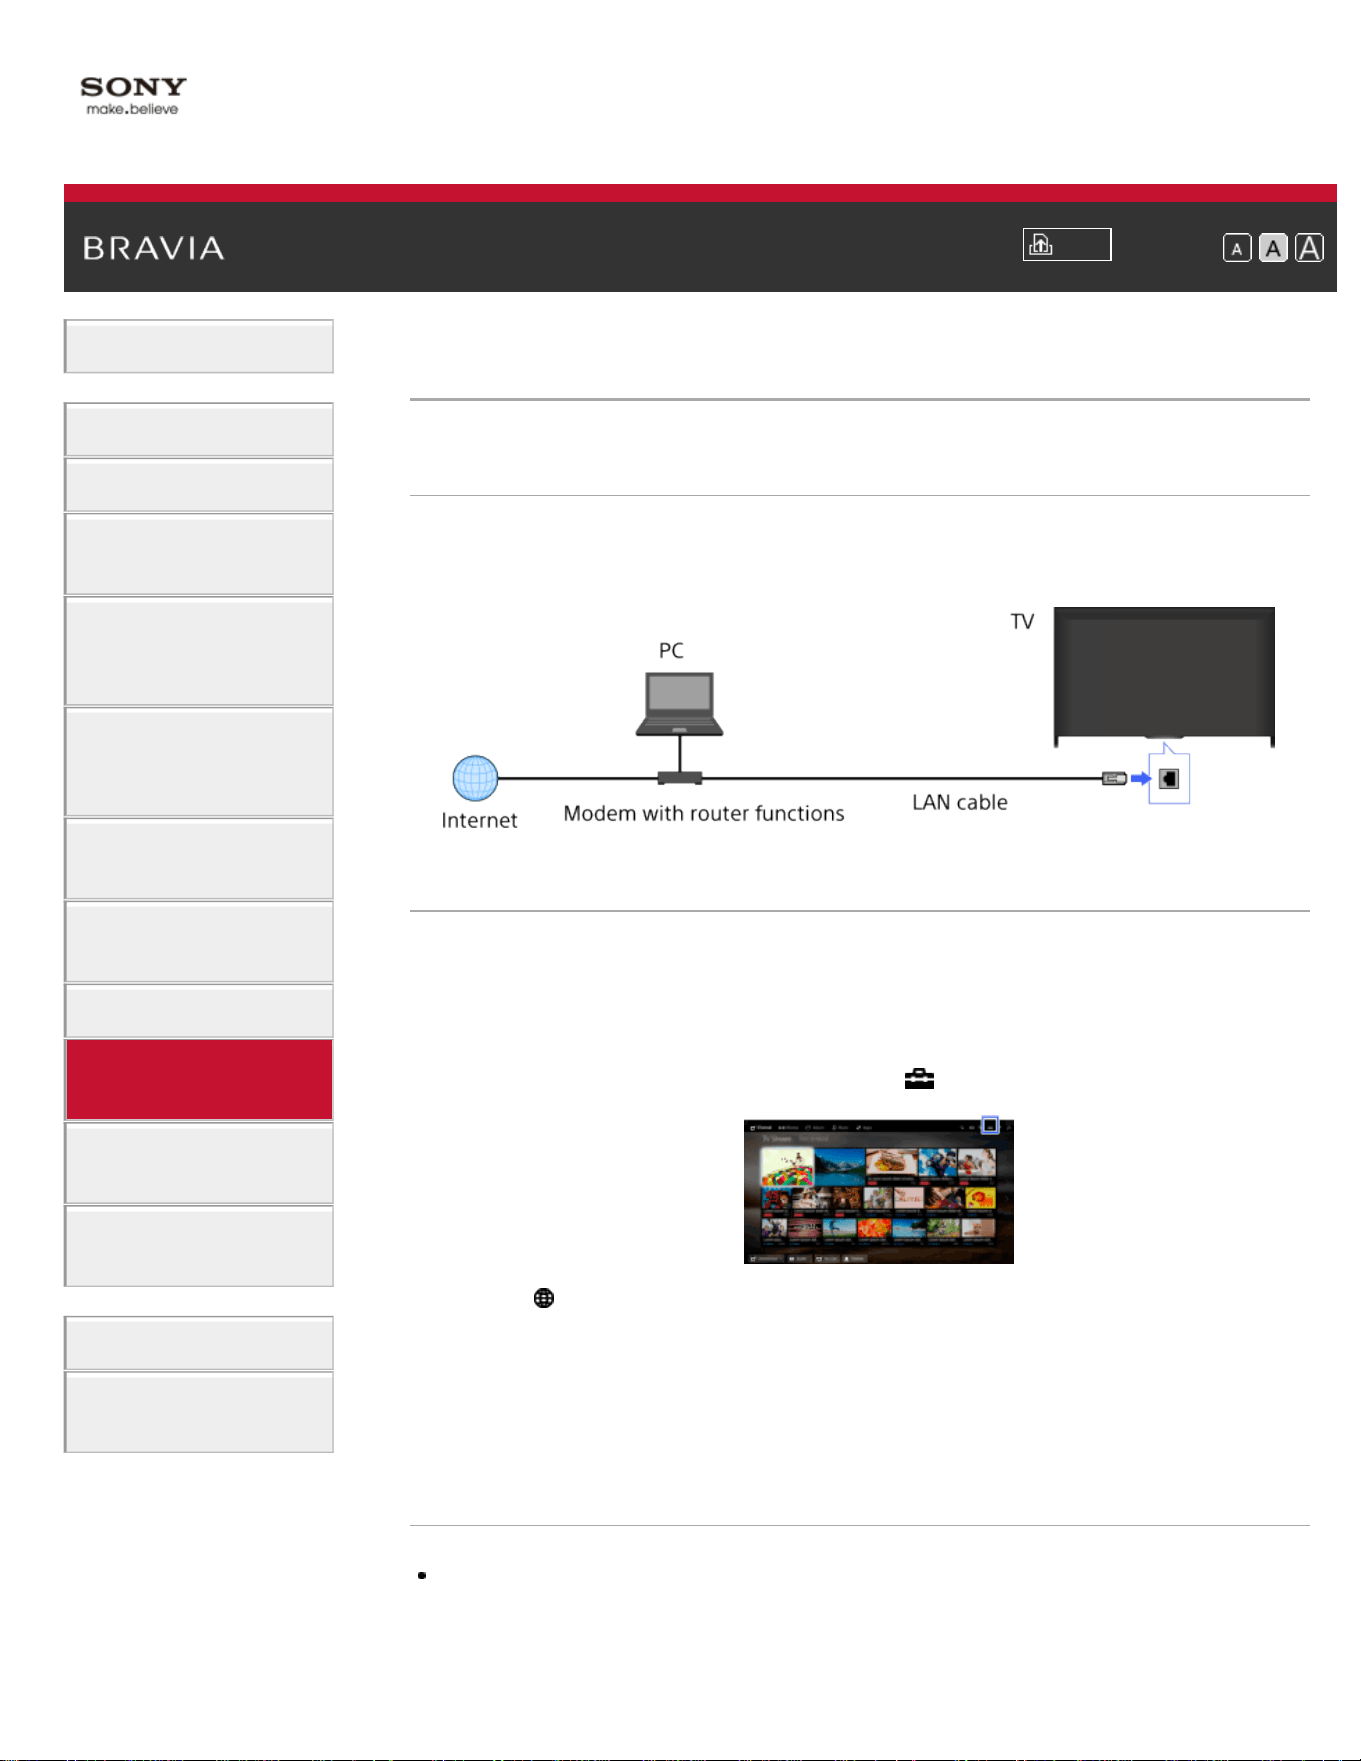
i-Manual
Print
Font Size
Basic Operations
Parts Description
Watching TV
Enjoying
Movies/Music/Photos
Using Internet
Services and
Applications
Watching TV with
Friends Far and
Near
Using Other
Devices
Using BRAVIA
Sync Devices
Useful Functions
Connecting to the
Internet
Using Home
Network
Configuring
Various Settings
Troubleshooting
How to Use
Bookmarks
Top Page > Connecting to the Internet > Wired Connection (with a LAN Cable)
Wired Connection (with a LAN Cable)
Making a Connection
A wired LAN connection allows you to access the Internet and your
home network. Connect a LAN cable to your TV.
Steps
1.
Set up your LAN router.
For details, refer to the instruction manual of your LAN router, or
contact the person who set up the network (network administrator).
2. Press the HOME button, then select [Settings].
3. Select [Network] → [Network Setup] → [Set up network
connection] → [Easy].
4. Follow the on-screen instructions to complete the setup.
5. After completing the setup, select [Refresh Internet Content].
Notes
The setting items (e.g. IP address, subnet mask, DHCP) may vary
depending on the Internet service provider or router. For details, refer to
the instruction manuals provided by the Internet service provider, or those
135

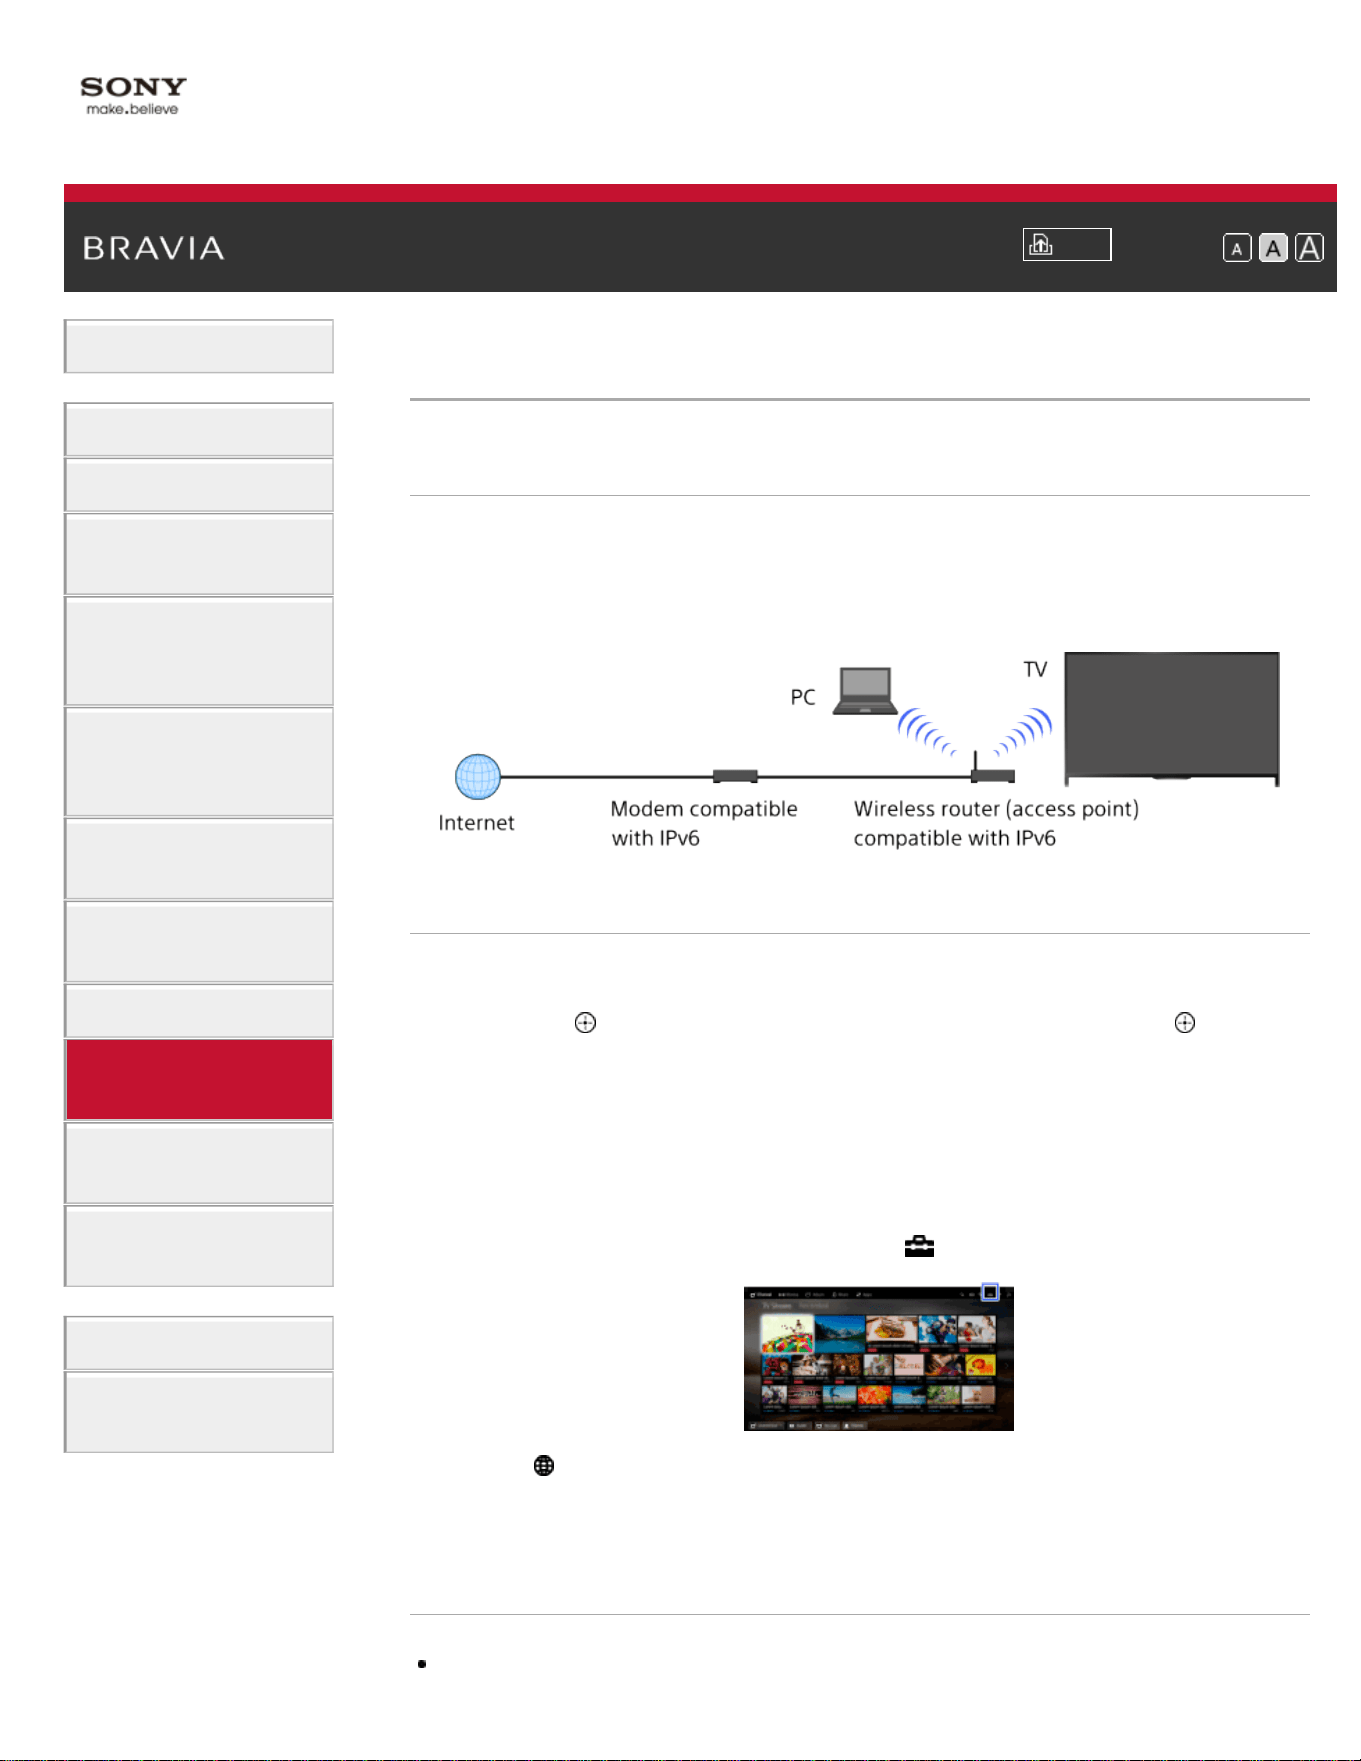
i-Manual
Print
Font Size
Basic Operations
Parts Description
Watching TV
Enjoying
Movies/Music/Photos
Using Internet
Services and
Applications
Watching TV with
Friends Far and
Near
Using Other
Devices
Using BRAVIA
Sync Devices
Useful Functions
Connecting to the
Internet
Using Home
Network
Configuring
Various Settings
Troubleshooting
How to Use
Bookmarks
Top Page > Connecting to the Internet > Setting IPv6
Setting IPv6
Making a Connection
If your provider's service is compatible with IPv6, you can connect this
TV to the Internet by IPv6.
Example of wireless connection:
Steps
1.
Connect to a broadband Internet connection.
Press the
button to jump to the title list. Then, press the button
again to go to “Wireless connection” or “Wired connection” in
“Connecting to the Internet” for details.
(When using the Touchpad Remote Control, press the touchpad.
Then, press the touchpad again to go to “Wireless connection” or
“Wired connection” in “Connecting to the Internet” for details.)
2. Press the HOME button, then select [Settings].
3. Select [Network] → [IPv6 Setup] → [Set up IPv6 connection].
4. Follow the on-screen instructions to complete the setup.
Notes
If your network environment does not support IPv6, turn off IPv6 of the TV.
137
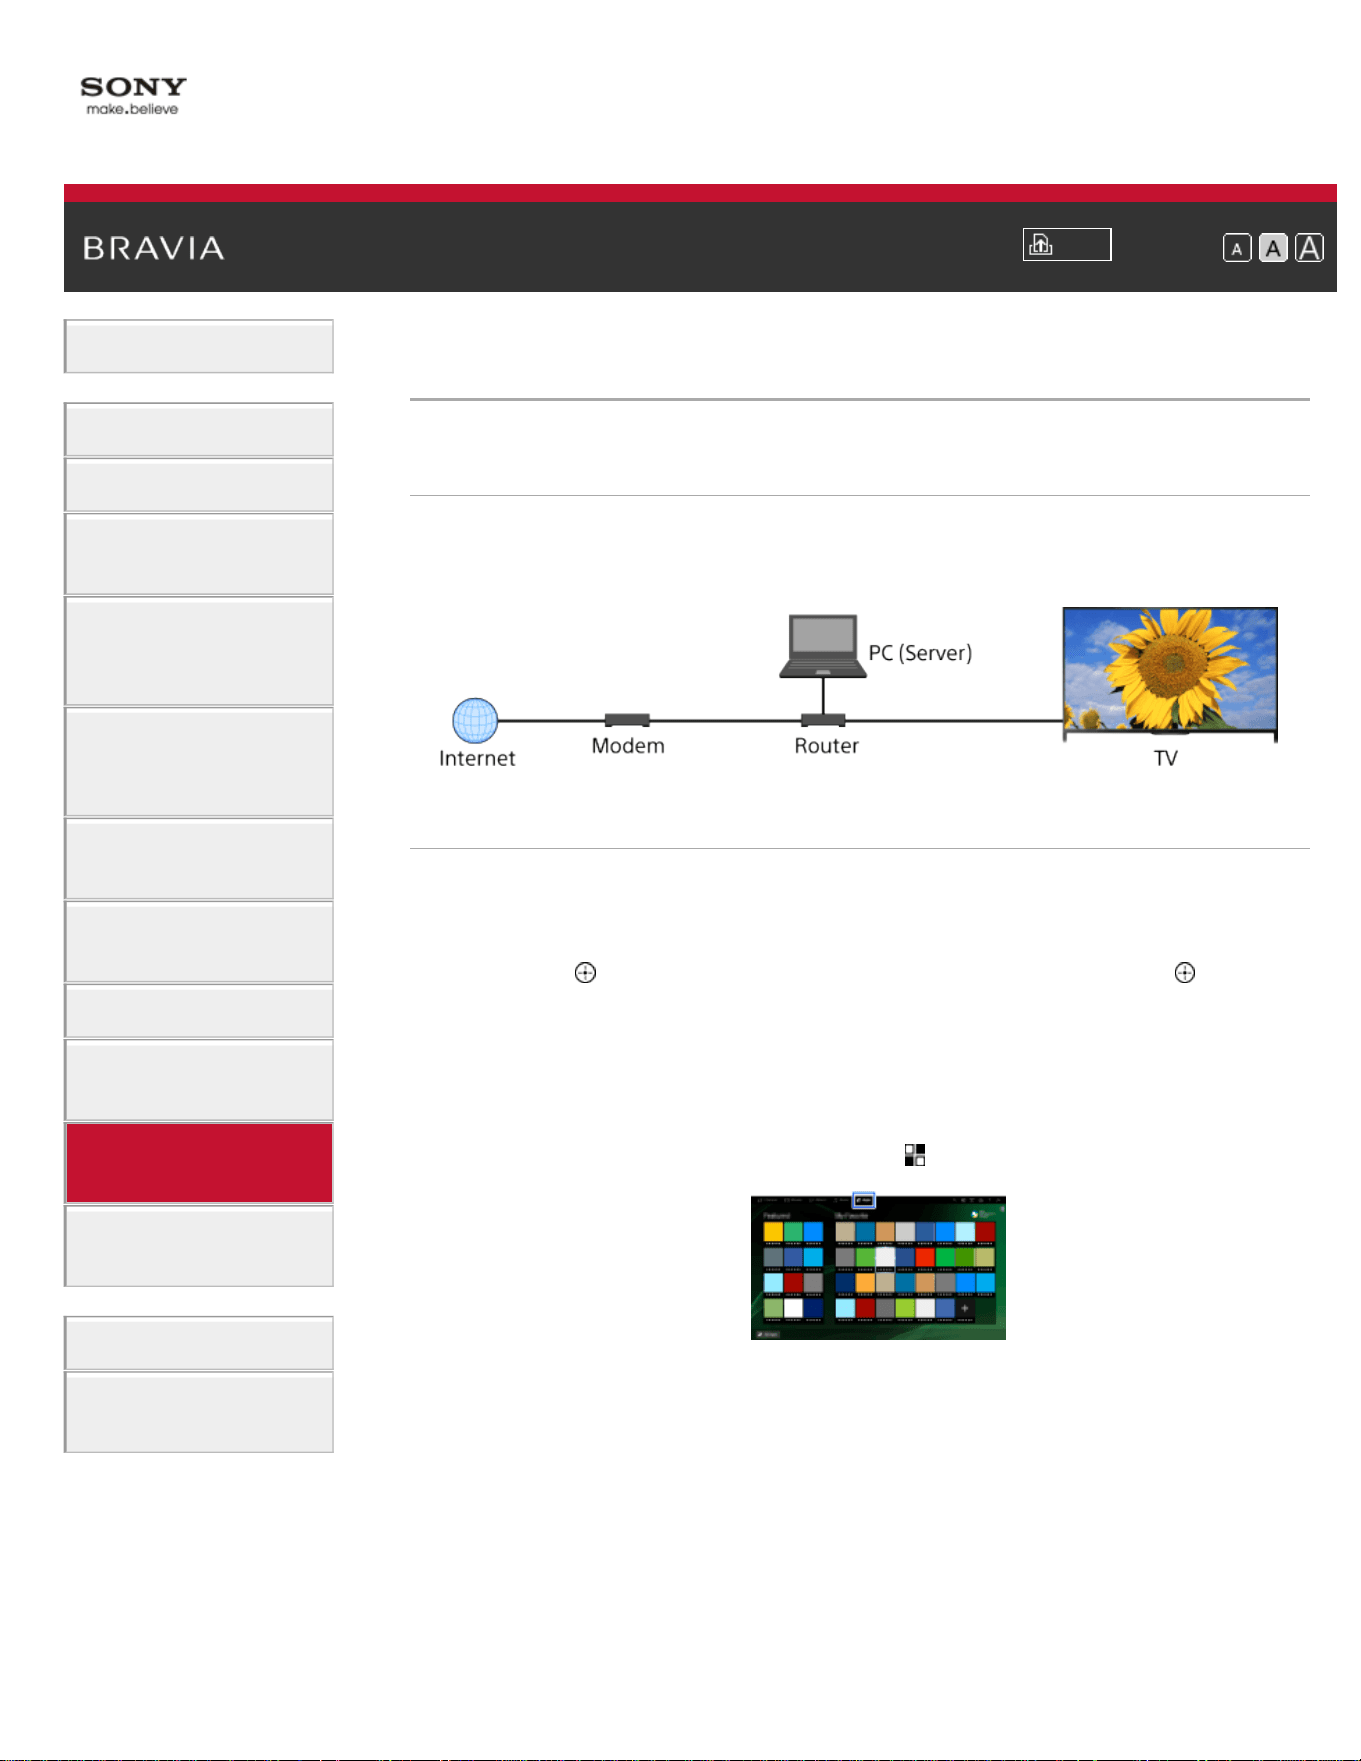
i-Manual
Print
Font Size
Basic Operations
Parts Description
Watching TV
Enjoying
Movies/Music/Photos
Using Internet
Services and
Applications
Watching TV with
Friends Far and
Near
Using Other
Devices
Using BRAVIA
Sync Devices
Useful Functions
Connecting to the
Internet
Using Home
Network
Configuring
Various Settings
Troubleshooting
How to Use
Bookmarks
Top Page > Using Home Network > Playing Content on a PC
Playing Content on a PC
Overview
You can play photo/music/video files stored on a server (e.g. PC) that is
connected to the same home network that the TV is connected to.
Steps
1.
Connect the TV to your home network, following the steps in
“Connecting to the Internet.”
Press the
button to jump to the title list. Then, press the button
again to go to “Connecting to the Internet” for details.
(When using the Touchpad Remote Control, press the touchpad.
Then, press the touchpad again to go to “Connecting to the Internet”
for details.)
2. Press the HOME button, then select [Apps].
3. Select [All Apps] → [Media Player] → [Photo], [Music] or [Video] →
the server containing the file to play → the folder or file from the list.
If you select a folder, select the desired file.
Playback starts.
To check the supported file formats
Codec List
Notes
138

The server is required to be DLNA-certified (e.g. VAIO).
Depending on the file, playback may not be possible even when using the
supported formats.
Only panoramic JPEG files in the following horizontal/vertical sizes can be
scrolled. (If the JPEG file is edited on a PC, etc., scrolling may not be
possible.)
- For horizontal scroll: 4912/1080, 7152/1080, 3424/1920, 4912/1920,
12416/1856, 8192/1856, 5536/2160, 3872/2160, 10480/4096, 11520/1080
- For vertical scroll: 1080/4912, 1080/7152, 1920/3424, 1920/4912,
1856/12416, 1856/8192, 2160/5536, 2160/3872, 4096/10480, 1080/11520
[Face Zoom] and [Expanded] in the option menu of [Display Size] may not
work for some image files.
List of Contents© 2014 Sony Corporation
Top of Page
139
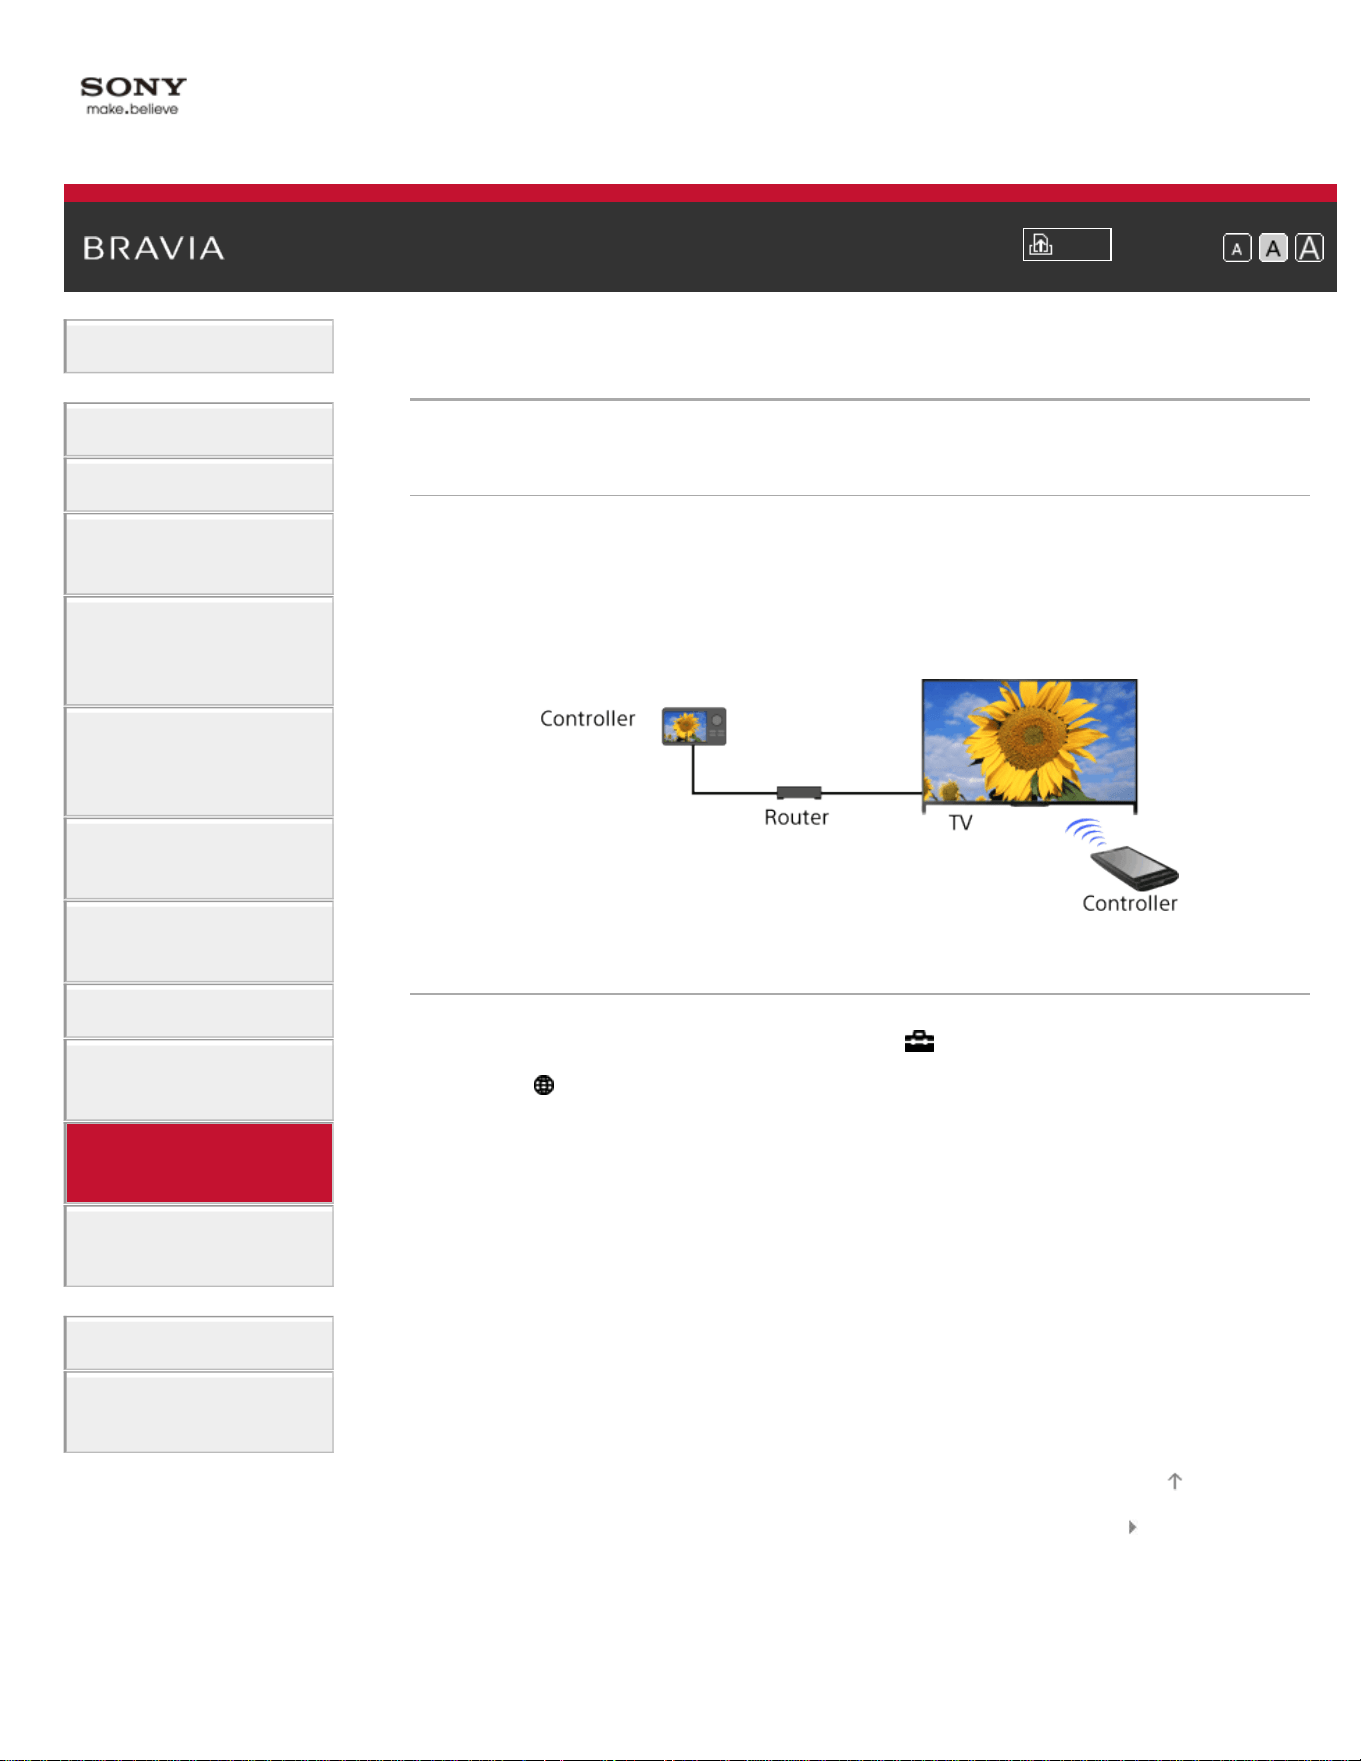
i-Manual
Print
Font Size
Basic Operations
Parts Description
Watching TV
Enjoying
Movies/Music/Photos
Using Internet
Services and
Applications
Watching TV with
Friends Far and
Near
Using Other
Devices
Using BRAVIA
Sync Devices
Useful Functions
Connecting to the
Internet
Using Home
Network
Configuring
Various Settings
Troubleshooting
How to Use
Bookmarks
Top Page > Using Home Network > Enabling the renderer function
Enabling the renderer function
Overview
By enabling the renderer function, you can play photo/music/video files
in a controller (e.g. digital still camera) on the TV screen by operating
the device directly. Also, a mobile device (e.g. smartphone) can work as
the TV’s remote control via the home network.
Steps
1.
Press the HOME button, then select [Settings].
2. Select [Network] → [Home Network Setup] → [Remote Device /
Renderer] → [Remote Device / Renderer] → [On].
List of Contents© 2014 Sony Corporation
Top of Page
140

i-Manual
Print
Font Size
Basic Operations
Parts Description
Watching TV
Enjoying
Movies/Music/Photos
Using Internet
Services and
Applications
Watching TV with
Friends Far and
Near
Using Other
Devices
Using BRAVIA
Sync Devices
Useful Functions
Connecting to the
Internet
Using Home
Network
Configuring
Various Settings
Troubleshooting
How to Use
Bookmarks
Top Page > Using Home Network > Allowing/blocking access from controller
Allowing/blocking access from controller
Steps
1.
Press the HOME button, then select [Settings].
2. Select [Network] → [Home Network Setup] → [Remote Device /
Renderer] → [Renderer Access Control] → the controller to change
the access permission setting → [Allow] or [Block].
Select [Allow] to allow access from the controller. Select [Block] to
block access from the controller.
List of Contents© 2014 Sony Corporation
Top of Page
141

i-Manual
Print
Font Size
Basic Operations
Parts Description
Watching TV
Enjoying
Movies/Music/Photos
Using Internet
Services and
Applications
Watching TV with
Friends Far and
Near
Using Other
Devices
Using BRAVIA
Sync Devices
Useful Functions
Connecting to the
Internet
Using Home
Network
Configuring
Various Settings
Troubleshooting
How to Use
Bookmarks
Top Page > Using Home Network > Making advanced renderer settings
Making advanced renderer settings
Steps
1.
Press the HOME button, then select [Settings].
2. Select [Network] → [Home Network Setup] → [Remote Device /
Renderer] → [Renderer Options] → the desired option.
Available Options
[Auto Access Permission]
Permits access to the TV automatically when a controller accesses the
TV for the first time.
[Smart Select]
Responds to infrared signals sent from controllers.
List of Contents© 2014 Sony Corporation
Top of Page
142
i-Manual
Print
Font Size
Basic Operations
Parts Description
Watching TV
Enjoying
Movies/Music/Photos
Using Internet
Services and
Applications
Watching TV with
Friends Far and
Near
Using Other
Devices
Using BRAVIA
Sync Devices
Useful Functions
Connecting to the
Internet
Using Home
Network
Configuring
Various Settings
Troubleshooting
How to Use
Bookmarks
Top Page > Using Home Network > Selecting servers to display
Selecting servers to display
Steps
1.
Press the HOME button, then select [Settings].
2. Select [Network] → [Home Network Setup] → [Show/Hide Media
Servers] → the server to display or not display → [Shown] or
[Hidden].
List of Contents© 2014 Sony Corporation
Top of Page
143

i-Manual
Print
Font Size
Basic Operations
Parts Description
Watching TV
Enjoying
Movies/Music/Photos
Using Internet
Services and
Applications
Watching TV with
Friends Far and
Near
Using Other
Devices
Using BRAVIA
Sync Devices
Useful Functions
Connecting to the
Internet
Using Home
Network
Configuring
Various Settings
Troubleshooting
How to Use
Bookmarks
Top Page > Using Home Network > Checking the server connection
Checking the server connection
Steps
1.
Press the HOME button, then select [Settings].
2. Select [Network] → [Home Network Setup] → [Media Server
Troubleshooting].
3. Follow the on-screen instructions to perform the diagnostics.
List of Contents© 2014 Sony Corporation
Top of Page
144
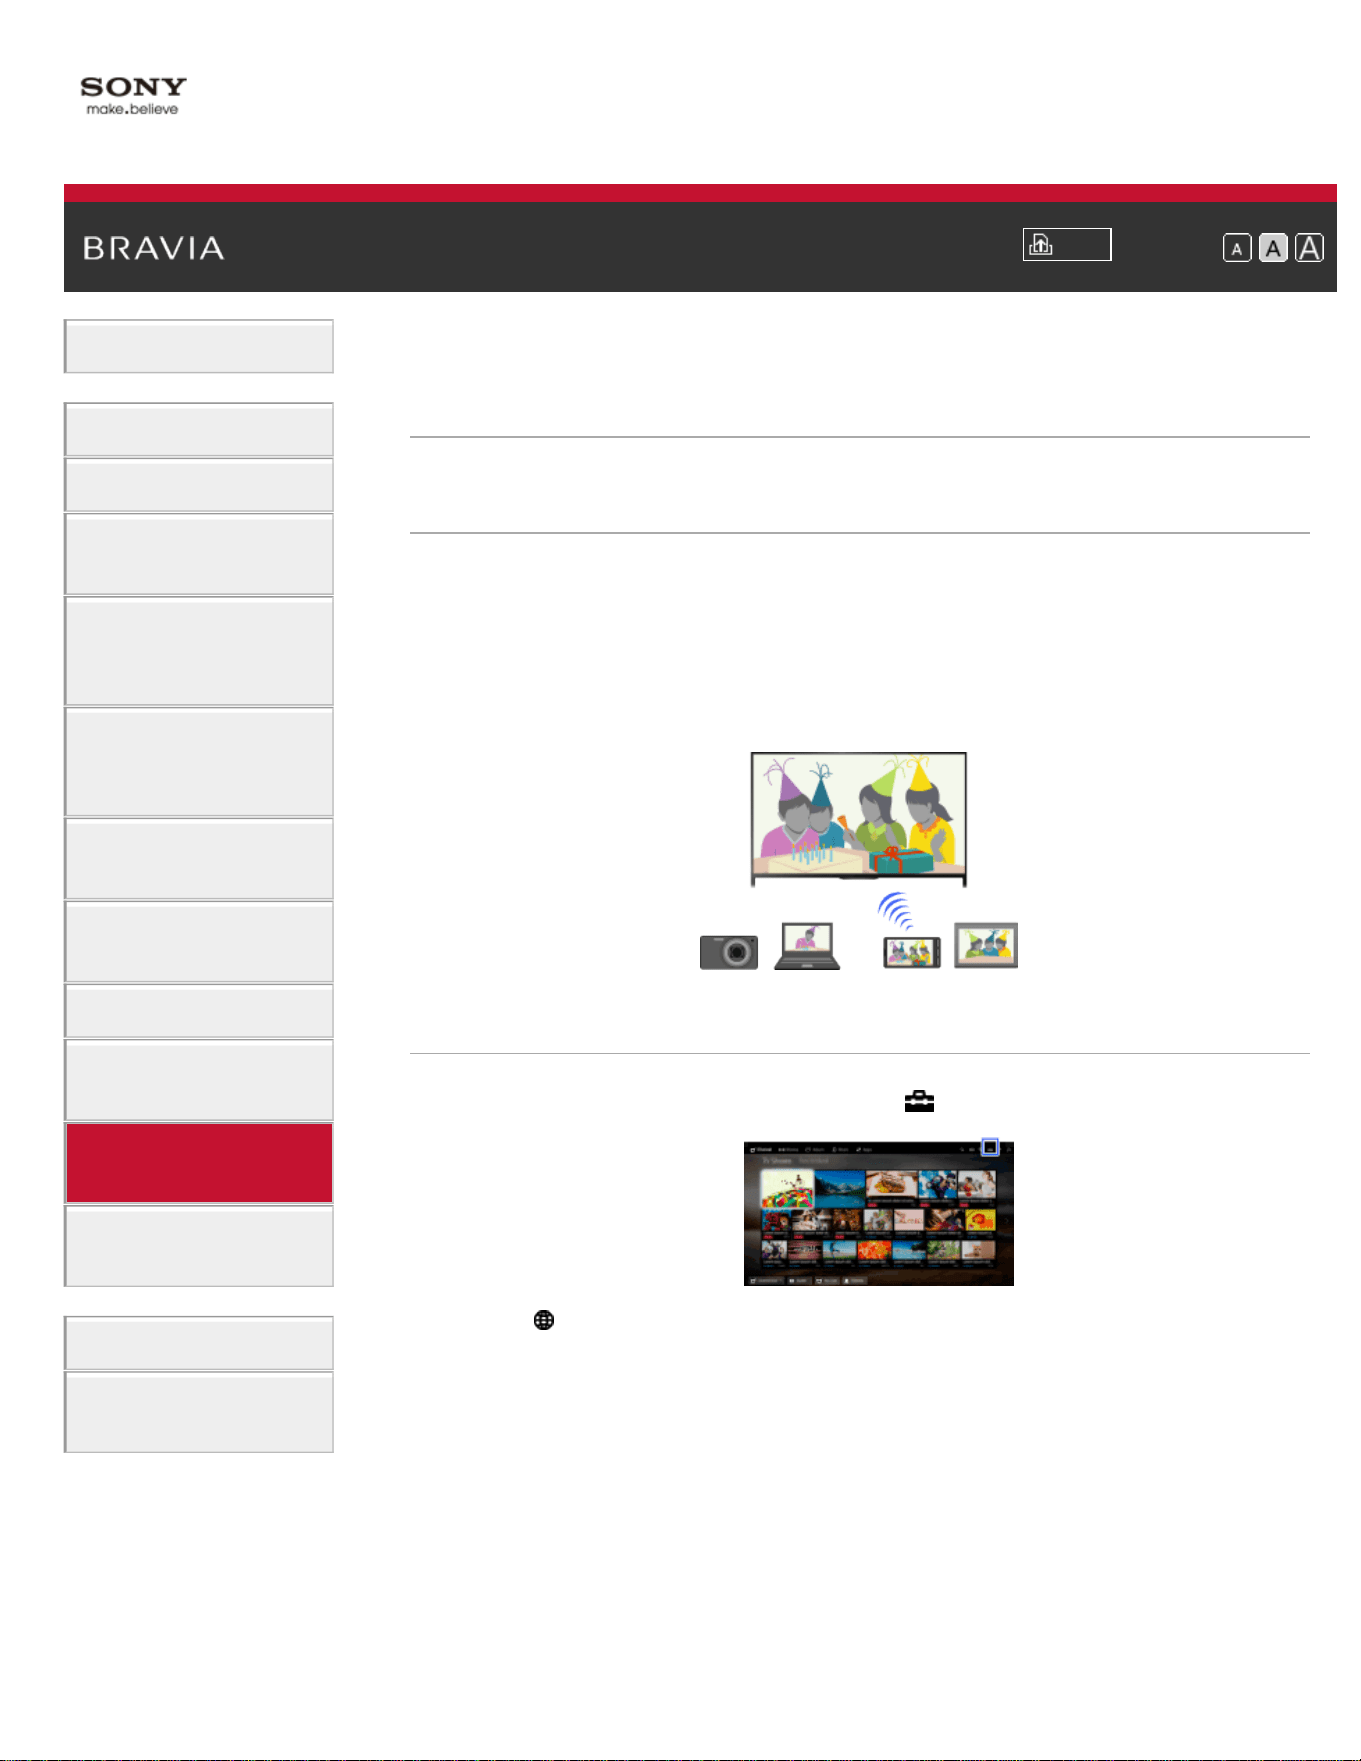
i-Manual
Print
Font Size
Basic Operations
Parts Description
Watching TV
Enjoying
Movies/Music/Photos
Using Internet
Services and
Applications
Watching TV with
Friends Far and
Near
Using Other
Devices
Using BRAVIA
Sync Devices
Useful Functions
Connecting to the
Internet
Using Home
Network
Configuring
Various Settings
Troubleshooting
How to Use
Bookmarks
Top Page > Using Home Network > Connecting via Wi-Fi Direct (without a wireless router)
Connecting via Wi-Fi Direct (without a wireless
router)
Overview
The TV can be directly connected to a Wi-Fi/Wi-Fi Direct device (e.g.
smartphone, PC) that also supports the “DLNA Push controller” function.
Content such as photos/music/videos on the device can be played on
the TV. No wireless router (or access point) is required to use this
feature.
Steps
1.
Press the HOME button, then select [Settings].
2. Select [Network] → [Wi-Fi Direct] → [On].
3. Select [Wi-Fi Direct Settings].
4. Select the TV name displayed on the TV screen with the Wi-Fi Direct
device.
If the device does not support Wi-Fi Direct, press the OPTIONS
button, then select [Manual].
5. Operate the Wi-Fi Direct/Wi-Fi device to connect with the TV.
6. Send the content from the Wi-Fi Direct/Wi-Fi device to the TV.
For details, refer to the instruction manual of the device.
145

If the connection does not succeed
When the standby screen for the Wi-Fi Direct Settings is displayed,
press the OPTIONS button, then select [Manual].
Select [WPS (Push Button)] if the device supports WPS. Otherwise,
select [Other Methods] and follow the on-screen instructions to
complete the setup.
To connect another device
Follow the steps above to connect devices. Up to 10 devices can be
connected at the same time. To connect another device when 10
devices are already connected, disconnect an unnecessary device, then
connect the device.
To change the name of the TV shown on the connected
device
Press the HOME button, then select [Settings] → [Network] →
[Device Name].
To list connected devices/deregister devices
When the standby screen for the Wi-Fi Direct Settings is displayed,
press the OPTIONS button, then select [Show Device List / Delete].
To deregister a device, select the device in the list to delete, then press
the
button (or press the touchpad on the Touchpad Remote Control).
Then, select [Yes] in the confirmation display.
To deregister all devices, press the OPTIONS button in the list, select
[Delete All], then [Yes] in the confirmation display.
Icons on the left of the list show the following.
(check icon): Connected devices
(display icon): Screen mirroring compatible devices
To display dialog when attempting to connect a device
with the TV
Activating this function can avoid an unintended device from being
connected.
When the standby screen for the Wi-Fi Direct Settings is displayed,
press the OPTIONS button, then select [Registration Notification].
Note that once you decline registration request from a device, you will
not be able to connect the device unless you delete it from the device
list.
To connect the declined device, press the OPTIONS button, select
[Show Device List / Delete], then delete the declined device. Then,
make a new connection with the device.
To change the band setting (for experts)
When your TV is not connected to any routers by wireless, you can
146

select the wireless band for the Wi-Fi Direct function. When the standby
screen for the Wi-Fi Direct setting is displayed, press the OPTIONS
button, then select [Band Setting].
[Auto]: Normally use this option. It automatically selects an appropriate
band for the Wi-Fi Direct function.
[Auto (2.4GHz Band)]: Use this option when connecting with devices
that support 2.4GHz only. This option may support more devices than
other options.
[Auto (5GHz Band)]: Use this option when connecting with devices that
support 5GHz. This option may improve video streaming quality.
Note that when you select this option, the TV cannot connect with
devices that support 2.4GHz only.
[Select a Channel]: Use this option to select a specific wireless channel.
Tips
For information about the supported wireless band of your device, refer
to the instruction manual of your device.
The 5GHz band may not be supported depending on your
region/country. If the 5GHz band is not supported, you can only use
[Auto] and [Select a Channel].
Notes
If the TV is connected with a wireless router (or access point) at 5GHz:
- The 5GHz connection will be disconnected when [Wi-Fi Direct] is set to
[On]. While the connection is disconnected, communication via the
Internet (such as an incoming call) is stopped.
- The connection will be resumed when [Wi-Fi Direct] is set to [Off].
The 5GHz band may not be supported depending on your region/country.
If the 5GHz band is not supported, the TV can only connect to a wireless
router (access point) using the 2.4GHz band.
List of Contents© 2014 Sony Corporation
Top of Page
147
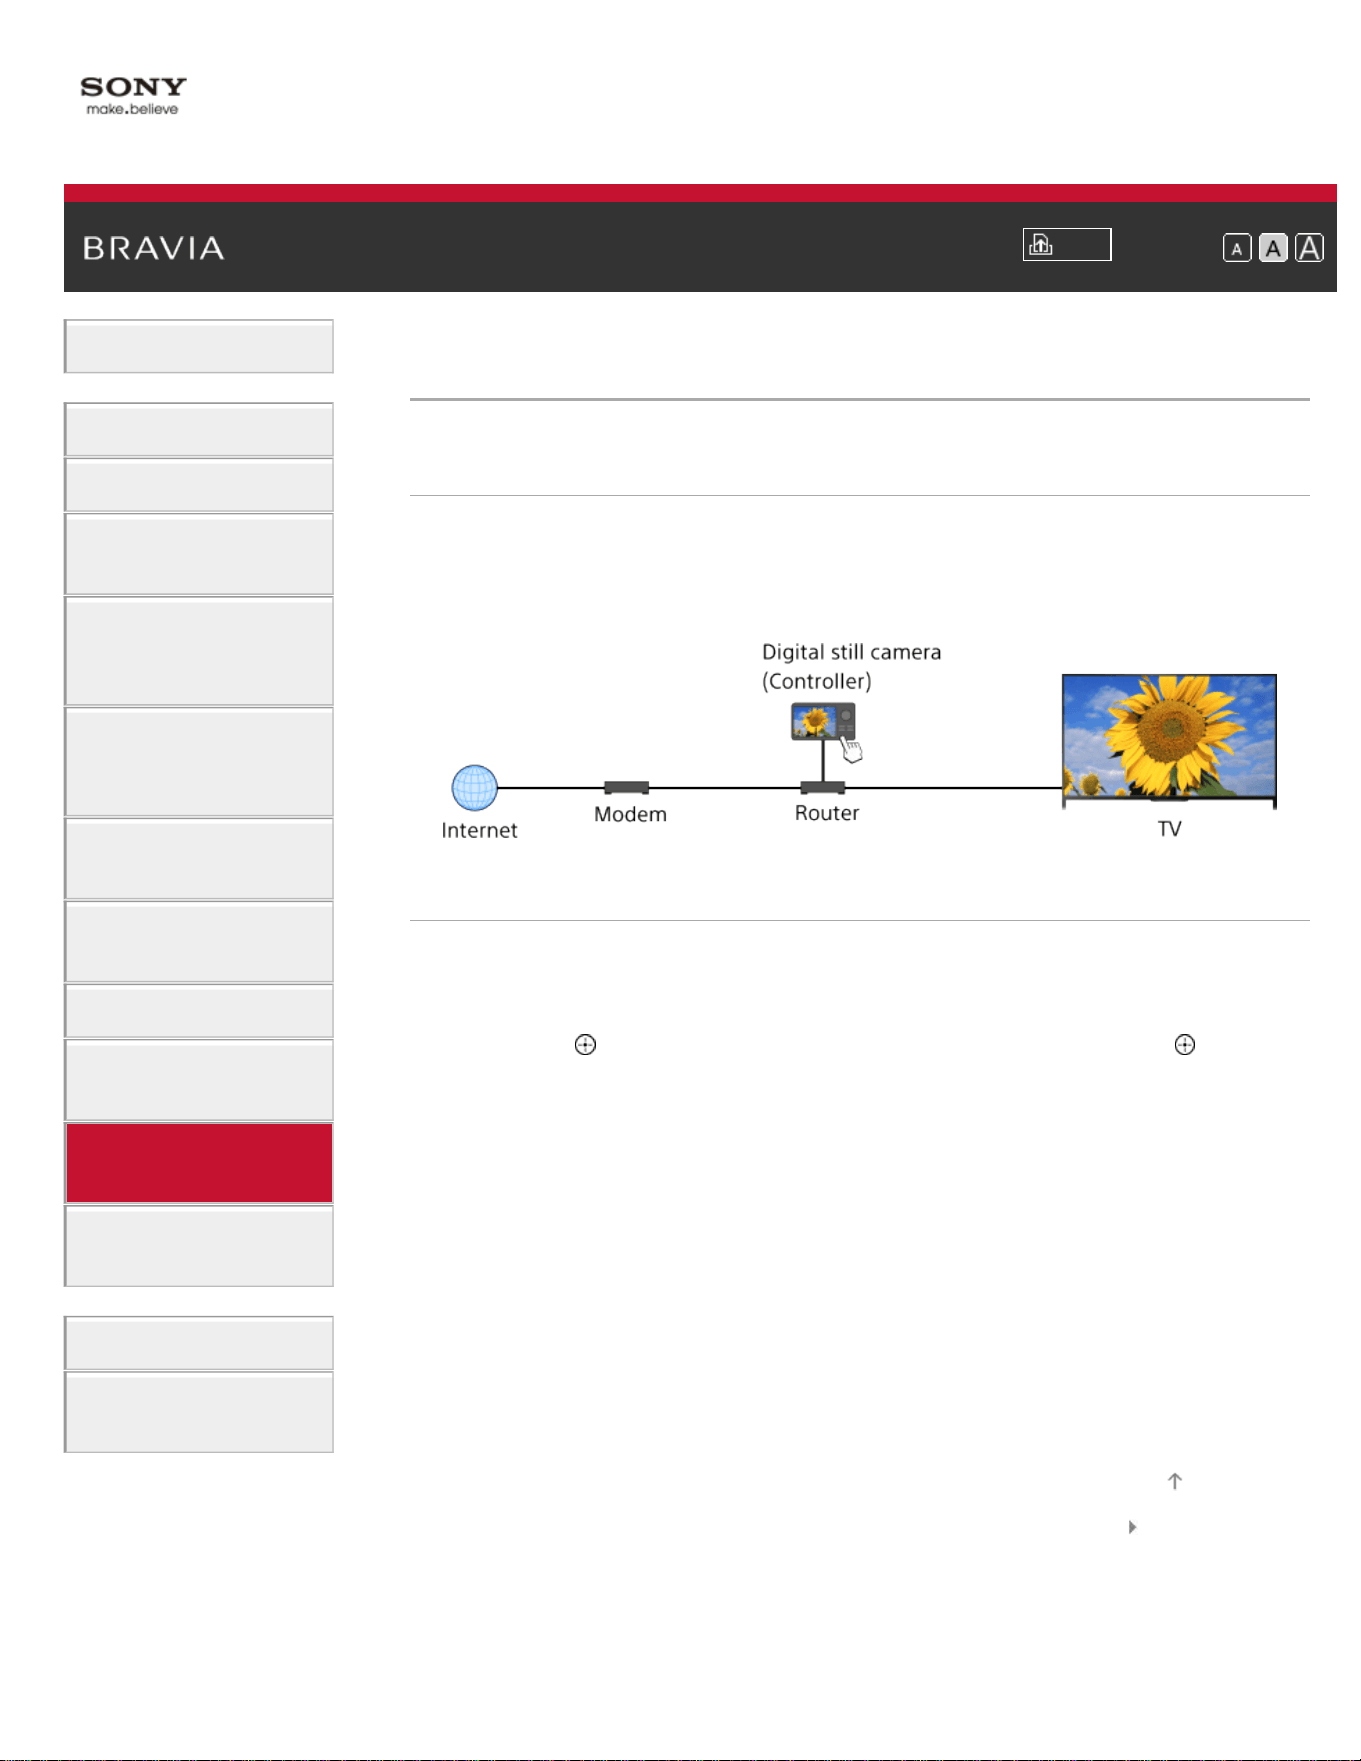
i-Manual
Print
Font Size
Basic Operations
Parts Description
Watching TV
Enjoying
Movies/Music/Photos
Using Internet
Services and
Applications
Watching TV with
Friends Far and
Near
Using Other
Devices
Using BRAVIA
Sync Devices
Useful Functions
Connecting to the
Internet
Using Home
Network
Configuring
Various Settings
Troubleshooting
How to Use
Bookmarks
Top Page > Using Home Network > Playing Content with the Renderer Function
Playing Content with the Renderer Function
Overview
You can play photo/music/video files in a controller (e.g. digital still
camera) on the TV screen by operating the controller directly. The
controller should also be renderer-compatible.
Steps
1.
Connect the TV to your home network, following the steps in
“Connecting to the Internet.”
Press the
button to jump to the title list. Then, press the button
again to go to “Connecting to the Internet” for details.
(When using the Touchpad Remote Control, press the touchpad.
Then, press the touchpad again to go to “Connecting to the Internet”
for details.)
2. Operate the controller to start playing the content on the TV screen.
List of Contents© 2014 Sony Corporation
Top of Page
148
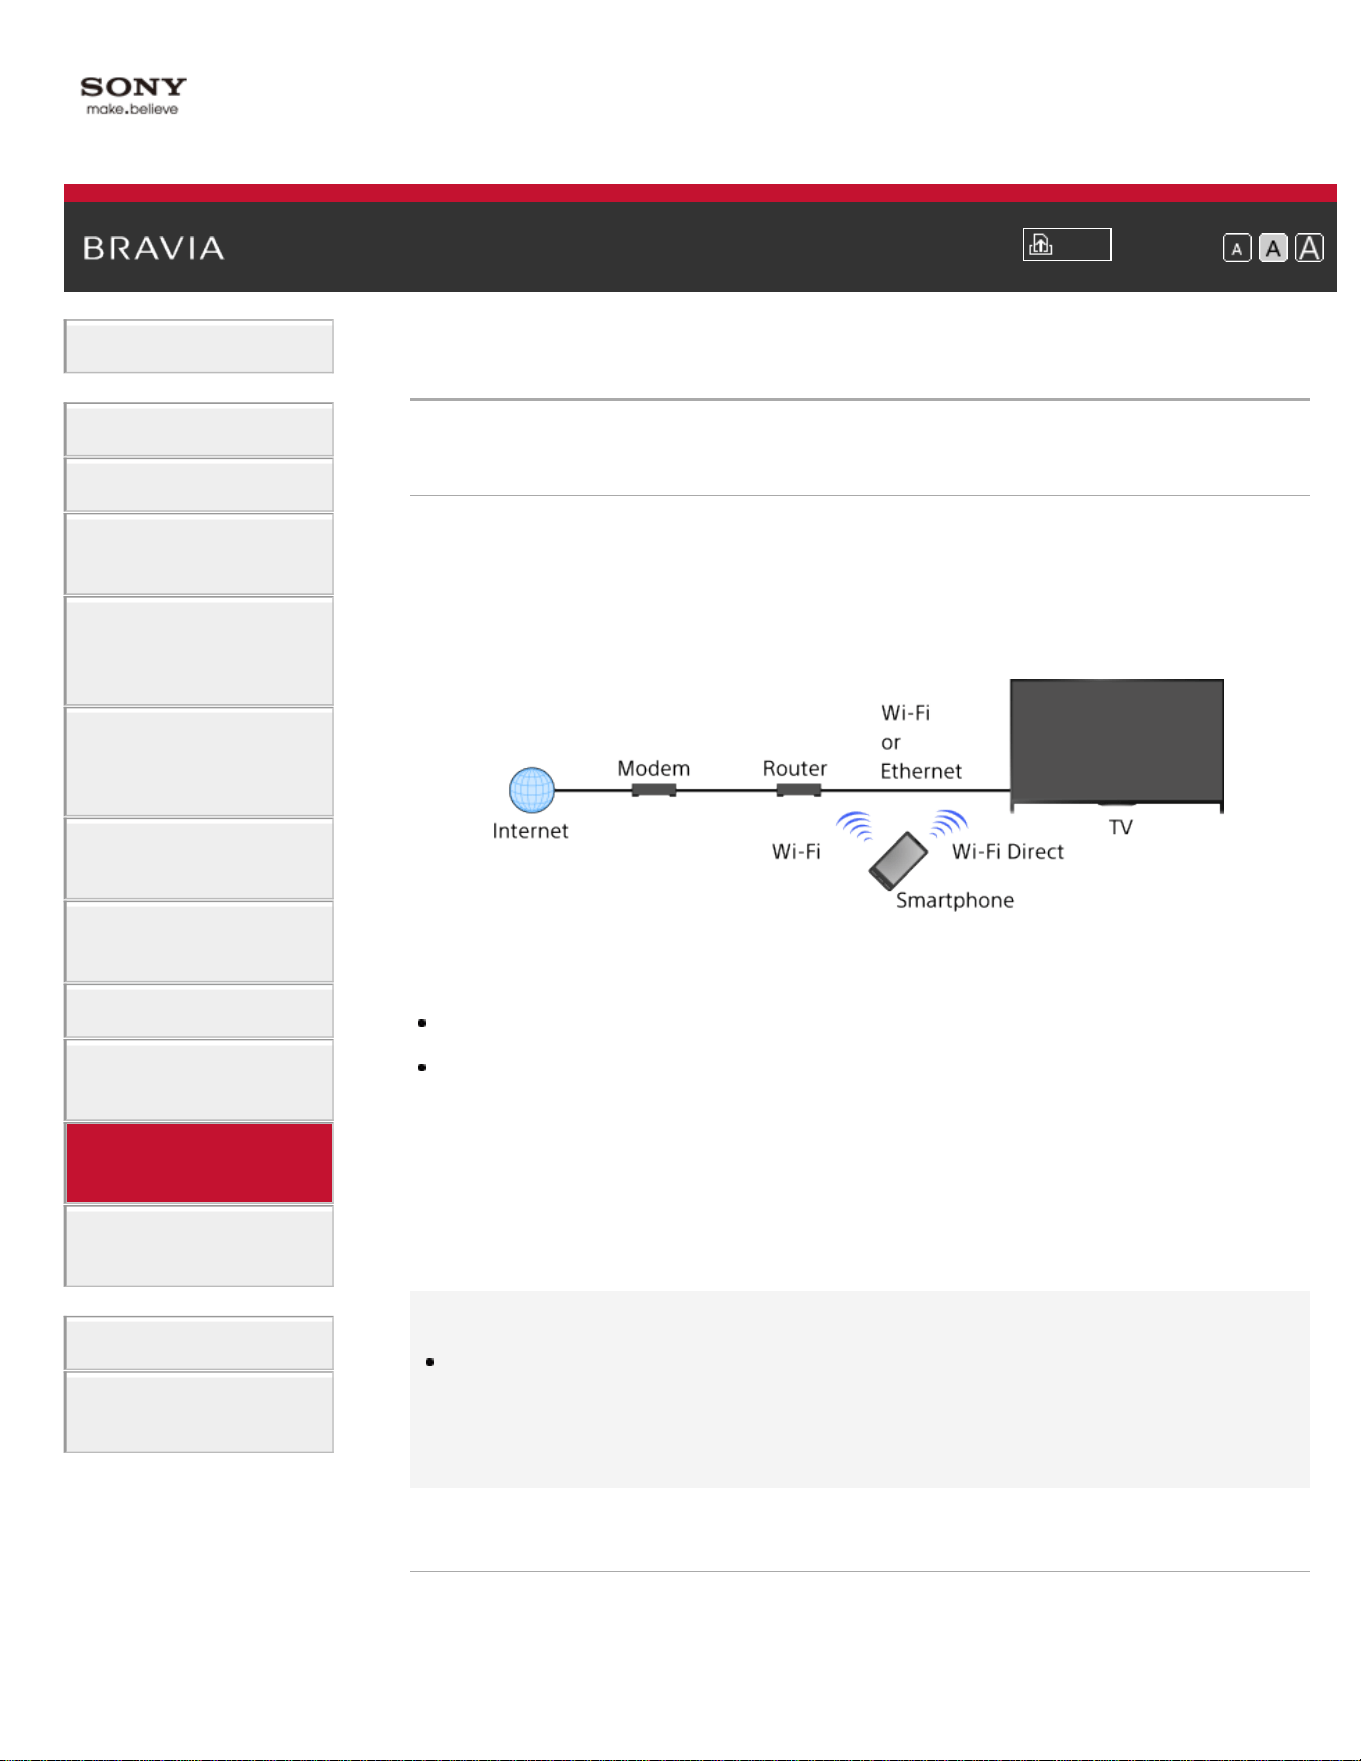
i-Manual
Print
Font Size
Basic Operations
Parts Description
Watching TV
Enjoying
Movies/Music/Photos
Using Internet
Services and
Applications
Watching TV with
Friends Far and
Near
Using Other
Devices
Using BRAVIA
Sync Devices
Useful Functions
Connecting to the
Internet
Using Home
Network
Configuring
Various Settings
Troubleshooting
How to Use
Bookmarks
Top Page > Using Home Network > Using a Smartphone/Tablet as a Remote
Using a Smartphone/Tablet as a Remote
Overview
You can control the TV from the touch panel of a mobile device (such
as a smartphone or tablet) with the "TV SideView" application installed.
To use your mobile device as a TV’s remote control, register it to the TV
as a remote device. (Registration is required only for the first time.)
Available operations using the mobile device with the
“TV SideView” application installed
Powering on and controlling the TV, as a remote control
Entering text using the mobile device’s keyboard
For comprehensive information about the “TV SideView” application,
refer to the following website:
http://info.tvsideview.sony.net
For details on how to use the “TV SideView” application, refer to the
application’s help.
Tips
You can search and download the “TV SideView” application from:
- Google Play (for Android OS)
- App Store (for iOS)
Steps
1.
Connect the TV to your home network, following the steps in
“Connecting to the Internet.”
149

Press the button to jump to the title list. Then, press the button
again to go to “Connecting to the Internet” for details.
(When using the Touchpad Remote Control, press the touchpad.
Then, press the touchpad again to go to “Connecting to the Internet”
for details.)
2. Connect the mobile device to the home network that the TV is
connected to.
3. Launch the “TV SideView” application on the mobile device, then
search for the TV in the home network or in the available Wi-Fi
Direct devices.
The detected device list appears on the mobile device.
4. Select the TV in the detected device list, then perform the required
operation on your device.
Mutual registration (the above steps) are required only for the first time.
Tips
You can also connect the “TV SideView” application to the TV using Wi-
Fi Direct. Turn on the Wi-Fi Direct function of the TV by selecting
[Settings] → [Network] → [Wi-Fi Direct] → [On], then navigate to the
[Wi-Fi Direct Settings] page of the TV by selecting
[Settings] →
[Network] → [Wi-Fi Direct Settings].
To turn on the TV from “TV SideView” on your mobile
device
Press the HOME button, then select [Settings] → [Network] →
[Home Network Setup] → [Remote Start] → [On].
The standby power consumption will increase if [On] is set.
Notes
Make sure that [Remote Device / Renderer] is set to [On]. To confirm the
setting, press the HOME button, then select
[Settings] → [Network]
→ [Home Network Setup] → [Remote Device / Renderer] → [Remote
Device / Renderer].
The name and available functions of “TV SideView” are subject to change.
List of Contents© 2014 Sony Corporation
Top of Page
150
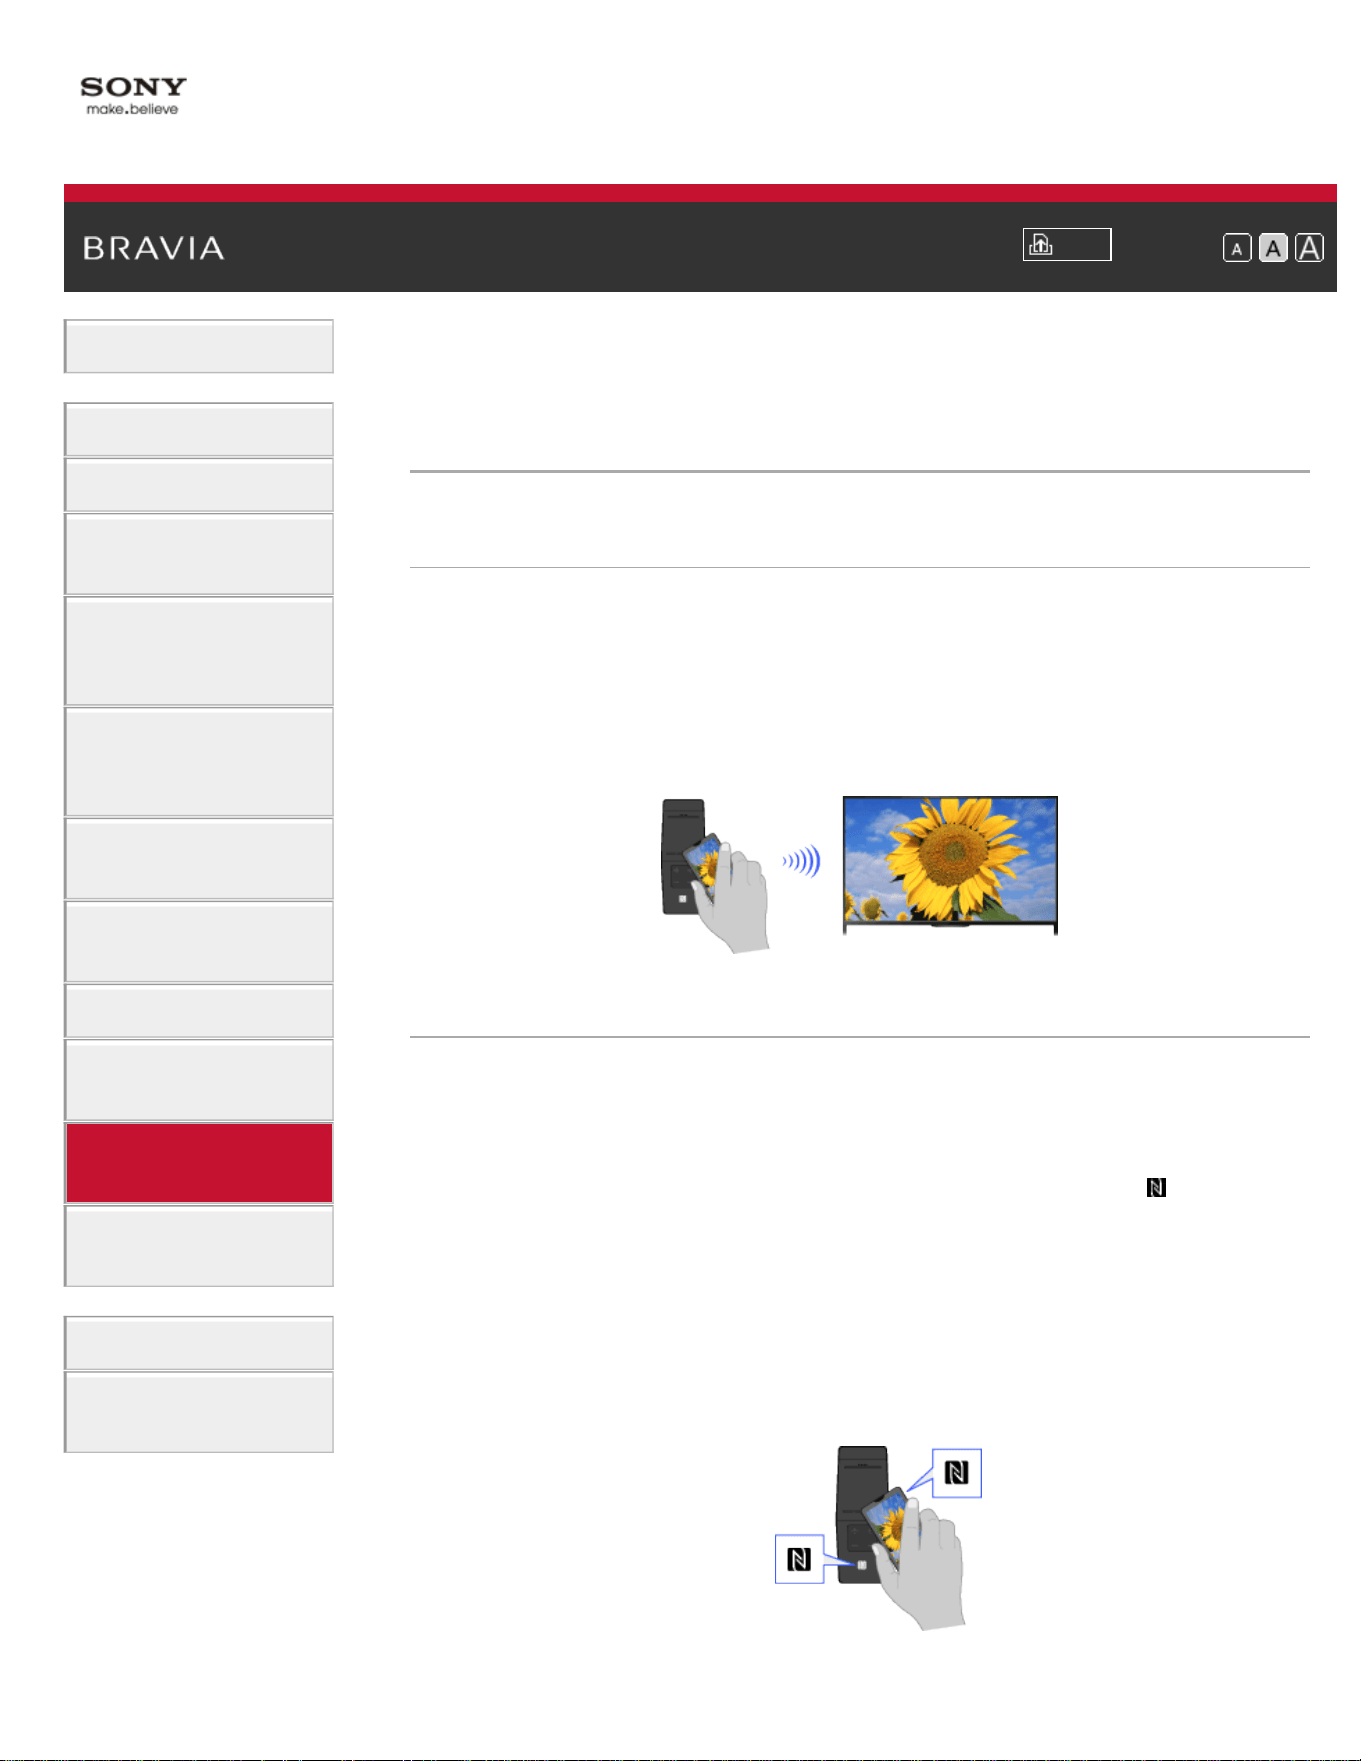
i-Manual
Print
Font Size
Basic Operations
Parts Description
Watching TV
Enjoying
Movies/Music/Photos
Using Internet
Services and
Applications
Watching TV with
Friends Far and
Near
Using Other
Devices
Using BRAVIA
Sync Devices
Useful Functions
Connecting to the
Internet
Using Home
Network
Configuring
Various Settings
Troubleshooting
How to Use
Bookmarks
Top Page > Using Home Network > Displaying the Smartphone’s Screen on the TV (One-
touch mirroring)
Displaying the Smartphone’s Screen on the TV
(One-touch mirroring)
Overview
By simply touching a mobile device (such as a smartphone or tablet) on
the Touchpad Remote Control, you can display its screen on your large
TV screen.
You can use this “One-touch mirroring” function with a One-touch
mirroring compatible device (e.g. some models of Xperia).
Steps
1.
Set the NFC* setting of your smartphone to on.
* NFC: Near Field Communication
2. Touch the NFC detection area of the smartphone to the mark on
the Touchpad Remote Control for about 2 seconds.
Remove the smartphone from the remote control when the device
confirmation completion message appears at the bottom of the TV
screen.
When the smartphone is connected with the TV, the screen
displayed on the smartphone will also be displayed on the TV.
151

To optimize the One-touch mirroring function (for
experts)
When the standby screen for Screen mirroring is displayed, press the
OPTIONS button, then select [Optimize One-touch mirroring].
[Off]: Normally use this option. It uses the same wireless channel at
2.4GHz as the wireless router (or access point) is using.
[Auto]: This option uses a wireless channel that may improve video
streaming quality. When you select this setting, the wireless connection
between the TV and the wireless router (access point) is disconnected
during One-touch mirroring, therefore communication via the Internet
(such as an incoming call) is stopped.
When your TV is connected to a wireless router (or access point) at
2.4GHz, you can optimize the wireless connection for the One-touch
mirroring function.
Notes
For connection with Xperia, release the screen lock of Xperia, then touch.
For the position of the NFC detection area on the smartphone, refer to the
instruction manual of the smartphone.
If the TV cannot recognize and connect with the smartphone, try again.
List of Contents© 2014 Sony Corporation
Top of Page
152
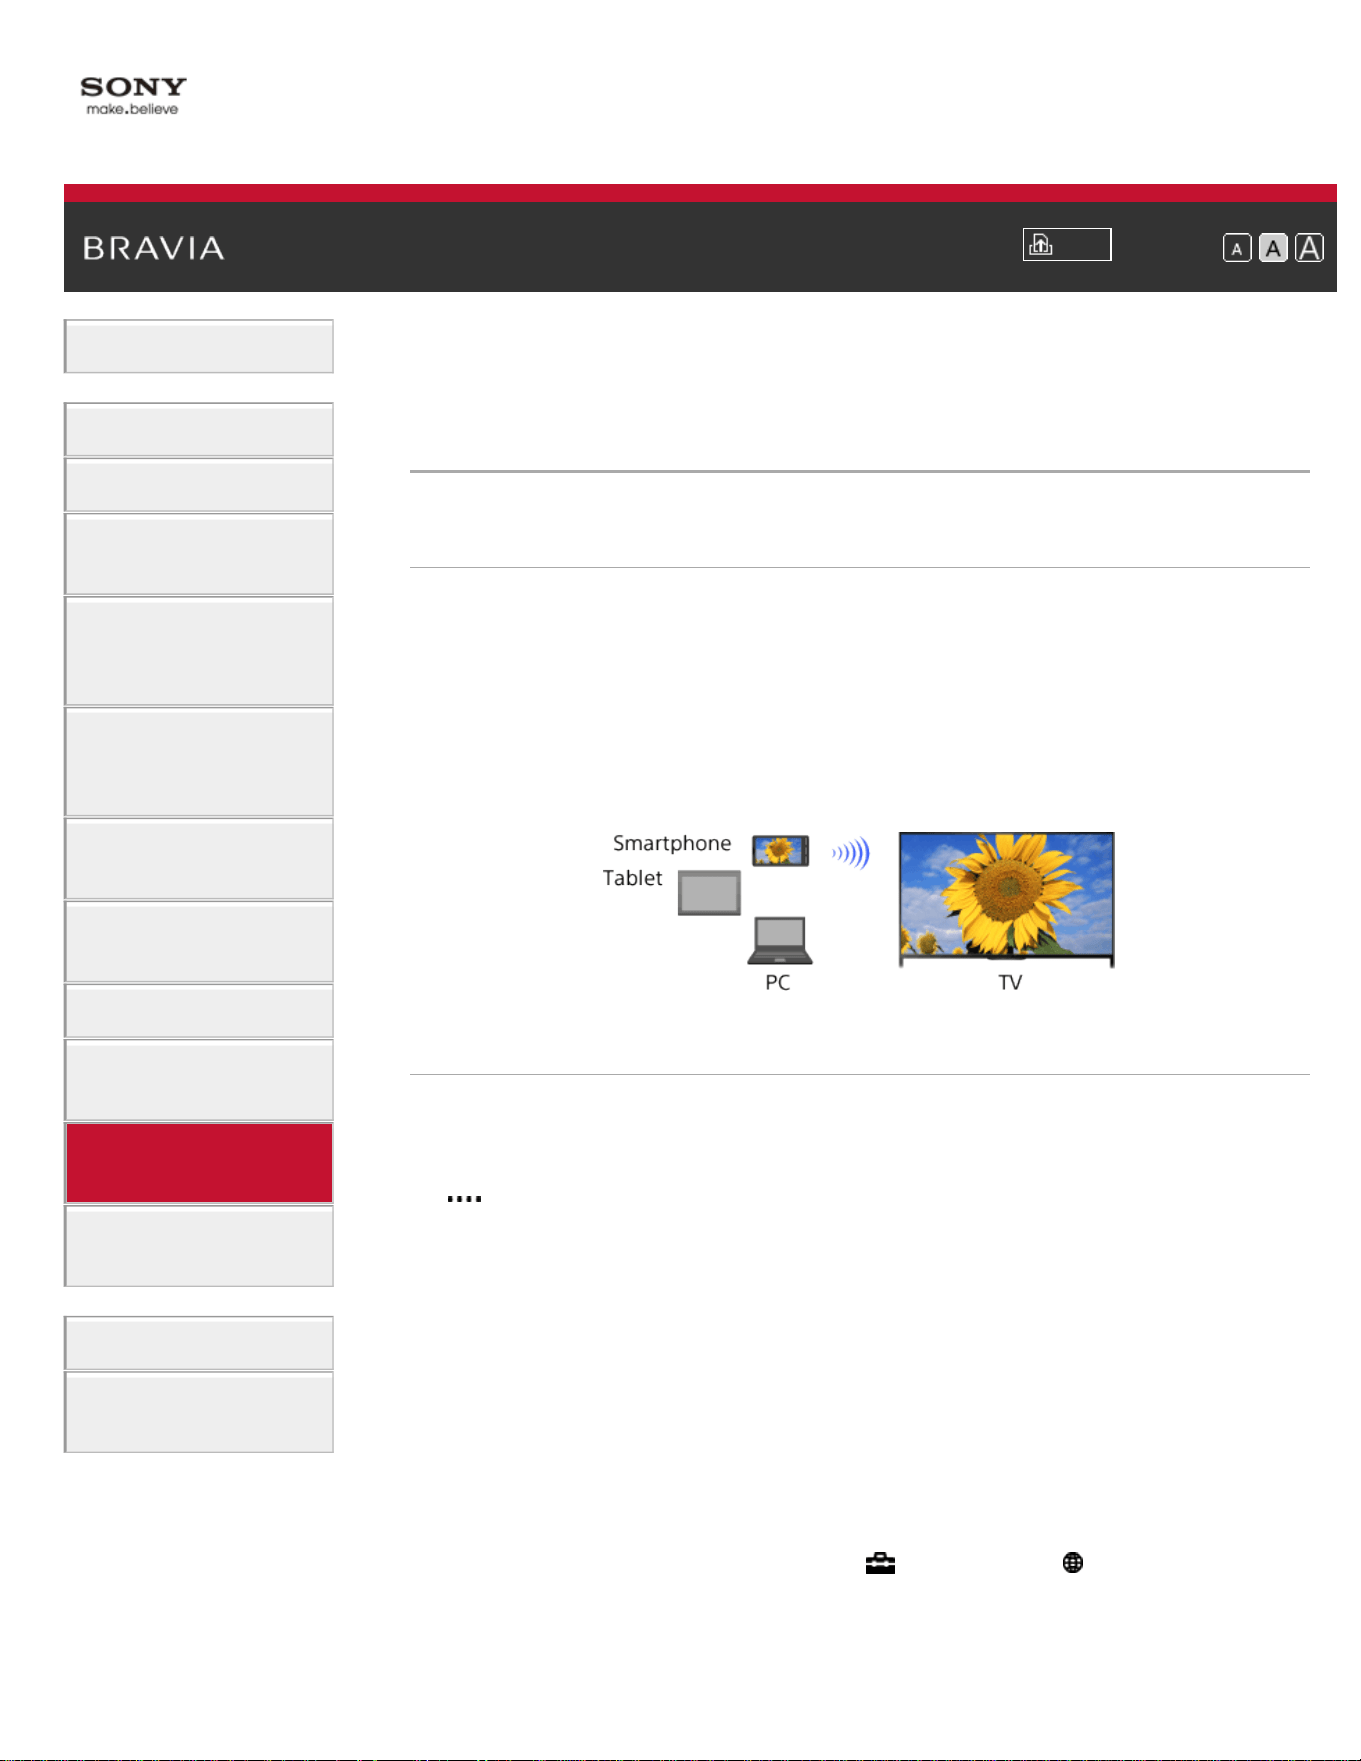
i-Manual
Print
Font Size
Basic Operations
Parts Description
Watching TV
Enjoying
Movies/Music/Photos
Using Internet
Services and
Applications
Watching TV with
Friends Far and
Near
Using Other
Devices
Using BRAVIA
Sync Devices
Useful Functions
Connecting to the
Internet
Using Home
Network
Configuring
Various Settings
Troubleshooting
How to Use
Bookmarks
Top Page > Using Home Network > Displaying the Smartphone’s Screen on the TV
(Screen mirroring)
Displaying the Smartphone’s Screen on the TV
(Screen mirroring)
Overview
You can display the screen of a mobile device (such as a smartphone
or tablet) on the TV to view photos, videos or websites.
“Screen mirroring” is a function to display the screen of a Screen
mirroring compatible device (such as a smartphone or PC) on the TV by
Miracast technology. A wireless router (access point) is not necessary
to use this function.
Steps
1.
Press the INPUT button, then select [Screen mirroring].
(When using the Touchpad Remote Control, press the Control Bar (
), slide the touchpad to highlight the INPUT button, press the
touchpad, slide the touchpad to highlight [Screen mirroring], then
press the touchpad.)
2. Operate your smartphone to connect with the TV.
When the smartphone is connected with the TV, the screen
displayed on the smartphone will also be displayed on the TV.
For details, refer to the instruction manual of your smartphone.
To change the name of the TV shown on the connected
device
Press the HOME button, then select [Settings] → [Network] →
[Device Name].
To list connected devices/deregister devices
153

When the standby screen for the Screen mirroring is displayed, press
the OPTIONS button, then select [Show Device List / Delete].
To deregister a device, select the device in the list to delete, then press
the button (or press the touchpad on the Touchpad Remote Control).
Then, select [Yes] in the confirmation display.
To deregister all devices, press the OPTIONS button in the list, select
[All Delete], then [Yes] in the confirmation display.
Icons on the left of the list show the following.
(check icon): Connected devices
(display icon): Screen mirroring compatible devices
To display dialog when attempting to connect a device
with the TV
Activating this function can avoid an unintended device from being
connected.
When the standby screen for the Screen mirroring is displayed, press
the OPTIONS button, then select [Registration Notification] → [On].
Note that once you decline registration request from a device, you will
not be able to connect the device unless you delete it from the device
list.
To connect the declined device, press the OPTIONS button, select
[Show Device List / Delete], then delete the declined device. Then,
make a new connection with the device.
To change the band setting (for experts)
When the standby screen for Screen mirroring is displayed, press the
OPTIONS button, then select [Band Setting].
[Auto]: Normally use this option. It automatically selects an appropriate
band for the Screen mirroring function.
[Auto (2.4GHz Band)]: Use this option when connecting with devices
that support 2.4GHz only. This option may support more devices than
other options.
[Auto (5GHz Band)]: Use this option when connecting with devices that
support 5GHz. This option may improve video streaming quality.
Note that when you select this option, the TV cannot connect with
devices that support 2.4GHz only (except for the standby screen for
Screen mirroring).
[Select a Channel]: Use this option to select a specific wireless channel.
Note that when your TV is connected to a wireless router (access point),
[Band Setting] cannot be changed.
Tips
For information about the supported wireless band of your device, refer
154

to the instruction manual of your device.
The 5GHz band may not be supported depending on your
region/country. If the 5GHz band is not supported, you can only use
[Auto] and [Select a Channel].
A different band might be used depending on the connected wireless
device.
Notes
While the standby screen for the Screen mirroring is displayed, the
wireless connection between the TV and your wireless router (access
point) is disconnected, therefore communication via the Internet (such as
an incoming call) is stopped.
List of Contents© 2014 Sony Corporation
Top of Page
155
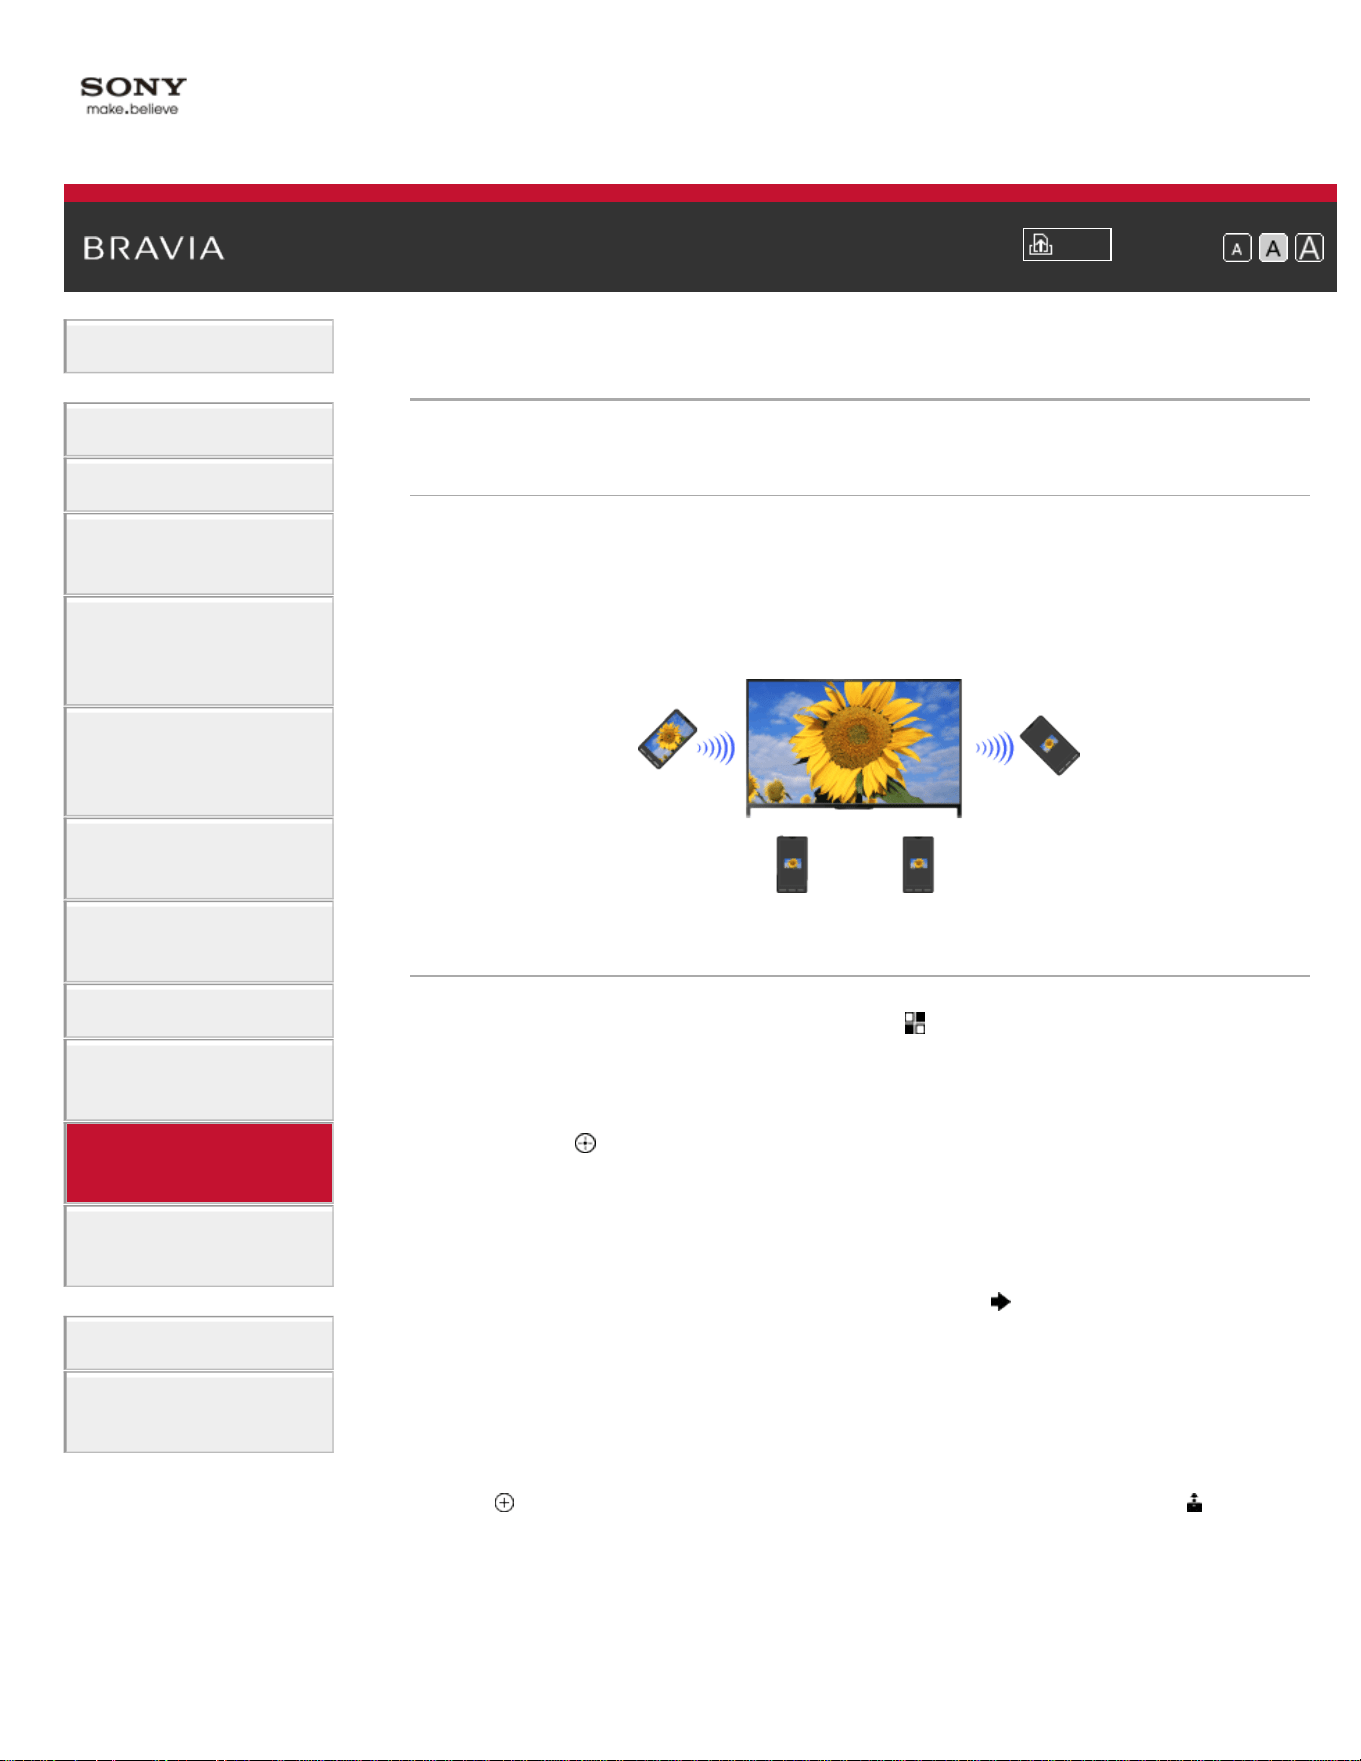
i-Manual
Print
Font Size
Basic Operations
Parts Description
Watching TV
Enjoying
Movies/Music/Photos
Using Internet
Services and
Applications
Watching TV with
Friends Far and
Near
Using Other
Devices
Using BRAVIA
Sync Devices
Useful Functions
Connecting to the
Internet
Using Home
Network
Configuring
Various Settings
Troubleshooting
How to Use
Bookmarks
Top Page > Using Home Network > Sharing Photos
Sharing Photos
Overview
Gather around the TV with your family or friends, connect your
smartphones/tablets to the TV and view your favorite photos on the
large screen TV. Furthermore, if you like a photo on someone else’s
smartphone/tablet, you can copy the photo to your device.
Steps
1.
Press the HOME button, then select [Apps] → [Photo Share].
The introduction to the steps to connect your smartphone/tablet to
the TV appears.
2. Press the button (or press the touchpad on the Touchpad Remote
Control) to start the steps.
3. Follow the on-screen instructions to connect each smartphone/tablet
to the TV.
4. After all connections are established, press .
(When using the Touchpad Remote Control, slide right.)
5. Open the web browser on your smartphone/tablet and follow the on-
screen instructions to access the URL shown on the TV screen.
6. To display a photo on the TV, tap [Start] on your smartphone/tablet,
tap
, select the photo on your smartphone/tablet, then tap . The
photo appears on the TV screen and its thumbnail is displayed on
each smartphone/tablet.
7. To save a photo displayed on the TV, tap its thumbnail on your
smartphone/tablet, then touch and hold the photo to open the context
156

menu. Select [Save] to save the photo. You can tap to view the
photo on the TV screen again.
Notes
The thumbnail history keeps up to 5 photos. You can also connect a USB
flash drive to the TV to keep up to 55 photos.
Do not disconnect a USB flash drive while using the Photo Share
application. Otherwise, data in the drive may be corrupted.
If the TV uses the 5GHz band to connect to a wireless router (or access
point), the connection is disconnected when Photo Share is started.
Up to 10 smartphone/tablet can be connected to the TV at the same time.
To connect another device when 10 devices are already connected,
disconnect an unnecessary device, then connect the device.
The default browser for Android 2.3 or later is supported.
The default browser for iOS is supported; however, some functions cannot
be used depending on the version of your iOS.
The maximum file size of photos is 10MB.
List of Contents© 2014 Sony Corporation
Top of Page
157
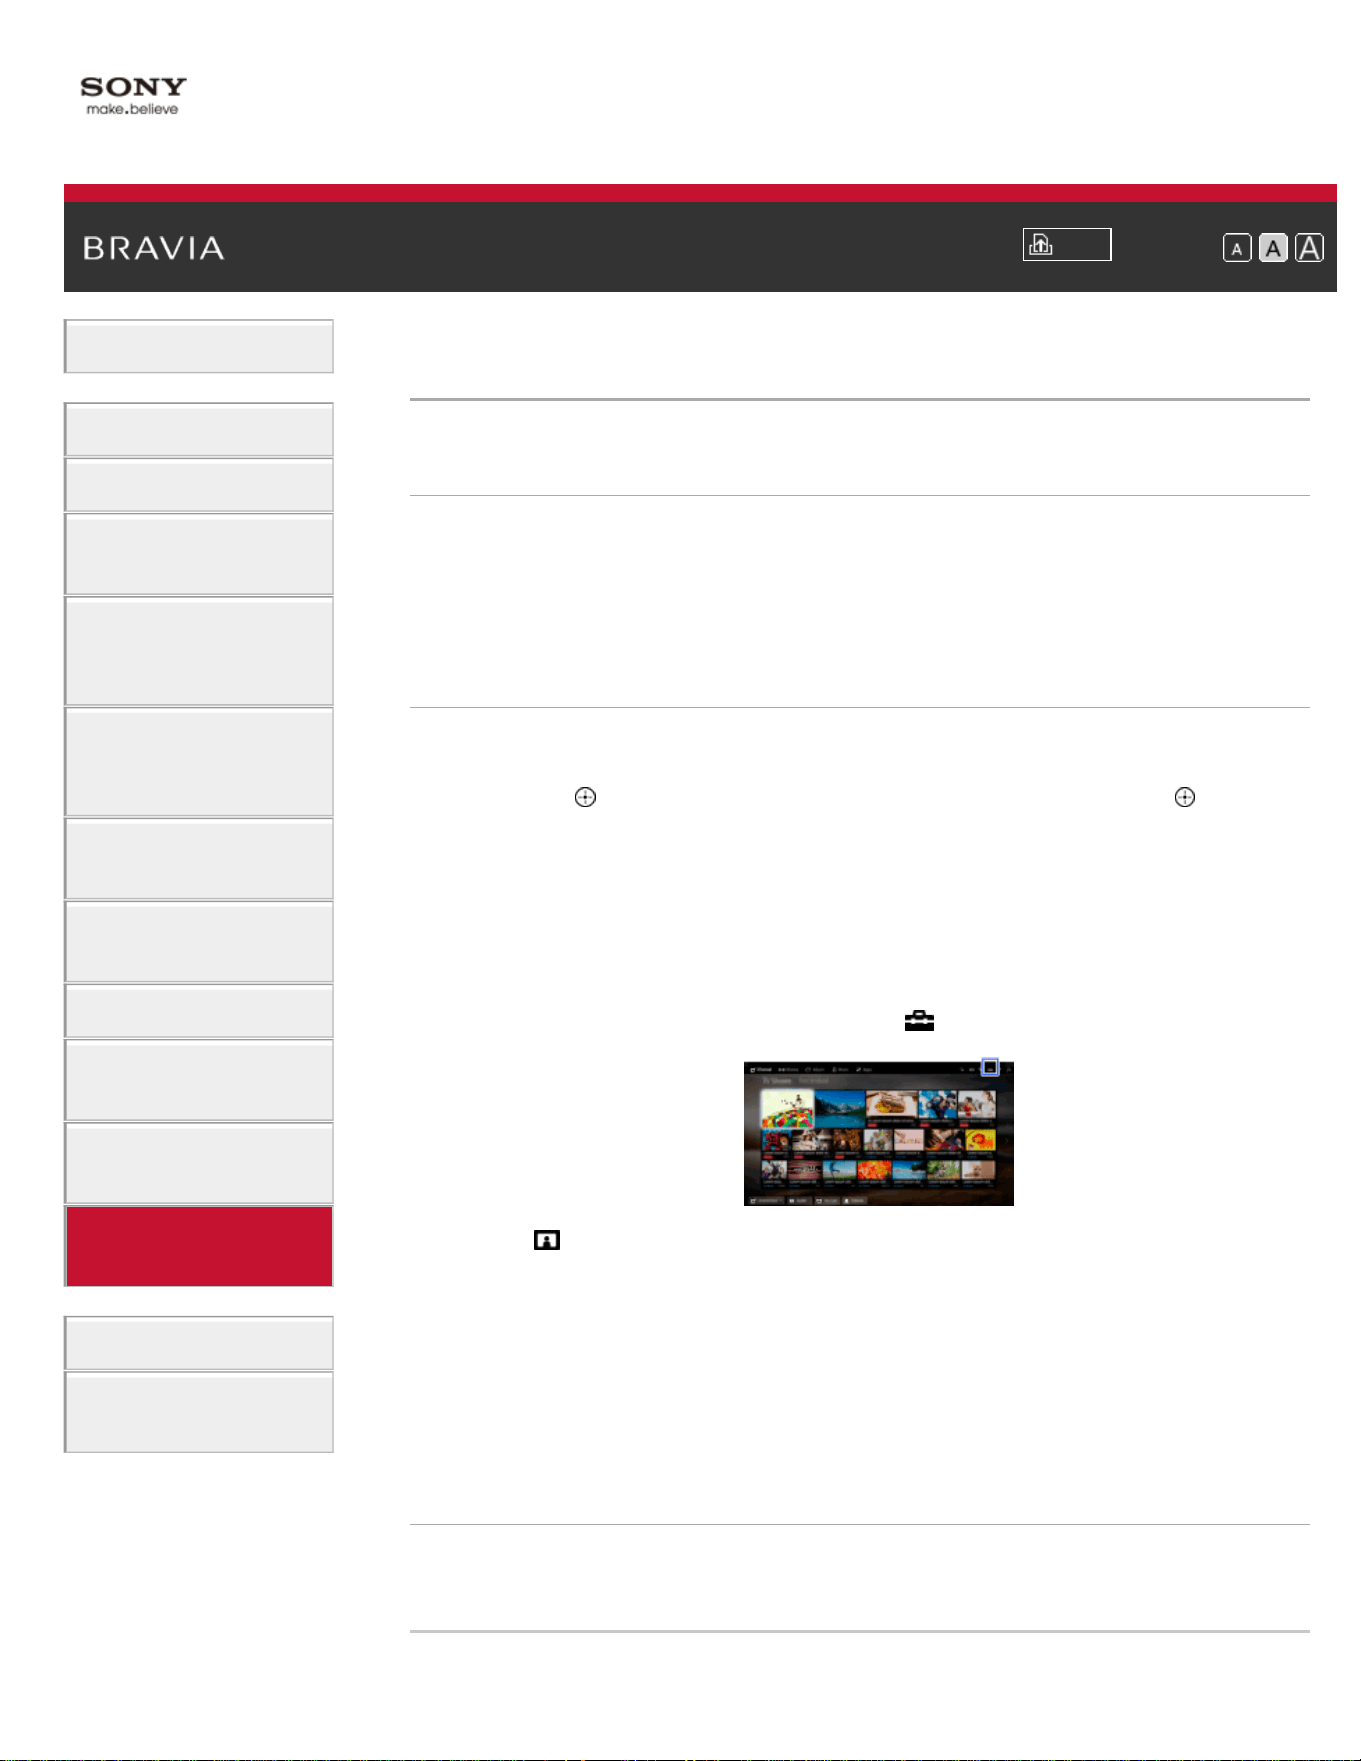
i-Manual
Print
Font Size
Basic Operations
Parts Description
Watching TV
Enjoying
Movies/Music/Photos
Using Internet
Services and
Applications
Watching TV with
Friends Far and
Near
Using Other
Devices
Using BRAVIA
Sync Devices
Useful Functions
Connecting to the
Internet
Using Home
Network
Configuring
Various Settings
Troubleshooting
How to Use
Bookmarks
Top Page > Configuring Various Settings > Selecting picture mode
Selecting picture mode
Overview
You can select the picture mode according to your preference. The
[Picture Mode] setting works in accordance with the [Scene Select]
setting.
Steps
1.
Set [Scene Select].
Press the
button to jump to the title list. Then, press the button
again to go to “Selecting a picture and sound setting suitable for the
content” for details.
(When using the Touchpad Remote Control, press the touchpad.
Then, press the touchpad again to go to “Selecting a picture and
sound setting suitable for the content” for details.)
2. Press the HOME button, then select [Settings].
3. Select [Picture & Display] → [Picture Adjustments] → [Picture
Mode] → the desired option.
See the following page(s) for available options. Note that the options
change depending on the [Scene Select] setting. (e.g. If [Scene
Select] is set to [General], the options in [Picture Mode] will be
[Vivid], [Standard] and [Custom].)
Available Options
[Vivid]
Enhances picture contrast and sharpness.
[Standard]
158

Provides standard picture for basic home use.
[Custom]
Stores your preferred settings.
[Cinema 1]
Provides film-based content for a cinema-like environment.
[Cinema 2]
Provides film-based content for basic home use.
[Sports]
Optimizes picture quality for viewing sports.
[Game-Standard]
Provides standard pictures suitable for games.
[Game-Original]
Adjusts the game picture according to your preference.
[Graphics]
Optimizes picture quality for viewing graphics.
[Photo-Vivid]
Enhances contrast, sharpness, and color of photographs.
[Photo-Standard]
Optimizes picture quality for viewing photographs.
[Photo-Original]
Enhances the visual warmth of photographs.
[Photo-Custom]
Adjusts the detailed settings for viewing photographs and stores your
preferred settings.
[Animation]
Optimizes picture quality for viewing animations.
List of Contents© 2014 Sony Corporation
Top of Page
159

i-Manual
Print
Font Size
Basic Operations
Parts Description
Watching TV
Enjoying
Movies/Music/Photos
Using Internet
Services and
Applications
Watching TV with
Friends Far and
Near
Using Other
Devices
Using BRAVIA
Sync Devices
Useful Functions
Connecting to the
Internet
Using Home
Network
Configuring
Various Settings
Troubleshooting
How to Use
Bookmarks
Top Page > Configuring Various Settings > Locking picture adjustment
Locking picture adjustment
Steps
1.
Press the HOME button, then select [Settings].
2. Select [Preferences] → [Picture Adjustments Lock] → [Lock] to
prevent the picture adjustments from being changed.
List of Contents© 2014 Sony Corporation
Top of Page
160
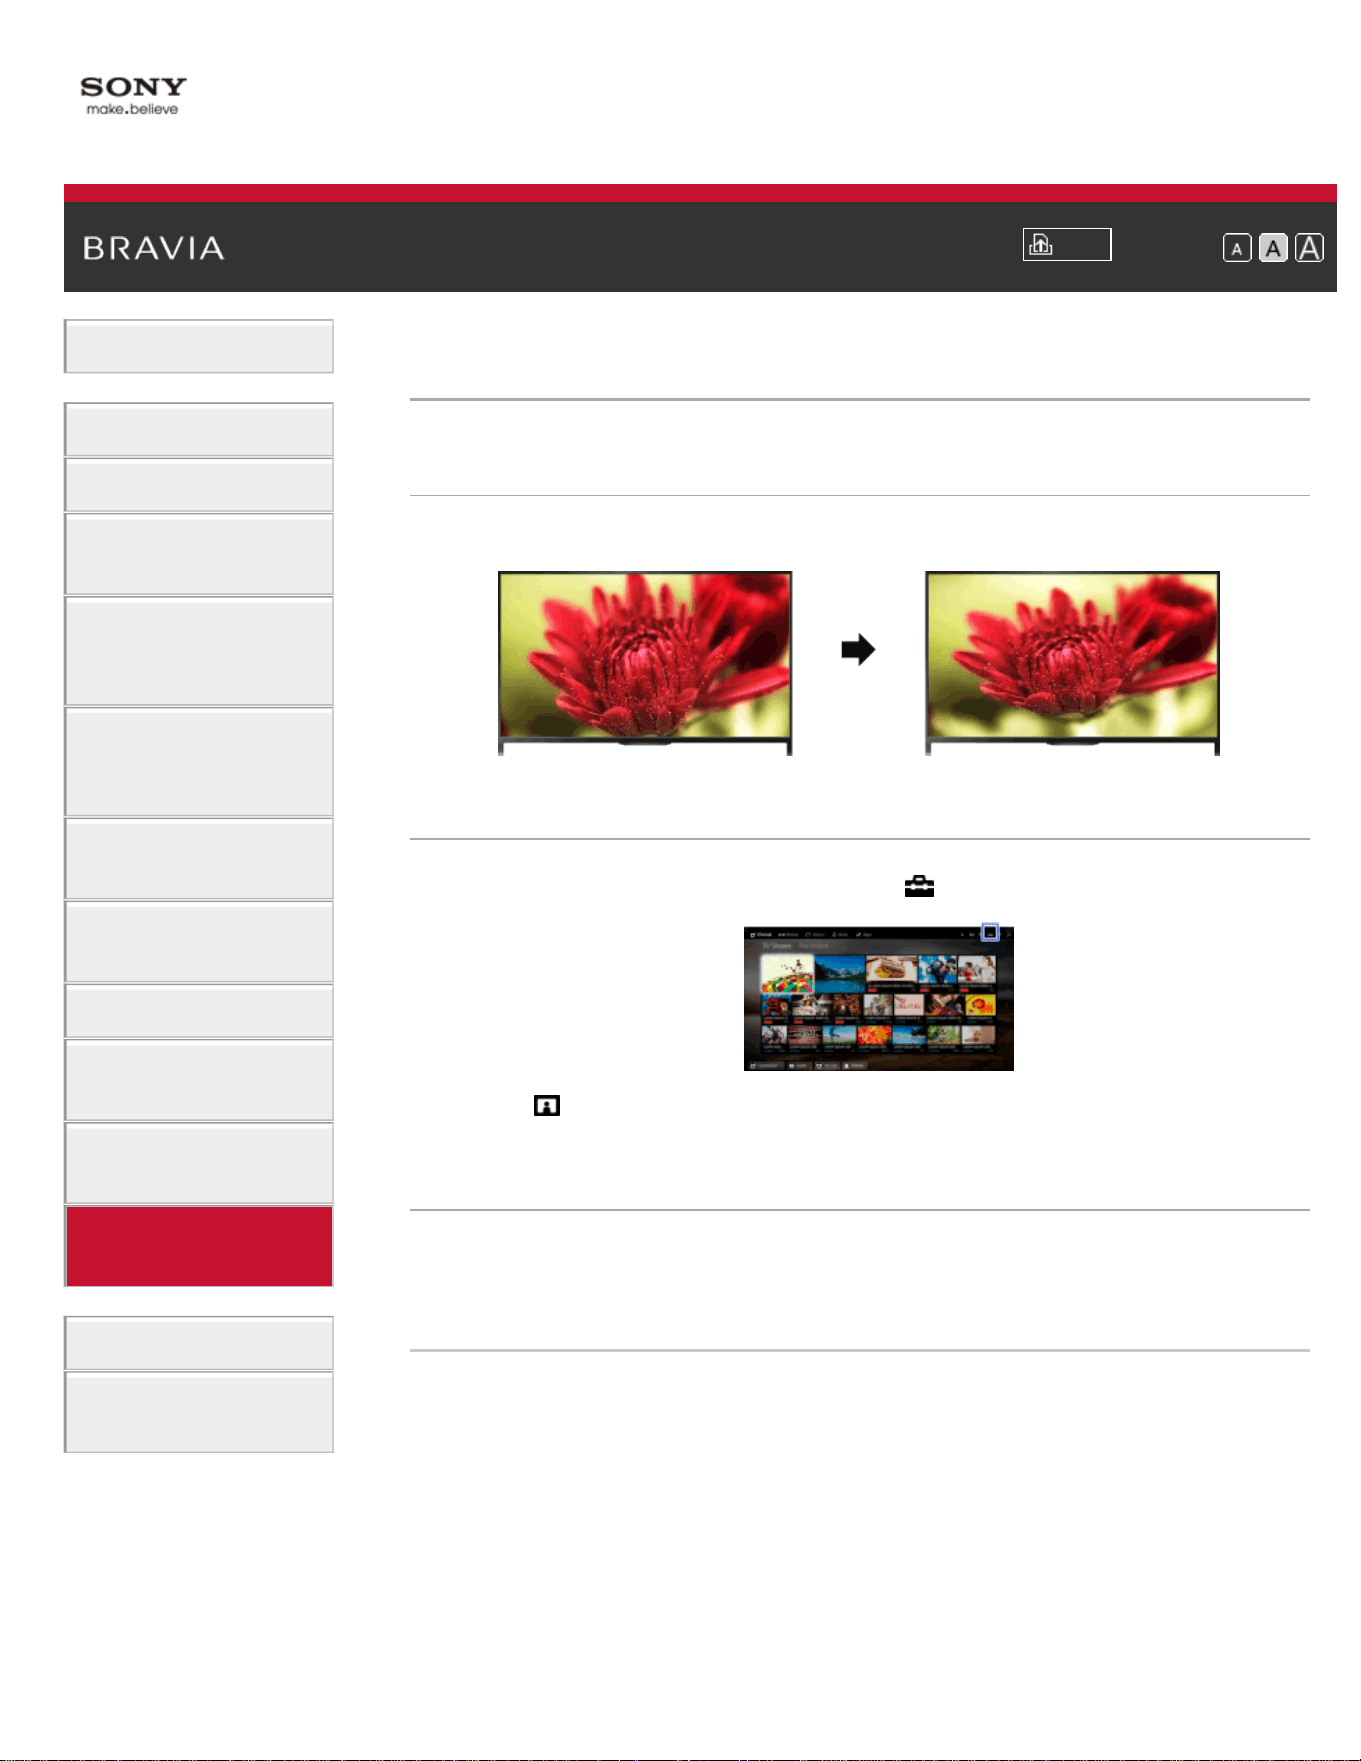
i-Manual
Print
Font Size
Basic Operations
Parts Description
Watching TV
Enjoying
Movies/Music/Photos
Using Internet
Services and
Applications
Watching TV with
Friends Far and
Near
Using Other
Devices
Using BRAVIA
Sync Devices
Useful Functions
Connecting to the
Internet
Using Home
Network
Configuring
Various Settings
Troubleshooting
How to Use
Bookmarks
Top Page > Configuring Various Settings > Setting the screen size/position
Setting the screen size/position
Overview
You can set the screen size and position according to your preference.
Steps
1.
Press the HOME button, then select [Settings].
2. Select [Picture & Display] → [Screen] → the desired option.
Available Options (for inputs other than a PC)
[Setting Memory]
Applies custom screen settings to the current input or to common
memory shared by other inputs.
[Wide Mode]
[Wide Zoom]: Enlarges the picture, preserving the original picture as
much as possible.
[Normal]: For 4:3 original source, displays a 4:3 picture in its original
size, with side bars to fill the 16:9 screen. For 16:9 original source,
displays a 4:3 picture that has been horizontally stretched to 16:9, in 4:3
format.
[Full]: Enlarges the picture horizontally to fill the screen when the input
signal is 4:3. When the input signal is 16:9 (High-definition source),
161

select this option to display the 16:9 picture in its original size.
[Zoom]: Displays a 16:9 picture that has been converted into 4:3 letter
box format, in the correct aspect ratio.
[14:9]: Displays the 14:9 picture in the correct proportion. As a result,
side bars are shown on the screen. ([14:9] is available depending on
your region/country.)
[Captions]: Enlarges the picture horizontally, while fitting captions in the
screen.
If component input (480p) is selected and [Scene Select] is set to
[Game] or [Graphics], the available options change to [Fine-
Normal]/[Fine-Full]/[Portable Game 1]/[Portable Game 2].
[Fine-Normal]: Displays a 4:3 picture in its original size. Side bars are
shown to fill the 16:9 screen.
[Fine-Full]: Stretches a 4:3 picture horizontally, to fill the 16:9 screen.
[Portable Game 1]: Stretches a black-framed game picture from
PlayStation®Portable.
[Portable Game 2]: Stretches a black-framed picture (e.g. browser) from
PlayStation®Portable.
[Auto Wide]
Automatically changes [Wide Mode] to match the input signal.
[4:3 Default]
Sets the default screen format for a 4:3 input signal.
[Auto Display Area]
Automatically adjusts the picture to the most appropriate display area.
[Display Area]
[Full Pixel]: Displays the original picture when parts of the picture are
cut.
[+1]: Displays the picture using the TV’s maximum display area.
[Normal]: Displays the recommended size picture.
[-1]: Enlarges the picture.
([Full Pixel] is available only when the input signal is 1080i/1080p and
[Wide Mode] is set to [Full].)
[Screen Position]
Adjusts the vertical position and horizontal position of the picture.
The vertical position cannot be adjusted when [Wide Mode] is set to
[Wide Zoom], [Normal] or [Full].
[Vertical Size]
Adjusts the vertical size of the picture.
This function is not available when [Wide Mode] is set to [Normal] or
[Full].
Available Options (for PC input)
162

[Reset]
Resets all PC screen settings to factory settings.
[Wide Mode]
[Normal]: Displays the original picture.
[Full 1]: Enlarges the picture to fill the display area, maintaining the
original picture.
[Full 2]: Enlarges the picture to fill the display area.
List of Contents© 2014 Sony Corporation
Top of Page
163
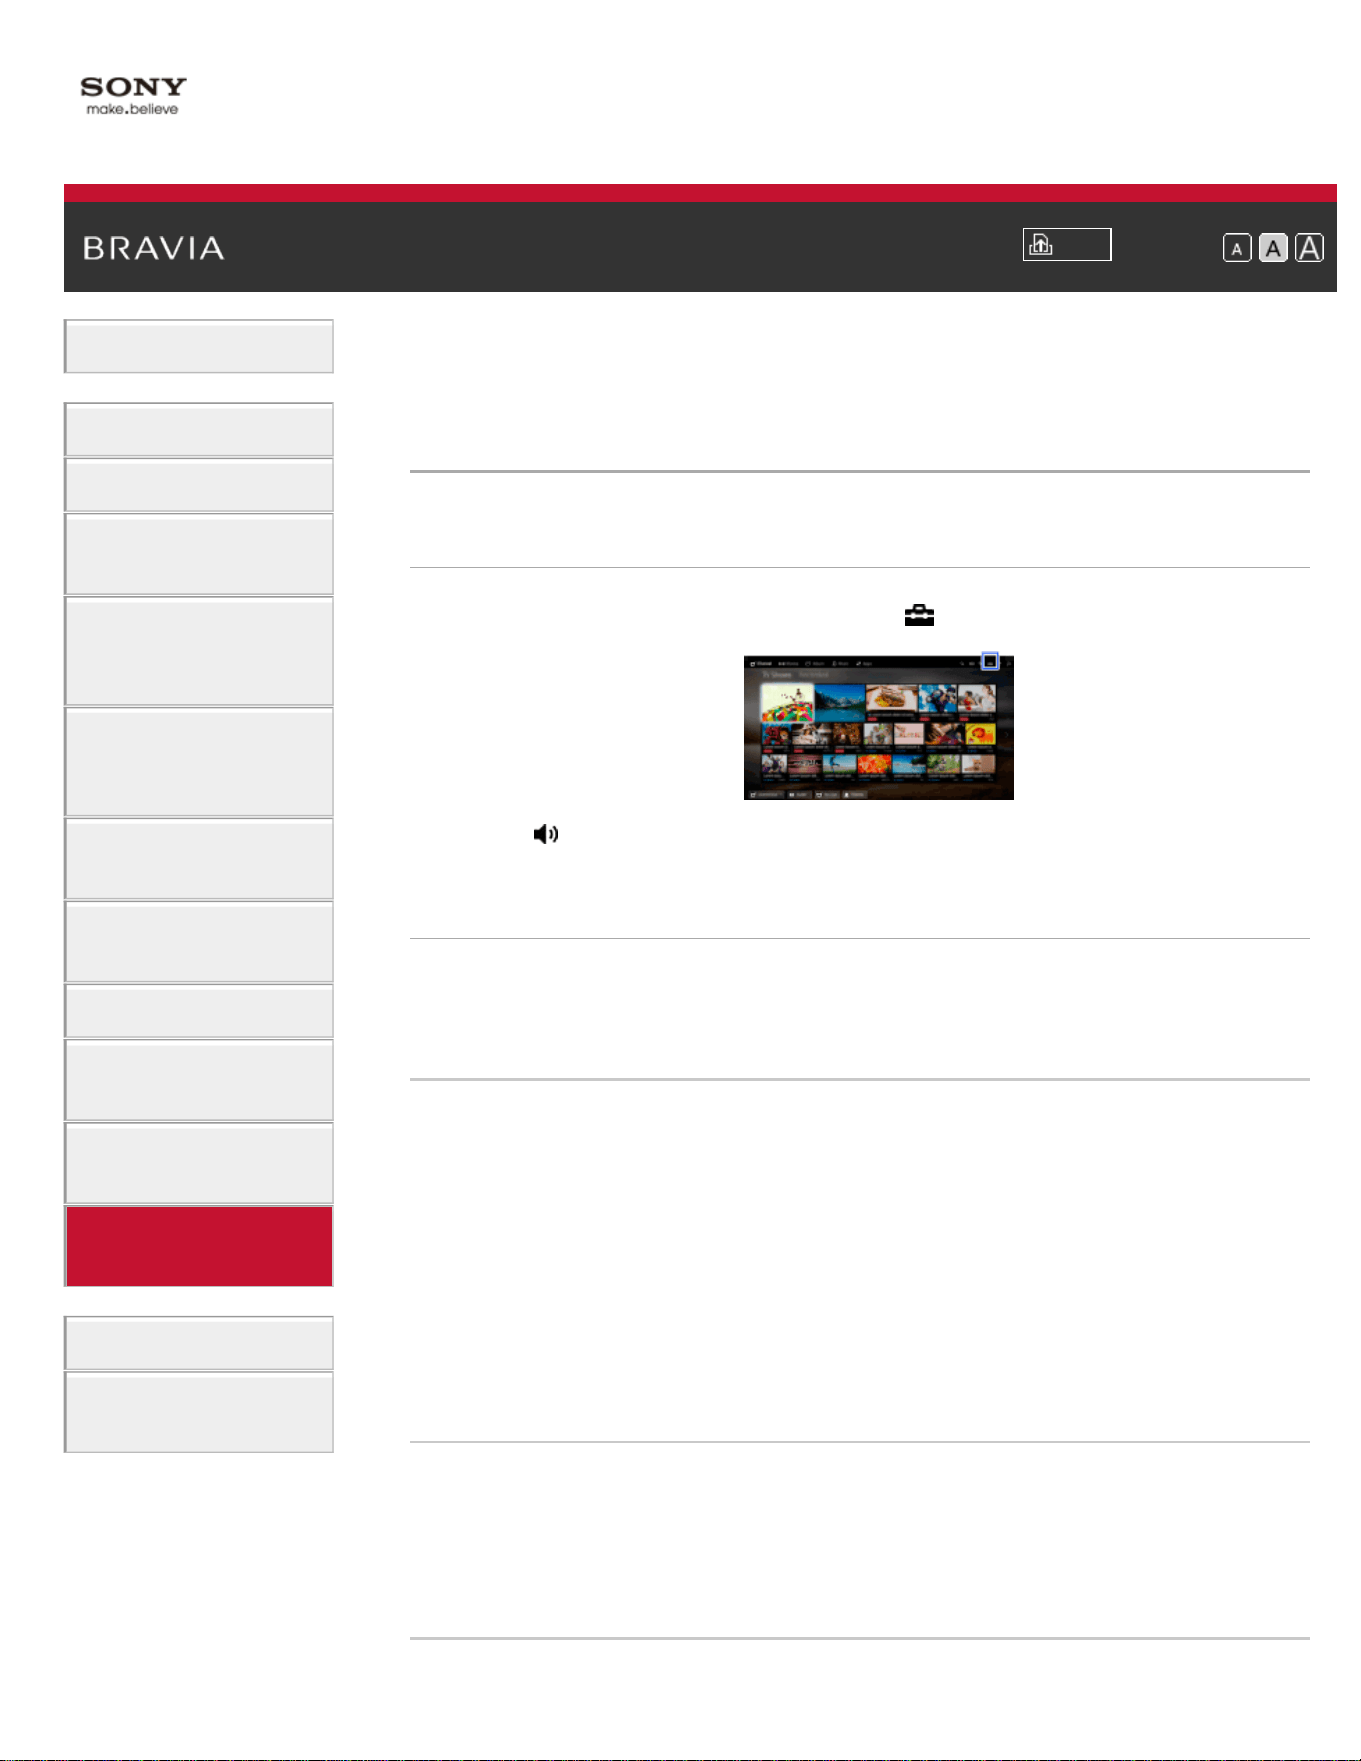
i-Manual
Print
Font Size
Basic Operations
Parts Description
Watching TV
Enjoying
Movies/Music/Photos
Using Internet
Services and
Applications
Watching TV with
Friends Far and
Near
Using Other
Devices
Using BRAVIA
Sync Devices
Useful Functions
Connecting to the
Internet
Using Home
Network
Configuring
Various Settings
Troubleshooting
How to Use
Bookmarks
Top Page > Configuring Various Settings > Adjusting various sound settings (e.g.
bass/treble/balance)
Adjusting various sound settings (e.g.
bass/treble/balance)
Steps
1.
Press the HOME button, then select [Settings].
2. Select [Sound] → [Sound] → the desired option.
Available Options
[Setting Memory]
Applies custom sound settings to the current input or to common
memory shared by other inputs.
[Sound Mode]
[Standard]: Optimizes sound quality for general content.
[Cinema]: Optimizes surround sound for movies.
[Sports]: Reproduces realistic sound, like that in a stadium.
[Music]: Lets you experience dynamic and clear sound, like that of a
concert.
[Game]: Broadens your game-playing experience with superb sound
quality.
[Compressed Audio]: Improves the sound quality of low bit rate
compressed audio content.
[Surround Effect]
Adjusts the surround sound effect.
If [Sound Mode] is set to [Cinema], [Sports], [Music] or [Game], a
surround sound technology developed by Sony reproduces a surround
sound field.
164

[Auto Surround]
Automatically outputs 5.1 surround sound when the TV receives a 5.1
surround sound signal from the input source.
[Sound Booster]
[On]: Enhances treble/bass and reproduces dynamic sound.
[Off]: Provides natural sound.
[Equalizer]
Adjusts the sound according to specific frequencies.
[Voice Zoom]
Emphasizes voice or ambient sounds.
[Live Football Mode]
You can emphasize the roar of the crowd on sporting events, as though
you are watching from the stands of the stadium.
[On]: Emphasizes the roar of the crowd.
[Off]: Turns off the function.
When this function is turned on, other sound settings except for [Sound
Booster] and [Equalizer] are deactivated.
This function is turned off when a channel is changed, input is changed
or the TV is turned off.
[Advanced Auto Volume]
Automatically compensates for the volume level that may vary by
program or input.
[Off]: Turns off the function.
[Normal]: Normal mode.
[Night]: Compresses the dynamic range for a more consistent level for
viewing at night.
[Volume Offset]
Adjusts the current volume level relative to other inputs, when [Setting
Memory] is set to the current input.
[Balance]
Emphasizes sound from the left or right speaker.
[Reset]
Resets the selected input settings to the initial value.
List of Contents© 2014 Sony Corporation
Top of Page
165
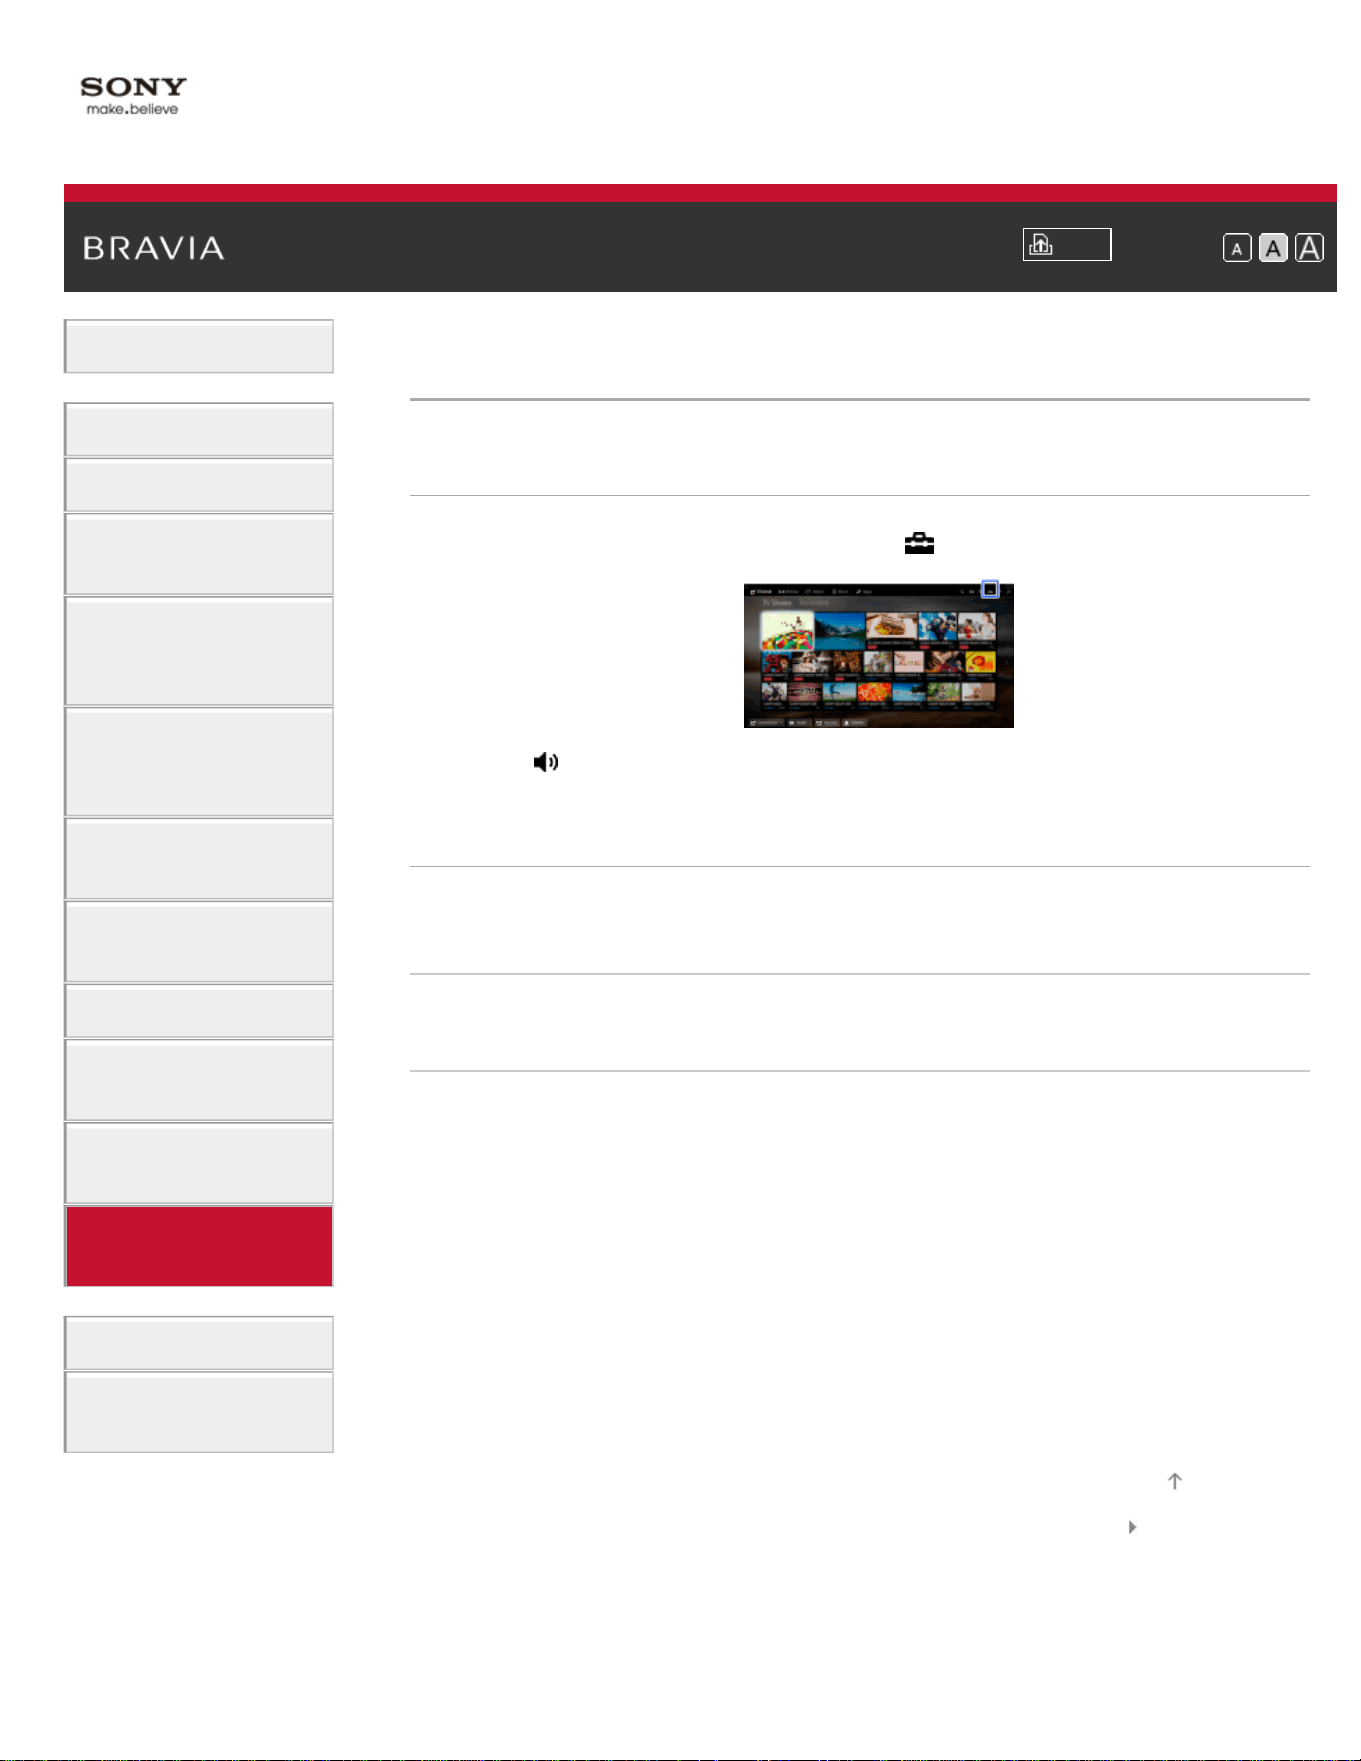
i-Manual
Print
Font Size
Basic Operations
Parts Description
Watching TV
Enjoying
Movies/Music/Photos
Using Internet
Services and
Applications
Watching TV with
Friends Far and
Near
Using Other
Devices
Using BRAVIA
Sync Devices
Useful Functions
Connecting to the
Internet
Using Home
Network
Configuring
Various Settings
Troubleshooting
How to Use
Bookmarks
Top Page > Configuring Various Settings > Setting the sound according to the TV position
Setting the sound according to the TV position
Steps
1.
Press the HOME button, then select [Settings].
2. Select [Sound] → [TV Position] → the desired option.
Available Options
[Table-Top Stand]
Provides the best sound quality when you place the TV on a TV stand.
[Wall Mount]
Provides the best sound quality when you hang the TV on a wall.
List of Contents© 2014 Sony Corporation
Top of Page
166

i-Manual
Print
Font Size
Basic Operations
Parts Description
Watching TV
Enjoying
Movies/Music/Photos
Using Internet
Services and
Applications
Watching TV with
Friends Far and
Near
Using Other
Devices
Using BRAVIA
Sync Devices
Useful Functions
Connecting to the
Internet
Using Home
Network
Configuring
Various Settings
Troubleshooting
How to Use
Bookmarks
Top Page > Configuring Various Settings > Checking signal information
Checking signal information
Steps
1.
Press the HOME button, then select [Help].
2. Select [Customer Support] → [Signal Diagnostics].
List of Contents© 2014 Sony Corporation
Top of Page
167

i-Manual
Print
Font Size
Basic Operations
Parts Description
Watching TV
Enjoying
Movies/Music/Photos
Using Internet
Services and
Applications
Watching TV with
Friends Far and
Near
Using Other
Devices
Using BRAVIA
Sync Devices
Useful Functions
Connecting to the
Internet
Using Home
Network
Configuring
Various Settings
Troubleshooting
How to Use
Bookmarks
Top Page > Configuring Various Settings > Selecting the cable/antenna signal
Selecting the cable/antenna signal
Steps
1.
Press the HOME button, then select [Settings].
2. Select [Channels & Inputs]/[Channels, Inputs & Ginga]* →
[Cable/Antenna], then select [Cable] or [Antenna] to set the received
signal.
* Option name differs depending on your region/country.
Tips
After changing this setting, it is recommended to run [Auto Program].
List of Contents© 2014 Sony Corporation
Top of Page
168

i-Manual
Print
Font Size
Basic Operations
Parts Description
Watching TV
Enjoying
Movies/Music/Photos
Using Internet
Services and
Applications
Watching TV with
Friends Far and
Near
Using Other
Devices
Using BRAVIA
Sync Devices
Useful Functions
Connecting to the
Internet
Using Home
Network
Configuring
Various Settings
Troubleshooting
How to Use
Bookmarks
Top Page > Configuring Various Settings > Tuning channels automatically
Tuning channels automatically
Steps
1.
Press the HOME button, then select [Settings].
2. Select [Channels & Inputs]/[Channels, Inputs & Ginga]* → [Auto
Program].
3. Follow the on-screen instructions to tune in all available channels
and store their settings in the TV.
* Option name differs depending on your region/country.
Tips
You can run [Auto Program] after moving to a new residence, changing
service providers, or to search for newly launched channels.
List of Contents© 2014 Sony Corporation
Top of Page
169

i-Manual
Print
Font Size
Basic Operations
Parts Description
Watching TV
Enjoying
Movies/Music/Photos
Using Internet
Services and
Applications
Watching TV with
Friends Far and
Near
Using Other
Devices
Using BRAVIA
Sync Devices
Useful Functions
Connecting to the
Internet
Using Home
Network
Configuring
Various Settings
Troubleshooting
How to Use
Bookmarks
Top Page > Configuring Various Settings > Adding digital channels
Adding digital channels
Steps
1.
Press the HOME button, then select [Settings].
2. Select [Channels & Inputs]/[Channels, Inputs & Ginga]* → [Add
Digital Channels].
3. Follow the on-screen instructions to add digital channels.
* Option name differs depending on your region/country.
List of Contents© 2014 Sony Corporation
Top of Page
170

i-Manual
Print
Font Size
Basic Operations
Parts Description
Watching TV
Enjoying
Movies/Music/Photos
Using Internet
Services and
Applications
Watching TV with
Friends Far and
Near
Using Other
Devices
Using BRAVIA
Sync Devices
Useful Functions
Connecting to the
Internet
Using Home
Network
Configuring
Various Settings
Troubleshooting
How to Use
Bookmarks
Top Page > Configuring Various Settings > Setting channels to surf with the CH +/-
buttons
Setting channels to surf with the CH +/- buttons
Steps
1.
Press the HOME button, then select [Settings].
2. Select [Channels & Inputs]/[Channels, Inputs & Ginga]* →
[Show/Hide Channels].
3. Select the desired channel, then select [Shown] or [Hidden].
Select [Shown] to select with the CH +/- buttons. Select [Hidden] to
not select with the CH +/- buttons.
4. Repeat step 3 to set other channels.
* Option name differs depending on your region/country.
Tips
The [Show/Hide Channels] settings are applied also in the channel list of
[TV Channel List] under [Channel] in the Home Menu.
List of Contents© 2014 Sony Corporation
Top of Page
171

i-Manual
Print
Font Size
Basic Operations
Parts Description
Watching TV
Enjoying
Movies/Music/Photos
Using Internet
Services and
Applications
Watching TV with
Friends Far and
Near
Using Other
Devices
Using BRAVIA
Sync Devices
Useful Functions
Connecting to the
Internet
Using Home
Network
Configuring
Various Settings
Troubleshooting
How to Use
Bookmarks
Top Page > Configuring Various Settings > Editing channel labels
Editing channel labels
Steps
1.
Press the HOME button, then select [Settings].
2. Select [Channels & Inputs]/[Channels, Inputs & Ginga]* → [Edit
Channel Labels] → the desired channel.
3. Enter the new name.
* Option name differs depending on your region/country.
List of Contents© 2014 Sony Corporation
Top of Page
172

i-Manual
Print
Font Size
Basic Operations
Parts Description
Watching TV
Enjoying
Movies/Music/Photos
Using Internet
Services and
Applications
Watching TV with
Friends Far and
Near
Using Other
Devices
Using BRAVIA
Sync Devices
Useful Functions
Connecting to the
Internet
Using Home
Network
Configuring
Various Settings
Troubleshooting
How to Use
Bookmarks
Top Page > Configuring Various Settings > Fine adjusting analog channels
Fine adjusting analog channels
Steps
1.
Press the HOME button, then select [Settings].
2. Select [Channels & Inputs]/[Channels, Inputs & Ginga]* → [Analog
Channel Adjustment].
3. Select [Channel] → the channel you want to adjust.
4. Select [Fine Tune], then select [Auto] or [Custom].
Select [Custom] to change the frequency.
5. Press the RETURN button, then select [Audio Filter].
6. Select [High], [Low] or [Off] to set the audio quality.
* Option name differs depending on your region/country.
List of Contents© 2014 Sony Corporation
Top of Page
173

i-Manual
Print
Font Size
Basic Operations
Parts Description
Watching TV
Enjoying
Movies/Music/Photos
Using Internet
Services and
Applications
Watching TV with
Friends Far and
Near
Using Other
Devices
Using BRAVIA
Sync Devices
Useful Functions
Connecting to the
Internet
Using Home
Network
Configuring
Various Settings
Troubleshooting
How to Use
Bookmarks
Top Page > Configuring Various Settings > Setting the information banner
Setting the information banner
Steps
1.
Press the HOME button, then select [Settings].
2. Select [Preferences] → [Info Banner] → the desired option.
Tips
This setting does not affect the operation of the DISPLAY button, which
displays full information about the currently viewed content.
Available Options
[Small]
Shows the current channel number or input name.
[Medium]
Shows the current channel number and program information.
[Large]
Shows the current channel number and detailed program information.
Notes
Available options may differ depending on your region/country.
List of Contents© 2014 Sony Corporation
Top of Page
174

i-Manual
Print
Font Size
Basic Operations
Parts Description
Watching TV
Enjoying
Movies/Music/Photos
Using Internet
Services and
Applications
Watching TV with
Friends Far and
Near
Using Other
Devices
Using BRAVIA
Sync Devices
Useful Functions
Connecting to the
Internet
Using Home
Network
Configuring
Various Settings
Troubleshooting
How to Use
Bookmarks
Top Page > Configuring Various Settings > Setting closed captions
Setting closed captions
Steps
1.
Press the HOME button, then select [Settings].
2. Select [Preferences] → [Closed Captions (CC)] → the desired
option.
Available Options
[CC Display]
Displays [Closed Captions (CC)]. Select [On when Muting] to
automatically display closed captions when the TV is muted.
[Analog CC]
Sets the basic analog closed caption options.
[Digital CC]
Sets the digital closed caption options.
[Display Options]
Customizes the closed caption appearance.
List of Contents© 2014 Sony Corporation
Top of Page
175
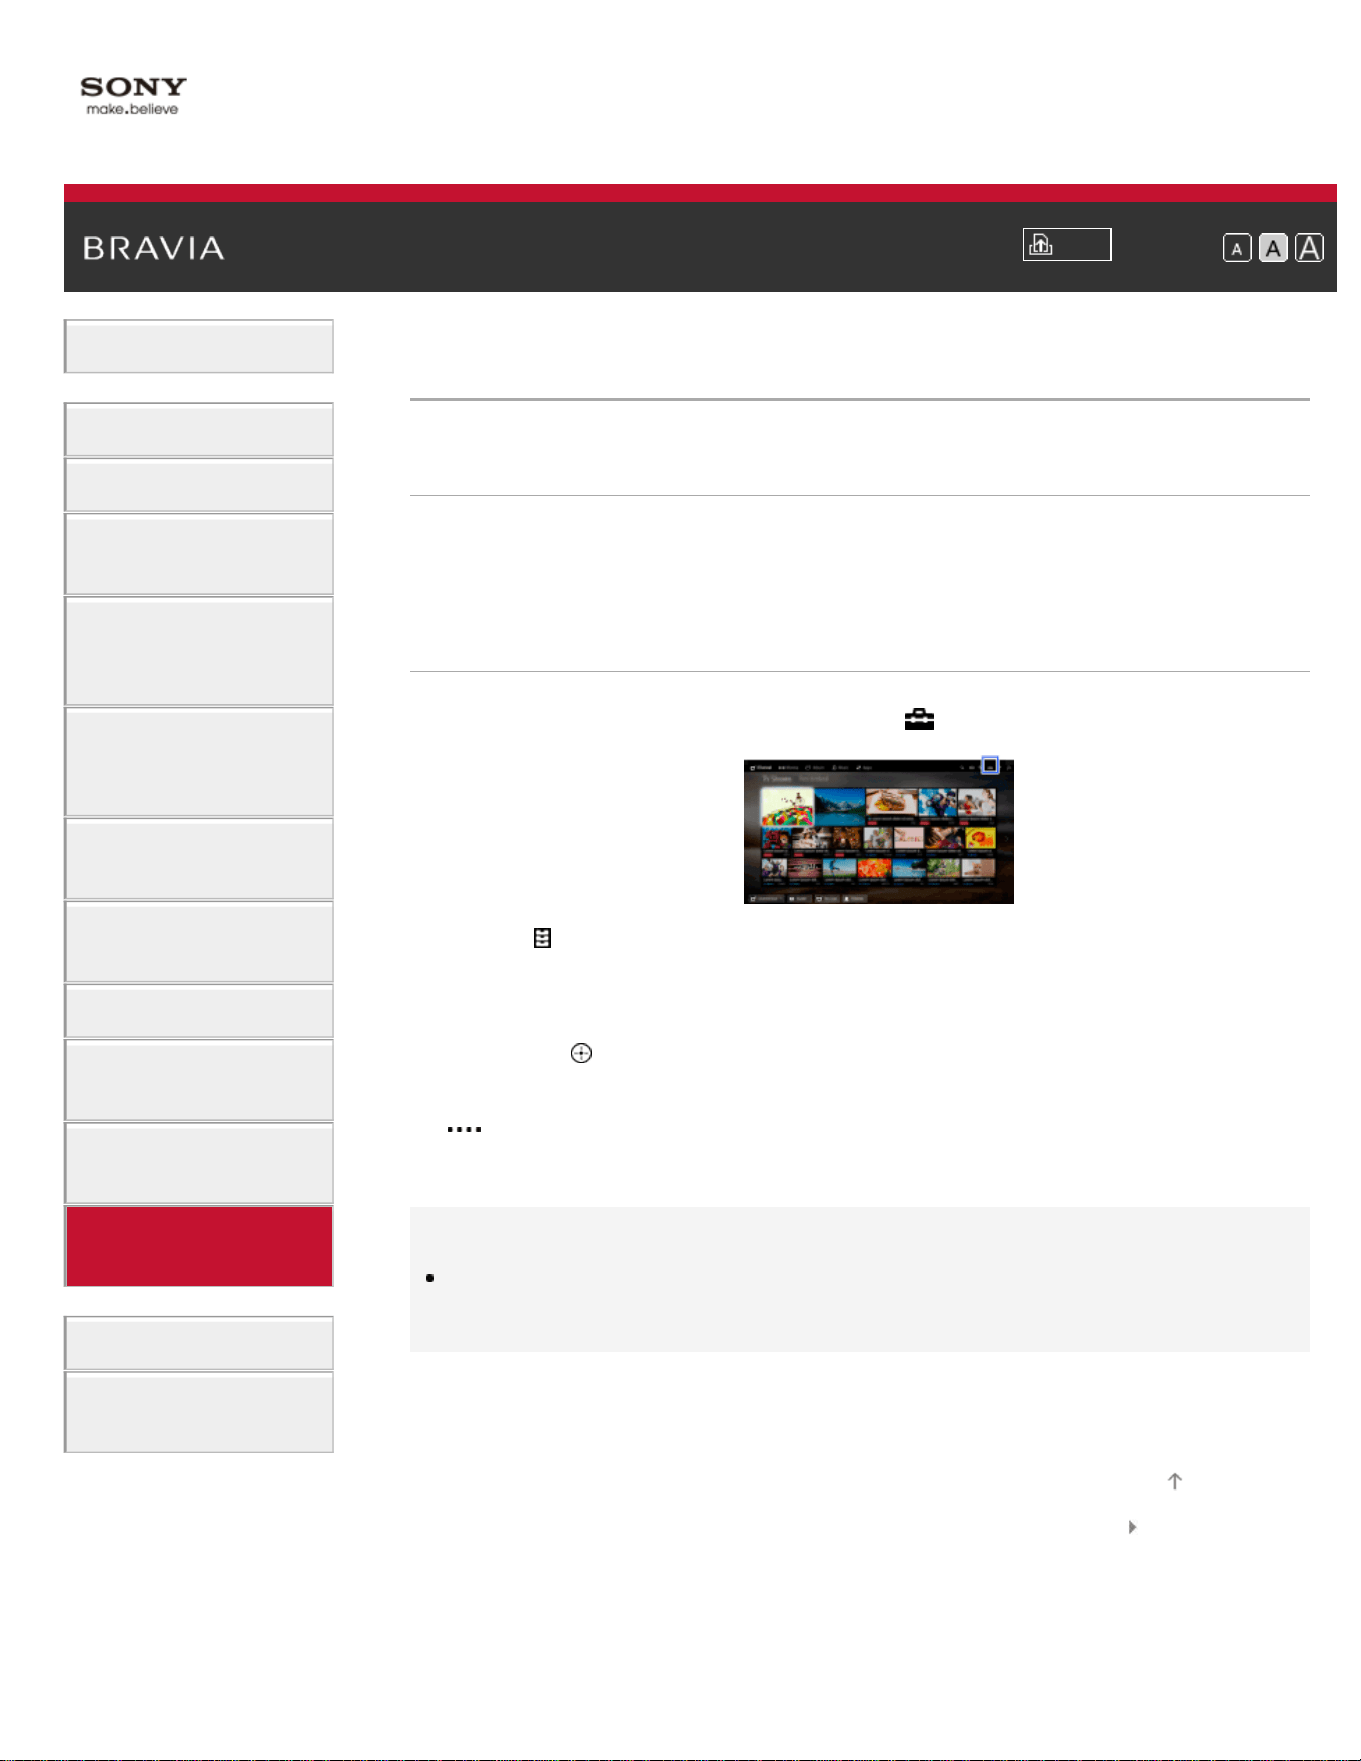
i-Manual
Print
Font Size
Basic Operations
Parts Description
Watching TV
Enjoying
Movies/Music/Photos
Using Internet
Services and
Applications
Watching TV with
Friends Far and
Near
Using Other
Devices
Using BRAVIA
Sync Devices
Useful Functions
Connecting to the
Internet
Using Home
Network
Configuring
Various Settings
Troubleshooting
How to Use
Bookmarks
Top Page > Configuring Various Settings > Setting the parental lock password
Setting the parental lock password
Overview
Set a 4-digit password for parental lock. The password will be required
when you change the parental lock settings.
Steps
1.
Press the HOME button, then select [Settings].
2. Select [Preferences] → [Parental Lock] → [Password] → enter the
password.
3. Re-enter the password using the number buttons to confirm, then
press the
button.
(When using the Touchpad Remote Control, press the Control Bar (
), slide the touchpad to select the number buttons to re-enter the
password, then press the touchpad.)
Tips
For the password, refer to Troubleshooting in the paper manual supplied
with this TV.
List of Contents© 2014 Sony Corporation
Top of Page
176
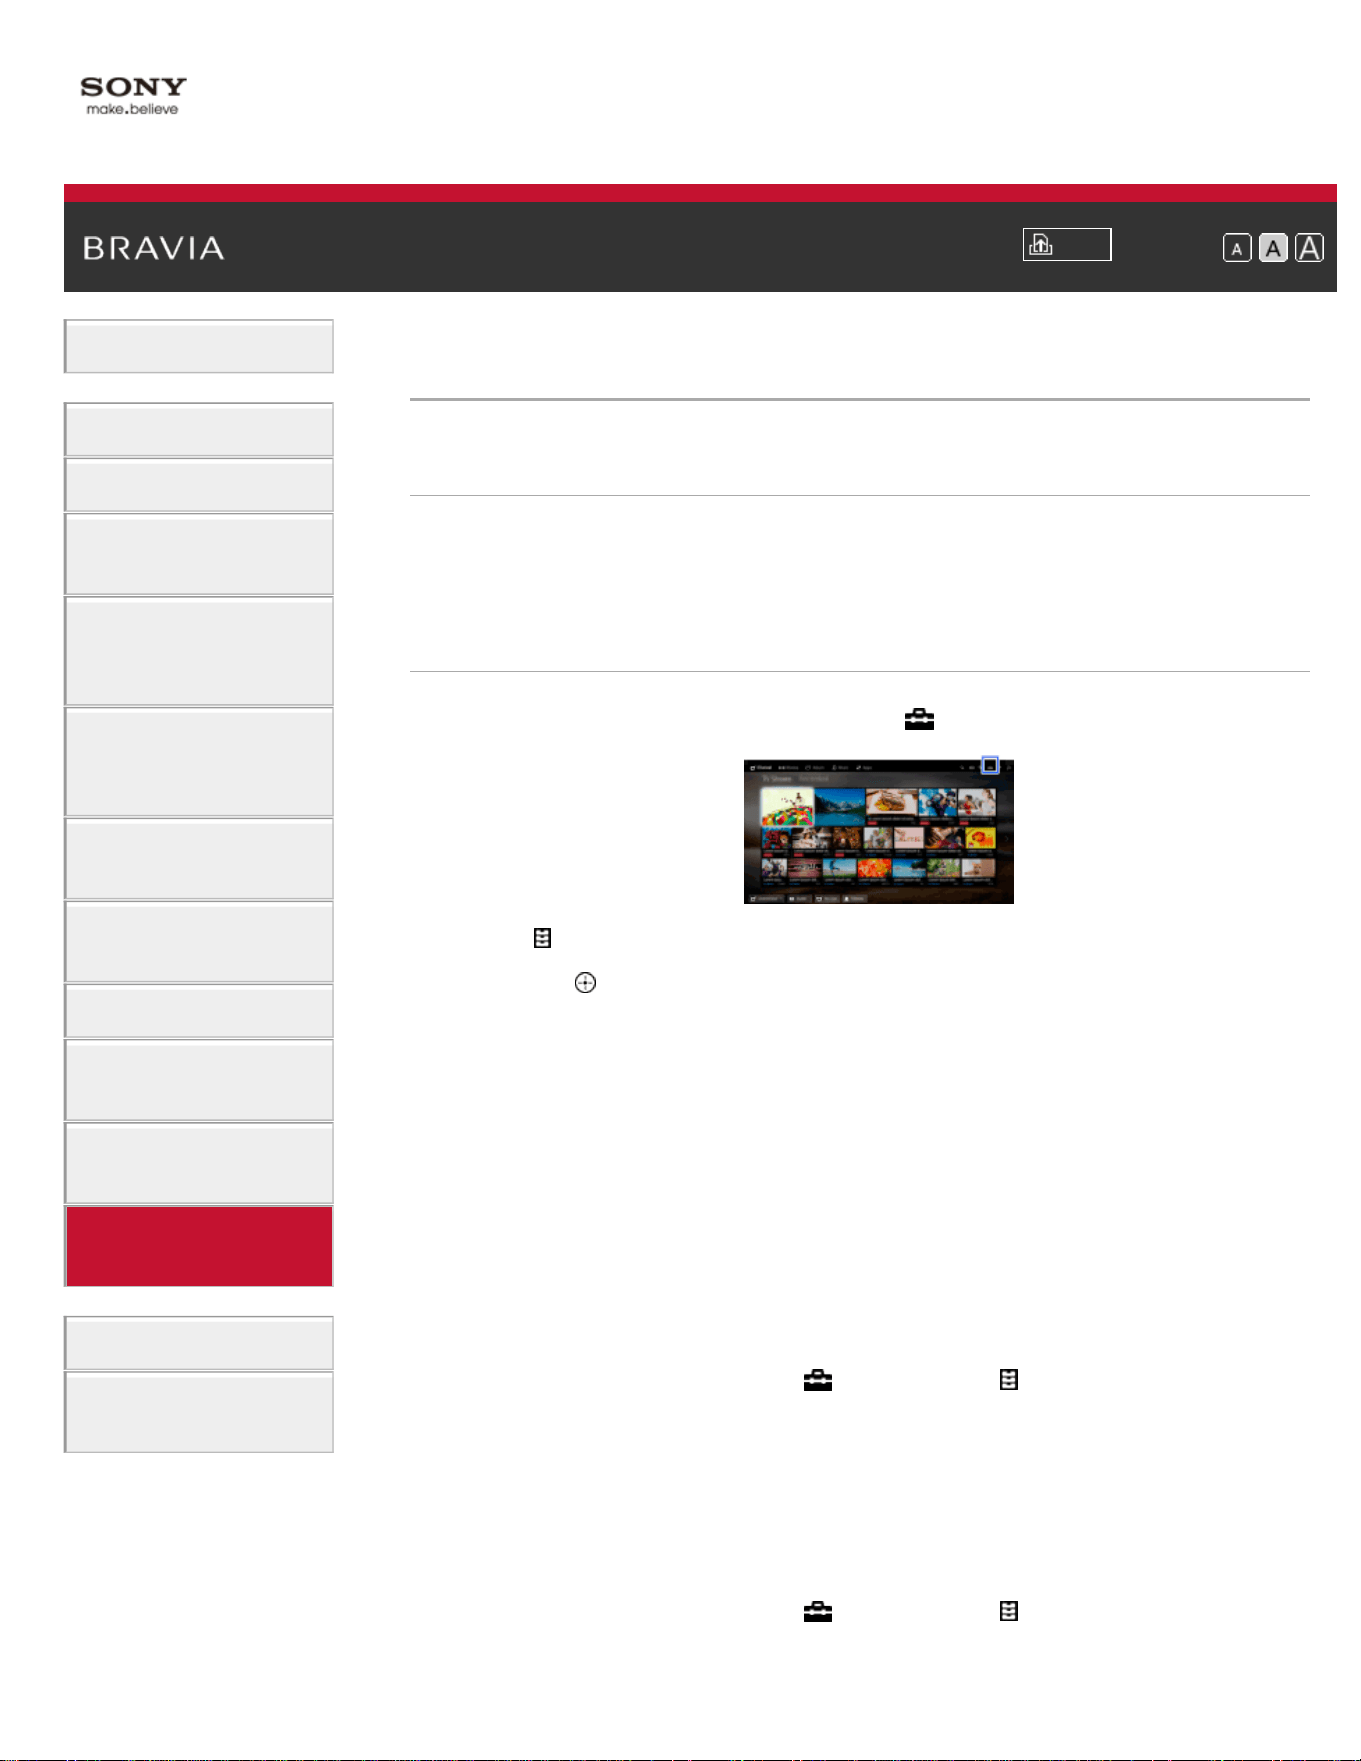
i-Manual
Print
Font Size
Basic Operations
Parts Description
Watching TV
Enjoying
Movies/Music/Photos
Using Internet
Services and
Applications
Watching TV with
Friends Far and
Near
Using Other
Devices
Using BRAVIA
Sync Devices
Useful Functions
Connecting to the
Internet
Using Home
Network
Configuring
Various Settings
Troubleshooting
How to Use
Bookmarks
Top Page > Configuring Various Settings > Setting a viewing restriction
Setting a viewing restriction
Overview
You can lock any event rated as unsuitable for below a specified limit.
(This function is available depending on your region/country.)
Steps
1.
Press the HOME button, then select [Settings].
2. Select [Preferences] → [Parental Lock].
3. Press the button in [Password], enter the password, then select
[Country]* → the country in which you apply parental rating* →
[Rating]/[Digital Rating] → [Child], [Youth], [Young Adult] or [Custom].
(When using the Touchpad Remote Control, press the touchpad in
[Password].)
When selecting [Custom], select the desired option.
* This step may not be available depending on your region/country.
Skip this step if unavailable.
To download digital rating data (available depending on
your region/country)
Press the HOME button, select [Settings] → [Preferences] →
[Parental Lock] → [Password], then enter the password. Select
[Downloadable U.S. Rating]/[Digital Rating] → [Custom] → the desired
options.
To block programs or movies without a rating (available
depending on your region/country)
Press the HOME button, select [Settings] → [Preferences] →
[Parental Lock] → [Password], then enter the password. Select
177

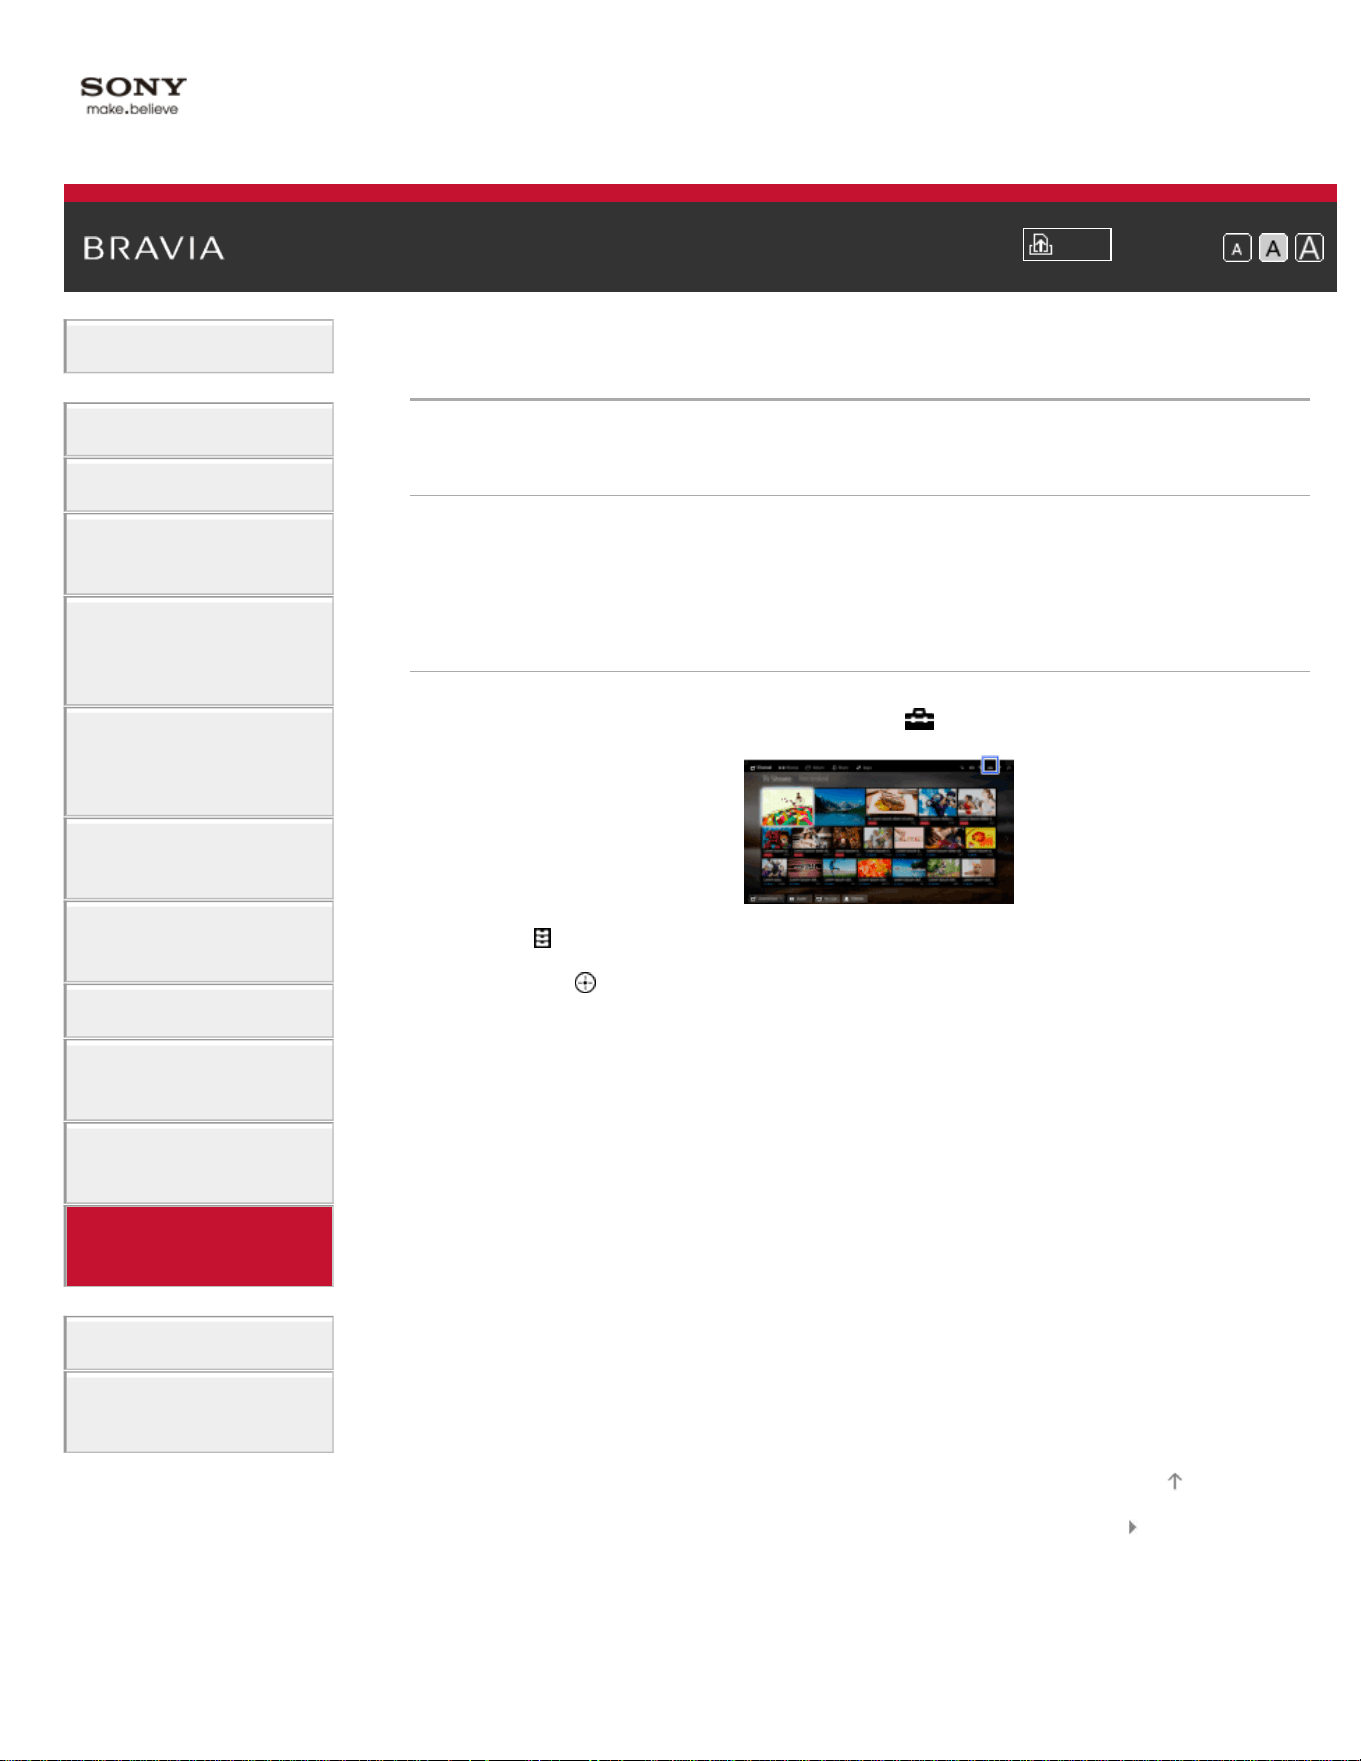
i-Manual
Print
Font Size
Basic Operations
Parts Description
Watching TV
Enjoying
Movies/Music/Photos
Using Internet
Services and
Applications
Watching TV with
Friends Far and
Near
Using Other
Devices
Using BRAVIA
Sync Devices
Useful Functions
Connecting to the
Internet
Using Home
Network
Configuring
Various Settings
Troubleshooting
How to Use
Bookmarks
Top Page > Configuring Various Settings > Blocking specific channels
Blocking specific channels
Overview
You can block channels regardless of program ratings, by specifying the
channel number.
Steps
1.
Press the HOME button, then select [Settings].
2. Select [Preferences] → [Parental Lock].
3. Press the button in [Password], enter the password, then select
[Channel Block]/[Analog Channel Block] → the channel to be blocked
→ [Blocked].
(When using the Touchpad Remote Control, press the touchpad in
[Password].)
You can also select the channel by entering the channel number
using the number buttons.
List of Contents© 2014 Sony Corporation
Top of Page
179
i-Manual
Print
Font Size
Basic Operations
Parts Description
Watching TV
Enjoying
Movies/Music/Photos
Using Internet
Services and
Applications
Watching TV with
Friends Far and
Near
Using Other
Devices
Using BRAVIA
Sync Devices
Useful Functions
Connecting to the
Internet
Using Home
Network
Configuring
Various Settings
Troubleshooting
How to Use
Bookmarks
Top Page > Configuring Various Settings > Turning off the key tone of remote control
operations
Turning off the key tone of remote control
operations
Steps
1.
Press the HOME button, then select [Settings].
2. Select [Sound] → [Key Tone] → [Off].
List of Contents© 2014 Sony Corporation
Top of Page
180

i-Manual
Print
Font Size
Basic Operations
Parts Description
Watching TV
Enjoying
Movies/Music/Photos
Using Internet
Services and
Applications
Watching TV with
Friends Far and
Near
Using Other
Devices
Using BRAVIA
Sync Devices
Useful Functions
Connecting to the
Internet
Using Home
Network
Configuring
Various Settings
Troubleshooting
How to Use
Bookmarks
Top Page > Configuring Various Settings > Turning off the start-up logo
Turning off the start-up logo
Steps
1.
Press the HOME button, then select [Settings].
2. Select [Preferences] → [Startup Logo] → [Off].
List of Contents© 2014 Sony Corporation
Top of Page
181

i-Manual
Print
Font Size
Basic Operations
Parts Description
Watching TV
Enjoying
Movies/Music/Photos
Using Internet
Services and
Applications
Watching TV with
Friends Far and
Near
Using Other
Devices
Using BRAVIA
Sync Devices
Useful Functions
Connecting to the
Internet
Using Home
Network
Configuring
Various Settings
Troubleshooting
How to Use
Bookmarks
Top Page > Configuring Various Settings > Turning on/off and adjusting the brightness of
the illumination
Turning on/off and adjusting the brightness of the
illumination
Steps
1.
Press the HOME button, then select [Settings].
2. Select [Preferences] → [Front Panel Illumination] → [Illumination
LED] → the desired option.
Available Options
[Demo]
The lamp blinks all the time the TV power is on.
[Auto Brightness Adjust]
Optimizes brightness according to the ambient light.
[Dark]
Lowers the brightness of the lamp.
[Simple Response]
Illumination lights in response to operations. It will not stay lit, even if
you set the timer, timer rec* or reminder*.
* This function is available depending on your region/country.
[Off]
The lamp does not light under normal use.
List of Contents© 2014 Sony Corporation
Top of Page
182

i-Manual
Print
Font Size
Basic Operations
Parts Description
Watching TV
Enjoying
Movies/Music/Photos
Using Internet
Services and
Applications
Watching TV with
Friends Far and
Near
Using Other
Devices
Using BRAVIA
Sync Devices
Useful Functions
Connecting to the
Internet
Using Home
Network
Configuring
Various Settings
Troubleshooting
How to Use
Bookmarks
Top Page > Configuring Various Settings > Setting the menu language
Setting the menu language
Steps
1.
Press the HOME button, then select [Settings].
2. Select [Preferences] → [Language] → the desired language.
List of Contents© 2014 Sony Corporation
Top of Page
183

i-Manual
Print
Font Size
Basic Operations
Parts Description
Watching TV
Enjoying
Movies/Music/Photos
Using Internet
Services and
Applications
Watching TV with
Friends Far and
Near
Using Other
Devices
Using BRAVIA
Sync Devices
Useful Functions
Connecting to the
Internet
Using Home
Network
Configuring
Various Settings
Troubleshooting
How to Use
Bookmarks
Top Page > Configuring Various Settings > Setting your region
Setting your region
Steps
1.
Press the HOME button, then select [Settings].
2. Select [Preferences] → [Region] → your location.
Tips
By setting your location, you can receive services from Internet content
providers.
List of Contents© 2014 Sony Corporation
Top of Page
184
i-Manual
Print
Font Size
Basic Operations
Parts Description
Watching TV
Enjoying
Movies/Music/Photos
Using Internet
Services and
Applications
Watching TV with
Friends Far and
Near
Using Other
Devices
Using BRAVIA
Sync Devices
Useful Functions
Connecting to the
Internet
Using Home
Network
Configuring
Various Settings
Troubleshooting
How to Use
Bookmarks
Top Page > Configuring Various Settings > Setting Touchpad Remote Control
Setting Touchpad Remote Control
Steps
1.
Press the HOME button of the IR Remote Control, then select
[Settings].
2. Select [Preferences] → [Touchpad Remote Control Setup].
3. Follow the on-screen instructions to register the Touchpad Remote
Control.
After completing this process, the Touchpad Remote Control can be
used.
List of Contents© 2014 Sony Corporation
Top of Page
185

i-Manual
Print
Font Size
Basic Operations
Parts Description
Watching TV
Enjoying
Movies/Music/Photos
Using Internet
Services and
Applications
Watching TV with
Friends Far and
Near
Using Other
Devices
Using BRAVIA
Sync Devices
Useful Functions
Connecting to the
Internet
Using Home
Network
Configuring
Various Settings
Troubleshooting
How to Use
Bookmarks
Top Page > Configuring Various Settings > Setting a Bluetooth Device
Setting a Bluetooth Device
Steps
1.
Press the HOME button, then select [Settings].
2. Select [Preferences] → [Bluetooth Settings]*.
3. Follow the on-screen instructions to complete the setup.
* This option is available depending on your model/region/country.
Notes
Only Bluetooth mice (up to Bluetooth v3.0) can be registered to the TV.
You can register up to 2 mice.
Pointer operation of the Bluetooth mouse can be performed only on an
internet browser.
List of Contents© 2014 Sony Corporation
Top of Page
186

i-Manual
Print
Font Size
Basic Operations
Parts Description
Watching TV
Enjoying
Movies/Music/Photos
Using Internet
Services and
Applications
Watching TV with
Friends Far and
Near
Using Other
Devices
Using BRAVIA
Sync Devices
Useful Functions
Connecting to the
Internet
Using Home
Network
Configuring
Various Settings
Troubleshooting
How to Use
Bookmarks
Top Page > Configuring Various Settings > Selecting speakers to output sound
Selecting speakers to output sound
Steps
1.
Press the HOME button, then select [Settings].
2. Select [Sound] → [Speakers] → [TV Speakers] or [Audio System].
Notes
To use multi-channel audio, connect to an external audio system
compatible with Dolby Digital using an optical cable, and select [Audio
System].
[Audio System] must be selected to listen to 5.1 multi-channel audio.
List of Contents© 2014 Sony Corporation
Top of Page
187

i-Manual
Print
Font Size
Basic Operations
Parts Description
Watching TV
Enjoying
Movies/Music/Photos
Using Internet
Services and
Applications
Watching TV with
Friends Far and
Near
Using Other
Devices
Using BRAVIA
Sync Devices
Useful Functions
Connecting to the
Internet
Using Home
Network
Configuring
Various Settings
Troubleshooting
How to Use
Bookmarks
Top Page > Configuring Various Settings > Outputting sound from headphones or another
audio system
Outputting sound from headphones or another
audio system
Steps
1.
Press the HOME button, then select [Settings].
2. Select [Sound] → [Headphone/Audio Out] → [Headphone], [Audio
Out] or [Subwoofer].
To output sound from headphones, select [Headphone]. To output
from an audio system connected to the TV, select [Audio Out]. To
output from a subwoofer, select [Subwoofer].
List of Contents© 2014 Sony Corporation
Top of Page
188

i-Manual
Print
Font Size
Basic Operations
Parts Description
Watching TV
Enjoying
Movies/Music/Photos
Using Internet
Services and
Applications
Watching TV with
Friends Far and
Near
Using Other
Devices
Using BRAVIA
Sync Devices
Useful Functions
Connecting to the
Internet
Using Home
Network
Configuring
Various Settings
Troubleshooting
How to Use
Bookmarks
Top Page > Configuring Various Settings > Controlling the volume of an audio system with
the TV’s remote control
Controlling the volume of an audio system with the
TV’s remote control
Steps
1.
Press the HOME button, then select [Settings].
2. Select [Sound] → [Headphone/Audio Out] → [Audio Out] → [Audio
Out] in the sound setting menu → [Fixed] or [Variable].
Select [Fixed] to adjust the volume using the connected audio
system’s remote control. Select [Variable] to adjust the volume with
the TV’s remote control when using an external audio system.
List of Contents© 2014 Sony Corporation
Top of Page
189

i-Manual
Print
Font Size
Basic Operations
Parts Description
Watching TV
Enjoying
Movies/Music/Photos
Using Internet
Services and
Applications
Watching TV with
Friends Far and
Near
Using Other
Devices
Using BRAVIA
Sync Devices
Useful Functions
Connecting to the
Internet
Using Home
Network
Configuring
Various Settings
Troubleshooting
How to Use
Bookmarks
Top Page > Configuring Various Settings > Setting the headphone speaker link
Setting the headphone speaker link
Steps
1.
Press the HOME button, then select [Settings].
2. Select [Sound] → [Headphone Speaker Link] → [Speakers Off] or
[Speakers On].
Select [Speakers Off] to not output sound from the TV’s internal
speakers when you connect headphones to the TV. Select
[Speakers On] to output sound from both the TV’s internal speakers
and headphones.
List of Contents© 2014 Sony Corporation
Top of Page
190

i-Manual
Print
Font Size
Basic Operations
Parts Description
Watching TV
Enjoying
Movies/Music/Photos
Using Internet
Services and
Applications
Watching TV with
Friends Far and
Near
Using Other
Devices
Using BRAVIA
Sync Devices
Useful Functions
Connecting to the
Internet
Using Home
Network
Configuring
Various Settings
Troubleshooting
How to Use
Bookmarks
Top Page > Configuring Various Settings > Setting sound for Home Theater Control
Setting sound for Home Theater Control
Steps
You can connect the TV to the Internet and use setup applications for
audio systems (such as Sound Bars).
1. Press the HOME button, then select [Settings].
2. Select [Sound] → [Home Theater Control].
Tips
An Internet connection is required to set up and use this function.
List of Contents© 2014 Sony Corporation
Top of Page
191

i-Manual
Print
Font Size
Basic Operations
Parts Description
Watching TV
Enjoying
Movies/Music/Photos
Using Internet
Services and
Applications
Watching TV with
Friends Far and
Near
Using Other
Devices
Using BRAVIA
Sync Devices
Useful Functions
Connecting to the
Internet
Using Home
Network
Configuring
Various Settings
Troubleshooting
How to Use
Bookmarks
Top Page > Configuring Various Settings > Managing external inputs
Managing external inputs
Steps
1.
Press the HOME button, then select [Settings].
2. Select [Channels & Inputs]/[Channels, Inputs & Ginga]* →
[Manage Inputs] → the input → [Auto] or [Always].
Select [Auto] to display icons or names only when the device is
connected, or [Always] to display regardless of connection status.
3. Select the device name → [Edit] to enter your preferred name.
After entering the name, press the
button, then select the icon.
(When using the Touchpad Remote Control, slide right, then select
the icon.)
* Option name differs depending on your region/country.
List of Contents© 2014 Sony Corporation
Top of Page
192

i-Manual
Print
Font Size
Basic Operations
Parts Description
Watching TV
Enjoying
Movies/Music/Photos
Using Internet
Services and
Applications
Watching TV with
Friends Far and
Near
Using Other
Devices
Using BRAVIA
Sync Devices
Useful Functions
Connecting to the
Internet
Using Home
Network
Configuring
Various Settings
Troubleshooting
How to Use
Bookmarks
Top Page > Configuring Various Settings > Switching the video input
Switching the video input
Steps
1.
Press the HOME button, then select [Settings].
2. Select [Channels & Inputs]/[Channels, Inputs & Ginga]* → [Video
2/Component Selection] → the desired option.
* Option name differs depending on your region/country.
Available Options
[Auto]
Automatically switches the input to either [Component] or [Video 2] by
detecting the terminal connection.
[Component]
Switches to component video input.
[Video 2]
Switches to composite video input.
Notes
You cannot use [Component] and [Video 2] at the same time.
List of Contents© 2014 Sony Corporation
Top of Page
193
i-Manual
Print
Font Size
Basic Operations
Parts Description
Watching TV
Enjoying
Movies/Music/Photos
Using Internet
Services and
Applications
Watching TV with
Friends Far and
Near
Using Other
Devices
Using BRAVIA
Sync Devices
Useful Functions
Connecting to the
Internet
Using Home
Network
Configuring
Various Settings
Troubleshooting
How to Use
Bookmarks
Top Page > Configuring Various Settings > Making detailed settings of video input
Making detailed settings of video input
Steps
1.
Press the HOME button, then select [Settings].
2. Select [Picture & Display] → [Pro Picture Setup] → the desired
option.
Available Options
[Video Color Space (x.v.Color)]
Adjusts the color space of the original video to an image quality
appropriate for the source.
[x.v.Color]: This is a video color space that supports the xvYCC
international standards and enables a wider color gamut for vivid
representation of colors in the natural world, such as the brilliant hues of
flowers and the wide array of beautiful ocean hues.
[Photo Color Space]
Adjusts the color space of a still picture to an image quality appropriate
for the source.
[sRGB]: A still image color space specified before Exif version 2.1;
sRGB is an international standard with a narrower color reproduction
gamut than Adobe RGB and sYCC.
[sYCC]: A still image color space specified after Exif version 2.2; sYCC
is an international standard that covers nearly all visible colors while
maintaining compatibility with sRGB color space.
[Adobe RGB]: A still image color space specified in Exif version 2.21;
Adobe RGB is an international standard that covers the color gamut for
printing devices.
[Color Matrix]
Reproduces the color-difference signals. It is recommended to leave this
at the factory default setting.
[Dynamic Range]
Produces a natural picture by changing the tone reproduction of input
signals. For standard use of HDMI input, [Auto] is recommended as this
194

changes the tone reproduction automatically. For Screen mirroring input,
[Limited] is recommended. Select [Full] if black/white colors appear
smeared.
[SBM]
Creates gradations using Super Bit Mapping technology.
[Color System]
Sets the color system according to the signal from the input source.
Notes
[Video Color Space (x.v.Color)], [Photo Color Space] and [Color System]
are available depending on your TV model/region/country.
List of Contents© 2014 Sony Corporation
Top of Page
195

i-Manual
Print
Font Size
Basic Operations
Parts Description
Watching TV
Enjoying
Movies/Music/Photos
Using Internet
Services and
Applications
Watching TV with
Friends Far and
Near
Using Other
Devices
Using BRAVIA
Sync Devices
Useful Functions
Connecting to the
Internet
Using Home
Network
Configuring
Various Settings
Troubleshooting
How to Use
Bookmarks
Top Page > Configuring Various Settings > Setting the IR Blaster
Setting the IR Blaster
Steps
This option is available depending on your model/region/country.
1. Press the HOME button, then select [Settings].
2. Select [Channels & Inputs]/[Channels, Inputs & Ginga]* → [IR
Blaster setup].
3. Select the external device to be controlled ([Set-top box control
setup] or [AV receiver control setup]).
4. Follow the on-screen instructions to complete the setup.
* Option name differs depending on your region/country.
List of Contents© 2014 Sony Corporation
Top of Page
196

i-Manual
Print
Font Size
Basic Operations
Parts Description
Watching TV
Enjoying
Movies/Music/Photos
Using Internet
Services and
Applications
Watching TV with
Friends Far and
Near
Using Other
Devices
Using BRAVIA
Sync Devices
Useful Functions
Connecting to the
Internet
Using Home
Network
Configuring
Various Settings
Troubleshooting
How to Use
Bookmarks
Top Page > Configuring Various Settings > Running Initial Set-up
Running Initial Set-up
Steps
1.
Press the HOME button, then select [Settings].
2. Select [Preferences] → [Initial Setup].
3. Follow the on-screen instructions to run the initial setup that
appeared when you first connected the TV.
Tips
This setting is useful when you change the settings after moving to a new
residence, or when you search for newly launched channels.
List of Contents© 2014 Sony Corporation
Top of Page
197

i-Manual
Print
Font Size
Basic Operations
Parts Description
Watching TV
Enjoying
Movies/Music/Photos
Using Internet
Services and
Applications
Watching TV with
Friends Far and
Near
Using Other
Devices
Using BRAVIA
Sync Devices
Useful Functions
Connecting to the
Internet
Using Home
Network
Configuring
Various Settings
Troubleshooting
How to Use
Bookmarks
Top Page > Configuring Various Settings > Checking Sony contact information
Checking Sony contact information
Steps
1.
Press the HOME button, then select [Help].
2. Select [Customer Support] → [Contact Sony].
Sony contact information is displayed for your convenience.
List of Contents© 2014 Sony Corporation
Top of Page
198

i-Manual
Print
Font Size
Basic Operations
Parts Description
Watching TV
Enjoying
Movies/Music/Photos
Using Internet
Services and
Applications
Watching TV with
Friends Far and
Near
Using Other
Devices
Using BRAVIA
Sync Devices
Useful Functions
Connecting to the
Internet
Using Home
Network
Configuring
Various Settings
Troubleshooting
How to Use
Bookmarks
Top Page > Configuring Various Settings > Uploading operation history
Uploading operation history
Steps
1.
Press the HOME button, then select [Help].
2. Select [Customer Support] → [Upload TV Usage and Statistics] →
[On].
Tips
The uploaded information will be used as feedback for software quality
check, feature improvement and feature enhancement.
Notes
This feature may not be available in some regions/countries.
List of Contents© 2014 Sony Corporation
Top of Page
199

i-Manual
Print
Font Size
Basic Operations
Parts Description
Watching TV
Enjoying
Movies/Music/Photos
Using Internet
Services and
Applications
Watching TV with
Friends Far and
Near
Using Other
Devices
Using BRAVIA
Sync Devices
Useful Functions
Connecting to the
Internet
Using Home
Network
Configuring
Various Settings
Troubleshooting
How to Use
Bookmarks
Top Page > Configuring Various Settings > Updating broadcast/service software
Updating broadcast/service software
Steps
1.
Press the HOME button, then select [Help].
2. Select [Customer Support] → [Automatic Software Download] →
[On].
After the download is complete, a confirmation message about
starting an update appears when you turn on the TV.
Notes
The software is downloaded when the TV is in standby mode.
List of Contents© 2014 Sony Corporation
Top of Page
200

i-Manual
Print
Font Size
Basic Operations
Parts Description
Watching TV
Enjoying
Movies/Music/Photos
Using Internet
Services and
Applications
Watching TV with
Friends Far and
Near
Using Other
Devices
Using BRAVIA
Sync Devices
Useful Functions
Connecting to the
Internet
Using Home
Network
Configuring
Various Settings
Troubleshooting
How to Use
Bookmarks
Top Page > Configuring Various Settings > Updating the TV’s software
Updating the TV’s software
Steps
1.
Press the HOME button, then select [Help].
2. Select [Customer Support] → [Software Update].
A confirmation message about starting an update appears. If no
software has been downloaded, the TV will start searching for an
update via the Internet (if connected).
List of Contents© 2014 Sony Corporation
Top of Page
201

i-Manual
Print
Font Size
Basic Operations
Parts Description
Watching TV
Enjoying
Movies/Music/Photos
Using Internet
Services and
Applications
Watching TV with
Friends Far and
Near
Using Other
Devices
Using BRAVIA
Sync Devices
Useful Functions
Connecting to the
Internet
Using Home
Network
Configuring
Various Settings
Troubleshooting
How to Use
Bookmarks
Top Page > Troubleshooting > Self Diagnostics
Self Diagnostics
How to check if the TV is working properly.
How to check if the TV is working properly.
Press the HOME button, then select [Help] → [Customer Support] →
[Problem Diagnosis] → [Self Diagnostics].
List of Contents© 2014 Sony Corporation
Top of Page
202

i-Manual
Print
Font Size
Basic Operations
Parts Description
Watching TV
Enjoying
Movies/Music/Photos
Using Internet
Services and
Applications
Watching TV with
Friends Far and
Near
Using Other
Devices
Using BRAVIA
Sync Devices
Useful Functions
Connecting to the
Internet
Using Home
Network
Configuring
Various Settings
Troubleshooting
How to Use
Bookmarks
Top Page > Troubleshooting > Power Symptoms
Power Symptoms
The TV turns off automatically.
The TV turns on automatically.
The TV turns off automatically.
Check if [Sleep Timer] is activated, or check the [Duration] setting of
[Timer].
Check if [Idle TV Standby] in [Eco] is activated.
Check if [Auto Shut-off] in [Eco] is activated.
The TV turns on automatically.
Check if [Timer] is activated.
List of Contents© 2014 Sony Corporation
Top of Page
203

i-Manual
Print
Font Size
Basic Operations
Parts Description
Watching TV
Enjoying
Movies/Music/Photos
Using Internet
Services and
Applications
Watching TV with
Friends Far and
Near
Using Other
Devices
Using BRAVIA
Sync Devices
Useful Functions
Connecting to the
Internet
Using Home
Network
Configuring
Various Settings
Troubleshooting
How to Use
Bookmarks
Top Page > Troubleshooting > Picture/Screen Symptoms
Picture/Screen Symptoms
Picture quality is not as good as viewed at the store.
Distorted picture.
The screen flickers.
No color/Dark picture/color is not correct/Picture is too bright
Dark screen. How to brighten the screen.
Color is not correct. How to adjust the color tone.
There is lag between video and sound.
Screen format/wide mode changes automatically.
Suddenly the picture becomes small.
A black box appears on the screen.
Black bands appear at the edges of the screen.
Demonstration mode appears in the screen.
A notification appears and hides subtitles or other information.
Picture quality is not as good as viewed at the store.
Picture quality depends on the signal content. See the specifications to
display the best possible picture for that signal.
Distorted picture.
Check the antenna/cable connection.
Keep the antenna/cable away from other connecting cables.
When installing an optional device, leave some space between the device
and TV.
Set [Motionflow] to [Standard] or [Off]. (For [Motionflow] compatible models
only.)
204

Change the current setting of [CineMotion] to another setting.
Set [LNA] to [Off] to improve picture reception. ([LNA] may not be available
depending on the situation/region/country.)
Perform [Fine Tune]/[AFT] in [Manual Program Preset] to improve picture
for analog reception.
Make sure that the antenna is connected using a 75-ohm coaxial cable.
The screen flickers.
Set [Motionflow] to other than [Impulse] (e.g. [Standard]).
No color/Dark picture/color is not correct/Picture is
too bright
Press the OPTIONS button, then select [Picture Adjustments] to make
adjustments.
Select [Reset] in [Picture Adjustments].
If you set [Power Saving] to [Low] or [High], the black level will be
enhanced.
Dark screen. How to brighten the screen.
Adjust [Backlight] or [Picture] in [Picture Adjustments].
Check the [Power Saving] option setting. If it is [Low] or [High], the screen
darkens. Set [Power Saving] to [Off] to brighten the screen.
Color is not correct. How to adjust the color tone.
Adjust [Hue] or [Color Temperature] in [Picture Adjustments].
To deepen the color tone, adjust [Color] or [Live Color] in [Picture
Adjustments].
There is lag between video and sound.
When enjoying Karaoke from a connected device, set [Scene Select] to
[Game].
Screen format/wide mode changes automatically.
When changing the channel or video input, if [Wide Mode] in [Screen] is
set to [On], the current [Wide Mode] setting is automatically changed
according to the input signal. To lock the [Wide Mode] setting, set [Auto
205

Wide] to [Off].
Check the [Auto Wide] setting in [Screen].
Suddenly the picture becomes small.
The picture becomes smaller during commercials due to the method used
by the provider to broadcast content. When HD content channels switch to
SD content (commercials), the picture may be small with a black border.
[Auto Wide] will not expand the picture while the content switches, since
the content information is regulated by the channel signal provider. You
can manually change the [Wide Mode] setting if desired, which will remain
in effect until you change the channel/input or manually change the [Wide
Mode] setting again.
A black box appears on the screen.
A text option is selected although no text is available. To deactivate this
feature, set [CC Display] to [Off]. If you are trying to select closed
captioning, select [CC1] instead of [Text1] - [Text4] (options may not be
available depending on your region/country).
Black bands appear at the edges of the screen.
Some wide screen programs are filmed in aspect ratios that are greater
than 16:9 (this is especially common with theatrical releases). Your TV will
show these programs with black bands at the top and bottom of the
screen. For more details, check the documentation that came with your
DVD (or contact your program provider).
Programs in 4:3 aspect ratio will have bands on the left and right sides of
the screen.
Programs broadcasted in HD formats (720p and 1080i) with 4:3 content
will commonly have black bands on the left and right sides of the screen
which are added by the broadcaster.
[Auto Wide] will not expand the picture when the black bands on the sides
of the screen are added by the broadcaster. You can manually set [Wide
Mode] to [Wide Zoom] or [Zoom], which will remain in effect until you
change the channel/input or manually change the [Wide Mode] setting
again.
Some cable and satellite set-top boxes can also control the size of the
picture. If you are using a set-top box, refer to the manufacturer of the set-
top box for more information.
206

Demonstration mode appears in the screen.
Press the OPTIONS button on the remote control and select [Suspend
Demo]. Then, press the HOME button on the remote control and proceed
with the [Initial Setup] from the
[Settings] - [Preferences] menu.
A notification appears and hides subtitles or other
information.
Set not to display notifications. Press the HOME button, then select
[Settings] → [Preferences] → [Notification Settings].
List of Contents© 2014 Sony Corporation
Top of Page
207

i-Manual
Print
Font Size
Basic Operations
Parts Description
Watching TV
Enjoying
Movies/Music/Photos
Using Internet
Services and
Applications
Watching TV with
Friends Far and
Near
Using Other
Devices
Using BRAVIA
Sync Devices
Useful Functions
Connecting to the
Internet
Using Home
Network
Configuring
Various Settings
Troubleshooting
How to Use
Bookmarks
Top Page > Troubleshooting > Broadcast Reception Symptoms
Broadcast Reception Symptoms
Check these things first to troubleshoot your TV reception.
Ghosting or double images appear.
Only snow noise or a black picture appears on the screen.
There is picture or sound noise when viewing a TV channel.
You cannot receive any channels.
You cannot receive or select channels.
Some digital cable channels are not displayed.
Broadcast HD formats have poor quality.
Noisy picture.
Some channels are blank.
Poor reception or poor picture quality with digital terrestrial broadcasts.
You cannot view digital channels.
Check these things first to troubleshoot your TV
reception.
Make sure that the antenna cable is firmly connected to the TV.
- Make sure that the antenna cable is not loose or disconnected.
- Make sure that the center conductor of the antenna cable connector is
not bent.
Ghosting or double images appear.
Check cable or antenna connections.
Check the antenna location and direction.
Set [Motionflow] to [Standard] or [Off]. (For [Motionflow] compatible models
only.)
208

Only snow noise or a black picture appears on the
screen.
Check if auto tuning is performed.
Check if the antenna is broken or bent.
Check if the antenna has reached the end of its serviceable life (3-5 years
for normal use, 1-2 years at a seaside location).
There is picture or sound noise when viewing a TV
channel.
Perform [Fine Tune]/[AFT] to obtain better picture reception. (Option name
differs depending on your region/country.)
Set [Audio Filter] to [Off], [Low] or [High] to improve sound for analog
reception. ([Audio Filter] may not be available depending on your
region/country.)
Set [LNA] to [Off] to improve picture reception. ([LNA] may not be available
depending on the situation/region/country.)
You cannot receive any channels.
Check the antenna/cable connection.
Make sure the [Cable/Antenna] setting is correct for your TV signal source.
If using CATV STB, refer to its instruction manual for installation.
You cannot receive or select channels.
Perform [Auto Program] to add receivable channels that are not present in
the TV’s memory.
To receive or select cable channels, make sure that signal type in the
channel settings is set to [Cable].
To receive or select channels by antenna, make sure signal type is set to
[Antenna].
Some digital cable channels are not displayed.
Certain cable companies have limitations on the broadcast of digital cable
channels. Check with your cable company for more information.
The digital cable channel may be set to [Hidden] in [Show/Hide Channels].
Broadcast HD formats have poor quality.
209

Content and signal quality are regulated by the signal provider. Many HD
channels and content are actually upscaled versions of standard-definition
broadcasts. The picture is affected by the quality of the signal received,
which varies between channel and program.
Noisy picture.
Make sure that the antenna is connected using a 75-ohm coaxial cable.
Keep the antenna cable away from other connecting cables.
To avoid TV interference, make sure to use an undamaged antenna cable.
Some channels are blank.
The channel is for scrambled/subscription service only. Subscribe to a pay
TV service.
The channel is used only for data (no picture or sound).
Contact the broadcaster for transmission details.
Poor reception or poor picture quality with digital
terrestrial broadcasts.
Change the position, direction and angle of the terrestrial television
antenna to maximize the antenna signal level. Make sure that the direction
of the antenna is not changed unintentionally (such as by wind).
If you are using a TV signal booster, adjust its signal gain.
If equipment (such as a TV signal distributor) is connected between the
antenna and the TV, it may affect the TV reception. Directly connect the
antenna and the TV to check if the reception is improved.
You cannot view digital channels.
Ask a local installer if digital transmissions are provided in your area.
Upgrade to a higher gain antenna.
List of Contents© 2014 Sony Corporation
Top of Page
210

i-Manual
Print
Font Size
Basic Operations
Parts Description
Watching TV
Enjoying
Movies/Music/Photos
Using Internet
Services and
Applications
Watching TV with
Friends Far and
Near
Using Other
Devices
Using BRAVIA
Sync Devices
Useful Functions
Connecting to the
Internet
Using Home
Network
Configuring
Various Settings
Troubleshooting
How to Use
Bookmarks
Top Page > Troubleshooting > 3D Picture/Glasses Symptoms
3D Picture/Glasses Symptoms
3D pictures are not displayed. The 3D effect is weak.
Black bars appear on both sides of the screen when watching 3D pictures.
3D display automatically switches on when 3D signal is detected.
The message [3D signal has been detected] automatically appears when
3D signal is detected.
You cannot turn the Active 3D Glasses on.
The LED indicator on the Active 3D Glasses blinks.
3D pictures are not displayed. The 3D effect is weak.
Be sure that there are no obstacles between the TV and the Active 3D
Glasses.
Replace the battery in the Active 3D Glasses.
Be sure that the Active 3D Glasses are powered on.
If two pictures are displayed side-by-side, press the 3D button repeatedly
until [3D (Side-by-Side)] appears. If two pictures are displayed one above
the other, press the 3D button repeatedly until [3D (Over-Under)] appears.
(When using the Touchpad Remote Control, press the Control Bar (
),
slide to highlight the 3D button, press the touchpad, slide the touchpad to
highlight [3D (Side-by-Side)] or [3D (Over-Under)], then press the
touchpad.)
If the [3D Display] screen appears and 3D pictures are not displayed, turn
off the device that plays 3D content and turn it on again.
Perceived 3D effect may vary from person to person.
It is necessary to register your Active 3D Glasses to the TV before use. To
use the glasses with another TV, it is necessary to re-register. Turn off the
glasses before re-registering.
For details on how to register, press the
button to jump to the title list.
Then, press the
button again to go to “Watching in 3D.”
(When using the Touchpad Remote Control, press the touchpad. Then,
211
press the touchpad again to go to “Watching in 3D” for details.)
Wireless devices or microwave ovens may affect the communication
between the 3D Glasses and the TV as the TV uses the 2.4GHz band. In
this case, try to register again.
If a device that is not 3D-compatible (such as a home theater system) is
connected between the TV and a 3D-compatible device, the TV will not
display 3D pictures. Connect the 3D-compatible device directly to the TV
via an authorized HIGH SPEED HDMI cable bearing the HDMI logo.
Black bars appear on both sides of the screen when
watching 3D pictures.
Black bars appear on both sides of the screen in order to process 3D
signals for the simulated 3D display mode or when adjusting the depth of
3D pictures in [3D Depth Adjustment].
3D display automatically switches on when 3D signal
is detected.
Set to manually turn the 3D display on or off. Press the HOME button,
then select
[Settings] → [Picture & Display] → [3D Settings] → [Auto
3D] → [Off].
The message [3D signal has been detected]
automatically appears when 3D signal is detected.
Deactivate the [3D Signal Notification] setting. Press the HOME button,
then select
[Settings] → [Picture & Display] → [3D Settings] → [3D
Signal Notification] → [Off].
You cannot turn the Active 3D Glasses on.
Replace the battery. (Applies only to TDG-BT400A/BT500A.)
For details on how to replace the battery, press the
button to jump to the
title list. Then, press the
button again to go to “Watching in 3D.”
(When using the Touchpad Remote Control, press the touchpad. Then,
press the touchpad again to go to “Watching in 3D” for details.)
The LED indicator on the Active 3D Glasses blinks.
Lights up for 3 seconds: Indicates when turning on the glasses.
212

Blinks every 2 seconds: Indicates the glasses are powered on.
Blinks 3 times: Indicates the glasses have been powered off.
Blinks green and yellow alternately: Indicates the glasses have started the
registration process.
Blinks 3 times every 2 seconds: Indicates the battery capacity is almost
running out. Replace the battery.
List of Contents© 2014 Sony Corporation
Top of Page
213

i-Manual
Print
Font Size
Basic Operations
Parts Description
Watching TV
Enjoying
Movies/Music/Photos
Using Internet
Services and
Applications
Watching TV with
Friends Far and
Near
Using Other
Devices
Using BRAVIA
Sync Devices
Useful Functions
Connecting to the
Internet
Using Home
Network
Configuring
Various Settings
Troubleshooting
How to Use
Bookmarks
Top Page > Troubleshooting > Sound Symptoms
Sound Symptoms
No sound but good picture.
Audio noise.
No audio or low audio with a home theater system.
Distorted sound.
No sound but good picture.
Check the volume control.
Press MUTING or VOL + button to cancel muting.
Set [Speakers] to [TV Speakers] in the [Sound] setting. If it is set to [Audio
System], the TV speakers do not output sound regardless of the TV’s
volume control.
When using HDMI input with Super Audio CD or DVD-Audio, DIGITAL
AUDIO OUT (OPTICAL) may not provide an audio signal.
Audio noise.
Make sure that the antenna is connected using a 75-ohm coaxial cable.
Keep the antenna cable away from other connecting cables.
To avoid TV interference, make sure to use an undamaged antenna cable.
No audio or low audio with a home theater system.
Set [Speakers] to [Audio System] in the [Sound] setting.
Set [Headphone/Audio Out] to [Audio Out] and set [Audio Out] to [Fixed] in
the [Sound] setting.
Distorted sound.
Check the antenna/cable connection.
Keep the antenna/cable away from other connecting cables.
214

Keep the TV away from electrical noise sources such as cars, hair-dryers,
Wi-Fi units, mobile phones, or optical devices.
When installing an optional device, leave some space between the device
and TV.
Perform [Fine Tune]/[AFT] in [Manual Program Preset] to improve sound
for analog reception.
Set [Audio Filter] to [Low] or [High] to improve sound for analog reception.
([Audio Filter] may not be available depending on your region/country.)
List of Contents© 2014 Sony Corporation
Top of Page
215
i-Manual
Print
Font Size
Basic Operations
Parts Description
Watching TV
Enjoying
Movies/Music/Photos
Using Internet
Services and
Applications
Watching TV with
Friends Far and
Near
Using Other
Devices
Using BRAVIA
Sync Devices
Useful Functions
Connecting to the
Internet
Using Home
Network
Configuring
Various Settings
Troubleshooting
How to Use
Bookmarks
Top Page > Troubleshooting > Connected Device Symptoms
Connected Device Symptoms
No picture from a connected device.
You cannot select a connected device in the Home Menu.
Some input sources cannot be selected.
Certain programs on digital sources display a loss of detail.
Photo images appear small on the screen.
Photo images or folders take time to display.
You cannot find a connected BRAVIA Sync HDMI device.
You cannot control a second AV receiver.
The TV does not output picture and/or sound from the MHL device.
An external device (such as a set-top box or AV receiver) cannot be
controlled via the IR Blaster.
No picture from a connected device.
Turn the connected device on.
Check the cable connection between the device and TV.
Press the INPUT button to display the list of inputs, then select the desired
input.
(When using the Touchpad Remote Control, press the Control Bar (
),
slide the touchpad to highlight the INPUT button, then press the touchpad
to select.)
Correctly insert the USB device.
Make sure that the USB device has been properly formatted.
Operation is not guaranteed for all USB devices. Also, operations differ
depending on the USB device features or the video files being played.
You cannot select a connected device in the Home
Menu.
216

Check the cable connection.
Some input sources cannot be selected.
Select [Manage Inputs] and confirm the [Always] setting for the input
sources.
Certain programs on digital sources display a loss of
detail.
Less detail than usual or artifacts (small blocks, dots or pixelation) may
appear on the screen, due to the digital compression of the source content
used by certain digital broadcasts and DVDs. The degree of visible
artifacts depends on the clarity and resolution of the TV.
Photo images appear small on the screen.
Photo images may not be displayed in full screen depending on the
resolution or aspect ratio of the file.
Photo images or folders take time to display.
Depending on the image dimension, file size, and number of files in a
folder, some photo images or folders take time to display.
The first time a USB device is connected to the TV via USB cable, it may
take up to a couple of minutes for the photos to display.
You cannot find a connected BRAVIA Sync HDMI
device.
Check that your device is BRAVIA Sync-compatible.
Make sure that [Control for HDMI] is set up on the BRAVIA Sync-
compatible device and [BRAVIA Sync Control] is set up on the TV.
You cannot control a second AV receiver.
Only one BRAVIA Sync-compatible AV receiver can be used.
The TV does not output picture and/or sound from the
MHL device.
Disconnect the MHL cable, then reconnect it. Or turn the MHL device off,
then turn on again and release the screen lock of the device.
217

An external device (such as a set-top box or AV
receiver) cannot be controlled via the IR Blaster.
Make sure that the IR Blaster is correctly set up and the IR transmitter is
located near the IR receiver of the external device.
Make sure that your TV supports the external device.
If you press and hold a button on the remote control, the operation may
not be transmitted. Instead, press the button repeatedly.
Some external devices may not respond to some buttons on the Screen
Key Pad.
List of Contents© 2014 Sony Corporation
Top of Page
218

i-Manual
Print
Font Size
Basic Operations
Parts Description
Watching TV
Enjoying
Movies/Music/Photos
Using Internet
Services and
Applications
Watching TV with
Friends Far and
Near
Using Other
Devices
Using BRAVIA
Sync Devices
Useful Functions
Connecting to the
Internet
Using Home
Network
Configuring
Various Settings
Troubleshooting
How to Use
Bookmarks
Top Page > Troubleshooting > Network Connectivity Test Results
Network Connectivity Test Results
The test results are “Failed”/“Failed”/“Failed”.
The test results are “OK”/“Failed”/“Failed”.
The test results are “OK”/“OK”/“Failed” or “OK”/“OK (IPv6 Only)”/“Failed”.
The test results are “OK”/“OK (IPv6 Only)”/“OK (IPv6 Only)” or
“OK”/“OK”/“OK (IPv6 Only)”.
The test results are “Failed”/“Failed”/“Failed”.
When using the wired LAN function, make sure that the cable is firmly
connected.
When using the wireless LAN function, unplug the TV from the AC power,
wait for a while, then plug it in again.
The test results are “OK”/“Failed”/“Failed”.
The router function of your router may be turned off. Turn it on and try
again.
When using the wireless LAN function, check the items below:
- If [Wireless Device on TV] is set to [Off], set [Built-in Wi-Fi] to [On].
- An incorrect security (WPA or WEP) key may have been entered. Make
sure that the correct security key is entered.
- If you select a network (SSID) from the scan list, ensure that you select a
correct network (SSID). If you enter an SSID manually, make sure that
you enter the correct SSID.
- To find the correct security key and SSID, consult with the person who
set up your network or refer to the router’s instruction manual or website,
or consult the router’s manufacturer.
- If you configured the TV’s wireless LAN function to connect to a wireless
router (or access point) at 5GHz, the connection with the wireless router is
disconnected while [Wi-Fi Direct] is [On]. When you turn off [Wi-Fi Direct],
the connection will automatically recover.
219

The test results are “OK”/“OK”/“Failed” or “OK”/“OK
(IPv6 Only)”/“Failed”.
Your router (broadband router) may be incorrectly set up to connect to
your Internet service provider (such as an incorrect PPPoE setting). To set
up your router correctly, refer to the router’s instruction manual or website,
or consult the router’s manufacturer. If you are uncertain about the setup
information of your provider (such as your account name and password),
consult your provider.
The test results are “OK”/“OK (IPv6 Only)”/“OK (IPv6
Only)” or “OK”/“OK”/“OK (IPv6 Only)”.
Your TV uses only IPv6 to establish an Internet connection, and may not
be able to use certain network functions. Your router (broadband router) or
Internet service provider may support only IPv6. Refer to the router’s
instruction manual or website, or consult the router’s manufacturer to
check whether the router supports IPv4. If you are uncertain whether your
contract includes the IPv4 connection, consult your provider.
List of Contents© 2014 Sony Corporation
Top of Page
220

i-Manual
Print
Font Size
Basic Operations
Parts Description
Watching TV
Enjoying
Movies/Music/Photos
Using Internet
Services and
Applications
Watching TV with
Friends Far and
Near
Using Other
Devices
Using BRAVIA
Sync Devices
Useful Functions
Connecting to the
Internet
Using Home
Network
Configuring
Various Settings
Troubleshooting
How to Use
Bookmarks
Top Page > Troubleshooting > Network/Application Symptoms
Network/Application Symptoms
Sometimes video streaming quality is poor when using the wireless LAN.
Wireless LAN connection fails or radio reception conditions are poor.
The TV cannot connect with your wireless router (or access point) at
5GHz.
Poor picture on Internet Videos.
Certain Internet video content displays a loss of detail.
Good picture quality but no sound on Internet video content.
Apps are inaccessible.
Serious Error 5006 Contact Sony appears when trying to perform [Refresh
Internet Content].
Some applications in [Apps] are not available./Disappeared from [All
Apps].
The TV cannot access the Internet when IPv6 is set.
Sometimes video streaming quality is poor when
using the wireless LAN.
The wireless network connection quality varies depending on the distance
or obstacles (e.g. wall) between the TV and the wireless router (access
point), environmental interference, and the quality of the wireless router
(access point). In this case, use a wired connection for the Internet, or try
the 5GHz band.
The 5GHz band may not be supported depending on your region/country.
If the 5GHz band is not supported, the TV can only connect to a wireless
router (access point) using the 2.4GHz band.
Wireless LAN connection fails or radio reception
conditions are poor.
221

Check the installation location of the TV and wireless router (access point).
Signal condition may be affected for the following reasons.
- Other wireless devices, microwaves, fluorescent lights, etc., are placed
nearby.
- There are floors or walls between the wireless router (access point) and
TV.
If the problem persists even after checking the above, try making a wired
LAN connection.
The TV cannot connect with your wireless router (or
access point) at 5GHz.
While [Wi-Fi Direct] is set to [On], you cannot connect to a wireless router
(or access point) at 5GHz. Set [Wi-Fi Direct] to [Off]. Press the HOME
button, then select
[Settings] → [Network] → [Wi-Fi Direct] → [Off].
Poor picture on Internet Videos.
Quality depends on the original video provided by the video content
provider and your connection bandwidth.
Certain Internet video content displays a loss of
detail.
Video quality and picture size depend on broadband speed and delivery
by content providers.
Good picture quality but no sound on Internet video
content.
Quality depends on the original content provided by the video content
provider and your connection bandwidth.
Due to the nature of Internet video, not all videos will contain sound.
Apps are inaccessible.
Check that the LAN cable or AC power cord of the router/modem* has
been connected properly.
* Your router/modem must be set in advance to connect to the Internet.
Contact your Internet service provider for router/modem settings.
Try using apps later. The app content provider’s server may be out of
service.
222

Serious Error 5006 Contact Sony appears when trying
to perform [Refresh Internet Content].
This error may occur if [Refresh Internet Content] did not complete
successfully. Use the following steps, re-checking the Internet content
status after completing each step:
1. Perform [Refresh Internet Content].
Press the HOME button, then select
[Settings] → [Network] →
[Refresh Internet Content].
2. If the problem still exists, perform step 1 again.
3. If the problem persists, troubleshoot the Internet connection via the
following:
- Check that an active Internet connection exists with a wired router,
wireless bridge, or wireless gaming adapter.
- Reset the network equipment, such as cable modem,
wired/wireless router, by powering off and on, then attempt step 1
again.
- If the problem continues, wait a while and try step 1 again.
- Confirm the Internet speed meets the minimum recommended
specification of 2.5 Mbps for standard definition (SD) content and 10
Mbps for High Definition (HD) content.
- Test the quality of service of your LAN connection by checking ping,
jitter and packet loss. (Ping should be under 30ms, jitter should be
less than 3ms, and packet loss should be 0.)
Some applications in [Apps] are not
available./Disappeared from [All Apps].
Reset the TV to the factory setting. To reset the TV, refer to
“Troubleshooting” in the paper manual supplied with this TV.
The TV cannot access the Internet when IPv6 is set.
IPv6 may not be available, in which case set IPv6 to off. Press the HOME
button, then select
[Settings] → [Network] → [IPv6 Setup] → [Set up
IPv6 connection] → [No].
List of Contents© 2014 Sony Corporation
Top of Page
223
i-Manual
Print
Font Size
Basic Operations
Parts Description
Watching TV
Enjoying
Movies/Music/Photos
Using Internet
Services and
Applications
Watching TV with
Friends Far and
Near
Using Other
Devices
Using BRAVIA
Sync Devices
Useful Functions
Connecting to the
Internet
Using Home
Network
Configuring
Various Settings
Troubleshooting
How to Use
Bookmarks
Top Page > Troubleshooting > Home Network Symptoms
Home Network Symptoms
Your TV cannot connect to the server.
A message appears stating that the TV cannot connect to your network.
Server is inaccessible.
Some media files in the USB device or server are not displayed.
When using the renderer function, music files cannot be played back.
The TV cannot be found by a Wi-Fi Direct device.
Your TV cannot connect to the server.
Check the LAN cable or wireless connection to your server and your TV.
Check if your network is properly configured on your TV.
A message appears stating that the TV cannot
connect to your network.
Check the current network settings. Press the HOME button, then select
[Settings] → [Network] → [Network Setup] → [View Network settings
and status]. Check your network connections and/or server’s instruction
manual for connection information, or contact the person who set up the
network (network administrator).
Reconfigure your network settings by pressing the HOME button, then
select
[Settings] → [Network] → [Network Setup].
If the LAN cable is connected to an active server and the TV has acquired
an IP address, check your server’s connections and configurations. Press
the HOME button, then select
[Settings] → [Network] → [Network
Setup] → [View Network settings and status].
Server is inaccessible.
Check your LAN cable/wireless connection or your server. The TV may
have lost connection with the server.
224

Perform [Media Server Troubleshooting] to check if your media server is
properly communicating with the TV. Press the HOME button, then select
[Settings] → [Network] → [Home Network Setup] → [Media Server
Troubleshooting].
Some media files in the USB device or server are not
displayed.
Unsupported files may not be displayed.
The accessible file or folder limit in a directory is 1,000 for USB and
30,000 for a server. This limit includes non-supported files or just folders.
Files or folders are populated based on their timestamps. Photo, music
files or folders exceeding the limit will not be displayed.
When using the renderer function, music files cannot
be played back.
Some applications display a photo file pre-installed in the PC
simultaneously with music playback when using the renderer function.
Depending on the pre-installed photo file, music playback may not be
possible, but may become possible by changing the photo file.
The TV cannot be found by a Wi-Fi Direct device.
Set [Wi-Fi Direct] to [On]. Press the HOME button, then select
[Settings] → [Network] → [Wi-Fi Direct] → [On].
If the TV cannot be found even though [Wi-Fi Direct] is [On], set [Band
Setting] to [Auto (2.4GHz Band)]. Press the HOME button, then select
[Settings] → [Network] → [Wi-Fi Direct Settings] → press the OPTIONS
button → [Band Setting] → [Auto (2.4GHz Band)].
List of Contents© 2014 Sony Corporation
Top of Page
225
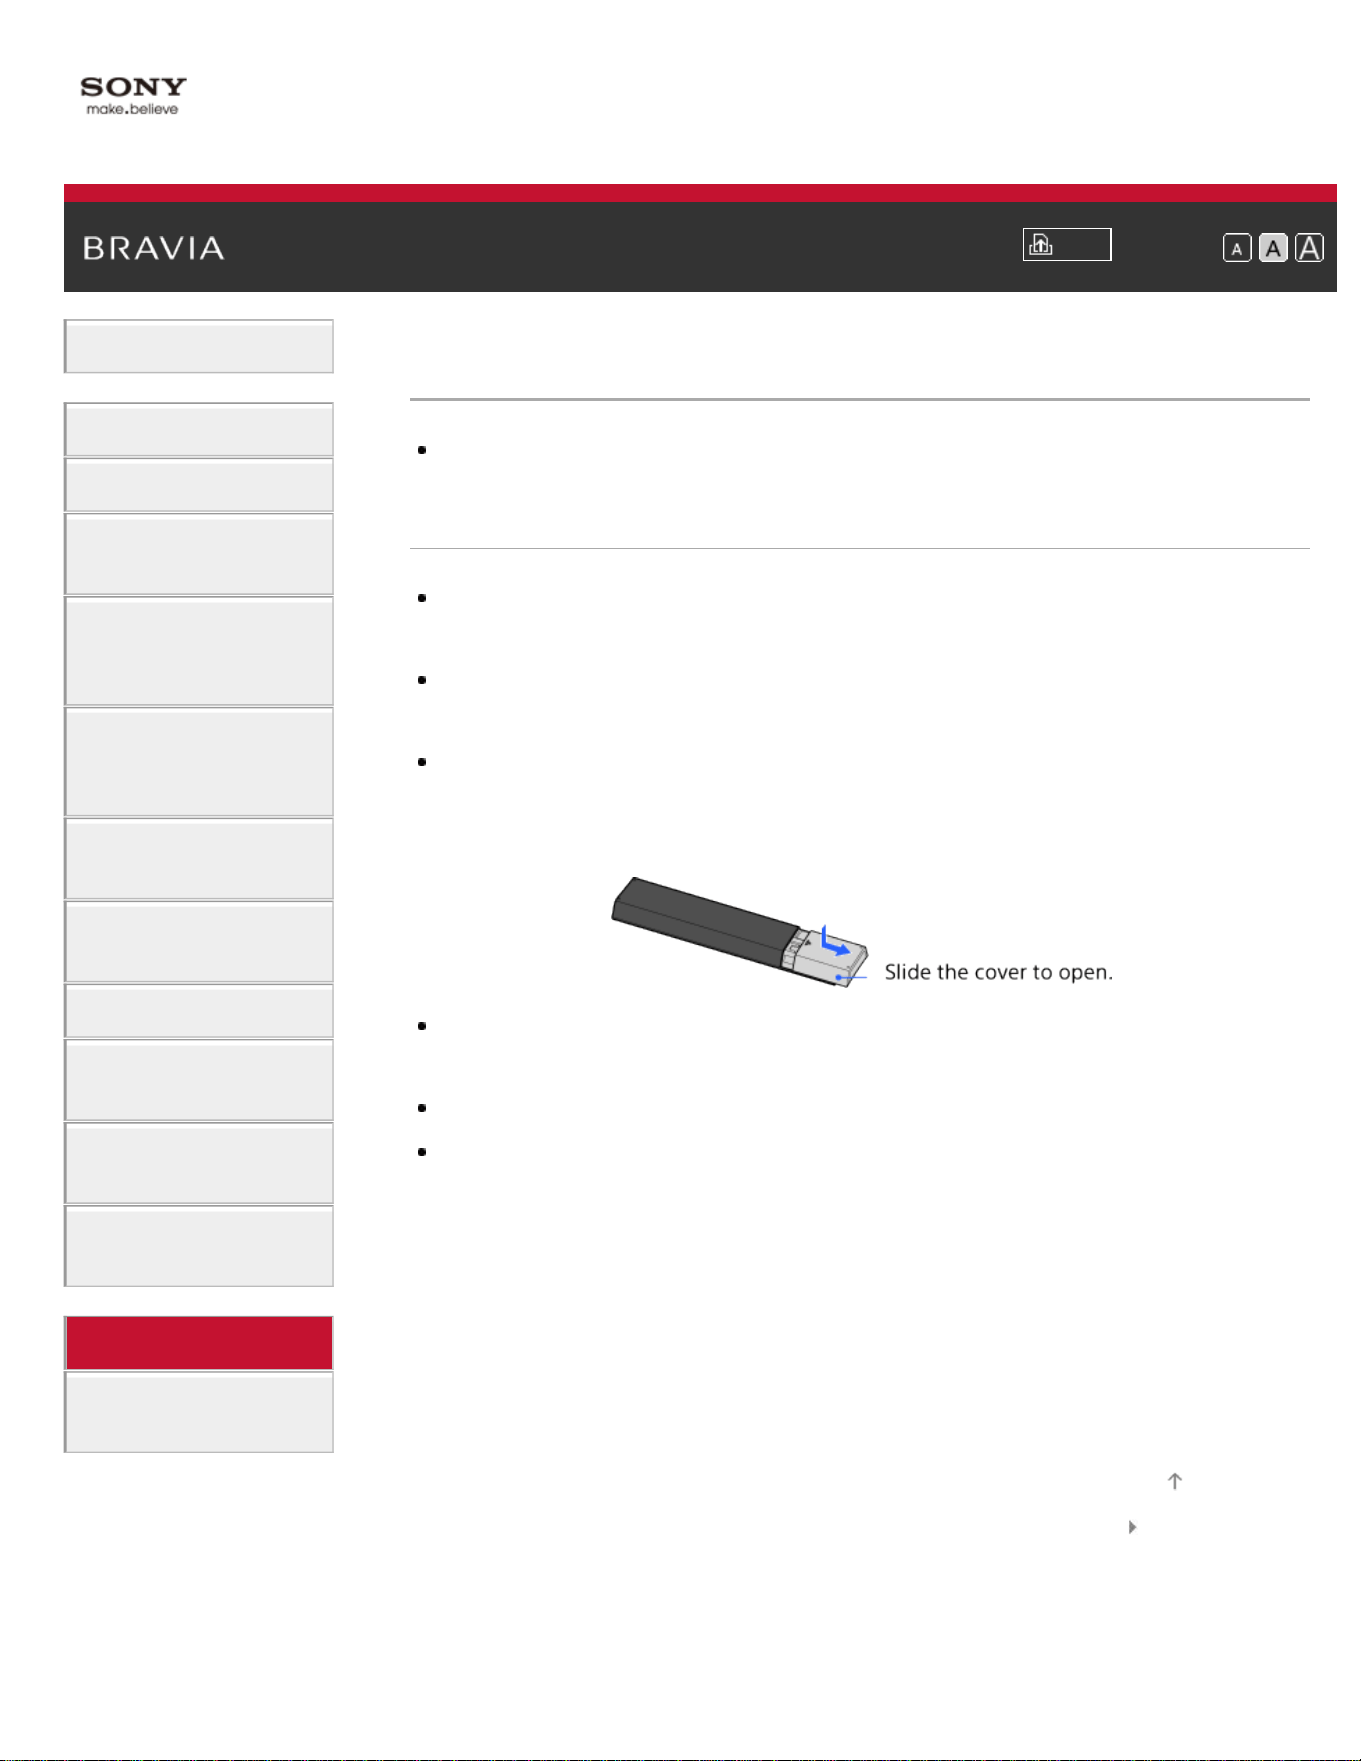
i-Manual
Print
Font Size
Basic Operations
Parts Description
Watching TV
Enjoying
Movies/Music/Photos
Using Internet
Services and
Applications
Watching TV with
Friends Far and
Near
Using Other
Devices
Using BRAVIA
Sync Devices
Useful Functions
Connecting to the
Internet
Using Home
Network
Configuring
Various Settings
Troubleshooting
How to Use
Bookmarks
Top Page > Troubleshooting > Remote Control Symptoms
Remote Control Symptoms
The remote does not operate.
The remote does not operate.
Press a button on the TV to determine if the problem is with the remote
control or not.
Check that the orientation of each battery matches the positive (+) and
negative (-) symbols in the battery compartment.
Battery power may be low. Replace the batteries with new ones.
For details on how to insert the batteries, refer to the paper manual
supplied with this TV.
Point the remote control at the remote control sensor located at the front
of the TV.
Keep the remote control sensor area clear from obstacles.
Fluorescent light can interfere with remote control operation; try turning off
any fluorescent light.
List of Contents© 2014 Sony Corporation
Top of Page
226
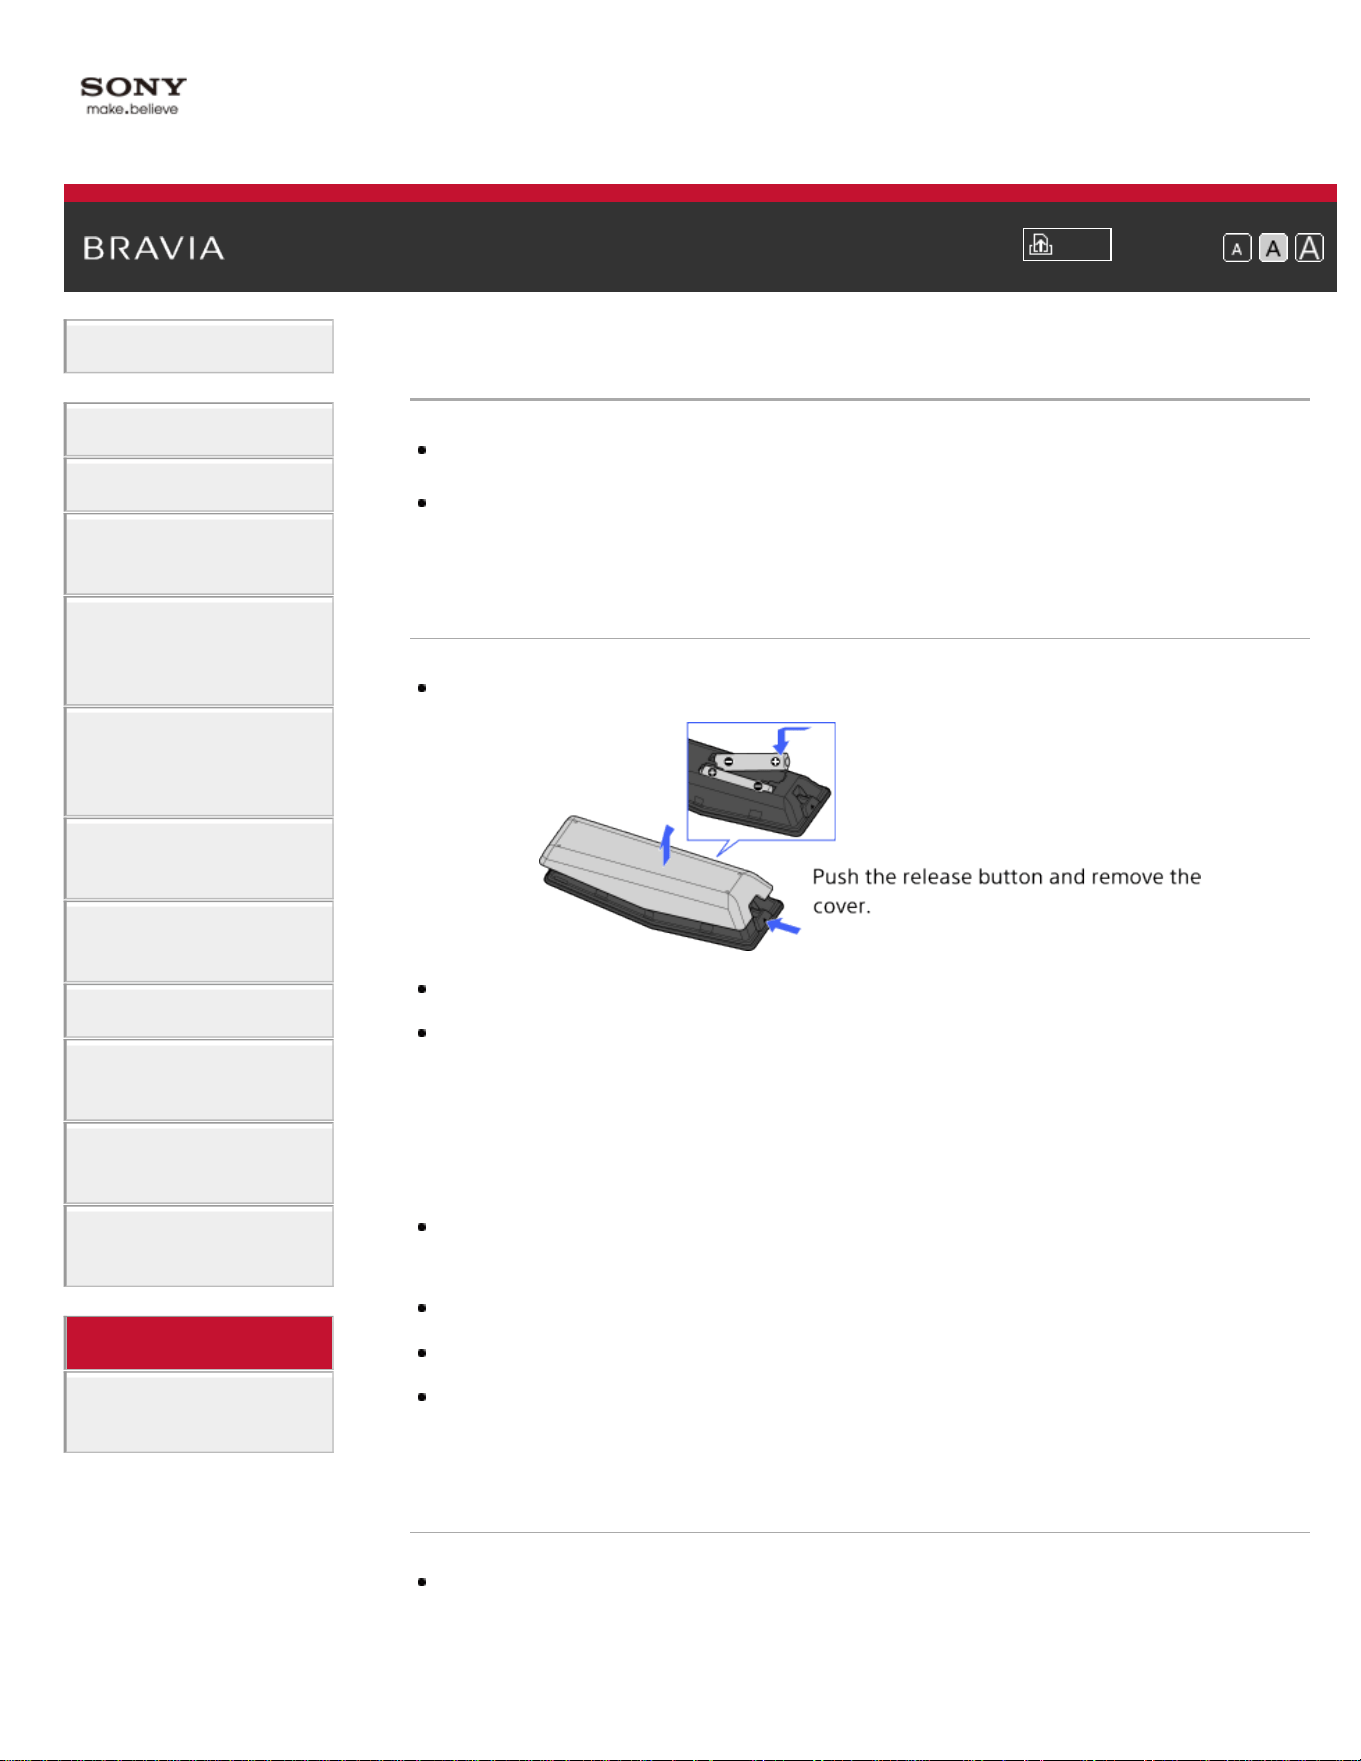
i-Manual
Print
Font Size
Basic Operations
Parts Description
Watching TV
Enjoying
Movies/Music/Photos
Using Internet
Services and
Applications
Watching TV with
Friends Far and
Near
Using Other
Devices
Using BRAVIA
Sync Devices
Useful Functions
Connecting to the
Internet
Using Home
Network
Configuring
Various Settings
Troubleshooting
How to Use
Bookmarks
Top Page > Troubleshooting > Touchpad Remote Control Symptoms
Touchpad Remote Control Symptoms
Touchpad Remote Control does not operate, or does not operate properly.
The batteries drain quickly.
Touchpad Remote Control does not operate, or does
not operate properly.
Replace the batteries.
Re-register the Touchpad Remote Control.
The Touchpad Remote Control uses the 2.4GHz band, therefore
communication speed may deteriorate or cut out occasionally due to
wireless LAN interference.
If household electric appliances (e.g. microwaves or smartphones) are
placed nearby, radio wave interference is more likely.
The TV or Touchpad Remote Control may not work on a metal rack due to
wireless communication interference.
The Touchpad Remote Control can control only the last registered TV.
Only one Touchpad Remote Control can be registered to the TV.
It is recommended to use the Touchpad Remote Control within 7 m (23 ft.)
of the TV.
The batteries drain quickly.
If you keep waving your NFC compatible device over the NFC touch point
of the remote control, it will increase battery drain of the remote and/or the
device.
227


i-Manual
Print
Font Size
Basic Operations
Parts Description
Watching TV
Enjoying
Movies/Music/Photos
Using Internet
Services and
Applications
Watching TV with
Friends Far and
Near
Using Other
Devices
Using BRAVIA
Sync Devices
Useful Functions
Connecting to the
Internet
Using Home
Network
Configuring
Various Settings
Troubleshooting
How to Use
Bookmarks
Top Page > Troubleshooting > Bluetooth Mouse Symptoms
Bluetooth Mouse Symptoms
Operation cuts out, or a device does not work.
Operation cuts out, or a device does not work.
Check if the device is turned on.
Replace the batteries of the device.
Re-register the device.
Bluetooth devices use the 2.4GHz band, therefore communication speed
may deteriorate or cut out occasionally due to wireless LAN interference.
If household electric appliances (e.g. microwaves or smartphones) are
placed nearby, radio wave interference is more likely.
The TV or mouse may not work on a metal rack due to wireless
communication interference.
For usable communication distances between the TV and other devices,
refer to the instruction manuals of the devices.
List of Contents© 2014 Sony Corporation
Top of Page
229

i-Manual
Print
Font Size
Basic Operations
Parts Description
Watching TV
Enjoying
Movies/Music/Photos
Using Internet
Services and
Applications
Watching TV with
Friends Far and
Near
Using Other
Devices
Using BRAVIA
Sync Devices
Useful Functions
Connecting to the
Internet
Using Home
Network
Configuring
Various Settings
Troubleshooting
How to Use
Bookmarks
Top Page > Troubleshooting > Screen mirroring Symptoms
Screen mirroring Symptoms
What kind of devices can be connected to use the Screen mirroring
function?
The TV cannot connect to a Miracast device.
Video or sound sometimes cuts out.
Some pay contents cannot be played.
Screen mirroring does not work./The TV cannot be found by a Screen
mirroring compatible device.
What kind of devices can be connected to use the
Screen mirroring function?
Sony Screen mirroring compatible devices (e.g. some models of Xperia)
can be connected.
The Screen mirroring function works by Miracast technology, making it
possible to connect with a device that conforms with Miracast.
The TV cannot connect to a Miracast device.
If connecting a Miracast device (e.g. note PC) fails, press the HOME
button, then select
[Inputs] → [Screen mirroring] to show the standby
screen for the Screen mirroring function.
Video or sound sometimes cuts out.
Devices emitting radio waves, such as other wireless LAN devices or
microwave ovens, may interfere with the Screen mirroring function using
wireless LAN. Keep the TV or Sony Screen mirroring compatible devices
(e.g. some models of Xperia) away from such devices, or turn them off if
possible.
Communication speed may change according to the distance or obstacles
between devices, device configuration, radio wave condition, line
230

congestion or the device you use. Communication may cut out due to the
radio wave condition.
Some pay contents cannot be played.
The source device needs to meet HDCP (High-bandwidth Digital Content
Protection) 2.0/2.1/2.2 standards. Some pay contents may not be
displayed via a source device which does not meet HDCP 2.0/2.1/2.2
standards.
Screen mirroring does not work./The TV cannot be
found by a Screen mirroring compatible device.
If you are using Screen mirroring with another device, turn off Screen
mirroring first and try again.
If your device does not support 5GHz and you set the [Band Setting]
option to [Auto (5GHz Band)], try changing it to [Auto].
Press the HOME button, then select
[Inputs] → [Screen mirroring] to
show the standby screen for Screen mirroring and try again.
List of Contents© 2014 Sony Corporation
Top of Page
231
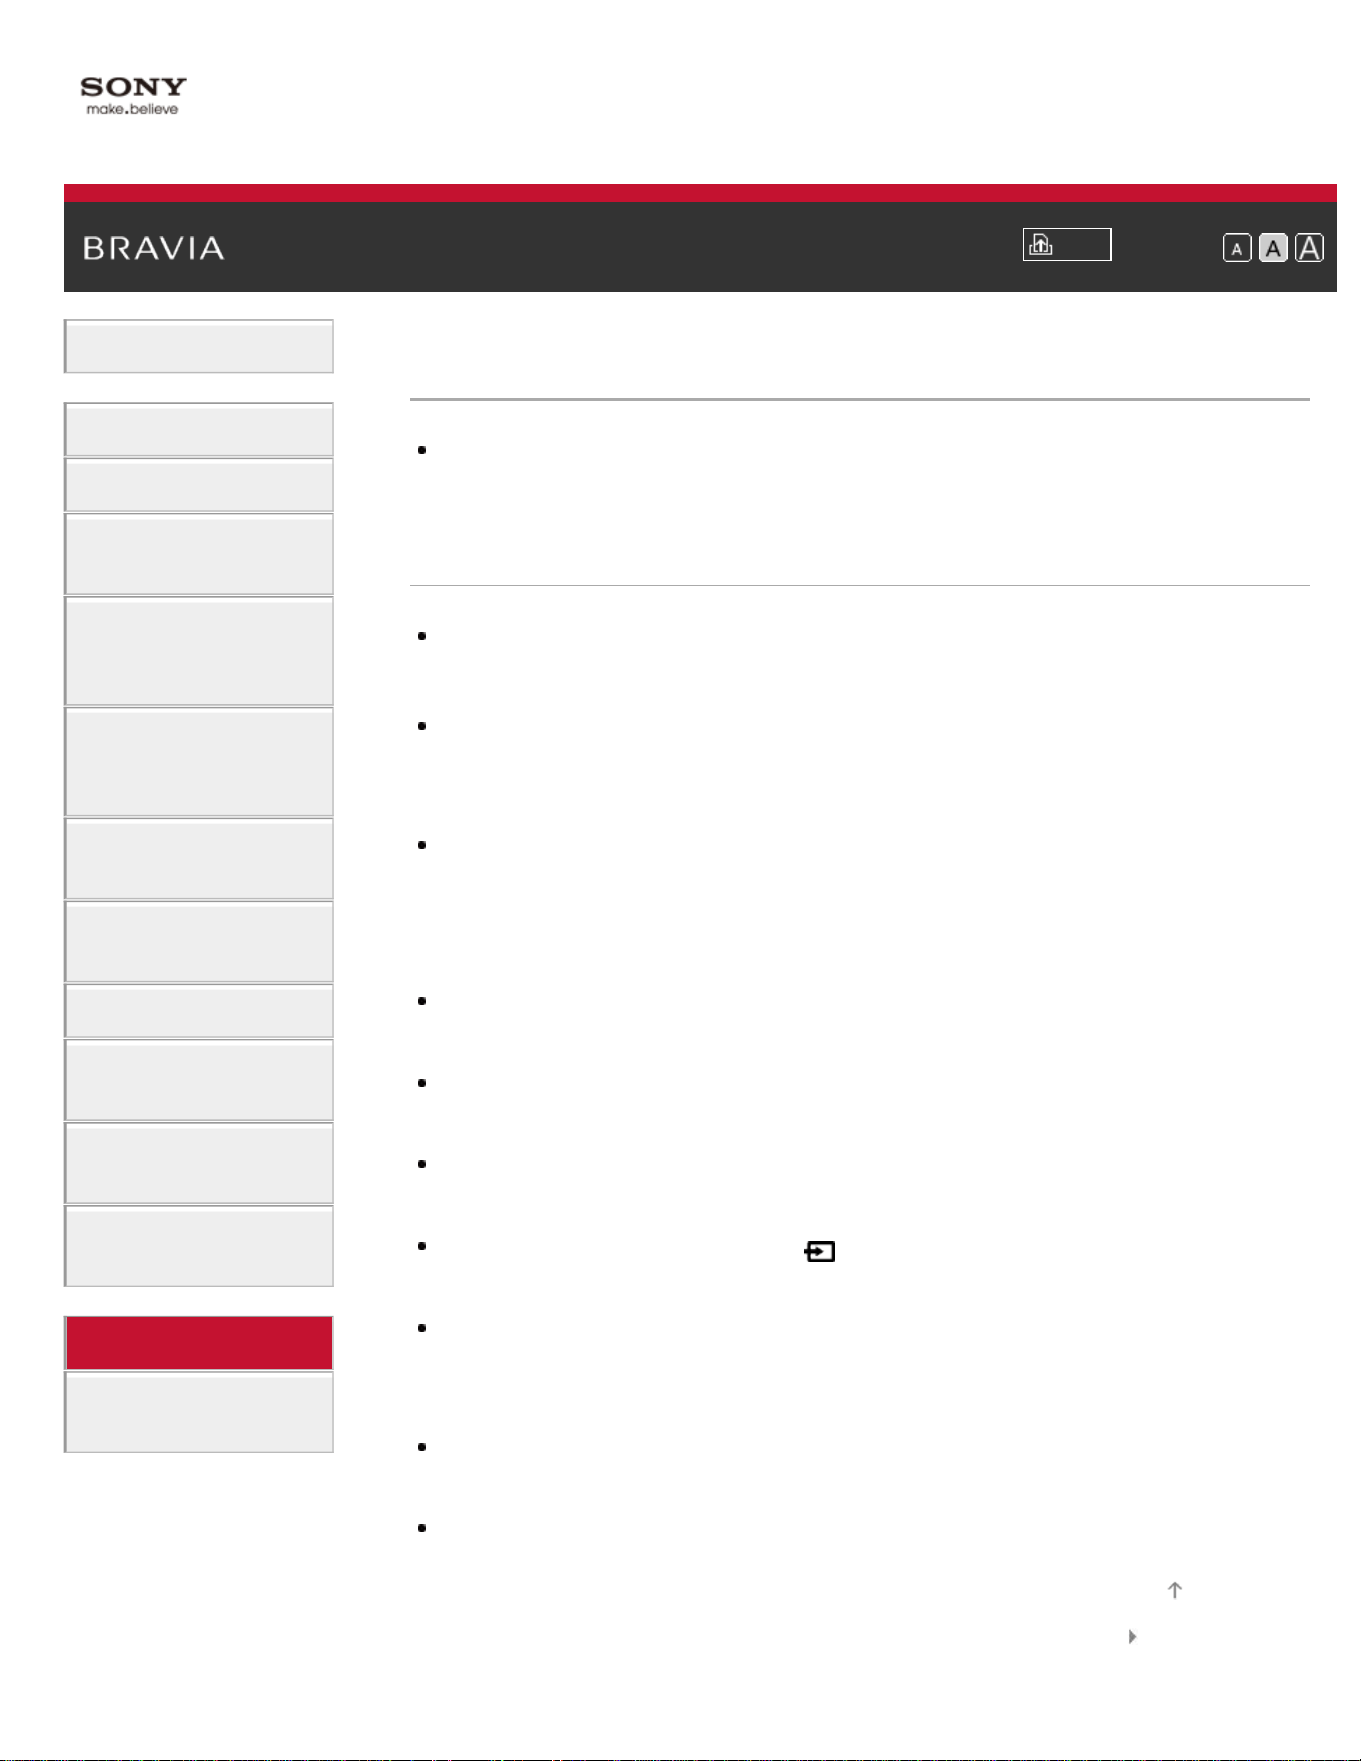
i-Manual
Print
Font Size
Basic Operations
Parts Description
Watching TV
Enjoying
Movies/Music/Photos
Using Internet
Services and
Applications
Watching TV with
Friends Far and
Near
Using Other
Devices
Using BRAVIA
Sync Devices
Useful Functions
Connecting to the
Internet
Using Home
Network
Configuring
Various Settings
Troubleshooting
How to Use
Bookmarks
Top Page > Troubleshooting > One-touch mirroring Symptoms
One-touch mirroring Symptoms
One-touch mirroring does not work./Target device cannot be recognized.
One-touch mirroring does not work./Target device
cannot be recognized.
Make sure that the NFC function of the One-touch mirroring compatible
device is turned on.
For connection with a One-touch mirroring compatible Xperia, the TV
cannot connect with the Xperia when its screen is locked. Release the
screen lock, then touch.
Determine the position of the NFC detection area on the One-touch
mirroring compatible device, then try touching again. For the position of
the NFC detection area, refer to the instruction manual of the compatible
device.
Move the compatible device away from the Touchpad Remote Control,
then try touching again.
If you are using Screen mirroring with another device, turn off Screen
mirroring first and try again.
If your device does not support 5GHz and you set the [Band Setting]
option to [Auto (5GHz Band)], try changing it to [Auto].
Press the HOME button, select
[Inputs] → [Screen mirroring] to open
the standby screen for Screen mirroring, then try again.
Check whether your device supports One-touch mirroring. Even if you
touch an incompatible device, the TV may show some reaction but cannot
start Screen mirroring.
It is necessary to register the Touchpad Remote Control to the TV before
use.
Set the NFC setting of the compatible device to on.
List of Contents© 2014 Sony Corporation
Top of Page
232

i-Manual
Print
Font Size
Basic Operations
Parts Description
Watching TV
Enjoying
Movies/Music/Photos
Using Internet
Services and
Applications
Watching TV with
Friends Far and
Near
Using Other
Devices
Using BRAVIA
Sync Devices
Useful Functions
Connecting to the
Internet
Using Home
Network
Configuring
Various Settings
Troubleshooting
How to Use
Bookmarks
Top Page > Troubleshooting > TV SideView Symptoms
TV SideView Symptoms
The TV cannot be turned on and controlled by using the TV SideView
application when [Remote Start] is set to [On].
The TV does not appear on the TV SideView screen. The TV cannot be
registered with the TV SideView application.
The TV cannot be turned on and controlled by using
the TV SideView application when [Remote Start] is
set to [On].
When devices that cause radio wave interference (microwave ovens,
cordless phones, etc.) are placed nearby, the TV SideView function may
not work. In this case, keep such devices away from the wireless router
(access point) or TV, or turn them off.
In the following cases, the TV SideView function may not work. Turn on
the TV and re-connect to the wireless router (access point).
- Turn on/off the wireless router (access point) power during TV standby
mode
- Reset the wireless router (access point) during TV standby mode
- Change the wireless router (access point) channel during TV standby
mode
The TV SideView function may not work with business-use wireless
routers (access points) that require re-connection periodically.
The TV SideView function may not work depending on the settings of the
wireless router (access point) (e.g. Multi SSID and Power saving mode).
If Wi-Fi Direct is used to connect the TV SideView application to the TV,
the TV may not be turned on from standby mode depending on your
smartphone/tablet.
The TV should be in the power-on or standby mode. Do not turn off the TV
by disconnecting its AC power cord.
Check the following has been set for your TV.
When the wireless router (access point) and TV are connected with
233

wireless LAN
- Built-in wireless LAN model TV is used
- [Built-in Wi-Fi] under [Network] is set to [On]
- [Remote Start] of [Home Network Setup] under [Network] is set to [On]
- TV is connected to the wireless router (access point)
When the wireless router (access point) and TV are connected with wired
LAN
- [Remote Start] of [Home Network Setup] under [Network] is set to [On]
The TV does not appear on the TV SideView screen.
The TV cannot be registered with the TV SideView
application.
Make sure that the TV is turned on.
Make sure that the TV and your smartphone/tablet have joined the same
home network.
(However, when connecting via Wi-Fi Direct, a home network connection
is not necessary.)
The maximum number of registration devices may have been reached.
Delete unnecessary registrations before registering another
smartphone/tablet.
For detailed information, refer to the following website:
http://info.tvsideview.sony.net/faq/
List of Contents© 2014 Sony Corporation
Top of Page
234

i-Manual
Print
Font Size
Basic Operations
Parts Description
Watching TV
Enjoying
Movies/Music/Photos
Using Internet
Services and
Applications
Watching TV with
Friends Far and
Near
Using Other
Devices
Using BRAVIA
Sync Devices
Useful Functions
Connecting to the
Internet
Using Home
Network
Configuring
Various Settings
Troubleshooting
How to Use
Bookmarks
Top Page > Troubleshooting > Photo Share Symptoms
Photo Share Symptoms
Supported Photo Format
Supported Photo Format
Only jpeg files are supported.
The maximum size of photos is 16384 × 16384.
The minimum size of photos is 16 × 16.
Panorama scrolling is not supported.
The maximum file size of photos is 10MB.
List of Contents© 2014 Sony Corporation
Top of Page
235

i-Manual
Print
Font Size
Basic Operations
Parts Description
Watching TV
Enjoying
Movies/Music/Photos
Using Internet
Services and
Applications
Watching TV with
Friends Far and
Near
Using Other
Devices
Using BRAVIA
Sync Devices
Useful Functions
Connecting to the
Internet
Using Home
Network
Configuring
Various Settings
Troubleshooting
How to Use
Bookmarks
Top Page > Troubleshooting > Notes
Notes
This manual is the simple version of the TV's built-in i-Manual. For details,
refer to that i-Manual.
List of Contents© 2014 Sony Corporation
Top of Page
236

i-Manual
Print
Font Size
Basic Operations
Parts Description
Watching TV
Enjoying
Movies/Music/Photos
Using Internet
Services and
Applications
Watching TV with
Friends Far and
Near
Using Other
Devices
Using BRAVIA
Sync Devices
Useful Functions
Connecting to the
Internet
Using Home
Network
Configuring
Various Settings
Troubleshooting
How to Use
Bookmarks
Top Page > Troubleshooting
Troubleshooting
Self Diagnostics
Power Symptoms
Picture/Screen Symptoms
Broadcast Reception Symptoms
3D Picture/Glasses Symptoms
Sound Symptoms
Connected Device Symptoms
Network Connectivity Test Results
Network/Application Symptoms
Home Network Symptoms
Remote Control Symptoms
Touchpad Remote Control Symptoms
Bluetooth Mouse Symptoms
Screen mirroring Symptoms
One-touch mirroring Symptoms
TV SideView Symptoms
Photo Share Symptoms
Notes
List of Contents© 2014 Sony Corporation
Top of Page
237
Supported Codec for DLNA / USB device
DLNA/USB设备支持的编解码器
Codec Suportado para dispositivo DLNA/USB
Photo
照片
Foto
File Format
文件格式
Formato do Arquivo
Extension
扩展名
Extensão
JPEG *.jpg / *.jpe / *.jpeg
MPO *.mpo
RAW *.arw
Go to Page Top
转到顶层页面
Ir para o início da página
Music
音乐
Música
Container
封装格式
Recipiente
Extension
扩展名
Extensão
Description
描述
Descrição
Supported Sampling Rate
支持的采样速率
Taxa de amostragem suportada
Photo
照片
Foto
Music
音乐
Música
Video
视频
Vídeo
External Subtitle
外挂字幕
Legenda Externa
238
-
- LPCM 32k / 44.1k / 48k
*.mp3
MP1L1 / MP1L2 / MP1L3 / MP2L1 / MP2L2 32k / 44.1k / 48k
MP2L3 16k / 22.05k / 24k
MP2.5L3 8k / 11.025k / 12k
*.wav WAV 32k / 44.1k / 48k
mp4
*.mp4 /
*.m4a
AAC-LC 16k / 22.05k / 24k / 32k / 44.1k / 48k
HE-AAC v1 / v2 24k / 32k / 44.1k / 48k
3gpp *.3gp / *.3g2
AAC-LC 16k / 22.05k / 24k / 32k / 44.1k / 48k
HE-AAC v1 / v2 24k / 32k / 44.1k / 48k
Asf *.wma WMA9 Standard 8k / 11.025k / 16k / 22.05k / 32k / 44.1k / 48k
Go to Page Top
转到顶层页面
Ir para o início da página
Video
视频
Vídeo
Container
封装格式
Recipiente
Extension
扩展名
Extensão
Video Codec
(Profile@Level)
视频编解码器
(Profile@Level)
Vídeo Codec
(Profile@Level)
Audio
Codec
音频编解码器
Áudio
Codec
Supported
Subtitle
Type
支持的字
幕类型
Tipo de
Legenda
Supported
Maximum
Resolution
支持的最
大分辨率
Resolução
Máxima
Supported
Minimum
Resolution
支持的最小
分辨率
Resolução
Mínima
Supported
Maximum
Frame Rate
支持的最大帧率
Frame Rate
Máximo
239

Surpotada
Suportada Suportada
Suportado
MPEG1
*.mpg /
*.mpe /
*.mpeg
MPEG1 MPEG1L2
External
外部
Externo
1920x1080
QCIF
(176x144)
1920x1080@30fps
1280x720@60fps
MPEG2PS
*.mpg /
*.mpe /
*.mpeg
MPEG2
MP@HL,
MP@H14L,
MP@ML
MPEG1L1 /
MPEG1L2 /
LPCM / AC3
External
外部
Externo
1920x1080
QCIF
(176x144)
1920x1080@30fps
1280x720@60fps
MPEG2TS
*.m2t
MPEG2
MP@HL,
MP@H14L,
MP@ML
MPEG1L1 /
MPEG1L2 /
AAC-LC /
HE-AAC v1 /
HE-AAC v2 /
AC3 / E-AC3
-
Internal
-
1920x1080
QCIF
(176x144)
1920x1080@30fps
1280x720@60fps
*.m2ts /
*.mts
AVC / H.264
BP@L3,
AVC / H.264
BP@L3,
-
Internal
-
1920x1080
QCIF
(176x144)
1920x1080@60fps
1920x1080@30fps
1280x720@60fps
MP4 *.mp4
AVC / H.264
BP@L3,
AVC / H.264
BP@L3,
AAC-LC /
HE-AAC v1 /
HE-AAC v2 /
AC3 / E-AC3
/ MPEG1L1 /
MPEG1L2
External
外部
Externo
1920x1080
QCIF
(176x144)
1920x1080@60fps
1920x1080@30fps
1280x720@60fps
MPEG4
SP@L6,
1920x1080
QCIF 1920x1080@30fps
240

ASP@L5,
ACEP@L4
(176x144) 1280x720@60fps
avi *.avi
Xvid
MPEG1L1 /
MPEG1L2 /
MPEG1L3 /
AC3 / E-AC3
External
外部
Externo
1920x1080
QCIF
(176x144)
1920x1080@30fps
1280x720@60fps
Motion JPEG
μ-LAW /
PCM(U8) /
PCM(S16LE)
External
外部
Externo
1280x720
QCIF
(176x144)
1280x720@30fps
Asf
*.asf
VC1 AP@L3,
MP@HL,
SP@ML
WMA9
Standard
External
外部
Externo
1920x1080
QCIF
(176x144)
1920x1080@30fps
1280x720@60fps
*.wmv
MKV *.mkv
Xvid
DTS core /
AC3 / AAC-
LC / E-AC3 /
HE-AAC v1 /
HE-AAC v2 /
MPEG1L1 /
MPEG1L2 /
Vorbis
AC3 / AAC-
LC / E-AC3 /
HE-AAC v1 /
HE-AAC v2 /
MPEG1L1 /
MPEG1L2 /
Vorbis
Internal /
External
内部 / 外部
Interno /
Externo
1920x1080
QCIF
(176x144)
1920x1080@30fps
1280x720@60fps
AVC / H.264
BP@L3,
AVC / H.264
BP@L3,
1920x1080
QCIF
(176x144)
1920x1080@60fps
1920x1080@30fps
1280x720@60fps
MPEG4
SP@L6,
ASP@L5,
ACEP@L4
1920x1080
QCIF
(176x144)
1920x1080@30fps
1280x720@60fps
VP8 1920x1080
QCIF
(176x144)
1920x1080@30fps
1280x720@60fps
241

3gpp
*.3gp /
*.3g2
MPEG4
SP@L6,
ASP@L5,
ACEP@L4
AAC-LC /
HE-AAC v1 /
HE-AAC v2 /
AC3 / E-AC3
/ MPEG1L1 /
MPEG1L2
External
外部
Externo
1920x1080
QCIF
(176x144)
1920x1080@30fps
1280x720@60fps
AVC / H.264
BP@L3,
AVC / H.264
BP@L3,
1920x1080
QCIF
(176x144)
1920x1080@60fps
1920x1080@30fps
1280x720@60fps
RealMedia
*.rm /
*.rmvb /
*.rv
RealVideo RV8 /
RV9 / RV10
RealAudio
sipro / cook /
aac
External
外部
Externo
1920x1080
QCIF
(176x144)
1920x1080@30fps
1280x720@60fps
MOV *.mov
AVC / H.264
BP@L3,
AVC / H.264
BP@L3,
AAC-LC /
HE-AAC v1 /
HE-AAC v2 /
AC3 / E-AC3
/ MPEG1L1 /
MPEG1L2 /
μ-LAW /
PCM(U8) /
PCM(S16BE)
/
PCM(S16LE)
External
外部
Externo
1920x1080
QCIF
(176x144)
1920x1080@60fps
1920x1080@30fps
1280x720@60fps
MPEG4
SP@L6,
ASP@L5,
ACEP@L4
1920x1080
QCIF
(176x144)
1920x1080@30fps
1280x720@60fps
Motion JPEG 1280x720
QCIF
(176x144)
1280x720@30fps
Internal /
242
WebM *.webm VP8 Vorbis
External
内部 / 外部
Interno /
Externo
1920x1080
QCIF
(176x144)
1920x1080@30fps
1280x720@60fps
Go to Page Top
转到顶层页面
Ir para o início da página
Supported Audio Codec Sampling Rate in Video Content
视频内容中支持的音频编解码器采样速率
Taxa de Amostragem do Áudio Codec em Conteúdo de Vídeo
Audio Codec
音频编解码器
Áudio Codec
Supported Sampling Rate
支持的采样速率
Taxa de Amostragem Suportada
LPCM 44.1k / 48k
MPEG1L1 / MPEG1L2 32k / 44.1k / 48k
MPEG1L3 32k / 44.1k / 48k
AAC-LC 16k / 22.05k / 24k / 32k / 44.1k / 48k
HE-AAC v1 / v2 24k / 32k / 44.1k / 48k
AC3 32k / 44.1k / 48k
E-AC3 32k / 44.1k / 48k
Vorbis 8k / 11.025k / 16k / 22.05k / 32k / 44.1k / 48k
WMA9 8k / 11.025k / 16k / 22.05k / 32k / 44.1k / 48k
243
DTS core 8k / 11.025k / 12k / 24k / 16k / 22.05k / 32k / 44.1k / 48k
RealAudio(sipro) 8k / 16k
RealAudio(cook) 8k / 11.025k / 22.05k / 44.1k
RealAudio(aac) 24k / 32k / 44.1k / 48k
μ-LAW 8k
PCM(U8) 8k
PCM(S16LE) 11.025k / 16k / 44.1k
PCM(S16BE) 11.025k / 16k / 44.1k
Go to Page Top
转到顶层页面
Ir para o início da página
External Subtitle
外挂字幕
Legenda Externa
File Format
文件格式
Formato do Arquivo
Extension
扩展名
Extensão
Supported Use Case
支持范围
Caso de Uso Suportado
SubStation Alpha *.ass / *.ssa USB
SubRip *.srt USB
MicroDVD *.sub / *.txt USB
SubViewer *.sub USB
244