Loading ...
Loading ...
Loading ...
4
Assembly
WARNING: Do not
attempt to modify or repair the appliance
Wall Mounting
The product can be wall mounted, if desired,
using the wall mount bracket, screws and
anchors supplied. To wall mount the vac,
refer to gures A, B, C and D.
• Figure A - Mark the location of the screw
holes (within reach of an electrical outlet
for chargeing the vac while it is on the wall
bracket).
• Figure B - Insert the charger cord into
the curved slot in the wall mount bracket
leaving approximately 8-9 inches (203mm
- 227mm) excess as shown.
A B
• Figure C - Hang the vac on the wall by
placing the opening on the base of the vac
over the hooks in the wall mount bracket
as shown in gure C.
C
• Figure D - Insert the jack plug into the
charging socket.
D
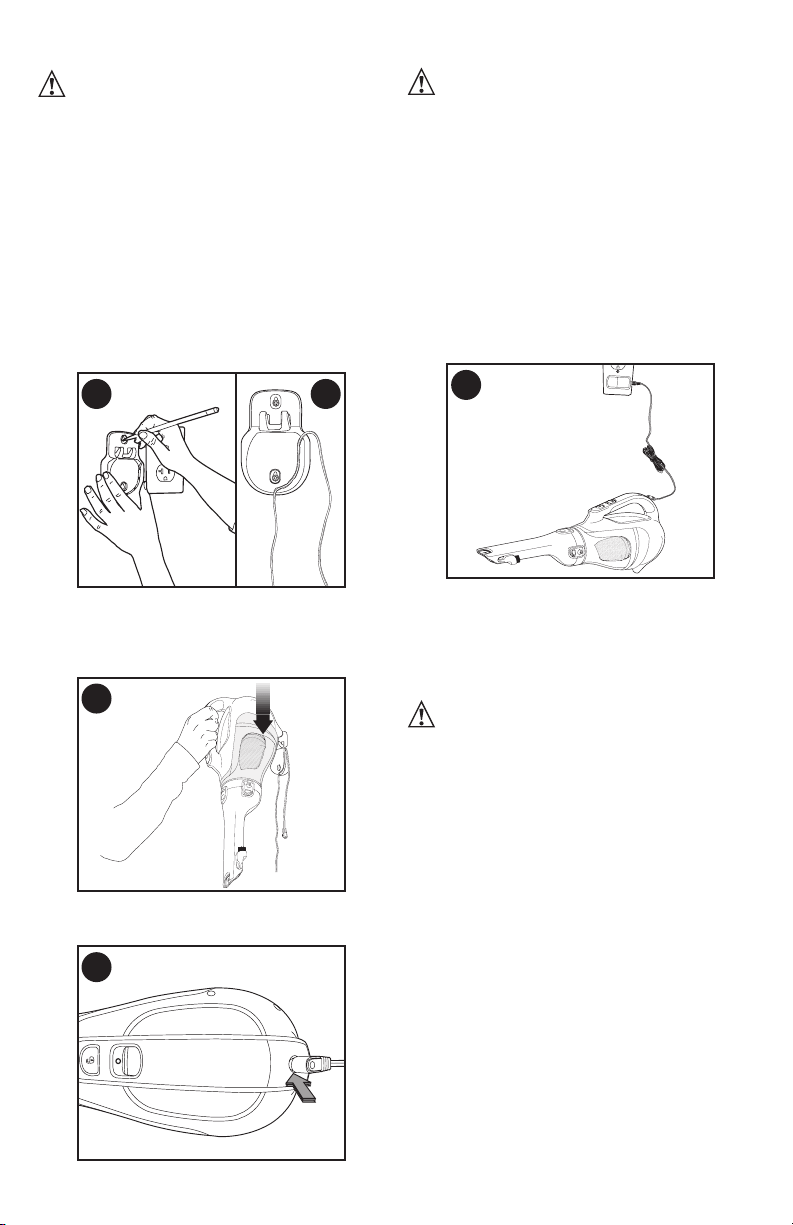
Charging the battery
WARNING: For use
only with the supplied charger.
From new, the rechargeable cells of the
product need a minimum charge time of 16
hours to ensure full power.
We suggest you fully discharge the product
when it is used for the first time as this will
help the cells recharge faster.
• The switch must be in the off (“O”)
position, the product will not charge if it is
in any other position.
• Figure E - Plug the jack plug of the
charger into the charging socket of the
tool. Plug the charger into any standard
120 Volt 60 Hz electrical outlet.
E
While charging, the charger may get
warm, this is perfectly normal and safe. It
is safe to leave the appliance connected
to the charger indefinitely. The charger
automatically reduces power consumption
when charging is complete.
WARNING: Do not
charge the battery at ambient temperatures
below 39°F (4°C) or above 104°F (40°C).
Use
Switching on and off
• Figure F - To start, slide the On/Off switch
forward (i.e. “O”= Off, “I” = On).
• To stop, slide the switch back.
• Return the product to the charger
immediately after use so that it will be
ready and fully charged for the next use.
Ensure that the product is fully engaged
with the charger plug.
Loading ...
Loading ...
Loading ...