Loading ...
Loading ...
Loading ...
64
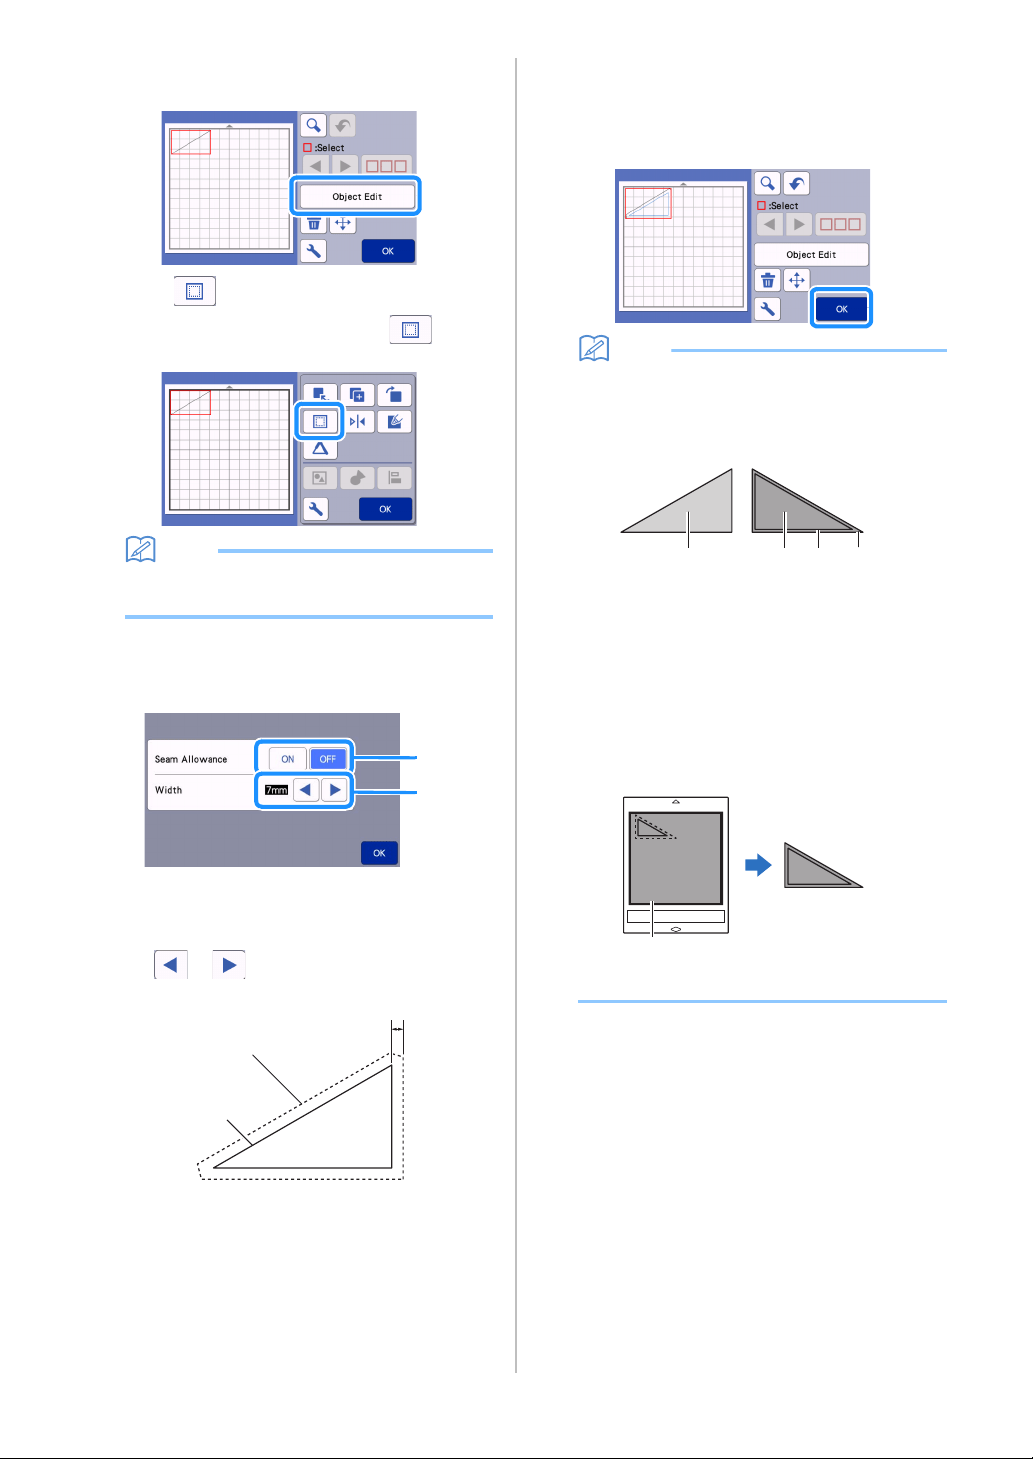
c Touch the “Object Edit” key in the mat editing
screen.
d Touch .
The Seam Allowance screen appears. If appears
in gray, the seam allowance cannot be applied.
Memo
• Depending on the pattern, the seam allowance
may be applied as a default. Check the setting.
The pattern in the preview appears with a
drawing line (blue) and a cutting line (black).
e Specify the seam allowance settings.
a Select whether or not to add a seam allowance.
b Specify the width (distance between the outline
and cutting line) of the seam allowance. Touch
or to change setting.
a Seam allowance line
b Pattern outline (stitching line)
c Seam allowance
Touch the “OK” key to finish specifying the
setting and return to the object editing screen.
f Touch the “OK” key in the object editing
screen.
g Touch the “OK” key to finish editing the
pattern.
Memo
• To draw the seam allowance on the wrong side
of the fabric, flip the pattern.
Image of Pattern Piece to be Created
a Right side of fabric
b Wrong side of fabric
c Drawing line (stitching line)
d Seam allowance line
After attaching to the mat the fabric with the
wrong side facing up, load the mat into the
machine, flip the pattern, and then draw it and
cut it out.
a Wrong side of fabric
a
b
c
a
b
acb d
a
Loading ...
Loading ...
Loading ...